How to Set Up SEO Rules
From this tutorial, learn how to set up SEO Rules for pages containing filters from the JetSmartFilters plugin for WordPress.
Before you start, check the tutorial requirements:
- Elementor (Free version), Block editor (Gutenberg), or Bricks
- JetSmartFilters plugin installed and activated
Let’s assume we have a business conference website. We want to build a page with business conferences and filter them by number of participants, conference type, and conference format. Also, on this page, we want to add a speakers list and filter them by their experience.
Then, we want this page to be indexed with different filter results. With JetSmartFilters, you can adjust SEO rules to add a filter page to the sitemap.
Create Filters
If you haven’t added filters to a certain page yet, you should first create them in the WordPress Dashboard > Smart Filters > Add New directory.
“Checkboxes list” filter
Preparation
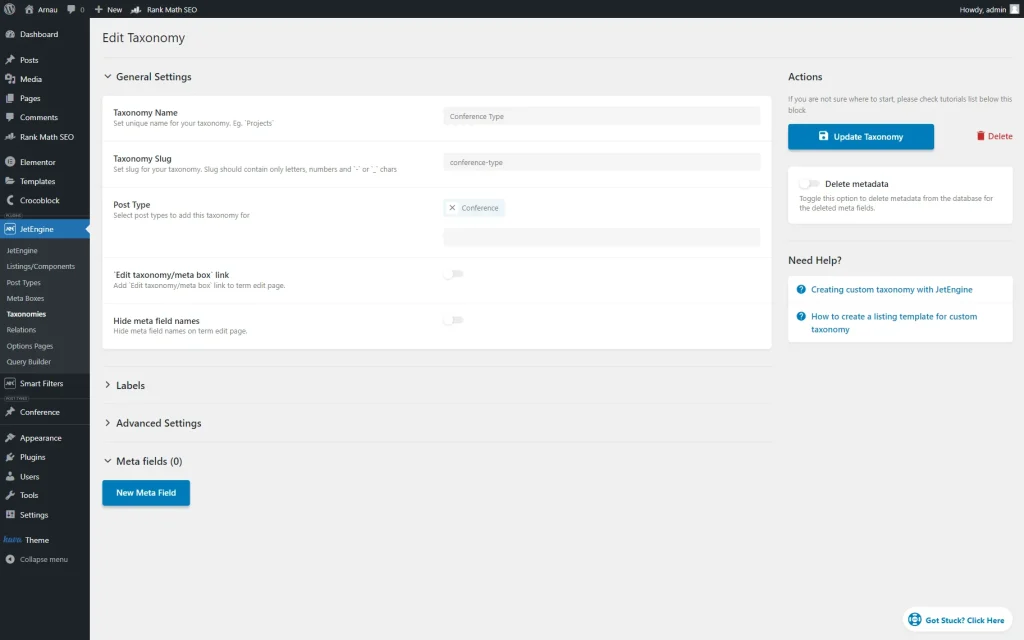
We created a custom “Conference Type” taxonomy and attached it to the “Conference” Custom Post Type (CPT) beforehand.
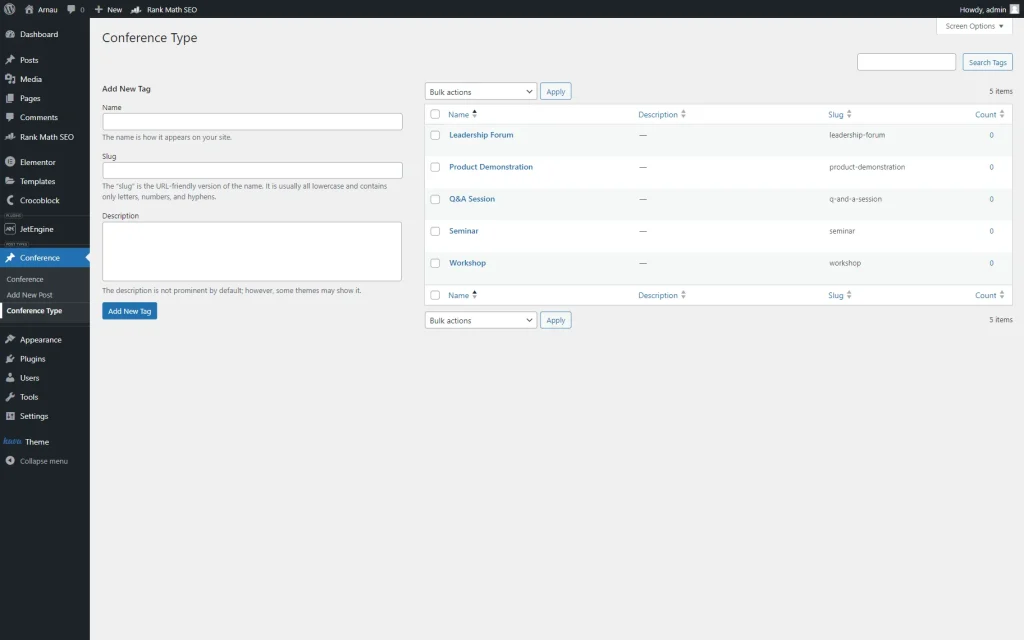
After that, we added some tags to the built taxonomy.
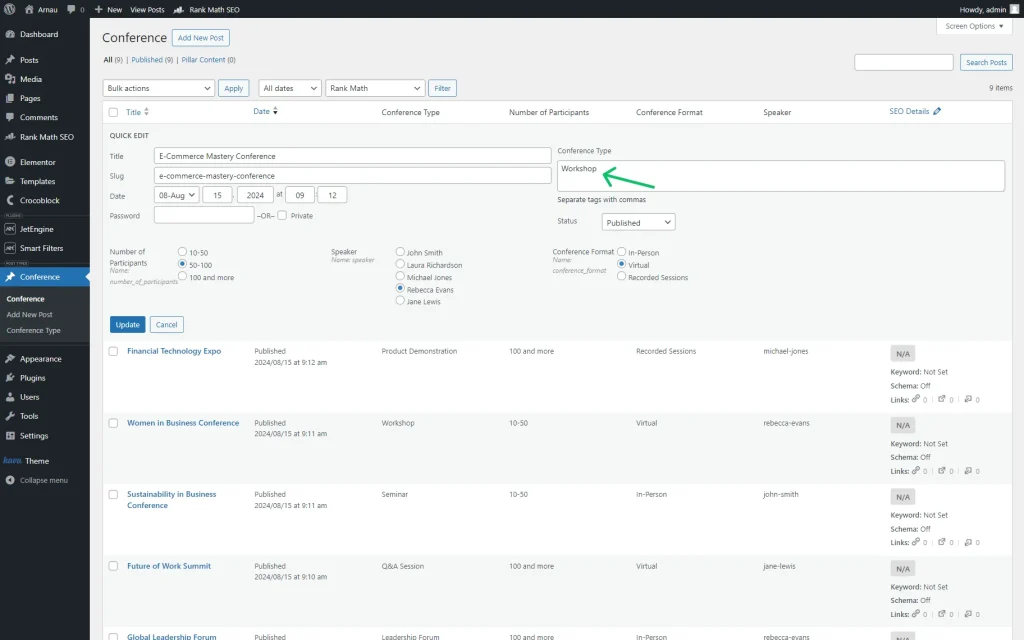
We then connected the CPT posts with the added conference types. It can be done in the CPT directory; just push the “Quick Edit” button next to each needed item and set its tags in the field named as your taxonomy.
Don’t forget to press the “Update” button to save the item.
Filter creation
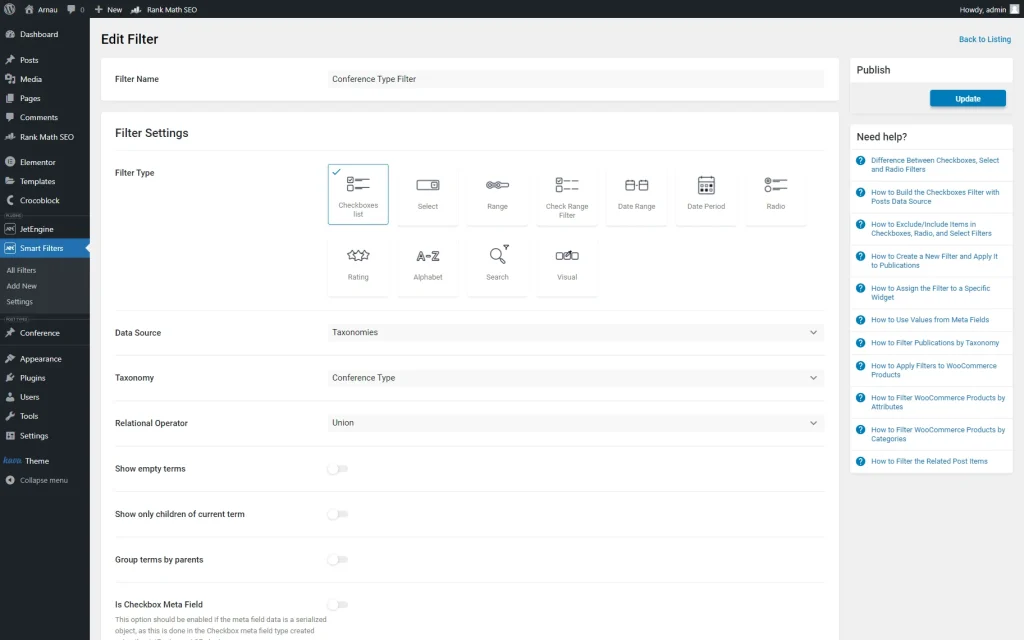
The first filter we built is a “Conference Type Filter.” This one has a “Checkboxes list” Filter Type. Its Data Source is set to “Taxonomies,” and the Taxonomy to filter is “Conference Type.”
“Radio” filter
Preparation
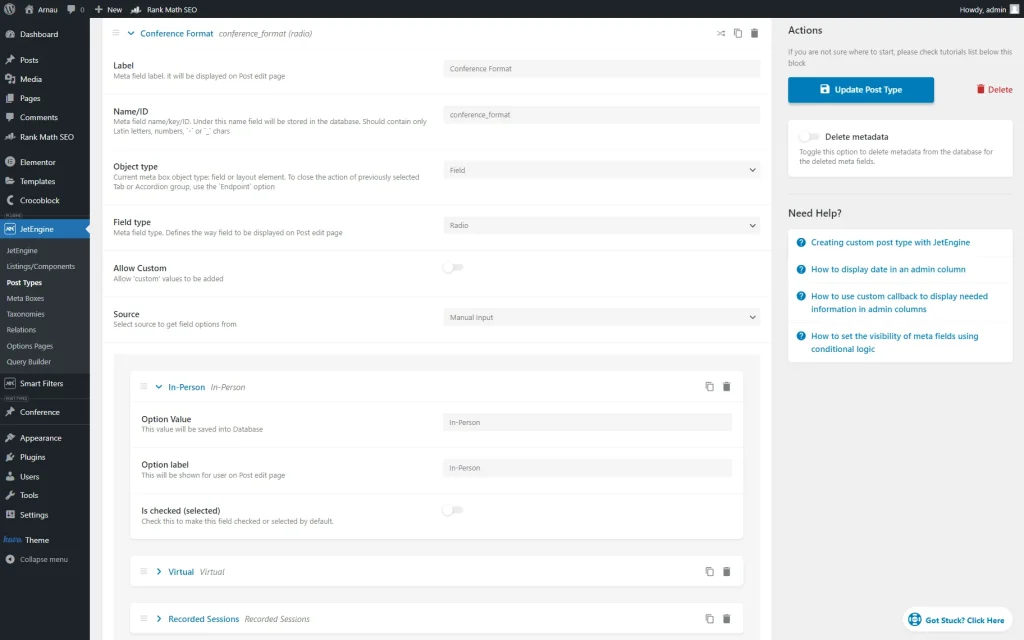
To build the following filter, we went to a “Conference” CPT editor in the WordPress Dashboard > JetEngine > Post Types directory and opened the Meta Fields section.
There, we have built a “Conference Format” field of the “Radio” Type and added its values.
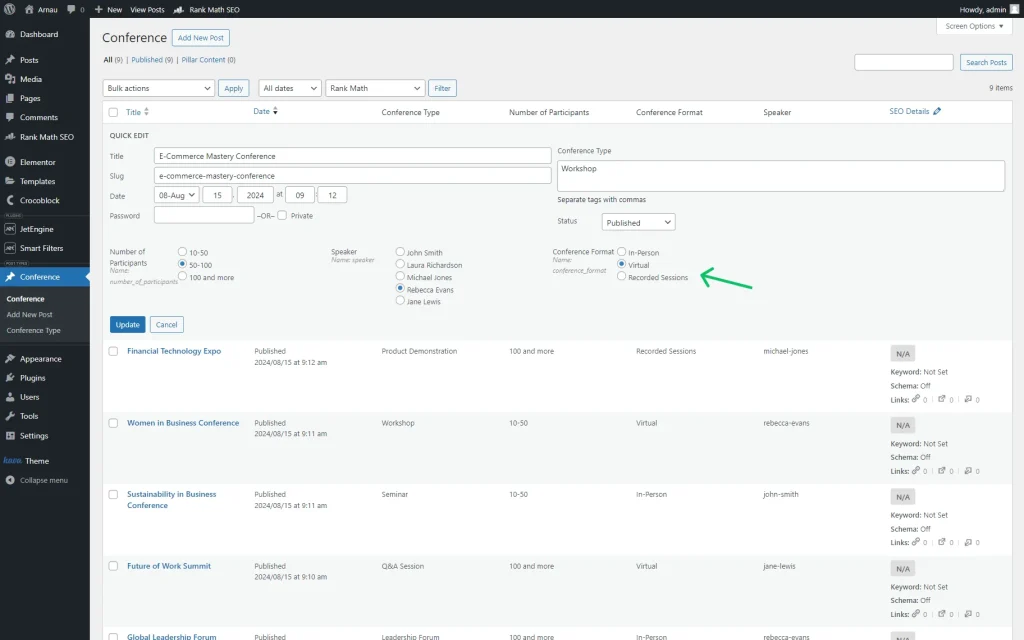
We have also enabled the Quick edit support for this field to edit the conference type right in the CPT items list.
After saving the changes, we headed to the CPT posts list, clicked the “Quick edit” button next to each post, and attached the needed conference types.
Filter creation
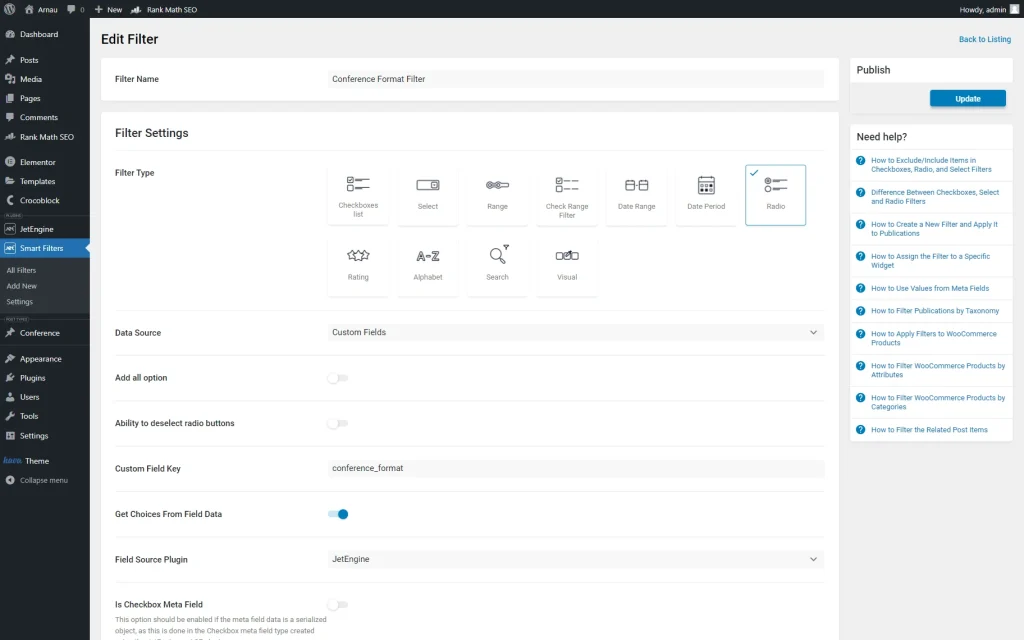
The filter we build has a “Radio” Filter Type and is called “Conference Format Filter.”
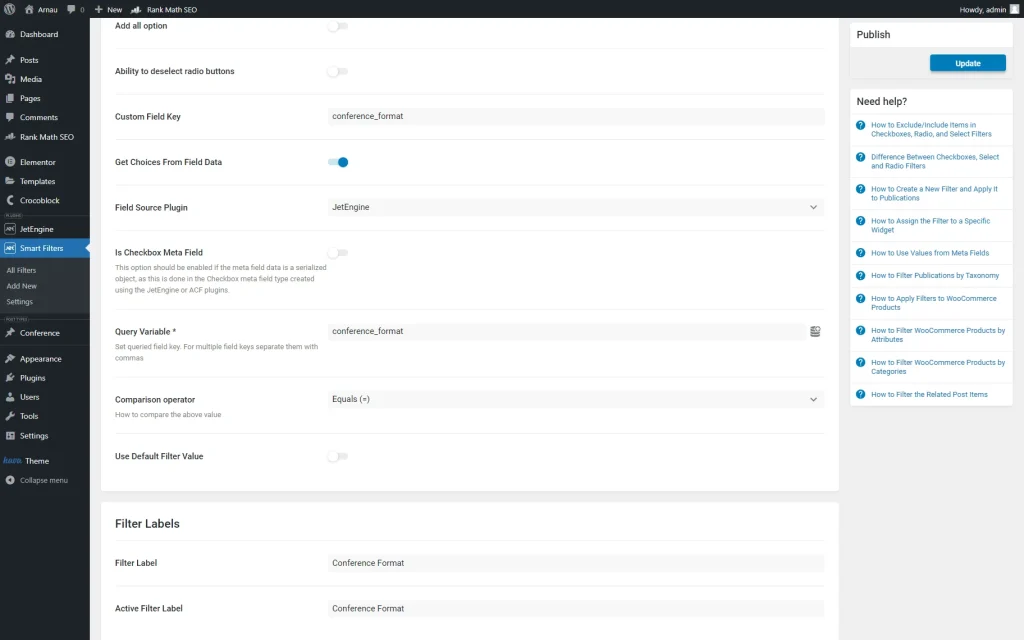
It is based on “Custom Fields” (the Data Source field), so we specified the Custom Field Key. This field should be taken from the previously set Name/ID of the meta field.
We also enabled the Get Choices From Field Data toggle and set “JetEngine” as the Field Source Plugin.
We also put the same custom field value into the Query Variable field.
“Visual” filter
Preparation
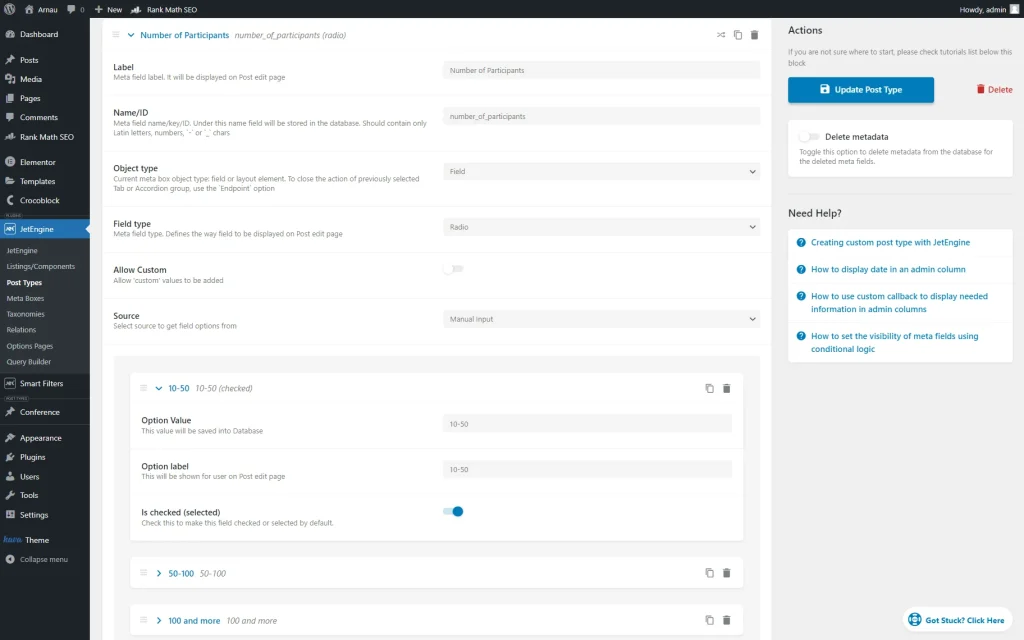
The future “Visual” filter will be based on the “Radio” custom field. So, we repeat the procedure of the “Radio” filter preparation and create a “Number of Participants” meta field of the “Radio” Field type in the CPT editor.
Filter creation
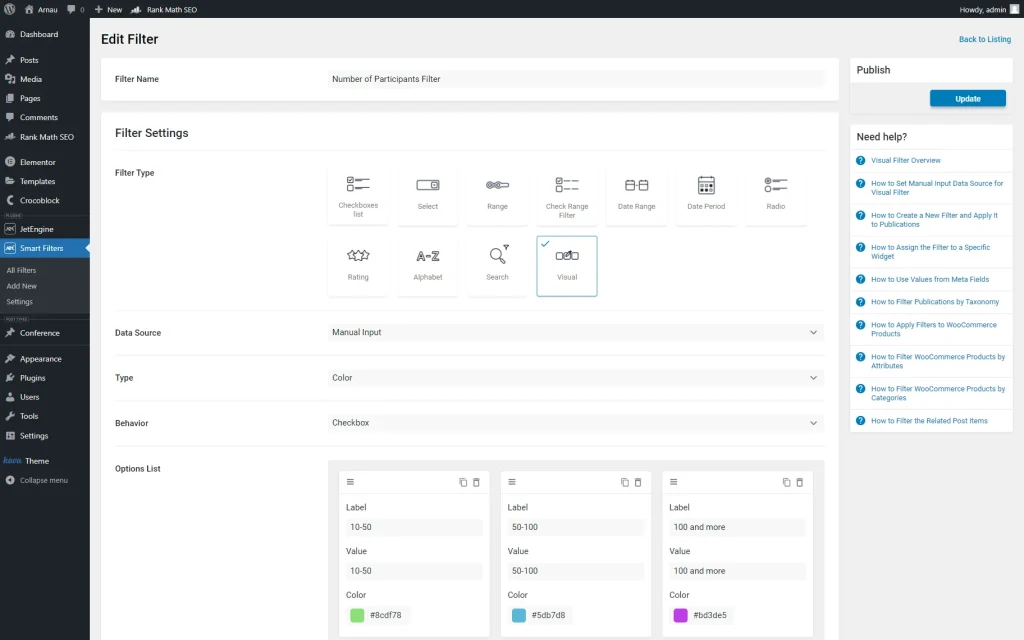
In the filter builder, we set the “Number of Participants Filter” name to the filter and set its Filter Type to “Visual.”
As the Data Source, we pick the “Manual Input” option and set the Filter Type to “Color.”
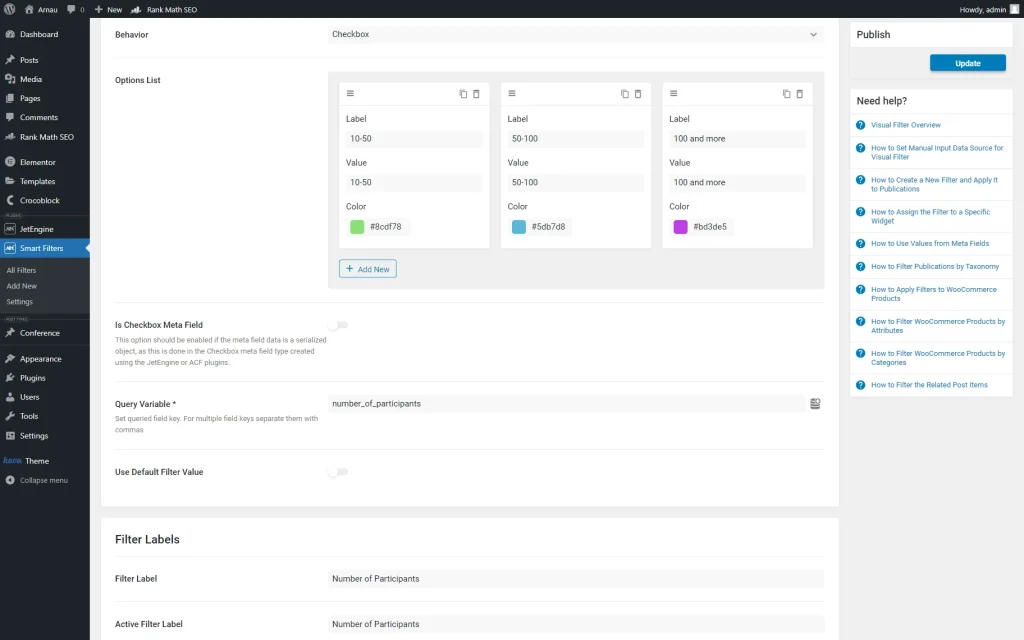
Then, we set the “Checkbox” Behaviour and adjust the needed options in the Options List.
Also, we specify the Query Variable by putting the Value of the attached meta box in there.
Additional “Radio” filter
We want to add one more “Radio” filter, but this time it will be used to filter the event speakers.
Preparation
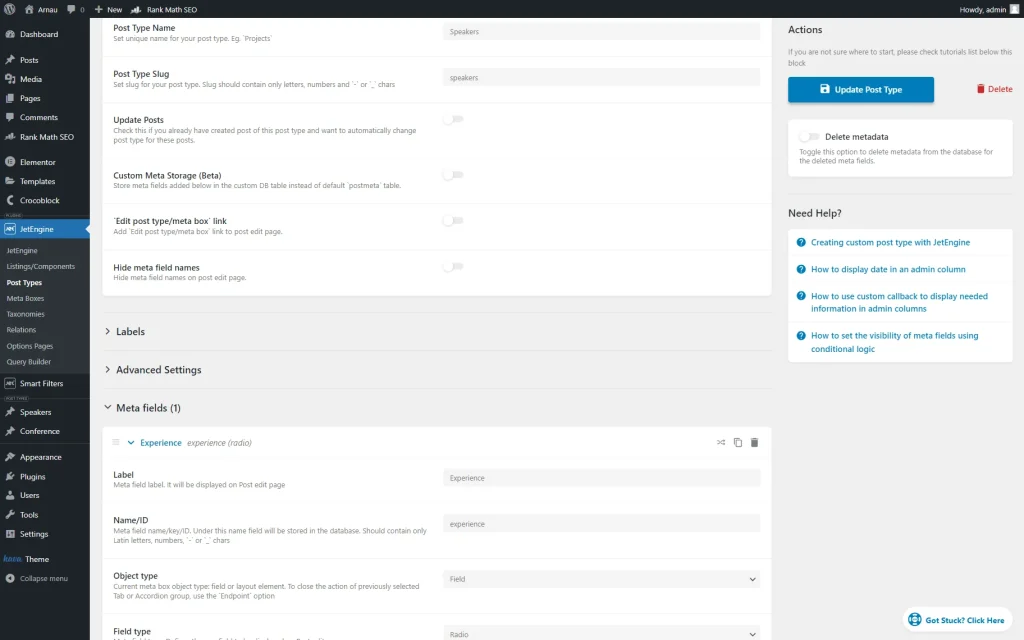
Beforehand, we created one more CPT, “Speakers.”
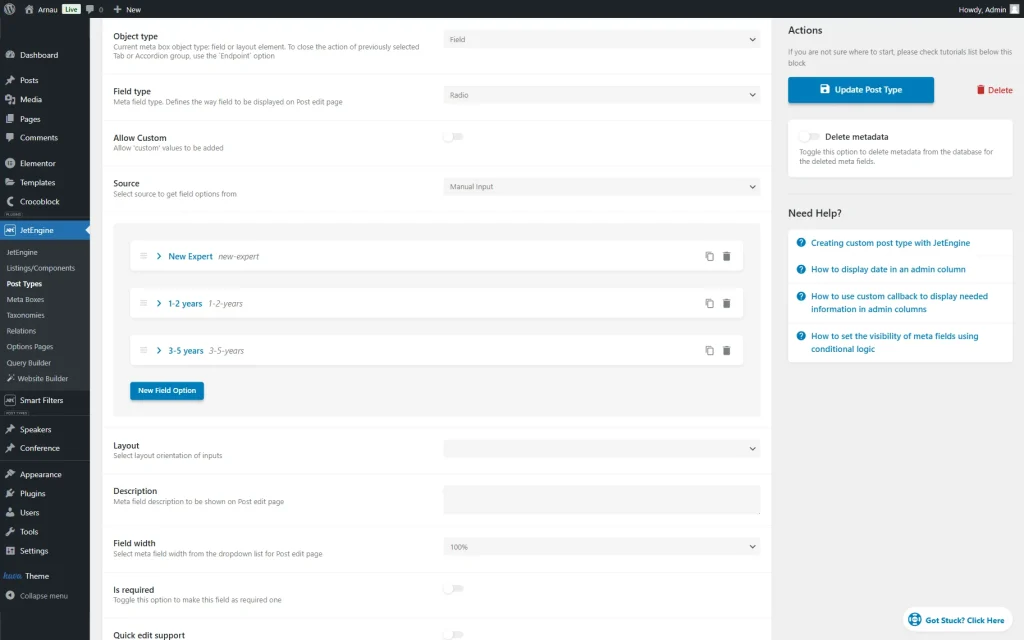
Also, we added a meta field of a “Radio” Field type.
We added three field options, which will later be attached to “Speakers” posts and used for filtering as well.
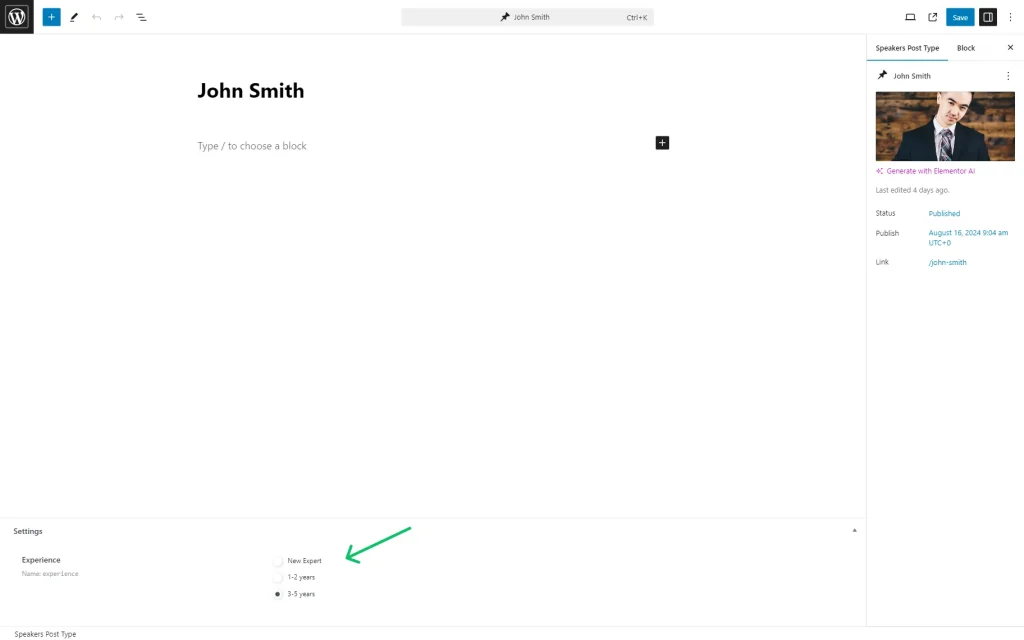
After saving the post type, we went to the built CPT, created a separate post for each speaker, and set their experience using the built “Radio” meta field.
Filter creation
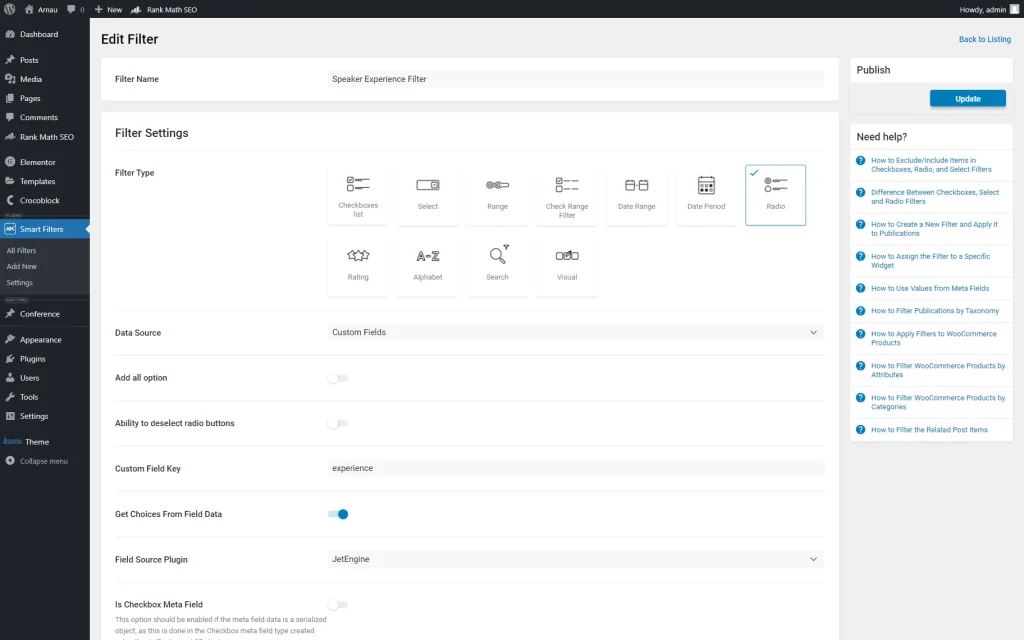
We create a “Speaker Experience” filter of a “Radio” Filter Type and set its Data Source to “Custom Fields.”
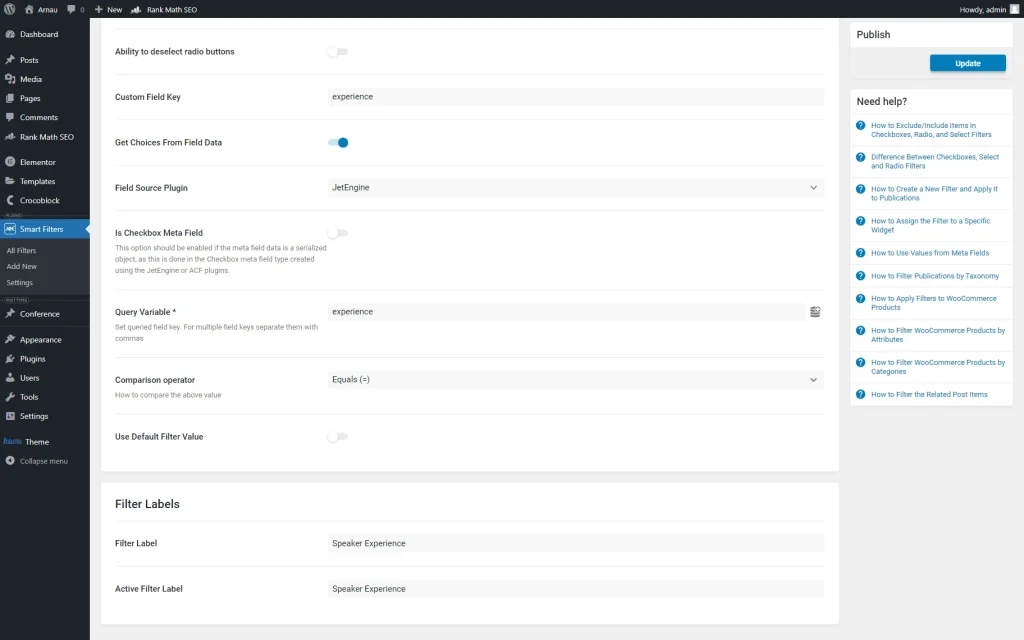
Then, we complete the Custom Field Key field with an “experience” value, the one put in the Name/ID field of the previously built meta field.
After, we activate the Get Choices From Field Data toggle and select “JetEngine” as the Field Source Plugin.
Then, we complete the Query Variable field with the same value as in the Custom Field Key field and save the filter.
Add Filters to the Page
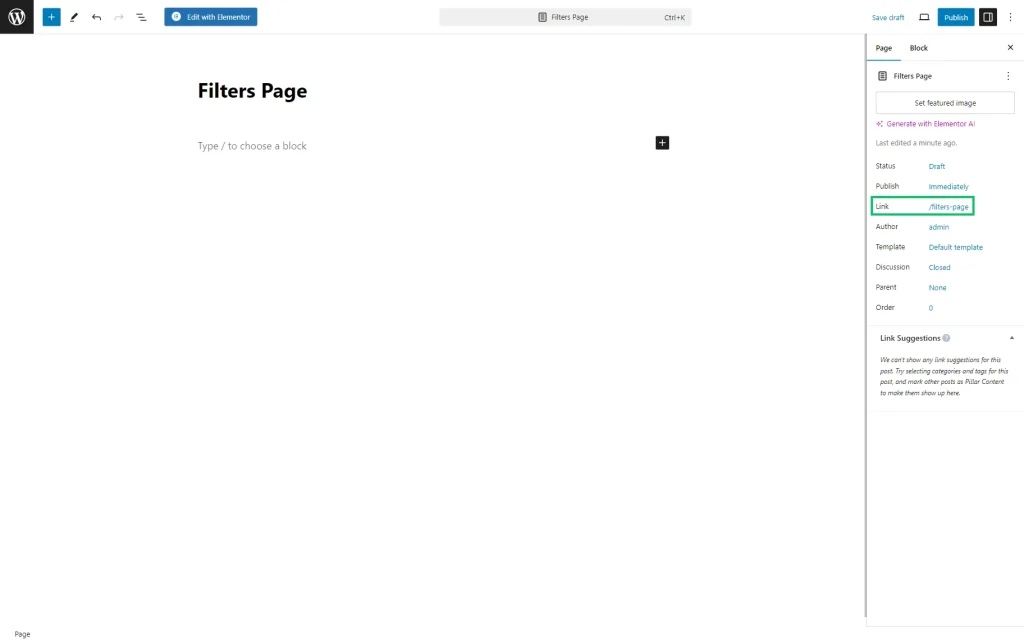
Now, it’s time to add the built filters to the page. First, go to WordPress Dashboard > Pages > Add New.
Here, we change the name of the page.
Pay attention to the Link of the page — we will need it later.
We click the “Edit with Elementor” button to build our page with Elementor.
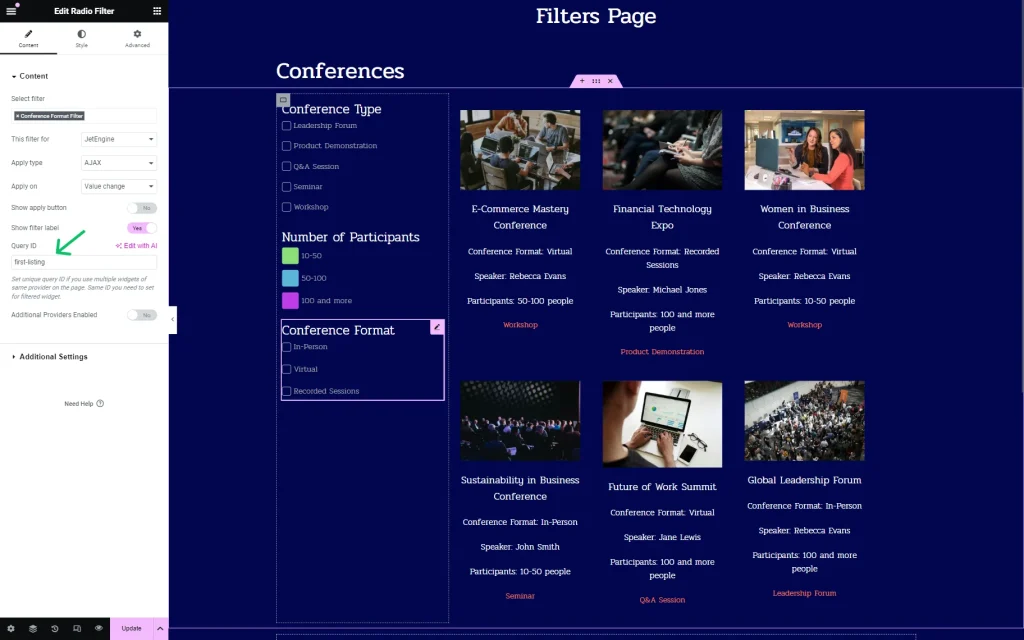
In Elementor, we add all the first three filters’ widgets built for the “Conference” CPT to the page and specify their Query ID. It should be done to attach filters to a certain provider.
For instance, we want to have two Listing Grids on the page, one with conferences and one with speakers, so we need to specify which Listing Grid should be filtered with this exact filter.
So, we set the “first-listing” value for the added three filters.
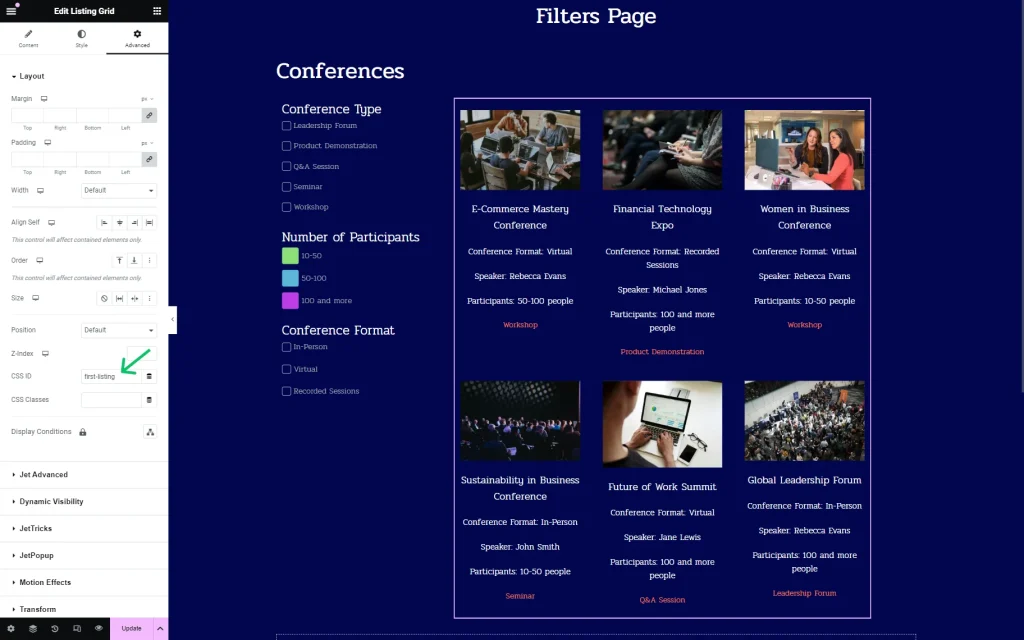
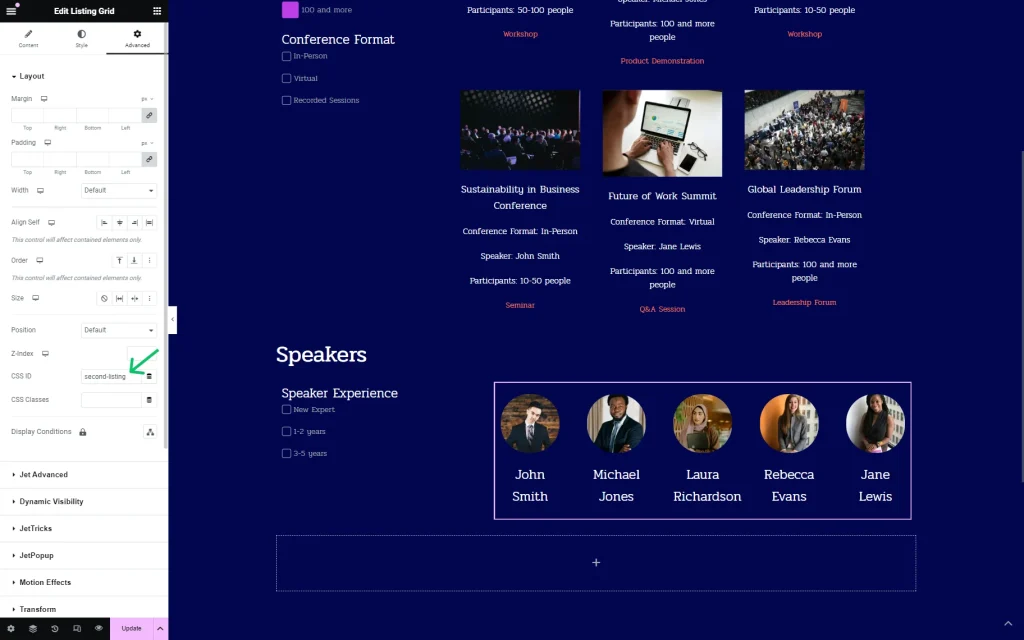
We attach the same ID to the provider (Listing Grid) in the CSS ID field.
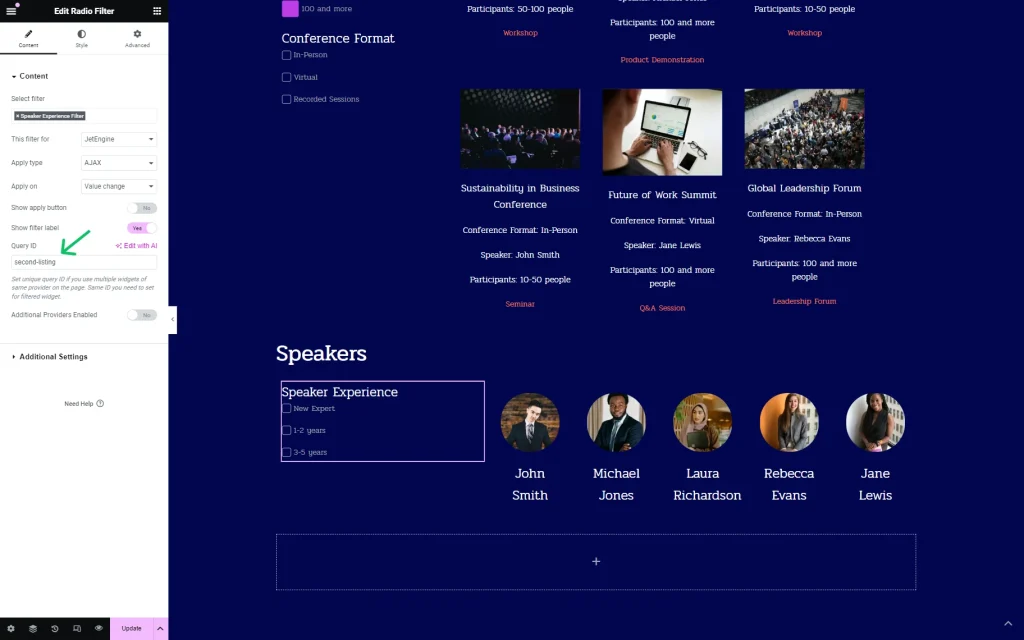
Then, we add one more section with the filter and provider — one more Listing Grid, this time with speakers.
We also set the Query ID for the filter here. This time, it is the “second-listing” value.
The same ID is put in the CSS ID field of the Listing Grid.
Now, we hit the “Publish/Update” button to save the page.
Adjust SEO Rules
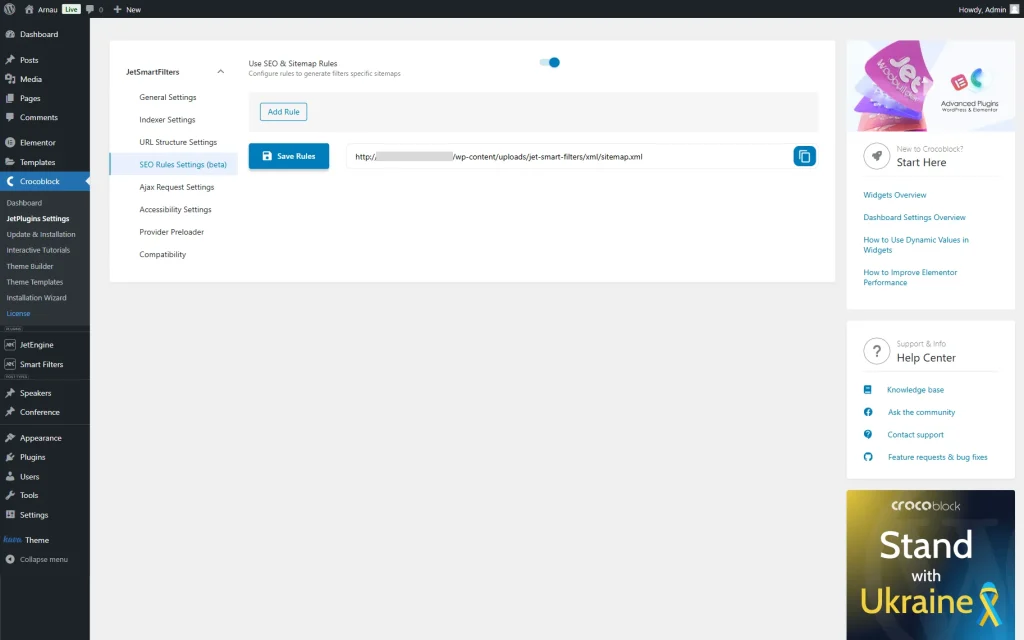
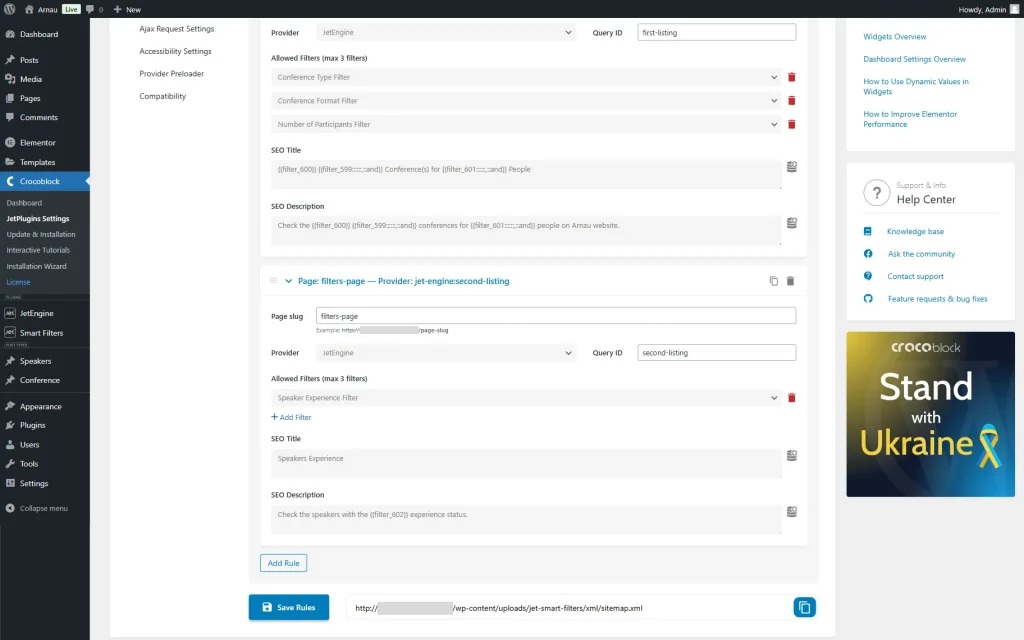
Go to WordPress Dashboard > Smart Filters > Settings and open the SEO Rules Settings tab.
Activate the Use SEO & Sitemap Rules toggle.
Press the “Add Rule” button.
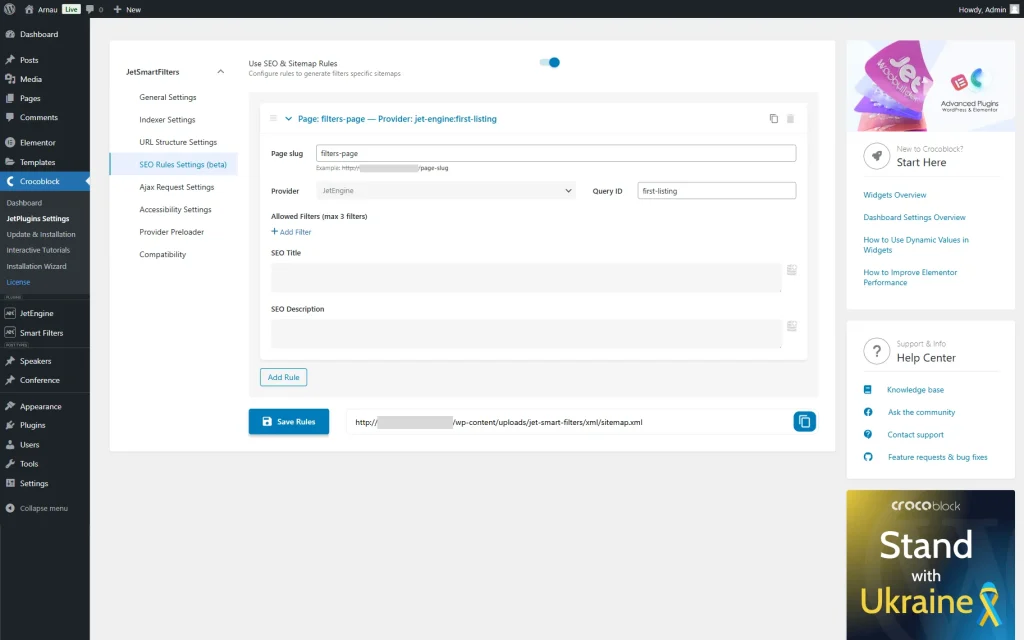
Paste the Link of the built page into the Page slug field; the “filters-page” in our case.
We set “JetEngine” as Provider and “first-listing” as Query ID. The last value refers to the one attached to the filters and provider of the first section of our page.
Hit the “Add Filter” button to attach the built filters to the current rule.
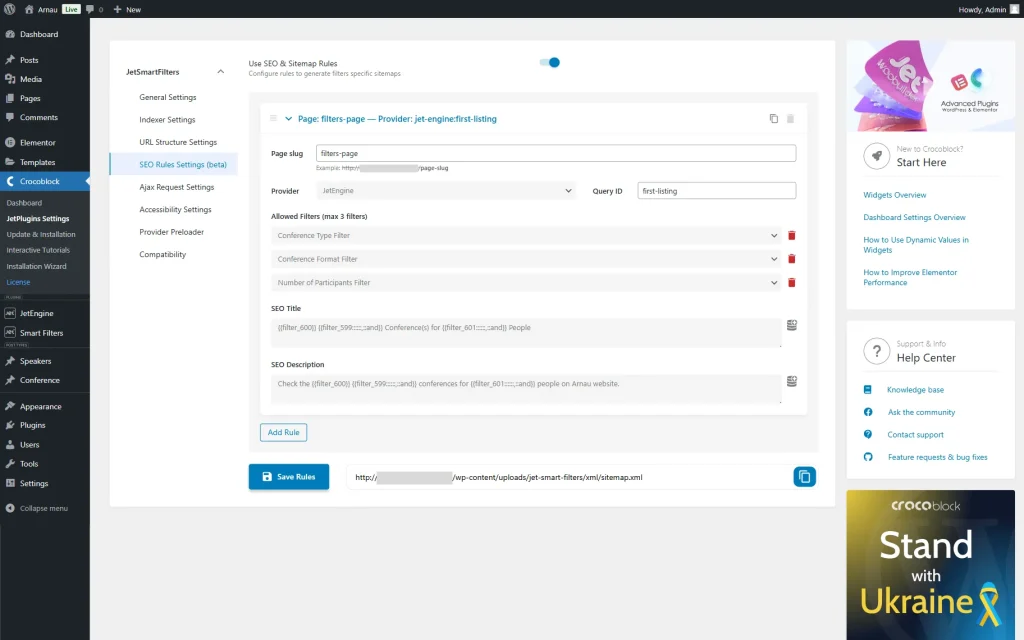
This way, we add the three filters (an allowed maximum).
Next, we set the SEO Title:
{{filter_600}} {{filter_599::::::,::and}} Conference(s) for {{filter_601::::::,::and}} Peopleand SEO Description:
Check the {{filter_600}} {{filter_599::::::,::and}} conferences for {{filter_601::::::,::and}} people on Arnau website.So, the SEO title and description will be changed when the filters are applied to the page.
Then, we press the “Add Rule” button to create another rule.
We complete the Page slug with the same “filters-page” value as we want this rule to be applied to the same page as the first one.
Also, we set “JetEngine” as a Provider as the second rule is also applied to the Listing Grid.
As the Query ID, this time, we put the “second-listing” value, the one attached to the filter and provider of the second section of the page.
In this rule, we attach one filter and set the SEO Title:
Speakers ExperienceNext, we complete the SEO Description:
Check the speakers with the {{filter_602::"::"}} status. The values like {{filter_602::”::”}} are macros of the filter that will show the values selected on the front end. To learn more details on how to adjust SEO data for sitemap, check the How to Set Up SEO Title and Description for filtered URLs tutorial.
Also, check our video tutorial on Setting Up SEO Rules.
Then, we press “Save Rules” and the “copy” button next to the sitemap link.
Check Sitemap Link
Use the Sitemap File
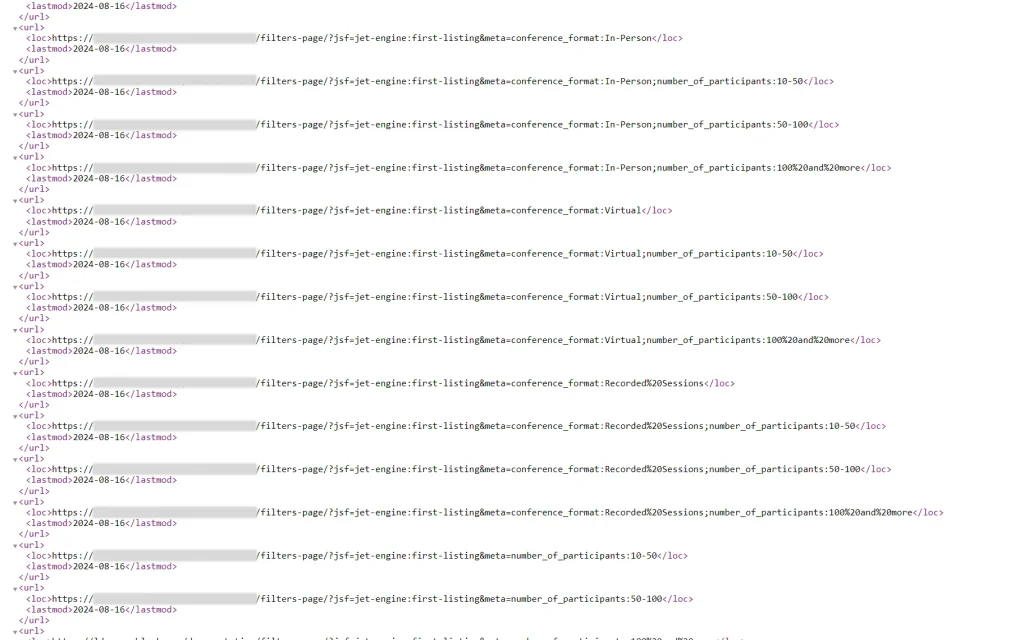
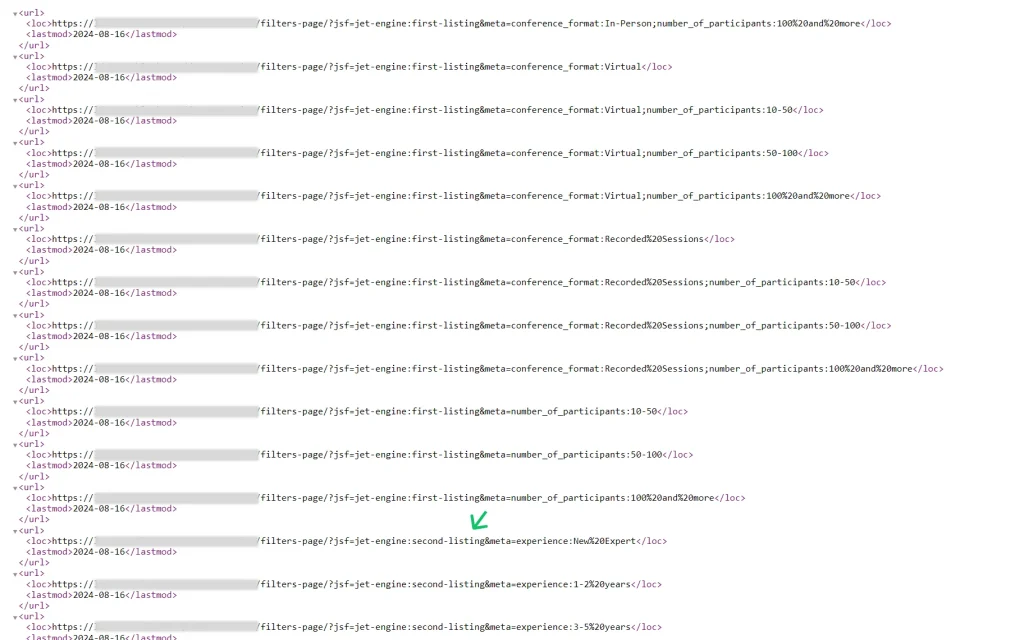
Now, you can use the generated sitemap file. For instance, with the SEO plugins like Rank Math or Yoast.
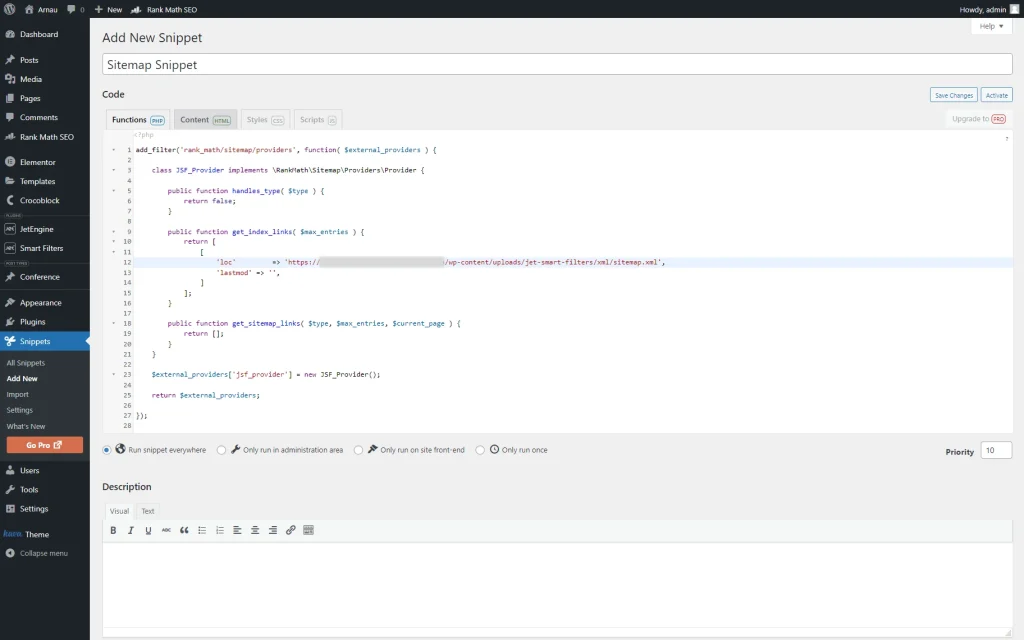
We will work with Rank Math. Also, we need a plugin to paste the code snippet, so we install and activate Code Snippets.
Go to WordPress Dashboard > Snippets > Add New and paste the following code in the special area:
add_filter('rank_math/sitemap/providers', function( $external_providers ) {

	class JSF_Provider implements \RankMath\Sitemap\Providers\Provider {

		public function handles_type( $type ) {
			return false;
		}

		public function get_index_links( $max_entries ) {
			return [
				[
					'loc'         => 'your_xml_url',
					'lastmod' => '',
				]
			];
		}

		public function get_sitemap_links( $type, $max_entries, $current_page ) {
			return [];
		}
	}

	$external_providers['jsf_provider'] = new JSF_Provider();

	return $external_providers;

});
Save and activate the code snippet.
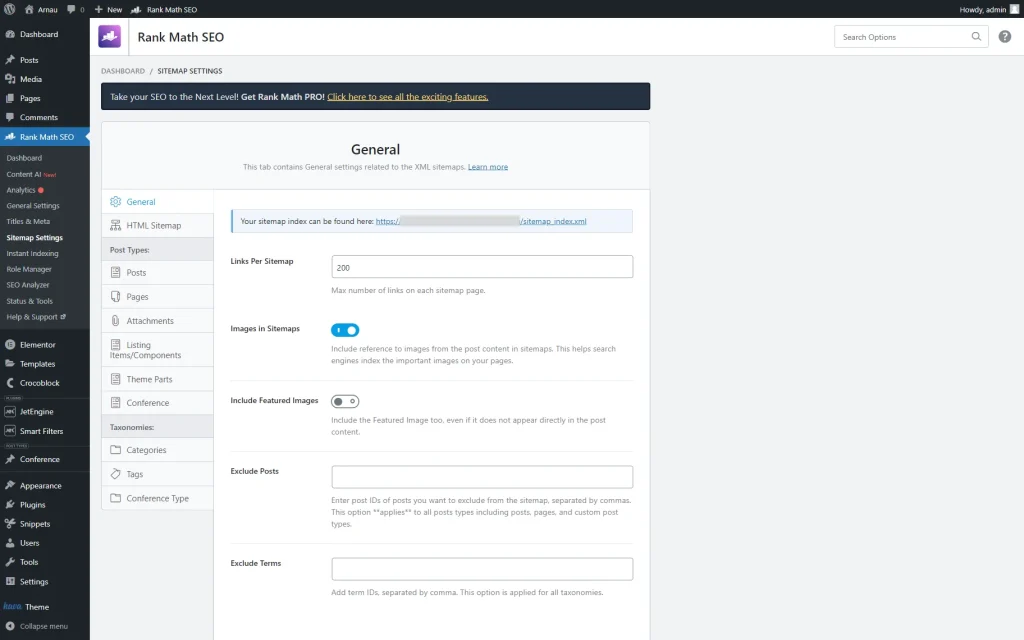
Now, we head to WordPress Dashboard > Rank Math SEO > Sitemap Settings.
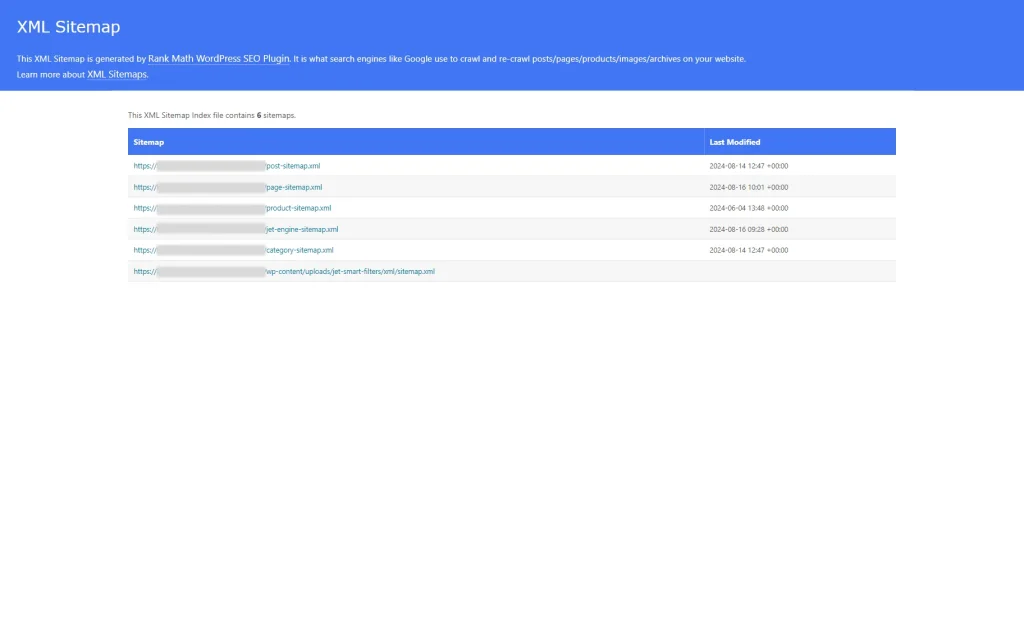
Click on the link in the banner at the top of the settings window.
Once clicked, you can see that the needed link with the SEO rules file is added to the sitemap.
That’s all; now, you know how to adjust the SEO rules for filters built with JetSmartFilters on your WordPress website.
