Displaying Custom Repeater Fields in the Classic Accordion Widget
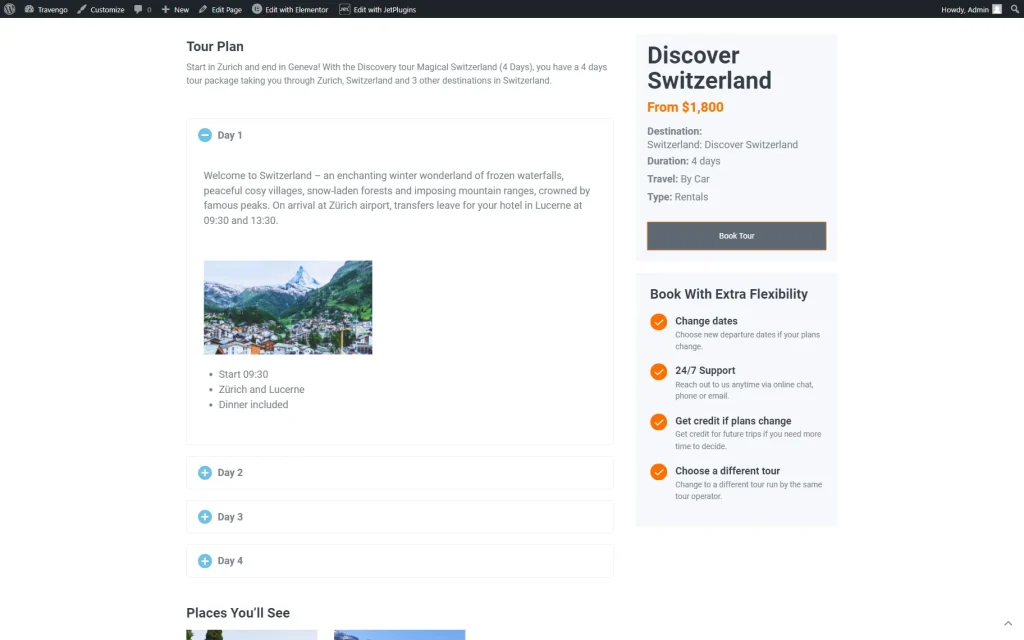
Display custom repeater fields in the Classic Accordion widget with the JetEngine and JetTabs plugins. Find out how to easily create a repeating block set and display the needed information.
Before you start, check the tutorial requirements:
- Elementor (Free version)
- JetEngine plugin installed and activated with a Custom Post Type created
- JetTabs plugin installed and activated
With the JetEngine and JetTabs plugins, you can display information from the repeater field in a Classic Accordion widget. For instance, you can showcase details about the different days of a tour on its single page or recreate the steps according to your use case.
Creating the Custom Repeater Meta Fields
Navigate to the WordPress Dashboard > JetEngine > Post Types directory and open a Custom Post Type editor where you want to add the repeater fields.
Scroll to the Meta Fields tab and press the “New Meta Field” button.
Complete the Label and Name/ID fields with the desired values.
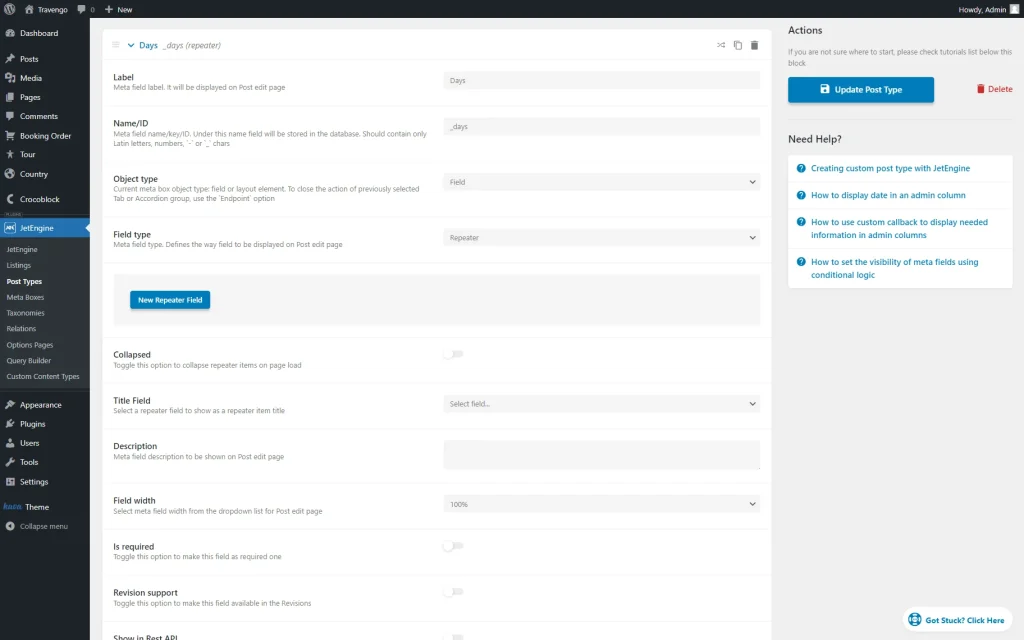
Leave the default “Field” Object type and set “Repeater” as a Field type.
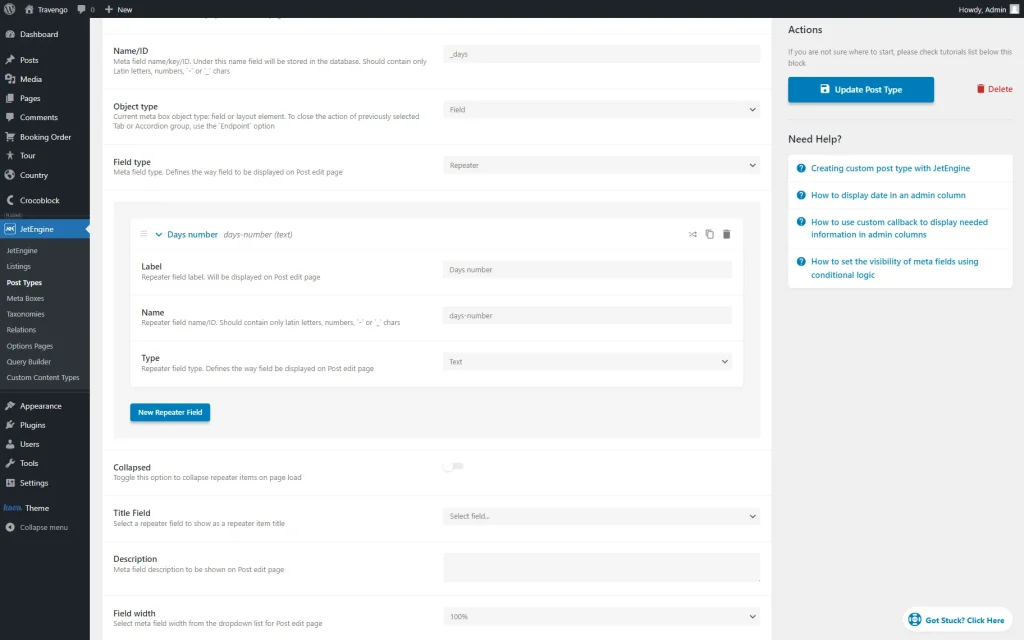
Follow the detailed guide through the Repeater meta field creation process and add the necessary fields to the repeater by pressing the “New Repeater Field” button.
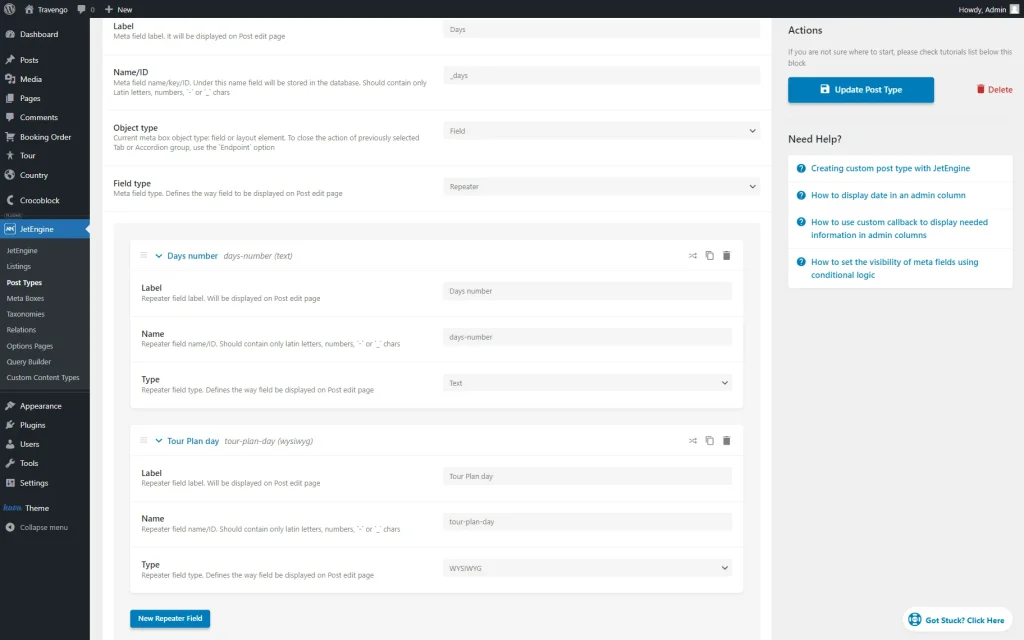
Firstly, we build a meta field for the label of the tab. For example, it can be a “Text” field as presented in this tutorial.
One more “WYSIWYG” field is built for the content of the tabs.
Once all the needed fields are created, click the “Update Post Type” button.
Filling the Fields Within the Posts
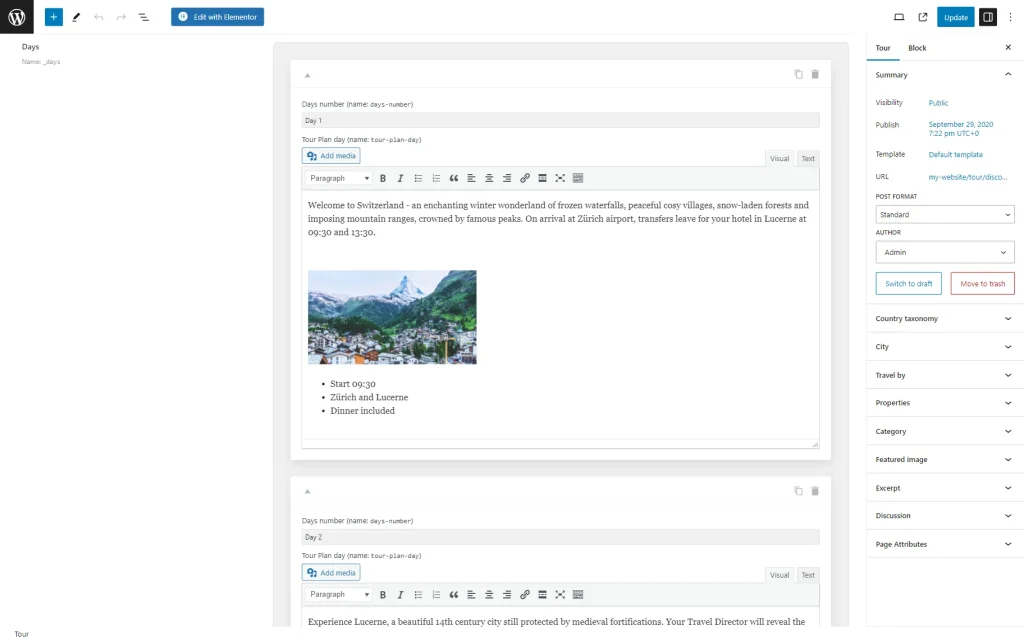
Go to each Custom Post Type post, scroll down the page, and add the needed information to the just-added repeater fields.
As the repeater fields will be displayed in the accordion tabs, you should add as many blocks with information as needed. For instance, in the case of the tours, each one will have four or more days.
Once you’re done, update the post.
Repeat the same procedure with all the needed posts and proceed to the next step.
Building a Query
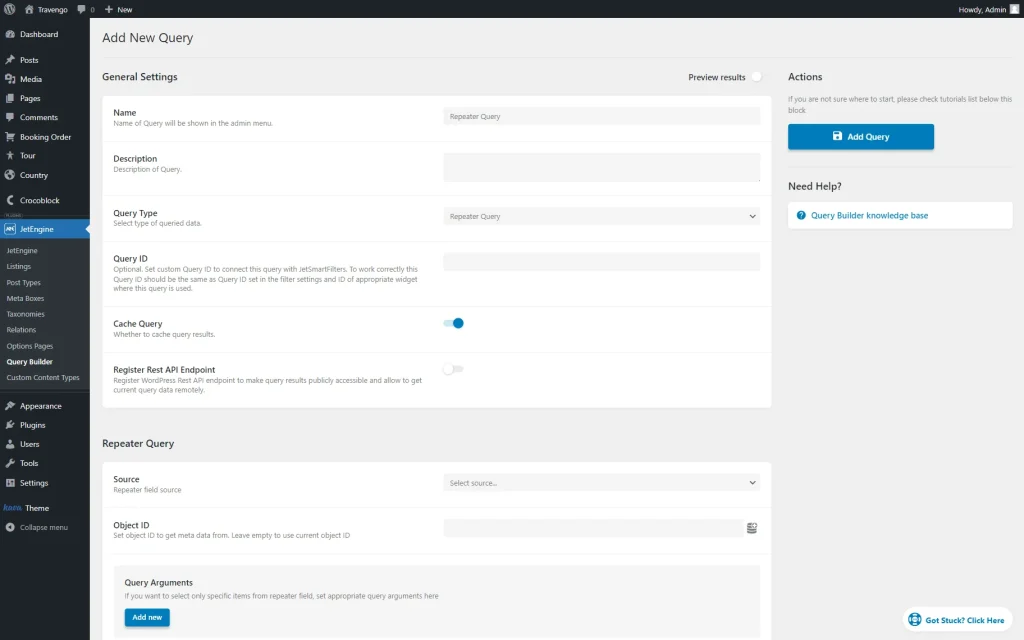
Go to WordPress Dashboard > JetEngine > Query Builder and press “Add New” to create a new query.
In the General Settings section, set the Name and define the Query Type, now it should be set to “Repeater Query.”
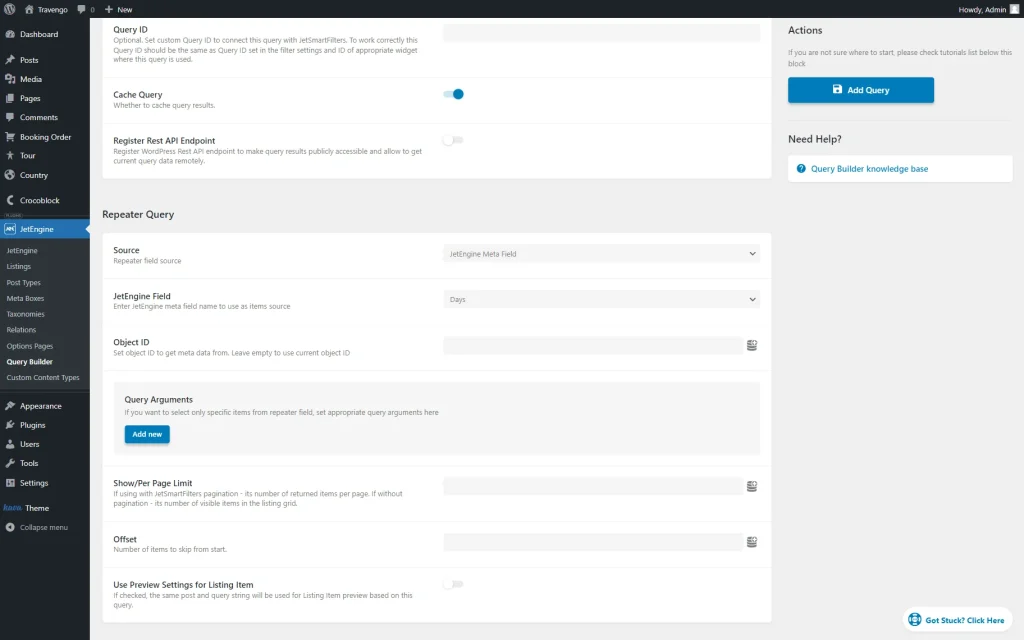
In the Repeater Query section, specify the Source of the query — “JetEngine Meta Field.”
As the JetEngine Field, select the “Repeater” meta field that you built earlier based on the Creating the Custom Repeater Meta Fields part of the article.
In the given case, we leave the Object ID field empty as we want to display the repeater on the Single page of the corresponding post. However, if you will work with a static page, you should complete this field with the ID of the needed post.
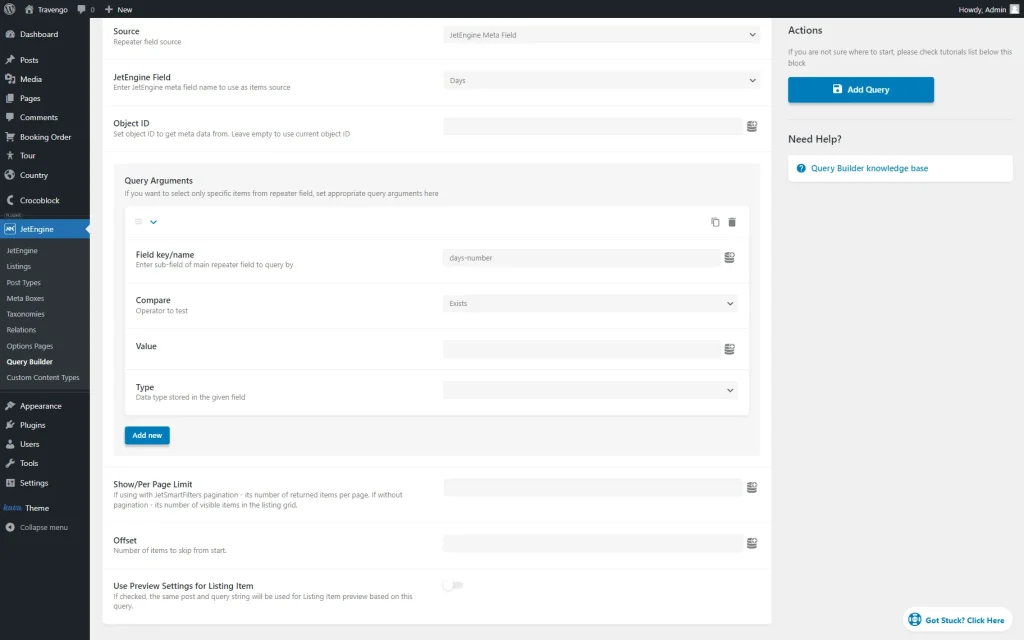
Press the “Add new” button under the Query Arguments section to connect the repeater fields to this query.
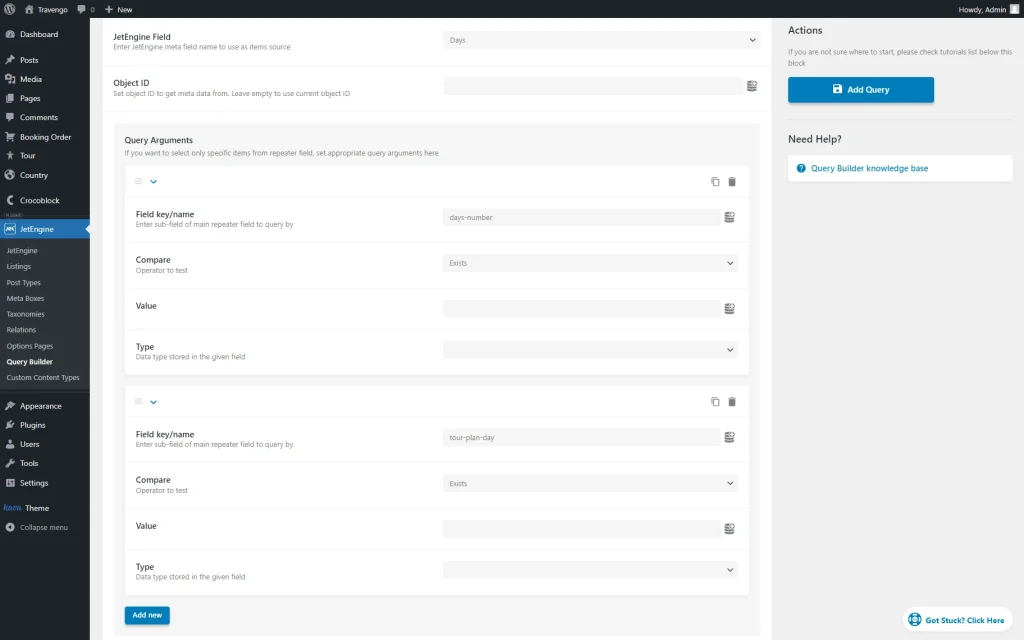
Put the Name of the needed repeater field as the Field key/name and set its Compare operator to “Exists.”
You can add more fields by pressing the “Add new” button once again.
After the changes are made, press the “Add Query” button.
Working with the Accordion Widget
Head to WordPress Dashboard > Crocoblock > Theme Templates. Open the Single Page in Elementor and drop the Classic Accordion widget.
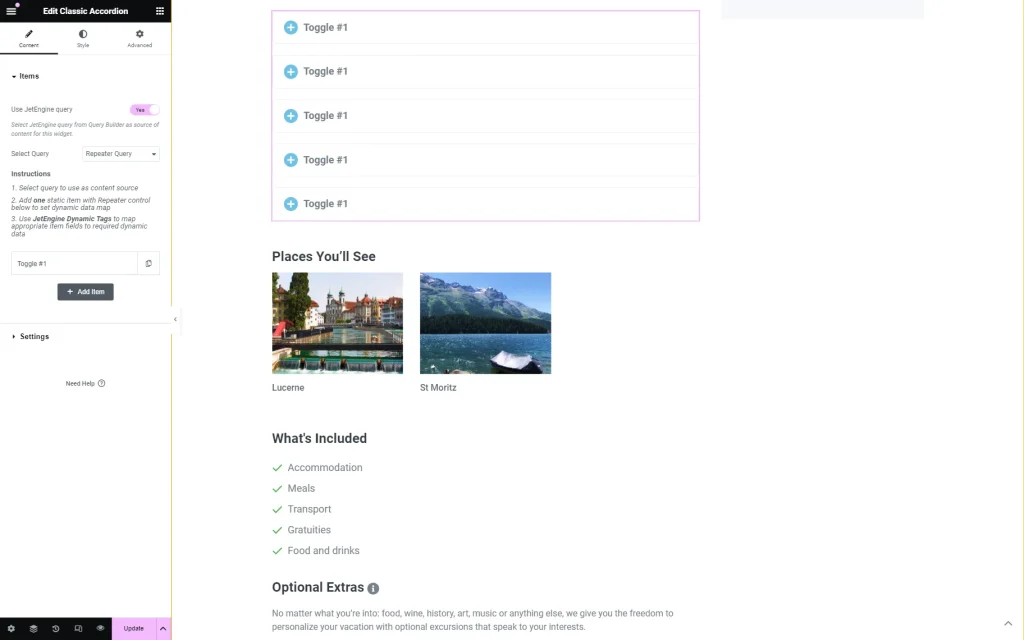
Activate the Use JetEngine query toggle and pick the just-created query in the Select Query field.
Then, delete the two last items presented by default as toggles so only one is left.
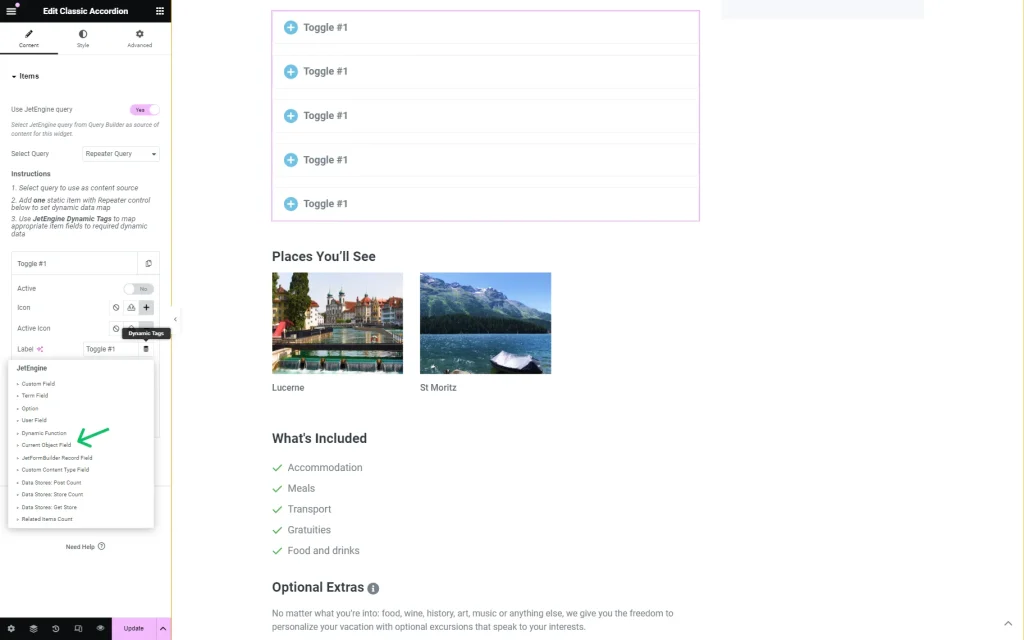
Open the Toggle #1 tab and press the “Dynamic Tags” button next to the Label field.
Choose the “Current Object Field” macro from the list.
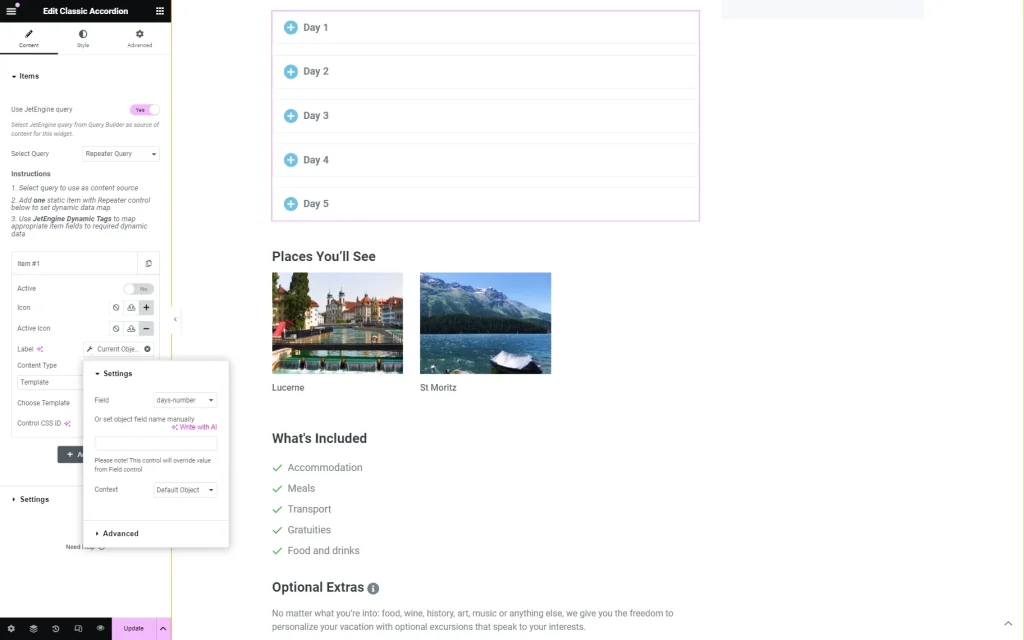
Once clicked, the additional customization fields are displayed.
As the Field, pick the repeater field you want to display as the tab label. You can find the needed field below the label of the query that we have assigned to repeater.
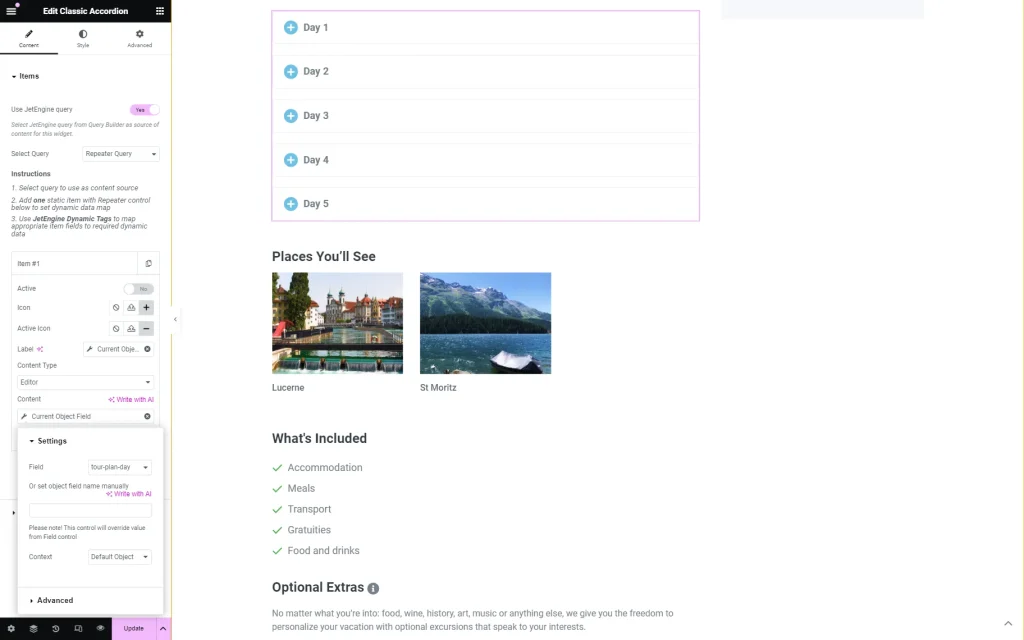
Then, set the Content Type. If you use the “Template” Content Type, you should pick the template (Choose Template field) that contains the Dynamic Field with the needed repeater field set as an Object Field.
However, in the described case, we select the “Editor” option. Here, press the “Dynamic Tags” button and select the “Current Object Field” macro from the list.
Select the needed Field to be displayed as the content of the tab.
Style up the widget and update the page once you’re done with the settings.
On the front end, the Classic Accordion widget will display the information you previously entered into the repeater meta fields of the post.
This is all about displaying custom Repeater fields in the Classic Accordion widget, which is available with the JetTabs plugin for WordPress.
