Displaying Icon from the Repeater Field Using the Dynamic Data Addon
Learn how to use the widgets, such as Tabs, Classic Accordion, Slider, etc., of the JetElements or JetTabs plugins to set a custom icon right from the Iconpicker field of the Repeater meta field.
Before you start, check the tutorial requirements:
- Elementor (Free version)
- JetThemeCore plugin installed and activated with a Single Post Template built.
If you have not done it yet, read the tutorial.
- JetElements or JetTabs plugins installed and activated.
- Free Dynamic data addon installed and activated.
Create an Iconpicker Field Within the Repeater Meta Field
Navigate to the WordPress Dashboard > JetEngine > Meta Boxes or WordPress Dashboard > JetEngine > Post Types (depending on the “Repeater” meta field location). For instance, we intend to add the “Repeater” meta field to the “Popular Tours” Custom Post Type (CPT).
In this case, we typed the “Days” text into the Label field, and the Name field was automatically filled with the “days” text. Here, the Repeater meta field will include two “Text” and two “Iconpicker” fields (the “Active Icon” field for the active widget and the “Icon” field 一 for the unrolled widget).
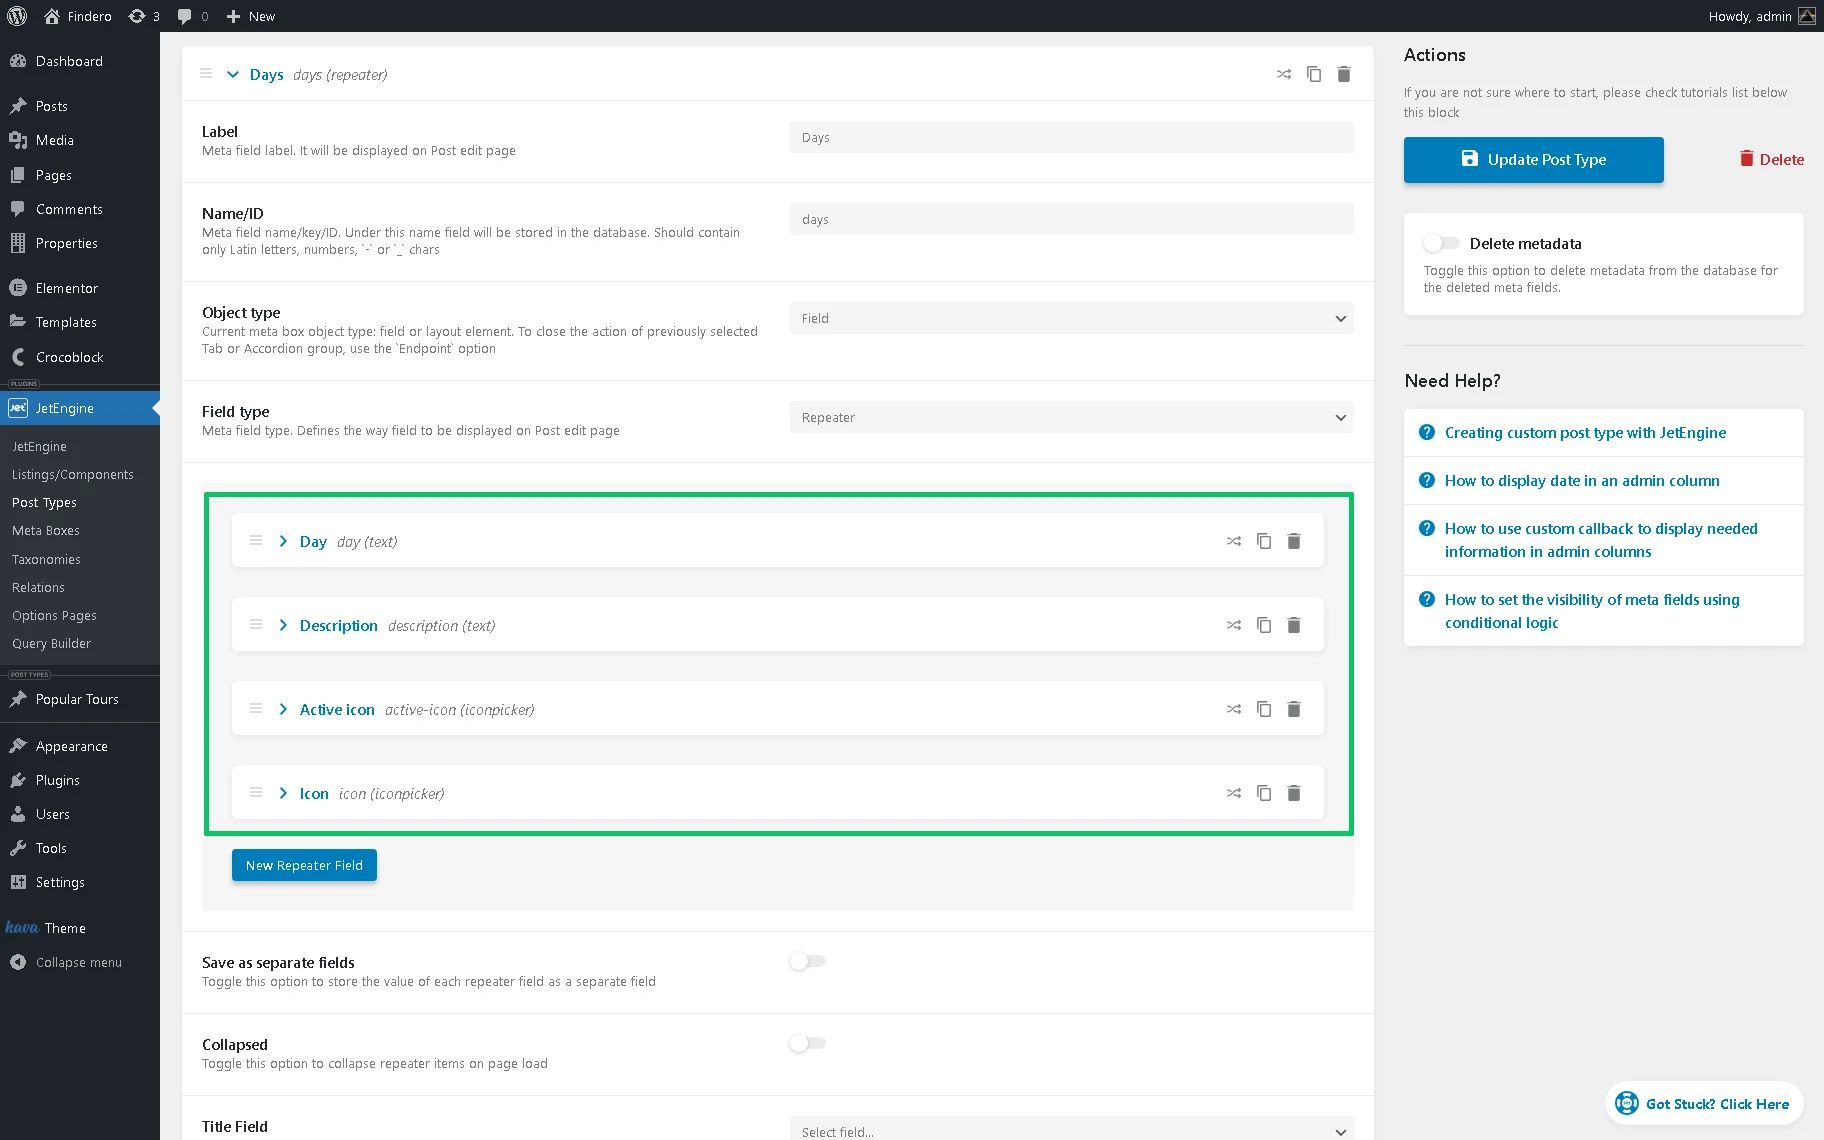
Once you are done, hit the “Update Post Type” button to save the changes.
Fill the Repeater Fields With Icons
The next thing you need to do is to set the icons for each post.
Open the CPT post you need, scroll down to your meta box, and find the “Repeater” meta field. For each Repeater item, set the desired icons. Update the post.
In this case, we opened the “Wonderful Poland” post of the “Popular Tours” CPT, inserted data into the “Day” and “Description” fields, and then selected the icons for the “Active icon” and “Icon” fields. Finally, we saved the changes.
Place the Widget
Open the previously created Single Post Template for this CPT. Customize the page as needed.
Find the Classic Accordion or any other widget that supports Dynamic data addon and add it to the page. Then, open the widget settings and expand the Dynamic Settings tab.
Read more about the widget’s settings in the How to Use Accordion Layout to Display Content in Tabs tutorial.
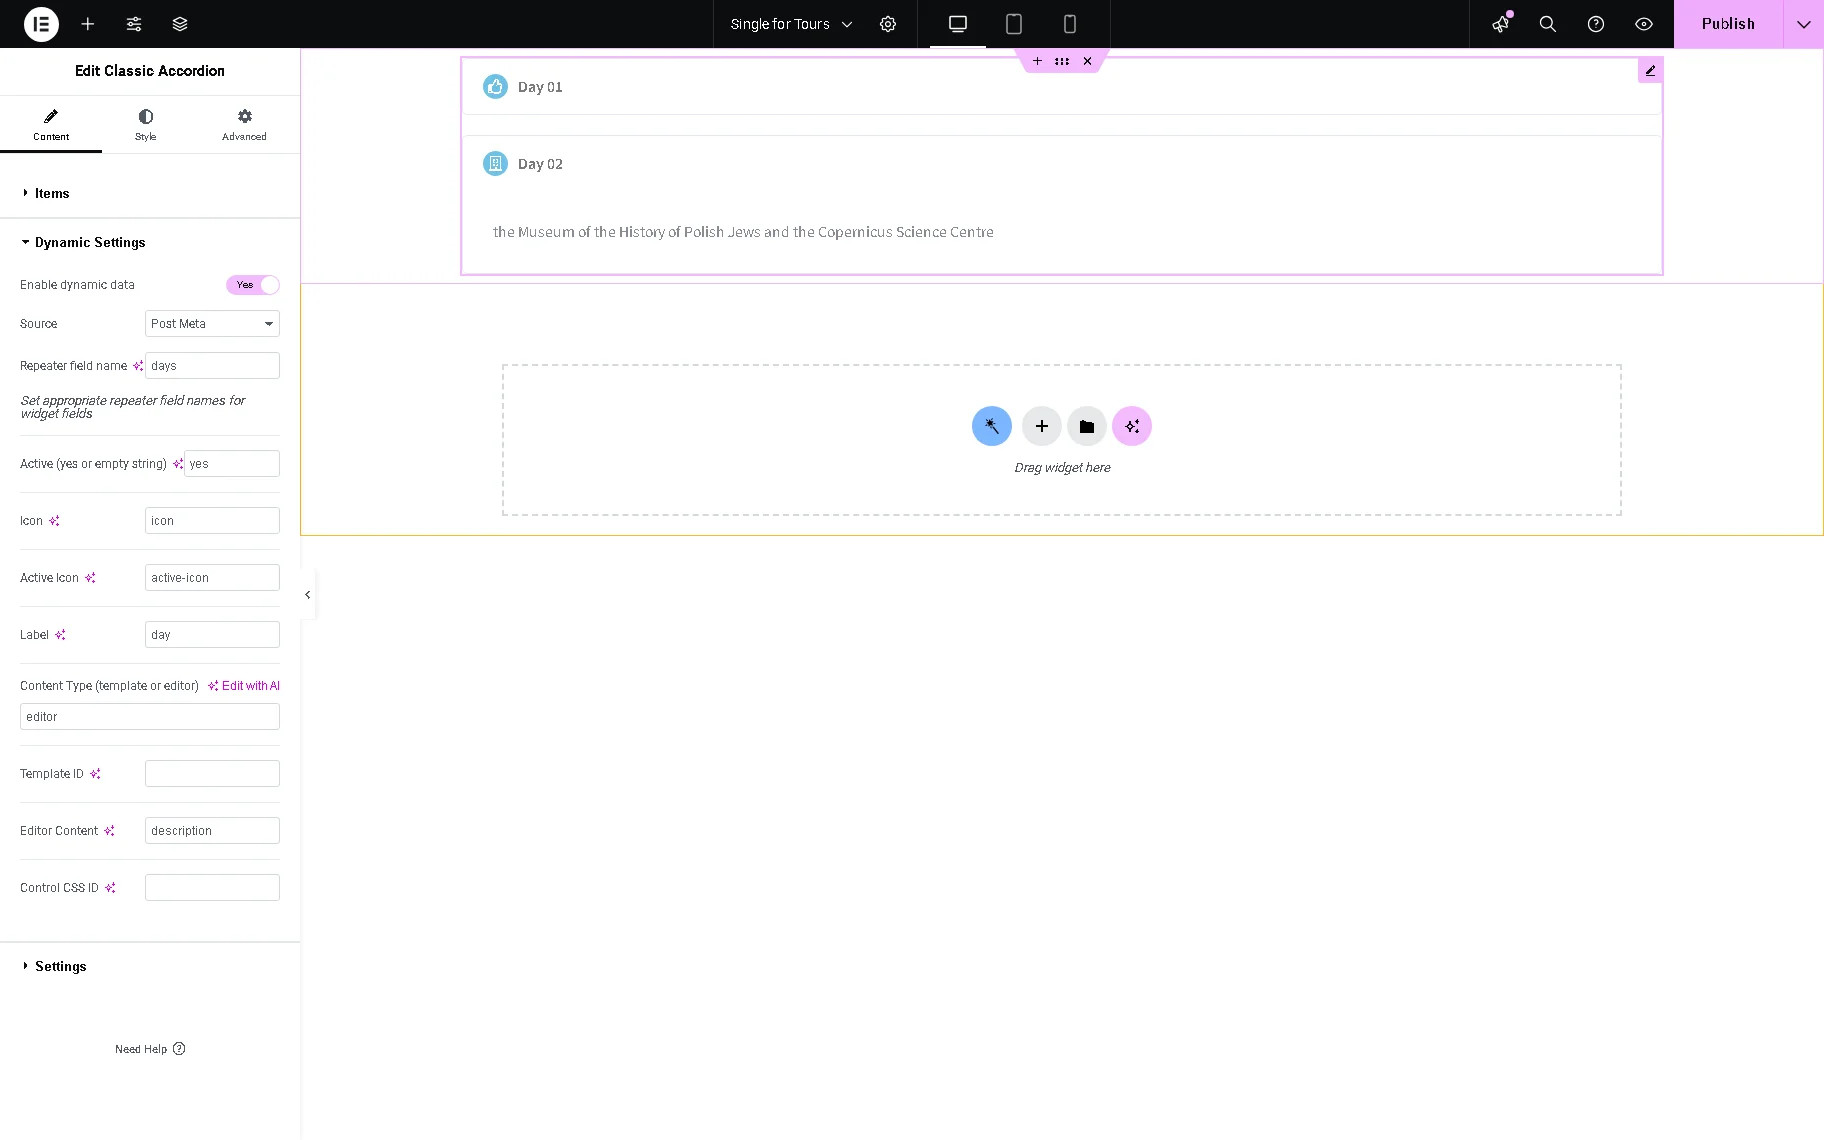
First, enable the Enable dynamic data toggle. After that, set the following settings in the newly-appeared fields.
Leave the “Post Meta” option in the Source drop-down list selected and add the “Repeater” meta field’s name in the Repeater field name field (here, we typed the “days” text).
Then, if you have two icons (one for the active widget and the second one ― for the unrolled widget), type the “yes” text in the Active (yes or empty string) field; otherwise, leave this field empty.
After that, insert the names of these fields into the Icon and Active Icon fields (the “icon” and “active-icon” values, respectively).
In the last step, fill out the Label field 一 here, we inserted the name of the “Day” meta field (in particular, the “day” text).
Type the “editor” text in the Content type (editor or template) field. Next, insert the name of the meta field that includes the data to be displayed in the active widget into the Editor Content field (the “description” text in this case).
Finally, press the “Publish” button.
Navigate to the front end to observe if the widget works correctly.
That’s it. Now you know how to display custom icons from the “Repeater” meta fields in the Accordion widget with the JetEngine and JetTabs plugins for WordPress.