Making JetElements and JetTabs Widgets Dynamic with Query Builder
This guide explains how to turn static widgets into dynamic, data-driven elements. You will learn how to connect widgets to queries so they can display content automatically based on your site’s structure and data sources.
Before you start, check the tutorial requirements:
- JetEngine plugin installed and activated
- JetElements plugin installed and activated
- JetTabs plugin installed and activated
JetEngine’s Query Builder module adds dynamics and flexibility to JetElements’ and JetTabs’ widgets, which are initially static. Modern websites often rely on dynamic functionality. Adding flexibility to new widgets improves content scalability, reduces manual work, and ensures consistent data output across the website. By connecting widgets to Query Builder, you can dynamically populate their content with posts, meta fields, relations, or custom query results, making them fully adaptable to different use cases and data structures.
Tabs for Posts
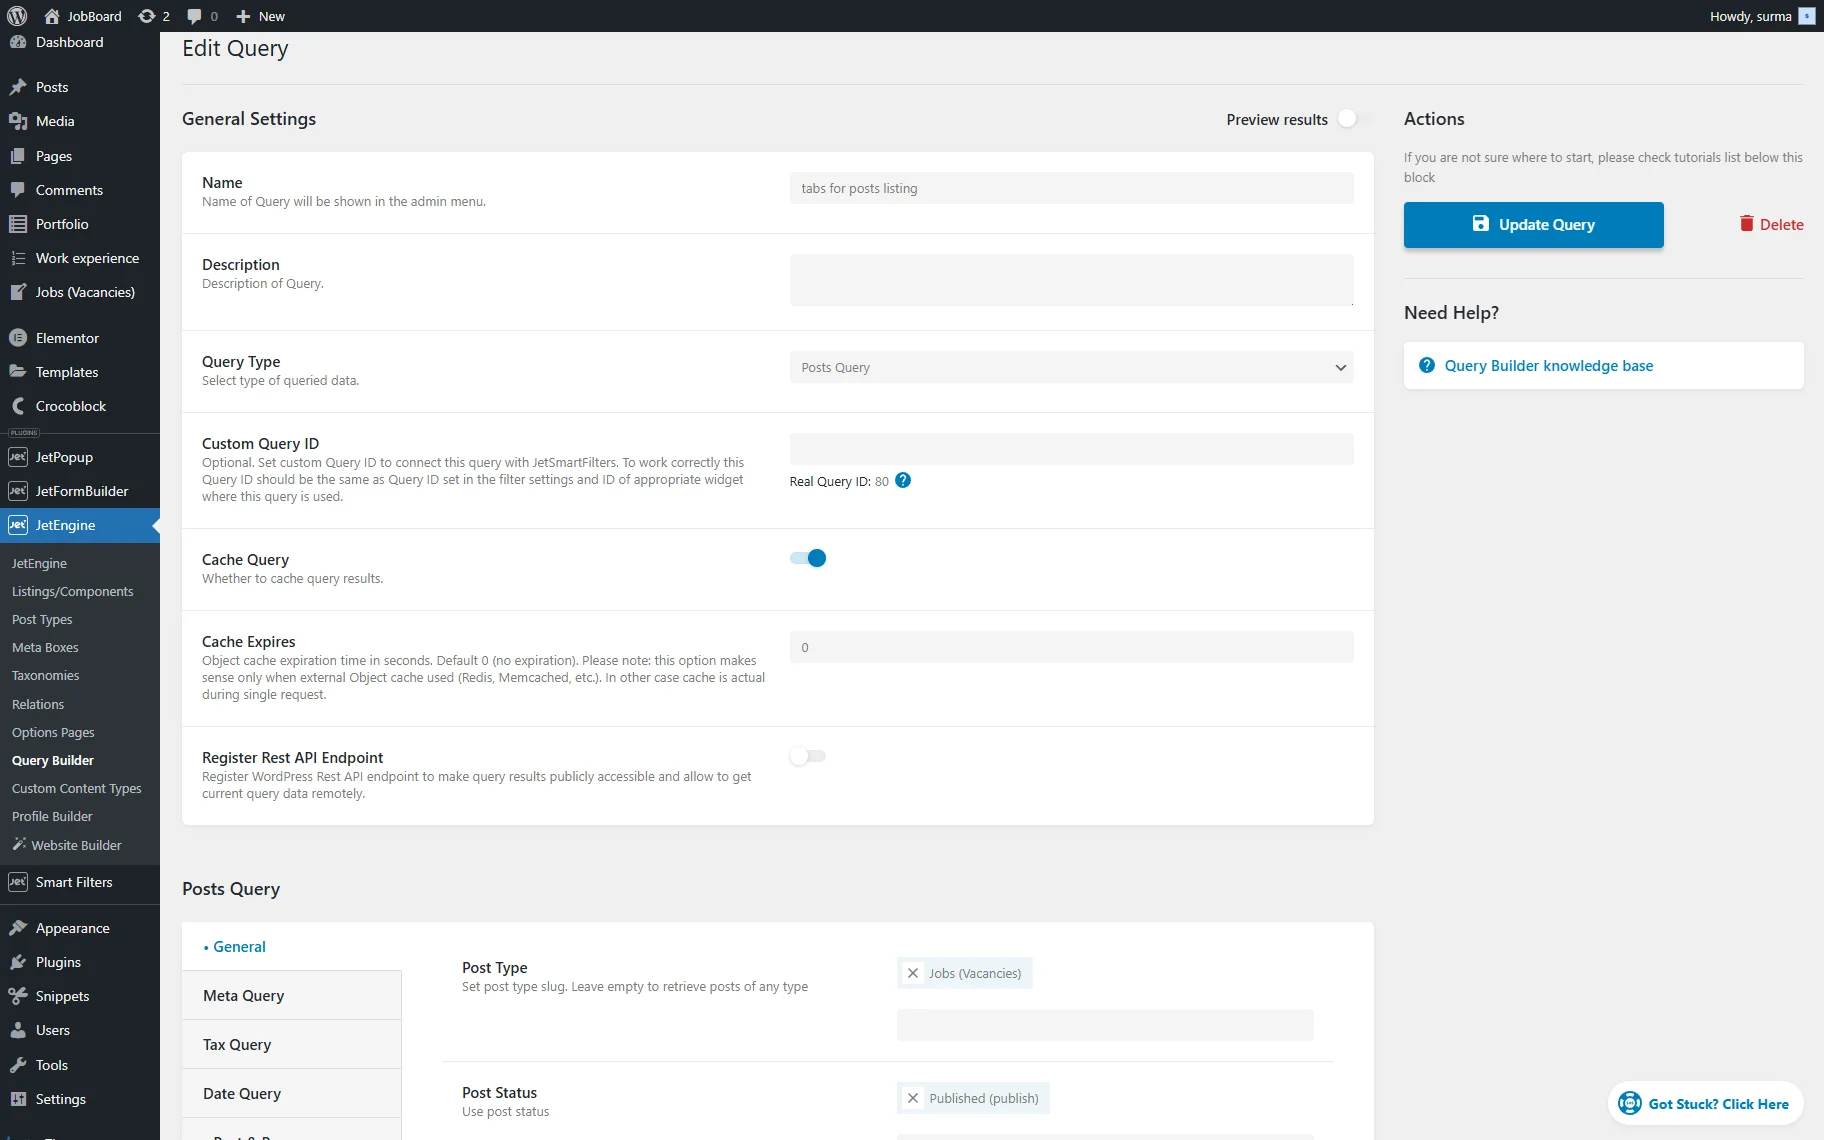
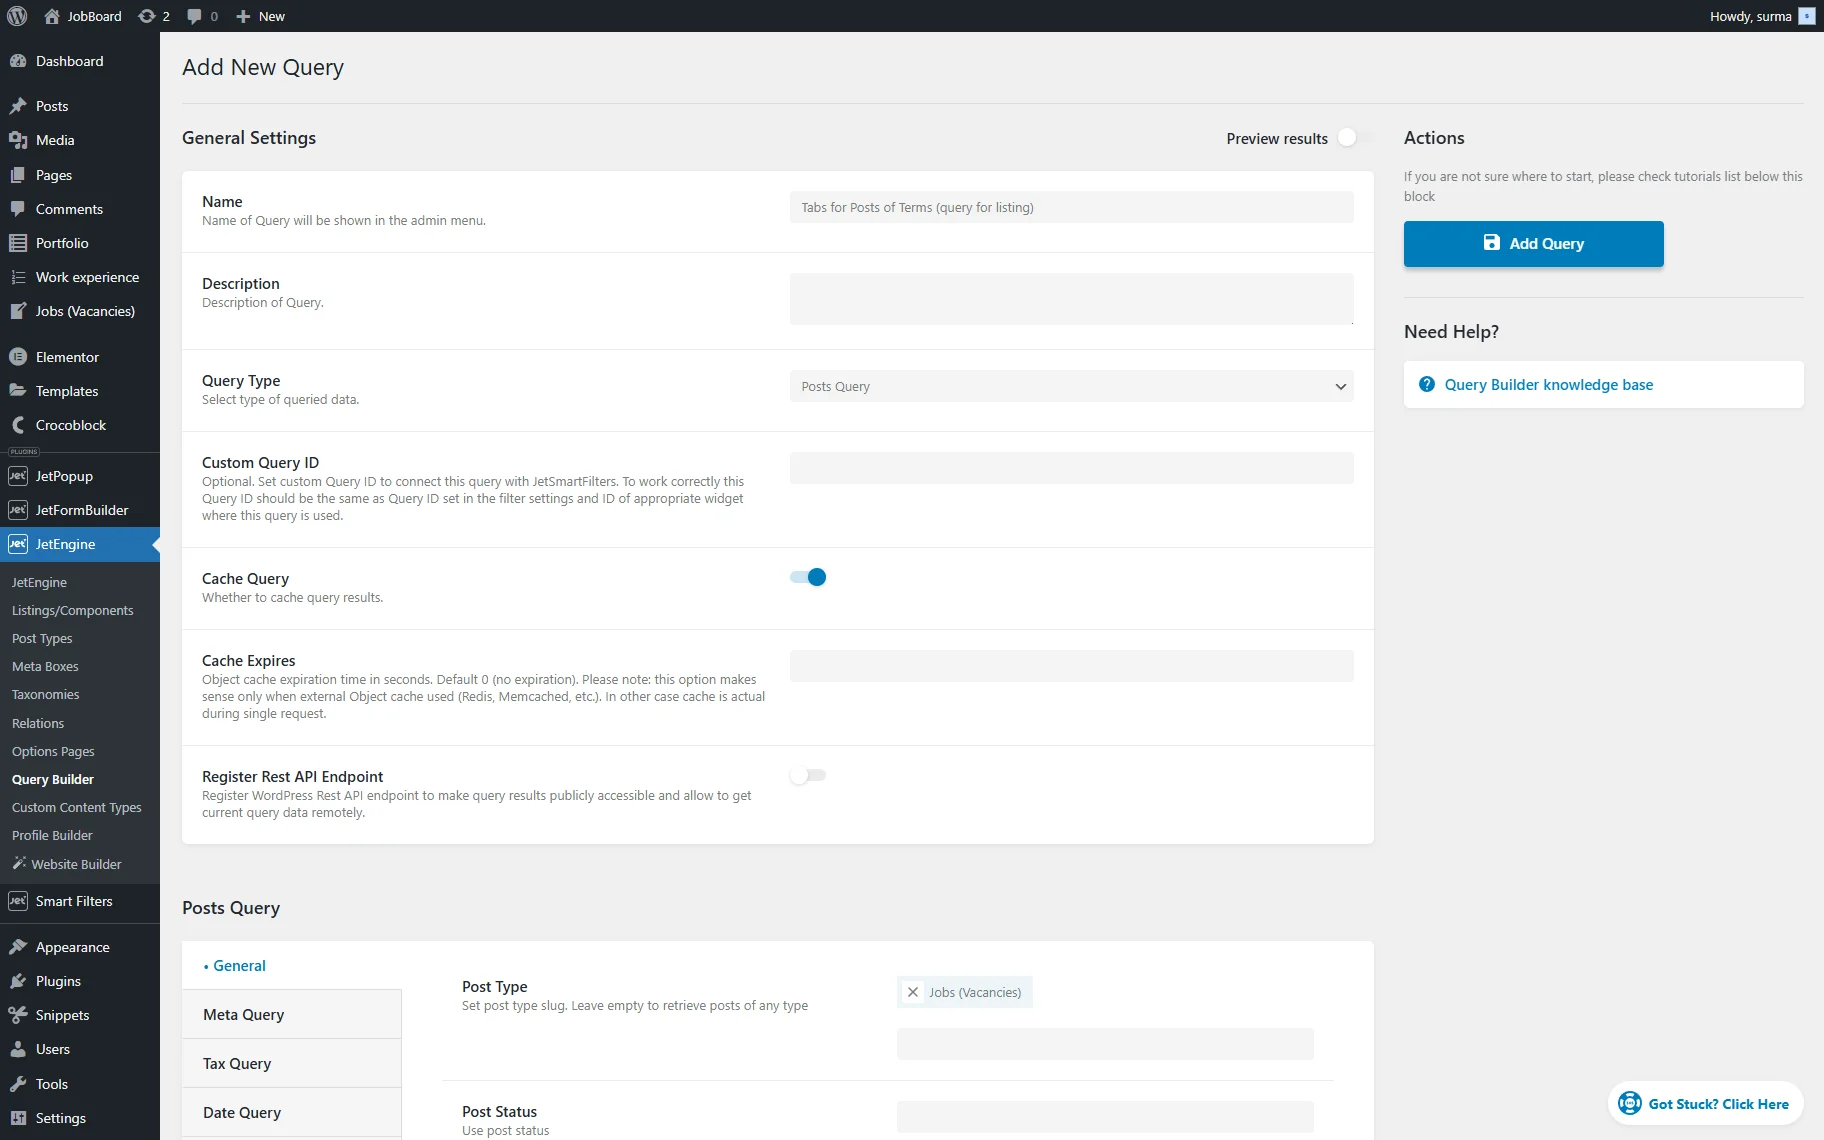
To display the dedicated posts in the Tabs widget dynamically, first of all, create a “Posts Query”. For that, proceed to WordPress Dashboard > JetEngine > Query Builder and click the “Add New” button.
Give a Name to the query and select the “Posts Query” Type. Set the needed Post Type and select the Post Status (“Published (publish)”).
Proceed to the Post & Page tab, click the “Dynamic Tag” icon next to the Posts In field, and select the “Current ID” option.
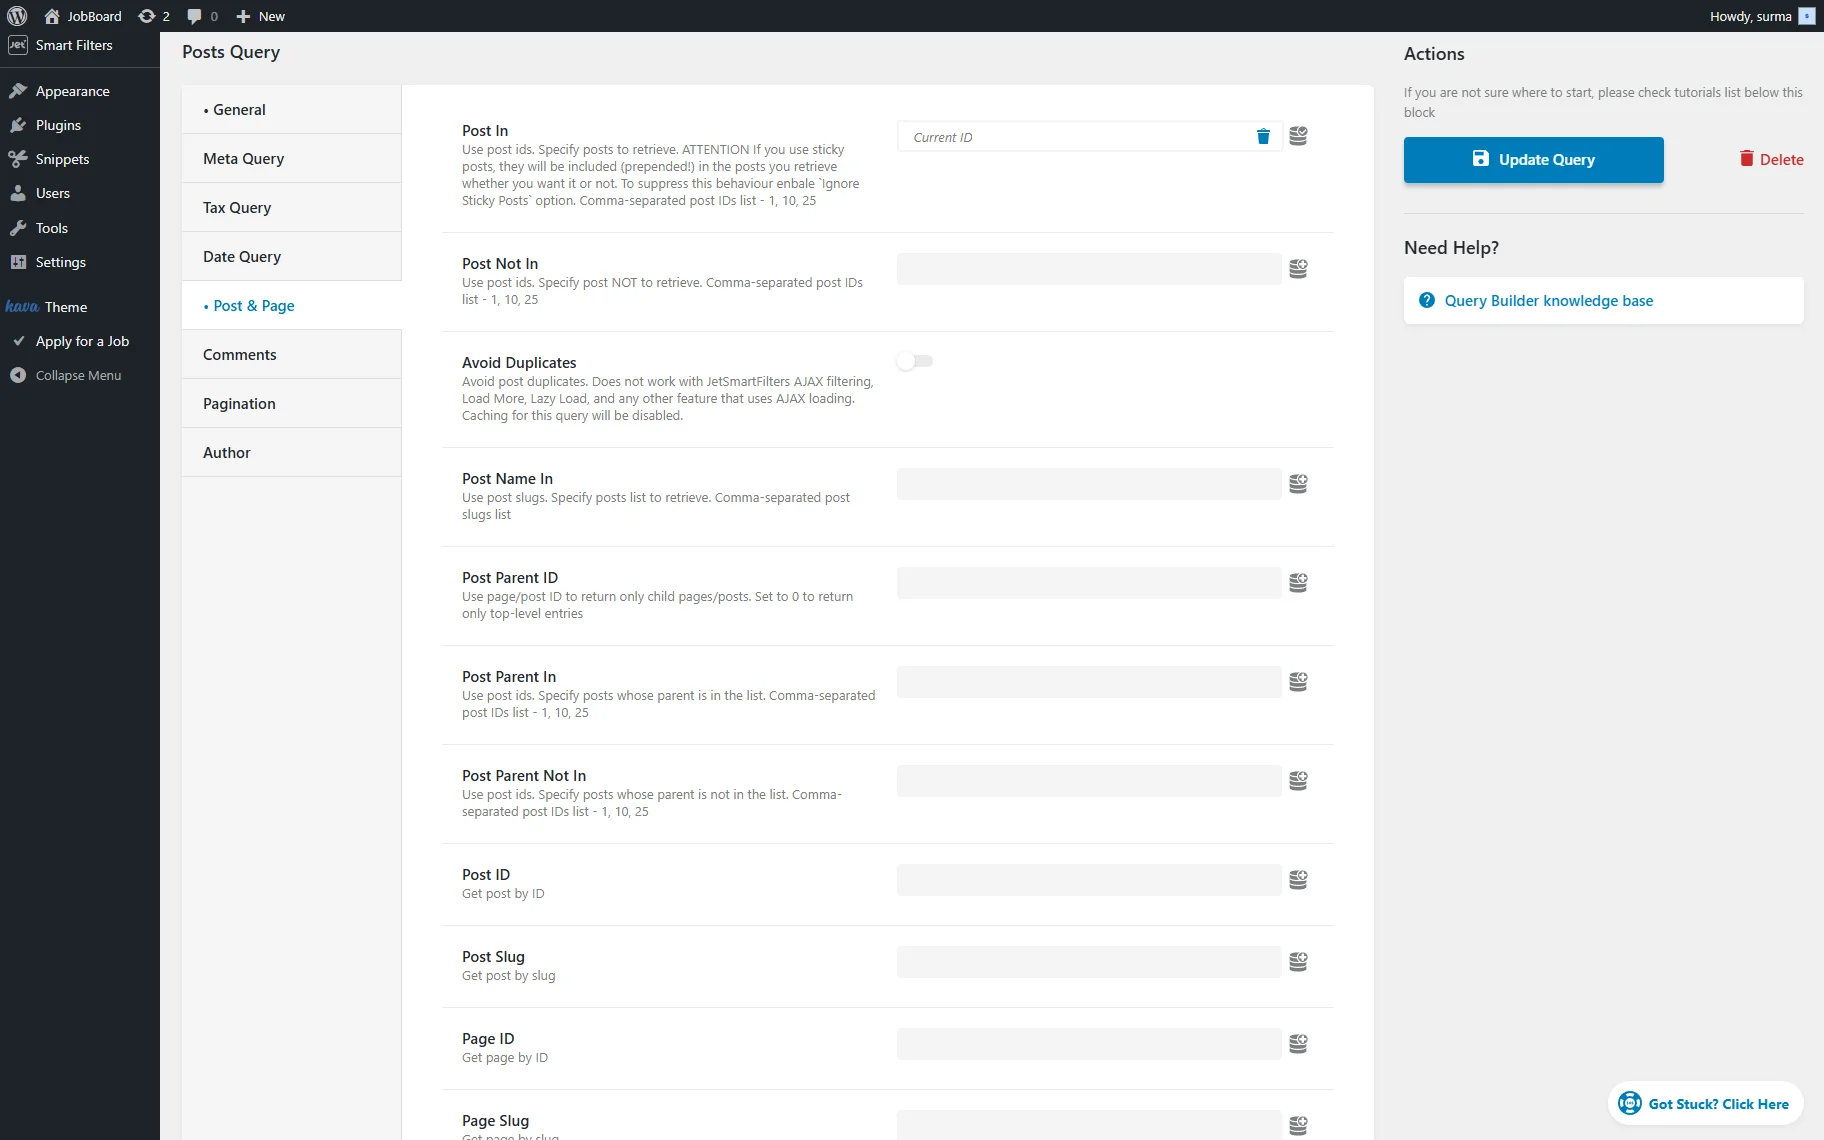
Save the query.
Proceed to WordPress Dashboard > JetEngine > Listings/Components and click the “Add New Item” button.
Build the Listing Template, which will be displayed inside the Tabs.
Click the “Publish” button once you are ready.
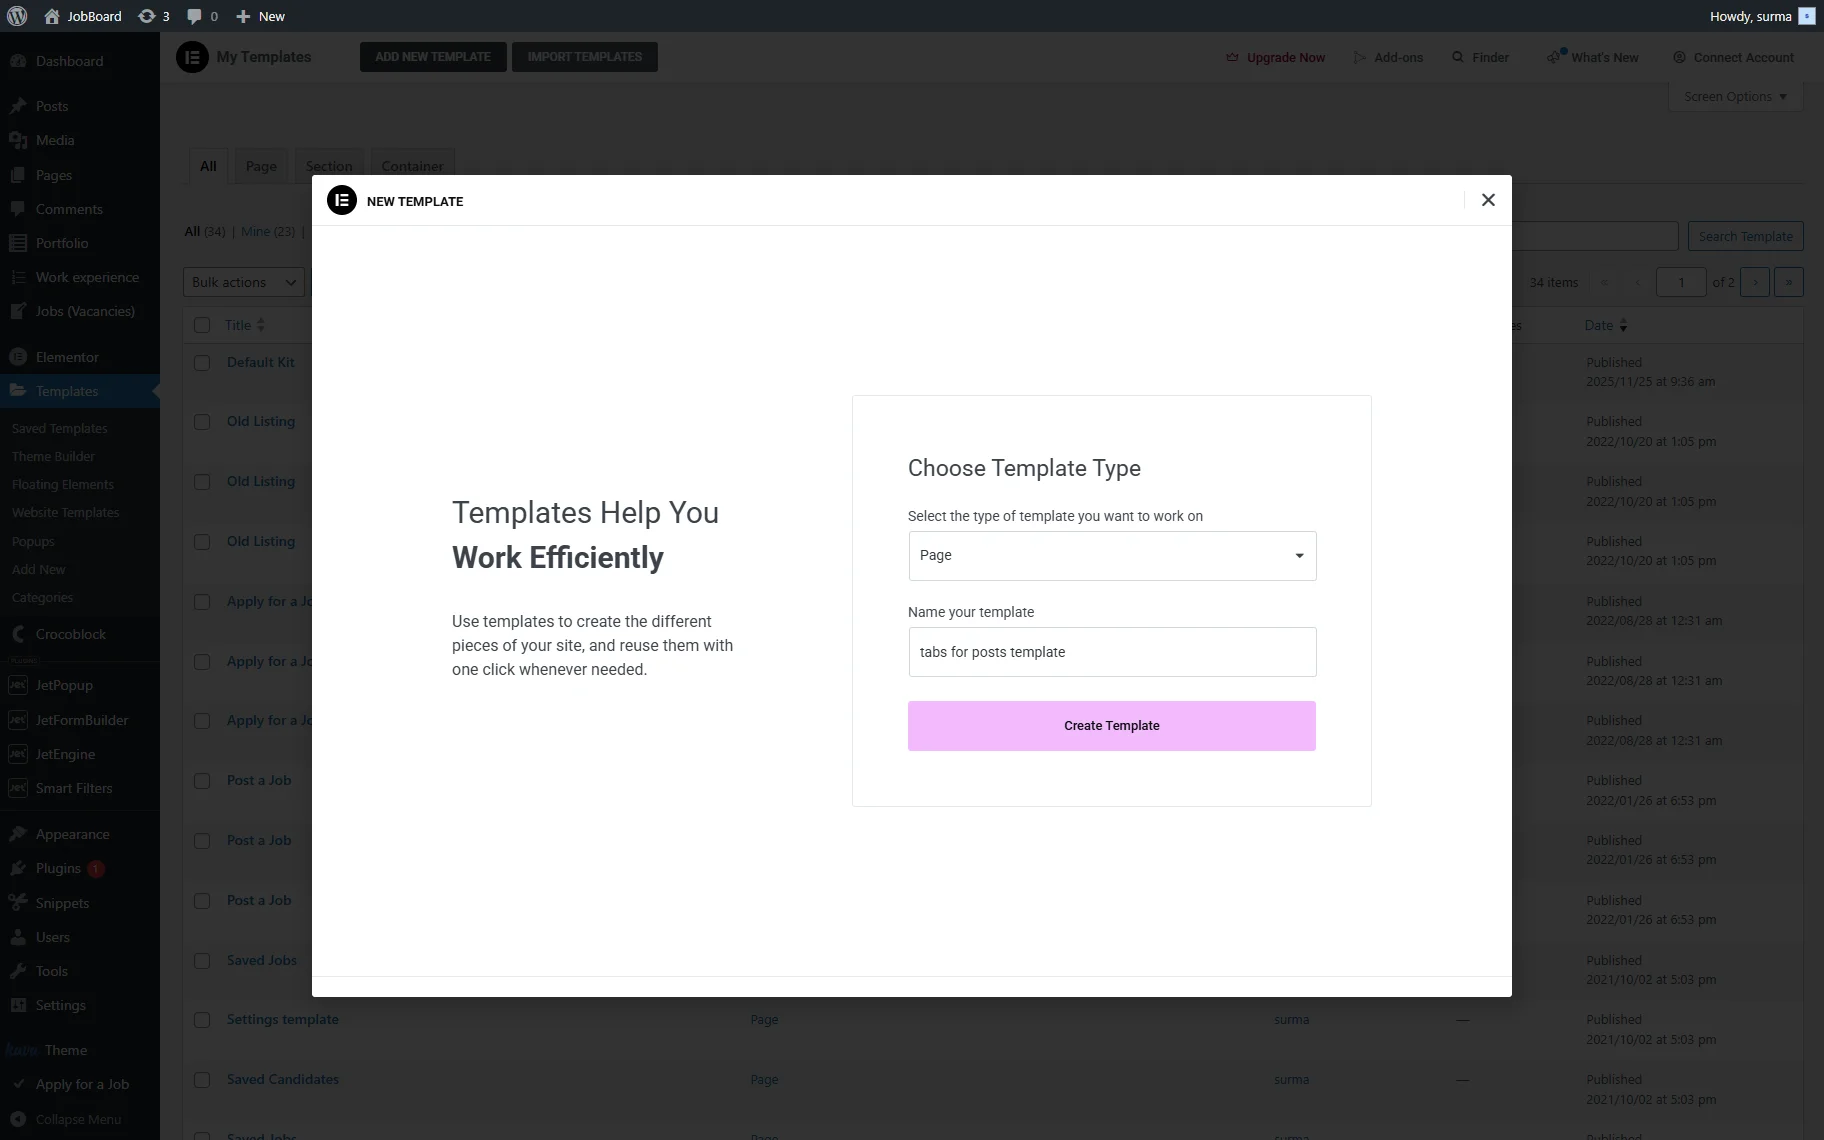
Now, move to the Elementor templates and create a new one. Select the “Page” type and enter the name for your template.
Then, click the “Create Template” button.
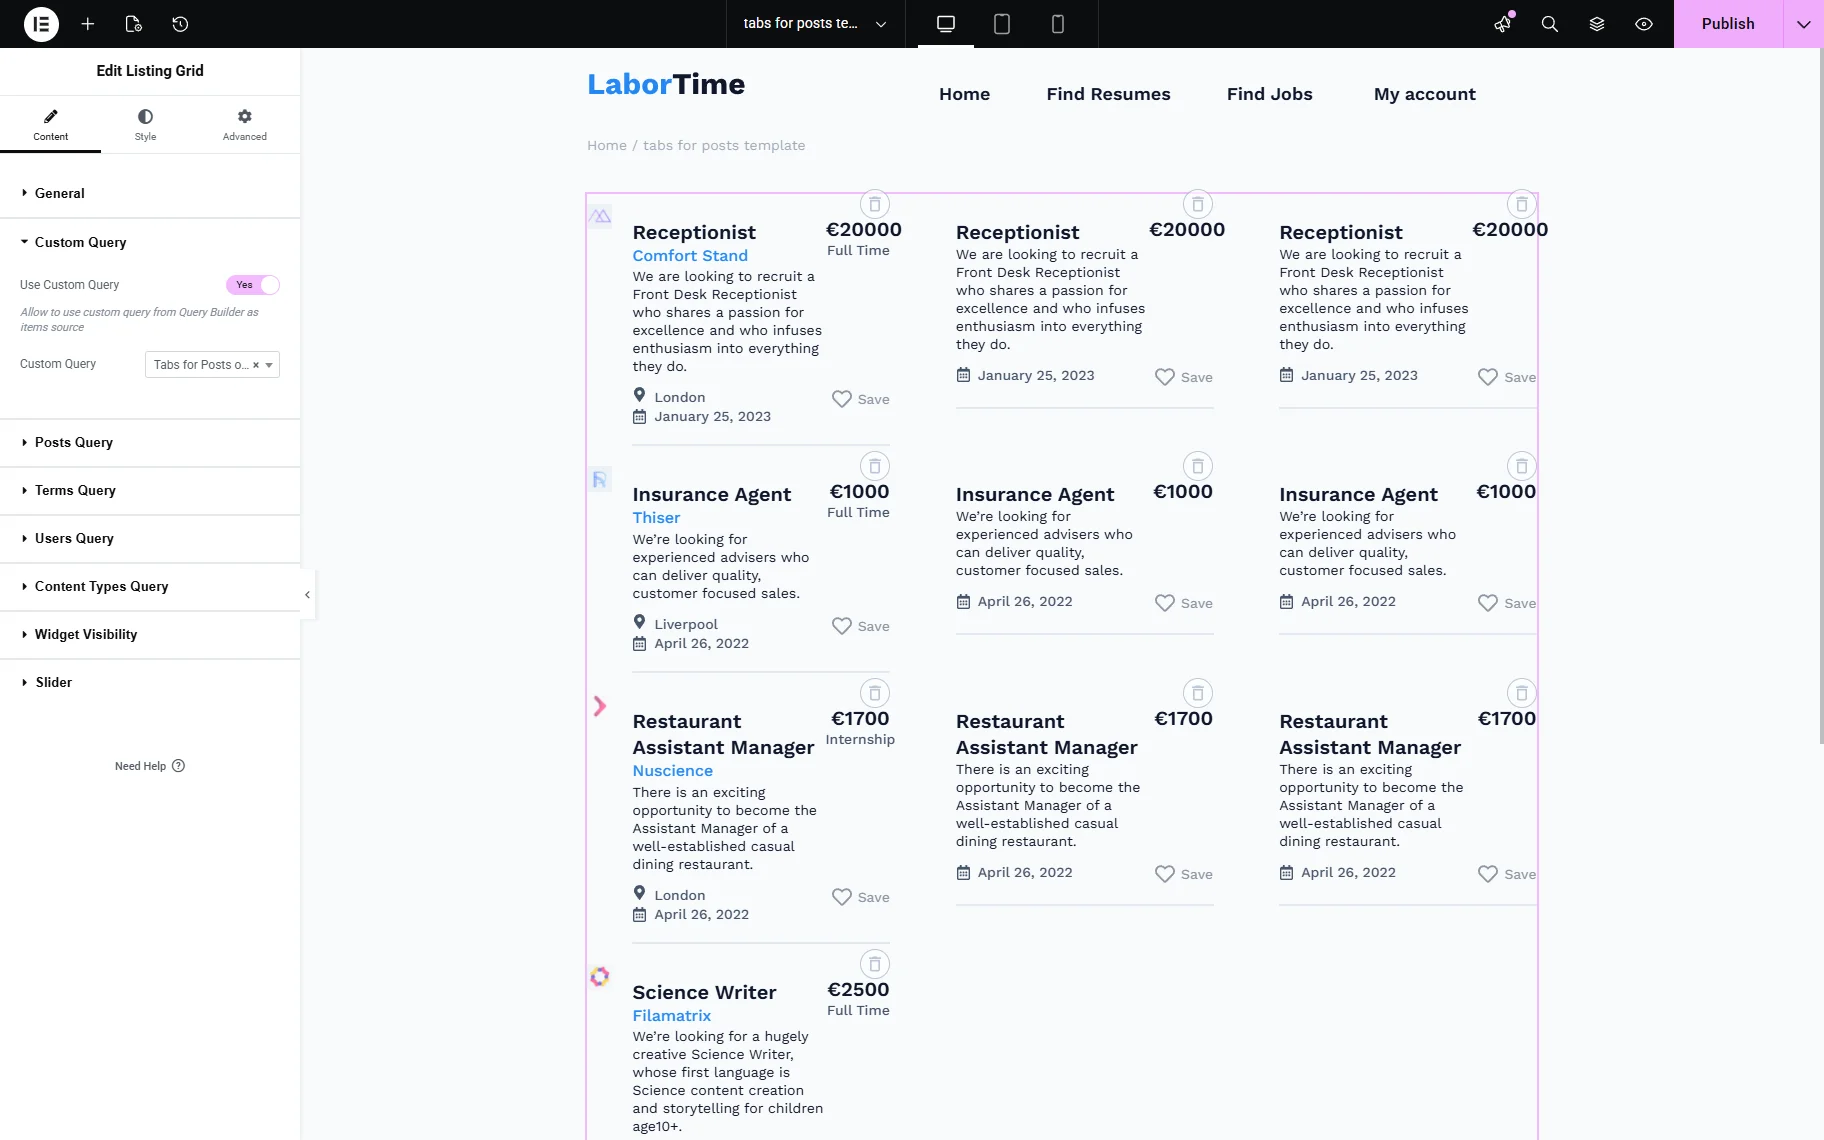
On the newly opened template editing page, add the Listing Grid widget. In the General > Listing field, select the template you have created.
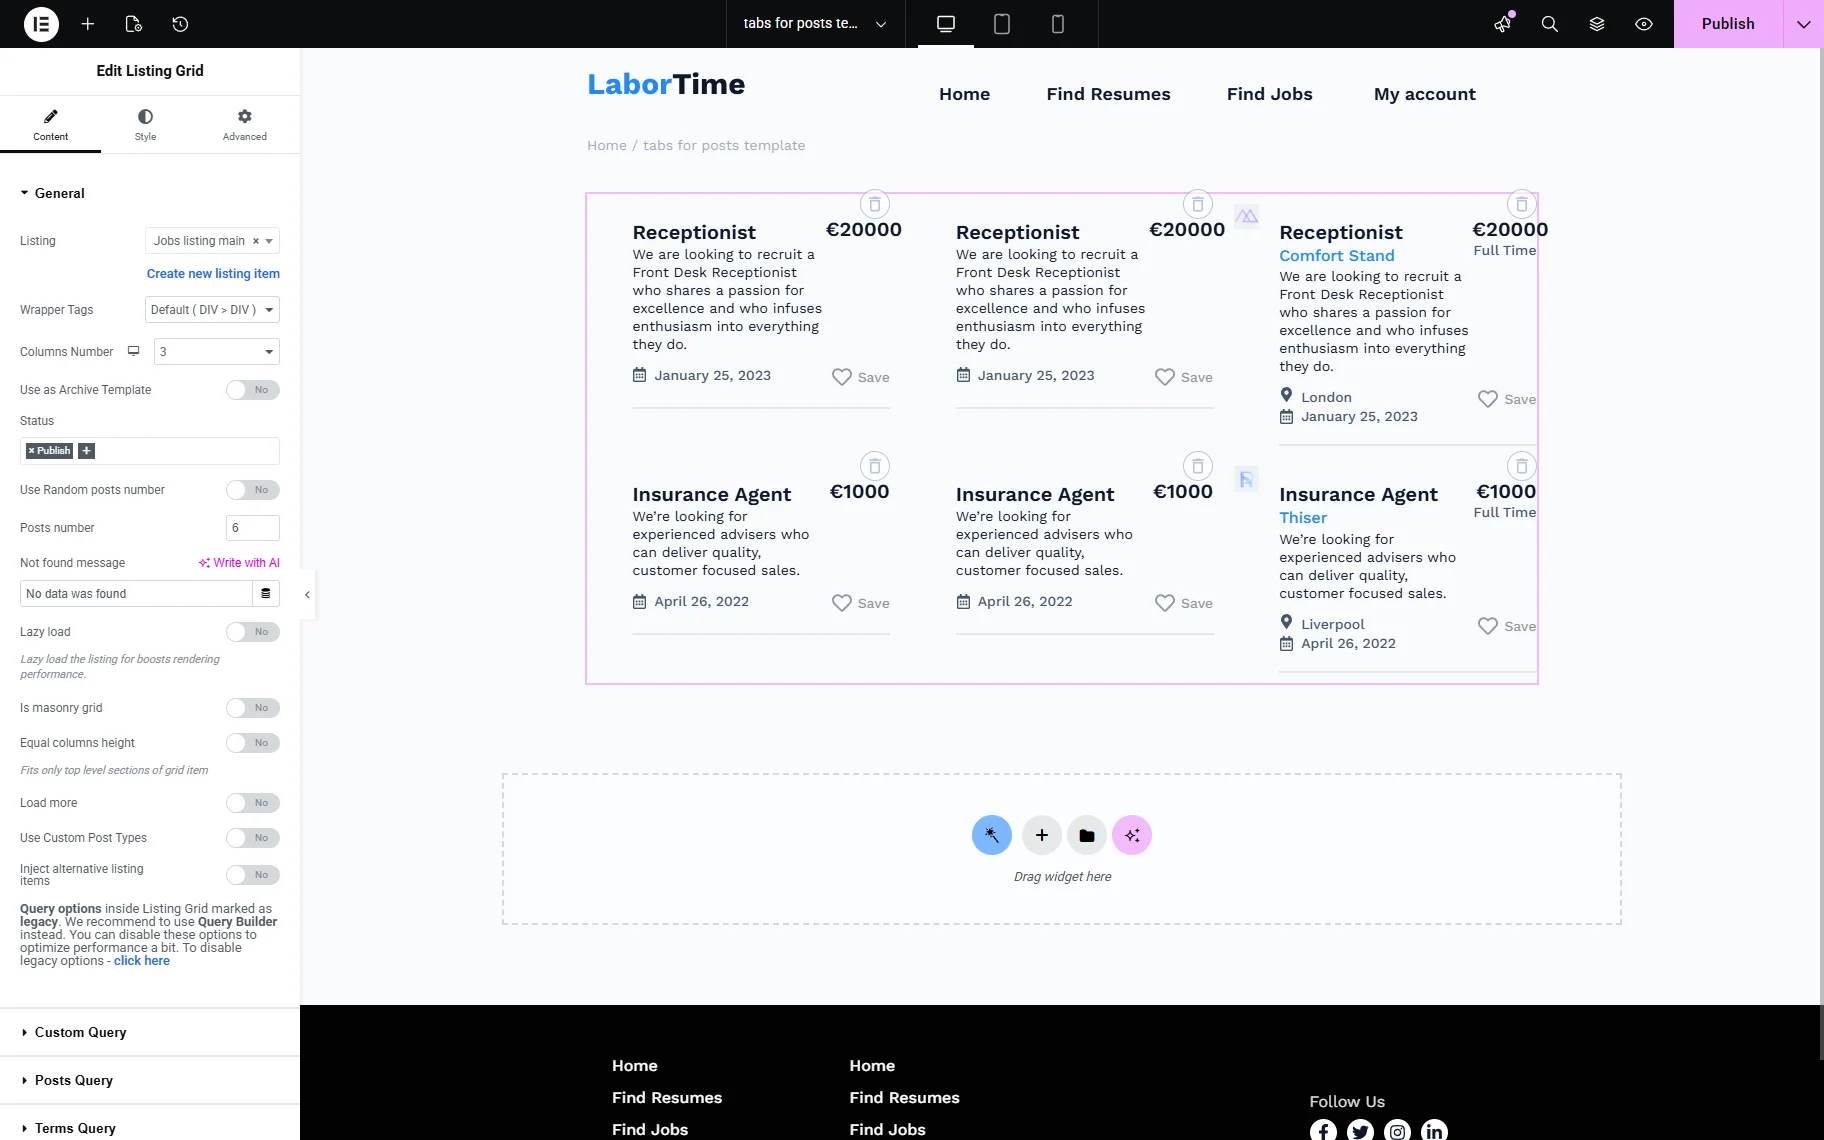
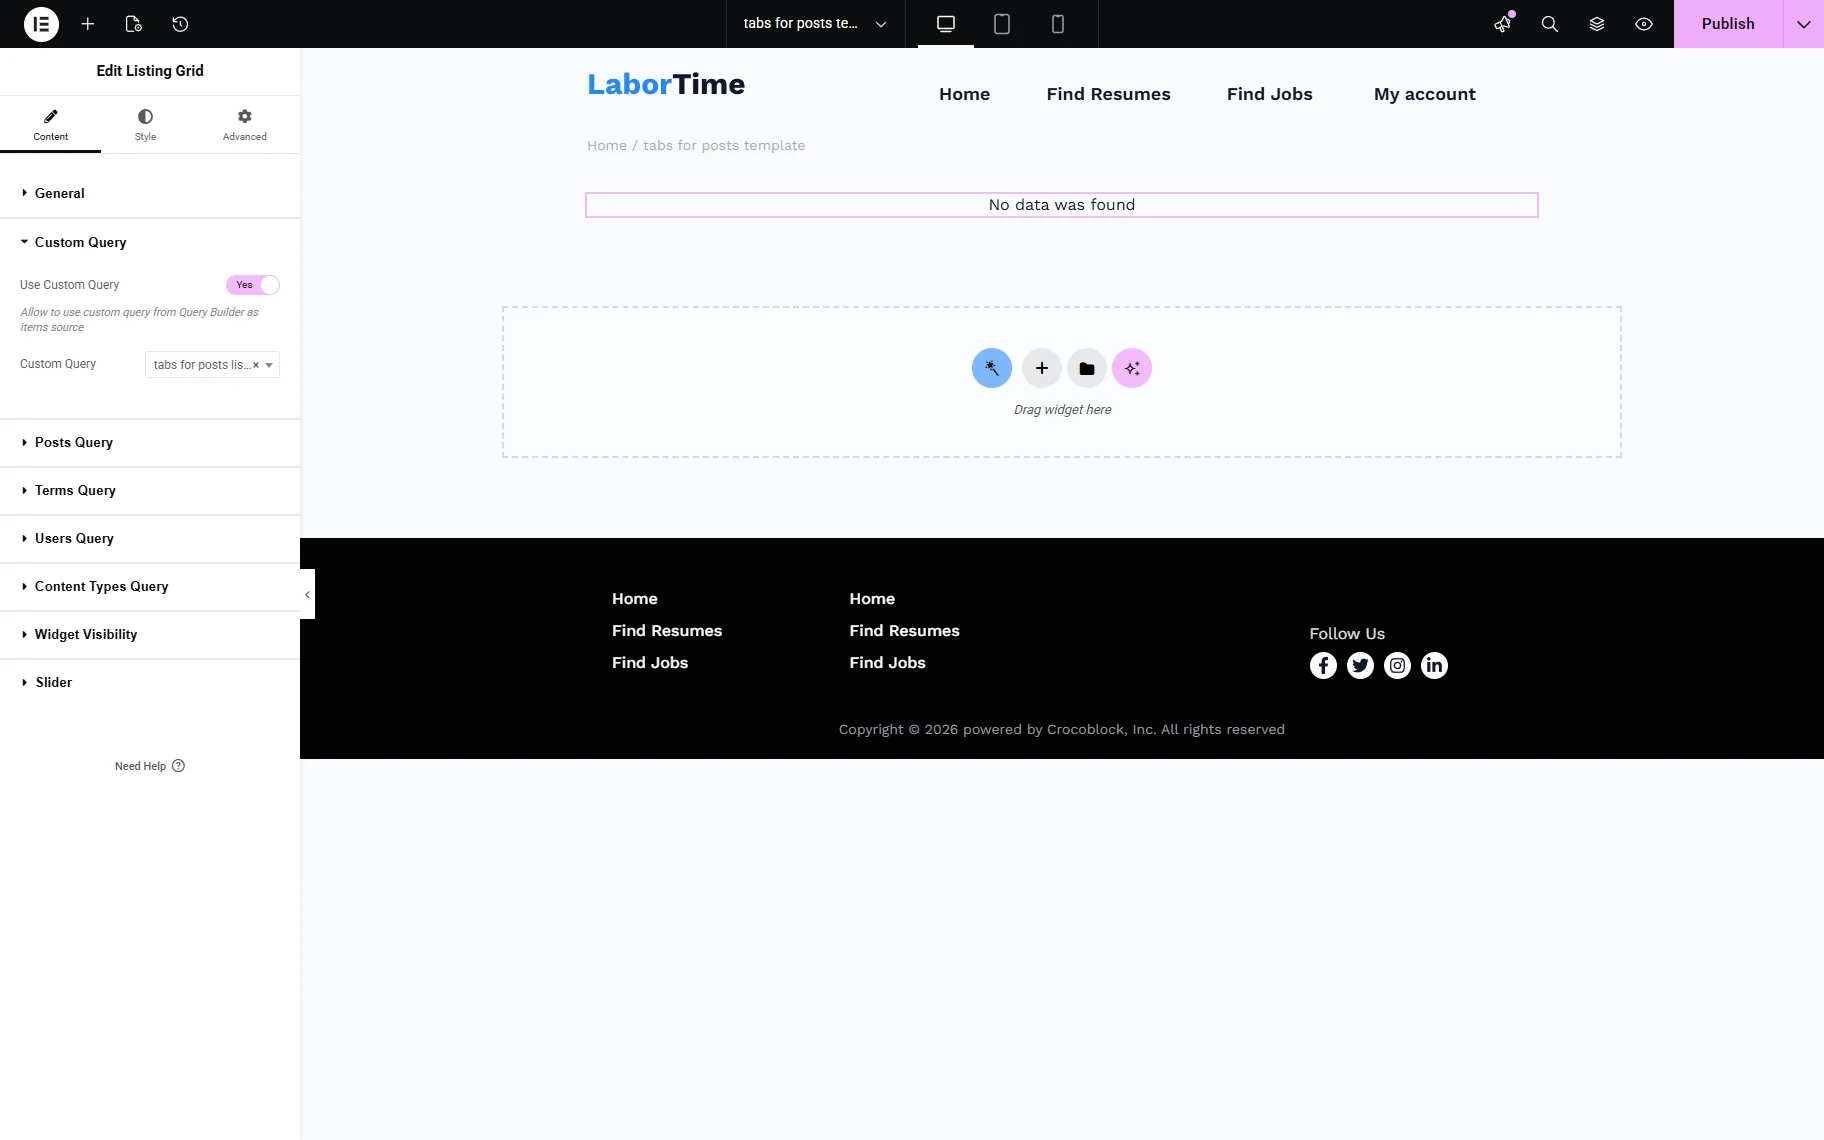
Open the Custom Query tab and enable the Use Custom Query toggle. Select the Custom Query you have created. The listing may show the “No data was found” message, but it is okay on this step. Go on and save the settings.
Now, create one more “Posts Query” for the same CPT.

Add any additional desired settings to the query if needed — here, you specify which posts will be shown in the Tabs (we specified the required posts by their IDs in the Post & Page > Post In field).
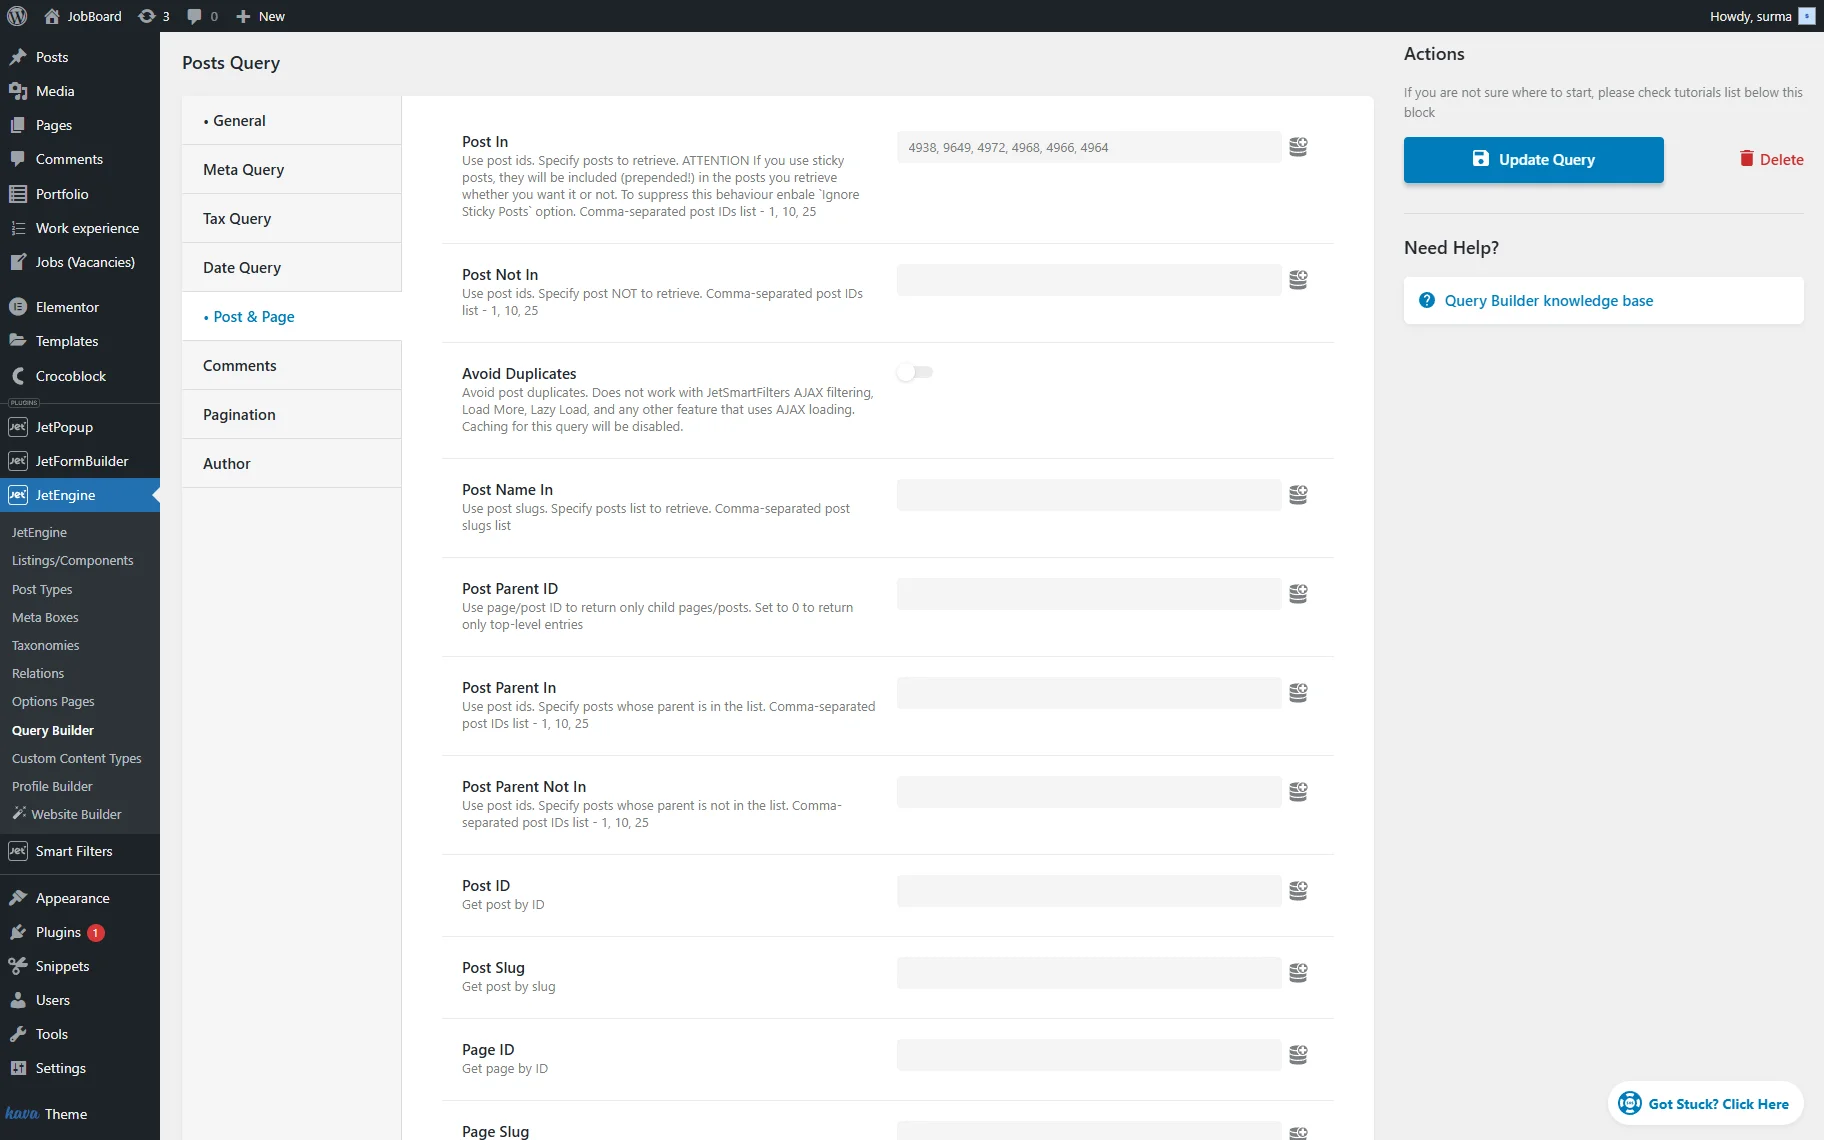
Save the query.
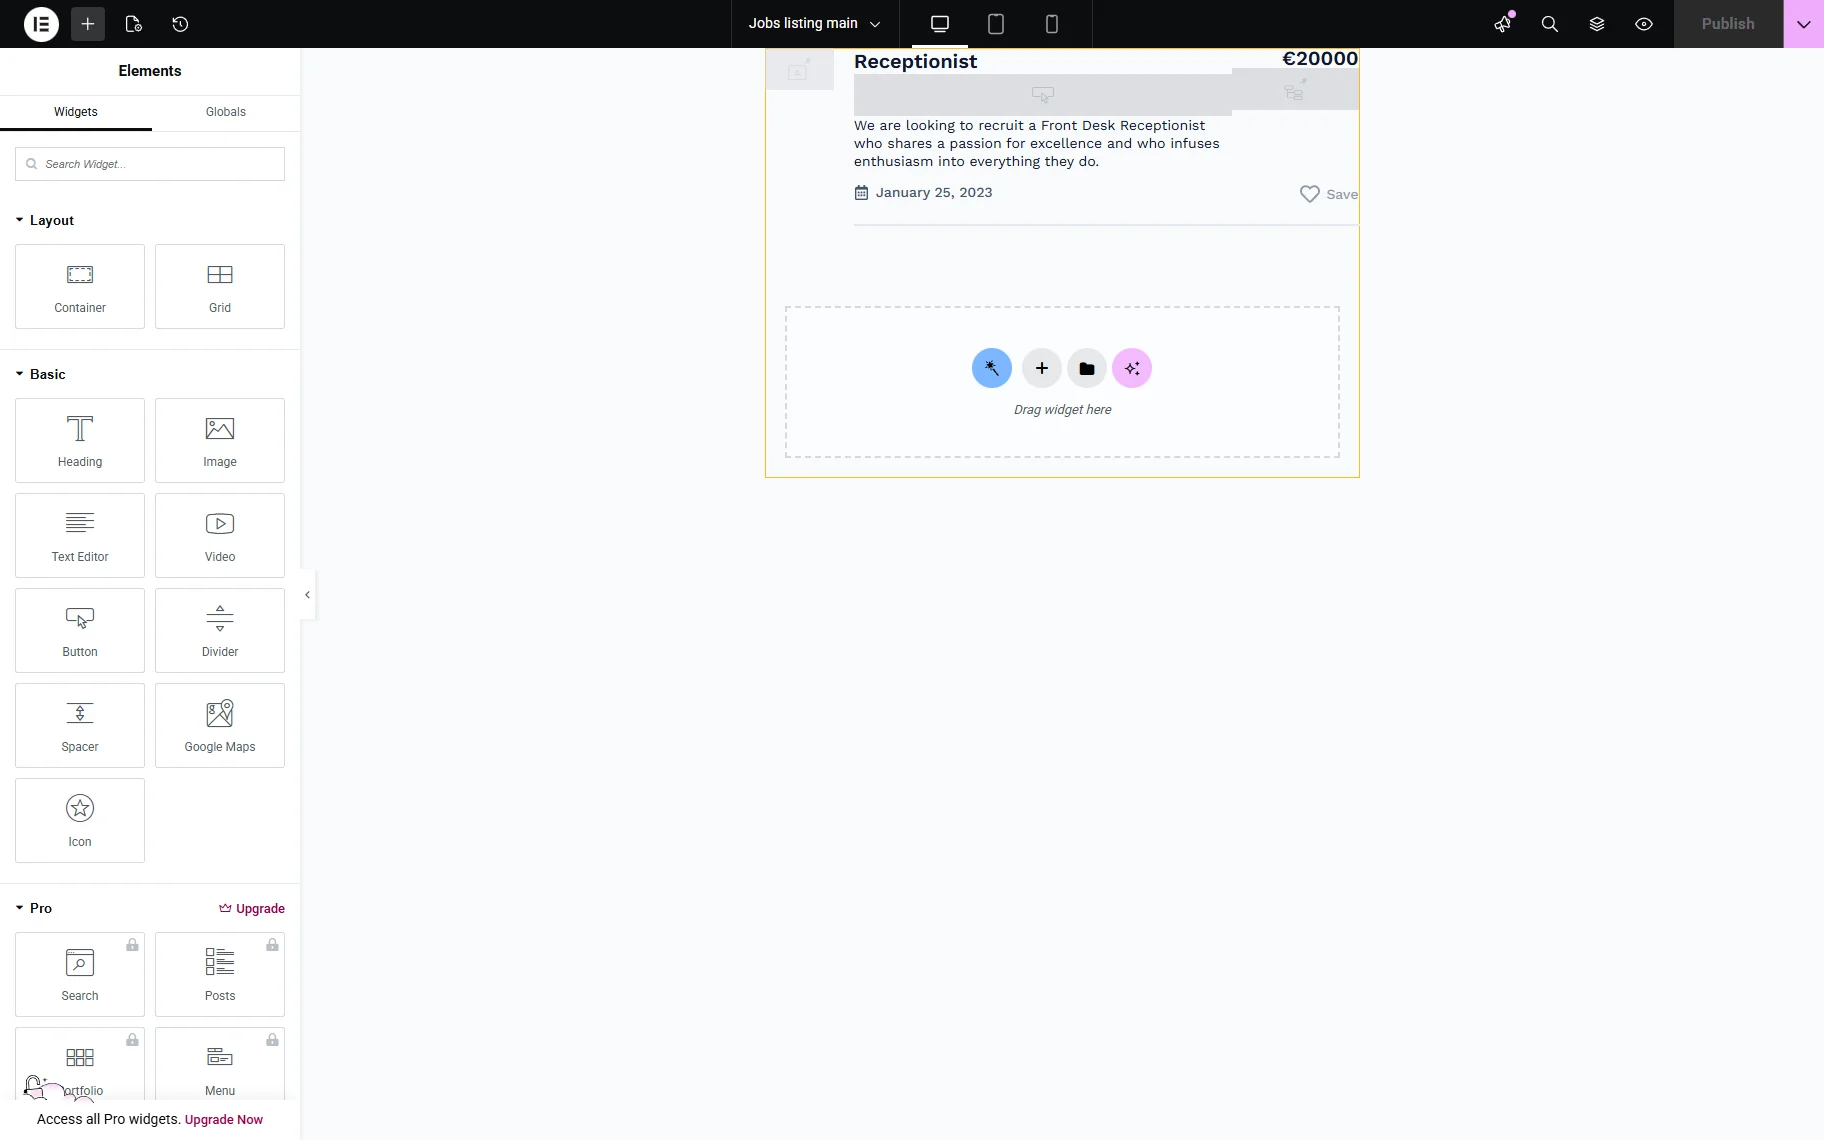
Go to the page where you need to display the Tabs, then add the Tabs widget to it. Enable the Use JetEngine query toggle and in the Select Query field, choose the last query you created.
Ensure that you have only one Item. For the Content Type, select the “Template” option, then in the Choose Template field, pick the template you created.
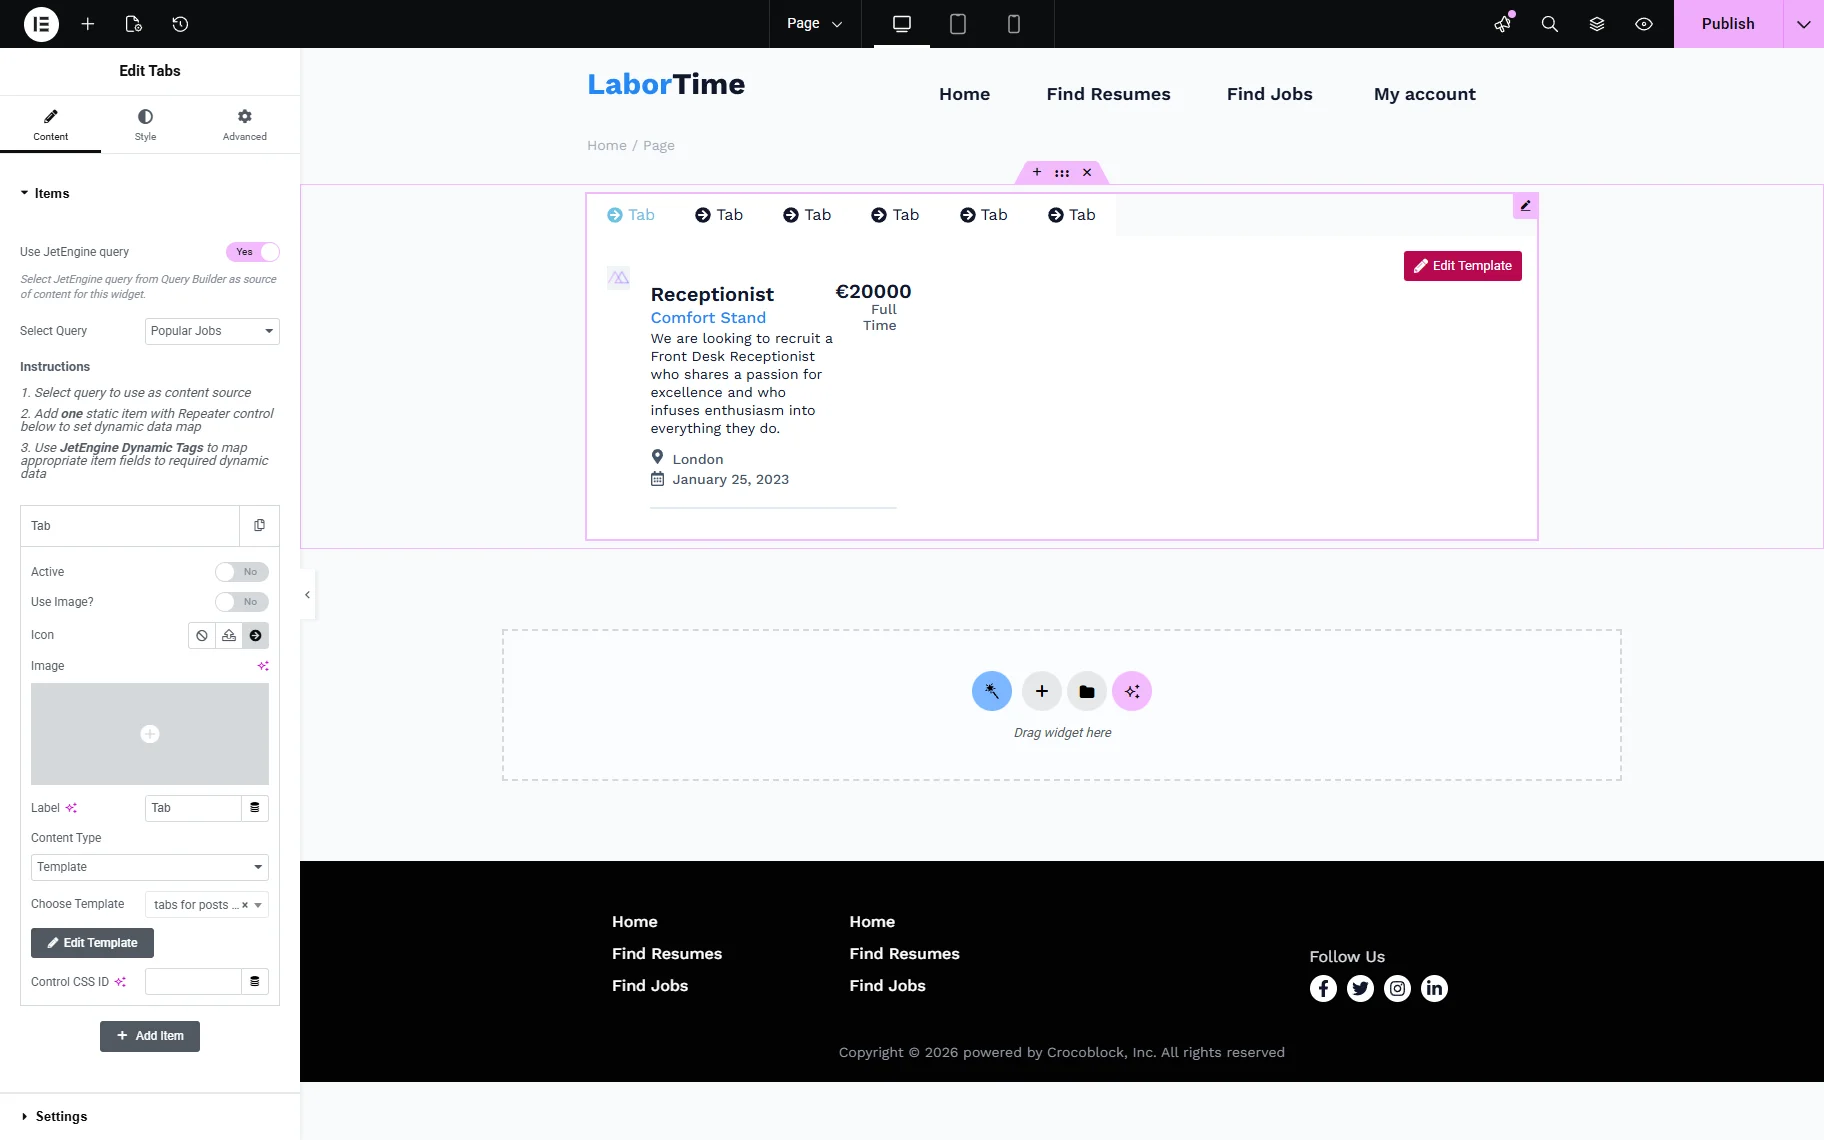
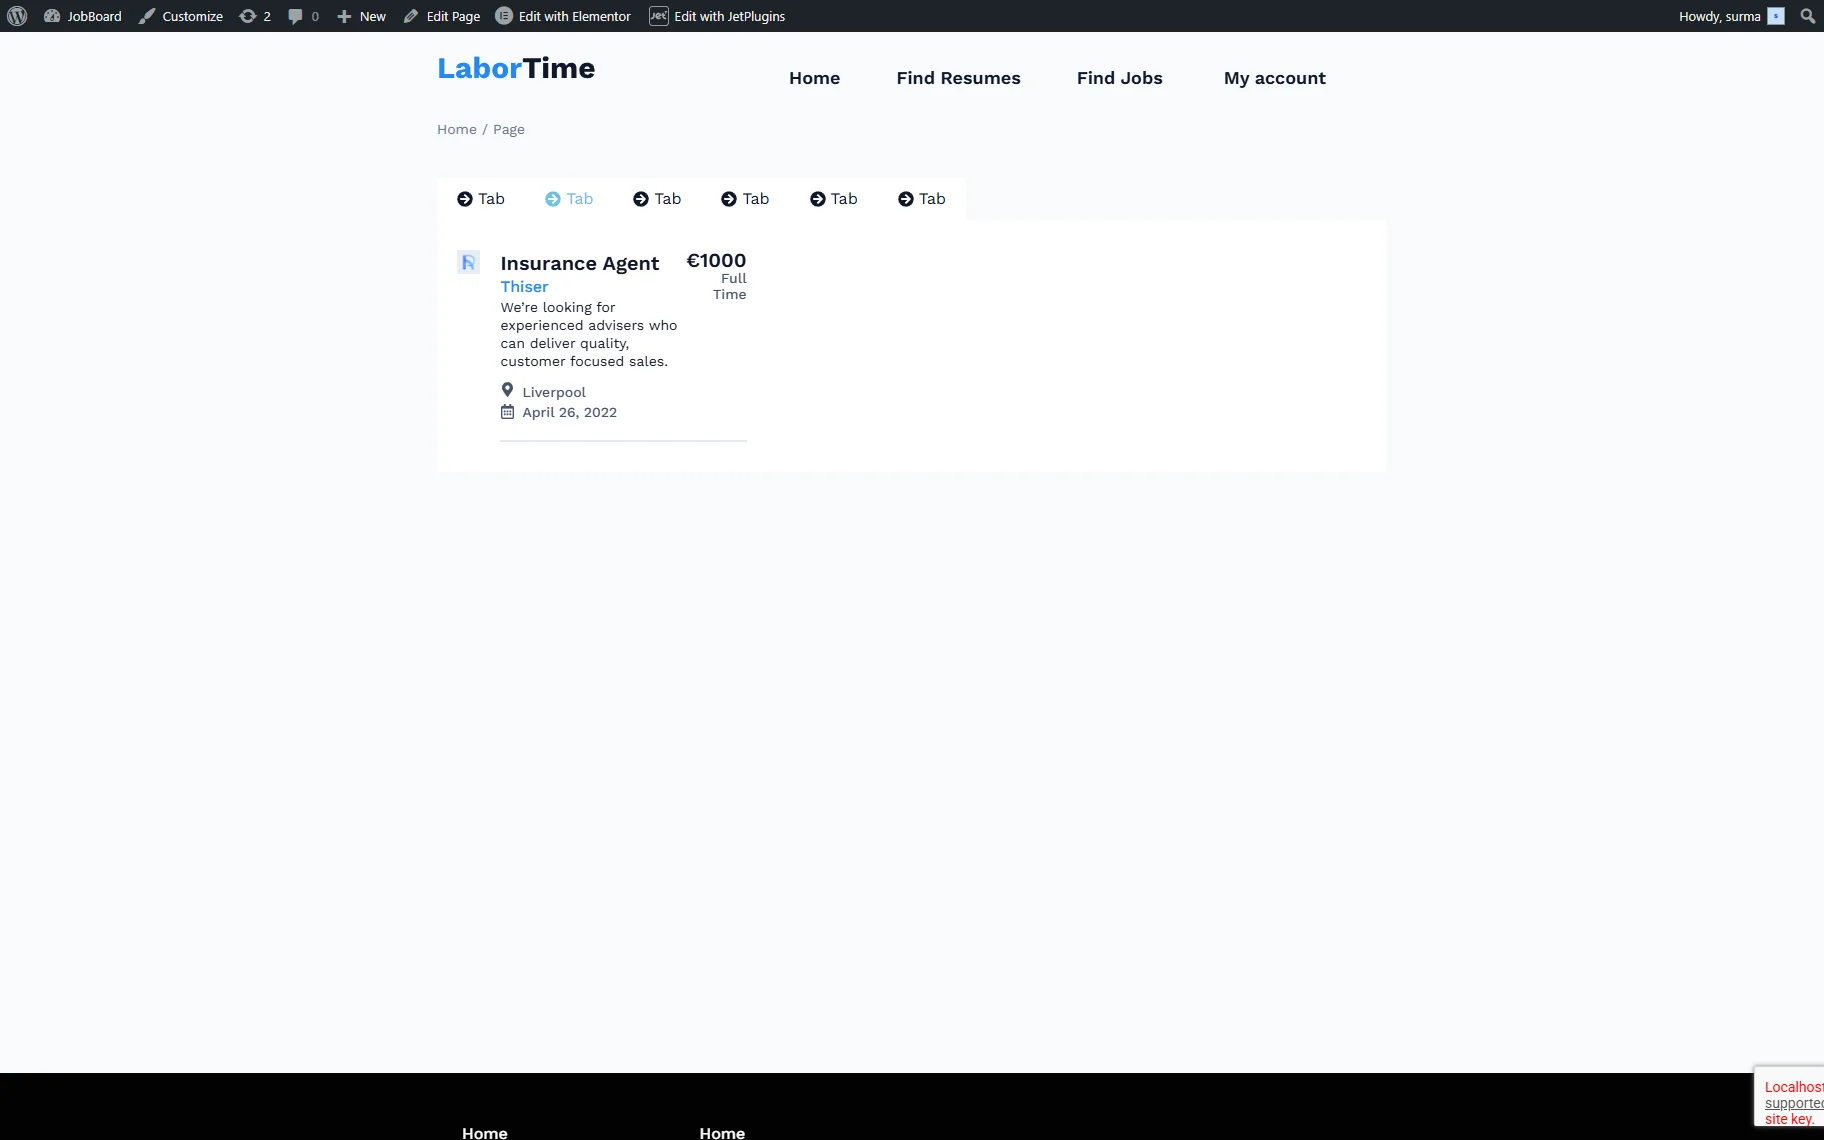
Publish the page and check the front end. The Tabs with the selected six posts are displayed.
Terms Tabs for Posts
Now, we will investigate how to dynamically display the posts classified by the terms in the Tabs.
First, create a “Posts Query”. For that, proceed to WordPress Dashboard > JetEngine > Query Builder and click the “Add New” button. Enter the query Name and select the “Posts Query” Type.
Choose the needed Post Type in the General settings tab.
Move to the Tax Query tab and click the “Add new” button. Select the needed Taxonomy and the “Term ID” option in the Field input. Next to the Terms field, click the “Dynamic Tag” icon and select the “Queried term” option. Choose the “IN” option for the Compare operator.
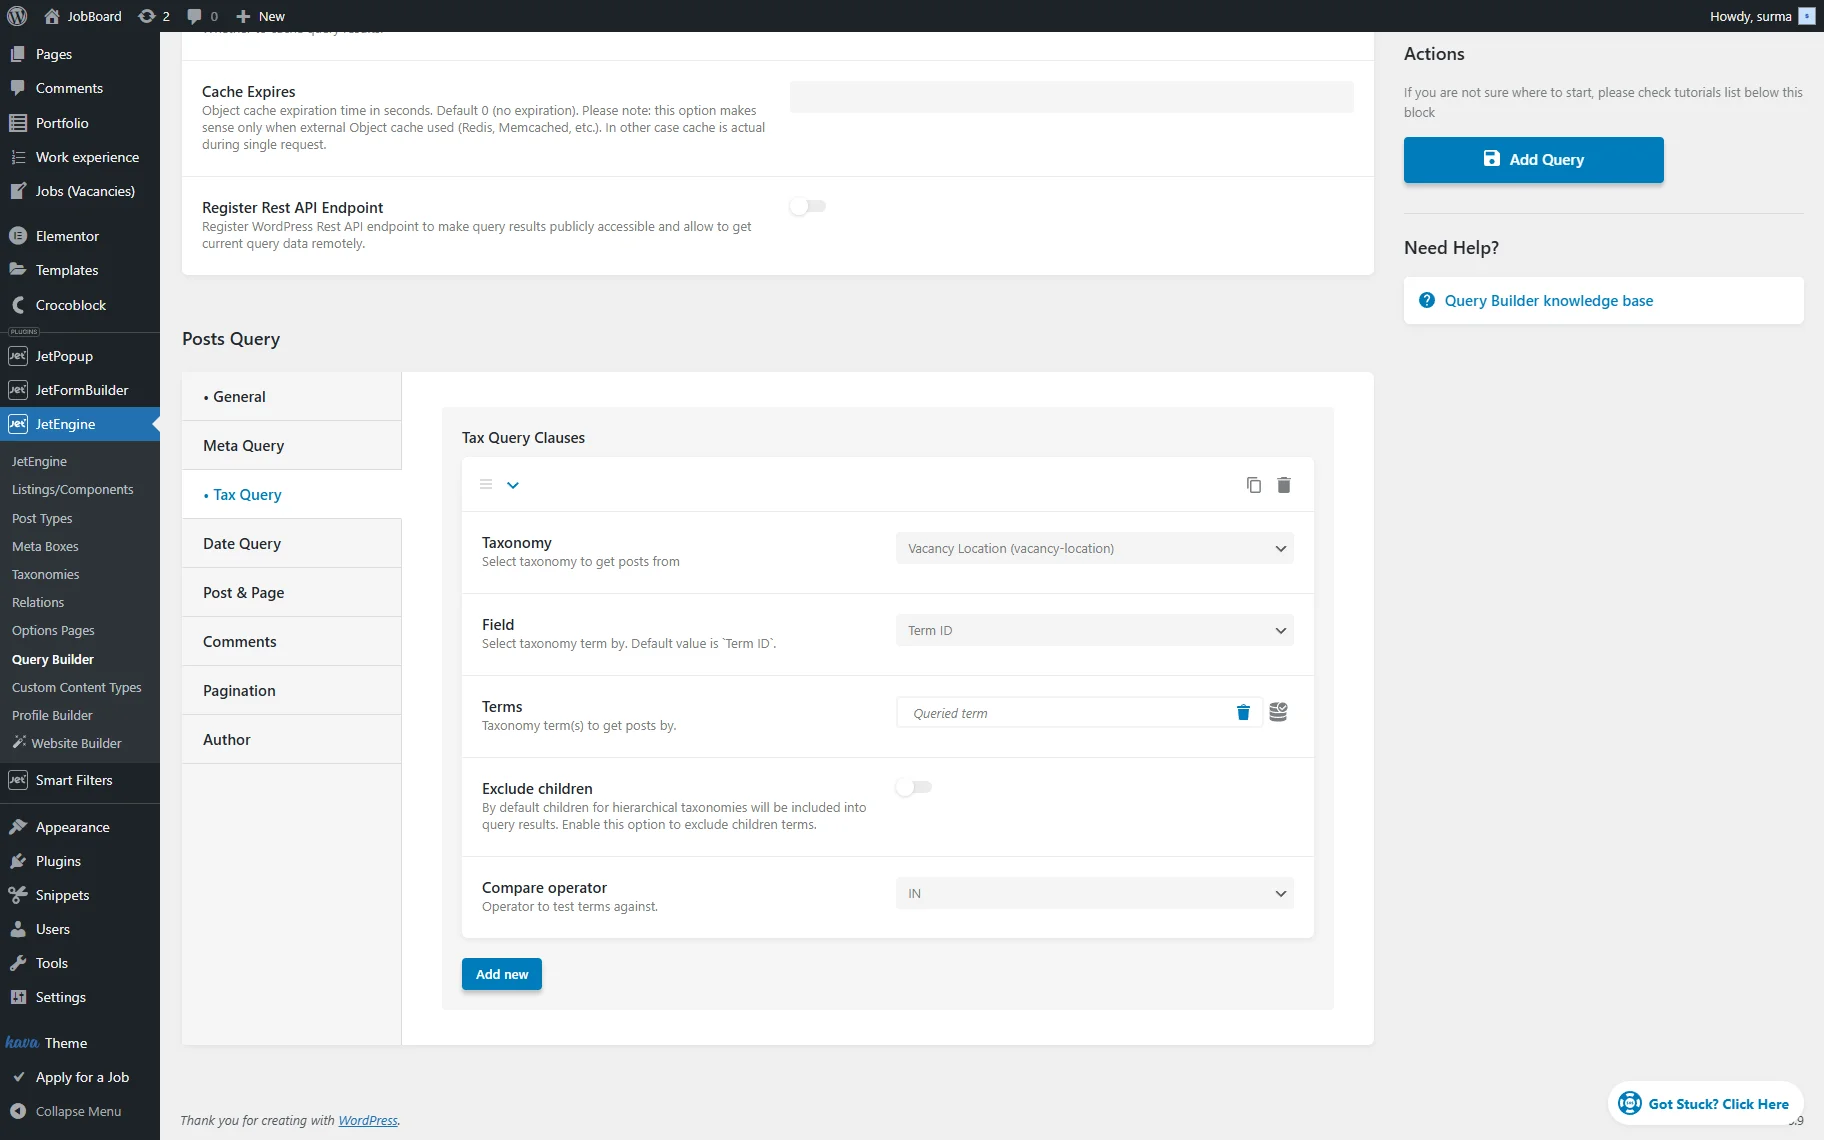
Click the “Add Query” button once you are ready.
Build a Listing Template proceeding to WordPress Dashboard > JetEngine > Listings/Components.

Save the Listing Template.
Then, create an Elementor template to display in the Tabs. In the template, add the Listing Grid widget and apply the query you created.
Save the template.
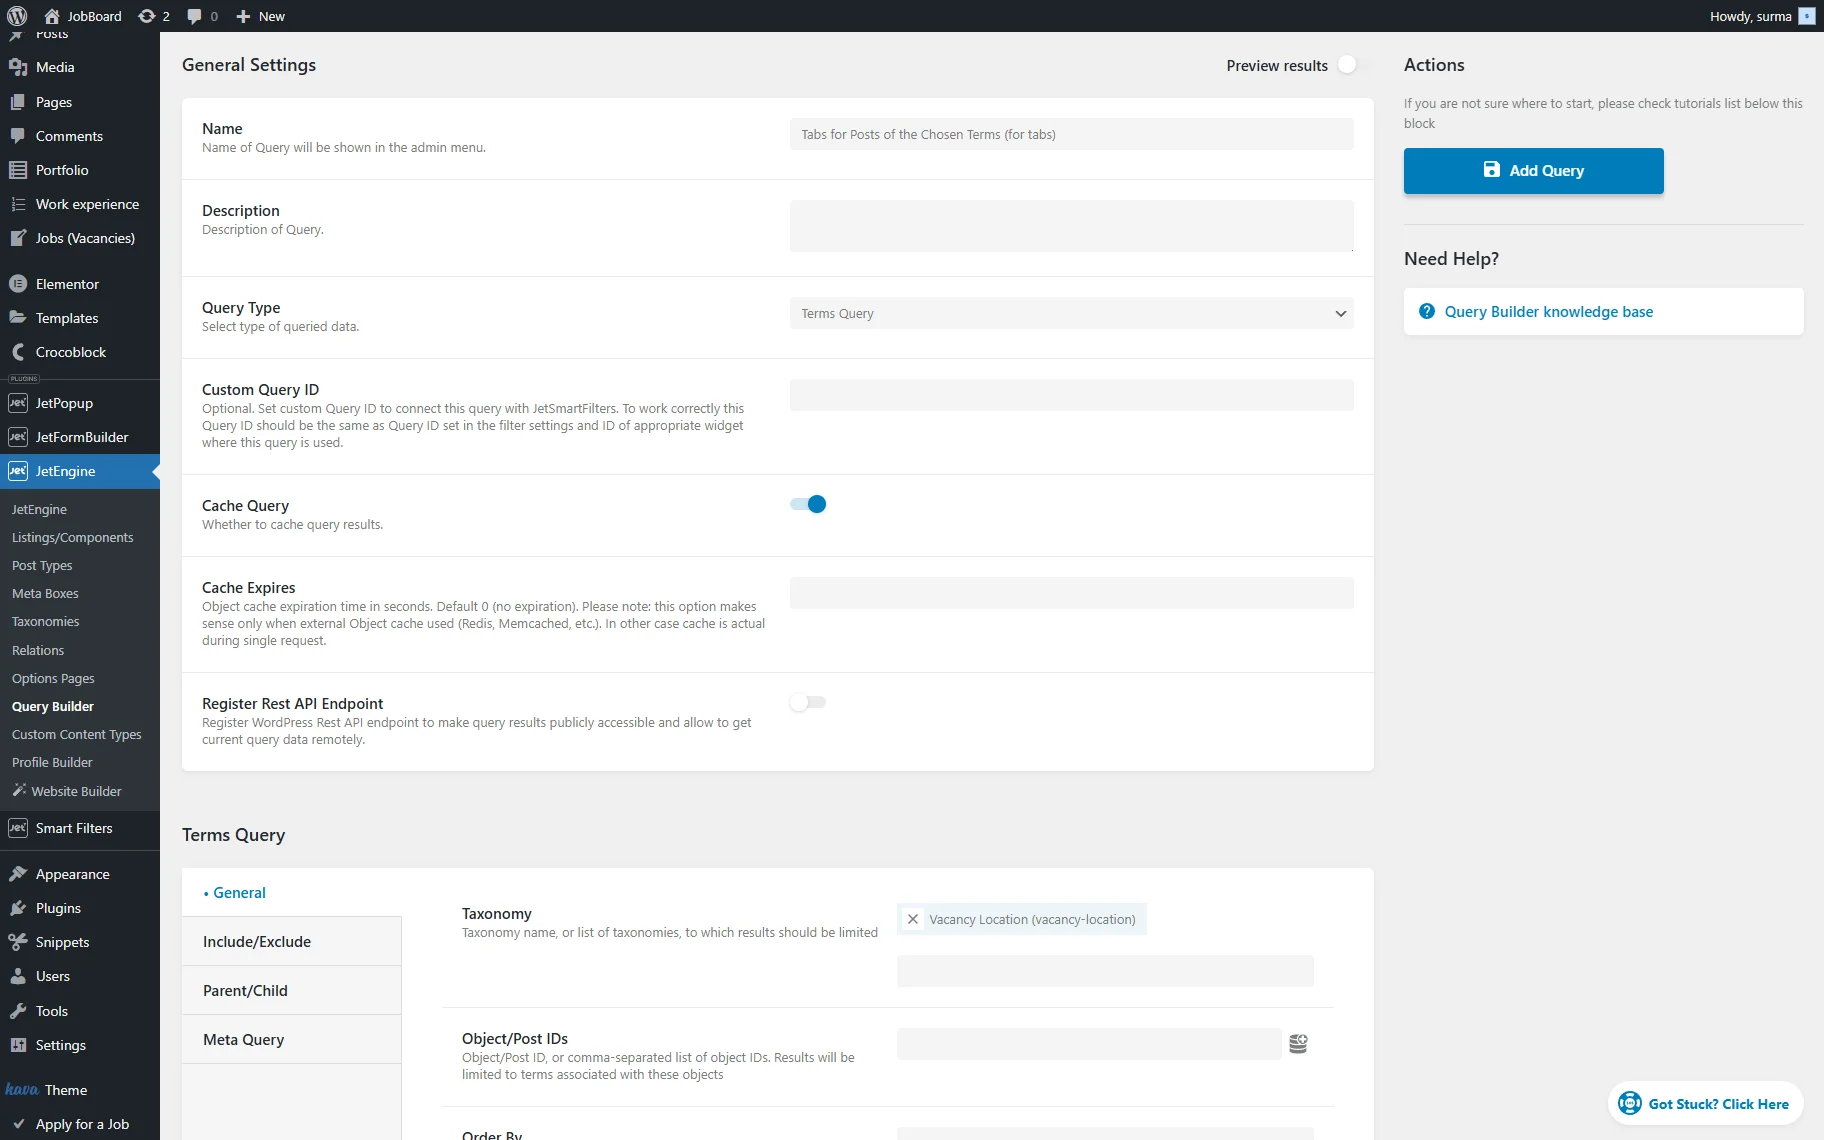
Then, create a “Terms Query”. Move to WordPress Dashboard > JetEngine > Query Builder and click the “Add New” button. Enter the Query Name and select the “Terms Query” Type.
Select the Taxonomy in the General tab and save the query.
Go to the page where the Tabs will be displayed. Add the Tabs widget and enable the Use JetEngine query toggle. Select the “Terms Query” you created.
Ensure that one Item only is added. To display the terms as the tabs’ names, click the “Dynamic Tag” icon next to the Label field. Select the “Term Field” option, and in the newly opened pop-up, select the Taxonomy and the “Term name” option as the Field.
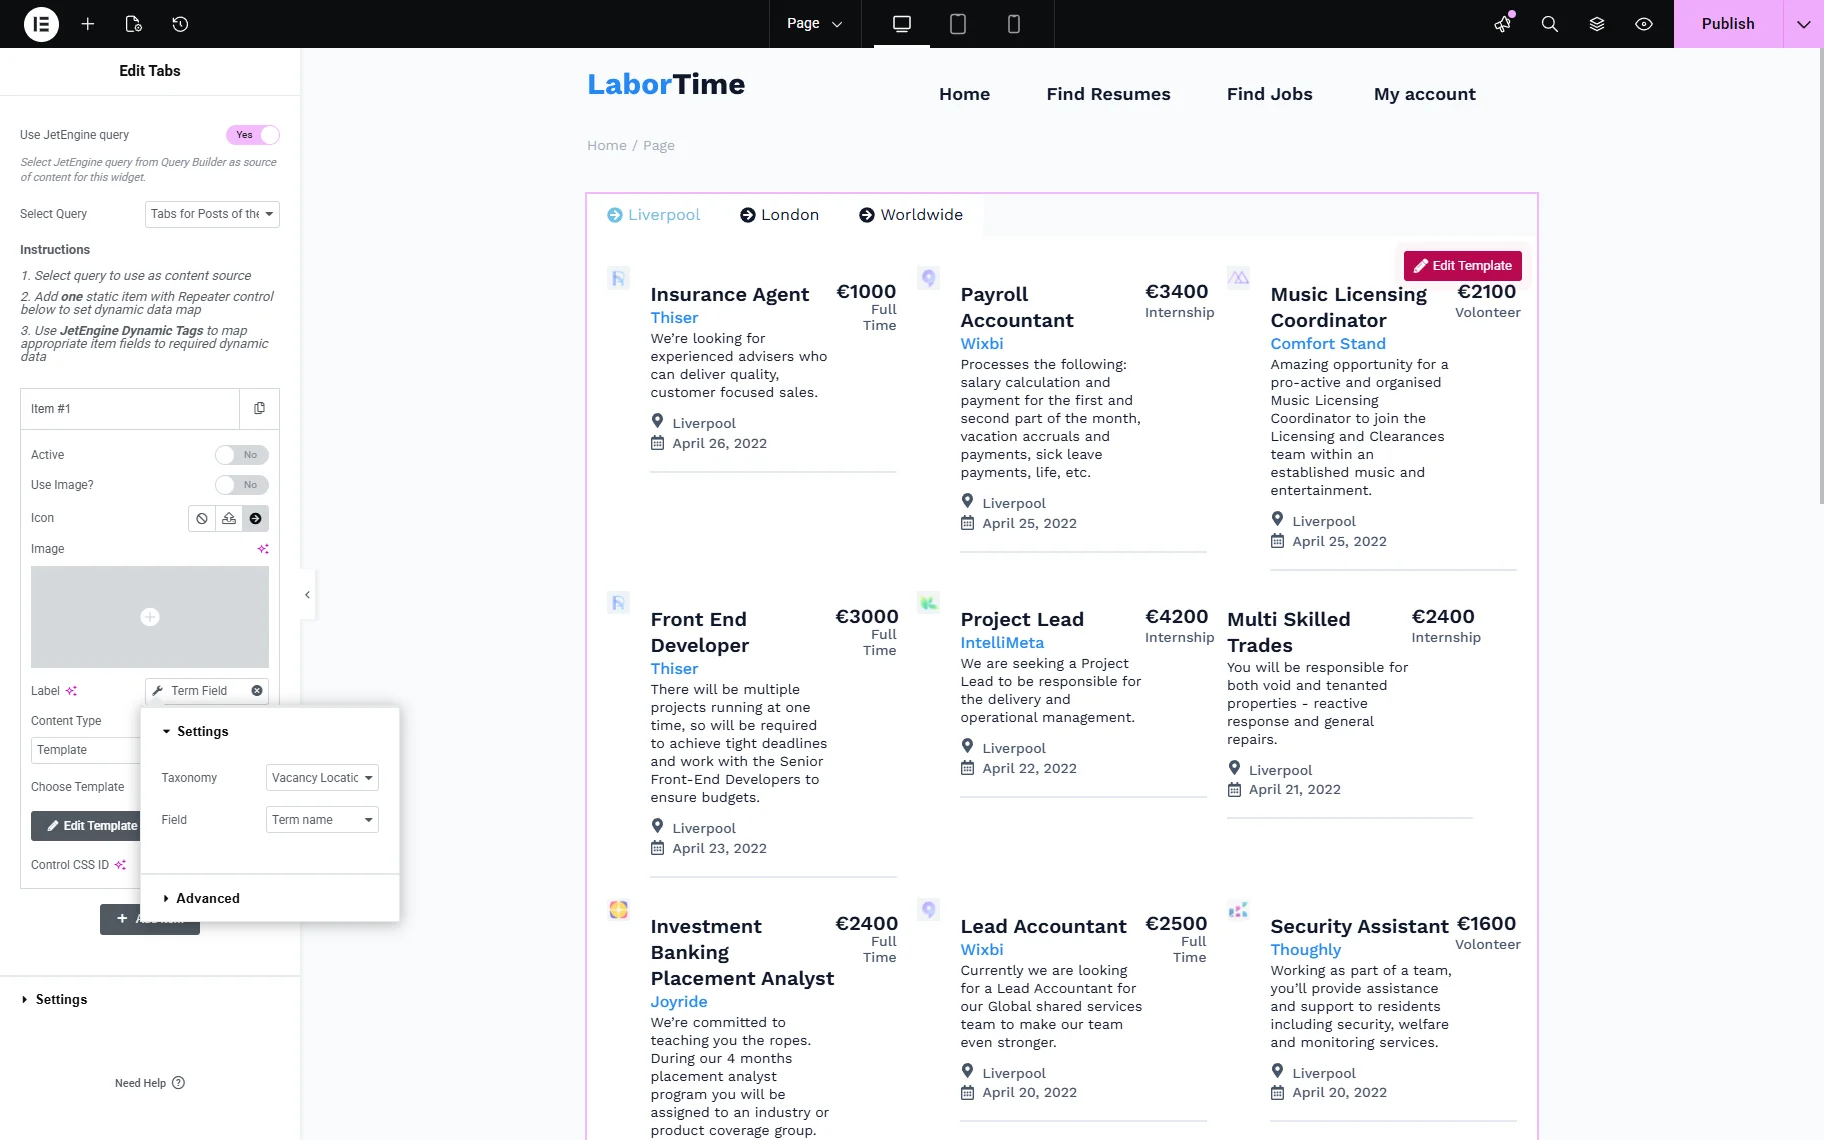
Ensure that the “Template” option is selected for the Content Type. In the Choose Template field, select the template you created. Save the page.
On the front end, you get tabs with posts classified by terms.

Tabs for Parent and Child Terms
Now, we will create Tabs with child terms, divided by parent terms.
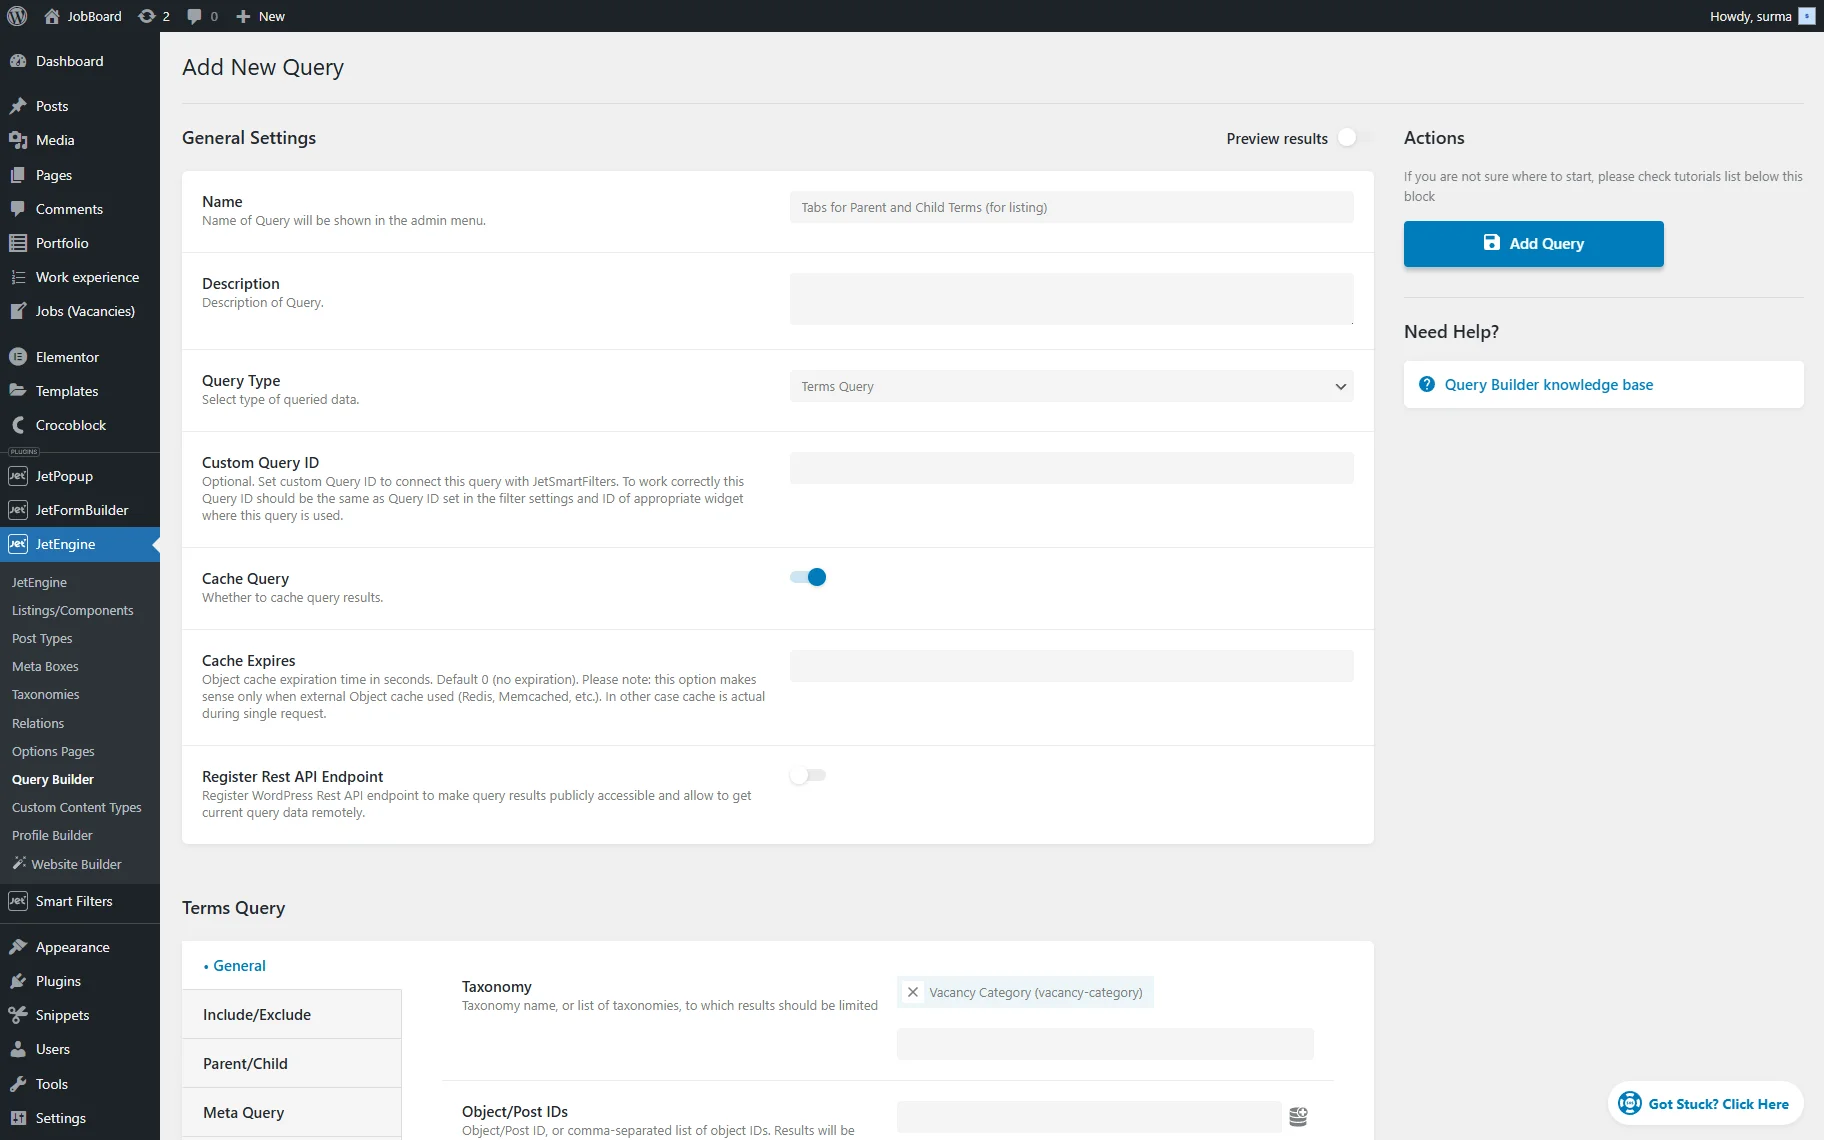
First, create a “Terms Query” by going to WordPress Dashboard > JetEngine > Query Builder and clicking the “Add New” button.
Select the needed Taxonomy in the General tab.
Move to the Parent/Child tab and in the Parent field select the “Queried term” option after clicking the “Dynamic Tag” icon.

Click the “Add Query” button.
Now, create a Listing Template for the children terms. For that, proceed to WordPress Dashboard > JetEngine > Lisings/Components. Click the “Add new item” button.

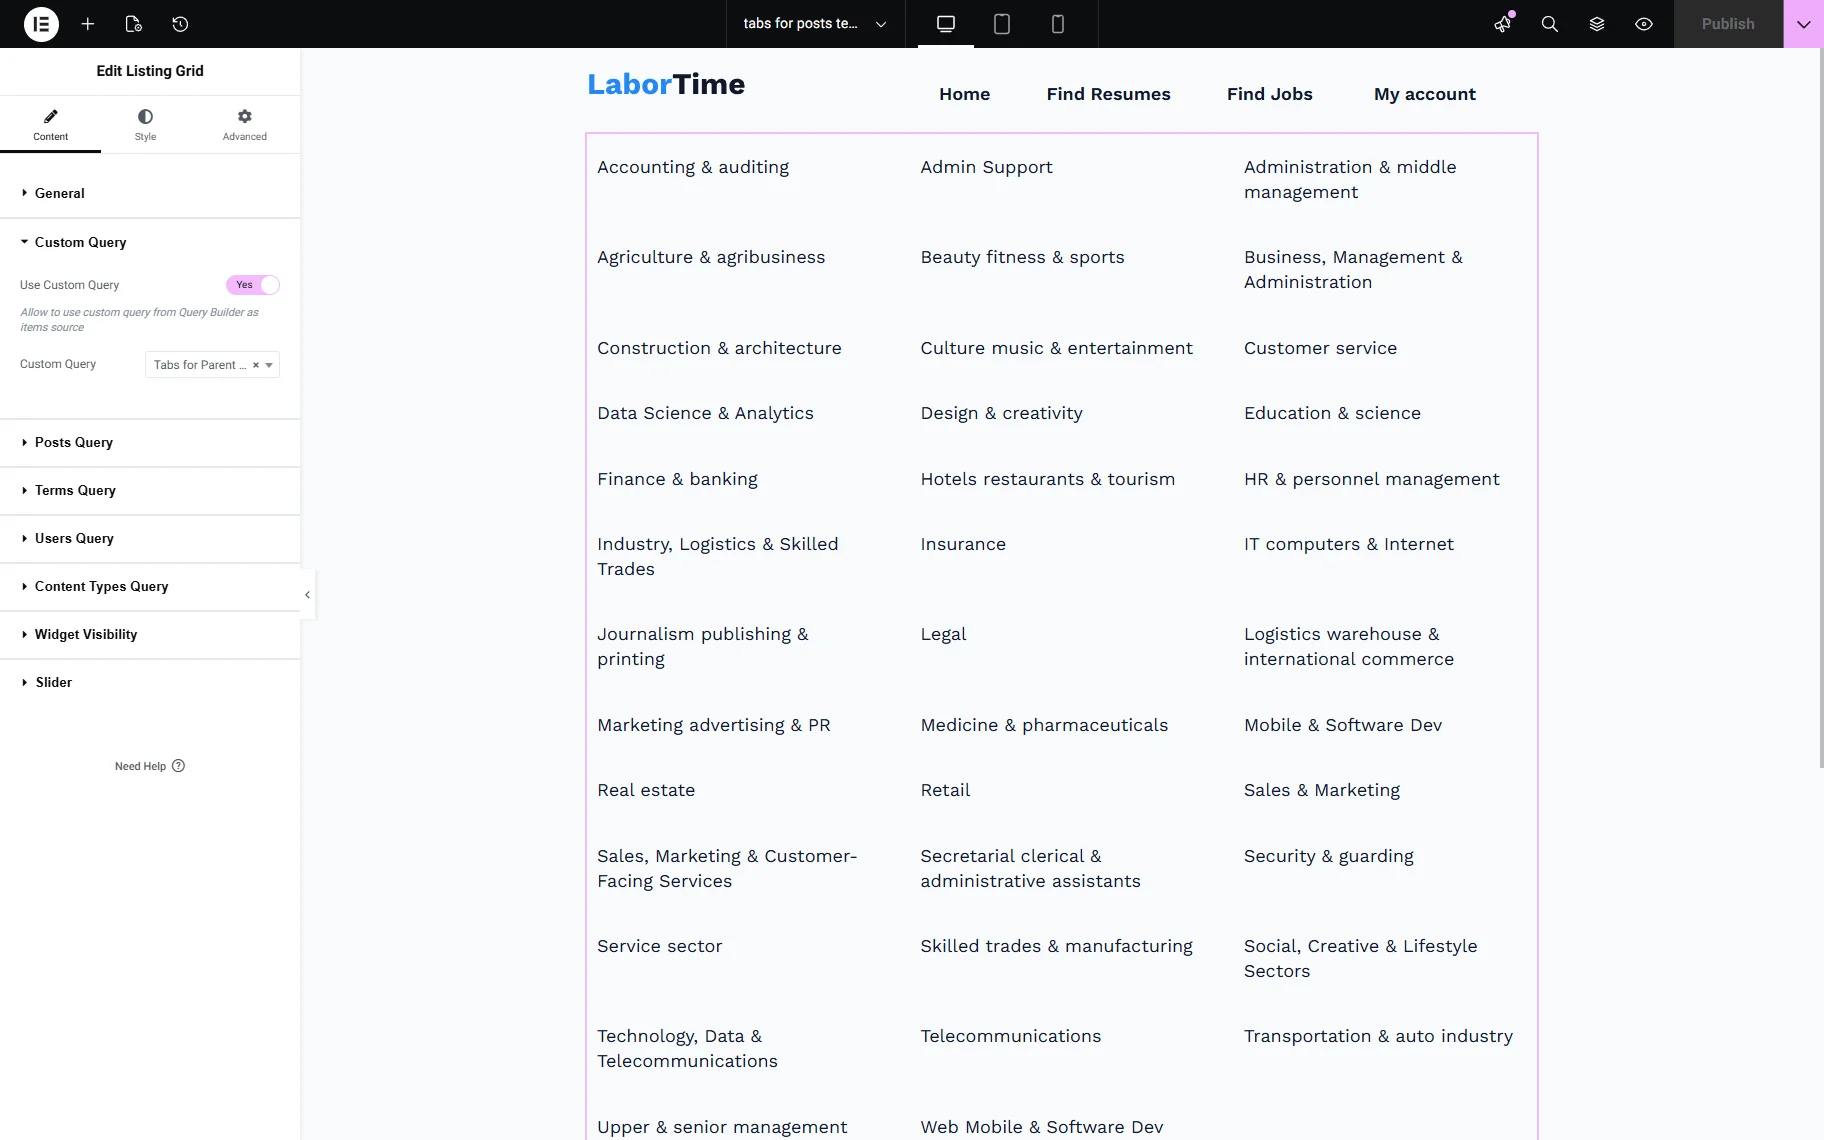
Publish the Listing Template and proceed to Elementor to create a “Page” template. In the template, add the Listing Grid widget and select the Listing you created. Apply the “Terms Query” you created to the Listing Grid.
Then create another “Terms Query” for the same Taxonomy. After adding the Name, Query Type, and selecting the Taxonomy in the General tab, proceed to the Parent/Child tab and put “0” in the Parent field.
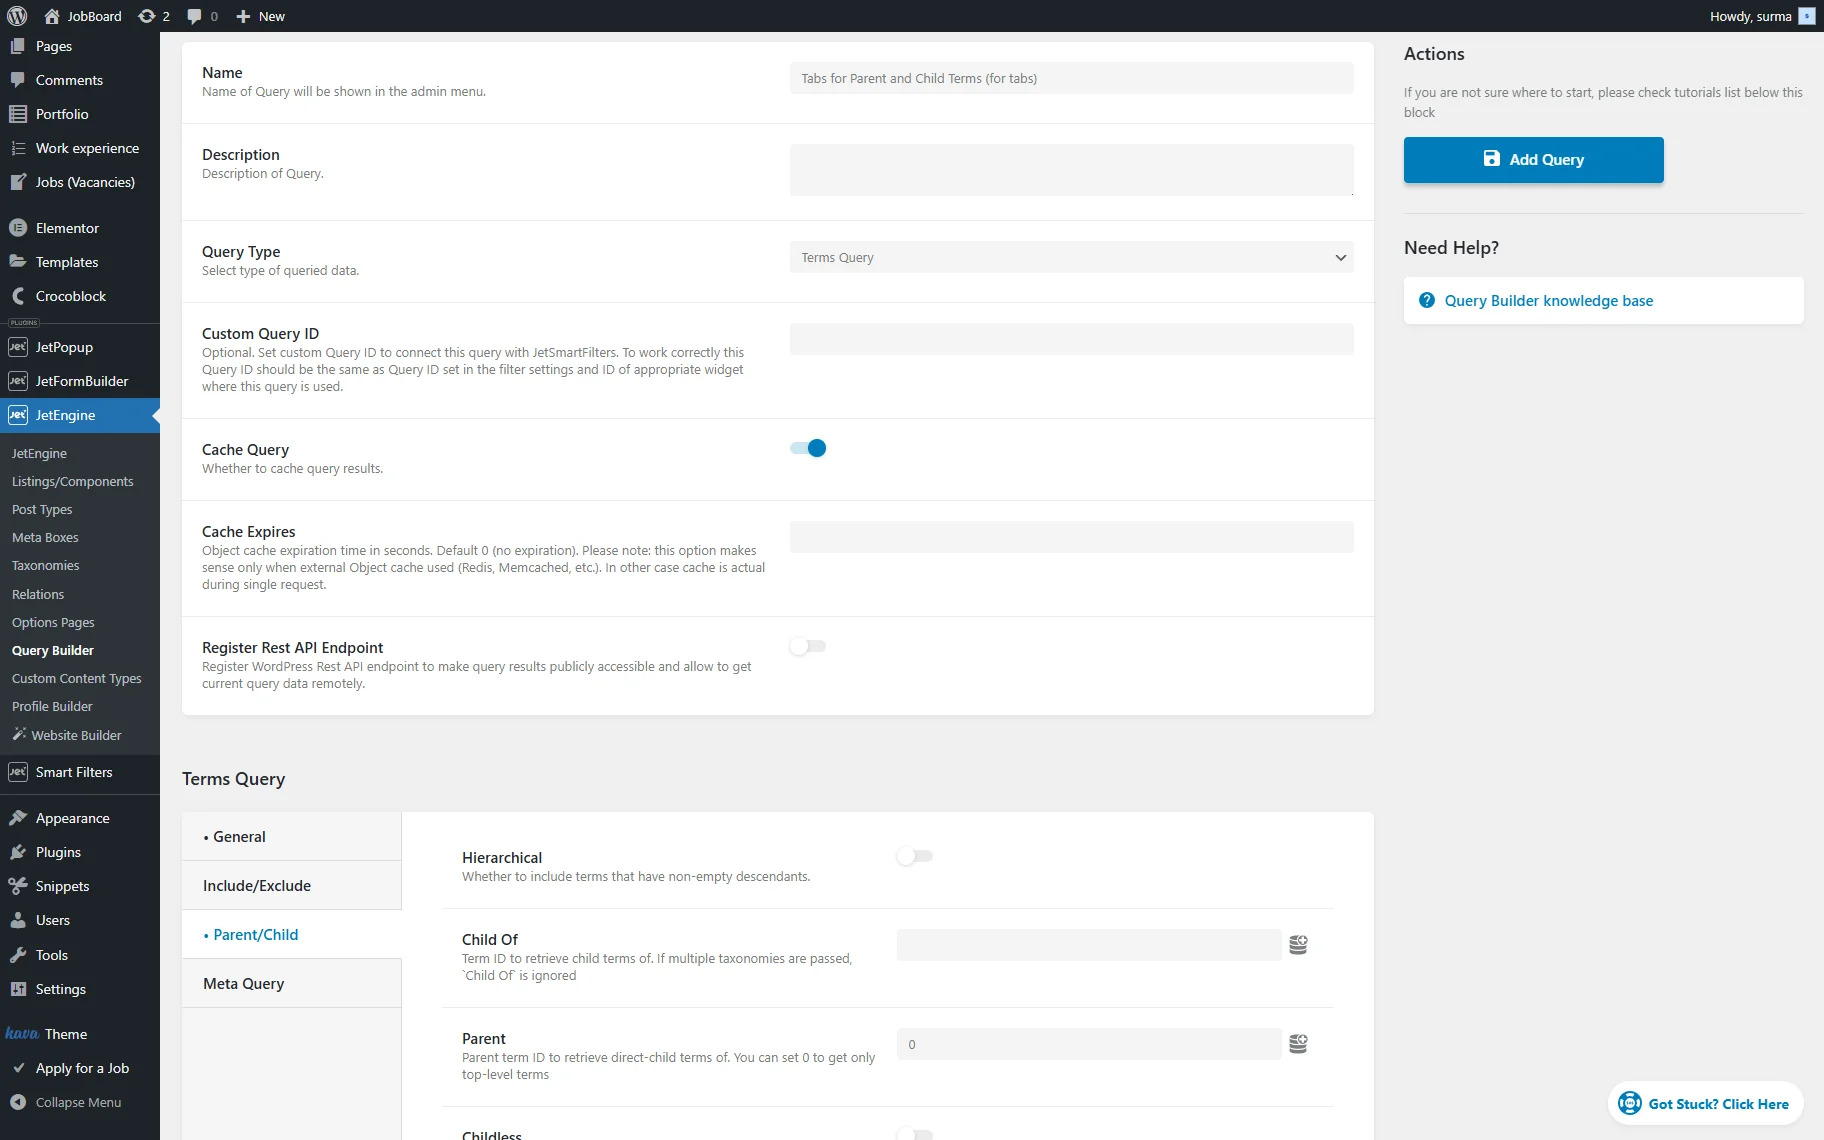
Click the “Add Query” button once you are ready.
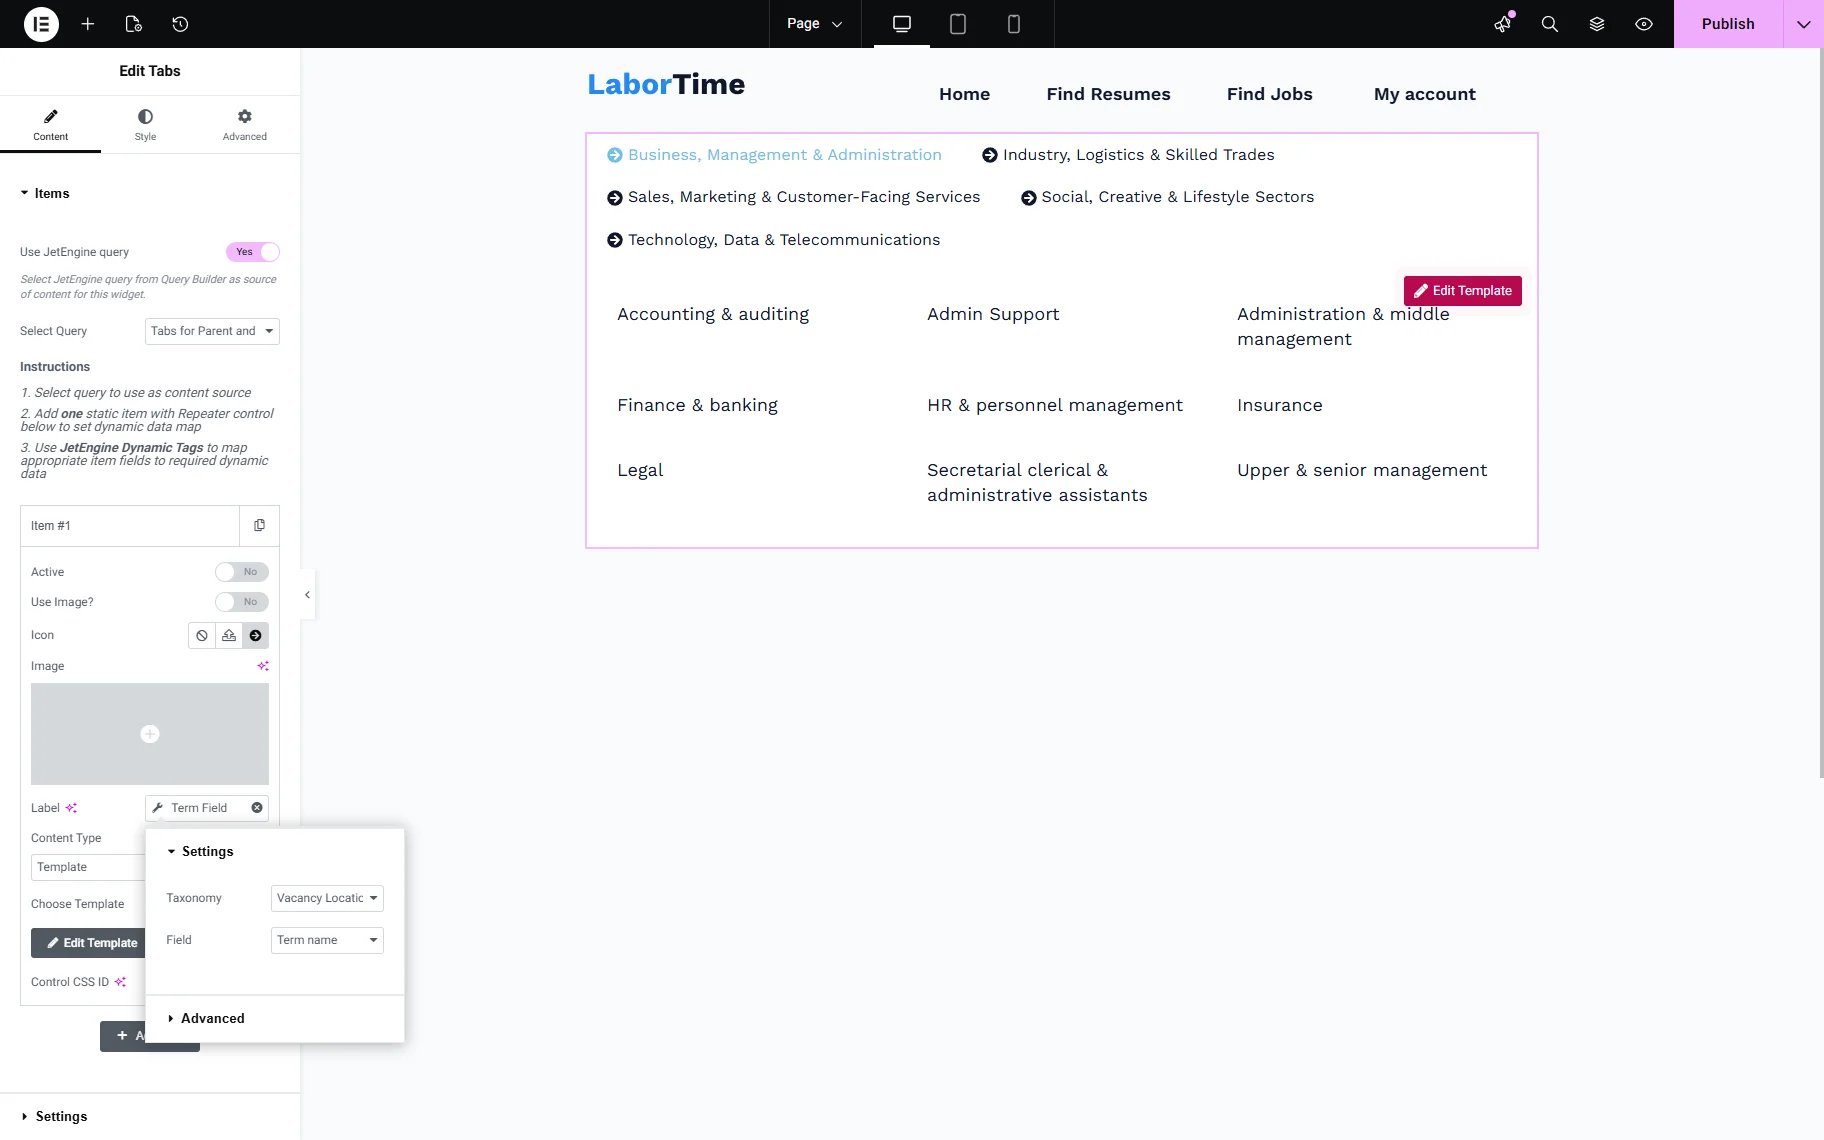
Move to the page and add the Tabs widget. Turn on the Use JetEngine query toggle and select the latest “Terms Query” you created.
Ensure that one Item only is added. To display the parents’ terms as the tabs’ names, click the “Dynamic Tag” icon next to the Label field. Select the “Term Field” option, and in the newly opened pop-up, select the Taxonomy and the “Term name” option.
Choose the “Template” option for the Content Type. In the Choose Template field, select the template you created. Save the page.
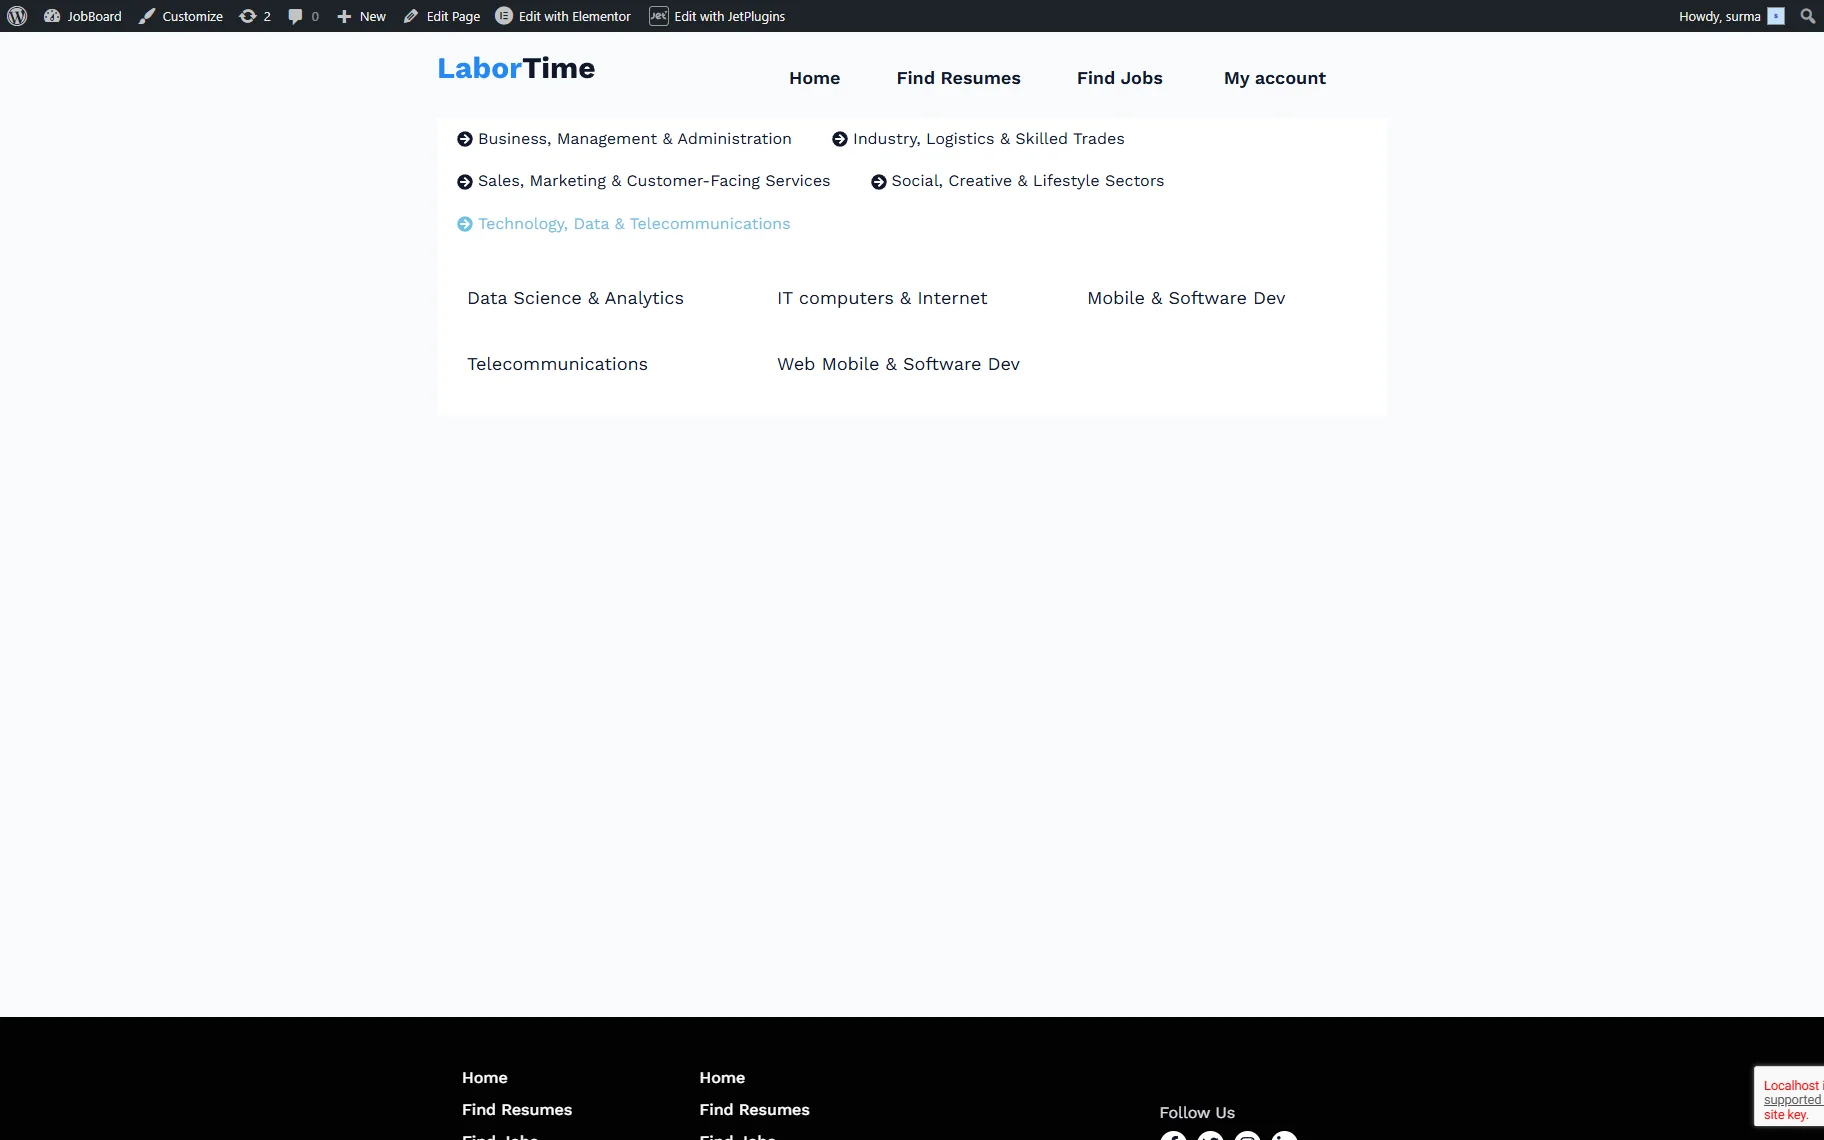
On the frontend page, you get tabs with children terms classified by parent terms.
Slider for Posts
To display posts in the Slider dynamically, create a “Posts Query” to return posts from the needed CPT.
For that, move to WordPress Dashboard > JetEngine > Query Builder and click the “Add New” button.
Enter a Name for the query and select “Posts Query” as the Query Type. In the Post Type field of the General tab, choose the needed CPT.

You can add any other needed settings and save the query.
Go to the page where you need to display the slider, then add the Slider widget. Enable the Use JetEngine query toggle and select the query you created.
Ensure that one Item only is kept. To display data from the posts, click the “Dynamic Tag” icon next to the needed fields and select the needed “Custom Field”.
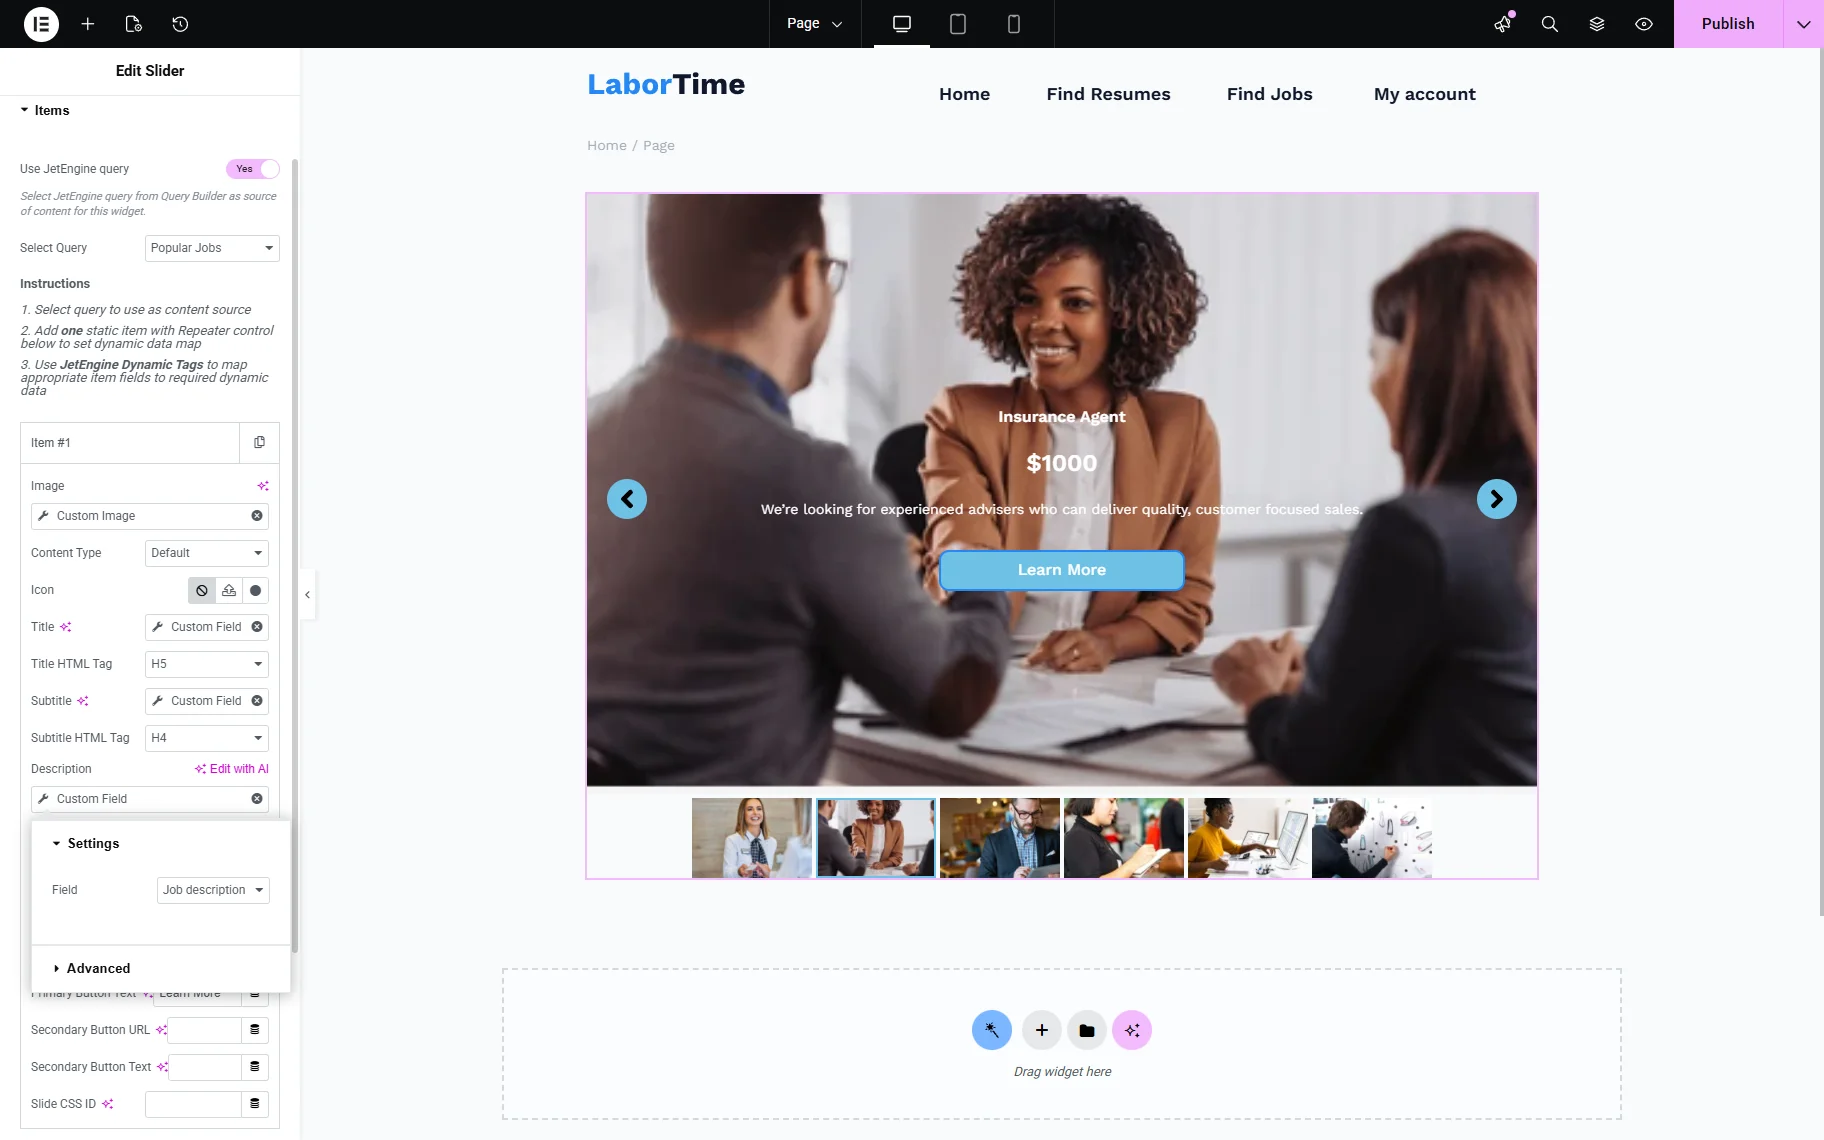
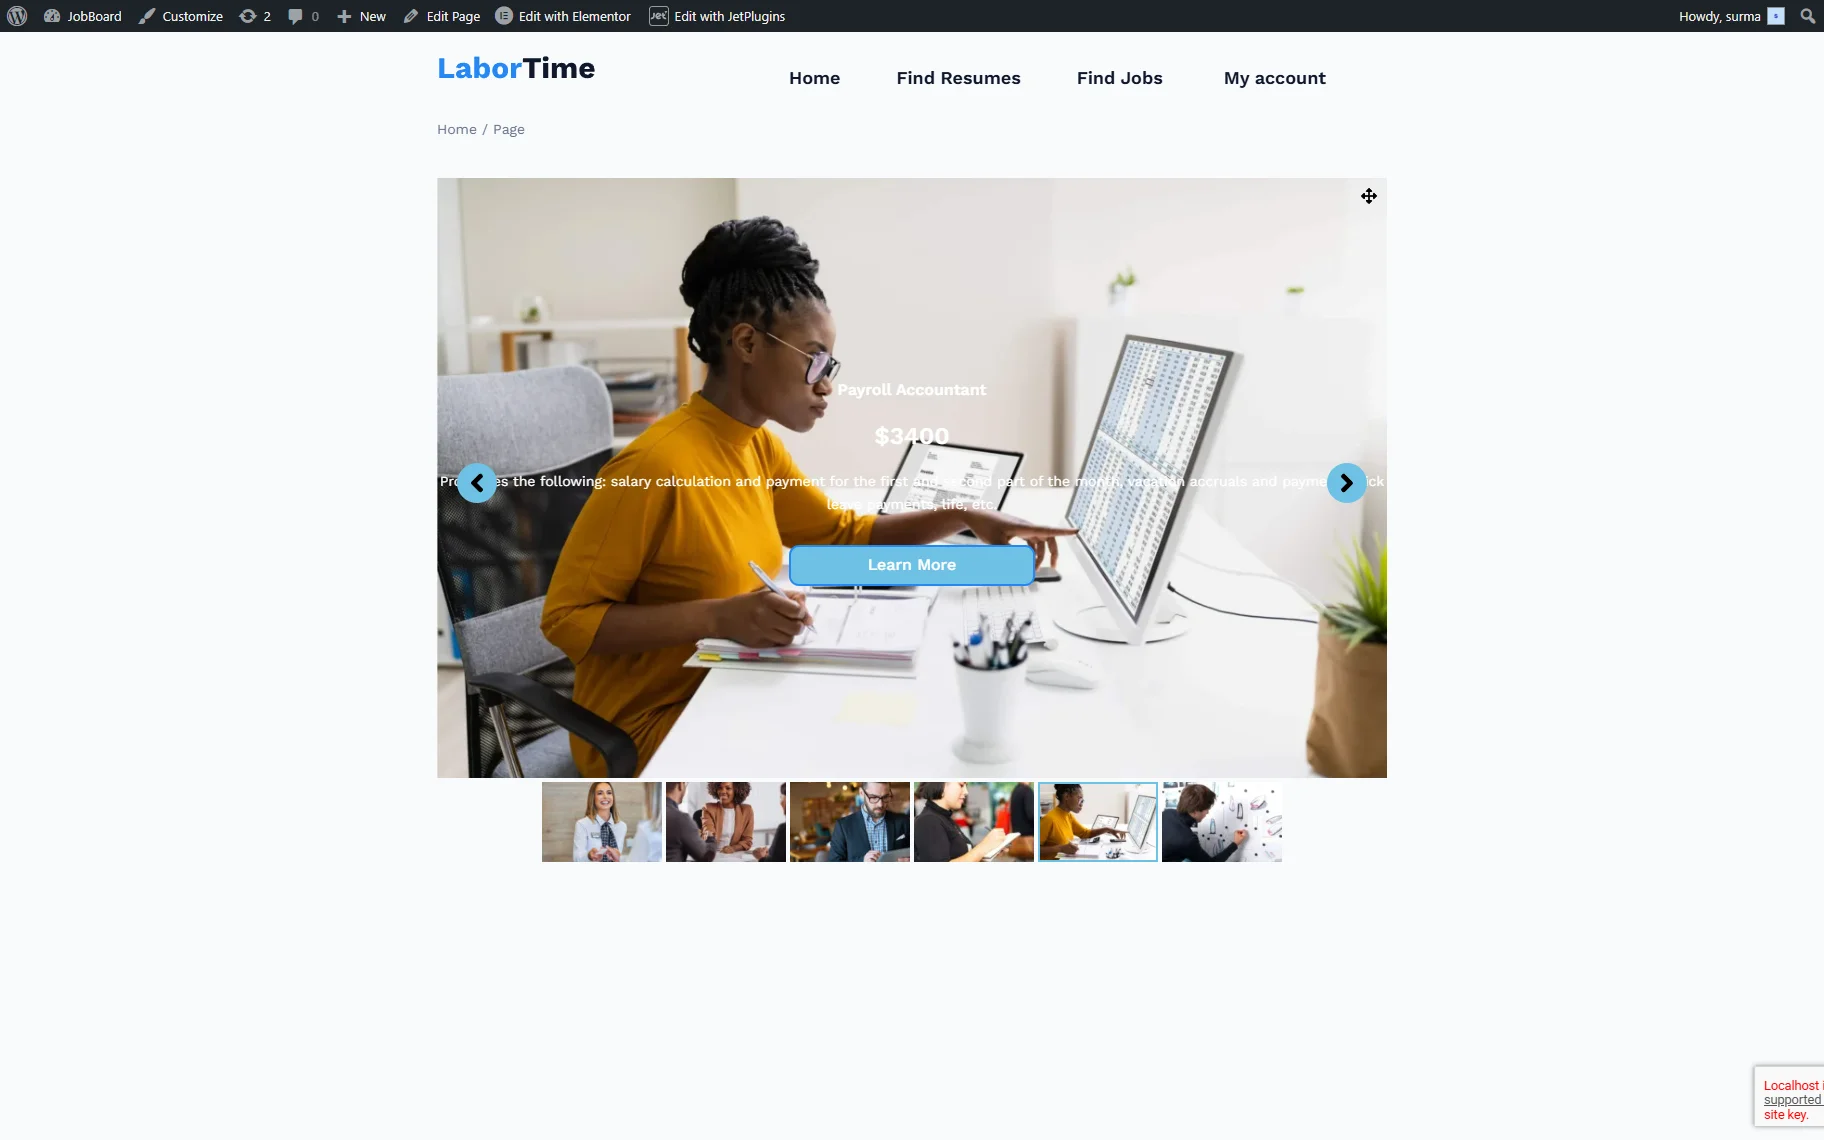
Once you are ready, publish the page and check the frontend. Here, we dynamically load the selected posts into the Slider widget.
Testimonials for Posts
To dynamically display the posts in the Testimonials widgets, first build a “Posts Query”. It can be a query that returns posts of the dedicated CPT.
For that, proceed to WordPress Dashboard > JetEngine > Query Builder and click the “Add New” button.
Enter a Name for the query and select “Posts Query” as the Query Type. In the Post Type field of the General tab, choose the required CPT.

Add any other settings you need to the query and save it.
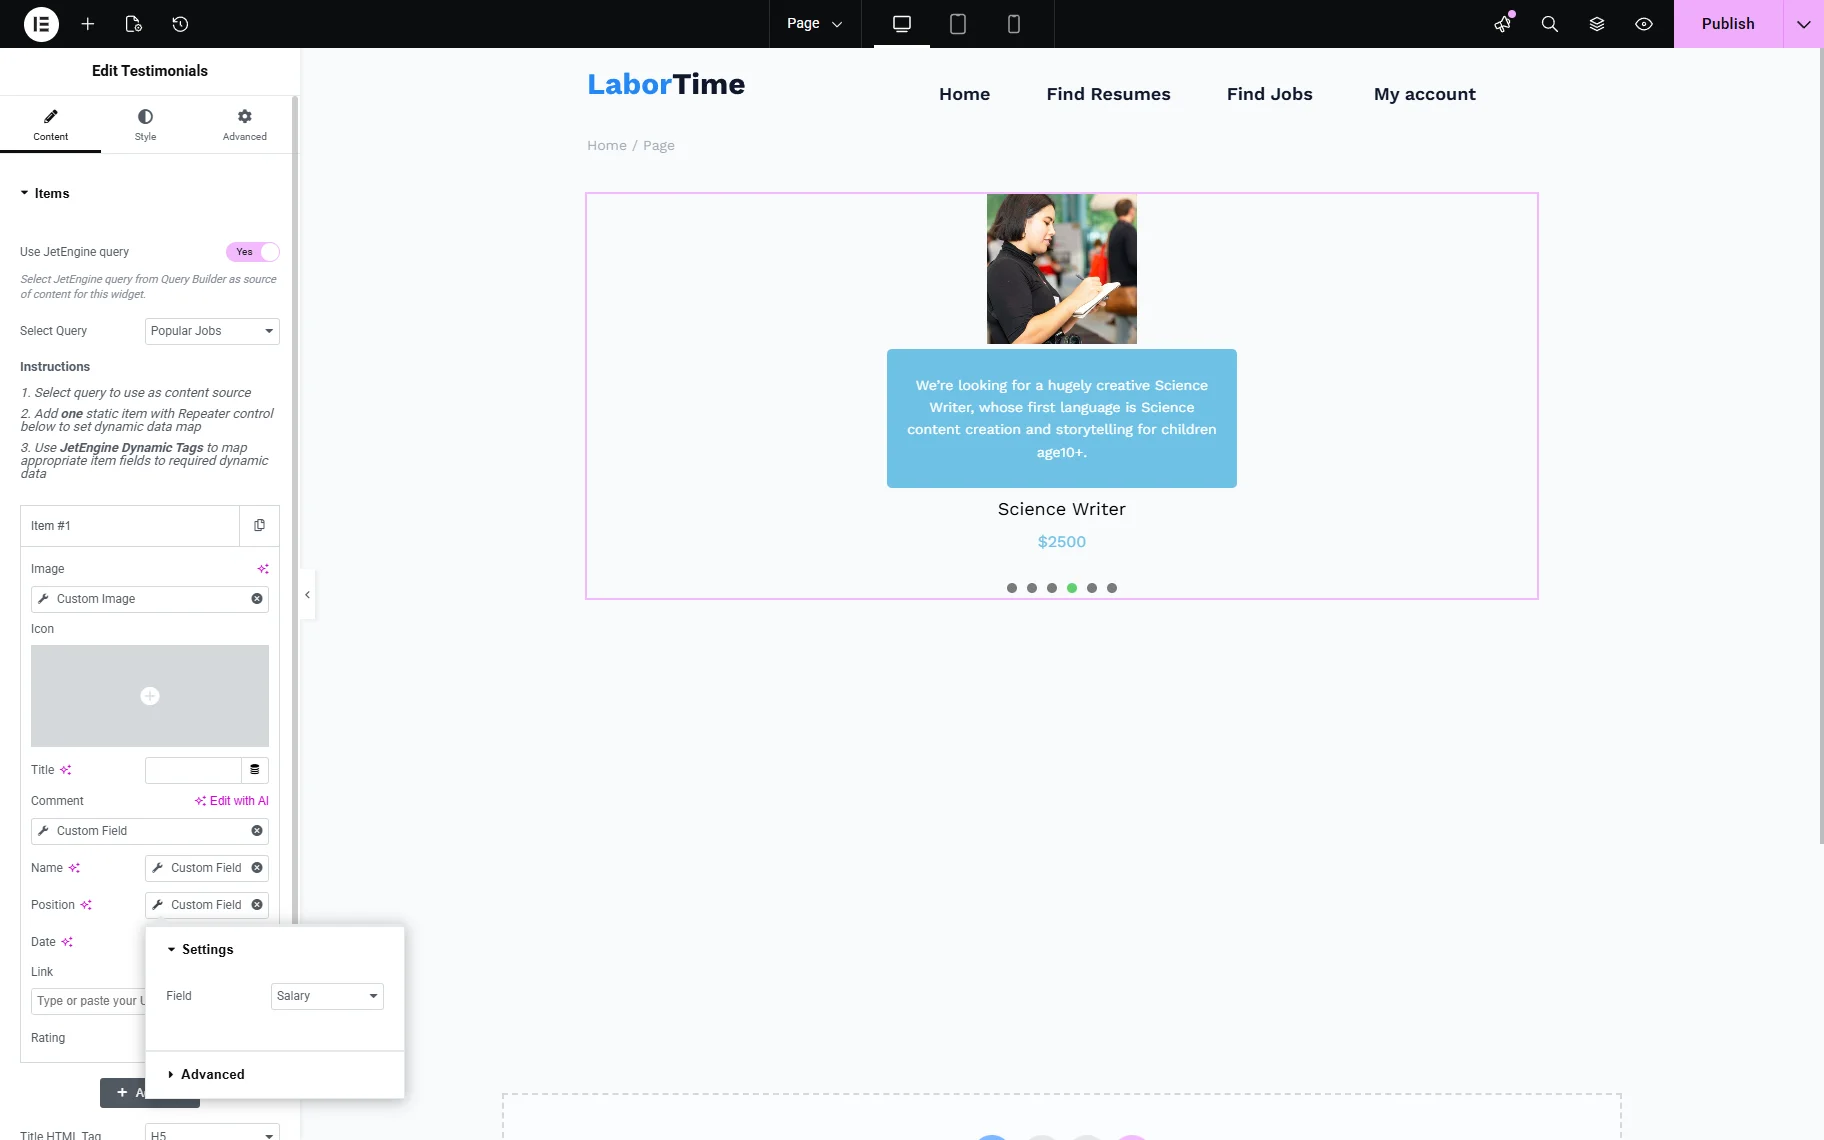
Proceed to the page where the data should be displayed. Add the Testimonials widget and enable the Use JetEngine query toggle. Select the query that was created before.
Keep one Item only. Then, to display the posts’ data, click the “Dynamic Tag” icon next to the field we need to fill in, select the “Custom Field” option, and choose the desired field.
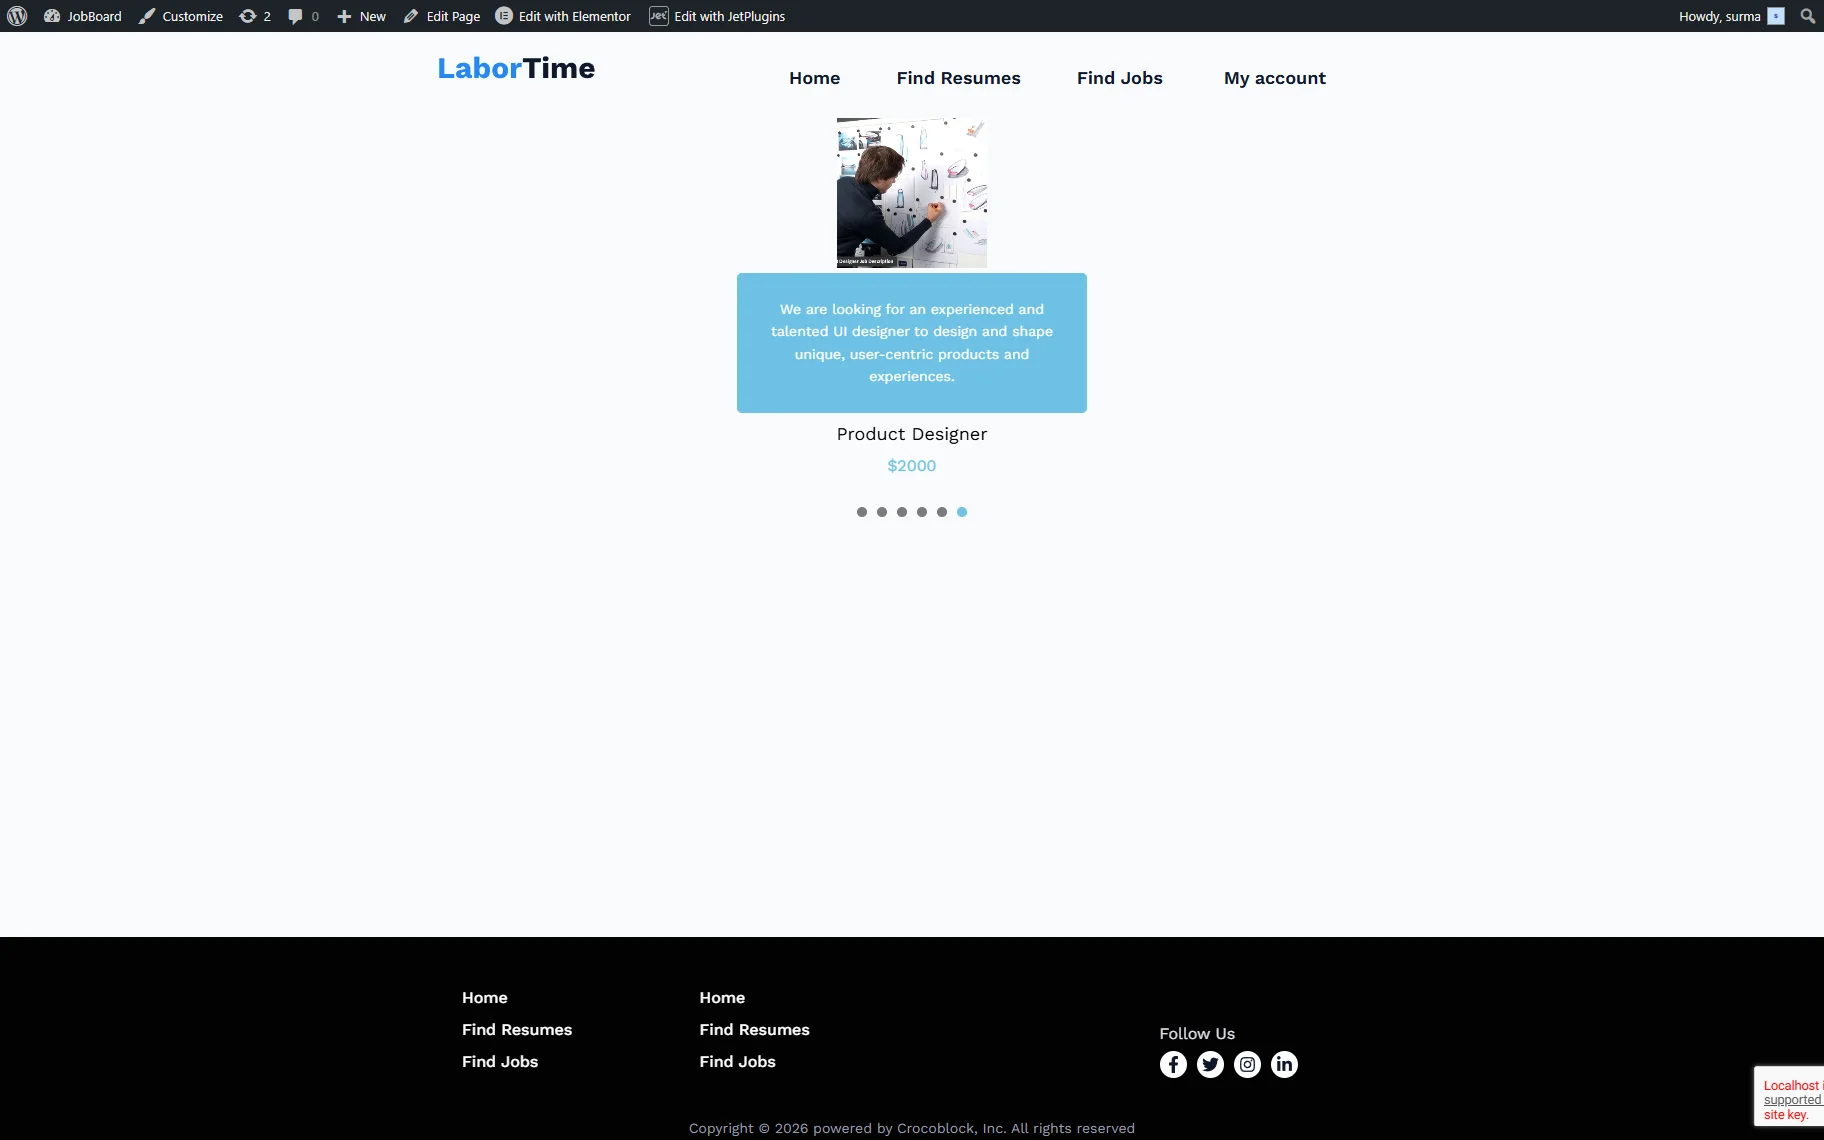
Save the changes when you are ready, then check the frontend.
Here, we dynamically display the Testimonials with the posts.
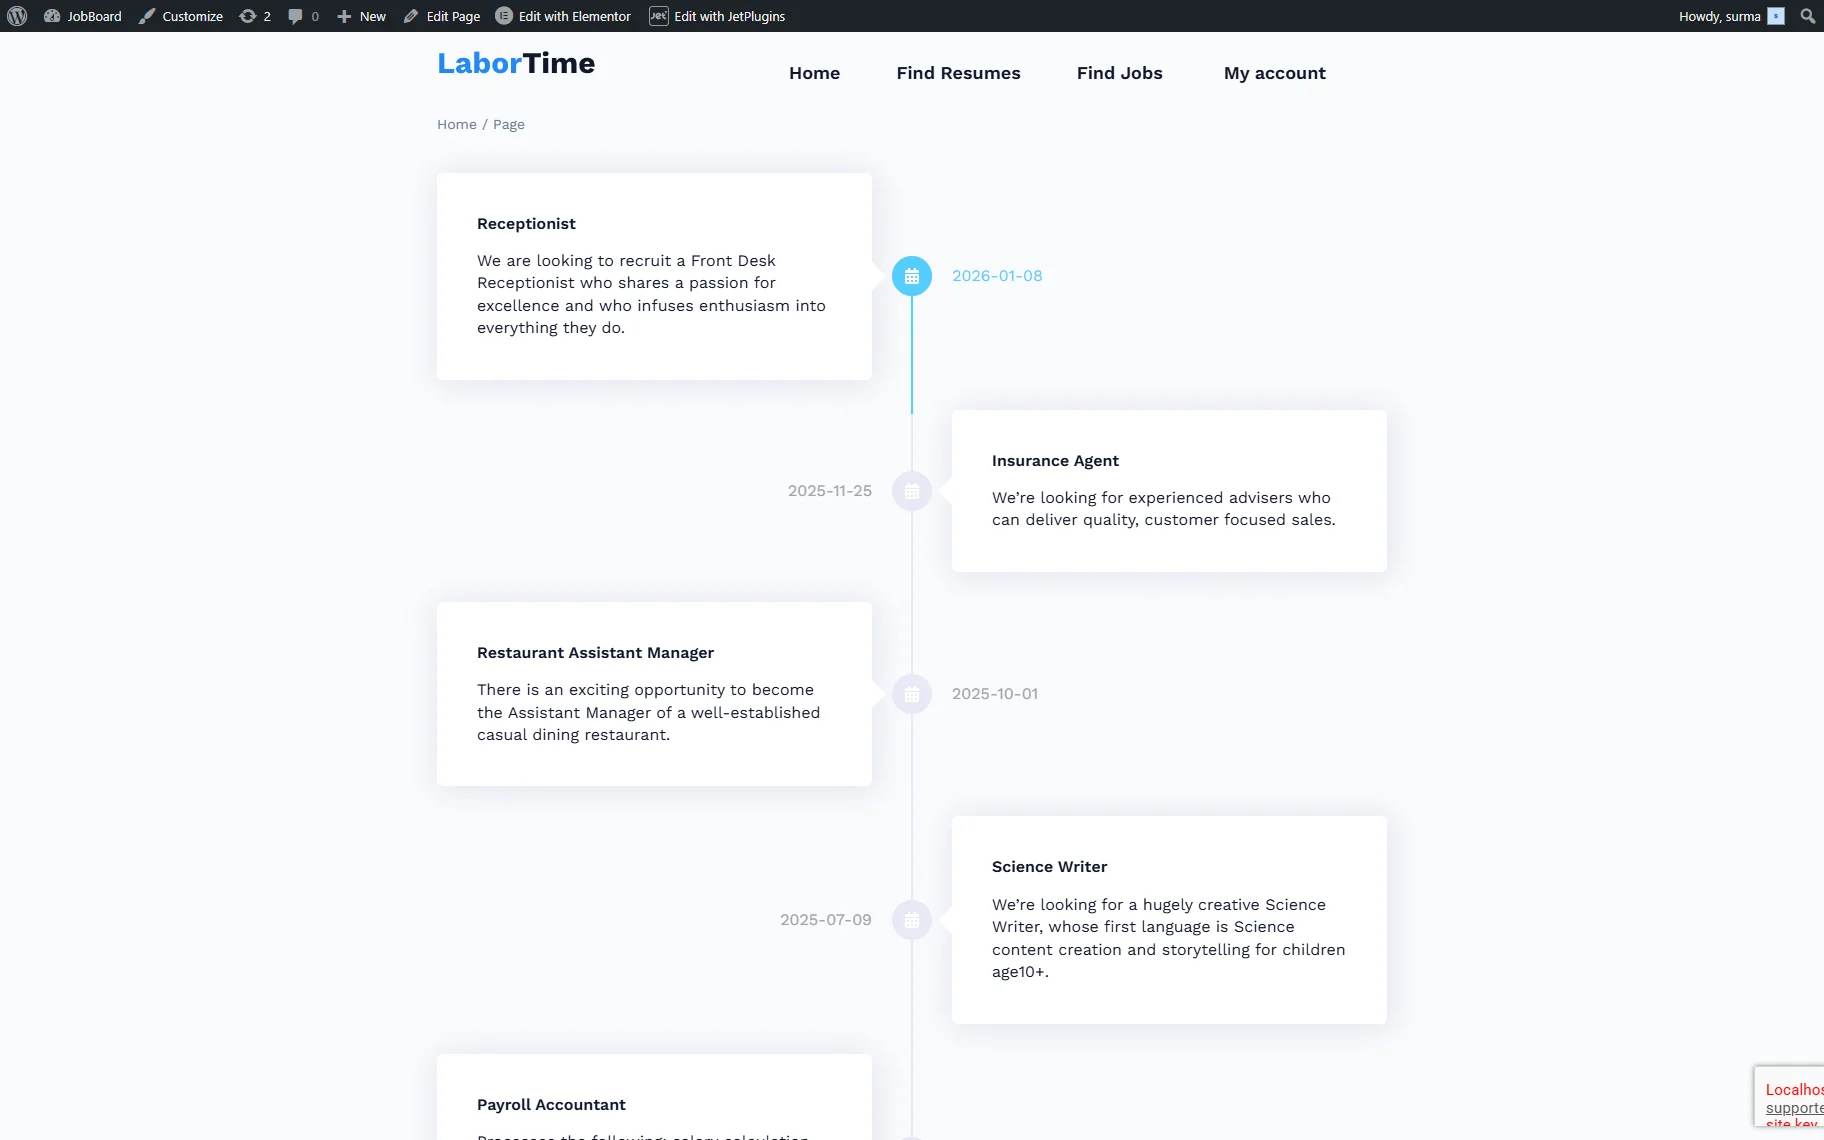
Vertical Timeline for Posts
To dynamically pull posts into the Vertical Timeline widget, you first need to create a “Posts Query”.
Navigate to WordPress Dashboard > JetEngine > Query Builder and click the “Add New” button.
Enter a Name for the query and select “Posts Query” as the Query Type. In the Post Type field of the General tab, choose the required CPT.

Adjust additional query settings if needed.
Click “Add Query” to save the changes.
Proceed to the page where you need to display the data and open it in Elementor. Locate the Vertical Timeline widget.
In the Cards tab of the widget settings, enable the Use JetEngine query toggle. Select the custom query created earlier.
Leave only one Card and remove the rest. This card will act as a template for dynamically loaded items.
To dynamically pull data from posts, use “Dynamic Tags” for the widget fields. Click the “Dynamic Tags” icon and select the “Custom Field” option. Choose the required meta field.
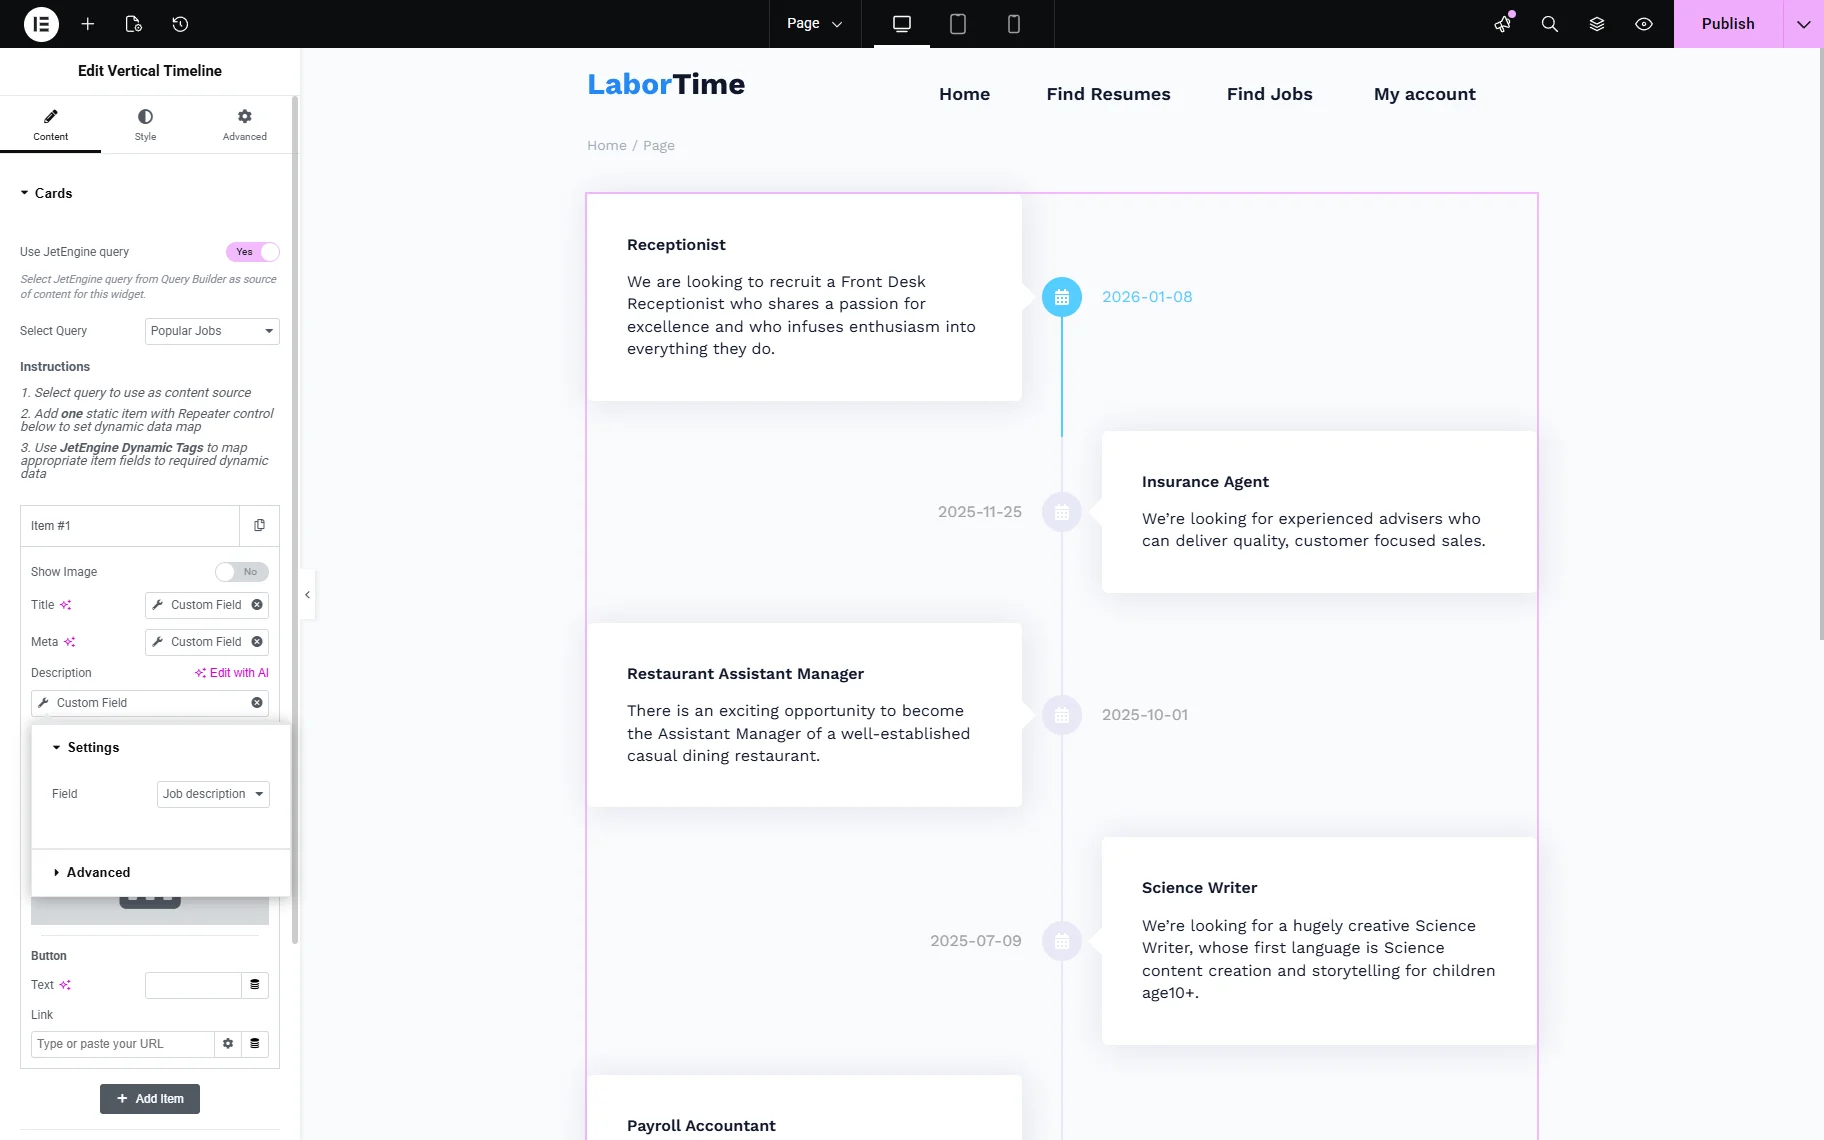
Once finished, click “Publish” to save the page. Open it on the front end to check how it works.
That’s it. Now you know how to make Tabs, Slider, Testimonials, and Vertical Timeline widgets from JetElements and JetTabs be updated dynamically using the JetEngine’s Query Builder module on the WordPress site.