Setting Up a Search Filter for the Repeater Field
Learn how to set up JetSmartFilters’ search filter to search by custom repeater fields made with the JetEngine plugin for WordPress.
Before you start, check the tutorial requirements:
- Elementor (Free version), Block editor (Gutenberg), or Bricks
- JetSmartFilters plugin installed and activated
- JetEngine plugin installed and activated with the “Repeater” meta field created (if you have not done it yet, please check the Repeater Custom Field Overview article)
Adjust a Repeater Field
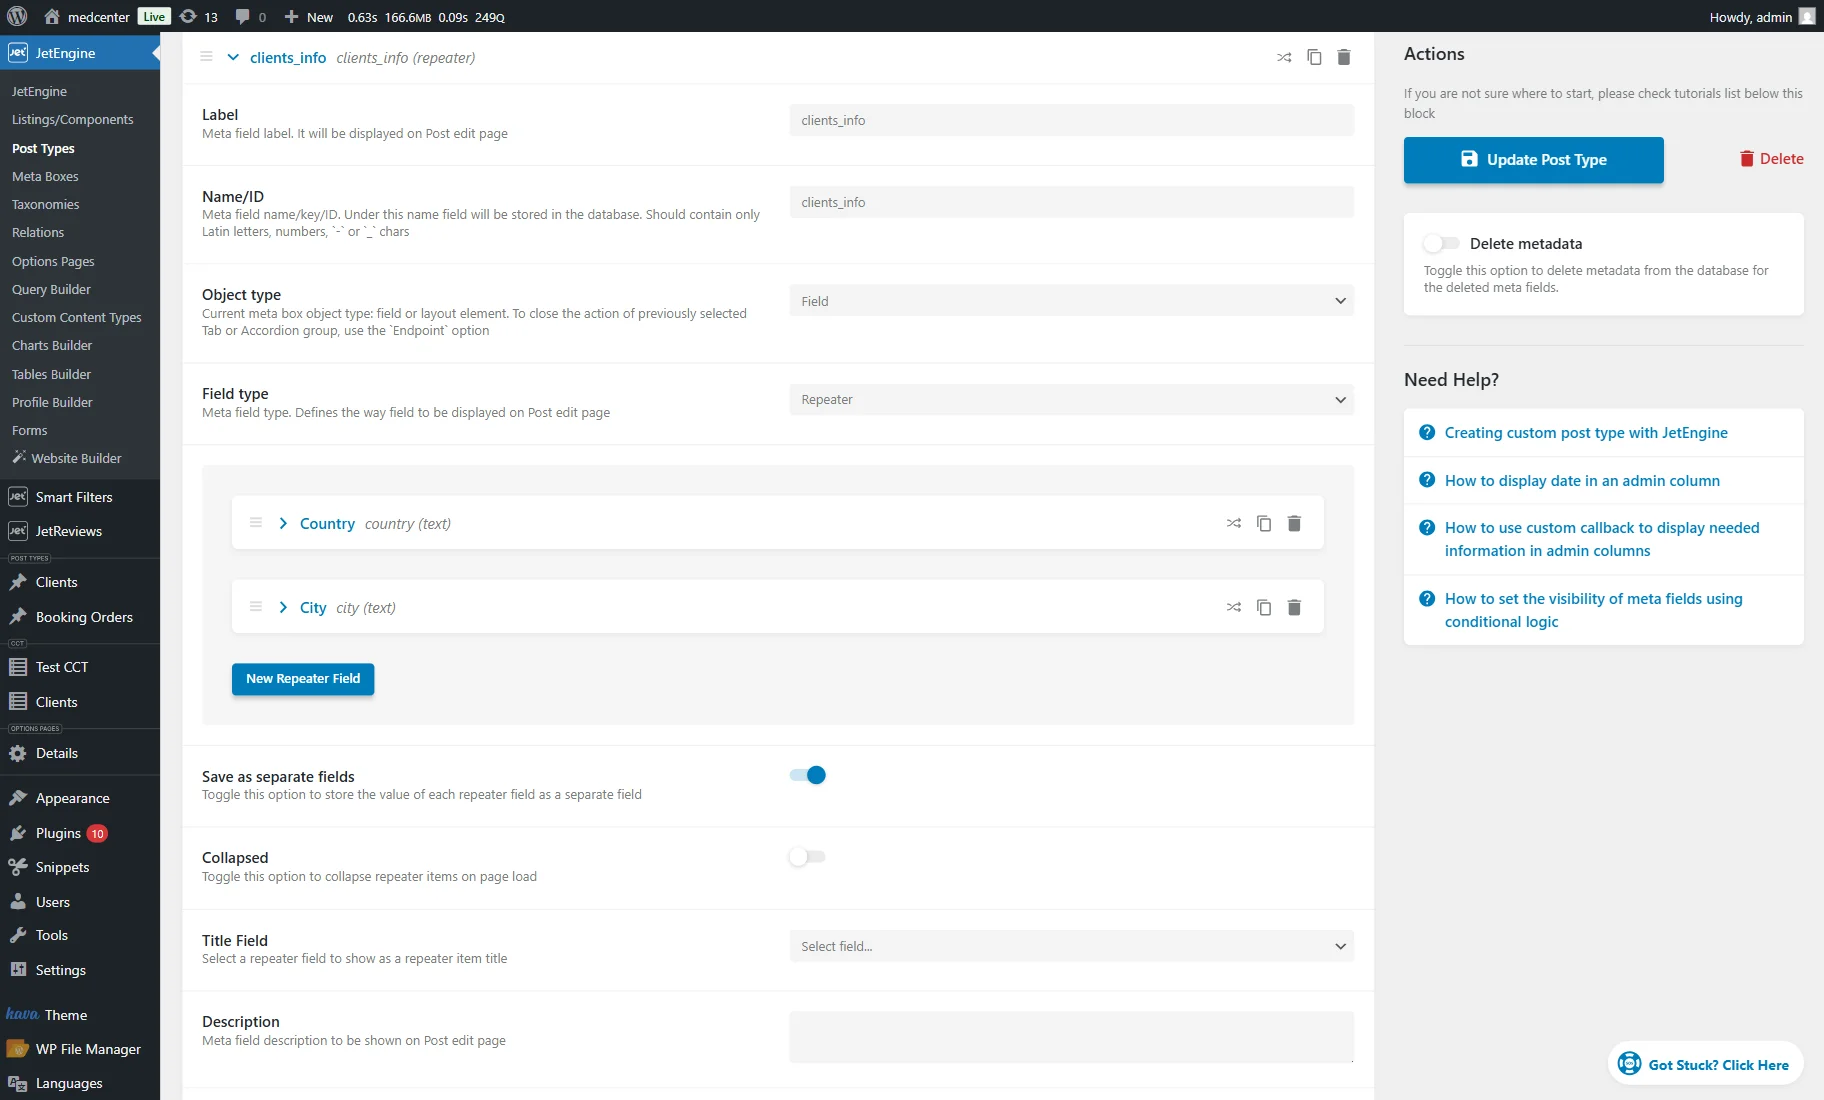
In this tutorial, we will use a “Repeater” field with two subfields: “Country” and “City.” You can find these settings by proceeding to the WordPress Dashboard > JetEngine > Post Types directory, opening the needed post type, and scrolling down to the Meta Fields section.
It is necessary to have the Save as separate fields toggle activated.
You can learn more about this toggle in the How to Save and Query Repeater Fields as Separate Fields tutorial.
Re-Save Repeater Field Values
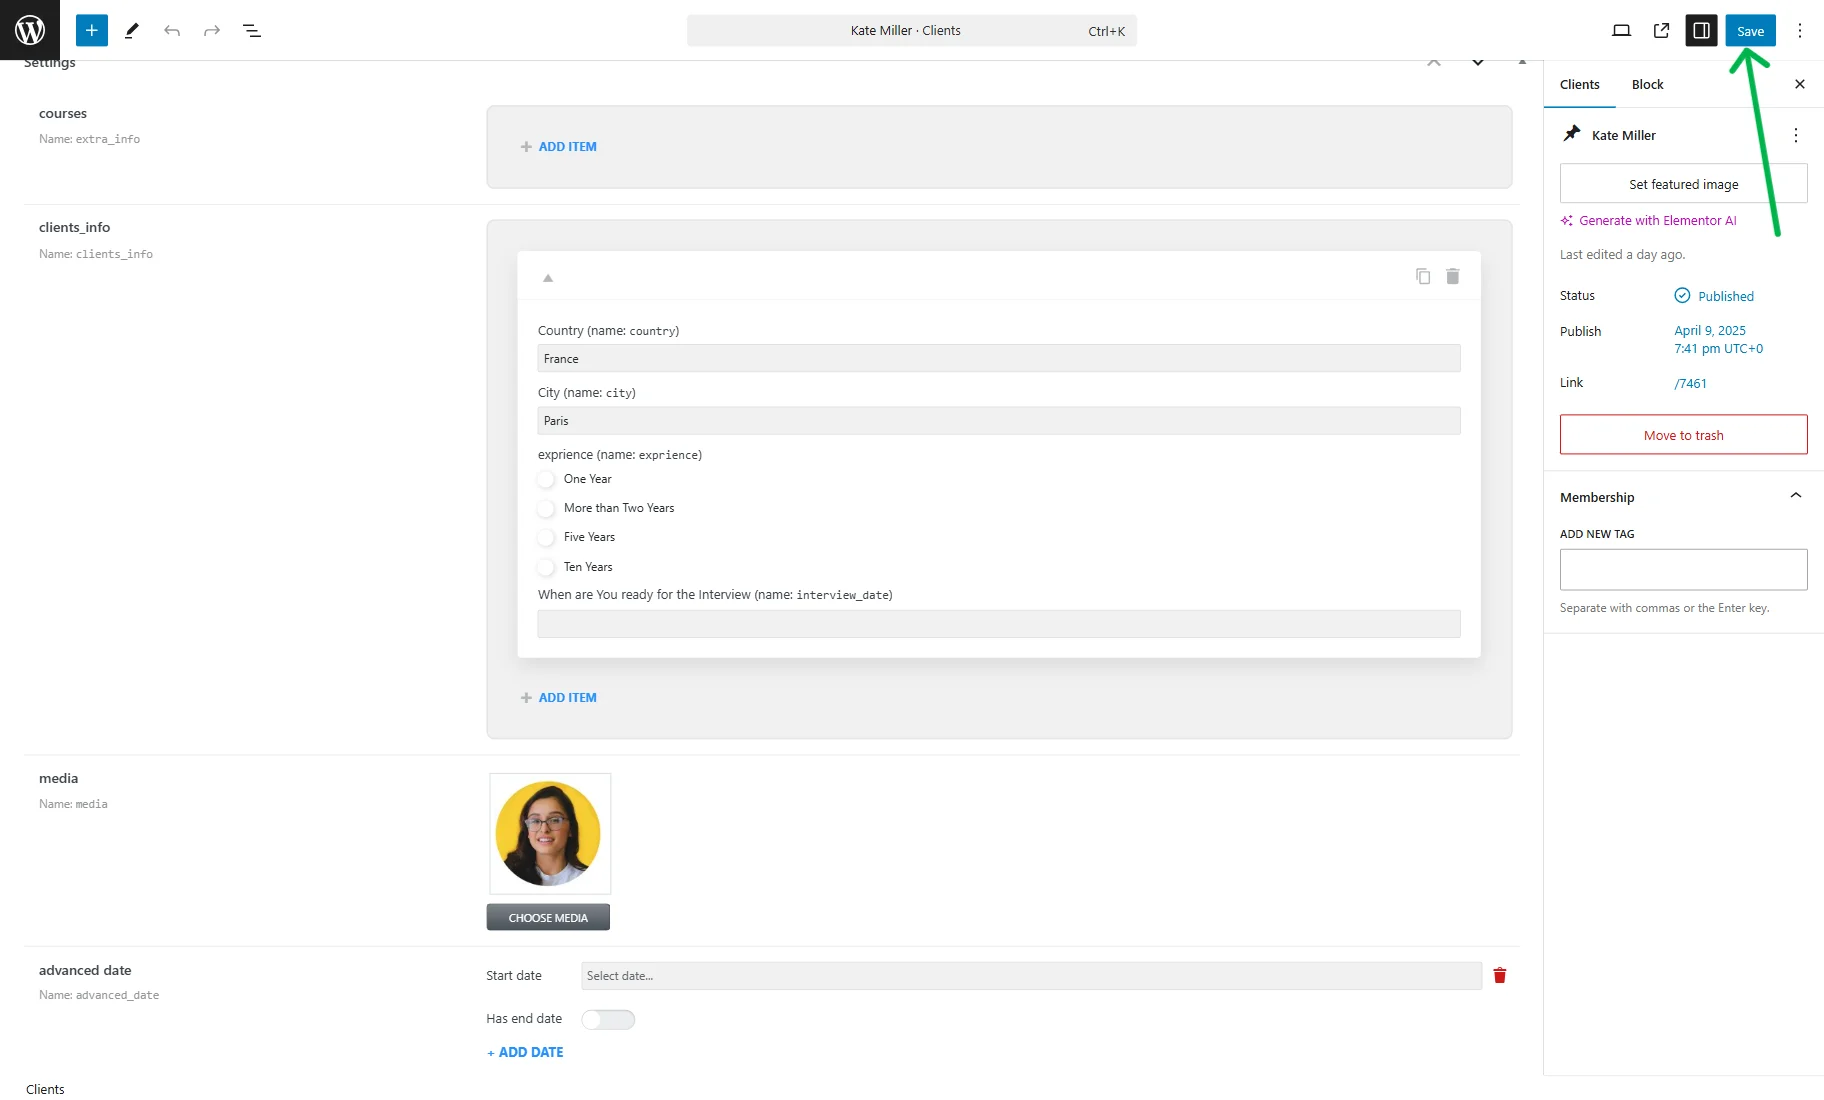
Once you’ve added your posts, make sure that the values are resaved in your “Repeater” fields.
If you previously filled out the repeaters, make sure to open each post and click “Save” to ensure the values are correctly stored in the database.
Create a Search Filter
Let’s create a filter now. Proceed to the WordPress Dashboard > Smart Filters > Add New.
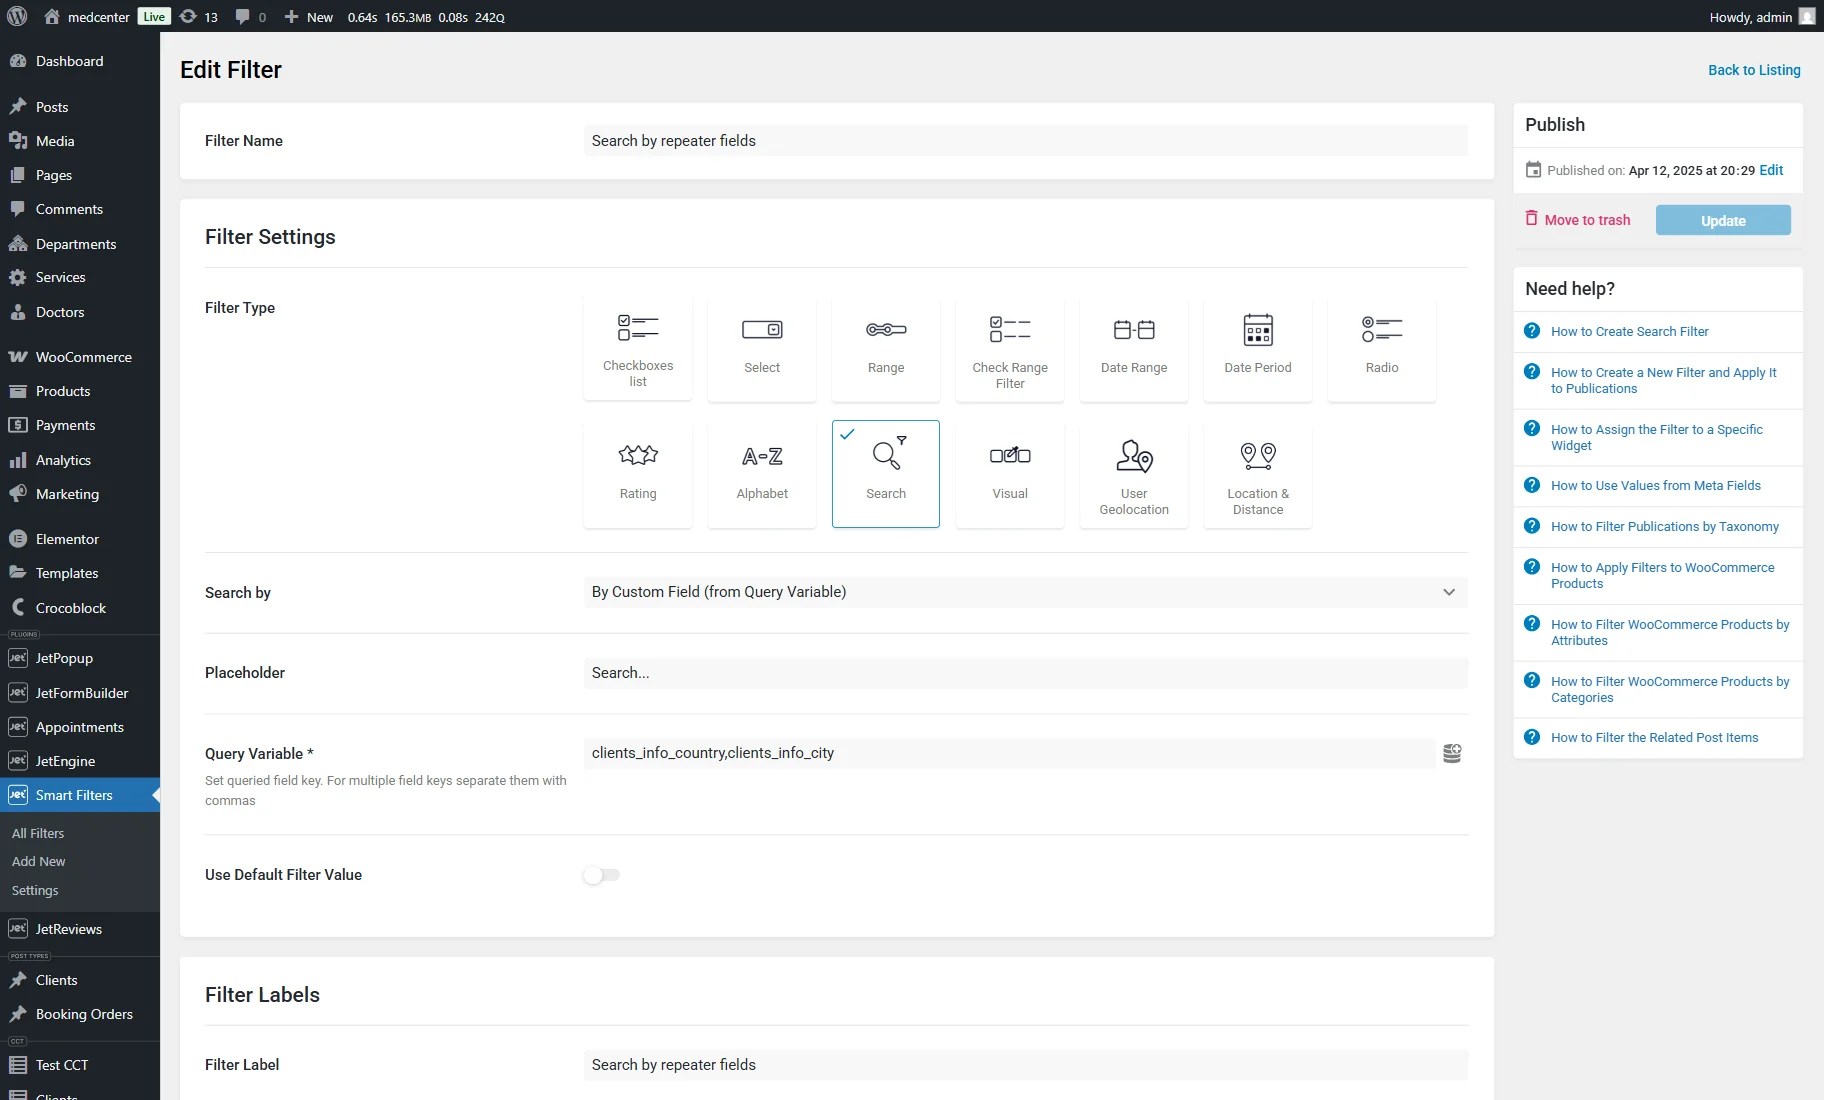
Enter the Filter Name and pick the Filter Type (“Search” in this case).
Select the “By Custom Field (from Query Variable)” option in the Search by field. The Placeholder field can be set up according to your needs; we leave its default setup.
Then, in the Query Variable field, we put the repeaters’ field names in the following way:
repeater-name_sub-field-nameSo, in our case, it is set up like this: “clients_info_country”, where “clients_info” is the repeater’s name, and “country” is a subfield’s name.
As we’re searching by two subfields of the repeater, we separate field keys with a comma.
Place the Filter and Its Provider on a Page
Now, we can display the items on the website. It can be done with a Listing Grid widget/block/element, so that a Listing Template should be built beforehand. You can check other filter providers to select the most suitable one.
The Listing Grid and Search Filter should be placed on the needed page or template in the Elementor, WordPress block editor, or Bricks editor. In the How to Use Filters with the Listing Grid Widget tutorial, you can find out how to apply a filter to the Listing Grid widget correctly.

Additionally, we assigned the Search Filter to the Listing Grid with the help of the Query IDs. To learn more about it, please check our How to Assign a Filter Widget to a Specific Listing Grid tutorial.
When you are ready with the settings, click the “Publish” button.
Check the Result
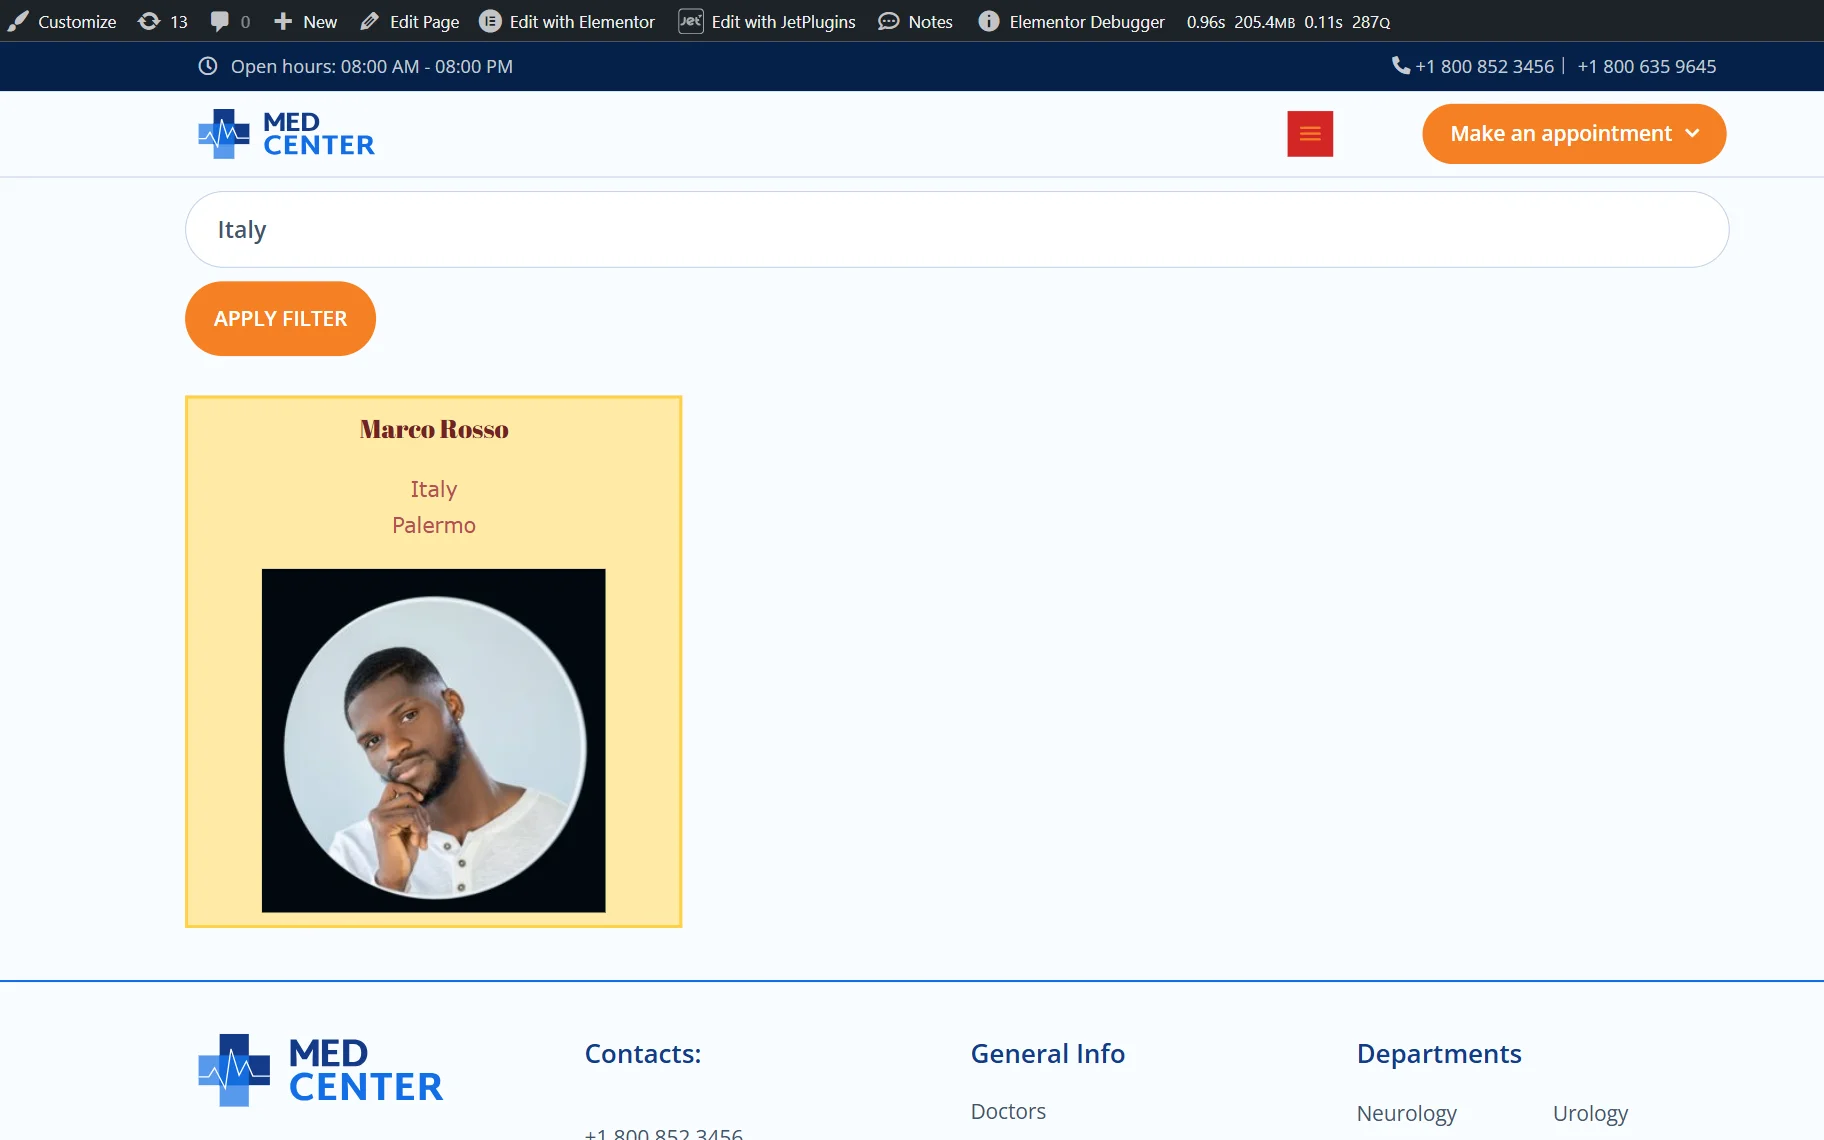
Now, the filter is ready for use. Open the page on the front end to test how it works.
When we search by country (“Italy”, for example), we get the correct results.
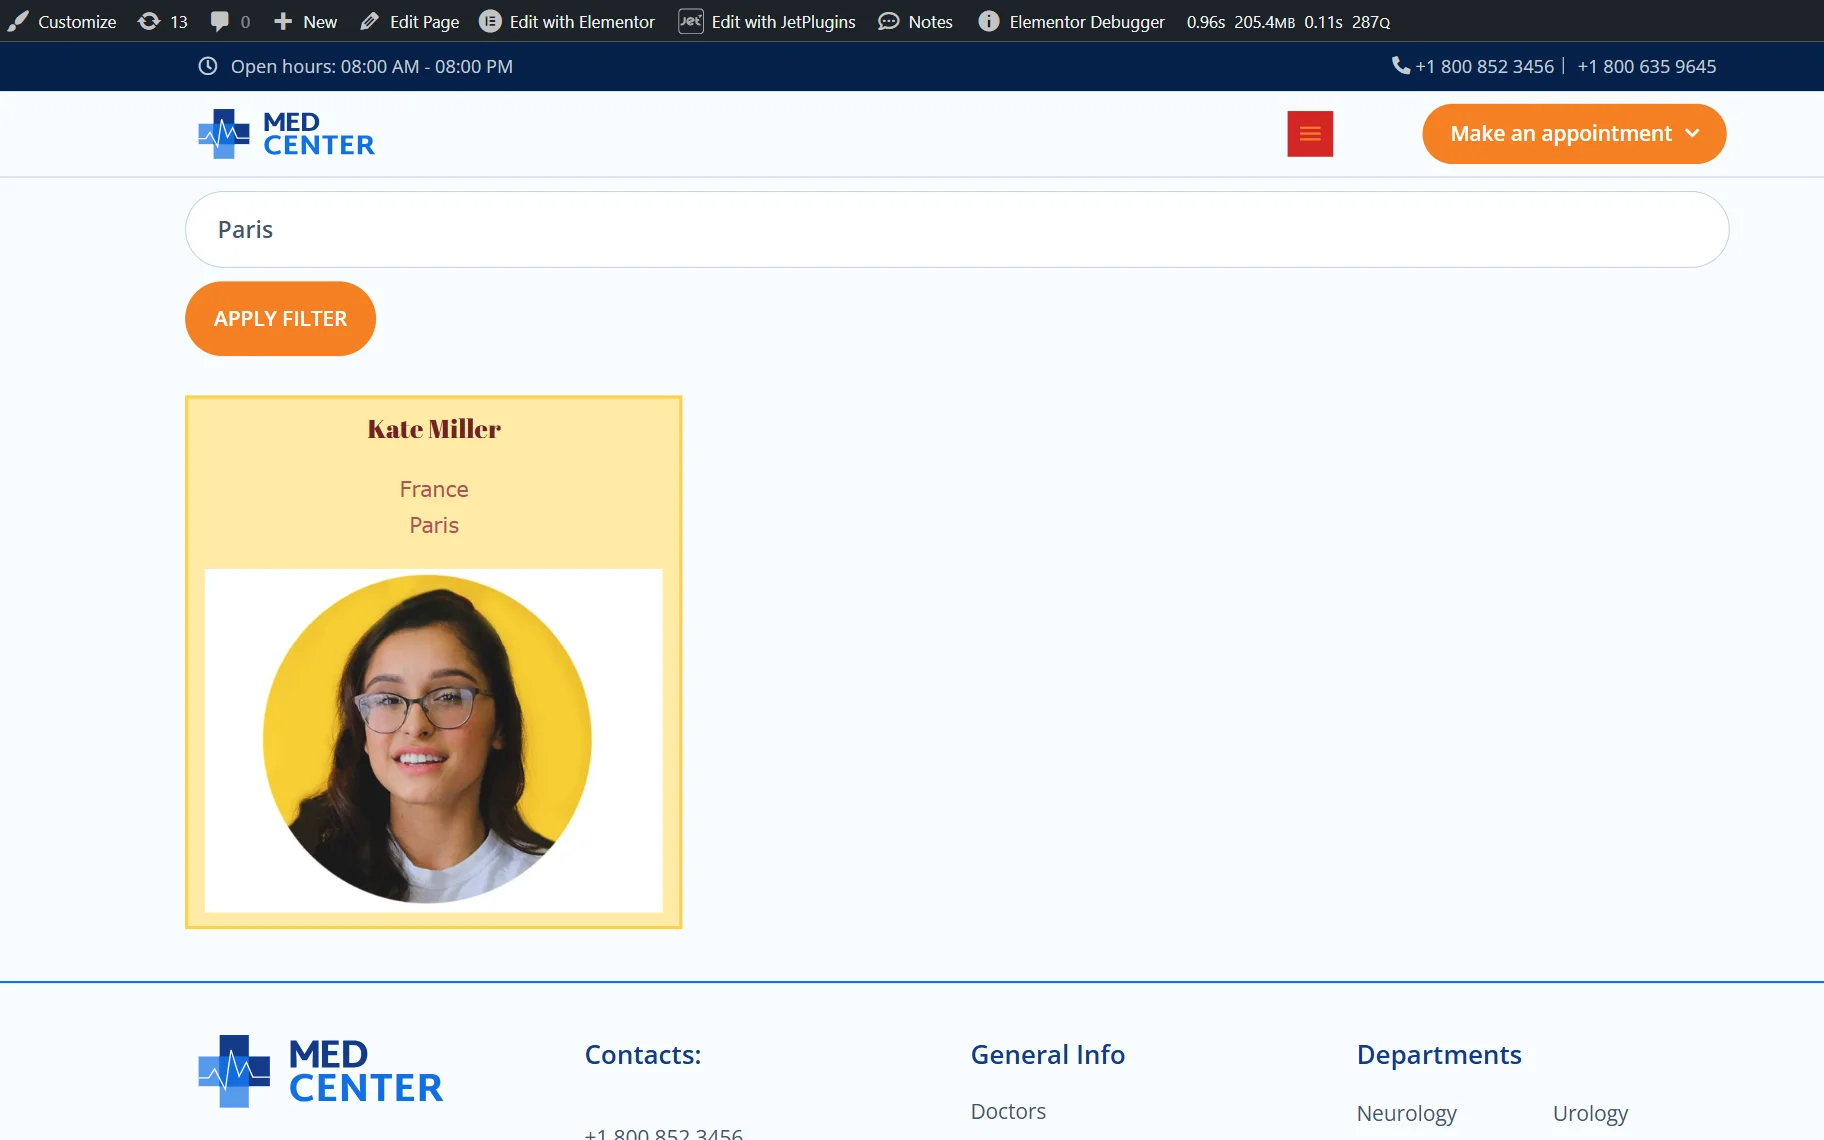
In the same way, the filter works when we search by city (“Paris”).
That’s it. Now you know how to use a JetEngine’s “Repeater” field as a source for the Search Filter from the JetSmartFilters plugin for WordPress.