Ever wondered how the OceanWP theme and Crocoblock would work together? Ponder no more. In this article, we’ll give you the nuts and bolts of such a combination and show how easy it is to build a dynamic website.
Table of contents:
- What Is the OceanWP Theme?
- Why OceanWP and Crocoblock Make a Good Combo
- How to Install the OceanWP Theme
- Guide to Building a Dynamic WordPress Website
- Bottom Line
What Is the OceanWP Theme?
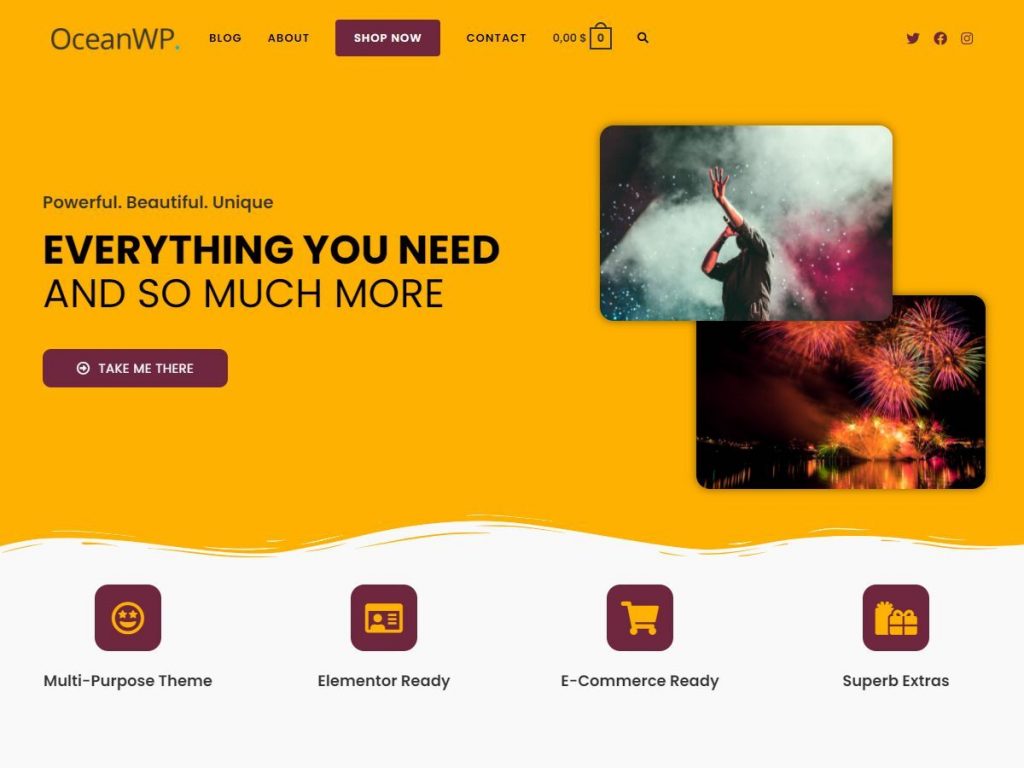
OceanWP is a versatile modern WordPress theme that helps create beautiful and unique websites for any occasion. Its creators, OceanWP LLC, believe everybody deserves tools for building splendid websites. Their theme is equally attractive for beginners (because it provides intuitive and user-friendly tools that require no coding skills) and WordPress experts (because it has more features and functionalities to realize their ideas).
Because OceanWP has so many customization options, it is insanely popular, with the number of downloads approaching 6 million. Not only do people download it often, but they also use it, like it, and give it almost exclusively 5-star ratings on wordpress.org.

Let’s see what OceanWP’s main features and benefits are.
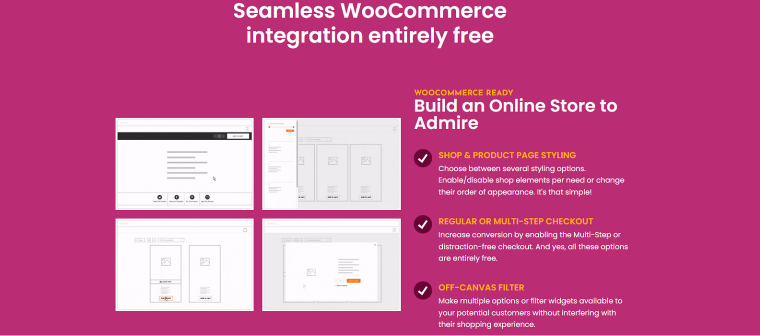
OceanWP theme is perfect for eCommerce sites
Although OceanWP is a multi-purpose theme, there’s one particular application where it shines brighter than any other theme, and it’s creating online stores. Whether you sell physical items, digital products, or services, OceanWP will accommodate your specific needs.
While the team supports integration with a viral WooCommerce plugin that ensures the backend functionalities essential for online stores, it also provides multiple tools for presenting products with maximum effect. Here are examples of conversion-enhancing gadgets to be used on eCommerce websites:
- Woo Popup extension displays a woo pop-up immediately after a customer adds an item to a cart offering to proceed to the checkout screen or continue shopping. This feature creates a better user experience for customers who came to buy only one item and also reduces shopping cart abandonment rates.
- White Label extension allows replacing all instances of OceanWP name with your business name to impress your clients and develop unique branding.
- Portfolio extension provides a simple way to display your products on any page using shortcodes or page templates. With this tool, you get complete control over items styling and filter products by their features, tags, and more.
Website demos and templates
For users who don’t feel comfortable about their design skills, OceanWP prepared fantastic news: the theme comes with 220+ high-quality demo websites made by professional web developers and designers. Most of the demos are tailored to specific needs, so they are grouped into 25 categories (bars, eCommerce, photography, lifestyle, etc.) for quick searching.
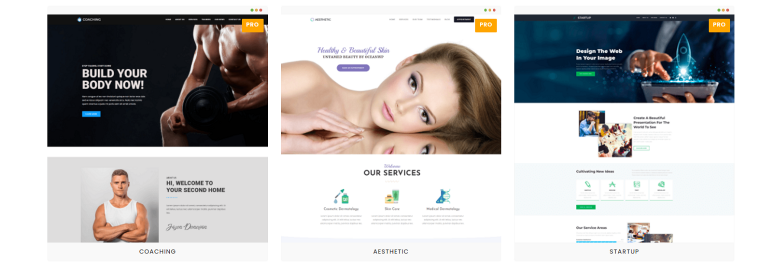
I’ve mentioned that OceanWP offers unprecedented customization options for all elements. But if changing colors/fonts/sizes is tiring, use built-in templates and suggested customizable styles and create unique designs. It seems like OceanWP has pre-made options for everything:
- seven header styles;
- three mobile menu styles;
- three blogging layouts;
- four shop and product categories styles;
- three pagination styles;
- and many more.
Expendability
OceanWP offers a large collection of free and premium extensions that are easy to choose from and install. These extensions improve the WordPress theme functionality and customize your dynamic website even more, and some of them are required installs for selected site demos. With many extensions, OceanWP allows using the theme in optimal configuration and keeping it lightweight.
Right now, OceanWP has seven free and 14 paid extensions which can be purchased separately or in a bundle with any paid plans.
The theme is tightly linked to popular third-party plugins like WooCommerce, LifterLMS, LearnDash, and page builders such as Gutenberg, Elementor, Divi, etc.
Support
When users buy a quality product, they expect to get quality support, which is the case with OceanWP products. The support is really quick, and developers even provide a basic support level to free users:
- responding to any bugs users find within the OceanWP theme or Ocean extensions;
- answering questions about the theme features, settings, etc.
All free users can receive support via the wordpress.org forum or Ocean WP Facebook Community Support Group, and the support team is active on both channels.
All users who have purchased at least one paid extension are entitled to support services via the ticketing system. If you bought Ocean Core Extension Bundle, you get a Priority Support Cover, which means you get priority in ticket replies. Even if you don’t own any OceanWP paid licenses, you can purchase a Priority Support Cover plan for three months or a year.
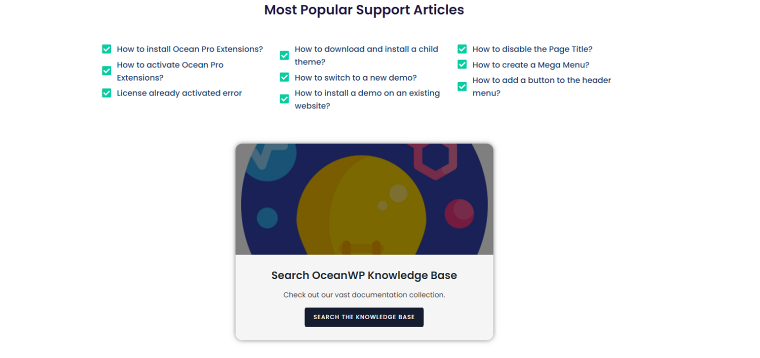
Other free support options include thorough documentation for the OceanWP theme on the Knowledge Base page. It covers many general questions, guides, troubleshooting advice, and more.
Other benefits and features
- Page speed. If you are building a dynamic website, you know for sure that page speed is vital. Pages should load instantly and look good on all devices. OceanWP lives up to that since it’s mobile-responsive, SEO-optimized, and boasts first-rate page speed scores.
- Beginner-friendliness. Although there’s a learning curve to master the OceanWP theme, you are still prone to a quick start. OceanWP’s accessibility is paramount; it’s easy to use and set up. Plus, you can always integrate it into a page builder you prefer.
- Responsive design. OceanWP takes its commitment to responsiveness rather seriously. Their demo templates adapt to any screen size and are easy to read on mobile devices and tablets.
- Reasonable pricing. It doesn’t cost a cent to install the core OceanWP theme, and some of the plugins are also free. As to the premium demos and plugins, they are reasonably priced. For more details, check the paragraph dedicated to pricing.
Altogether, OceanWP features serve the purpose of helping every developer create good-looking web spots regardless of their coding or design experience.
Pricing
The core OceanWP theme is free. However, there are 13 premium extensions, which can be bought separately to extend the website functionality.

Each premium extension comes at a fixed yearly price – $29.99.
OceanWP boasts three pricing plans – Personal, Business, and Agency. All three grant access to the same features; the main differences are the number of supported activations and access to primary support services.
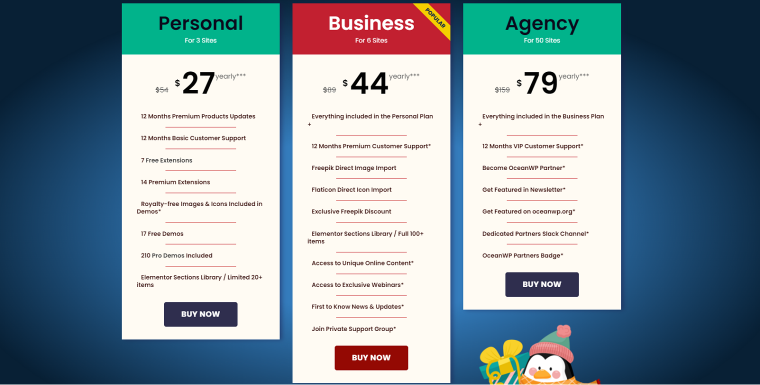
A Personal membership plan is for three sites only and costs $54. A Business plan supports up to six sites and has a price tag of $89, and it’s the most popular one. Finally, the Agency package comes at $159 a year and can support up to 50 sites.
Don’t want to be billed annually? Consider a lifetime plan, then. You pay once – from $222 to $636 – and enjoy all OceanWP features forever.
Why OceanWP & Crocoblock Make a Good Combo
OceanWP and Crocoblock is a tried and true combo allowing both newbies and seasoned developers to build a dynamic website from the ground up.
Uncomplicated visual editing
As a developer, you no longer have to switch between the back and front. Gutenberg Blocks makes the whole routine straightforward. When building a website on the backend, you create a unique structure that will look the same on the front end. It’s that simple. Even those lacking special technical and design knowledge can build the website they want.
A no-brainer workflow
WordPress page editor gives developers equal possibilities in terms of website creation. Previously, custom websites were created by a designer-developer tandem. A designer comes up with a site layout, and a dev implements it. Today, anyone can devise a design concept and turn it into a dynamic website – all thanks to Gutenberg and Crocoblock tools.
Fewer third-party integrations
Gutenberg is fully compatible with a #1 Crocoblock dynamic plugin – JetEngine. It’s a standalone product whose principal purpose is to give developers as much dynamic functionality as possible without having to recur to external solutions. Many such solutions offer one to two dynamic content features, which is never enough. But if you choose JetEngine, you’ll gain access to more than 30 features for both dynamic and static content – all for one price.
📚 Read also: 10 Plugins You No Longer Need If You Have JetEngine
As you can see, Crocoblock plugins and OceanWP theme are great together. They let you improve load times, conversion rates and optimize the website for search engines. In the end, you get a well-performing website powered by the minimum needed tools.
How to Install the OceanWP Theme
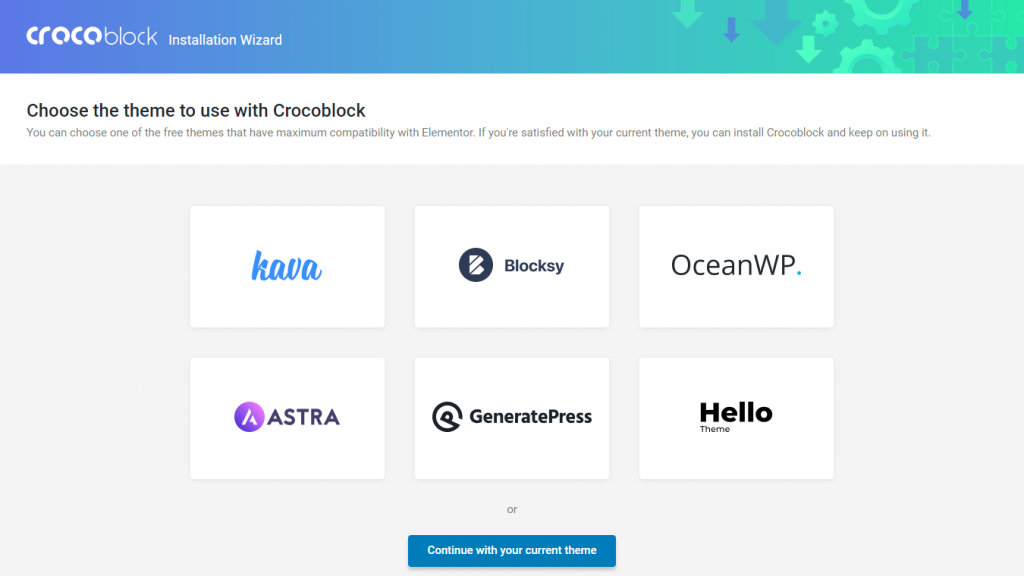
OceanWP can be easily installed through Crocoblock Installation Wizard.
- Open the WordPress dashboard.
- Follow the Crocoblock > Installation Wizard.
- Press the “Let’s Go” button on the welcome screen.
- Select the “Full Crocoblock installation” type to install the package.
- At the next step, select the OceanWP theme.
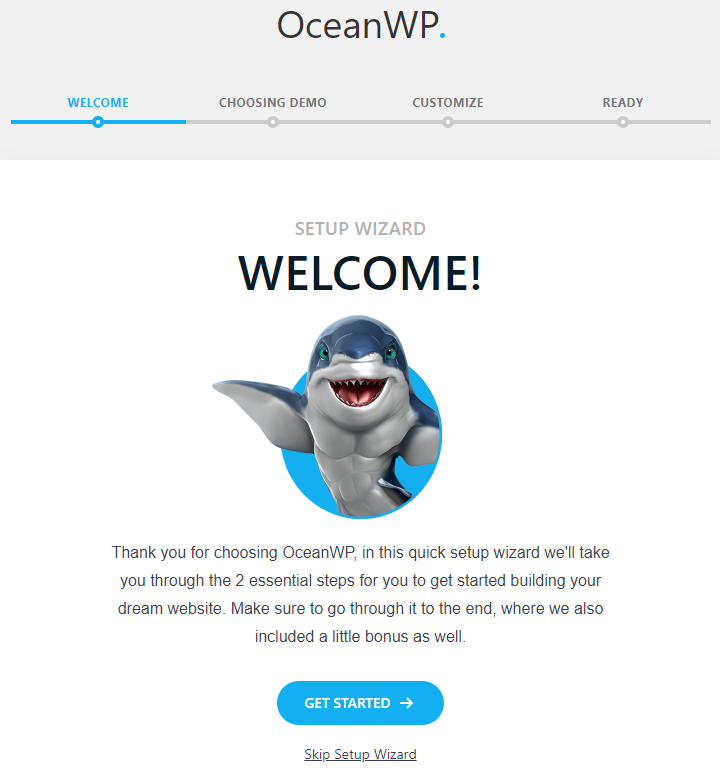
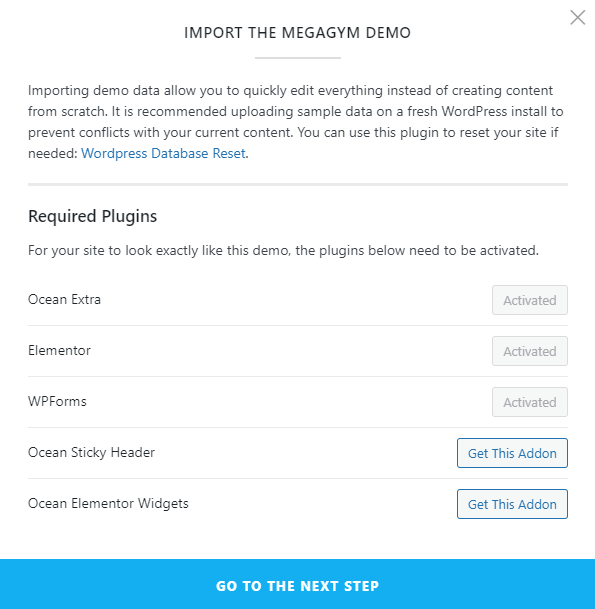
After you finish the installation, go to Appearance > Themes. The installed OceanWP theme should already be there. You will see a notice informing you that it’s recommended to install Ocean Extra. We’ll dare to go further and say that it’s mandatory because the theme won’t work correctly without Ocean Extra. Install the plugin and proceed to customize the theme as necessary.
Once done, refresh the page. You will see another notice suggesting you jumpstart the OceanWP setup. It comprises four steps:
- a welcome screen that you see in the picture below;
- a demo selection step, where you are supposed to pick a free demo template;
- a demo customization step;
- the final step screen, asking you to enter the draw and get a chance to win a premium extensions bundle.
By the way, OceanWP and Cloudways have partnered up to bring users the most extraordinary WordPress experience yet. Now you can purchase the Ocean Core Extensions Bundle, choose any WordPress website template demo you wish to start with, and get everything installed on Cloudways servers with one click.
The available demo templates are categorized, so you can pick any to create Blog, One Page, Business, Corporate, Sport, or eCommerce websites. Go through all setup steps to get the website ready to go. If you do not want to install any demos at the moment, you can always skip those steps and do it later. Just open the Theme Panel > Install Demos pathway in the WordPress admin panel and choose a demo template you fancy.
NOTE:
Please acknowledge that some demo templates require OceanWP premium extensions to work correctly. You can still install the given demo, but not all content will be displayed as intended.
These video playlists by Ferdy Korpershoek and WPTuts will help you master the premium extensions bundle.
Guide to Building a Dynamic WordPress Website
Any dynamic WordPress website starts small. You will need to build CPT templates, add meta fields, set the posts relations, configure content listings, add Data Stores, and do many more actions depending on the website type.
Today, we will build a dynamic blog, so stay tuned to find out what it incorporates.
Add custom fields to the meta box
Custom fields output additional information about posts, and they are attached either to Custom Post Types or Meta Boxes. To create a new Meta Box, follow the JetEngine > Meta Boxes pathway and hit the “Add New” button. Fill out the General Settings and add as many meta fields as needed afterward. Finish the routine by clicking “Add Meta Box.”
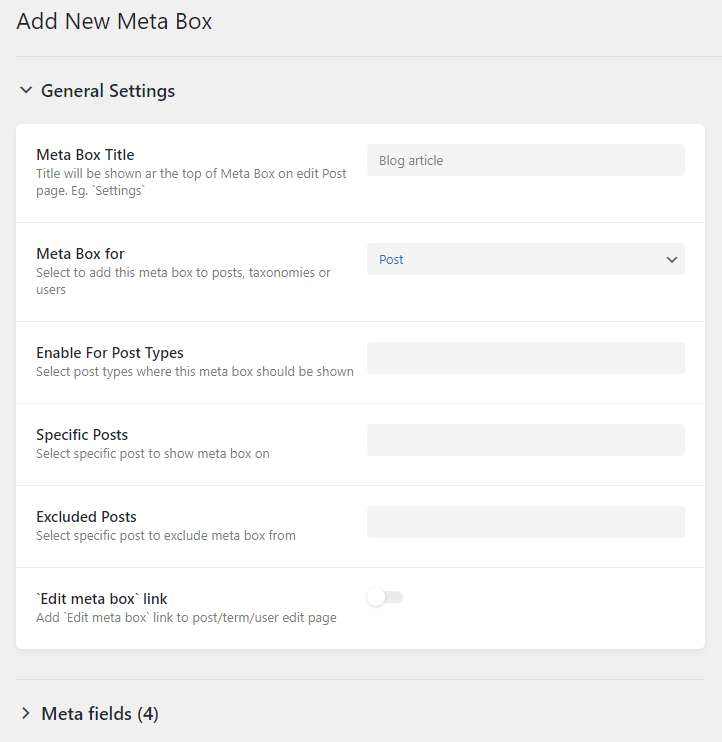
Not sure how to add meta fields to the Meta Box? Check out the following video tutorial.
Next, we need to attach this Meta Box to the CPT. In the Enable For Post Types drop-down, you must select a post type to which this meta box will be applied. Since we are creating a culinary blog, the corresponding CPT would be “Recipe.” Save the changes.
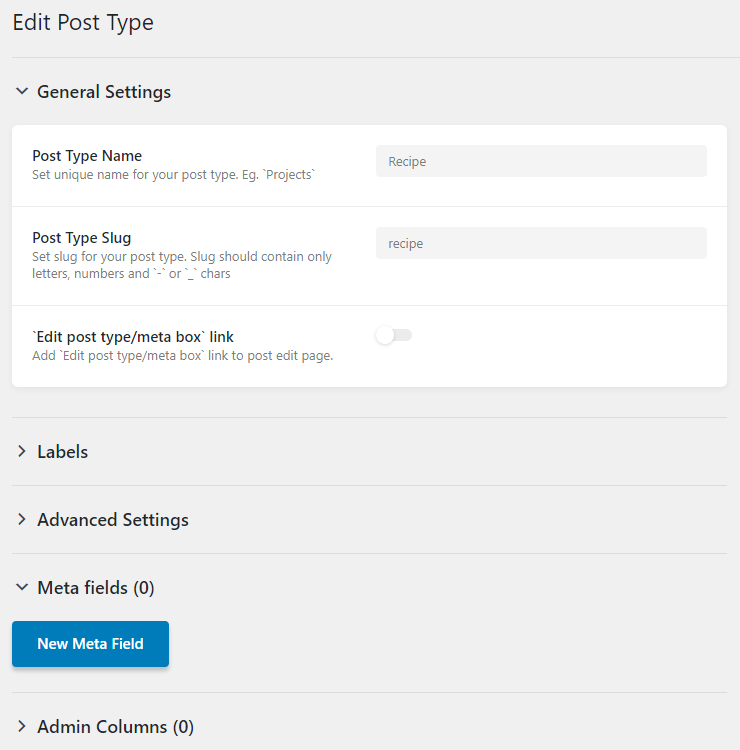
Create a custom post type
Custom Post Type, aka CPT, is the #1 thing to structure the website content. Unlike regular posts, CPTs can have their slugs and archive pages. Most importantly, they tend to “house” other WordPress posts and categorize them.
To create a new CPT, go to JetEngine > Post Types > Add New. You won’t see the Meta Box fields you created at the previous step but don’t worry. The fields will appear on the post-addition screen.
Provide the Post Type Name; the slug will be generated automatically. Fill in the Labels fields if necessary and click on the “Add Post Type” button.
If you need a hint on using Gutenberg for CPT creation, the video tutorial below will help.
Now, it’s time to add new posts to the Recipe CPT. Locate the “Recipe” item on the WordPress control panel, hover over it, and click the “Add New Recipe” subitem. You will be redirected to a post-addition screen. Fill in the post contents, add images where needed, and hit the “Publish” button. Create as many posts as necessary and proceed to the next step.
Build a listing grid for posts
You can easily output all blog posts on the same page using a Listing template. To create one, proceed to JetEngine > Listings, press “Add New,” and then fill out the fields as shown in the screenshot below:

On the Gutenberg page editing screen, start adding dynamic JetEngine blocks to build the listing item layout. Dynamic Image, Dynamic Field, Dynamic Meta, etc., will help you succeed.
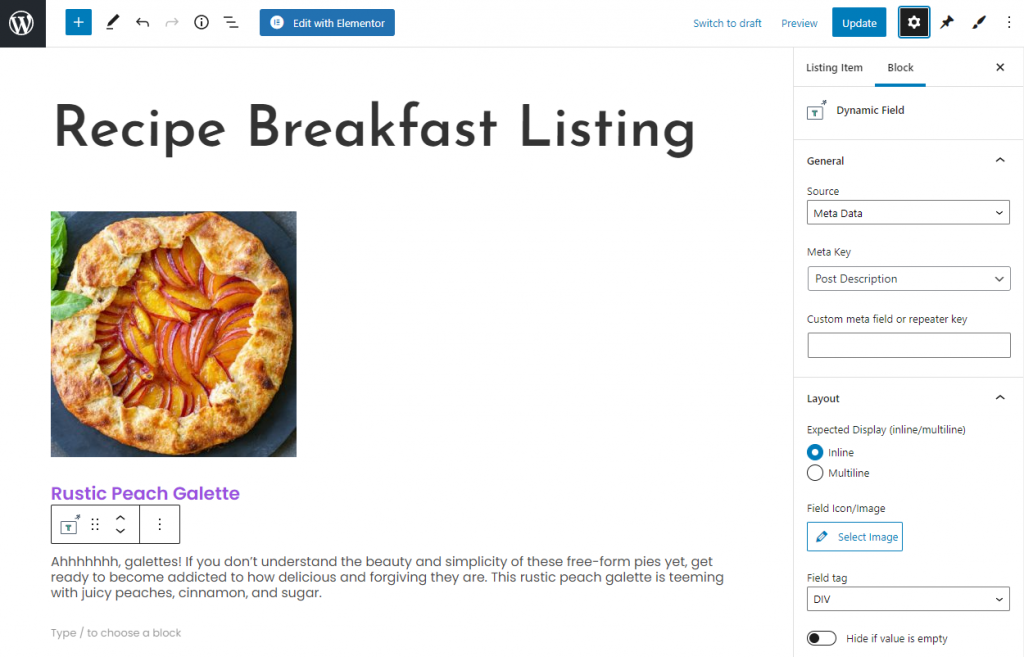
Don’t forget about JetStyleManager. It is a free Gutenberg plugin for styling WordPress blocks by Crocoblock and JetPlugins-added fields.
Next, go to Pages > All Pages and open a Gutenberg-built page. If you do not have any, create one by hitting “Add New.” In the newly-opened window, find the Listing Grid block and place it somewhere on the page. Select a listing to show by picking it from the Listing drop-down in the Block section on the left sidebar.
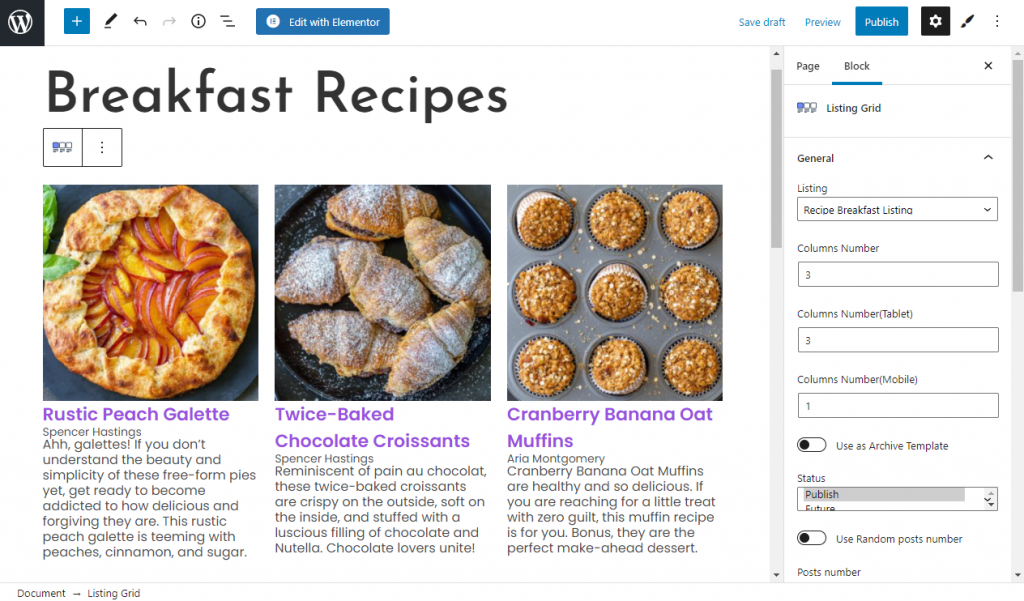
Adjust the rest of the settings, apply styles if necessary, and then press the “Publish” button. That’s it – you’ve just added a Listing Grid to the page. Let’s check it out on the front end:
Create a contact form
Last but not least, we can add a contact form to the page and thus streamline communication between the blogger and their audience. To make it happen, you’ll need to install and activate the JetFormBuilder plugin. It’s free. 😉
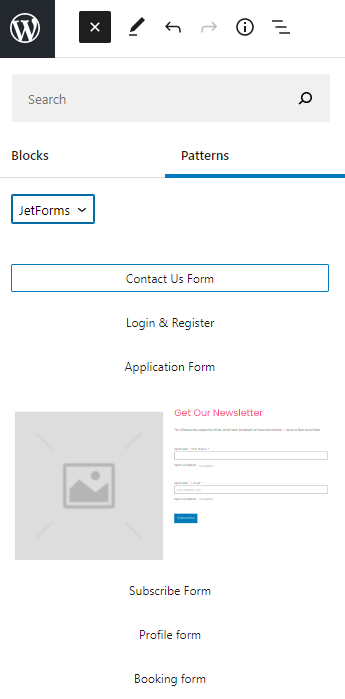
You can create a form layout by yourself or choose a ready-made JetFormBuilder Pattern. Click on the “+” button in the upper left corner, select the Patterns tab, and pick the “JetForms” option from the drop-down list. You will see all available Patterns, including the one we need – the Contact Us Form.
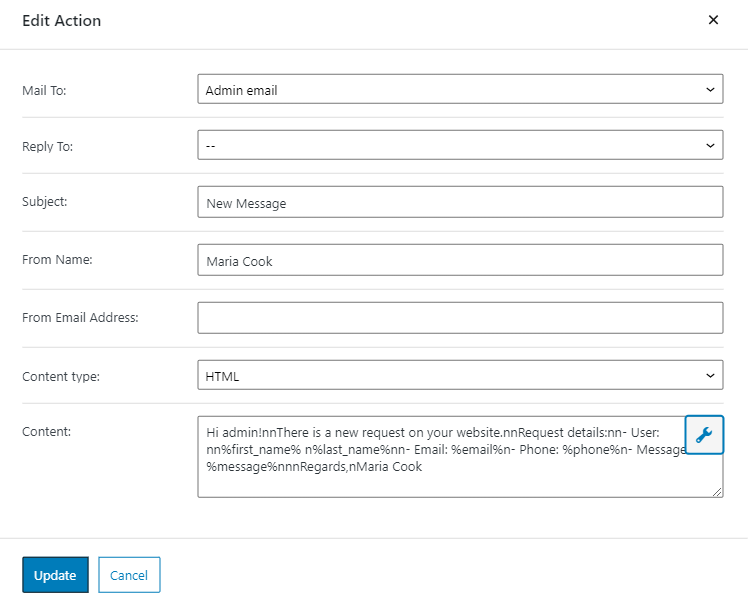
Once you added all necessary blocks to the page, proceed to apply custom form block styles. Also, make sure to set up the Post-Submit Action; otherwise, the contact form won’t work correctly.
This time, we are going to set up the Send Email action.
Now, it’s time to add the form to the page. Open the page where you would like to place the form. Find the JetForm block and drop it somewhere. In the Choose Form drop-down, pick the contact form you’ve just created.
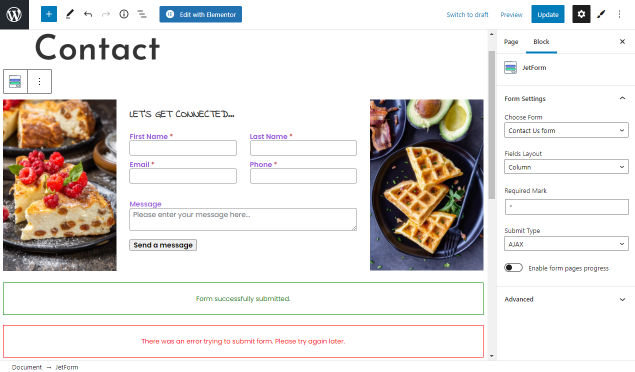
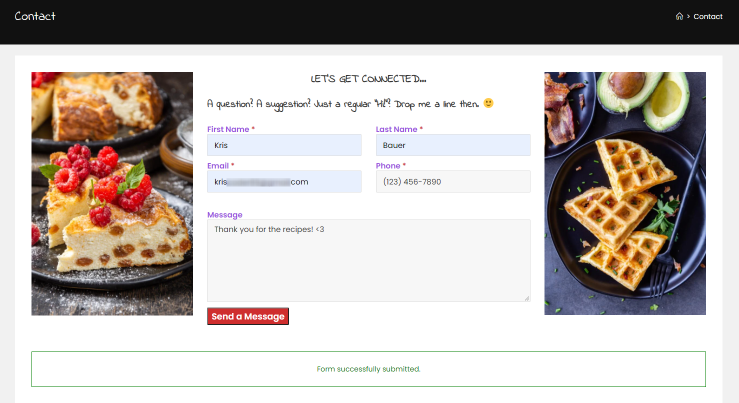
Customize the remaining settings and press the “Publish”/“Update” button. Ready to enjoy the way it looks on the front end? Neat, stylish, and workable – just what you need.
FAQ
OceanWP is a free WordPress theme that can work with premium paid extensions.
OceanWP integrates with the WooCommerce plugin and offers all the necessary tools for creating top-notch eCommerce sites.
Creating sites with Crocoblock and OceanWP is easy because Crocoblock’s JetEngine provides many features to support dynamic content eliminating the need for other third-party extensions.
Yes, the OceanWP theme includes 15 free website demos and seven free extensions.
Bottom Line
OceanWP theme and Crocoblock dynamic plugins are a go-to combo. It’s relatively easy to create a website that is not just eye-catching but also functional.
JetEngine, JetFormBuilder, and JetStyleManager are just a few plugins we could use today. In fact, the possibilities are endless. Some other solutions include JetSmartFilters to add a filtering gear to the Posts archive page, JetSearch for quick sitewide search functionality, JetReviews to add a dynamic Reviews & Comments section to the Post single page, and many more.
Have you already tried to build a dynamic website with JetPlugins and OceanWP? Please share it in the comments below or submit it to our Made with Crocoblock directory.