In today’s competitive eCommerce landscape, standing out requires more than high-quality images. Adding videos to your product pages is a proven way to enhance the web browsing experience, improve your site’s SEO, and ultimately drive more sales. Videos let customers see your products in action, offering a level of detail and understanding that static images can’t match.
However, adding videos to a WooCommerce product gallery isn’t always straightforward. Many free plugins have significant limitations, such as allowing only a single video per product. Attempting a custom-coded solution can also be frustrating; even functional code snippets often have drawbacks, such as video thumbnails failing to display properly in the gallery. This leaves many store owners stuck with a less-than-professional setup.
Fortunately, there are powerful, no-code solutions. Using the Crocoblock suite (specifically the JetProductGallery and JetEngine plugins), you can bypass these common limitations. This guide will walk you through three proven methods to build a professional, dynamic, and fully interactive product video gallery that captivates customers and boosts conversions.
Why a Video Gallery Is a Game-Changer for Your Store
A well-executed product video gallery is not just a “nice-to-have” feature; it’s a strategic tool that directly impacts user engagement, search engine visibility, and your bottom line. Here are the key benefits of adding a video gallery to your WooCommerce store.
Enhanced UX
Offering both images and videos provides a range of media formats that enhance the overall user experience. Interactive elements enrich the viewing experience, making it more engaging and turning passive browsing into active exploration. Customers can see product details, textures, and functionality in ways that static images simply can’t convey.
Improved SEO
Search engines favor websites with rich media content. Including images and videos can help your product pages rank higher in search engine results, driving more organic traffic to your store. Video content increases time-on-page metrics, which signals quality to search algorithms.
Higher conversion rates
An attractive and informative product video gallery is a powerful conversion tool. Studies show that product pages with videos can see up to an 80% conversion boost. By presenting your products more effectively, you enhance customer confidence and decrease purchase hesitation.
Detailed product information
Videos are the perfect medium to provide detailed explanations and clarifications. With interactive elements, you can add in-depth information through pop-ups, links, or text overlays, allowing customers to dig deeper without ever leaving the video. This reduces customer service inquiries and returns.
The Best Ways to Create an Interactive Product Video Gallery
Method 1: JetProductGallery
JetProductGallery is a powerful video gallery plugin for WordPress, designed specifically to build advanced product image and video galleries for WooCommerce. It offers the flexibility and customization options needed to create galleries without custom development.
This plugin works seamlessly with the Elementor page builder, giving you an intuitive interface to design stunning galleries in real time and tailor the look and feel to match your brand perfectly.
Key features that make a difference
Multiple gallery layouts
Choose from four distinct layouts to display your media via a set of widgets: a structured Gallery Grid, a navigable Gallery Slider, a sleek Gallery Modern layout, or an intuitive Anchor Navigation gallery that lets users switch between different views smoothly. Each layout is fully customizable to match your store’s aesthetic.
Supports images and videos
Unlike many plugins that only handle one media type, JetProductGallery fully supports both images and videos. This makes it an exceptional image and video gallery plugin for WordPress, creating gallery layouts without requiring upgrades or installing multiple plugins.
Built-in zoom and lightbox
Enhance the user experience with practical, built-in features. The zoom-on-hover functionality provides better product previews, while the distraction-free lightbox mode lets users enlarge images and videos for a closer look without leaving the product page.
Creating a video gallery
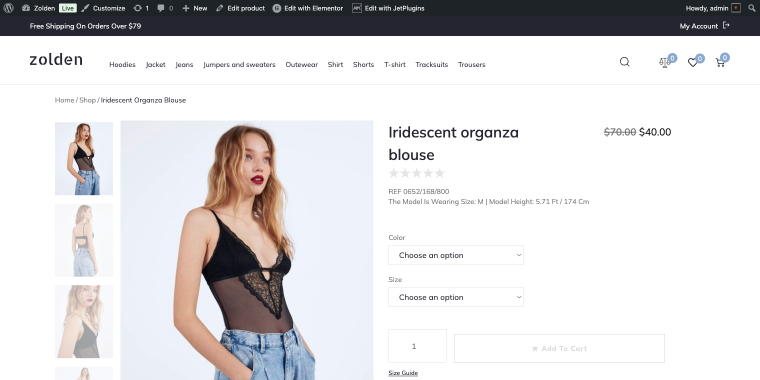
To see this in action, let’s look at the Zolden dynamic store template, specifically, the Iridescent Organza Blouse product page, which demonstrates a beautifully integrated video gallery.
Step 1: Purchase, download, and install the JetProductGallery plugin from the Crocoblock website, either as a standalone product ($23) or as part of an All-Inclusive subscription (starting at $199/year).
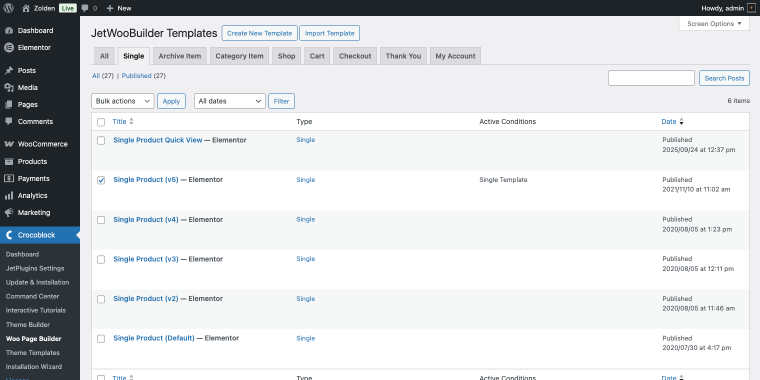
Step 2: Navigate to the single product page template where you want the gallery to appear, then open the familiar Elementor editor. If you’re using the default WooCommerce template, you’ll need to create a custom single product template first. Since I already have one created with JetWooBuilder, I’ll go to WordPress Dashboard > Crocoblock > Woo Page Builder, and in the Single tab, I’ll find the corresponding template.
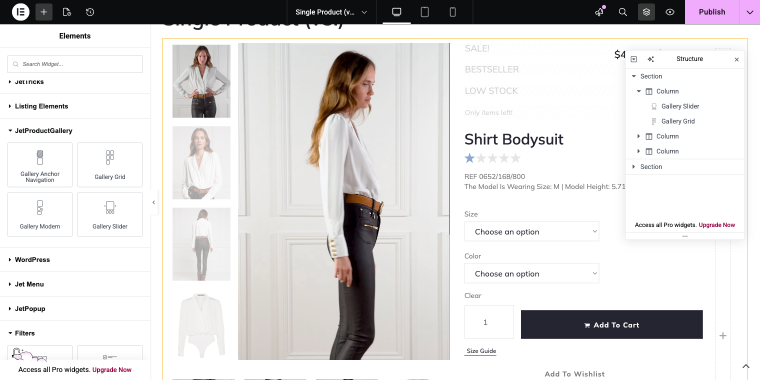
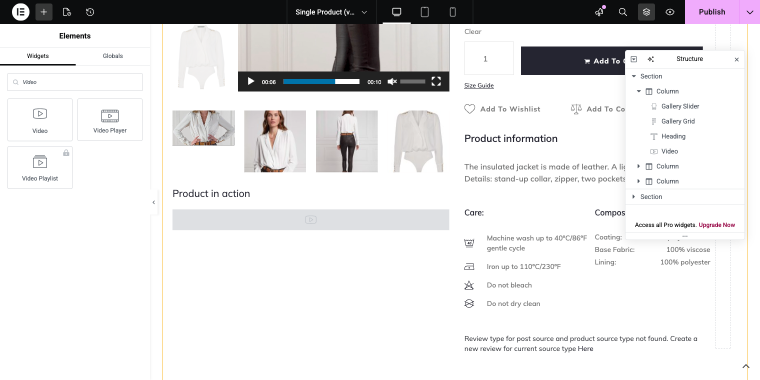
Step 3: In the Elementor widget panel, search for the JetProductGallery widgets and drag your preferred option (e.g., GalleryGrid, Gallery Slider) onto the page. The Zolden template uses different widgets in variations of the single product template, but they all share similar settings, allowing videos to be added in a few clicks.
Step 4: In the widget’s settings, set the Source to “WooCommerce Products.” The widget will automatically pull in the product’s images/videos.

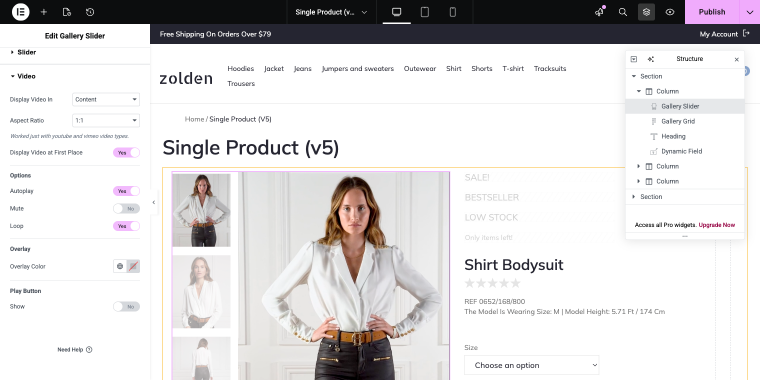
You can also adjust the video settings in the Video tab. The Display Video In option lets you display the product video either alongside product images or in a pop-up. Display Video at First Place is a handy option that does exactly what it says. Whenever your clients reach your product page, the product video will play immediately (if the Autoplay toggle is enabled).
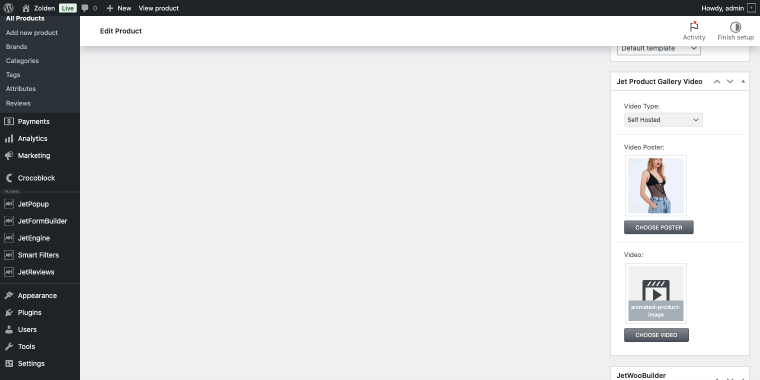
Step 5: Add videos to your products. Go to the product’s edit page in WooCommerce, where you will find a new Jet Product Gallery Video block added by JetProductGallery. Paste your YouTube or Vimeo video URL, or select a self-hosted video from the Media Library.
Step 6: Use the extensive styling options within the widget’s Style tab to customize everything from colors and spacing to navigation icons, ensuring the gallery aligns perfectly with your store’s branding. You can adjust thumbnail sizes, control video autoplay settings, and configure how videos appear in the gallery flow.
This method is ideal for store owners who want a quick, visual solution with minimal setup. The entire process takes less than 10 minutes.
Method 2: JetEngine with Video Widget
While JetProductGallery is perfect for standard WooCommerce galleries, what if you need more flexibility? For stores with many products or those wanting to display multiple videos per product without cluttering the default gallery, JetEngine is the answer.
This WordPress video gallery plugin approach lets you create custom fields to dynamically manage your video files and URLs. This method is not only more powerful but also creates a cleaner, more scalable workflow by separating your video data from the standard media gallery, which is essential for stores with large or frequently updated inventories.
Creating a dynamic video display with the Video widget
Step 1: Purchase, download, and install the JetEngine plugin from the Crocoblock website, either as a standalone product ($43) or as part of an All-Inclusive subscription (starting at $199/year).
Step 2: On your website, navigate to WordPress Dashboard > JetEngine > Meta Boxes to create a new Meta Box. This will serve as a container for your custom video fields and will be added to your WooCommerce product editing pages. When creating a meta box, you need to fill in a set of fields to make things work the right way:
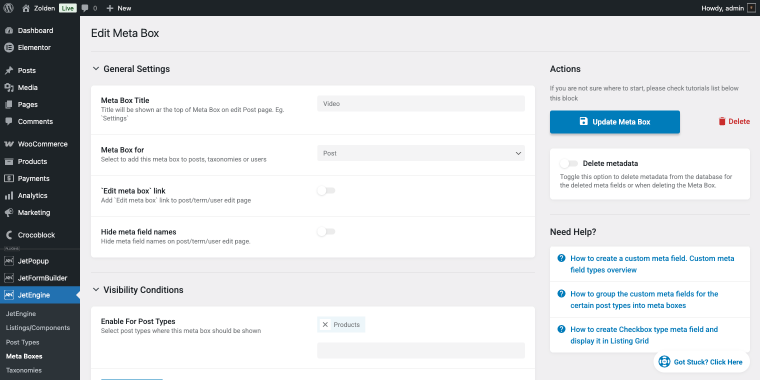
- Meta Box Title – set the title of your meta box;
- Meta Box for – select the type of content pages where to add the meta box, in our case, it’s “Post”;
- Enable For Post Types – select the option “Products.”
After filling in these fields, scroll down to the Meta field section to set the meta field details for your videos.
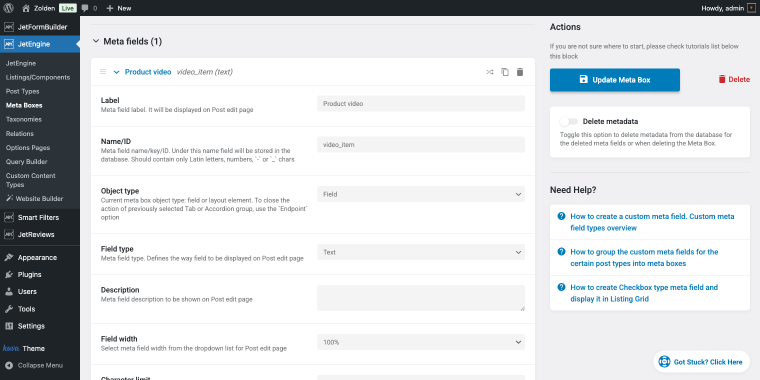
- Label – in this field, you need to enter the name of the field (e.g., “Product video”);
- Name/ID – in this field, enter the unique identifier that will be used to store the data in the database;
- Object type – in this field, select whether this meta field will be displayed as a standalone field or as part of a layout element like a Tab or Accordion group. Choose “Field” for standard individual meta fields;
- Field type – in this field, select “Text” to allow your site admins paste video links. For products that require multiple videos, use a “Repeater” field instead, which lets you add an unlimited number of videos with individual titles and descriptions.
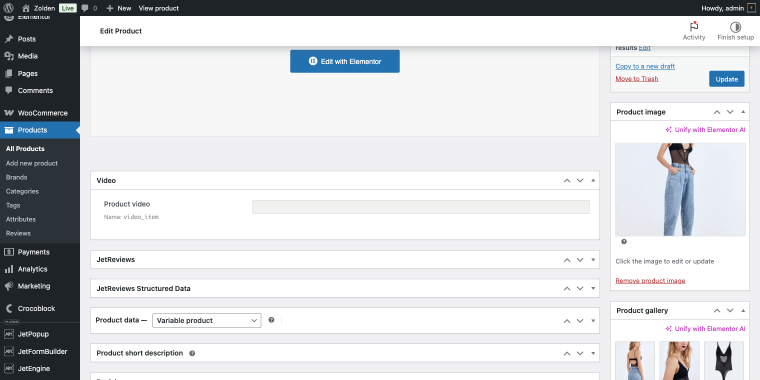
Step 3: Go to any WooCommerce product’s edit page, and you will now see the new custom field where you can paste self-hosted, YouTube, or Vimeo URLs. Update the product to save your changes.
Step 5: Back in your Elementor/JetWooBuilder single product template, drag the Video widget onto the page.
Step 6: After adding the widget, we need to fine-tune it a bit so it can display the videos from our meta field.
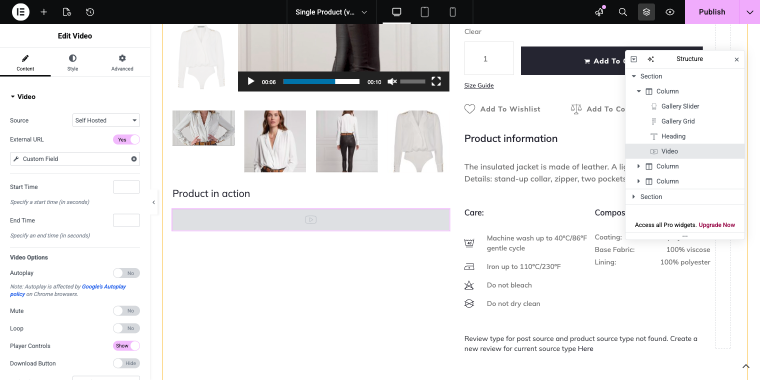
- Source – in this field, select the video source type. I’ll opt for “Self Hosted” since I’m using the file directly from the WordPress media library;
- External URL – this toggle should be enabled to reveal the select field:
- Custom Field – here I’ll select the JetEngine meta field that contains the video URL. This connects the Video widget to the custom field I’ve created in the Meta Box.
The remaining fields are optional; you can choose any you prefer. Now, let’s preview the video on the front end.
You can also customize video settings, including autoplay, muted start, loop, and control visibility. You can also add a custom placeholder image that displays before the video loads, helping maintain your page’s visual appeal.
This method gives you complete control over video placement and behavior. You can position videos anywhere on your product page.
Method 3: JetEngine with Dynamic Field widget
For advanced users who need maximum flexibility and custom styling, the Dynamic Field widget approach offers the most control.
Creating a custom video display
Step 1: Follow the same process as Method 2 to create a Meta Box in JetEngine.
Step 2: In your Elementor/JetWooBuilder template, drag the Dynamic Field widget onto the page.
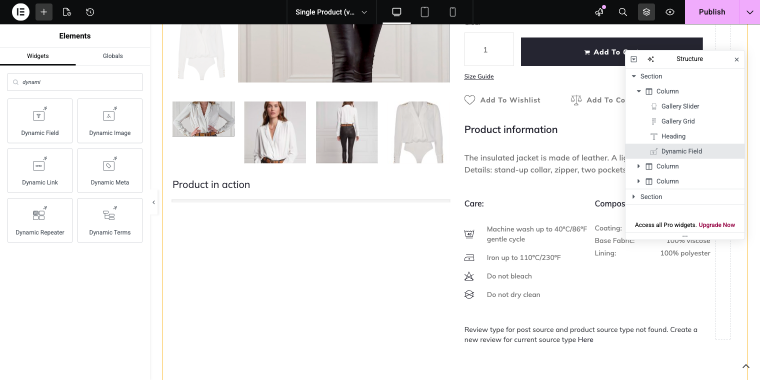
In the widget settings, set the Source to “Metadata” and select the meta field specified in your Video meta box.
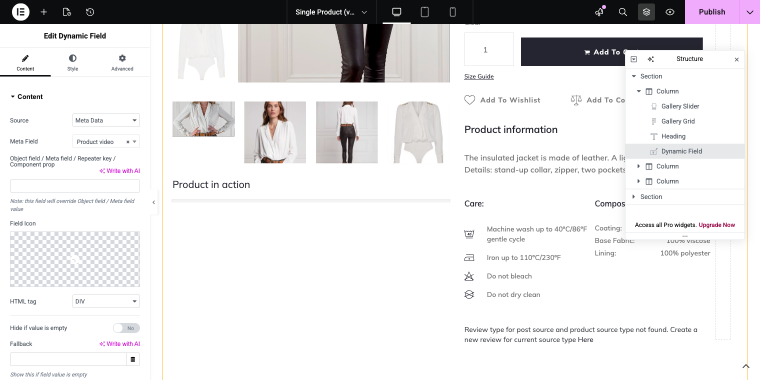
Step 3: Scroll down to the Customize field output switch and enable it. This unlocks advanced formatting options. In the Field format input field, you can add custom HTML and shortcodes to control exactly how your video renders.
For self-hosted videos in WEBM or OGV format, add the appropriate HTML5 video code. This ensures maximum browser compatibility. You can reference code examples for the WEBP and the OGV formats to get started.
<video width="400" height="" controls="controls">
   <source src="%s" type='video/mp4; codecs="avc1.42E01E, mp4a.40.2"'>
</video>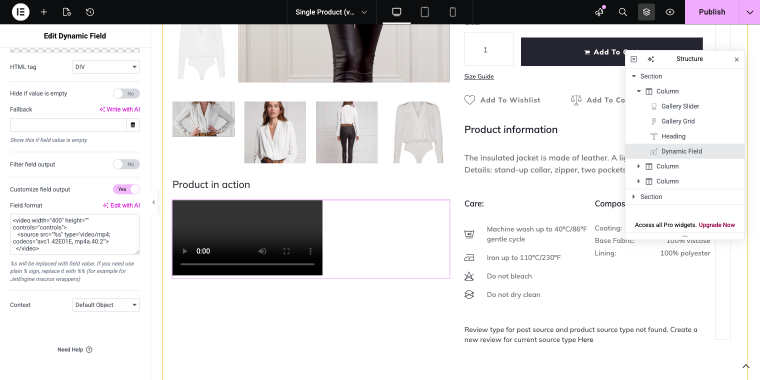
This approach is best suited for developers or advanced users who need specific functionality beyond standard video widgets.
Since I’m not changing any visual settings, the preview will look the same as in Method 2.
Alternative Method for Adding WooCommerce Product Video
If you’re looking for an alternative outside the Crocoblock ecosystem, feel free to try out the WooCommerce Product Video plugins featured in this round-up. While not as feature-rich as JetProductGallery, it offers a straightforward solution for basic video integration needs.
For comparison, JetProductGallery offers superior customization, better performance, and seamless integration with your entire Elementor workflow, making it the best video gallery plugin for WordPress WooCommerce stores that prioritize professional presentation.
FAQ
For the best balance of quality and loading speed, use the MP4 format with H.264 encoding for self-hosted videos. For embedded content, YouTube and Vimeo handle optimization automatically. Keep videos under two minutes and optimize them for mobile viewing, since most eCommerce traffic now comes from mobile devices.
All three methods support multiple videos per product. With JetProductGallery, you can add videos alongside images in the native gallery. With JetEngine methods, use a Repeater field to add unlimited video entries. This is particularly useful for showing different product angles, demonstrations, and customer testimonials on the same product page.
When implemented correctly, videos should not significantly affect page load speed. Embedded YouTube or Vimeo videos load asynchronously and don’t affect initial page rendering. For self-hosted videos, use lazy loading and ensure proper compression. The methods outlined in this guide are optimized for performance, loading videos only when needed.
Conclusion
Creating an engaging product video gallery in WooCommerce doesn’t have to be complicated or require extensive coding. Whether you choose the visual simplicity of JetProductGallery, the flexible power of JetEngine with the Video widget, or the advanced control of the Dynamic Field approach, you now have the tools to transform your product pages into compelling, conversion-focused experiences.
The key is choosing the method that aligns with your technical comfort level and business needs. For most store owners, JetProductGallery offers the ideal balance of features and ease of use. For growing stores with complex requirements, JetEngine provides the scalability and flexibility to keep pace with your business. Whichever path you choose, remember that investing in high-quality product videos and presenting them professionally with these video plugins for WordPress will pay dividends in customer engagement, reduced returns, and increased sales.
