It’s great to find new use cases for good old static UI elements, right? Let’s take Testimonials, for example. Almost every business website has them, and we all know what they look like: the customer’s name, a photo, and a short text that assures you the product is great.
But is it the only thing the Elementor testimonial widget can do? Especially if it’s a dynamic widget? Definitely not.
That’s why, let’s discuss three interesting and creative ways of using the dynamic testimonial widget by JetElements for different cases, other than just showing testimonials.
💡 Check this article about creative use cases for the Timeline widget as well.
JetElements Testimonials Widget 101
Before we proceed to some creative cases and non-typical usage of this widget, let’s have a quick overview of what this tool actually does and how it looks, in case you are not familiar with it.
The Testimonials widget by JetElements is a very flexible tool for displaying static and dynamic testimonials with plenty of settings, not only for retrieving content but also for widget styling.
You can add as many testimonials as you want, and each testimonial card has these fields:
- Title;
- Comment;
- Position;
- Date;
- Link;
- Image;
- Icon;
- Rating.
Plus, the field to select an HTML tag for a Title.
Then, there’s an extensive list of settings in the Settings tab. There, you can:
- set up how many slides to show and how many should be on scroll;
- animation speed and settings;
- item equal height;
- adaptive height for individual items;
- arrows/dots settings;
- settings for rating icons;
- lazy loading.
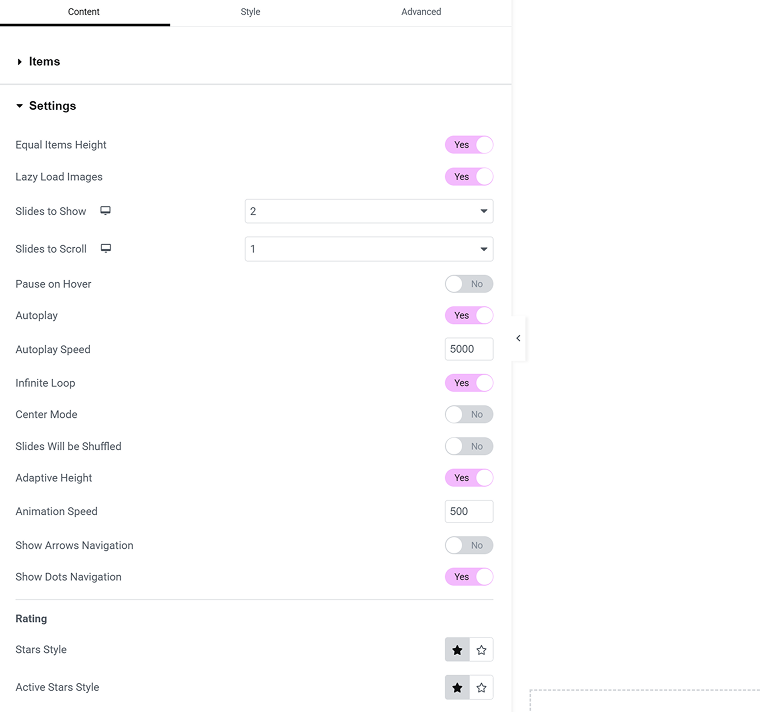
And, of course, there’s a Styling tab where you can adjust the design of the whole thing. One cool thing I want to highlight is that you can change the order of the elements on your testimony card.
So, there’s enough flexibility to create testimonials of any format and complexity, from short quotes and ratings to detailed case-style feedback with images and links. Combined with extensive styling options, it’s a clear win.
Dynamic Testimonials System on WordPress
Static testimonials widget is a cool thing, but there’s an elephant in the room – the Testimonials widget by JetElements can display data dynamically. If you click on the database icon in the corner of one of the fields – this link is called a Dynamic Tag – you will see the list of available sources: data from current post fields, from different custom fields, etc.
But I want to build a full-fledged dynamic testimonial system, and to implement it, I will need three Crocoblock plugins:
- JetElements;
- JetEngine;
- JetFormBuilder.
I will store the testimonials as Custom Content Type (CCT) items on the website – check this article to learn why this content entity is the best solution here.
WordPress dynamic testimonial (reviews) system with Crocoblock in 6 steps
- Go to JetEngine > JetEngine and activate the Custom Content Type module.
- Create a CCT with all the fields the testimonial should have, corresponding to the fields the Testimonials widget has. Pay attention that there are only two fields that can’t be populated dynamically:
- Icon;
- Star rating.
So don’t create a field for them.
- The user submits their testimonial using the JetFormBuilder form with the Insert/Update Custom Content Type Item post submit action.
📌 This guide will help you create such a form and save data in the CCT fields. - Fill out the form several times to add testimonials.
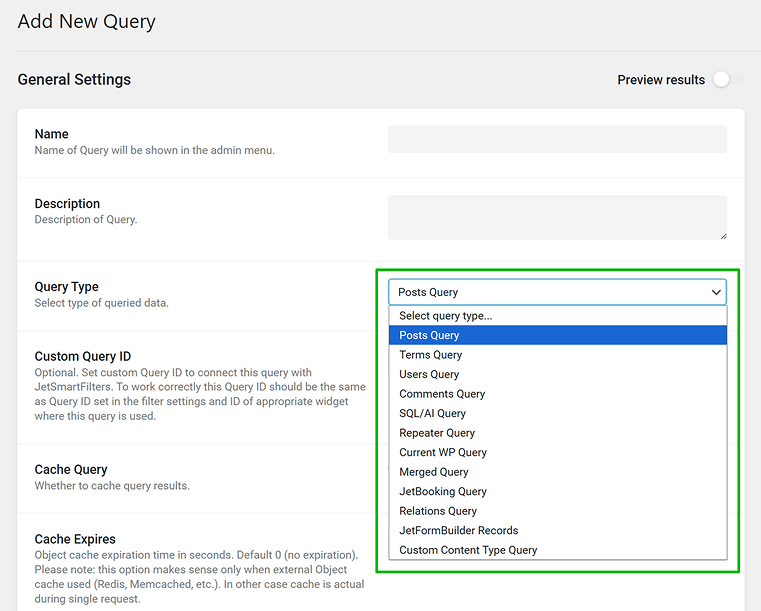
- Now, we need to fetch the necessary data from the database. Go to JetEngine > Query Builder > Add New Query.
Query Type – Custom Content Type Query.
Then, choose the CCT name you use for storing testimonials.
You can adjust sorting and query only specific items using the query settings.
I just want to display all of them, so I will leave it as it is. Save the query. - Open the page you want to display testimonials with Elementor and insert the Testimonials widget. In the Items tab, activate the Use JetEngine Query toggle. Choose the query you’ve just created from the dropdown.
Now we need to map the widget fields to dynamic data from the query for the first item. Using the Dynamic Tag tool (database icon), find the JetEngine > Custom Content Type Field in the list and select it. From the dropdown, choose the fields you want to pull data from.
Repeat for all the fields you want to populate dynamically.
Enjoy the result!
Advanced WordPress dynamic testimonial (reviews) system with related testimonials
The previous method works perfectly for displaying testimonials about a company or a general service. However, if you offer multiple services and each has its own set of testimonials, you’ll want to show only the testimonials relevant to the specific service on its page. And you can do it using the same set of plugins and the workflow, but let’s add a couple of extra steps.
We will use the previous workflow as a basis and add extra functionality on top. These are the steps to follow:
- After creating a CCT, create a CPT in JetEngine > Post Types > Add New. It will be a post type for your services, let’s call it “Service.” Add all the fields and content you want to have there.
- In JetEngine > Relations > Add New, create a new relation, one-to-many type, where the Service CPT is a parent.
- Get back to your form for collecting testimonials, and now, in the post-submit actions, you will find a new action: Connect Relation Items. This action is for setting up or updating a relation using a form.
We will need one extra field to select the Service the testimonial will be for. And here are two scenarios:- It’s a general form, maybe on the Main page, and it lists all the services. In this case, add a Select field and fetch all the existing Services dynamically.
📌 This guide will give you all the details on how to do it. - The form will be placed on the Service page template, so users will write something about the current service. In this case, add a Hidden field. By default, its active value in the Source dropdown is “Current Post ID.” This is what we need.
- It’s a general form, maybe on the Main page, and it lists all the services. In this case, add a Select field and fetch all the existing Services dynamically.
So, for the first scenario, in the Connect Relation Items settings, specify the Select field as a source for a parent item. For the second, the Hidden field.
- Add some testimonials using a form and create a query. But this time, the query type will be Relations Query. Settings are very simple – you just choose parent and child items, Services CPT and Testimonials CCT in our case.
- Unlike in the previous case, when testimonials can be displayed on any page, because there’s no separation between services, and all of the testimonials are about one thing, now, it’s different. These are related testimonials, so they should be placed only on the Service page template to fetch testimonials for this particular service. That’s why, create a Single template for Service CPT using JetThemeCore or Elementor Pro Theme Builder.
After adding all the fields you want to see on the Service page, add the Testimonials widget. - Activate the Use JetEngine Query toggle. Choose the query you’ve just created from the dropdown.
- Let’s map the field, but in this case, we need a bit different fields. Find JetEngine > Current Object Field. There, choose your CCT and its field you want to display. To have a proper preview while you’re editing, choose the particular service in the page settings at the top of the Elementor panel.
📌 You can find a full guide on how to do it here – it’s about dynamic timelines, but the workflow is exactly the same.
💡 All of the JetElements widgets that support dynamic data and custom queries are set up this way. So, it opens up a wide space for creative use cases.
Creative Ideas for Using the Testimonials Widget Beyond Reviews
The Testimonials widget can be used in many ways, as it’s essentially a set of fields that can behave as a slider or a static grid.
The secret ingredient of all the dynamic JetElements widgets is the query. There are over 10 types of queries, and each one has a lot to offer.
As a result, you can display posts, users, categories, comments, JetFormBuilder records, Options Pages fields, and much more using JetElements dynamic widgets.
Practical tips:
- If the settings for the CCT query type for storing reviews or other data for displaying inside the widget are limiting you, try CPT with the custom storage option instead.
- Don’t forget about the WooCommerce Product Query Type – it can be very useful.
- Use query context instead of hard-coding IDs. Avoid static post IDs, term IDs, or user IDs in queries. Rely on dynamic context (current post, queried term, current user) to keep layouts scalable. Dynamic widgets have Context settings.
Query Builder also has them: click the database icon, then select Advanced Settings in the dropdown.
JetReviews Plugin
While building custom review or testimonial systems with forms and dynamic widgets gives you full control, it’s worth mentioning the obvious alternative: JetReviews.
Unlike JetElements – a dedicated design add-on for Elementor, it also works with the Block Editor.
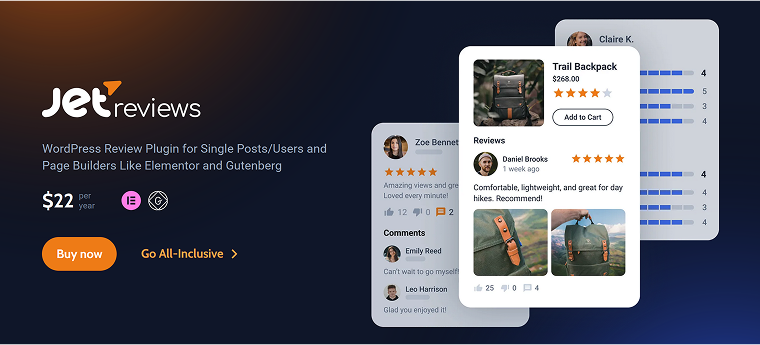
JetReviews is Crocoblock’s dedicated plugin for handling reviews and ratings. Also, it can work as a great alternative to WordPress comments, as you can build custom comment systems using it.
It can be set up in just a few clicks and allows users to leave ratings and comments without building a custom data structure from scratch. In addition, users can upvote and downvote reviews, which helps surface the most helpful feedback.
It also has moderation, verification, and notification features, a banned words filter, CAPTCHA, and an analytical dashboard.
So, if your goal is to collect and display classic reviews with minimal configuration, JetReviews is often the more practical choice. Custom-built solutions still make sense when you need full flexibility or non-standard logic, but for straightforward review functionality, JetReviews covers most use cases out of the box.
FAQ
Yes. Testimonial widgets can pull dynamic data from posts, custom fields, users, or other data sources when connected to a query system. This allows the same widget to display different content depending on context.
Static testimonials are manually added and fixed on a page. Dynamic testimonials are generated from database content and can change automatically based on queries, relationships, or the current page.
No. Testimonial widgets are essentially structured content blocks. They can be used for quotes, expert notes, highlights, updates, user feedback, or any attributed content.
Custom systems offer maximum flexibility and control over structure and logic. Dedicated review plugins are faster to set up and better suited for standard rating-and-comment use cases.
Wrapping Up
The Testimonials widget is useful not because it shows testimonials, but because it already solves a common UI problem: displaying short, attributed pieces of content in a clean, repeatable layout. Once it’s connected to JetEngine queries, it doesn’t matter whether the data represents reviews, expert notes, service feedback, user comments, or internal notes; the widget just renders what the query returns.
If you need filtering, relations, service-specific content, or form-driven submissions, building a custom setup with JetEngine and JetFormBuilder gives you full control over the data and logic. You can find many creative ways to use it beyond just reviews.
If your case is limited to classic star ratings and comments, using a dedicated reviews plugin is simply faster. The key decision is not “which widget to use,” but how much control over data structure and relations you actually need.
