Creating a Structure Similar to a Nested Repeater
This tutorial explains how to use the JetEngine Relation feature to create a three-stage relation structure that resembles the nested repeater. Using the nested listing, display the grouped items on the front end.
Before you start, check the tutorial requirements:
- Elementor (Free version), Block editor (Gutenberg), or Bricks
- JetEngine plugin installed and activated
Currently, the nested repeater feature isn’t available, but we can suggest using the Relations as an alternative.
With the JetEngine plugin, you can create relations between posts, Custom Content Type (CCT) items, taxonomy terms, and users. Additionally, you can create a three-stage grandparent-grandchild hierarchy.
There is one of the use case examples: let’s imagine a corporation where each team member has multiple roles, and each role is associated with multiple projects. The nested repeated could have such components:
- Outer Repeater — role(s) for that member.
- Inner Repeater — projects associated with each role.
Instead, we will use the Relation feature to replicate this structure:
- The “Team Roles” (Custom Post Type) CPT will be the “outer repeater”;
- The “Team Projects” CPT will be the “inner repeater.”
So, first, we will establish a grandparent-grandchild relation between users (team members), “Team Roles,” and “Team Projects” post types. The relationship structure will look like this: “Users > Team Roles > Team Projects.”
Next, to display the parent (roles) and child (project) items on the grandparent page (user), we will craft a nested listing. This allows you to dynamically showcase the data in a hierarchical format.
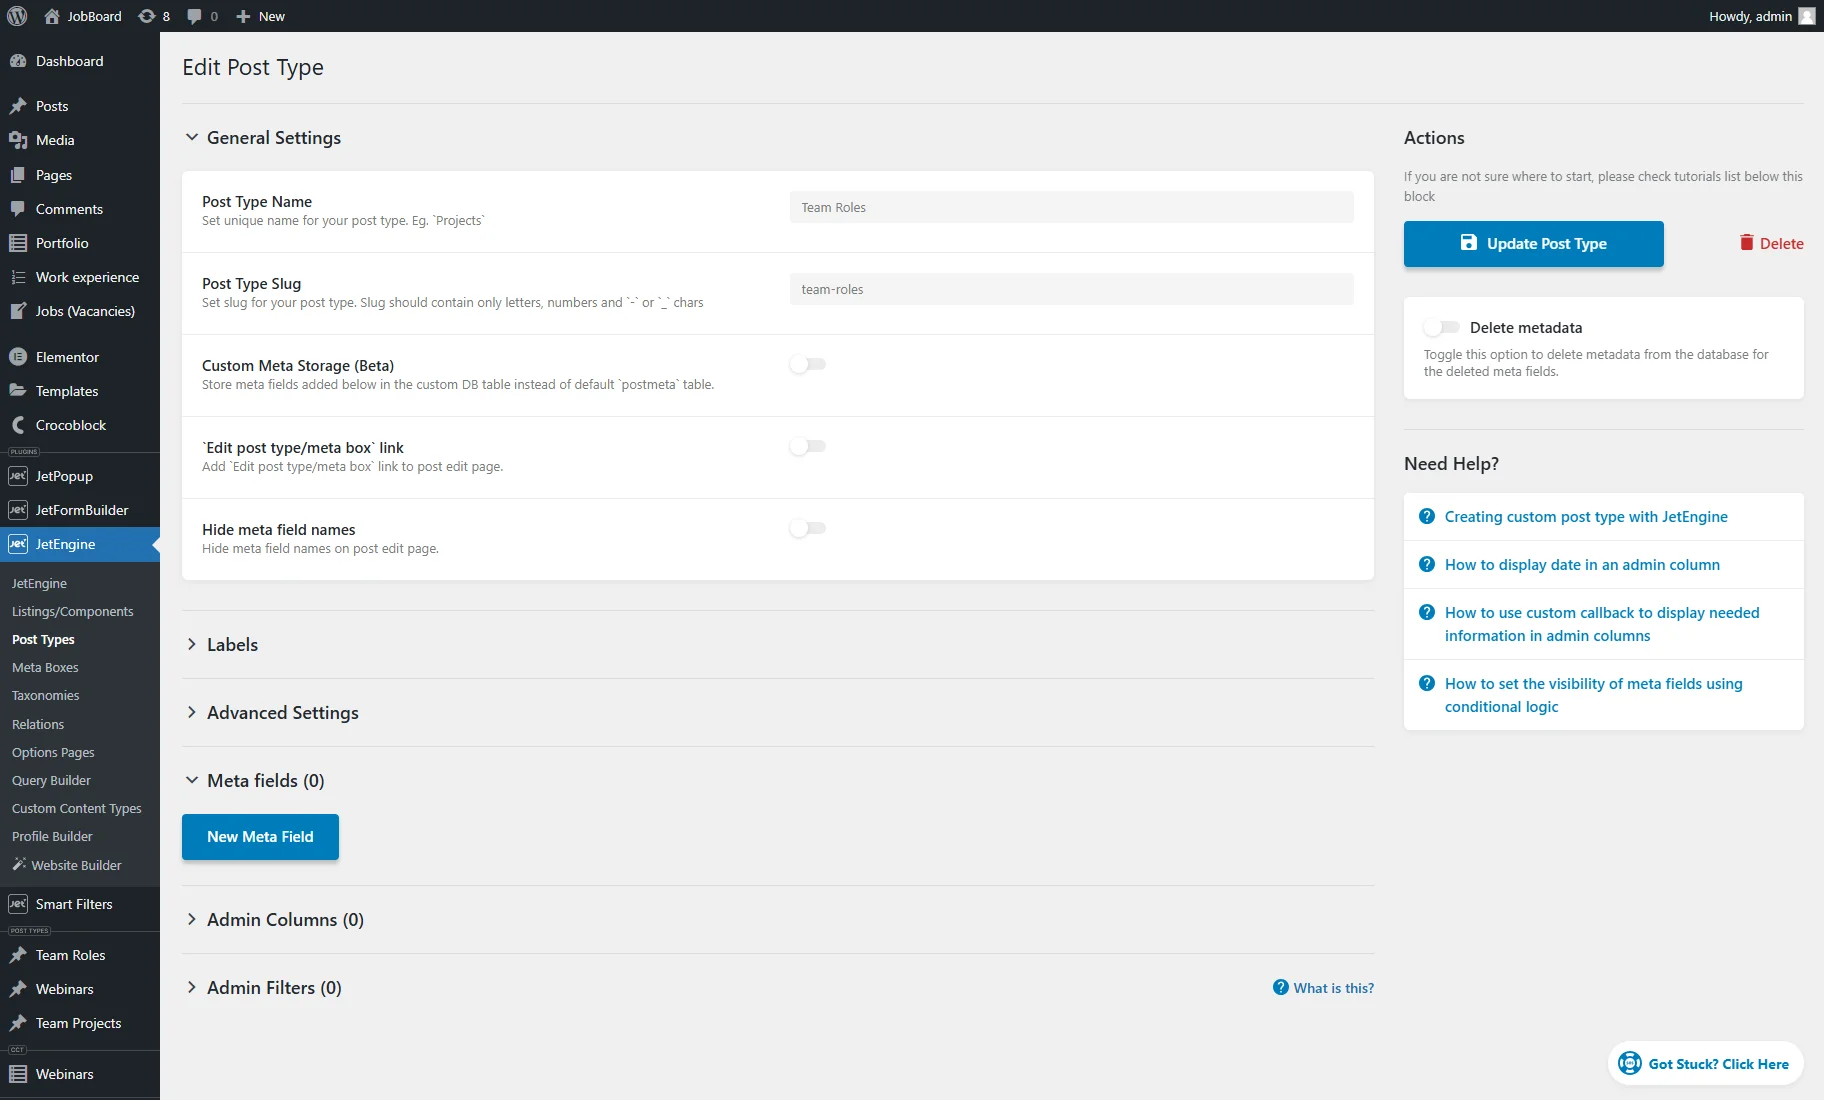
“Team Roles” CPT
We navigate to WordPress Dashboard > JetEngine > Post Types and hit the “Add New” button.
We type the Post Type Name (e.g., “Team Projects”); the Post Type Slug will be generated automatically. Custom fields can be added if desired.
Then, we push the “Add Post Type” button.
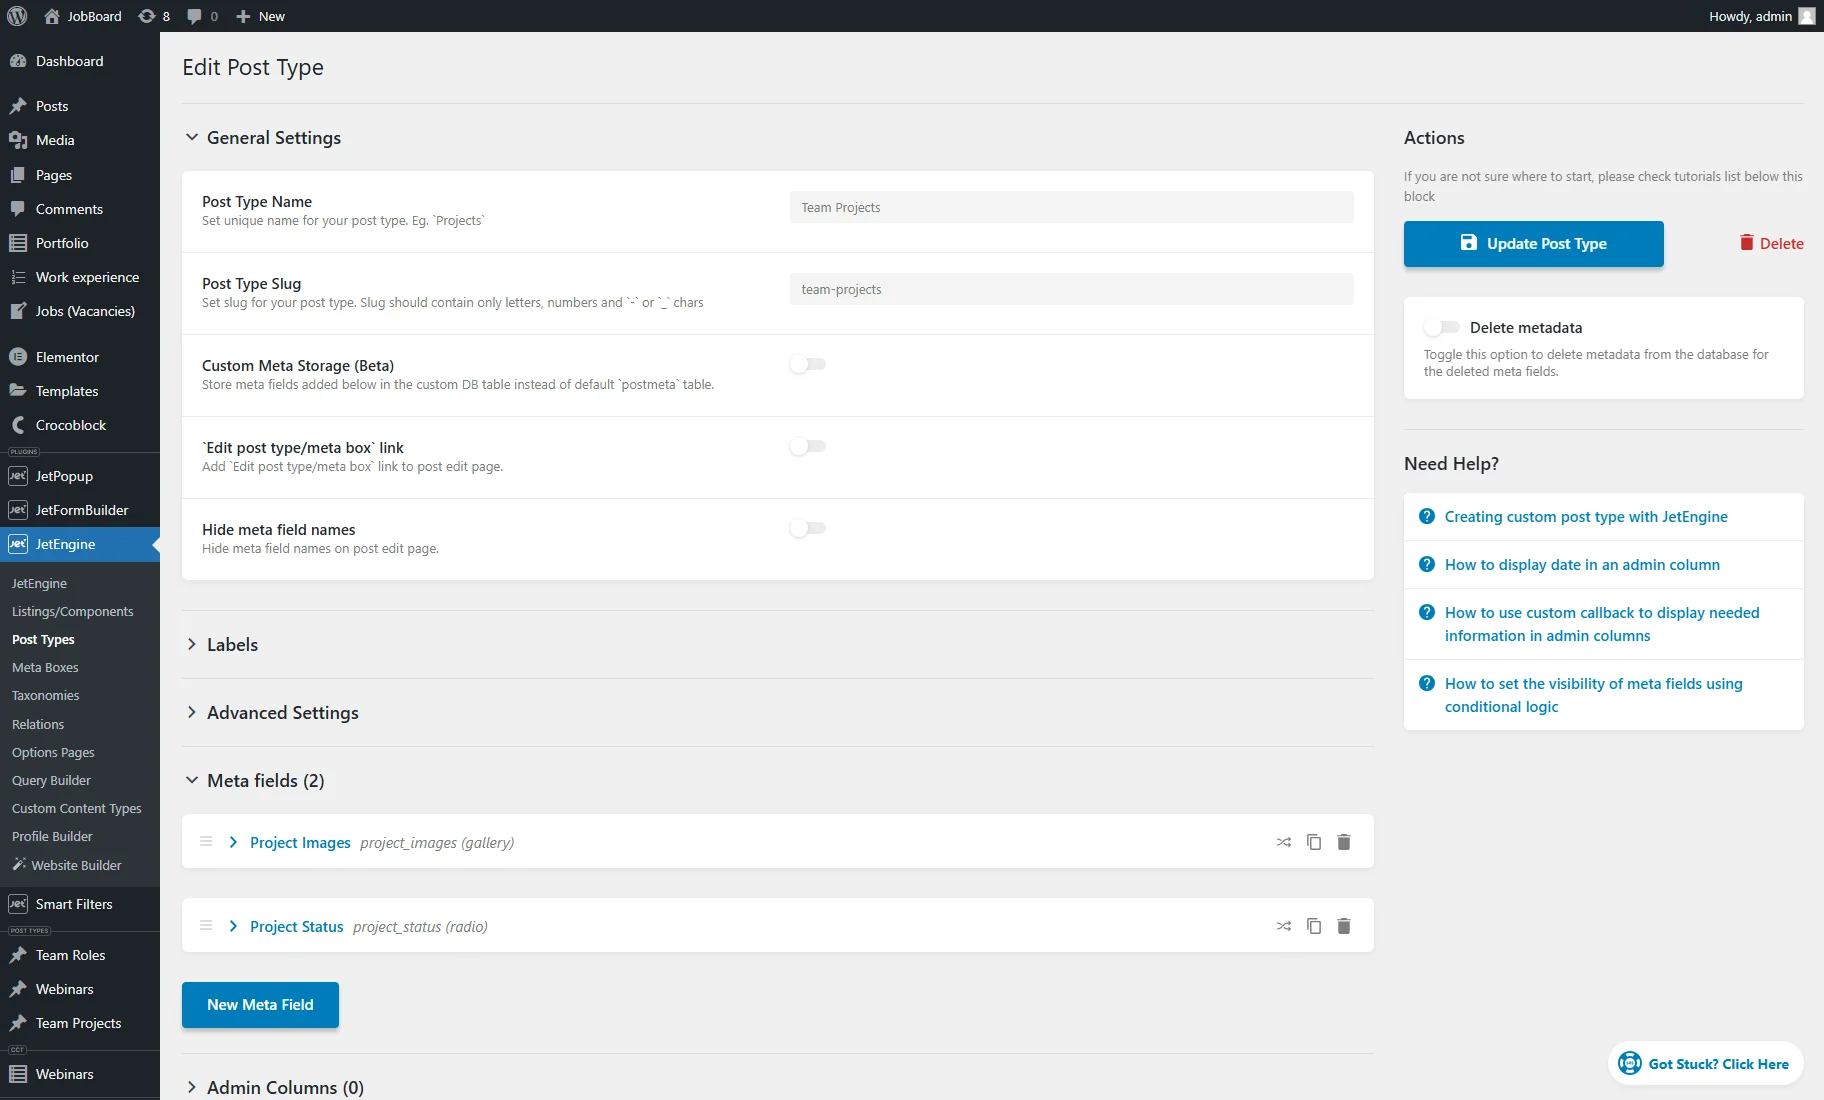
“Team Projects” CPT
We return to WordPress Dashboard > JetEngine > Post Types and hit the “Add New” button.
We type the Post Type Name (e.g., “Team Projects”); the Post Type Slug will be generated automatically. Custom fields can be added if desired.
As an example, we add such custom fields:
- “Project Images” with the “Gallery” Field type;
- “Project Status” with the “Text” Field type with the “Not started,” “In progress,” “On hold,” and “Completed” options.
Then, we press the “Add Post Type” button.
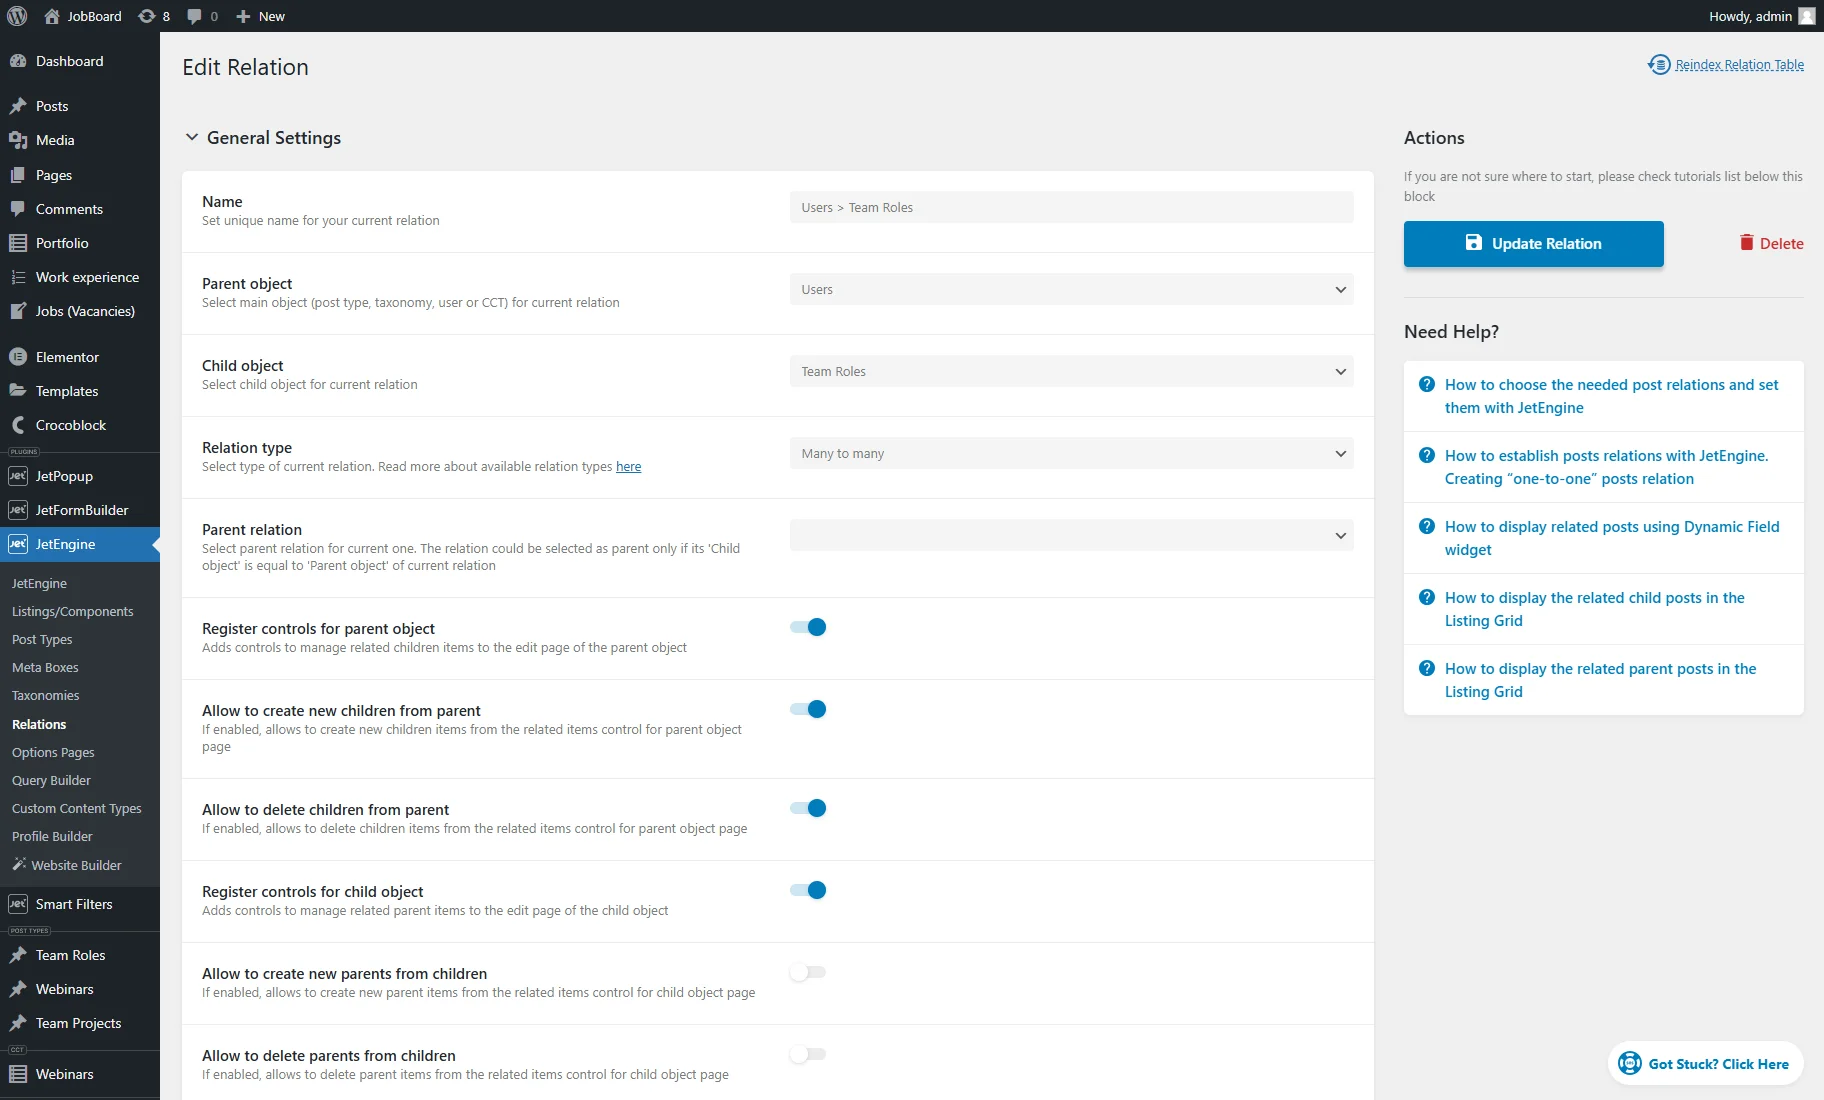
Grandparent-to-Parent Relation
We head to WordPress Dashboard > JetEngine > Relations tab and press the “Add New” button.
In the Edit Relation page, we enter the name (“Users > Team Roles” in our case).
We pick “Users” as the Parent object and “Team Roles” CPT as the Child object.
Also, we set the “Many to many” Relation Type.
Next, we enable the Allow to create new children from parent and Allow to delete children from parent to be able to adjust projects while editing the team roles from the user editing page.
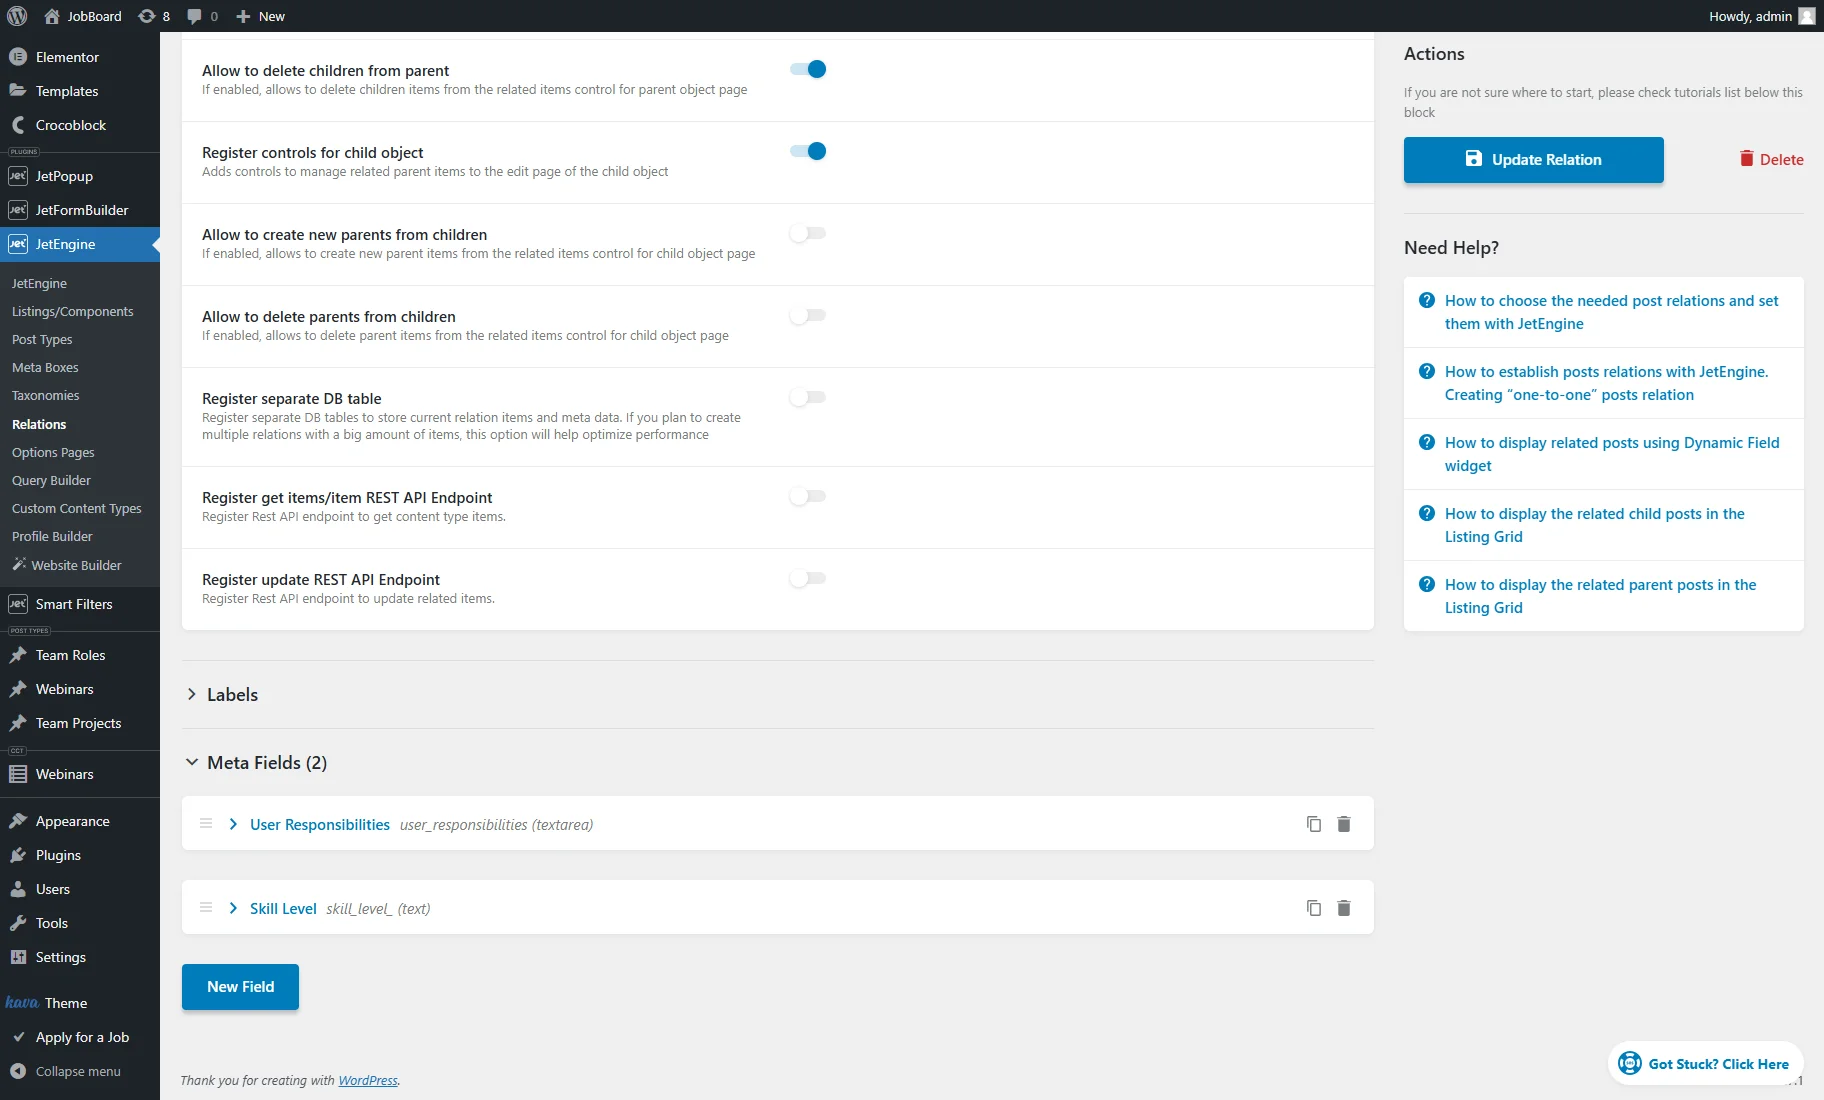
Then, we scroll down and add the Meta Fields for this relation: “User Responsibilities” and “Skill Level.”
Finally, we press the “Add/Update Relation” button.
Parent-to-Child Relation
Now, we return to the WordPress Dashboard > JetEngine > Relations tab and hit the “Add new” button to create a parent-to-child relation.
We enter the relation’s Name (“Team Roles > Team Projects”) and set the Parent object (“Team Roles” CPT), Child object (“Team Projects” CPT), and Relation type (“Many to many”).
As the Parent relation, we adjust the recently created grandparent-parent relation (“Users > Team Roles”).
Additionally, we enable the options to create or delete the child posts from the parent post editing page and vice versa.

Then, we scroll the page down and add such Meta Fields: “Start date” and “End date” with the “Date” Field type and “Tasks Assigned,” “Project Progress Notes,” and “Feedback” with the “Textarea” Field type.
Eventually, we press the “Add/Update Relation” button.

Creating Posts from the User Editing Page
First, we proceed to the user editing page and scroll down to the Children Team Roles tab to add roles the user occupies in the company.
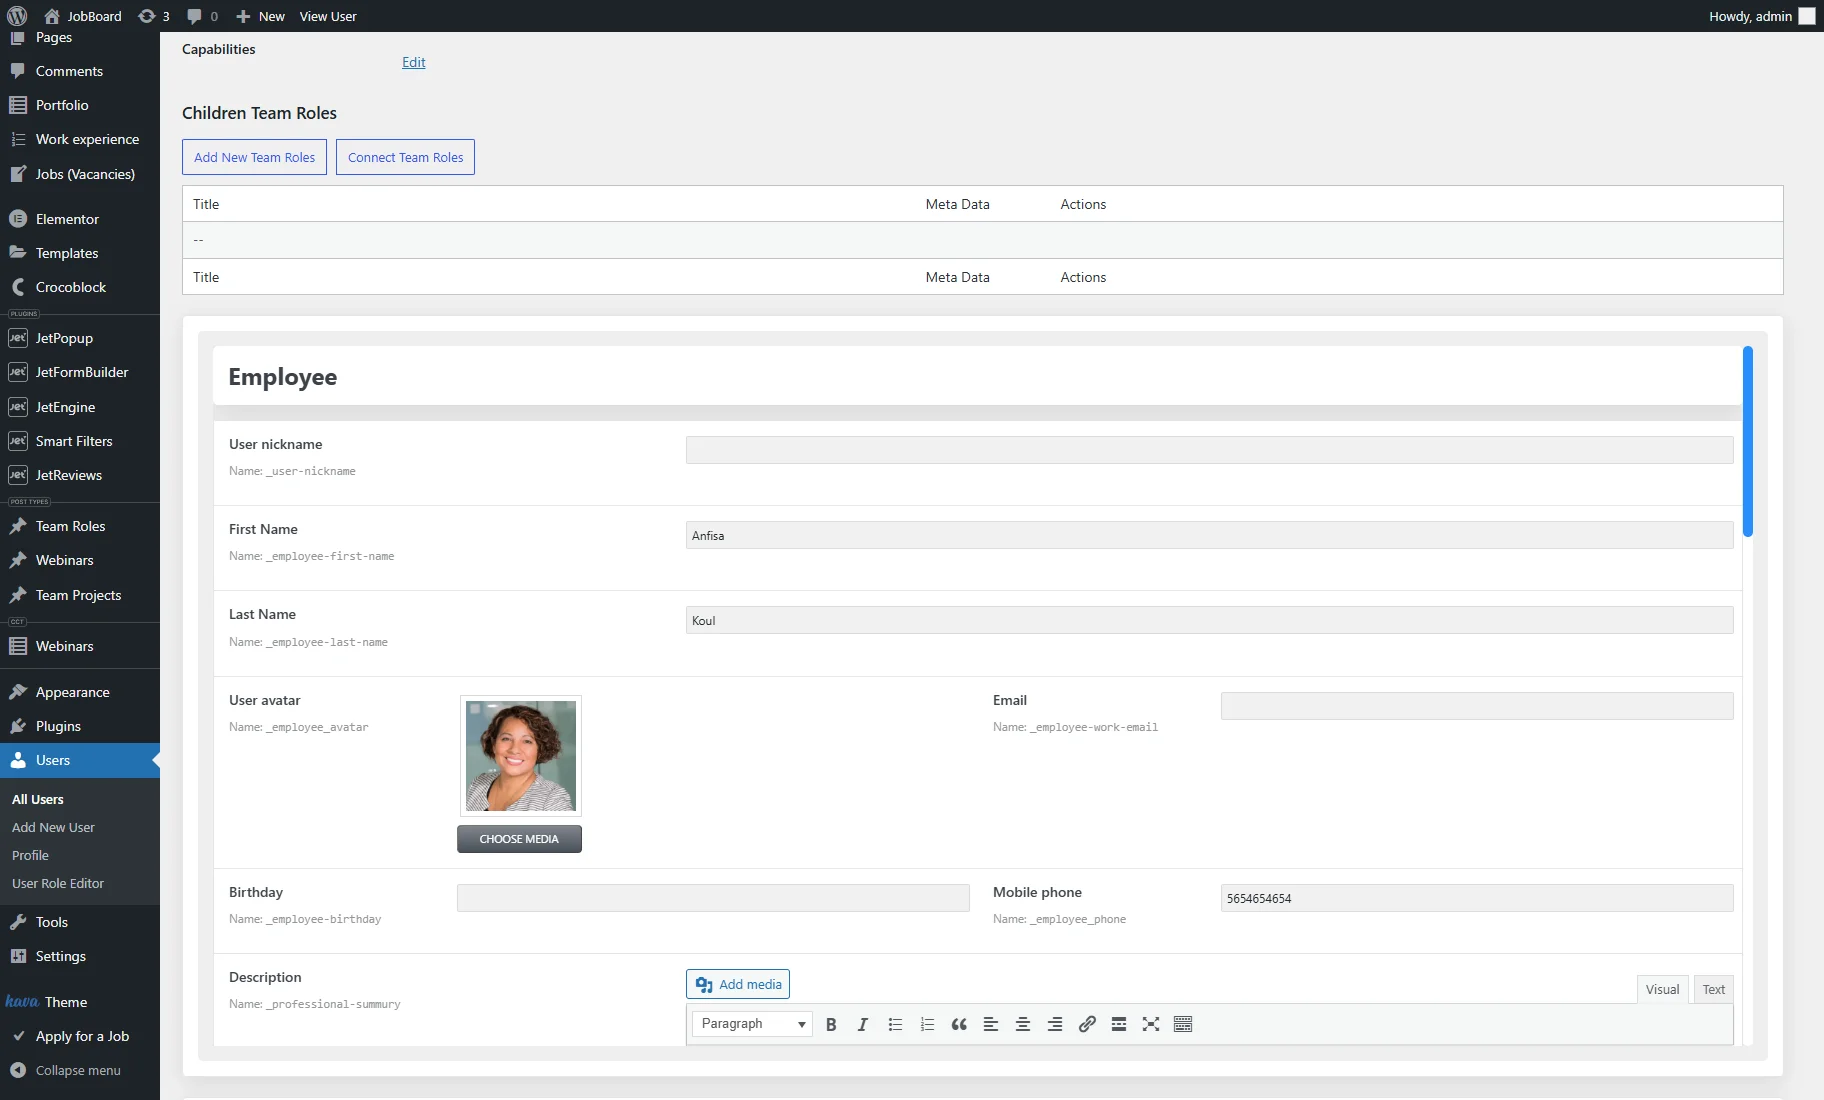
We press the “Add New Team Roles” button, type the “Frontend Developer” in the TITLE field, and hit the “Add New Team Roles” button to save it.

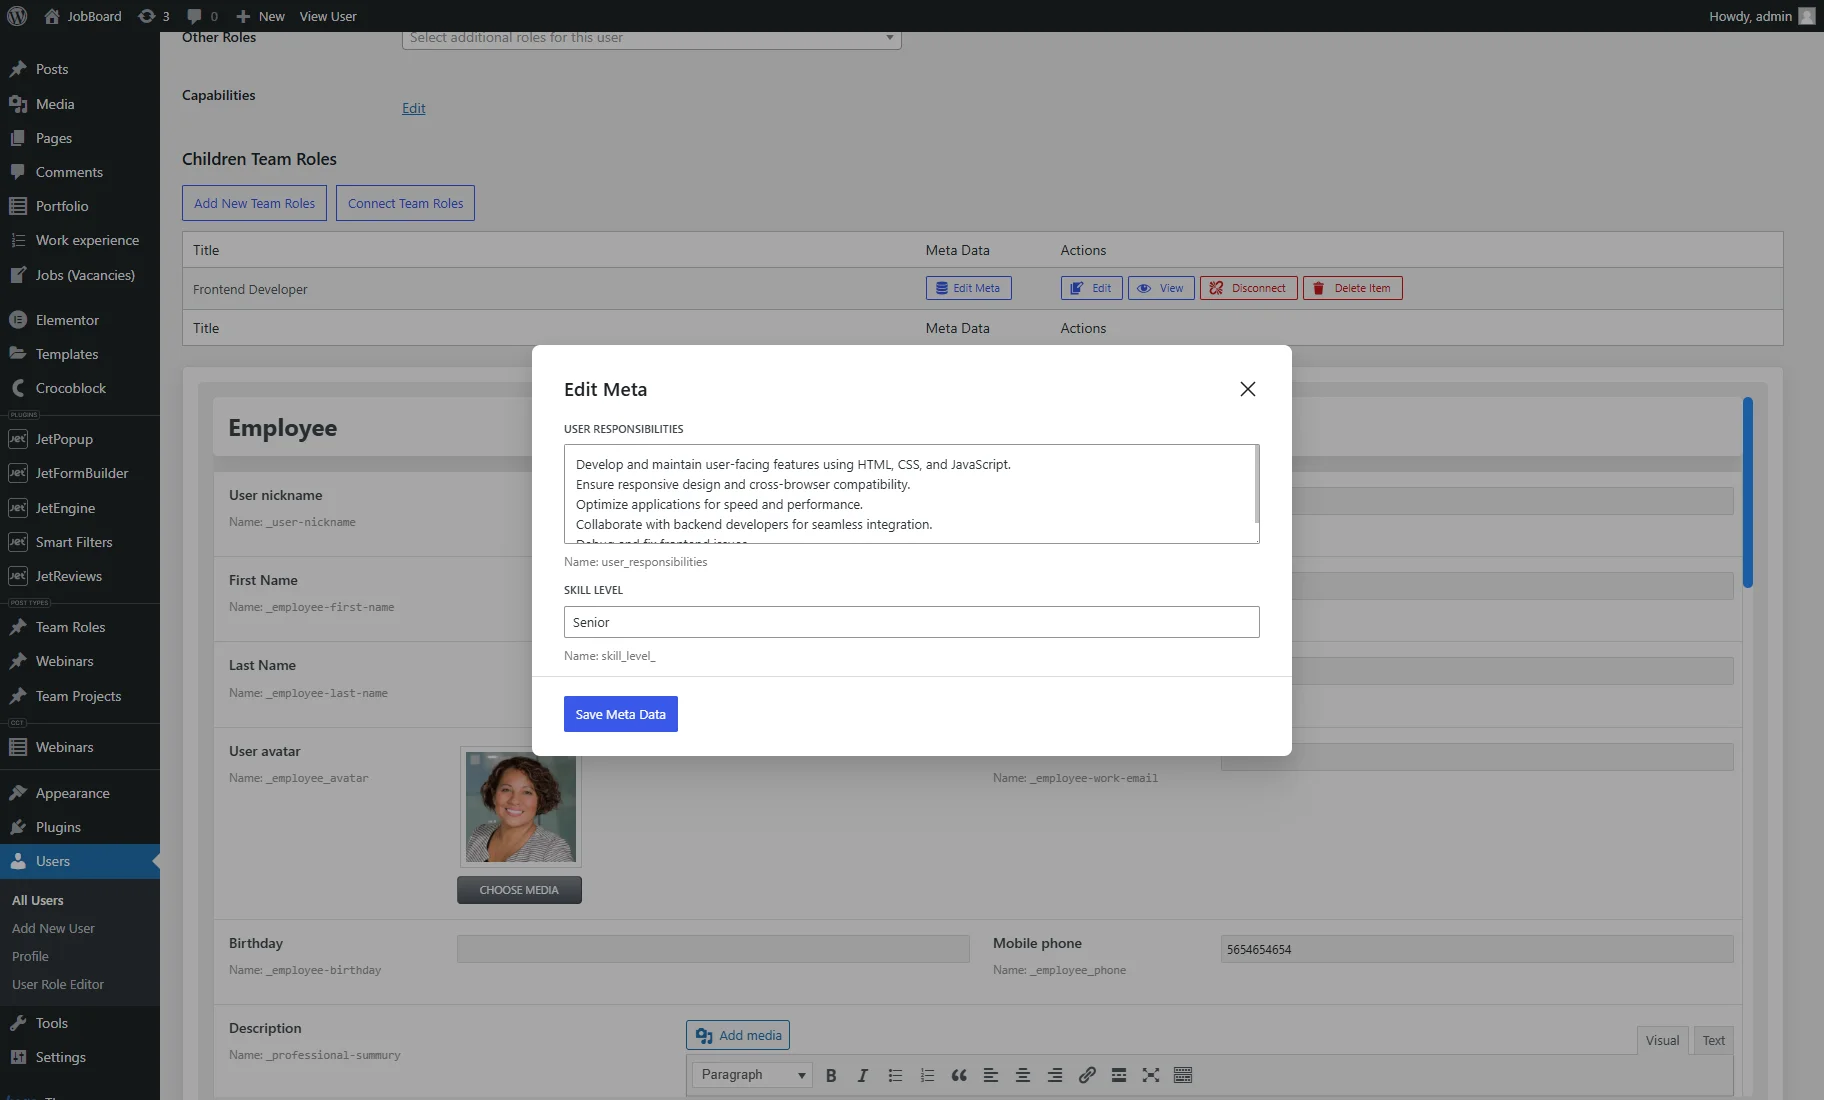
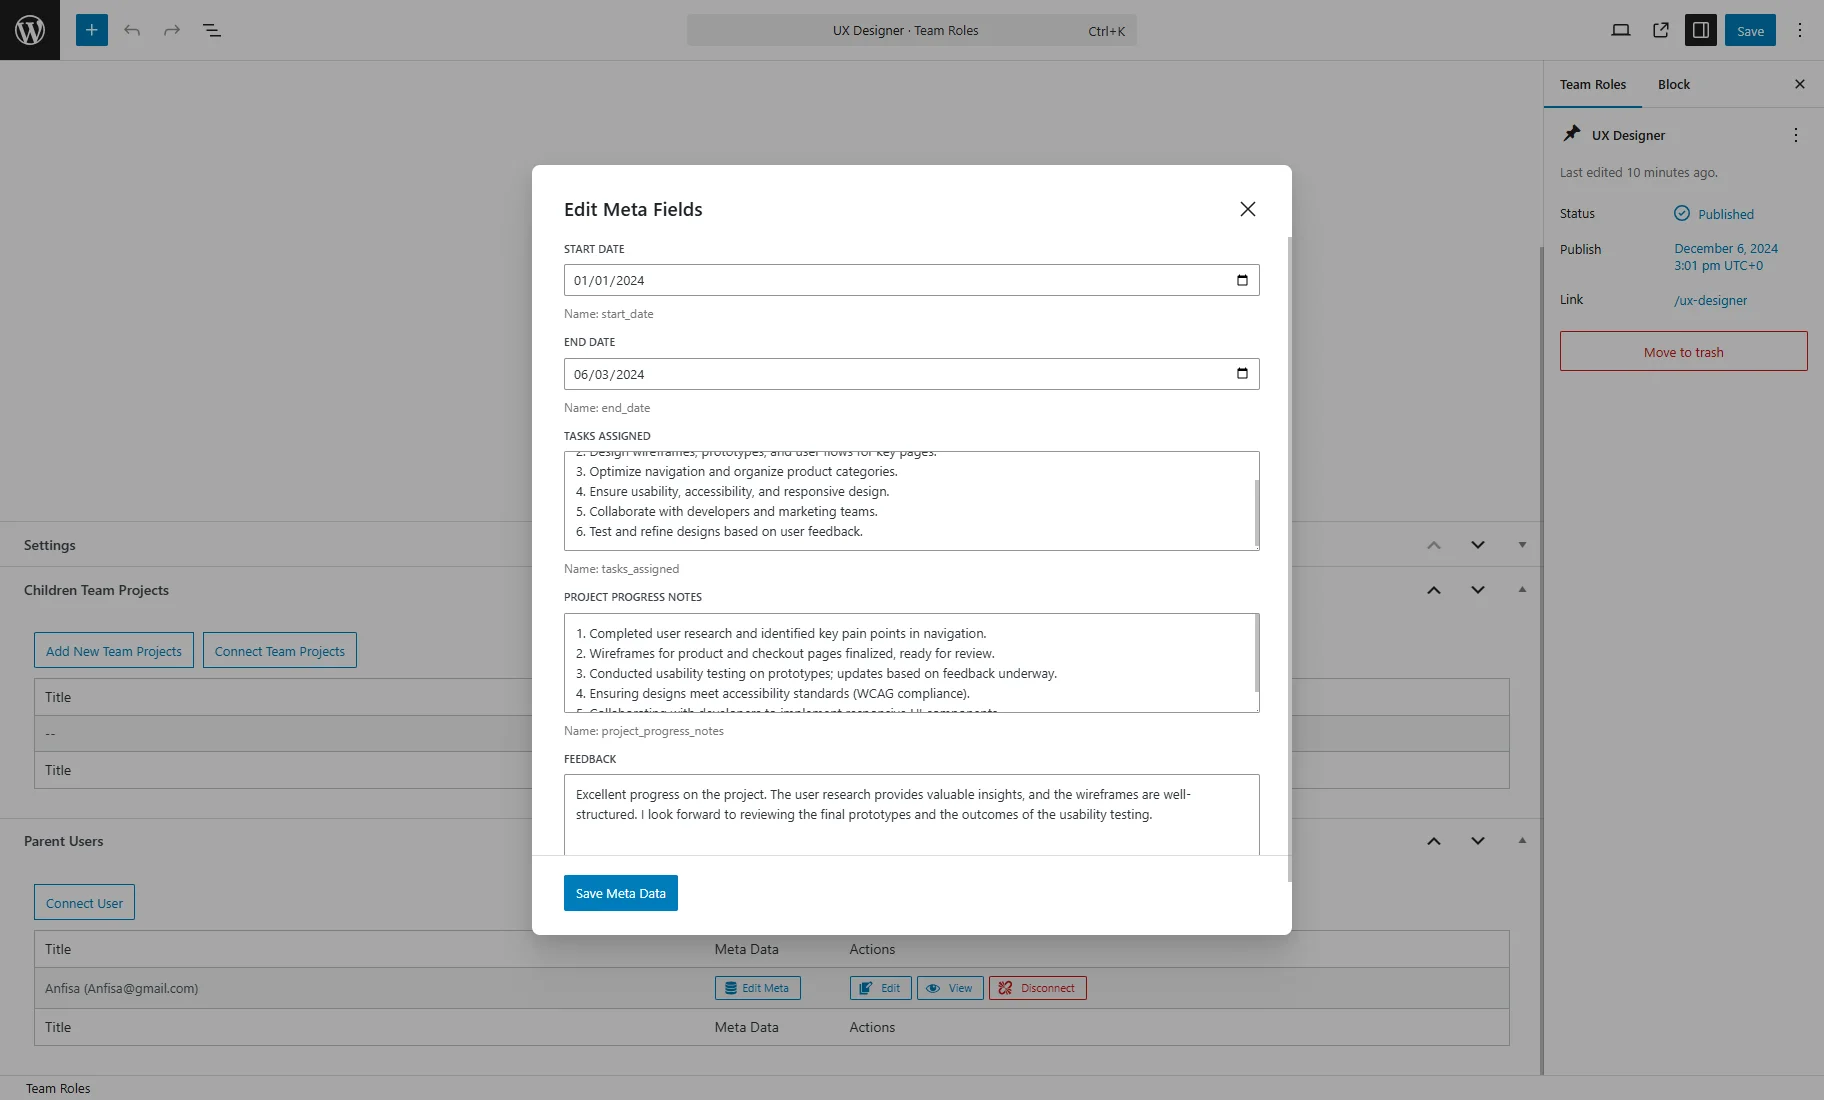
In the Edit Meta pop-up, we fill in the meta fields with the information about this role. Then, we press the “Save Meta Data” button.
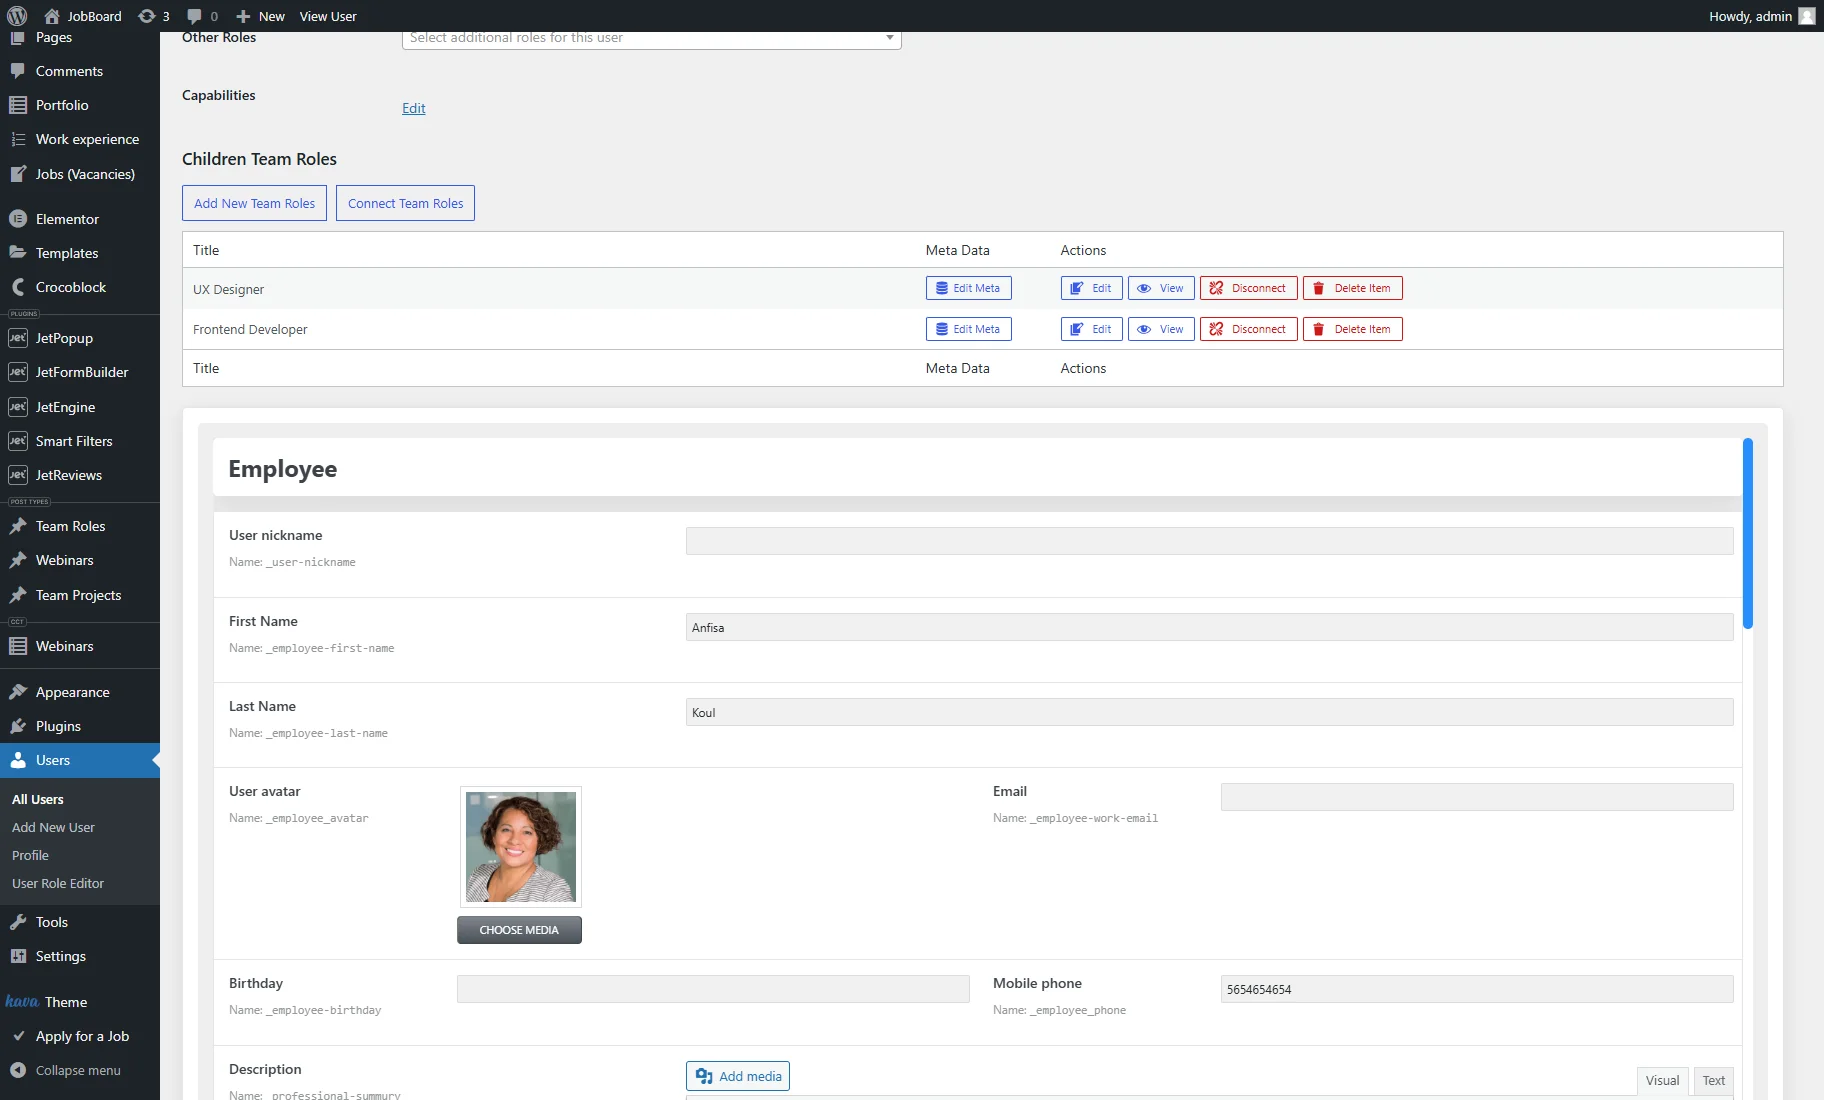
In the same way, we add the second role of this user — “UX Designer.”
Creating Children Posts from the Parent Post Editing Page
Now, we can proceed to the Team Roles tab on the WordPress Dashboard.
Two roles added from the user editing page were created as posts.
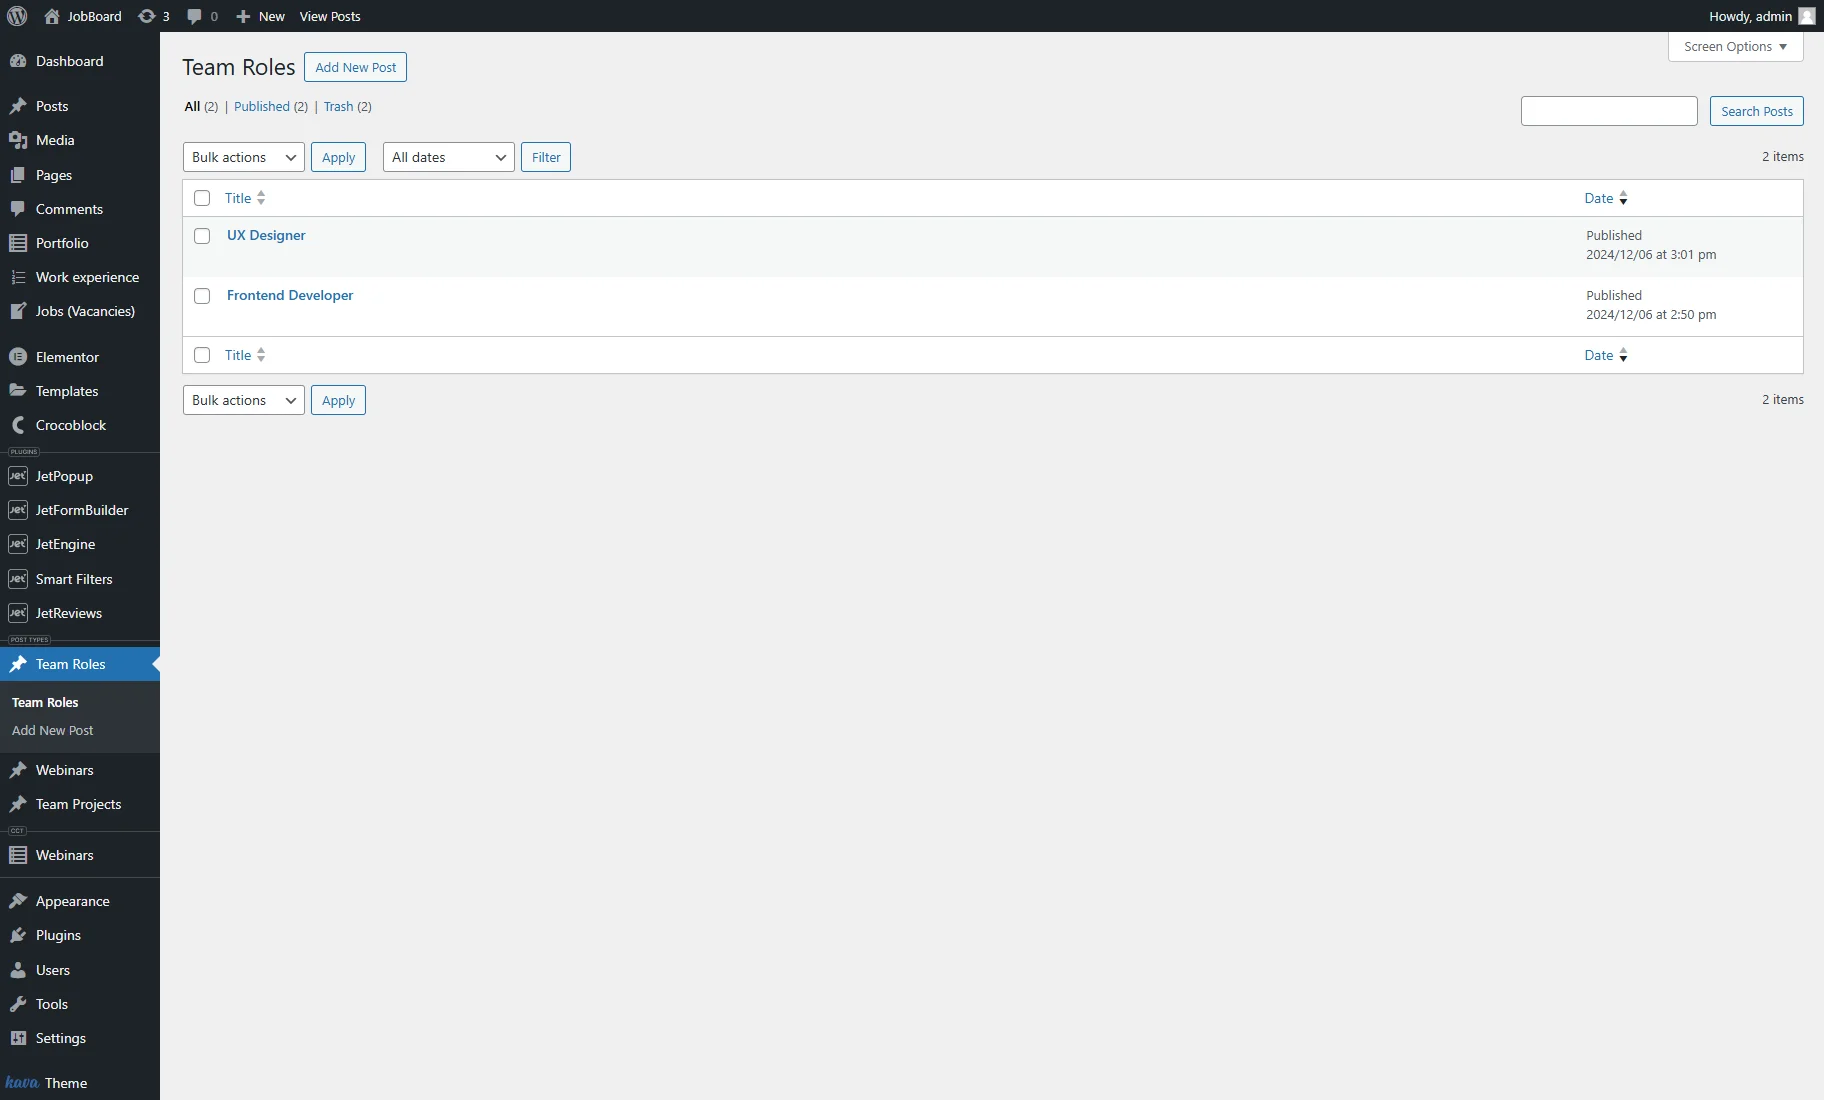
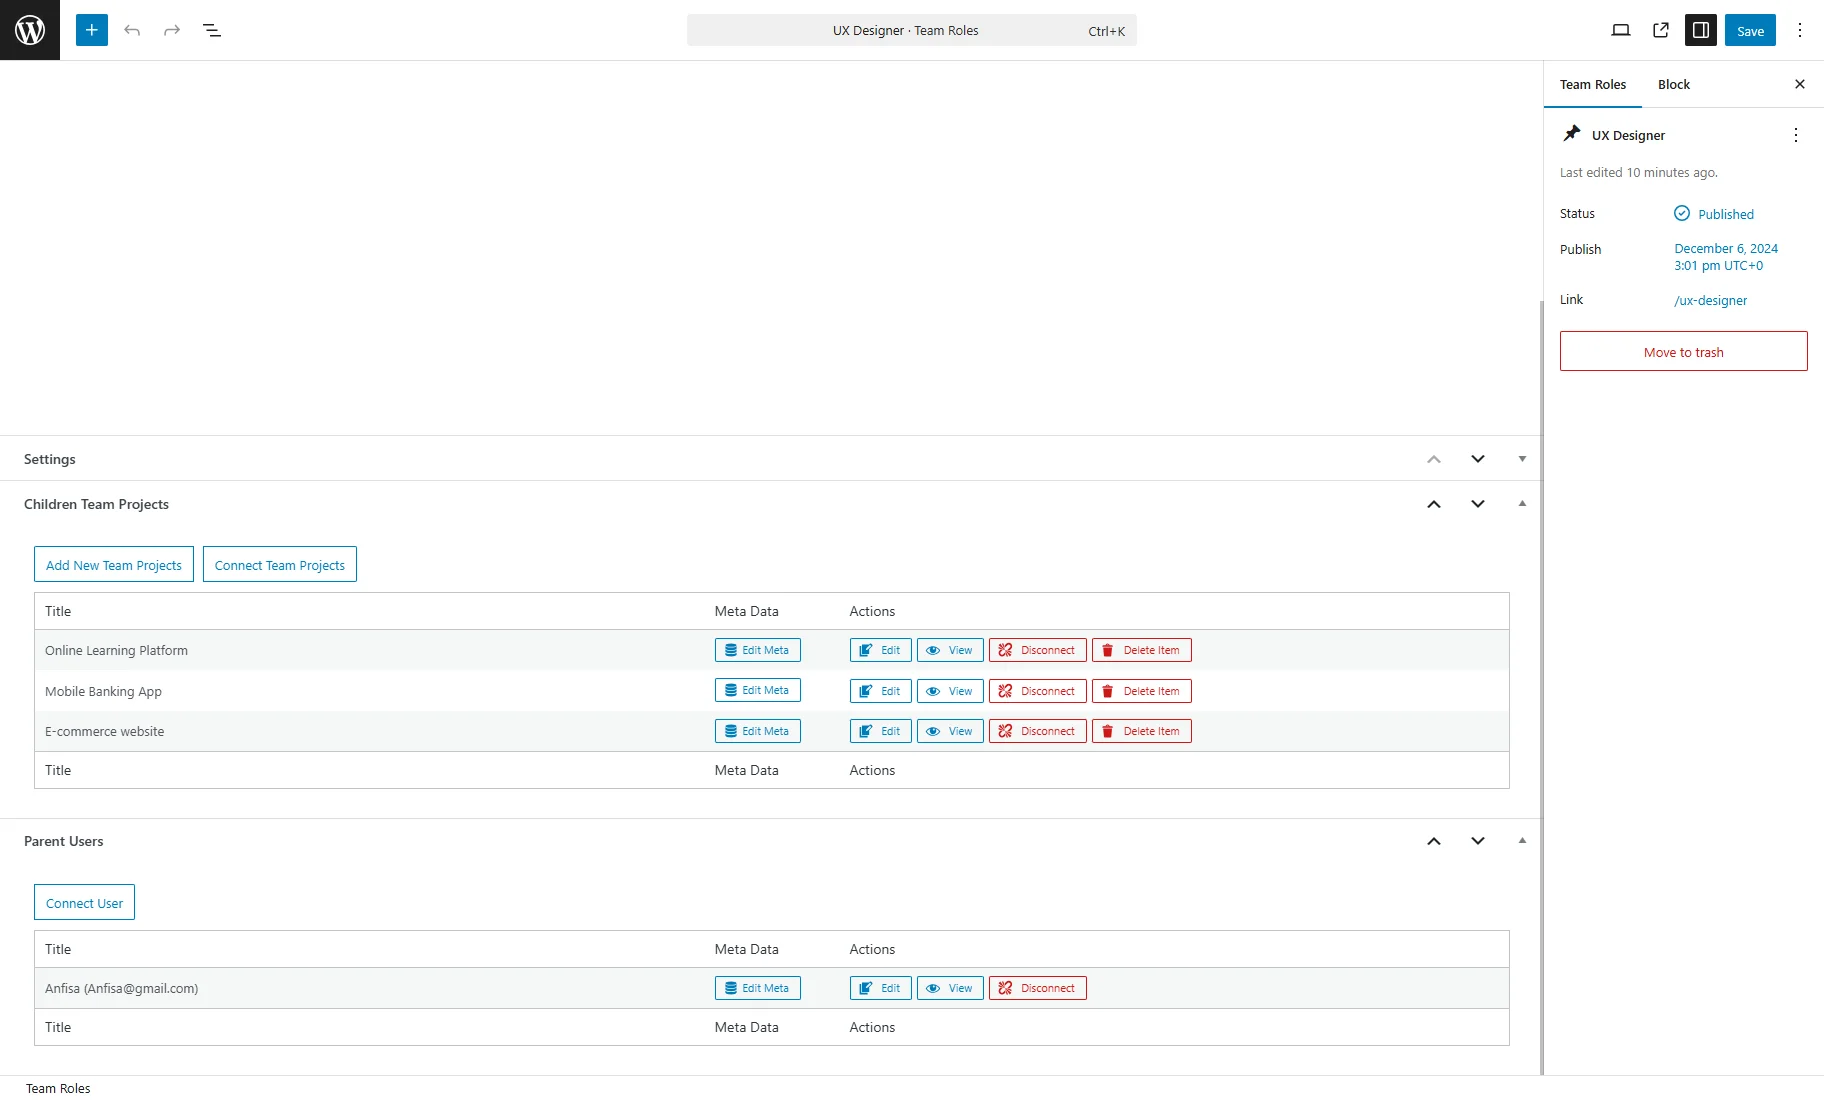
We click to edit the “UX Designer” post to add new projects.
In the Parent User section, the user is already connected to the role.
In the Children Team Projects section, we add the “E-commerce website” project by filling in the title and custom fields.
In the same way, we add the “Mobile Banking App” and “Online Learning Platform” projects.
Then, we complete the same for the “Frontend Developer” post.
Additionally, the required parent and children posts can be edited for the custom meta fields to be filled in.
Query for the Parent-to-Child Relation
First, we will create a custom query for the “Team Roles > Team Projects” relation to display projects (children) for roles (parents).
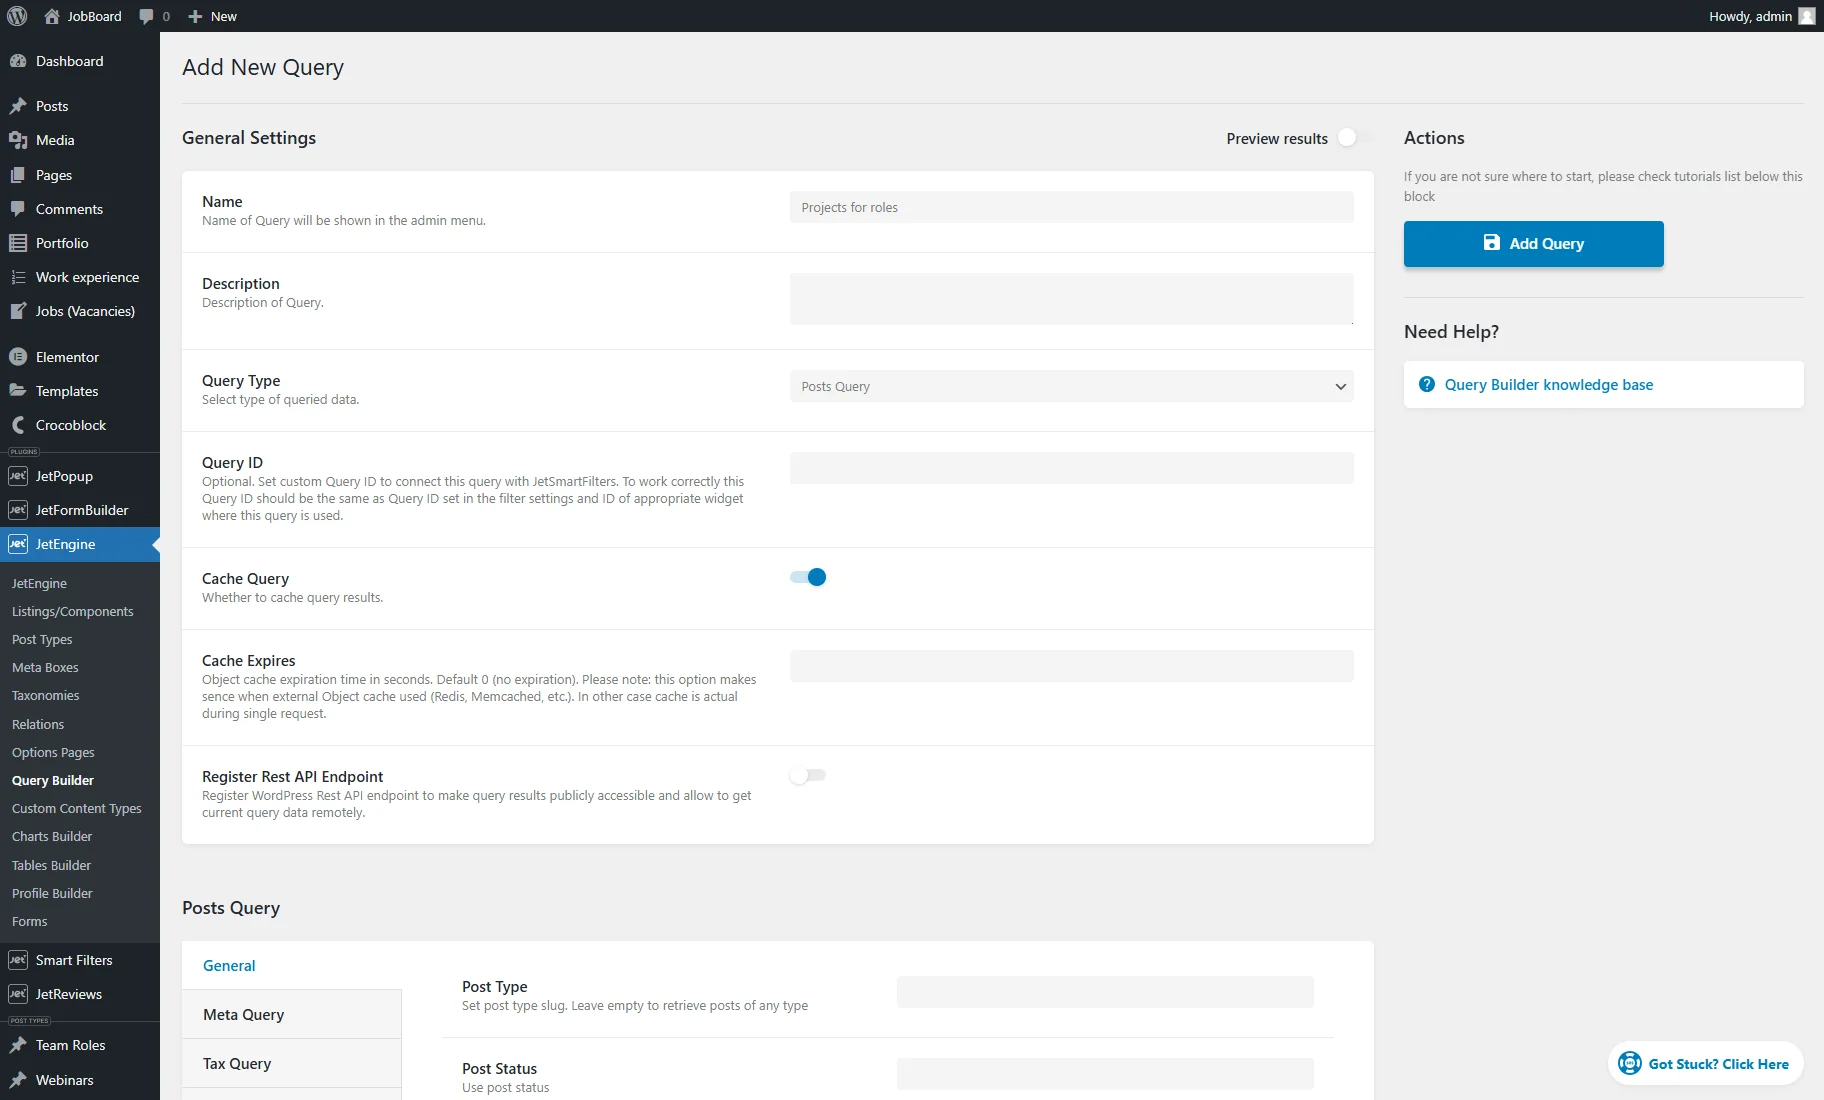
We move to the WordPress Dashboard > JetEngine > Query Builder tab and press the “Add New” button.
We enter the Name (“Projects for roles” in our case). The Query Type depends on the item type you want displayed with the query. In our case, that’s posts, so we keep the “Posts Query” option.
In the General tab of the Posts Query section, we selected the child Post Type — “Team Projects.”
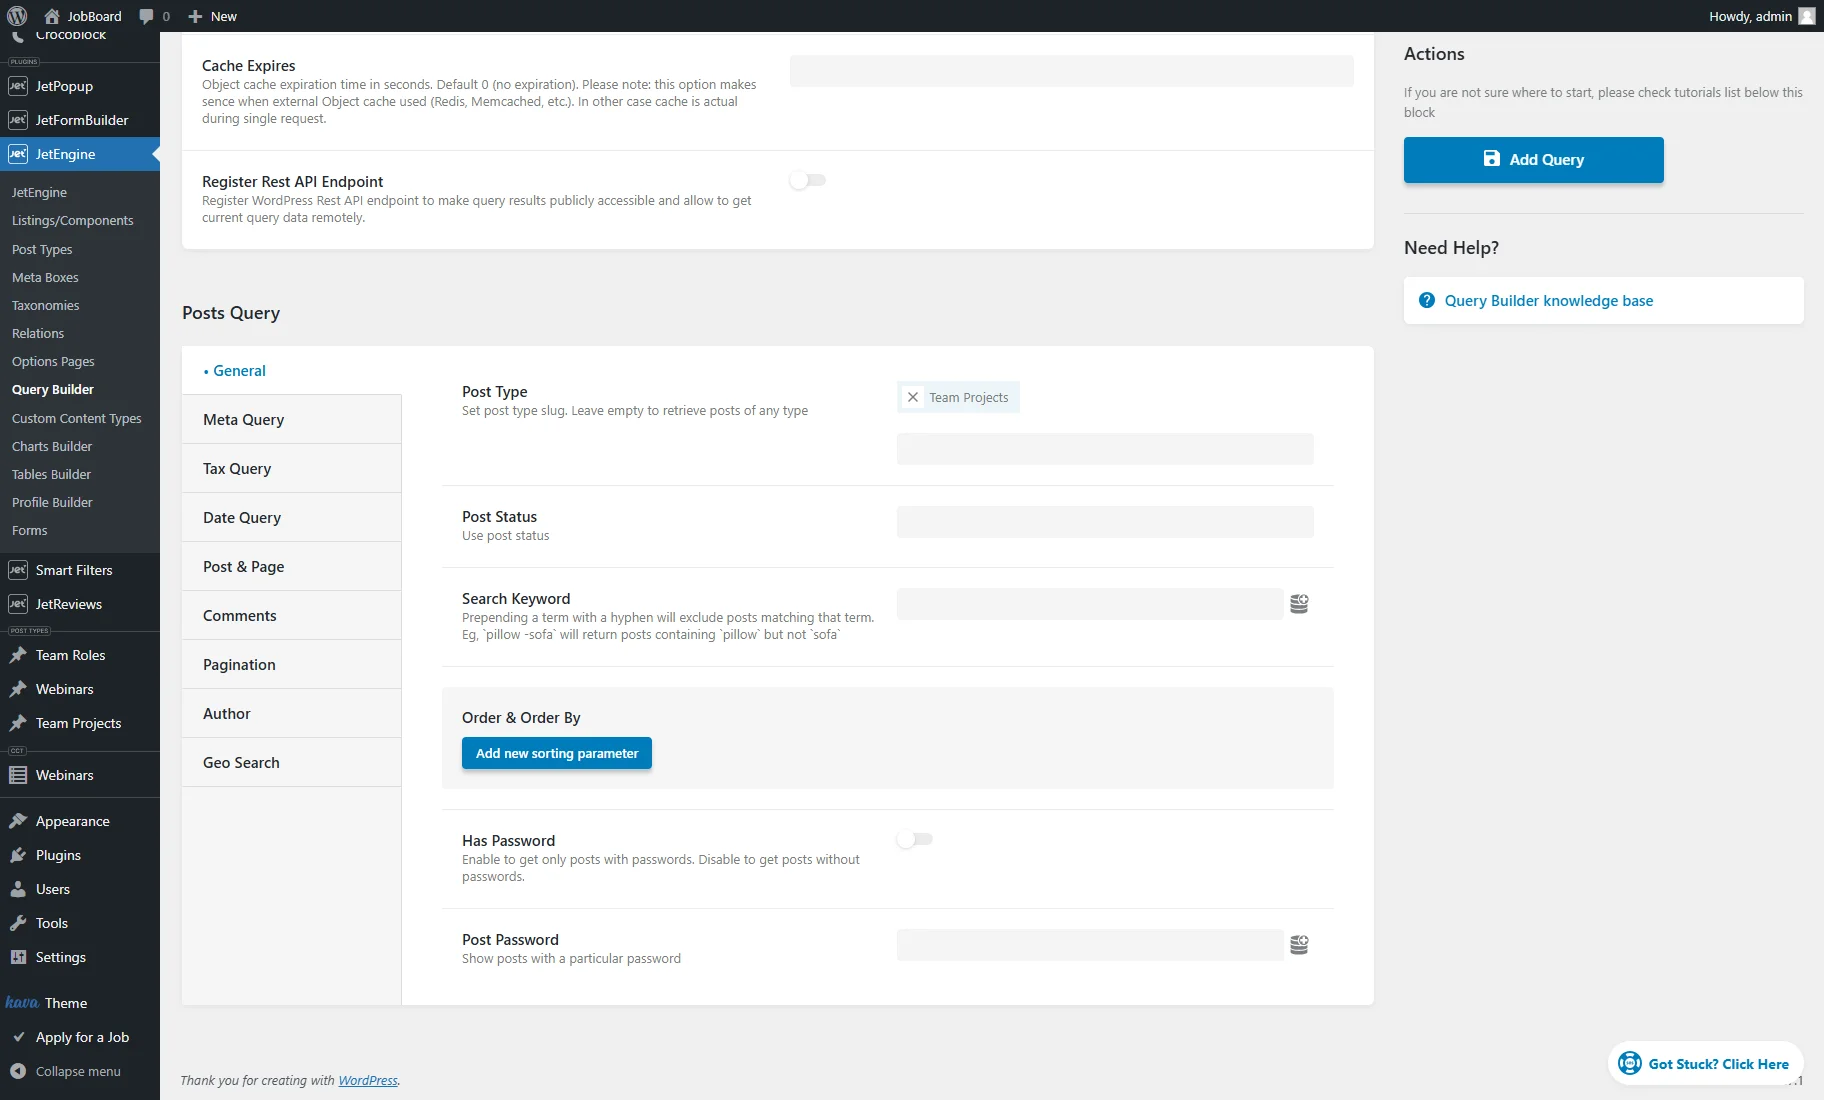
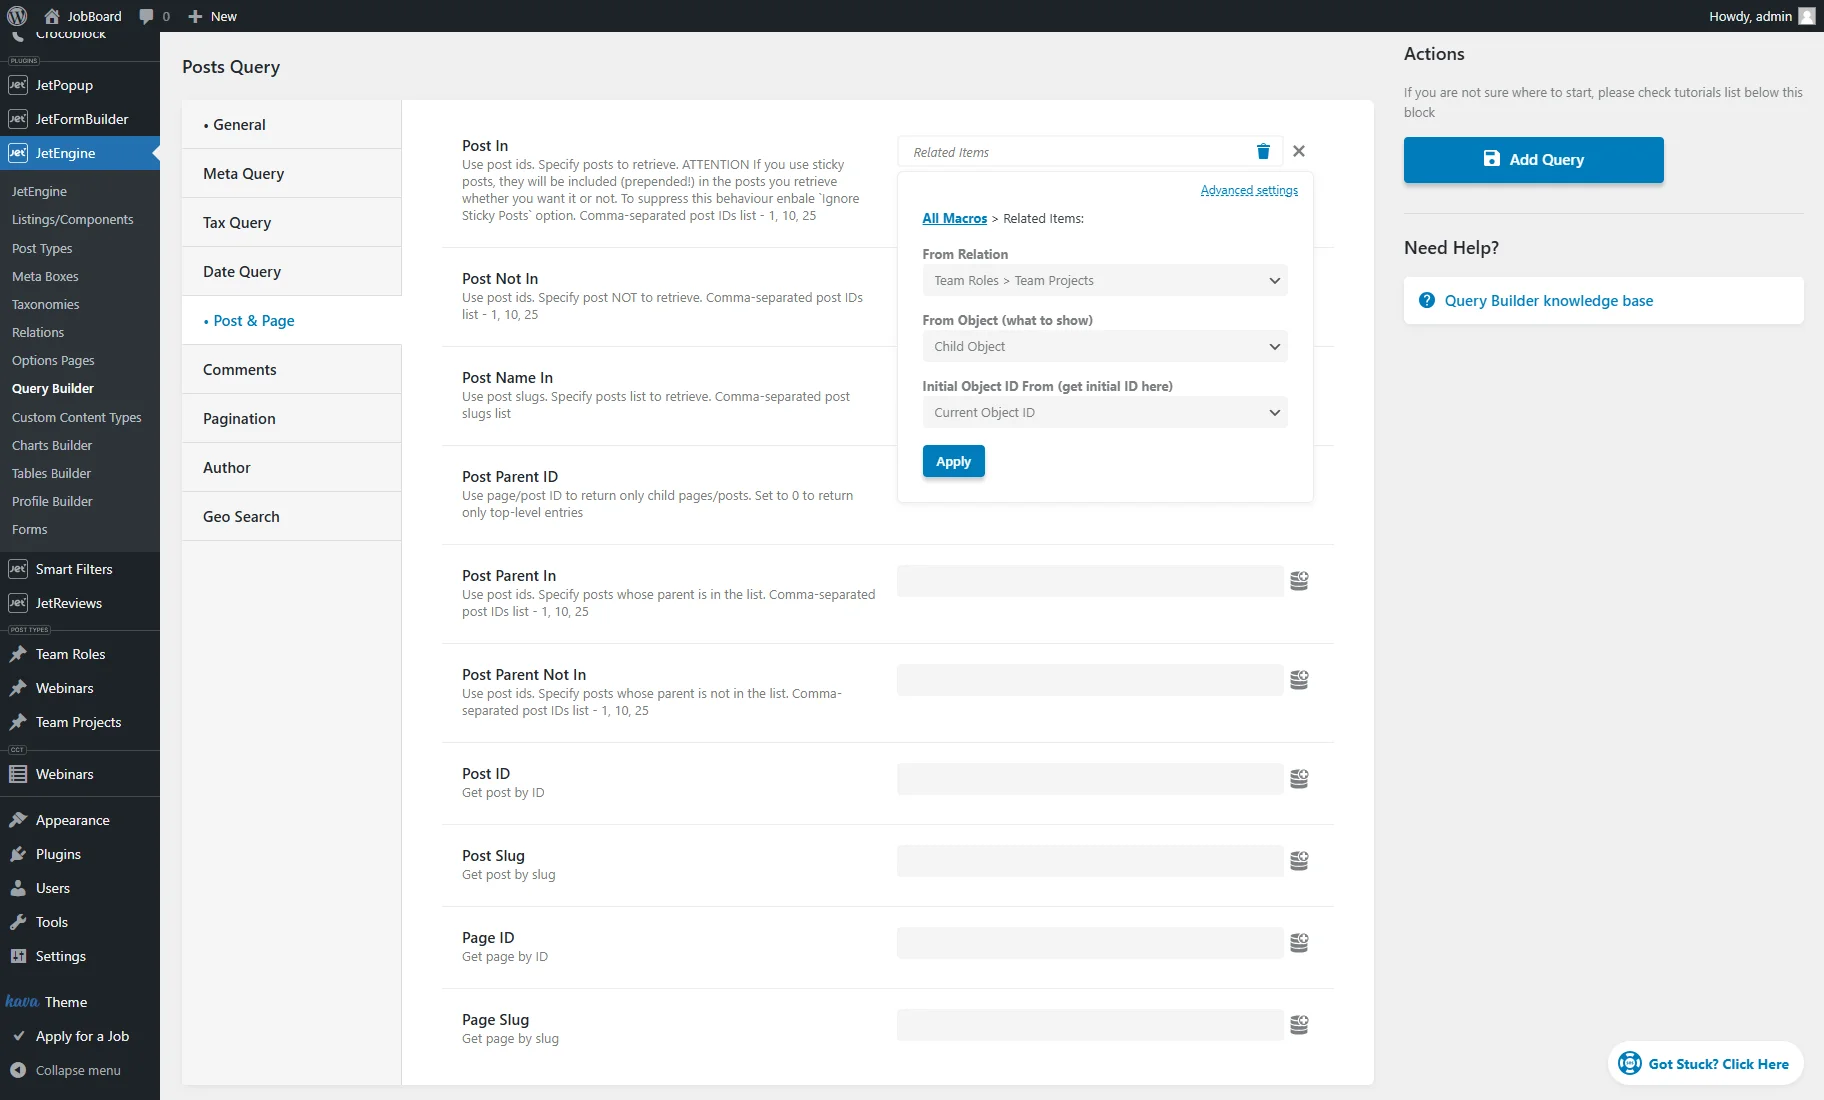
In the Post & Page section, we click the “database” icon near the Post In field and select the “Related Items” option.
We set the “Team Roles > Team Projects” relation in the From Relation field, “Child Object” in the From Object (what to show) field, and “Current Object ID” in the Initial Object ID From (get initial ID here) field.
Then, we push the “Apply” button.
After finishing customizing the query, we hit the “Add/Update Query” button.
Query for Grandparent-to-Parent Relation
Now, we will create a custom query for the “Users > Team Roles” relation to display roles (parents) for users (grandparents).
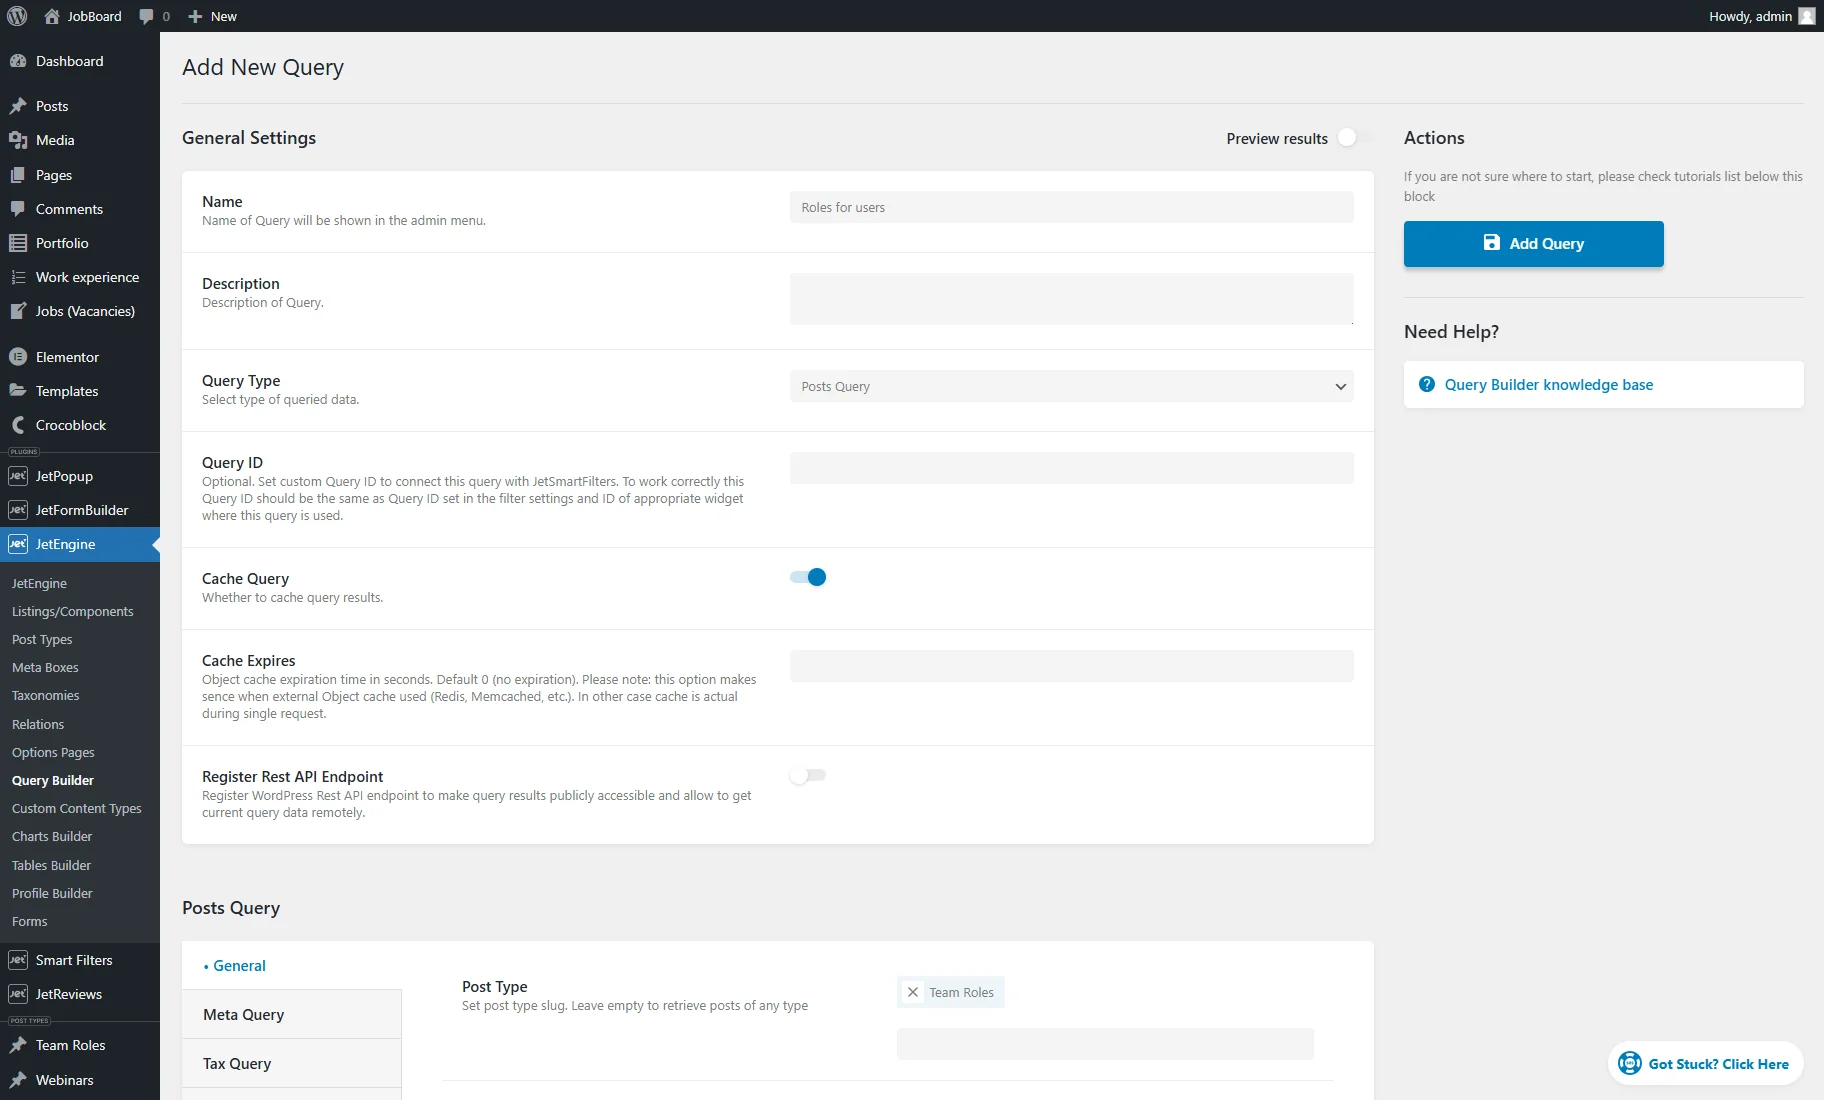
We return to the WordPress Dashboard > JetEngine > Query Builder tab and press the “Add New” button.
We enter the Name (“Roles for users” in our case) and pick the “Posts Query” Query Type.
In the General tab of the Posts Query section, we selected the child Post Type — “Team Roles.”
In the Post & Page section, we click the “database” icon near the Post In field and select the “Related Items” option.
We set the “Users > Team Roles” relation in the From Relation field, “Child Object” in the From Object (what to show) field, and “Current Object ID” in the Initial Object ID From (get initial ID here) field.
Then, we push the “Apply” and “Add/Update Query” buttons.

Query Builder Listing for the Related Items
Now, we need to create a Listing template for showing the children items.
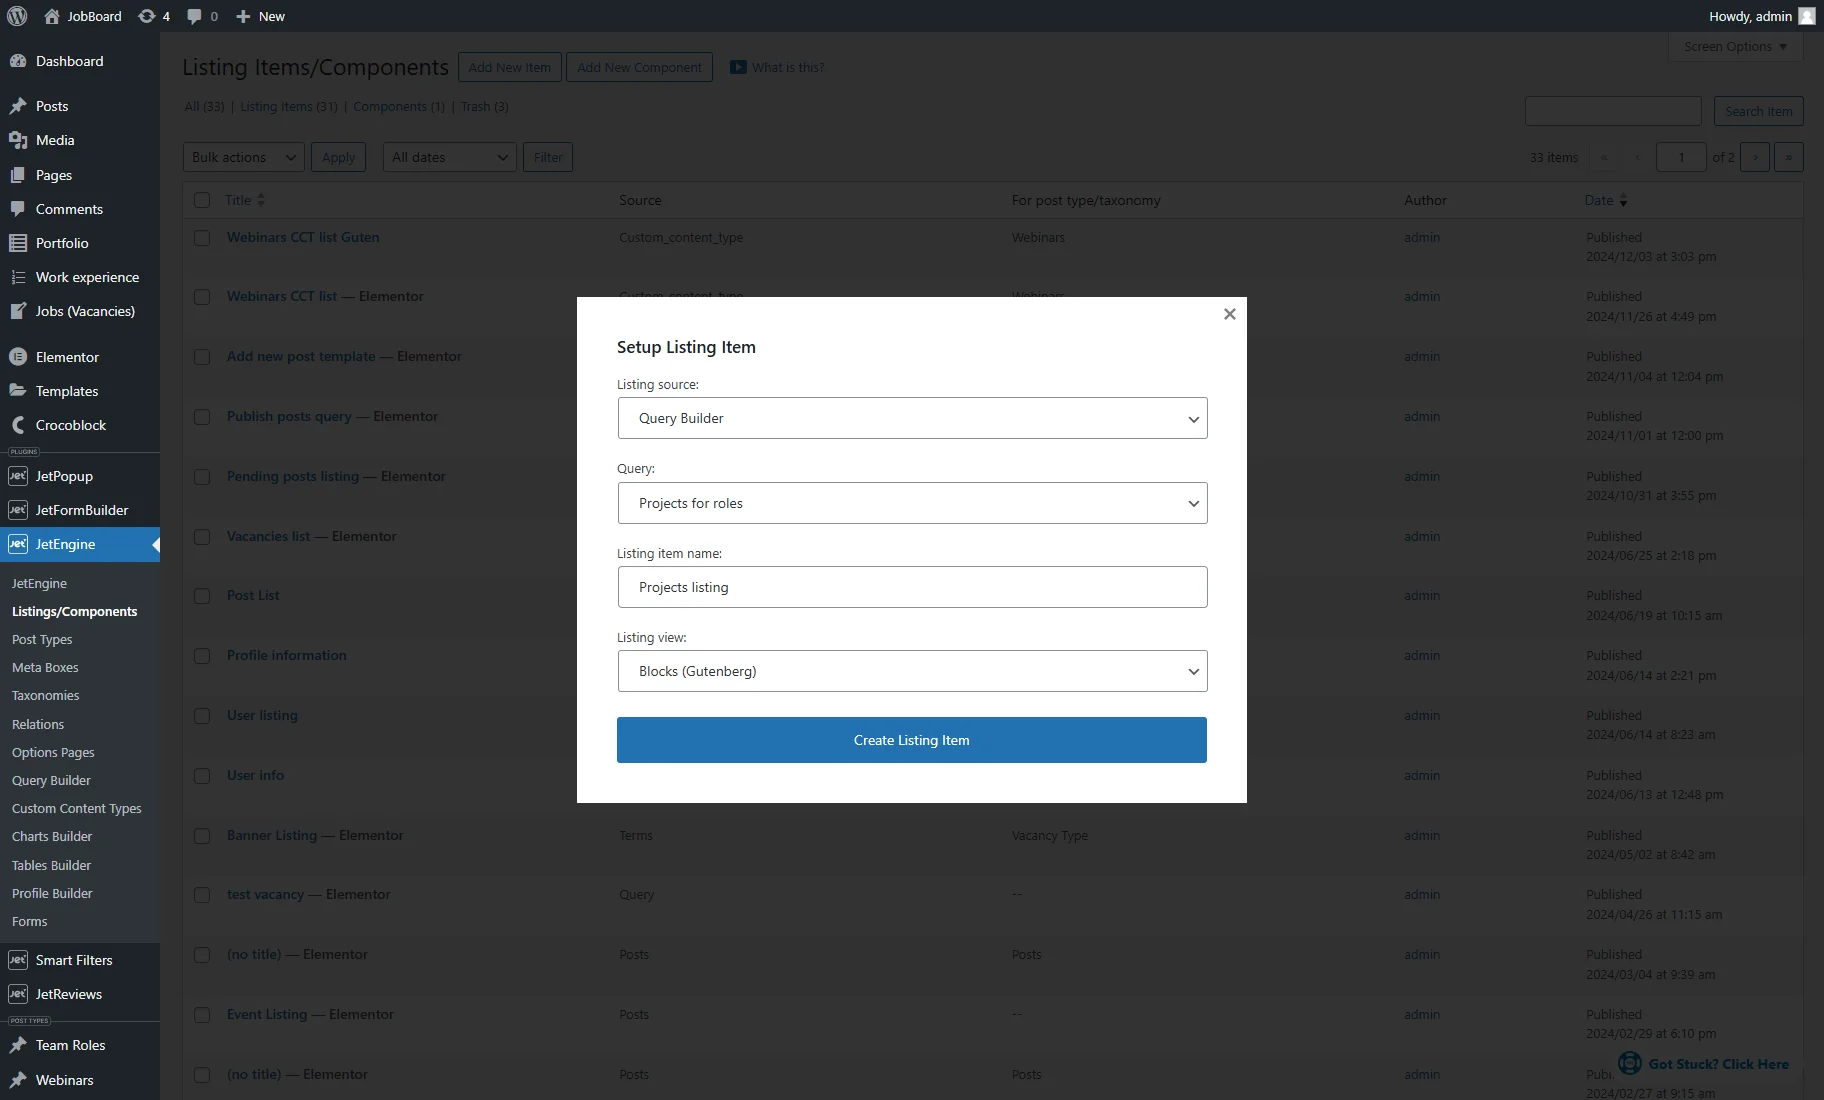
We move to the WordPress Dashboard > JetEngine > Listing/Components tab and press the “Add New Item” button.
In the Setup Listing Item pop-up, we pick the “Query Builder” option as the Listing source, set the first created Query (“Projects for roles” in our case), enter the Listing item name (“Projects listing” in this case), and choose the Listing view (for this case we choose “Blocks (Gutenberg),” but it can also be “Bricks,” “Timber/Twig,” or “Elementor”).
Afterward, we click the “Create Listing Item” button.
We use Dynamic Widgets/Blocks/Elements to display the post data (post title, values from the custom fields, etc.) as usual.

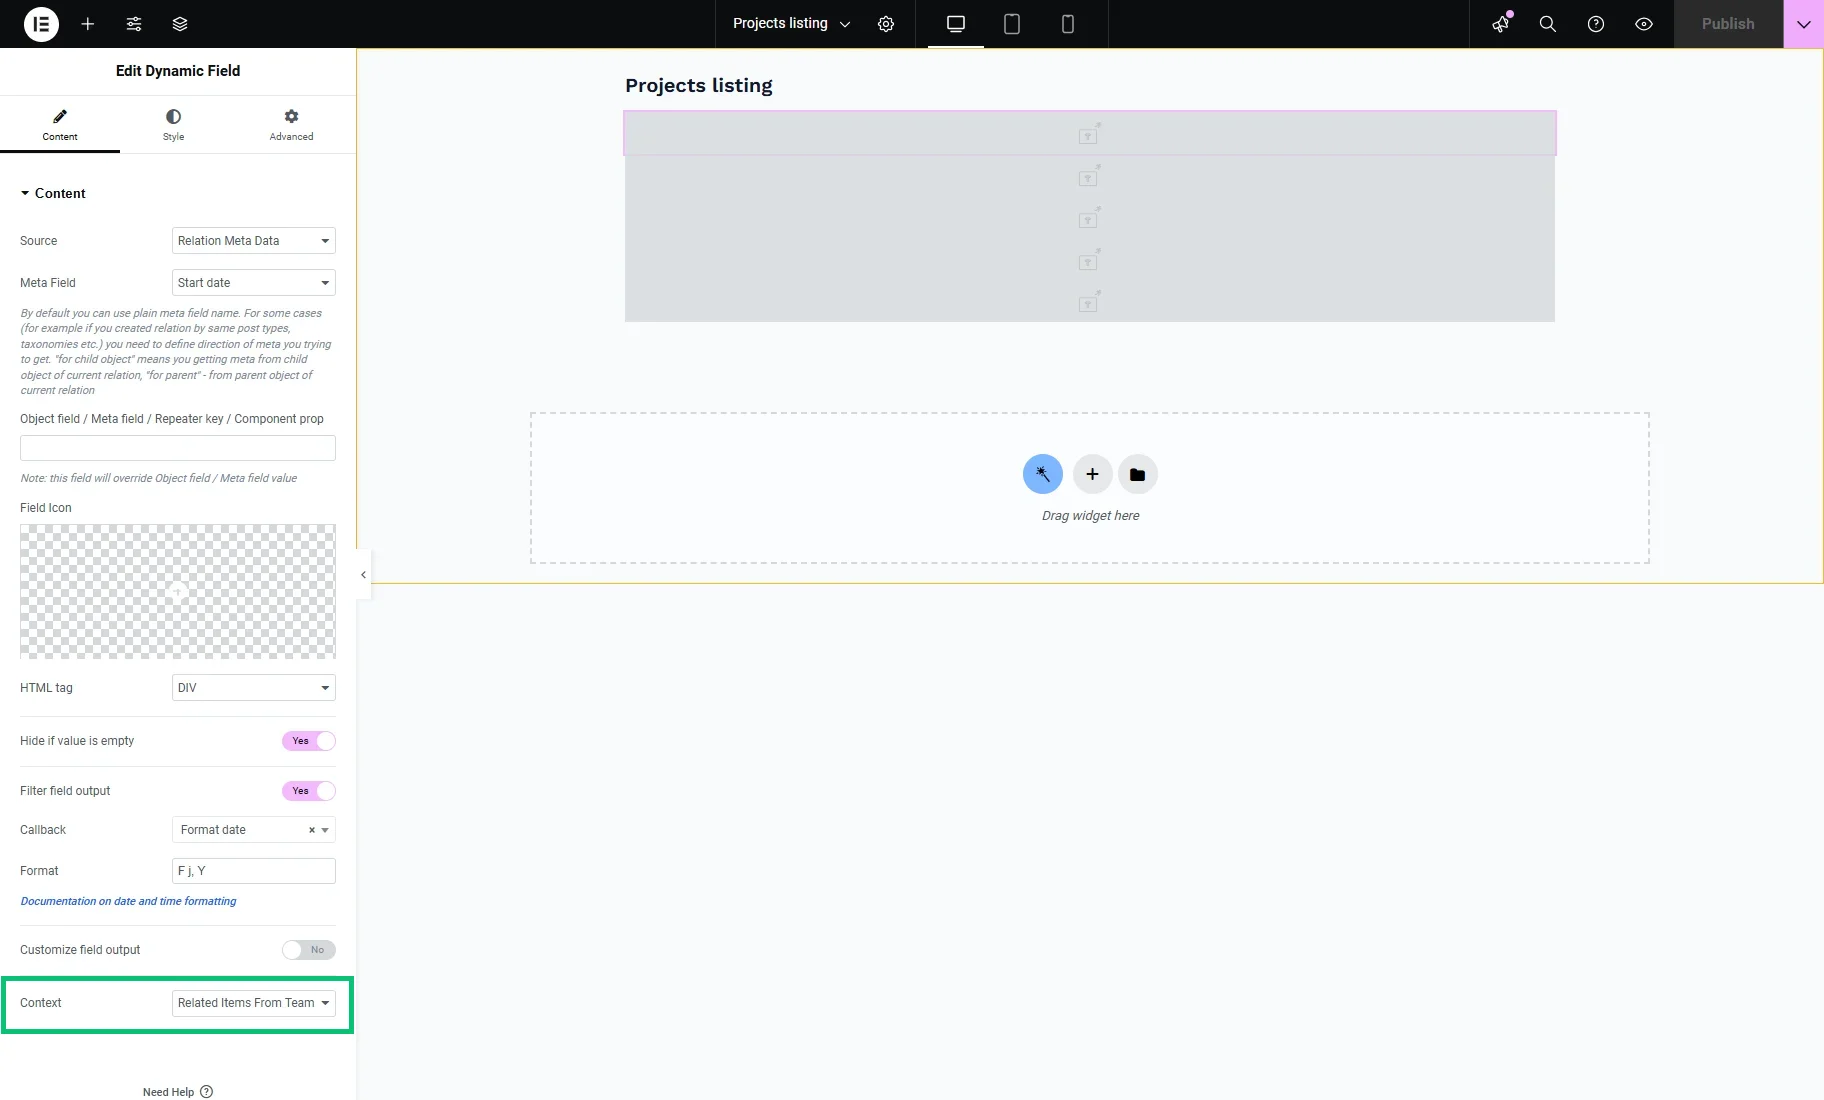
To display the relation meta data, we insert the Dynamic Field and select the “Relation Meta Data” Source. In the Meta Field dropdown menu, we pick the required custom field from the required relation (“Team Roles > Team Projects”).
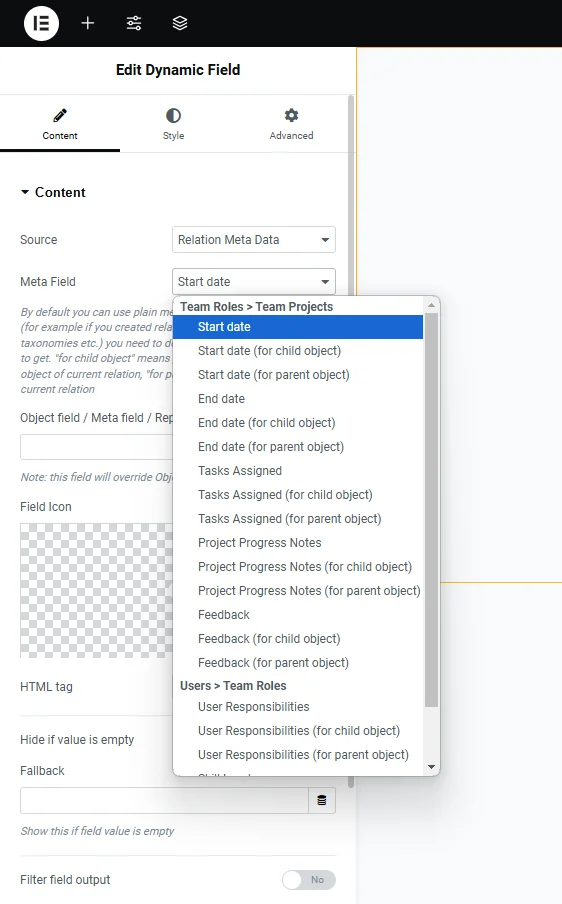
Another significant option for displaying the relation meta data is the Context. From this dropdown menu, the “Related Items From…” option should be selected with the required relation name.
Then, the Dynamic Field can be customized according to the needs.
For example, we enabled the Hide if value is empty toggle to hide the field if it’s not filled in.
We also activate the Filter field output option. To customize the date output from the “Date” custom field, we select the “Format date” Callback.
For the “Text” meta field, the “Trim string by chars or words” Callback is suitable. This callback is available after you enable the Trim string callback toggle in the WordPress Dashboard JetEngine > JetEngine Dashboard > Modules > External Modules tab.
Be aware that a view will only be ready on the front end after all steps of this tutorial are completed.
After finishing customizing the Listing template components, publish it.
Nested Listing for Related Items
In this step, we will create a Listing template for displaying the parent items that will contain a Listing Grid with the children items. Such listings that contain sublists as an element are known as nested listings.
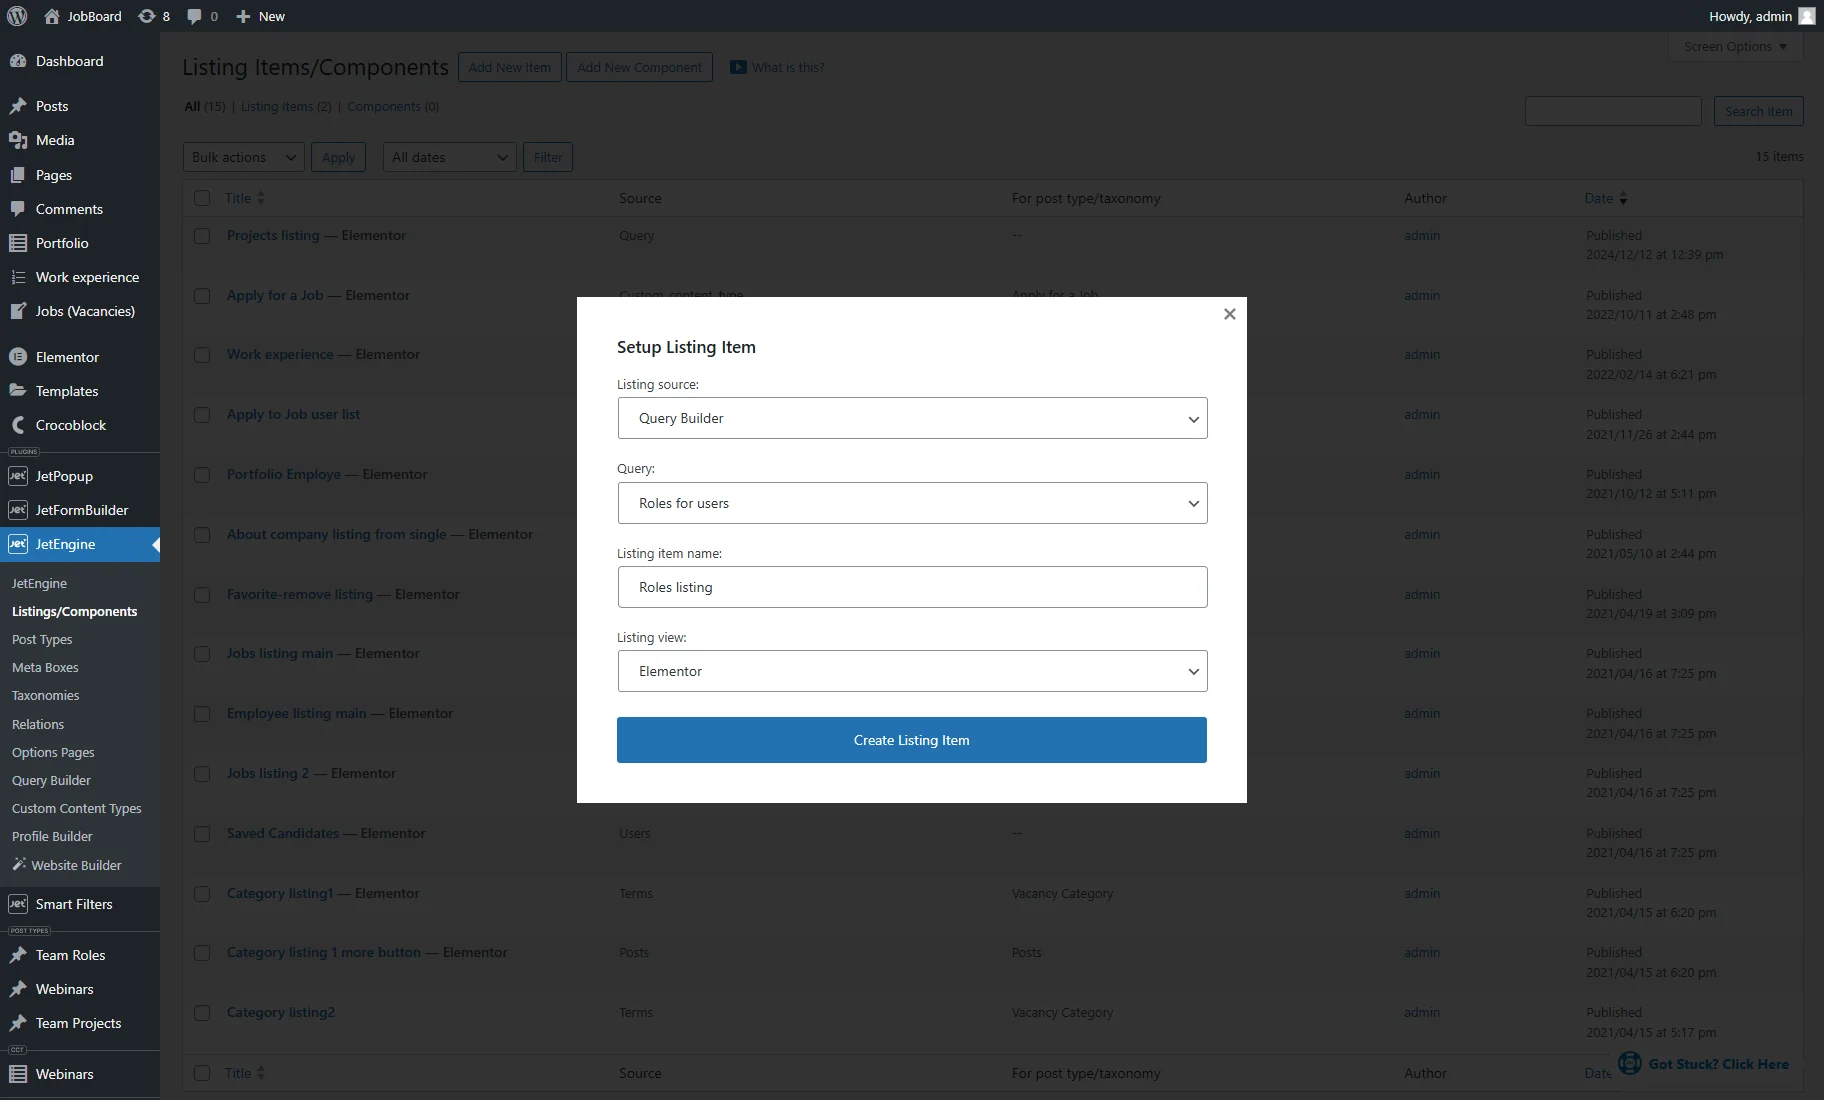
Return to the WordPress Dashboard > JetEngine > Listing/Components tab and press the “Add New Item” button.
In the Setup Listing Item pop-up, pick the “Query Builder” option as the Listing source, set the second created Query (“Roles for users” in our case), enter the Listing item name (“Roles listing” in this case), and choose the Listing view.
Then, click the “Create Listing Item” button.
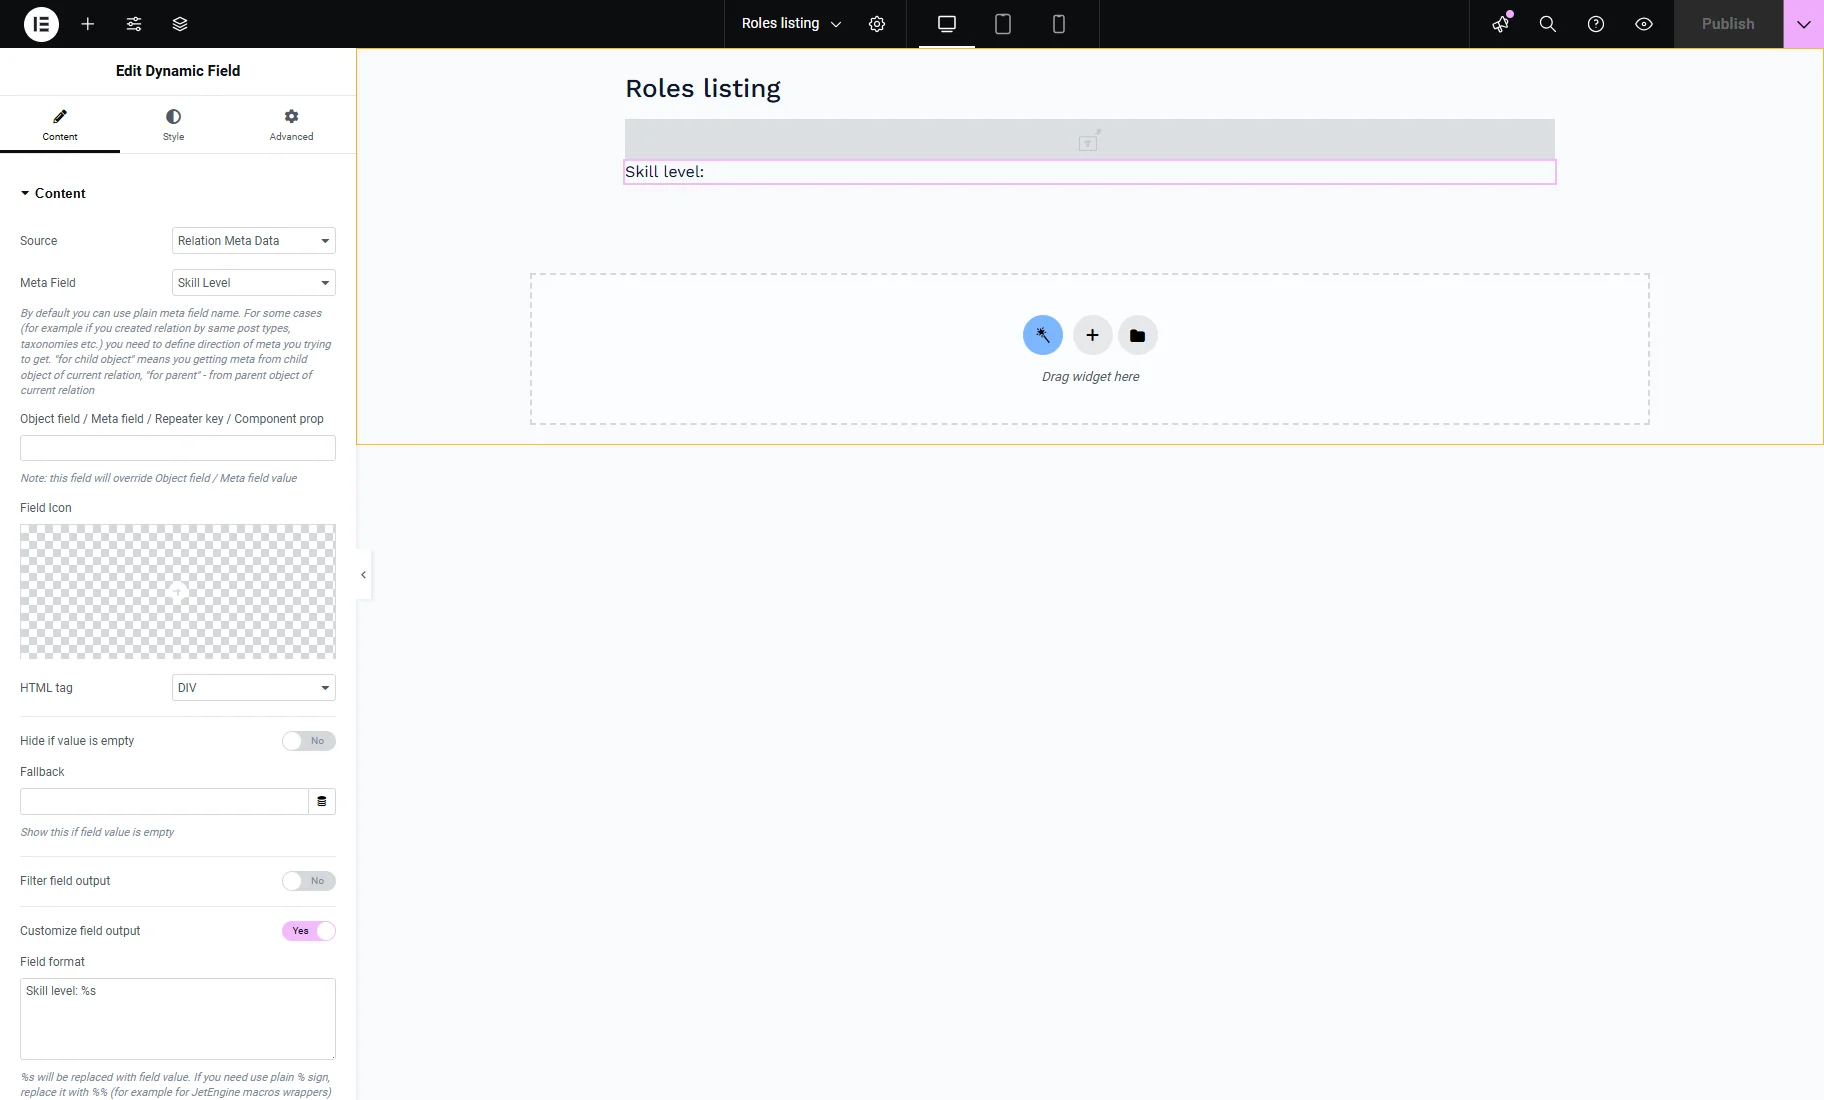
As we did for the previous Listing template, we displayed the post and relation meta field values with Dynamic Fields.
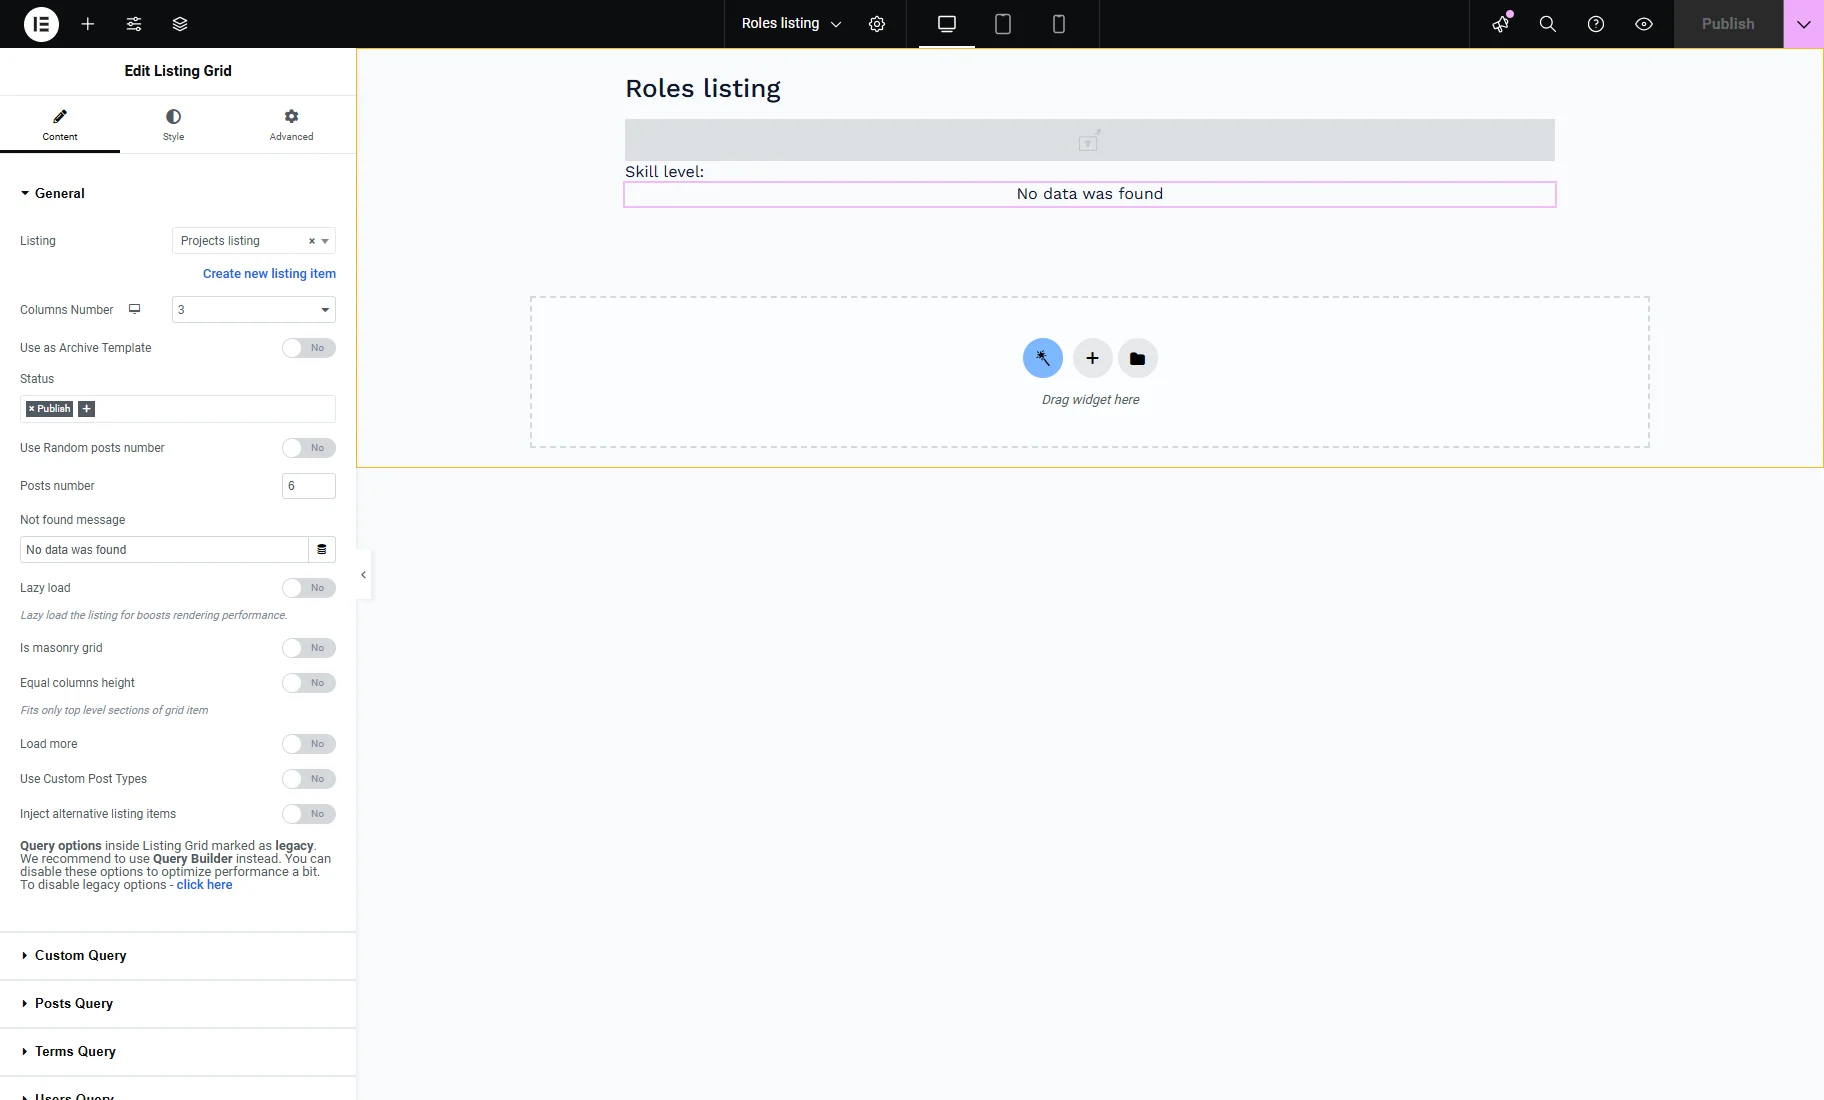
Next, we drag-n-drop the Listing Grid and select the pre-made Listing. As we mentioned above, the preview isn’t available for now.
Customize the Listing template components and save the changes.
Placing the Nested Repeater
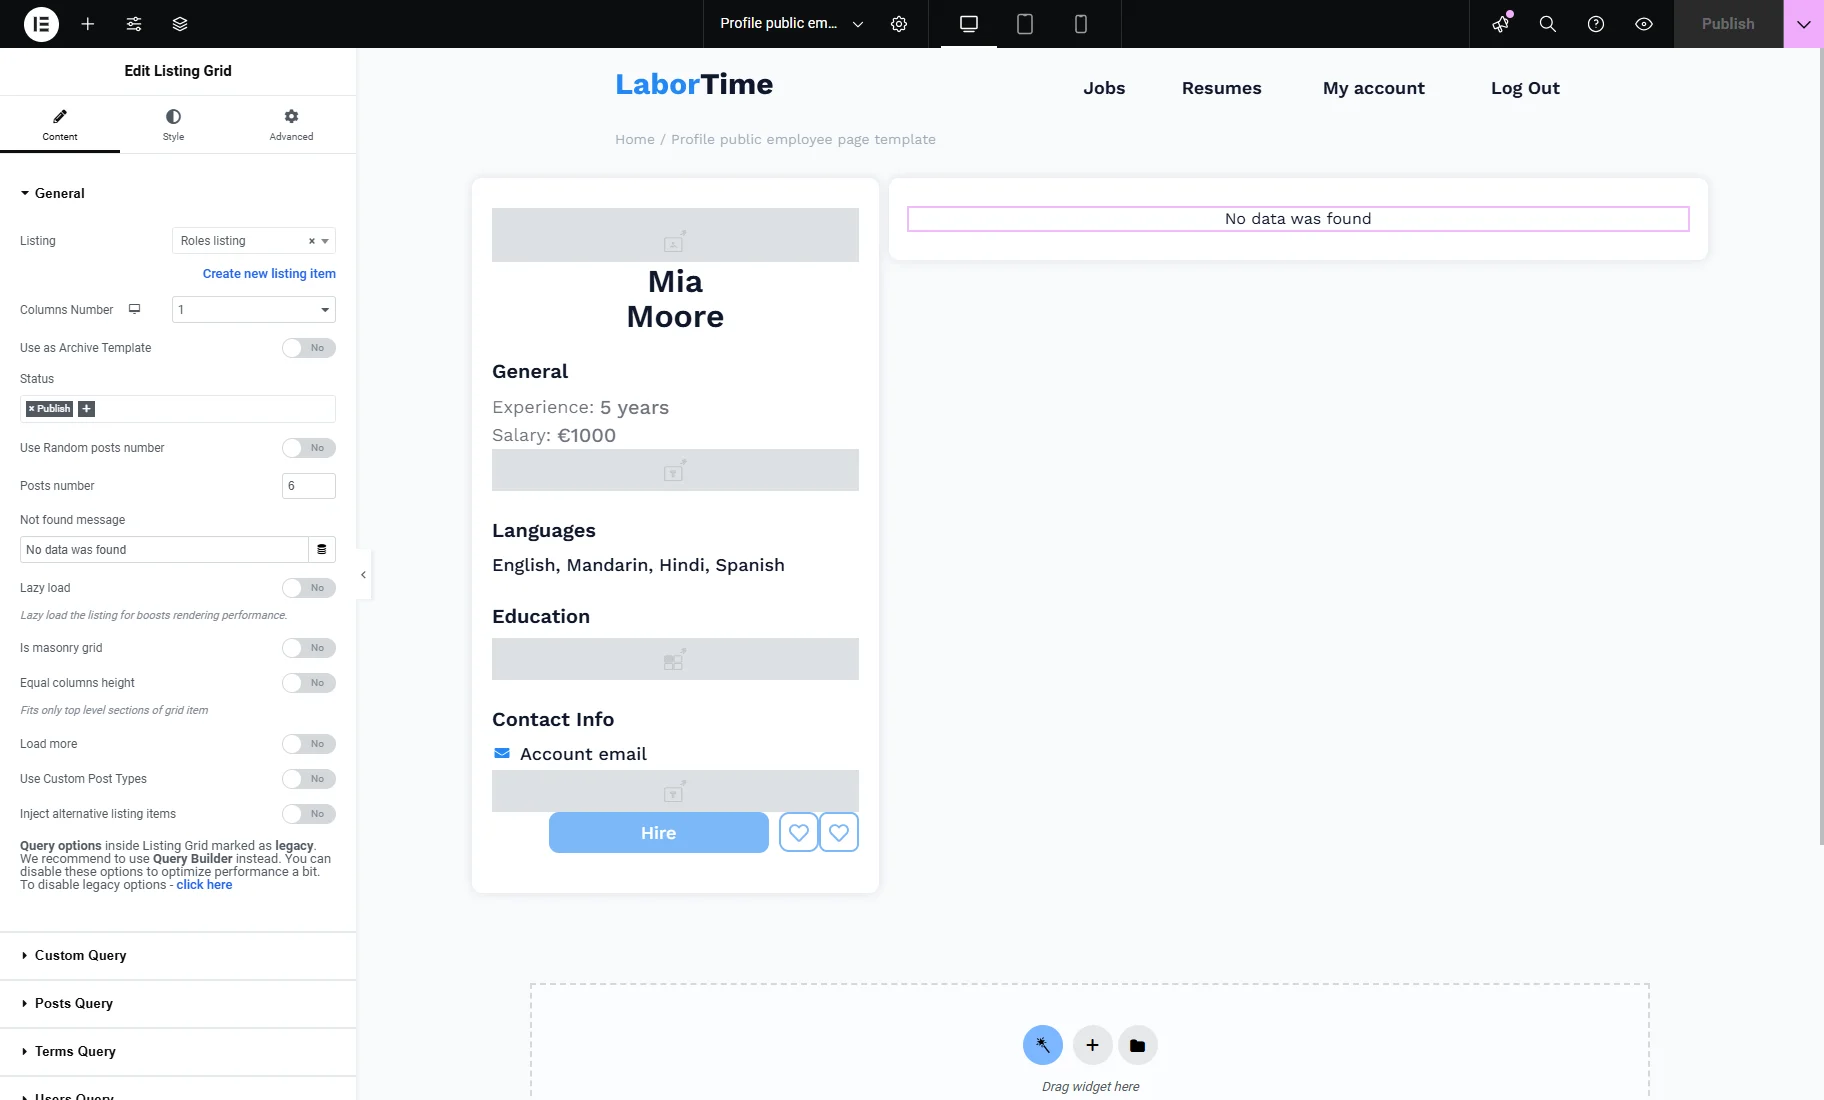
Now, we can place the Listing Grid with the nested listing on the Single template of the grandparent object. We will insert it on the User Profile page build with the Profile Builder feature.
We open the subpage template with user information in the editor, place the Listing Grid, choose the Listing created in the previous step, and save the changes.
Checking the Result
On the front end, we open the Profile page of the required user (grandparent). The page shows related parent and children items with the nested listing.
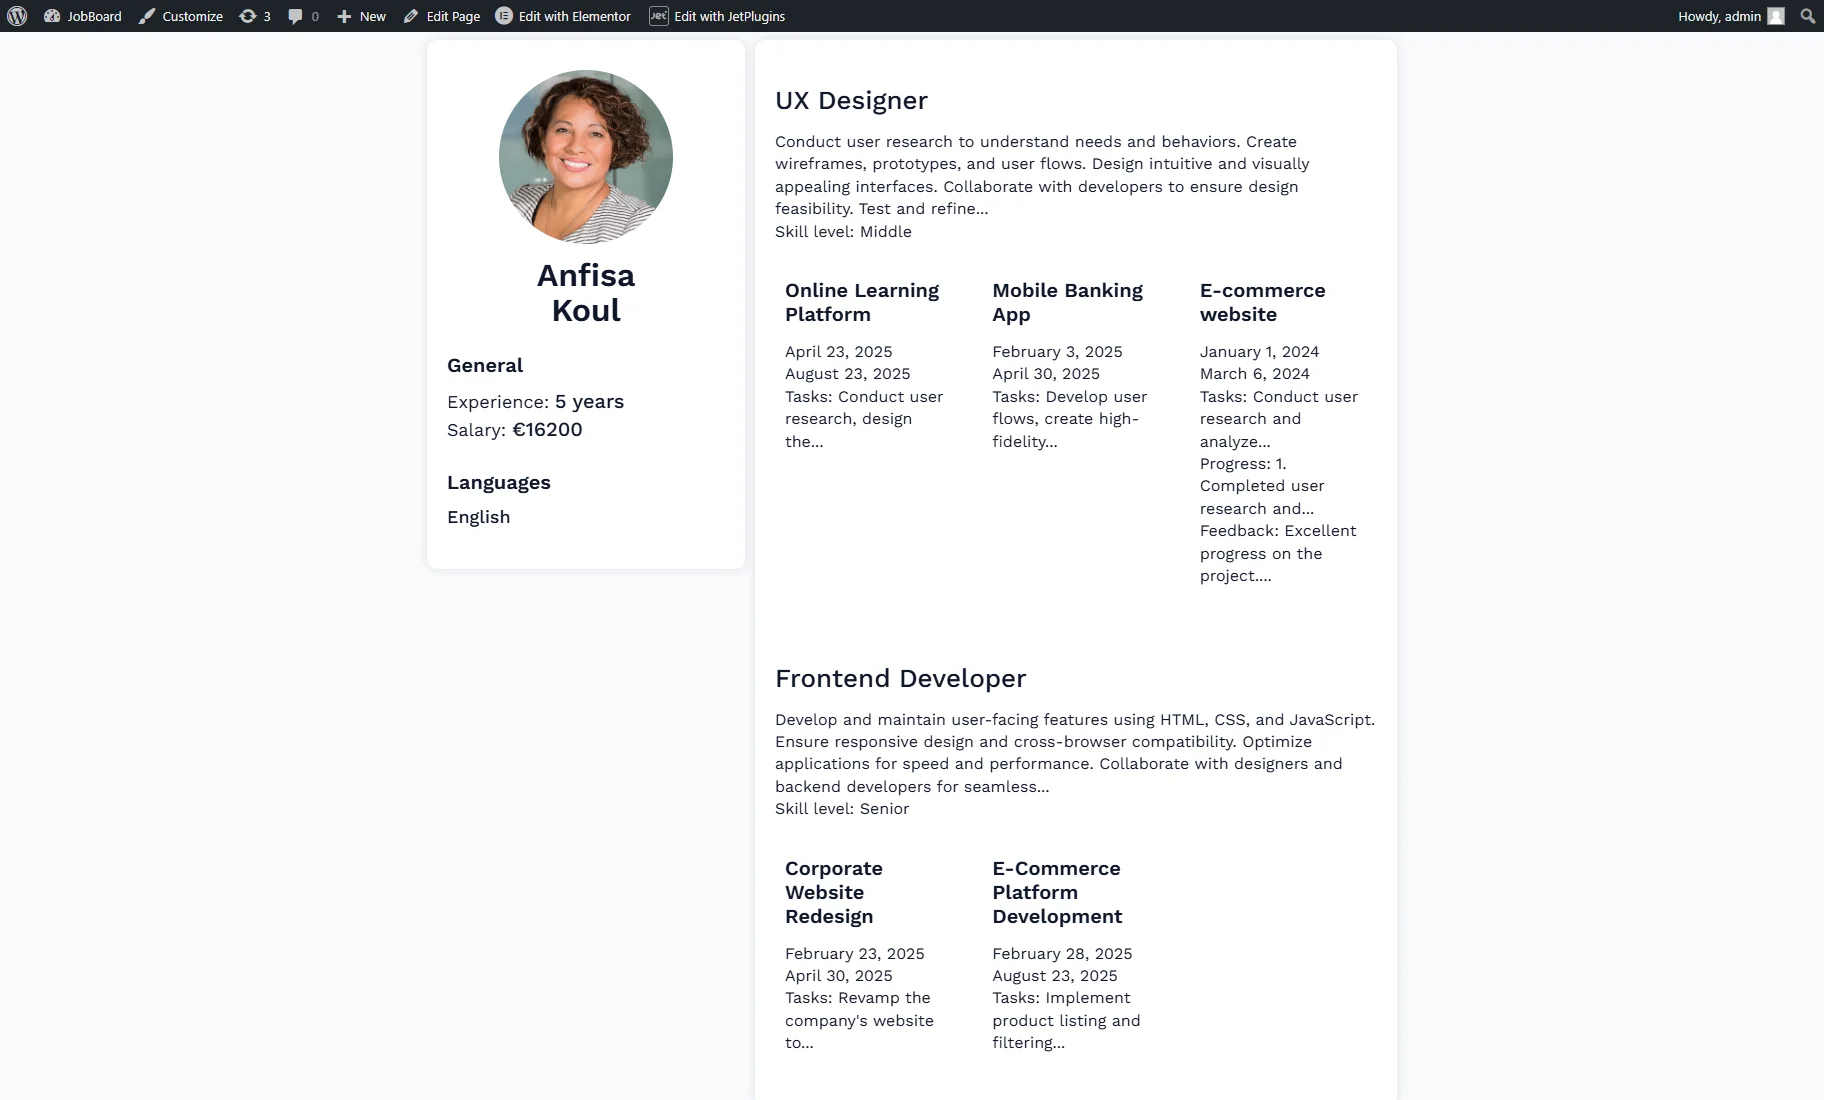
That’s all. Now you know how to create a three-stage relation structure and display the grouped items on the front end with the nested listing using the JetEngine plugin for WordPress.