How to Manage Сustom Booking Orders CPT
Discover how to manage the custom booking orders Custom Post Type for the WordPress JetBooking plugin with the help of the JetEngine plugin.
Before you start, check the tutorial requirements:
- Elementor (Free version), Block editor (Gutenberg), or Bricks
- JetBooking plugin installed and activated
- JetEngine plugin installed and activated
- JetThemeCore plugin installed and activated
- JetFormBuilder plugin installed and activated
This tutorial focuses on creating the Orders CPT, managing and updating orders, and displaying them on the front end with the help of JetEngine and JetBooking WordPress plugins.
The “Orders” Custom Post Type (CPT) is a useful solution for cases where online payments are not used, but orders need to be organized on the backend and made available for display on the front end.
The “Orders” CPT is needed when the WooCommerce Integration is not used on the site. After submitting the booking form, a post is added to the “Orders” CPT, where the administrator can check, reorganize, or update the information or the booking’s status. These posts can be displayed on the front end and be available for the administrator only.
Creating the “Orders” Custom Post Type
First, let’s proceed to the WordPress Dashboard > JetEngine > Post Types > click the “Add Post Type” button.
Add the Post Type Name (“Orders”).
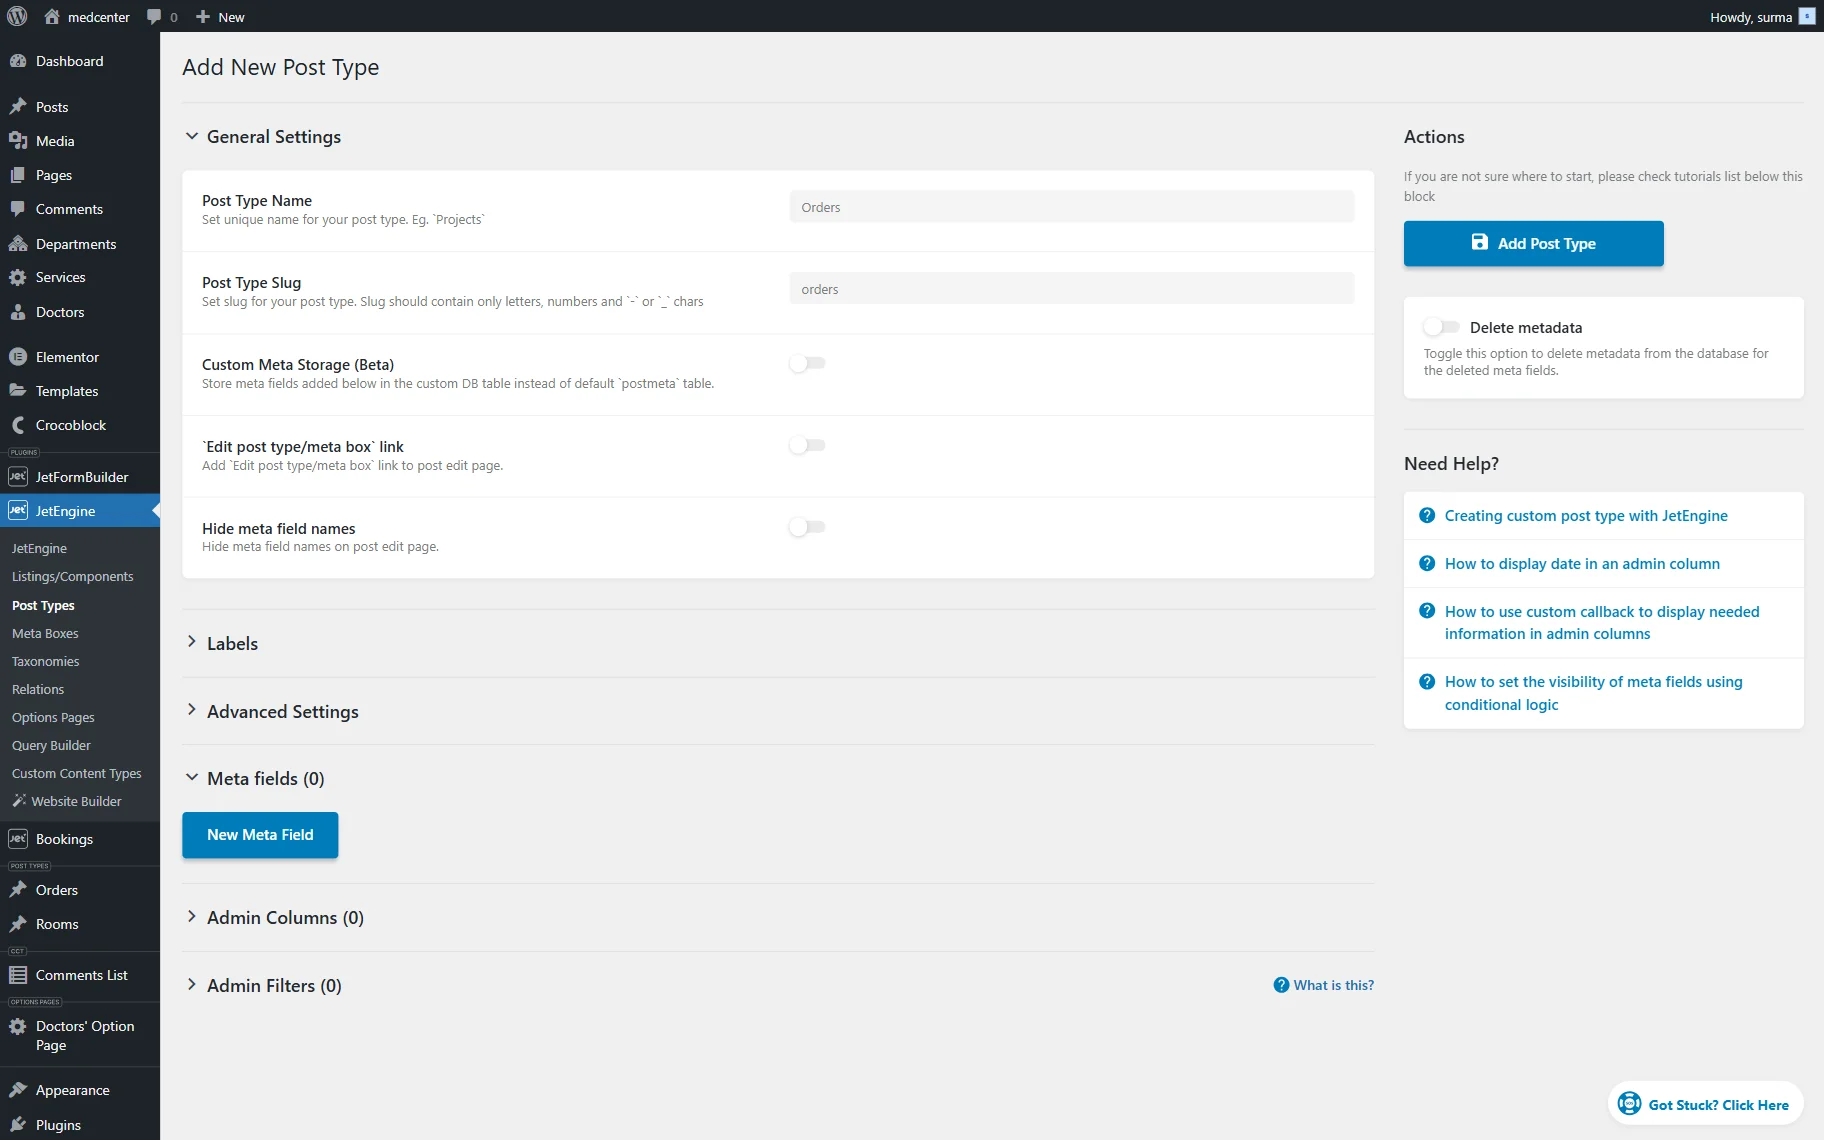
You can create a CPT without any meta fields, as we will get all the required information from the database.
However, in this tutorial, we added meta fields to get the extra data that is not default in the Booking Details.
We added “Text” fields for the customer’s name, surname, and email address, as well as “Number” fields for the customer’s number and service price, and “Date” fields.

Click the “Add Post Type” button once you are ready.
Adjusting the Booking Orders Post Type
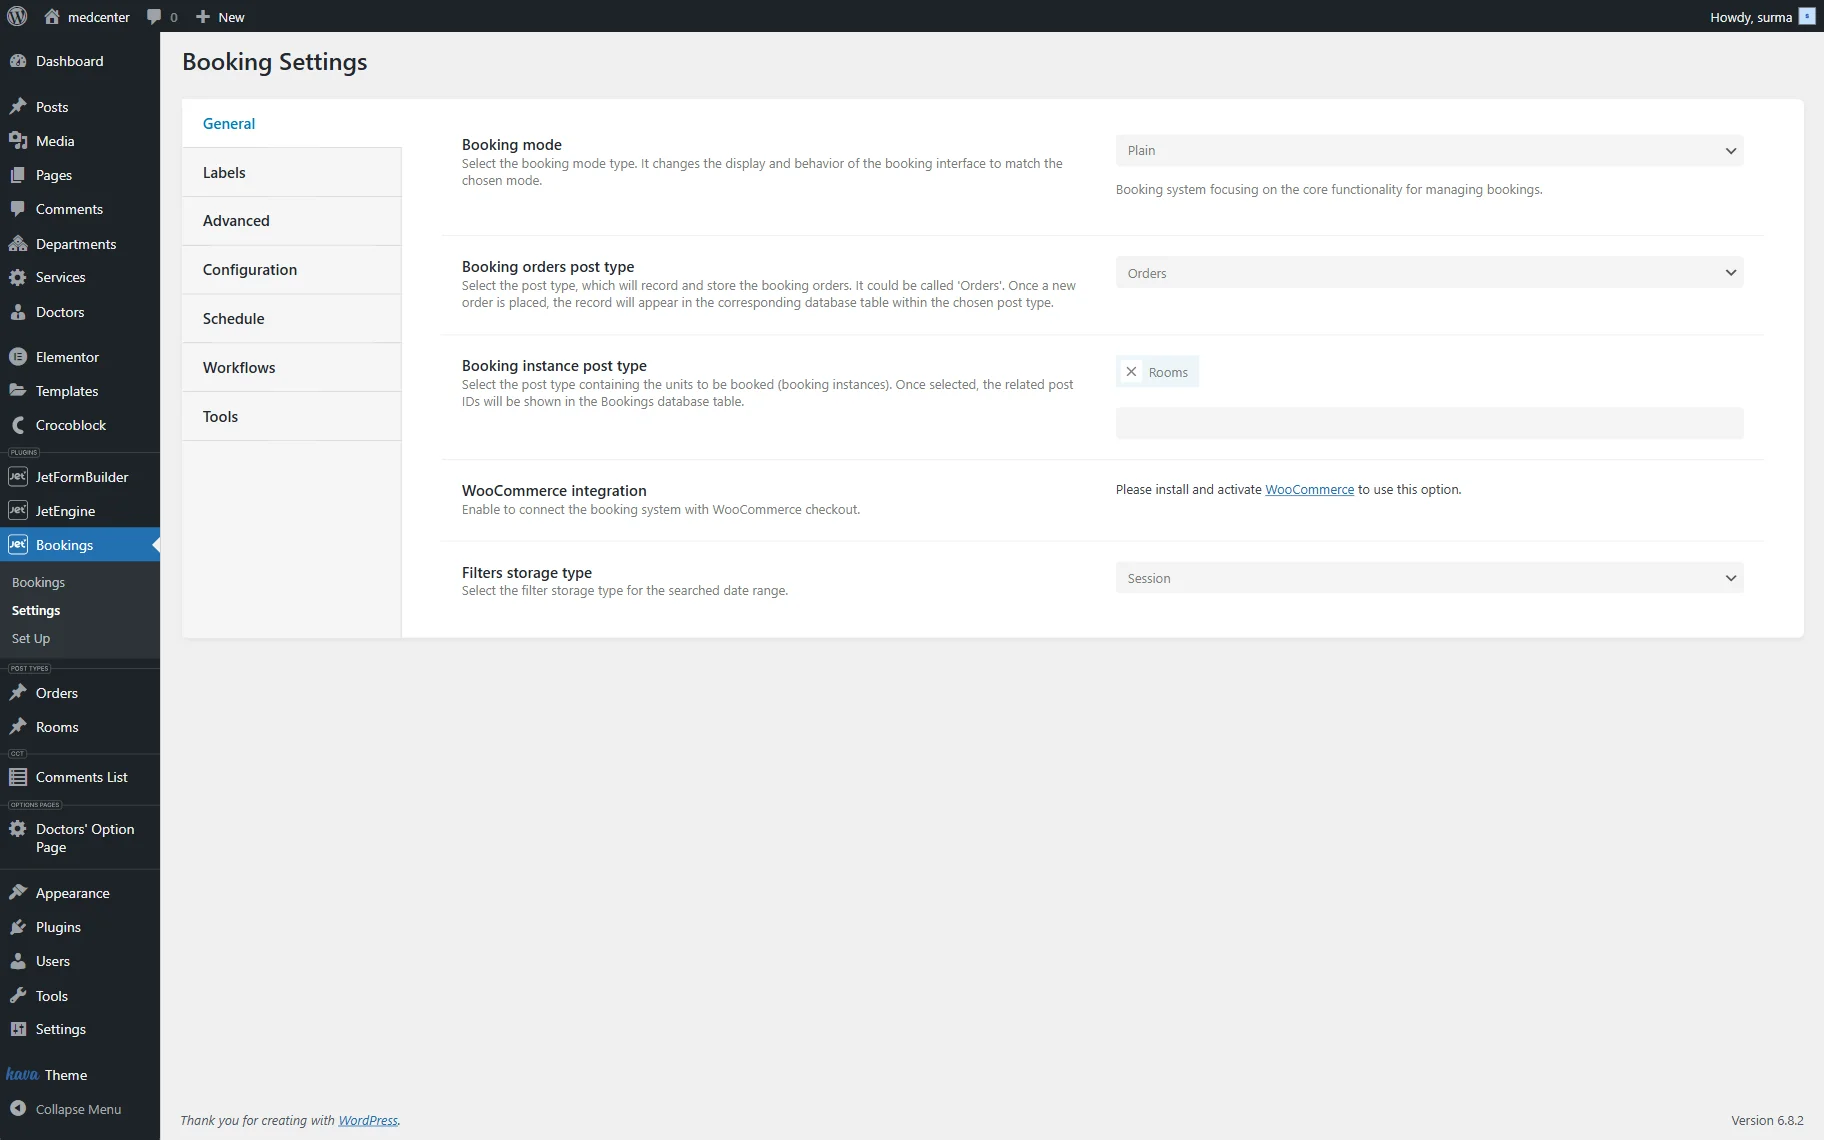
Now, proceed to the WordPress Dashboard > Bookings > Settings > General. In the Booking orders post type field, select the “Orders” CPT we have just created.
Organizing Booking Order Data on the Backend
Once the “Orders” CPT is created, the booking orders can be added via the booking form. Let’s have a closer look.
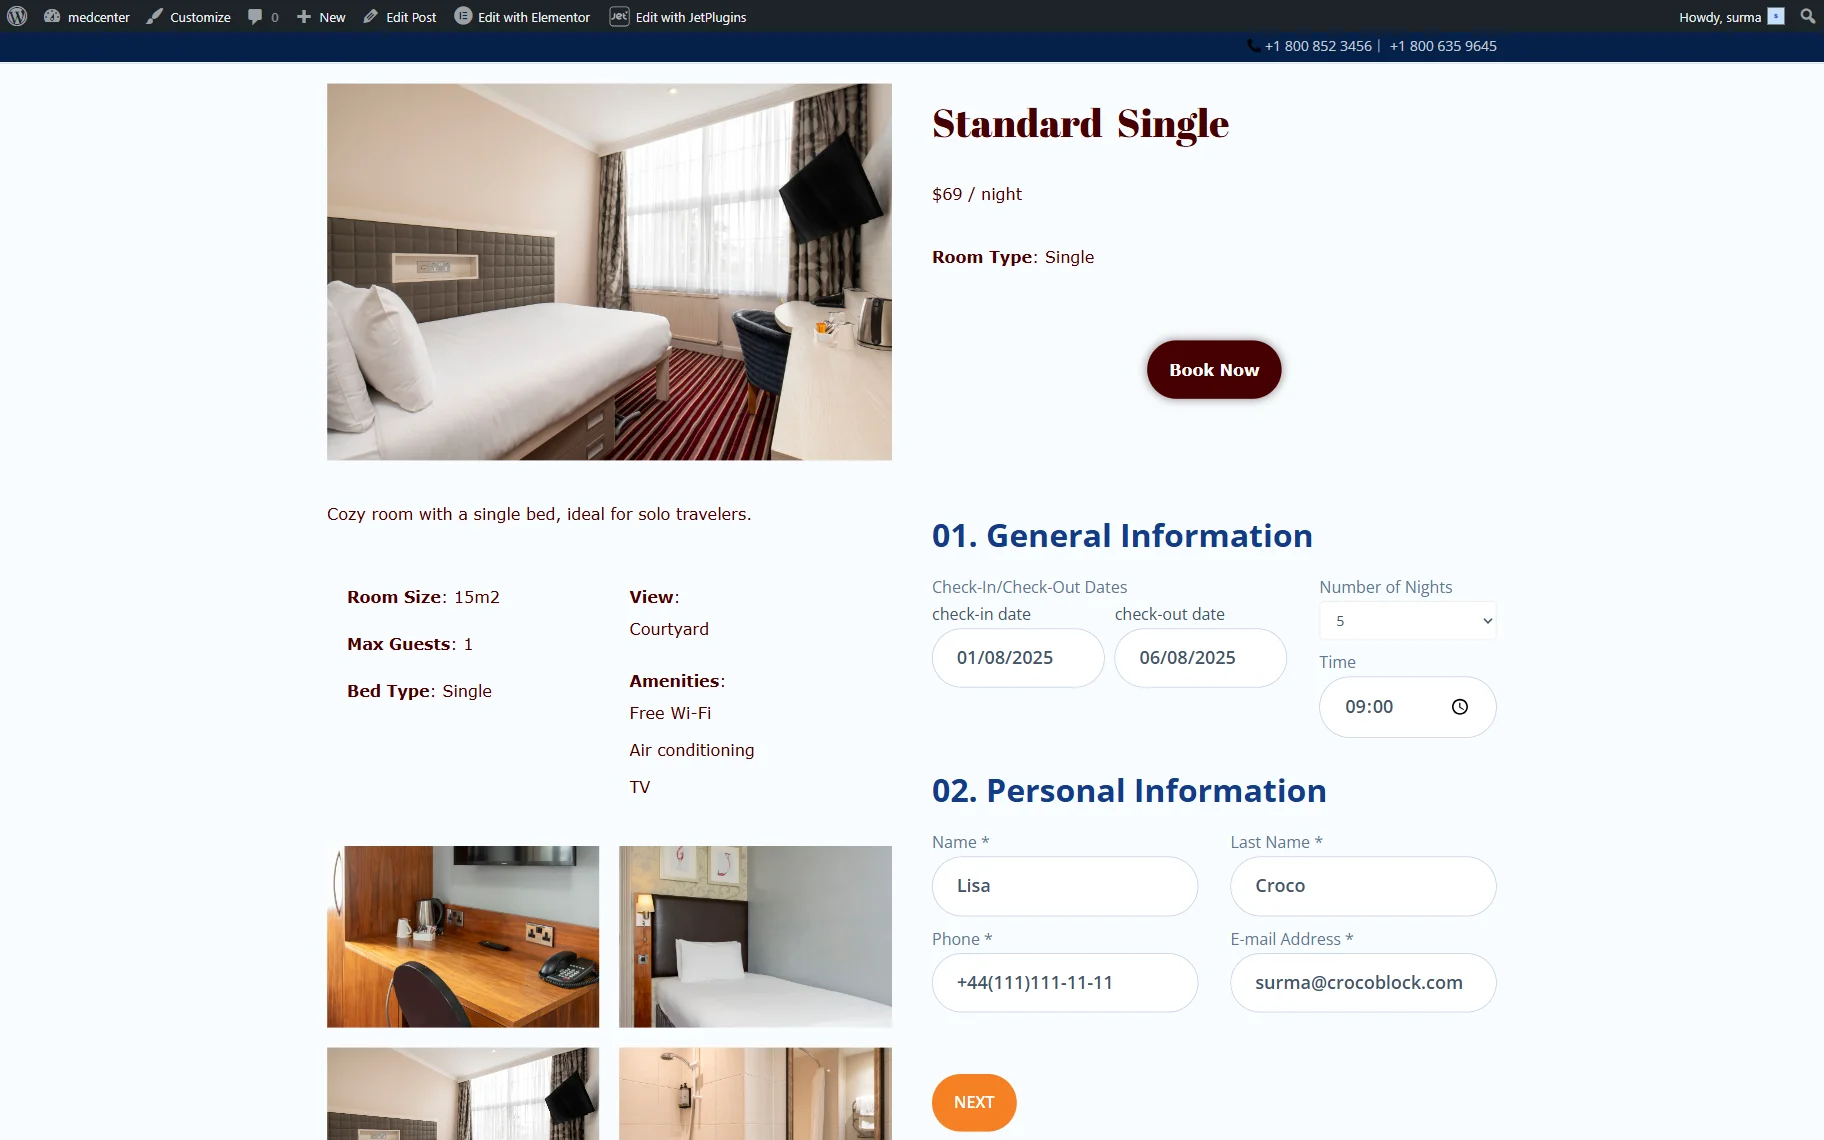
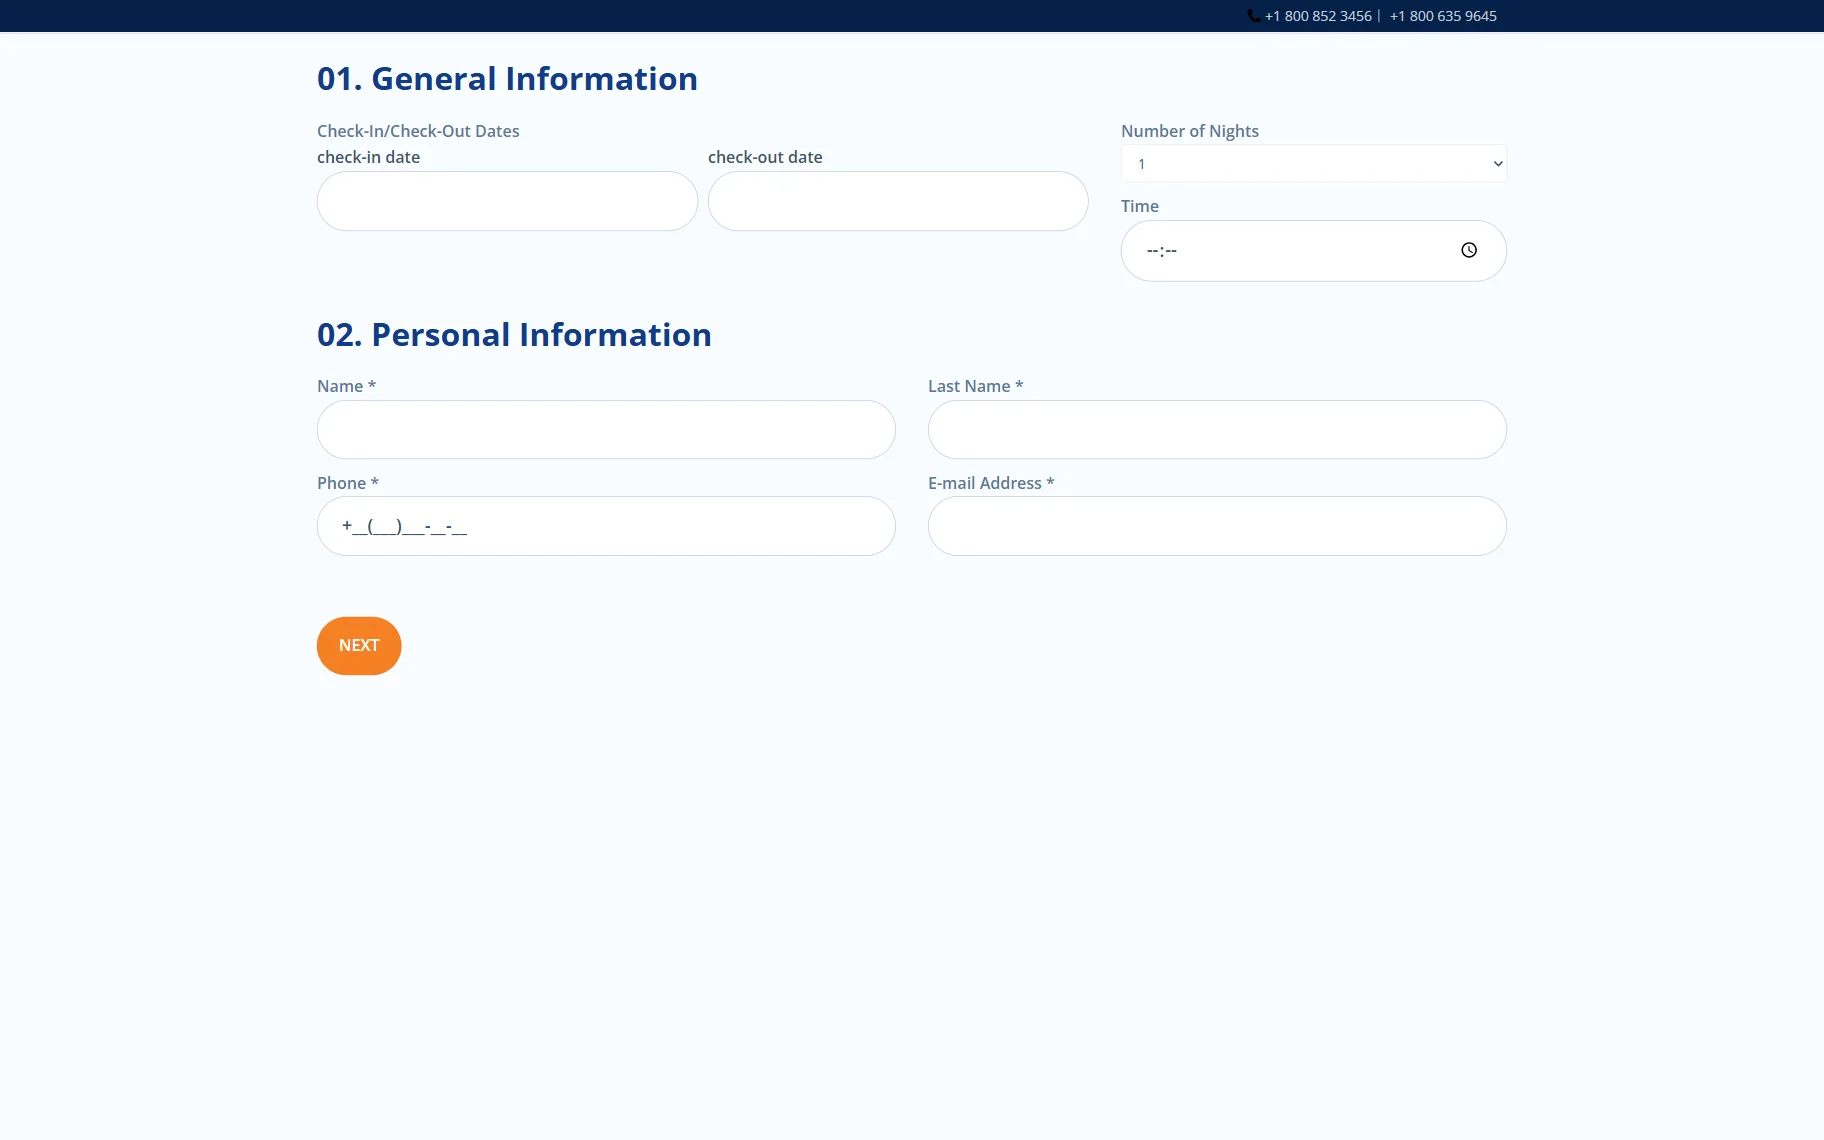
Ensure that you have a booking form created. Proceed to the front end page where the form is added and submit it after filling in all the form fields.
Now, let’s proceed to the “Orders” CPT, and here is our new post:
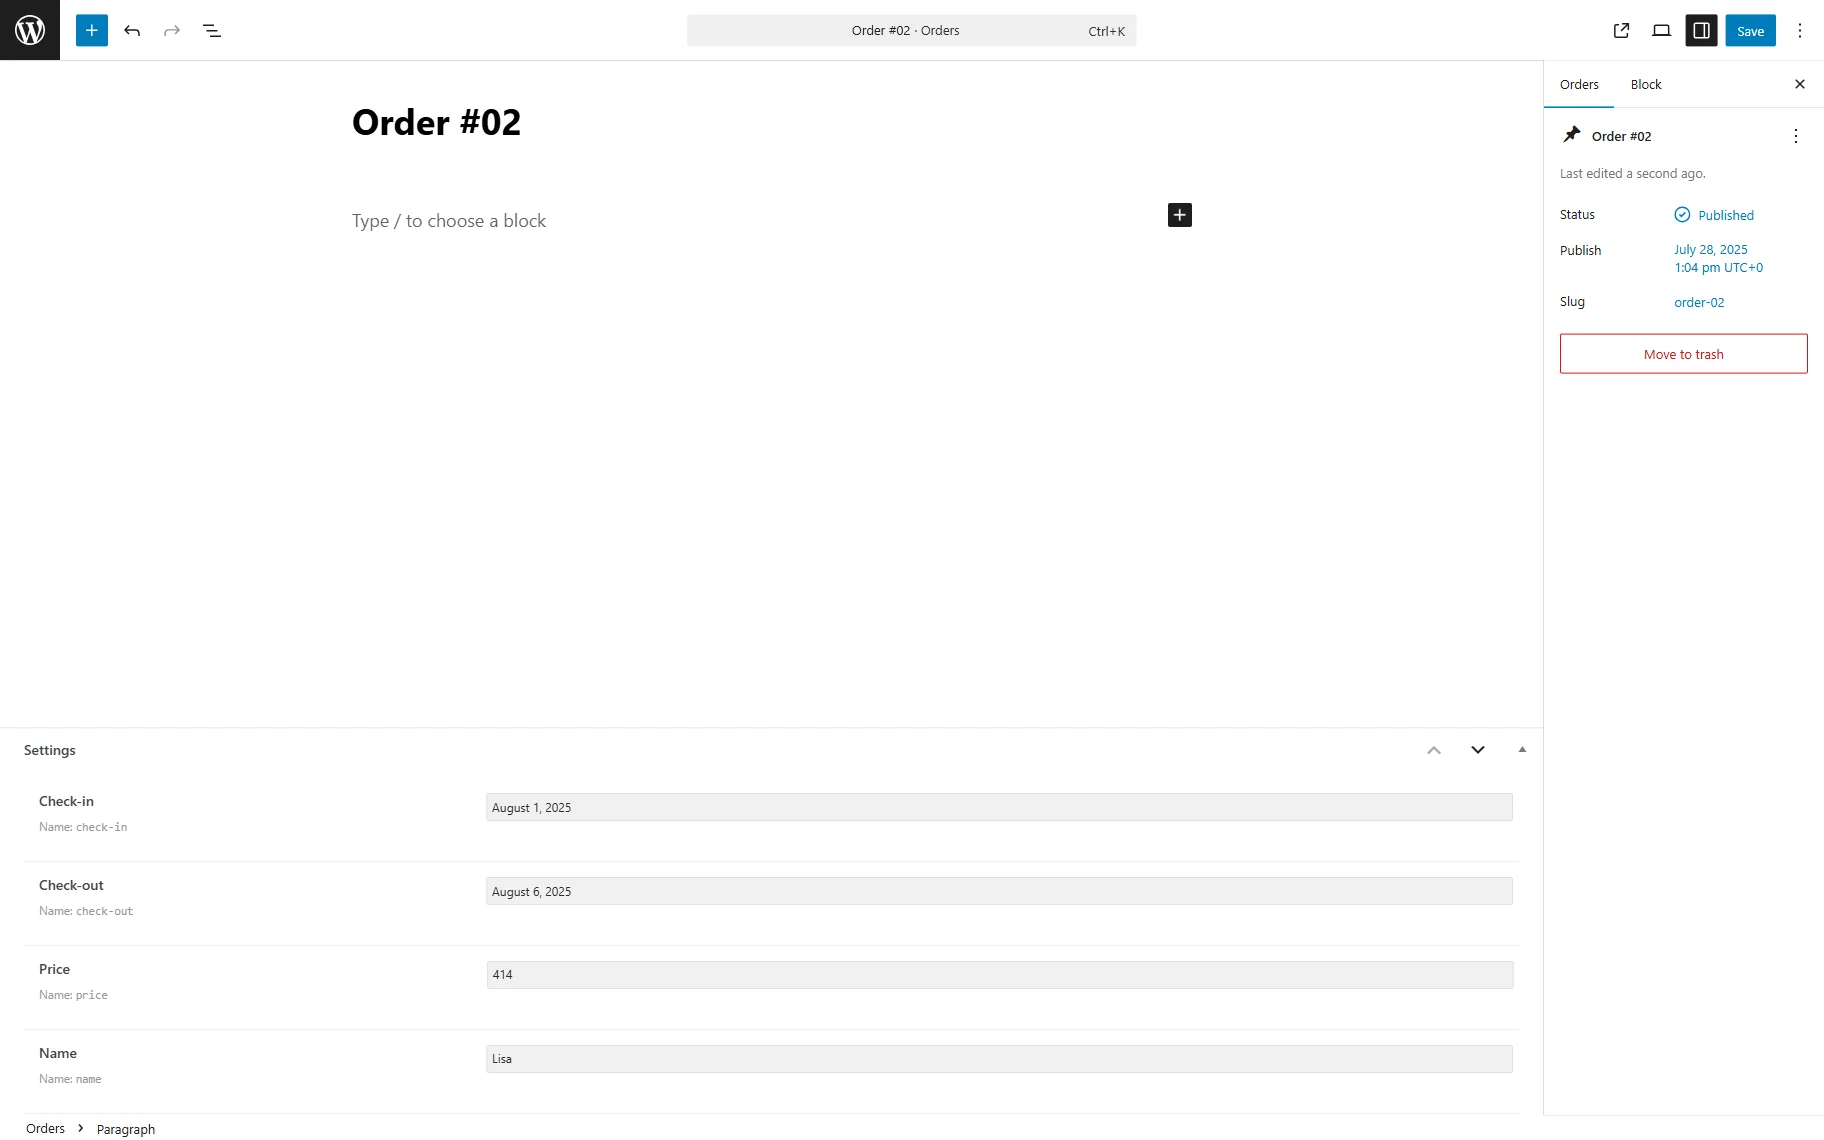
You can add or change the data in the meta fields if needed. Click the “Save” button if you made any changes.
Setting Up a Custom Query
Proceed to the WordPress Dashboard > JetEngine > Query Builder tab and press the “Add New” button to build a new query.
Type the query’s name (here, “Booking Orders List”) into the Name field and select the “JetBooking Query” option from the Query Type drop-down menu.
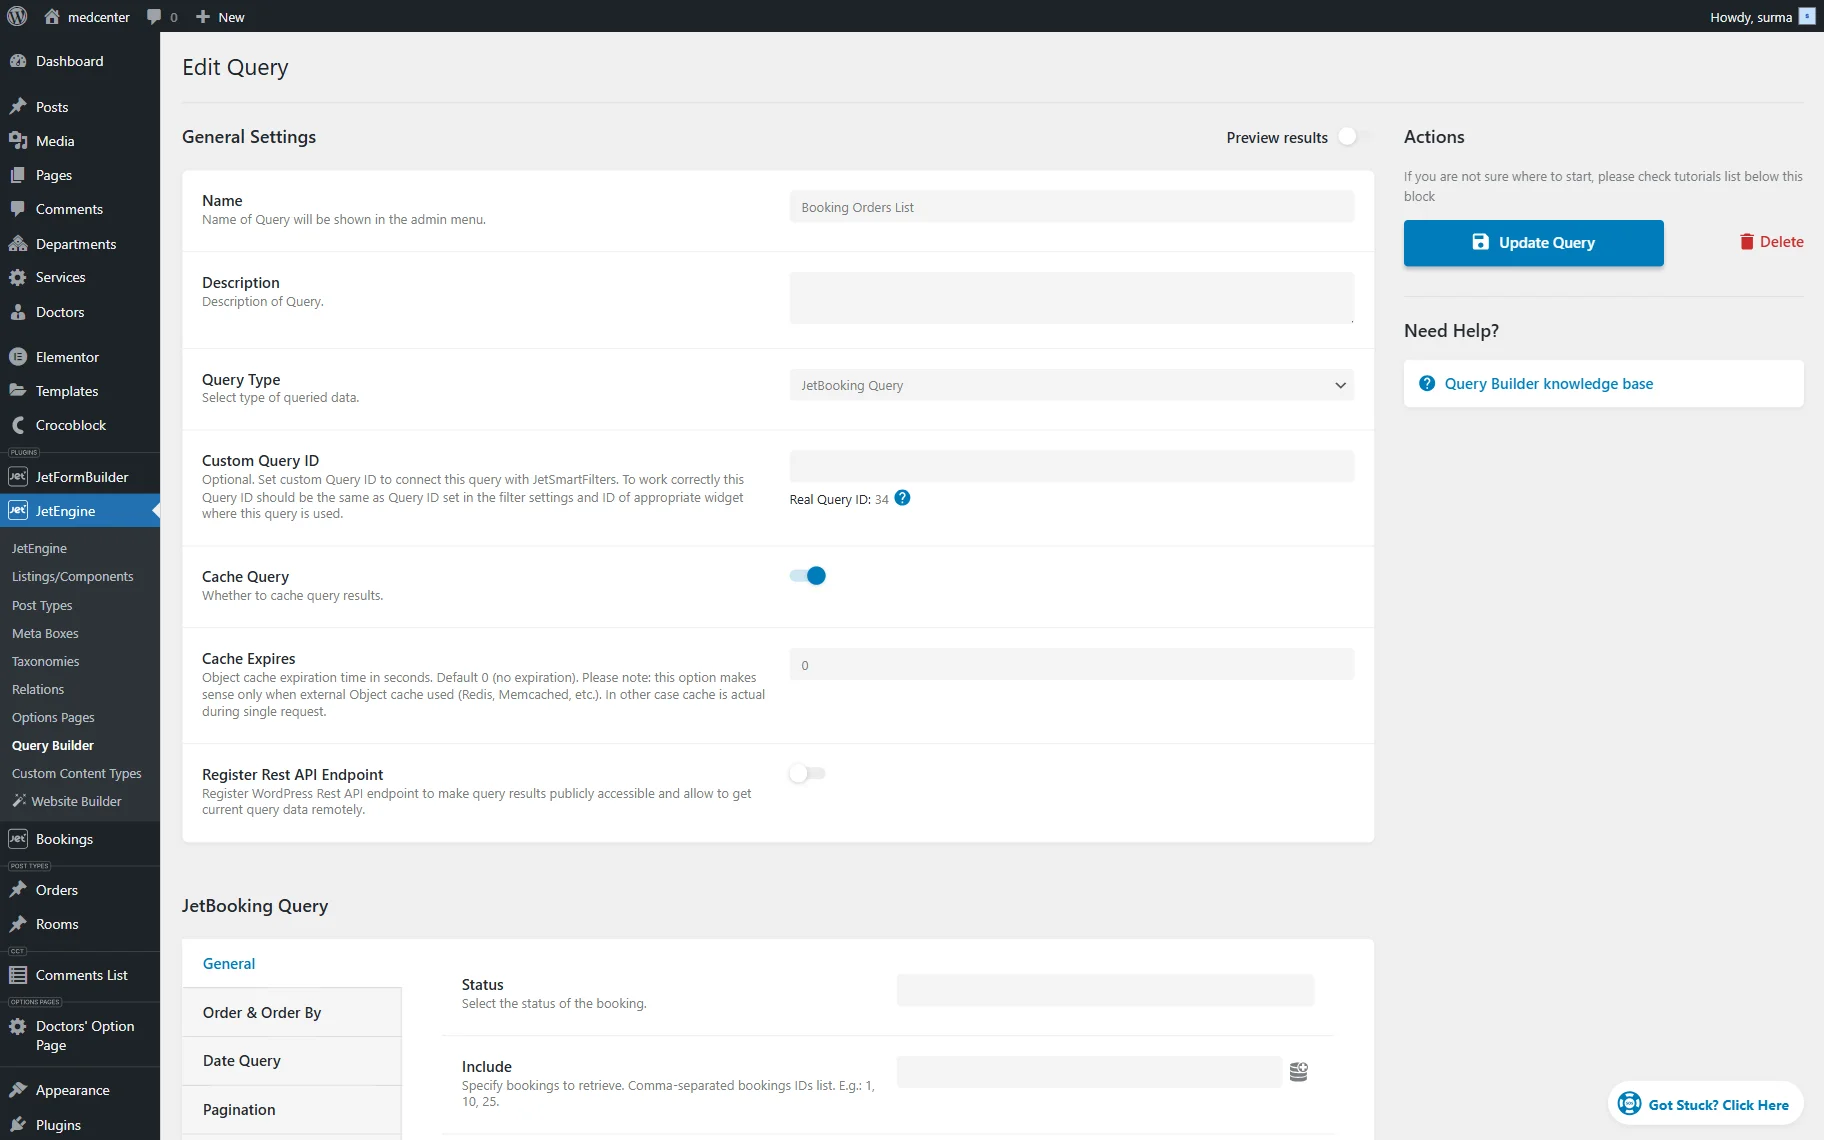
You can add more settings if needed to clarify the particular booking status or user, but in this tutorial, we will not do anything else in the query. In our JetBooking Query Type in the Query Builder Overview guide, you can find out more about the settings of the “JetBooking Query” type.
Click the “Add Query” button once you are ready.
Creating a Listing Item for the Booking Orders
If you need to display orders created on the site on the front end, you can use the Listing Grid widget.
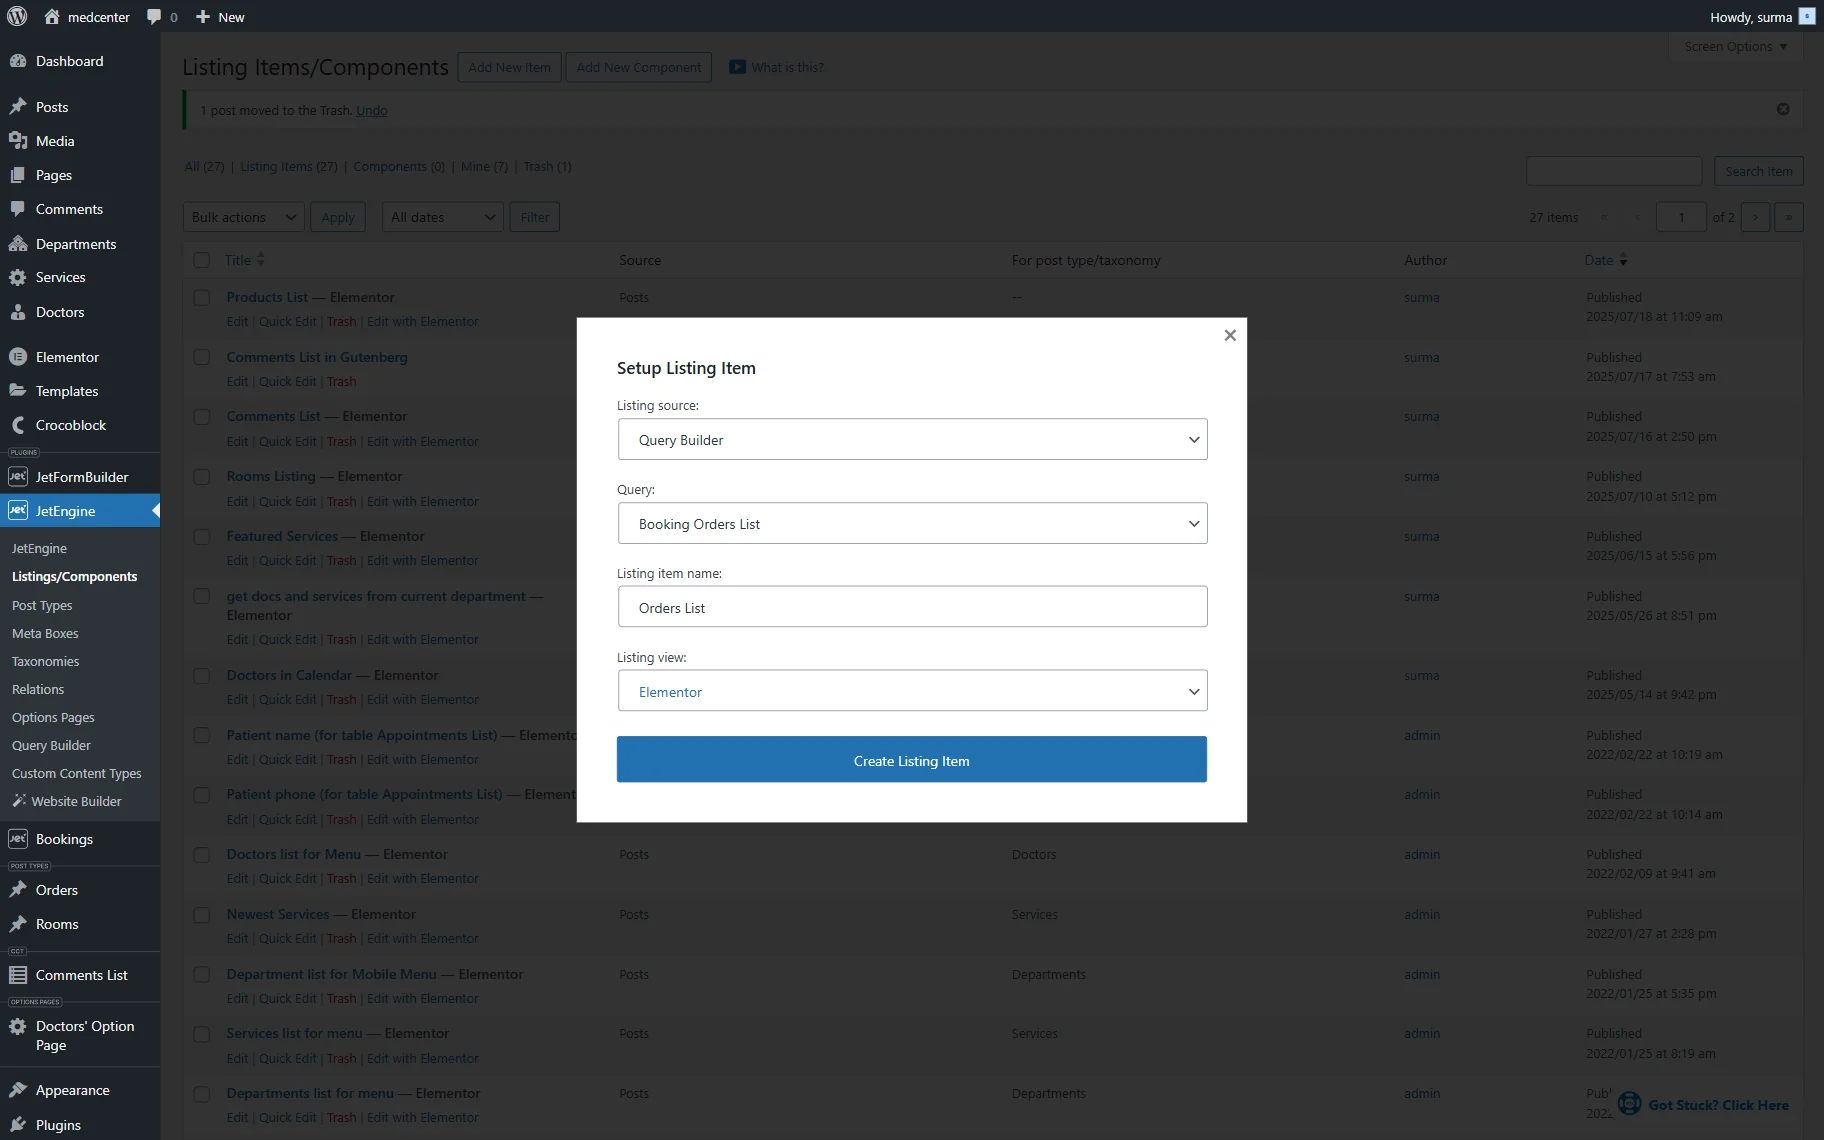
First, navigate to the WordPress Dashboard > JetEngine > Listings/Components tab and press the “Add New Item” button. Now, select the “Query Builder” option from the Listing source drop-down menu and choose the necessary query from the Query drop-down menu (here, we pick the “Booking Orders List” query); next, set the Listing item name field, and select the editor from the Listing view drop-down menu. After that, you can press the “Create Listing Item” button.
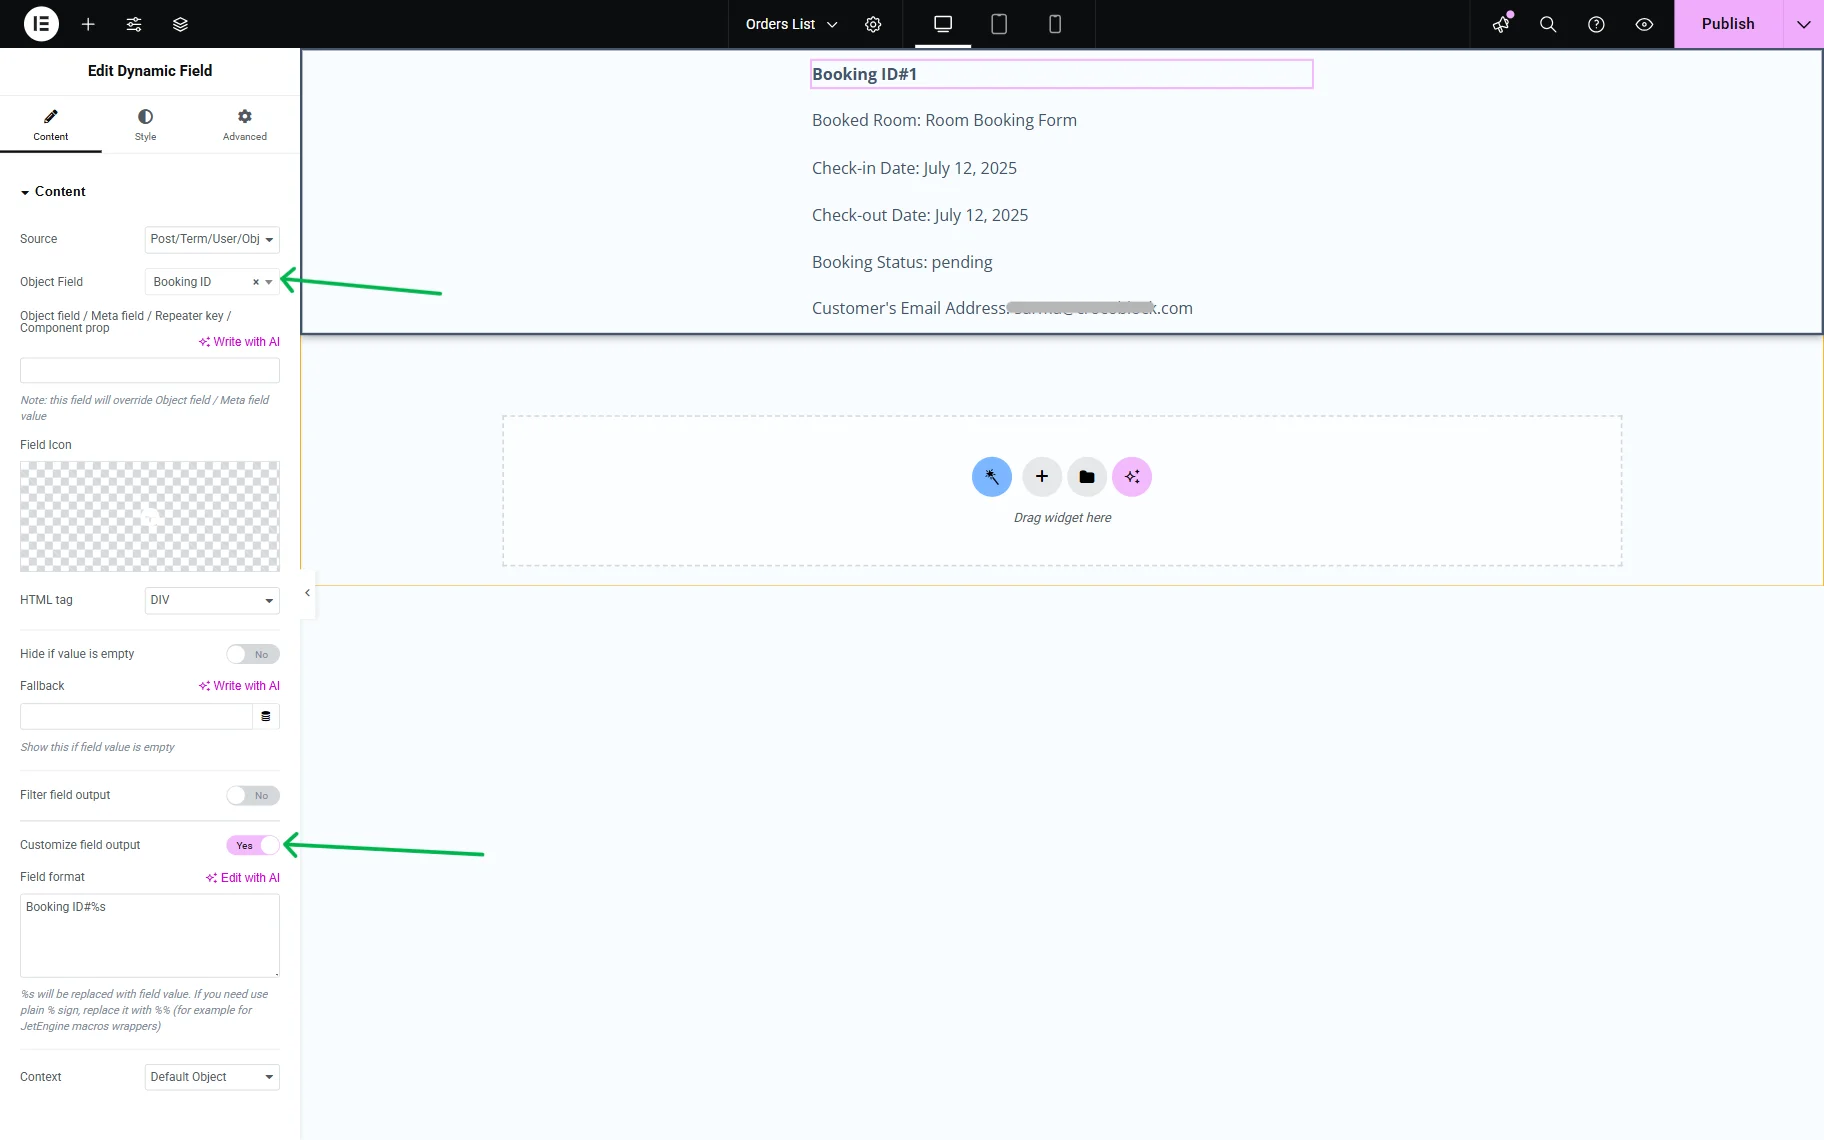
Add the necessary fields to the listing item. For this tutorial, we find and drag-and-drop the Dynamic Field widget.
First, we select the “Post/Term/User/Object Data” option from the Source drop-down menu and set the “Booking ID” option in the Object Field drop-down menu, located in the JetBooking section. Additionally, we enabled the Customize field output toggle and added the “Booking ID#” text in the newly appeared field.
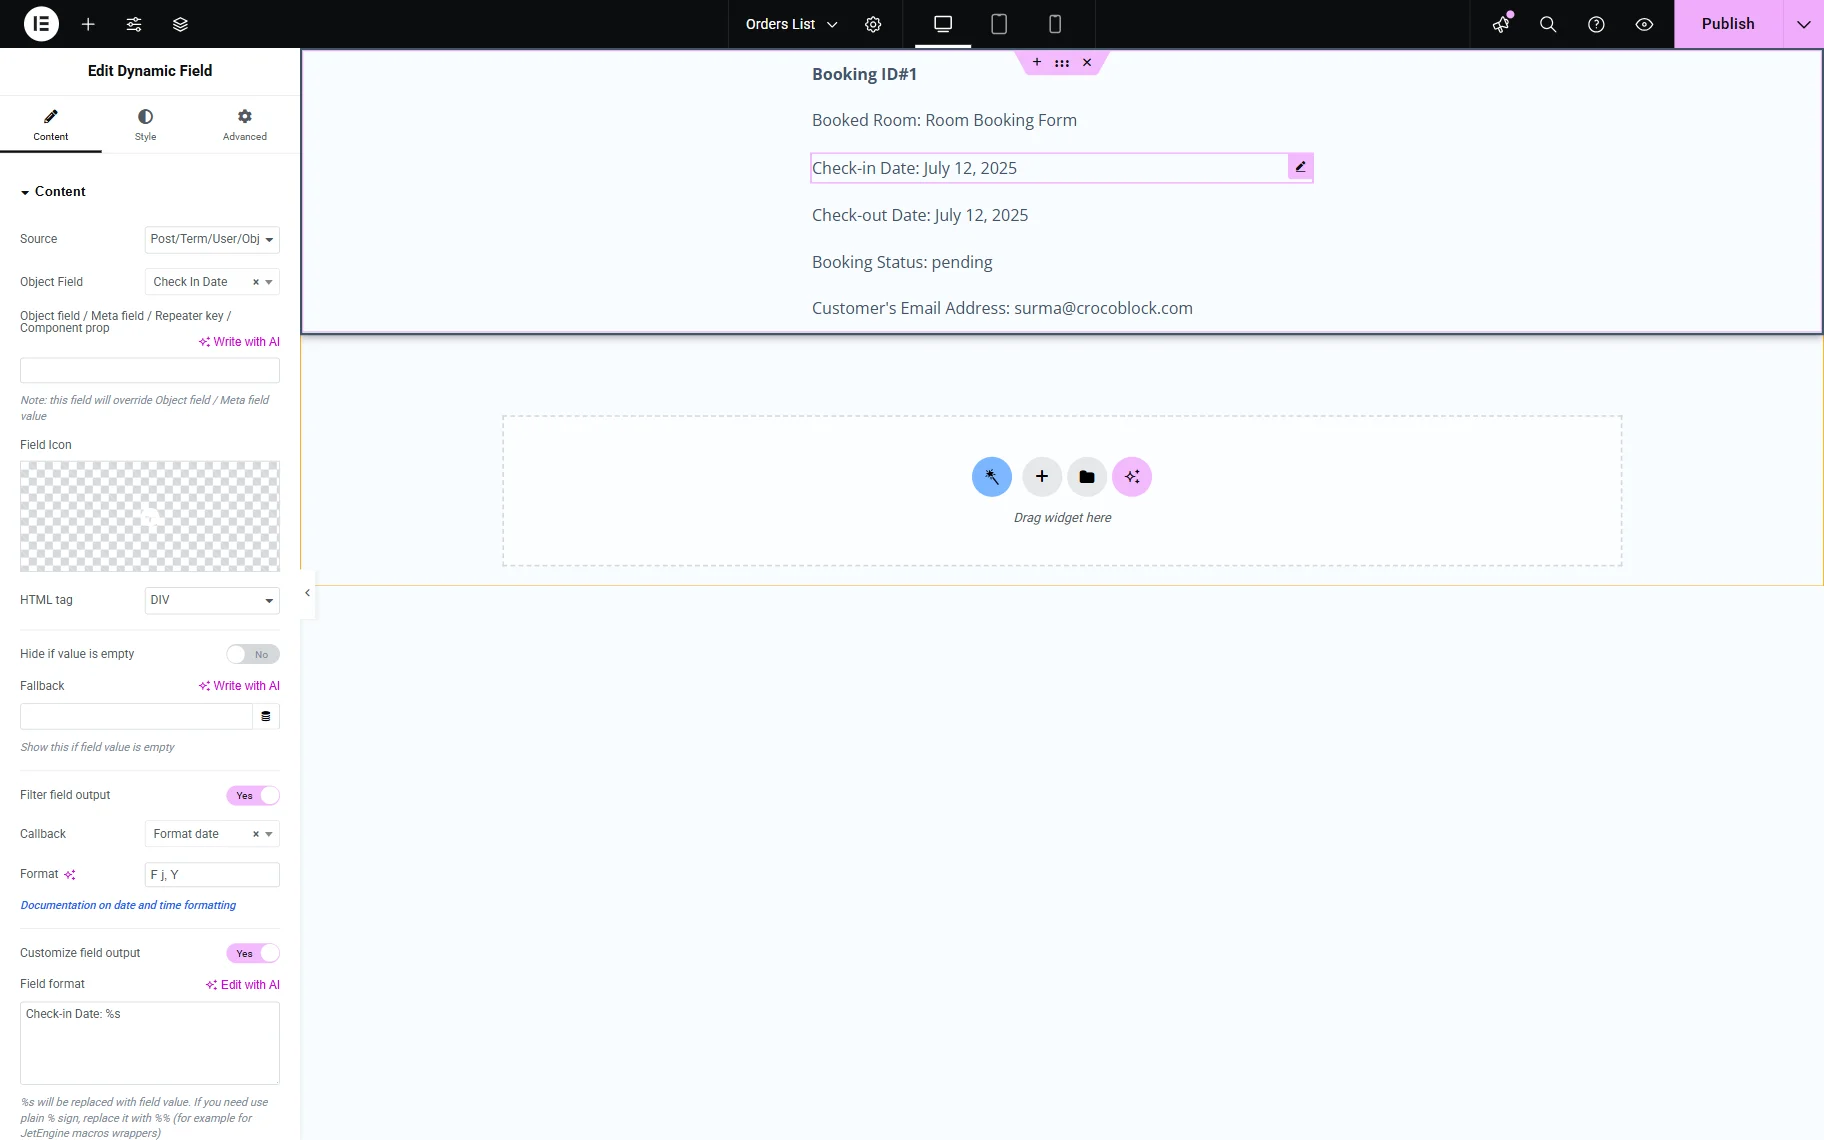
After that, we duplicate the Dynamic Field widget and select the “Check In Date” option that can be found in the JetBooking section in the Object Field drop-down menu.
To display the data in the necessary format, activate the Filter field output toggle and select the format option from the Callback drop-down menu. In this case, we choose the “Format date” Callback and set the “F j, Y” Format to display the date in the “Month, day, year” view.
We enabled the Customize field output toggle and added the “Check-in Date:” text in the newly appeared field.
Similarly, we set up other fields to display the checkout date, the title of the booked service, the booking status, and the customer’s email address.
Click the “Publish” button once you are ready with the settings.
Displaying Orders on the Front End
Now, proceed to the editing page where you need to display the booking orders.
Add the Listing Grid widget to the page. In the Listing field, select the listing you have just created.
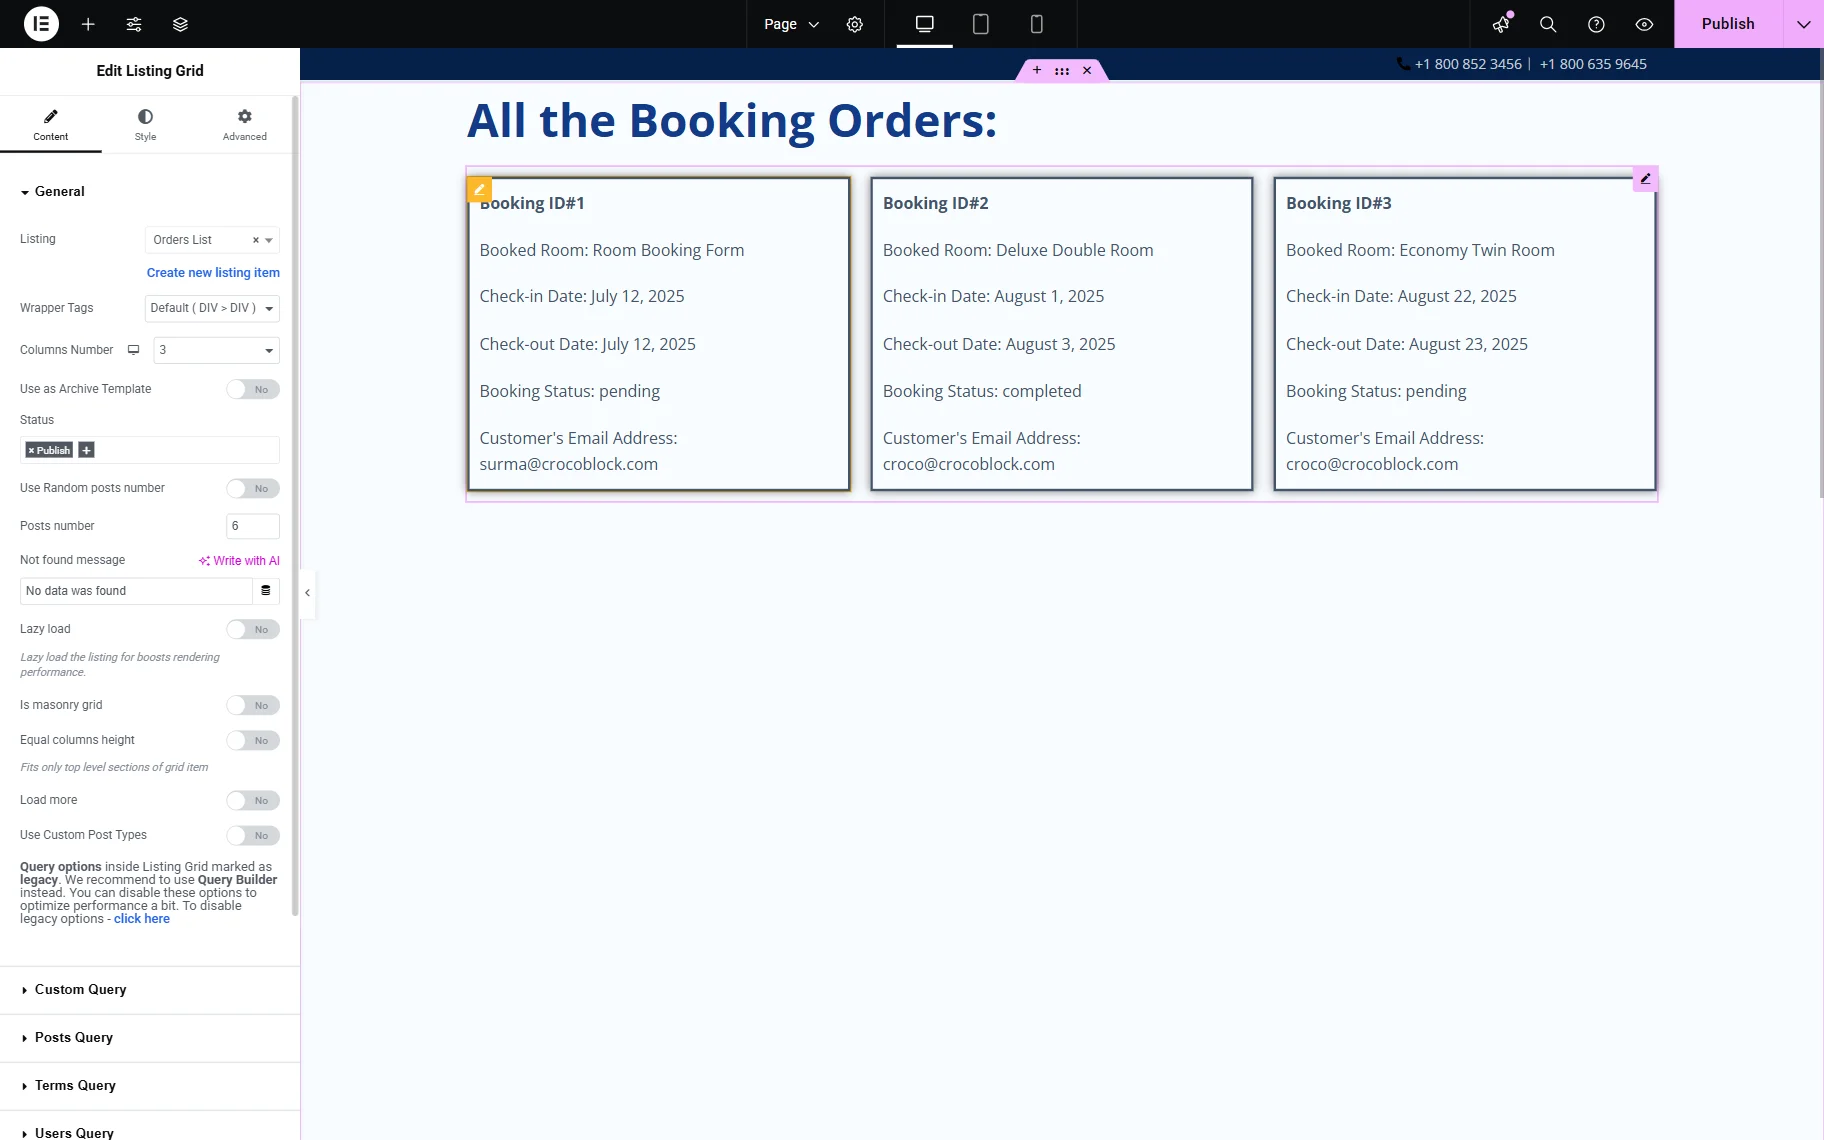
After all the settings are done, click the “Publish” button.
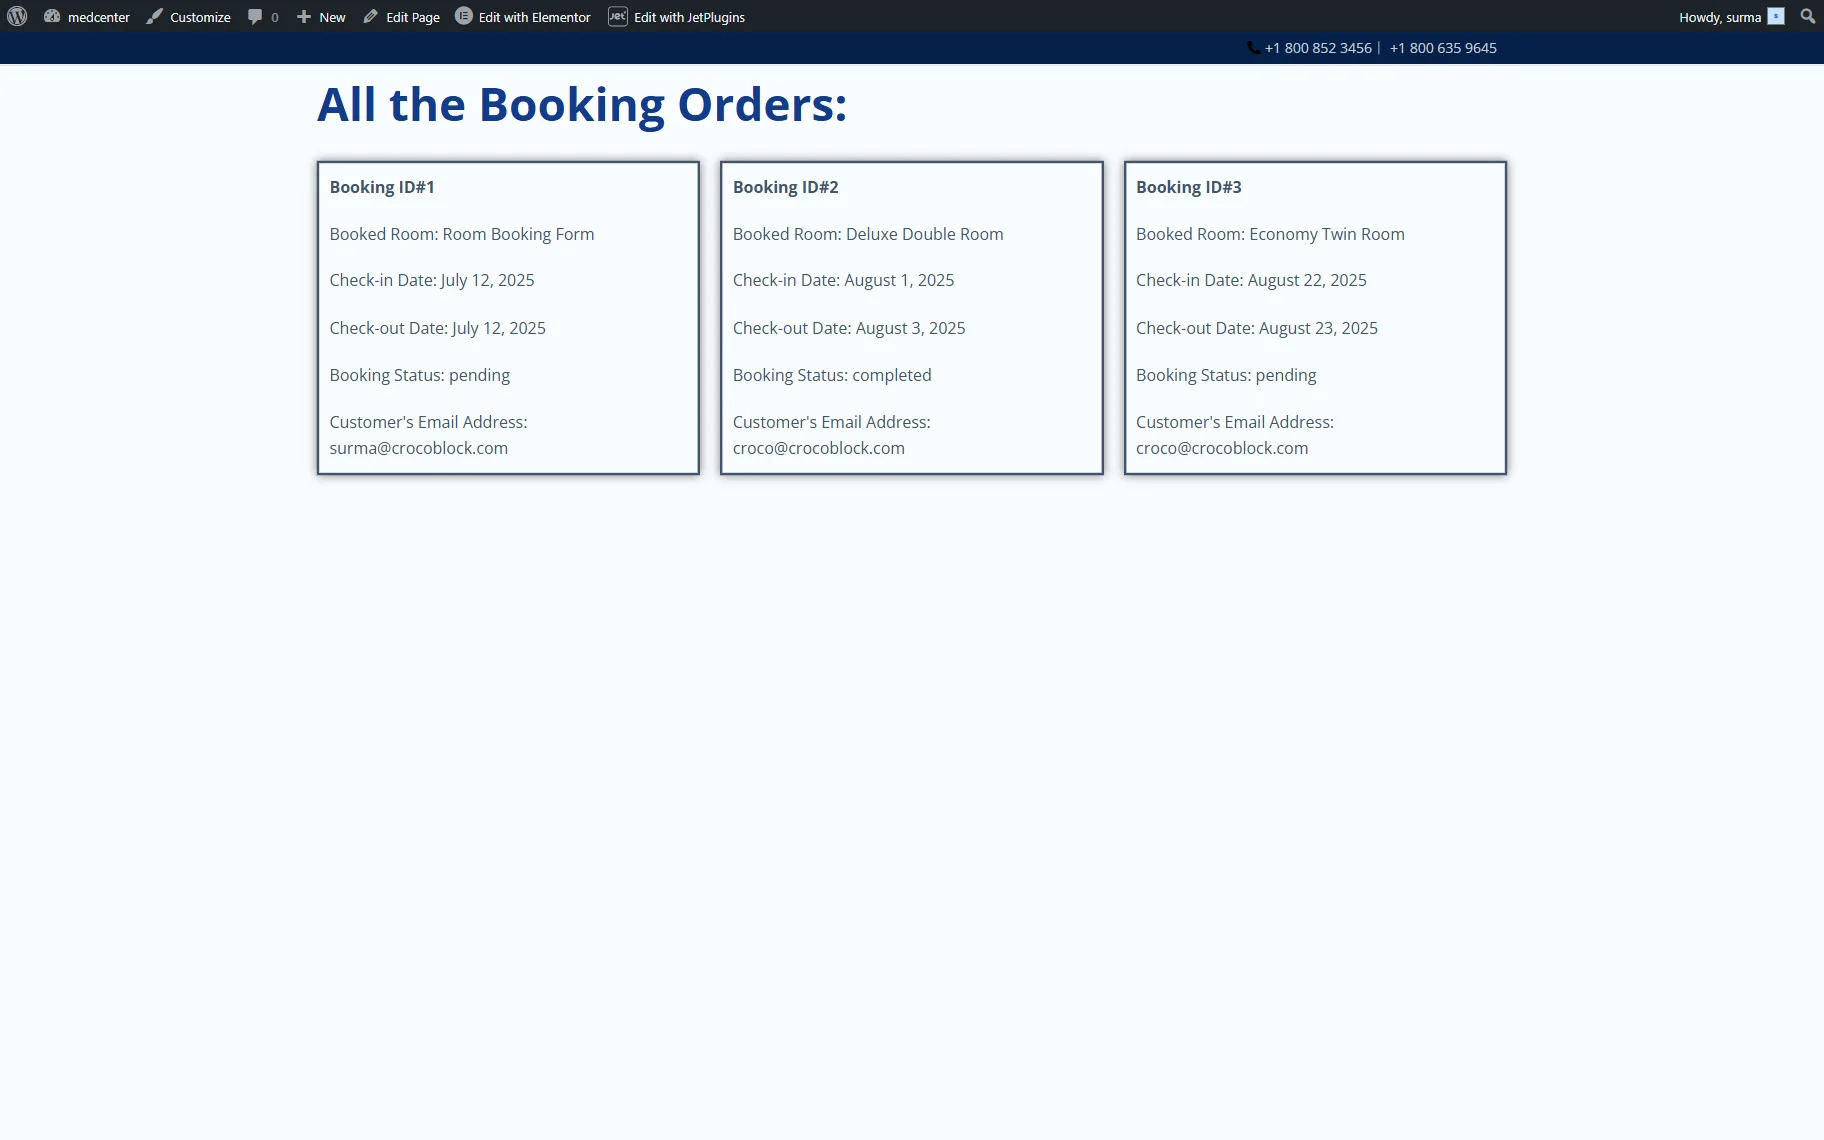
Then, proceed to the front end page, where we can view the orders.
Displaying orders for the administrator only
If you would like to display all created booking orders for the administrator only, you can set up a Dynamic Visibility condition.
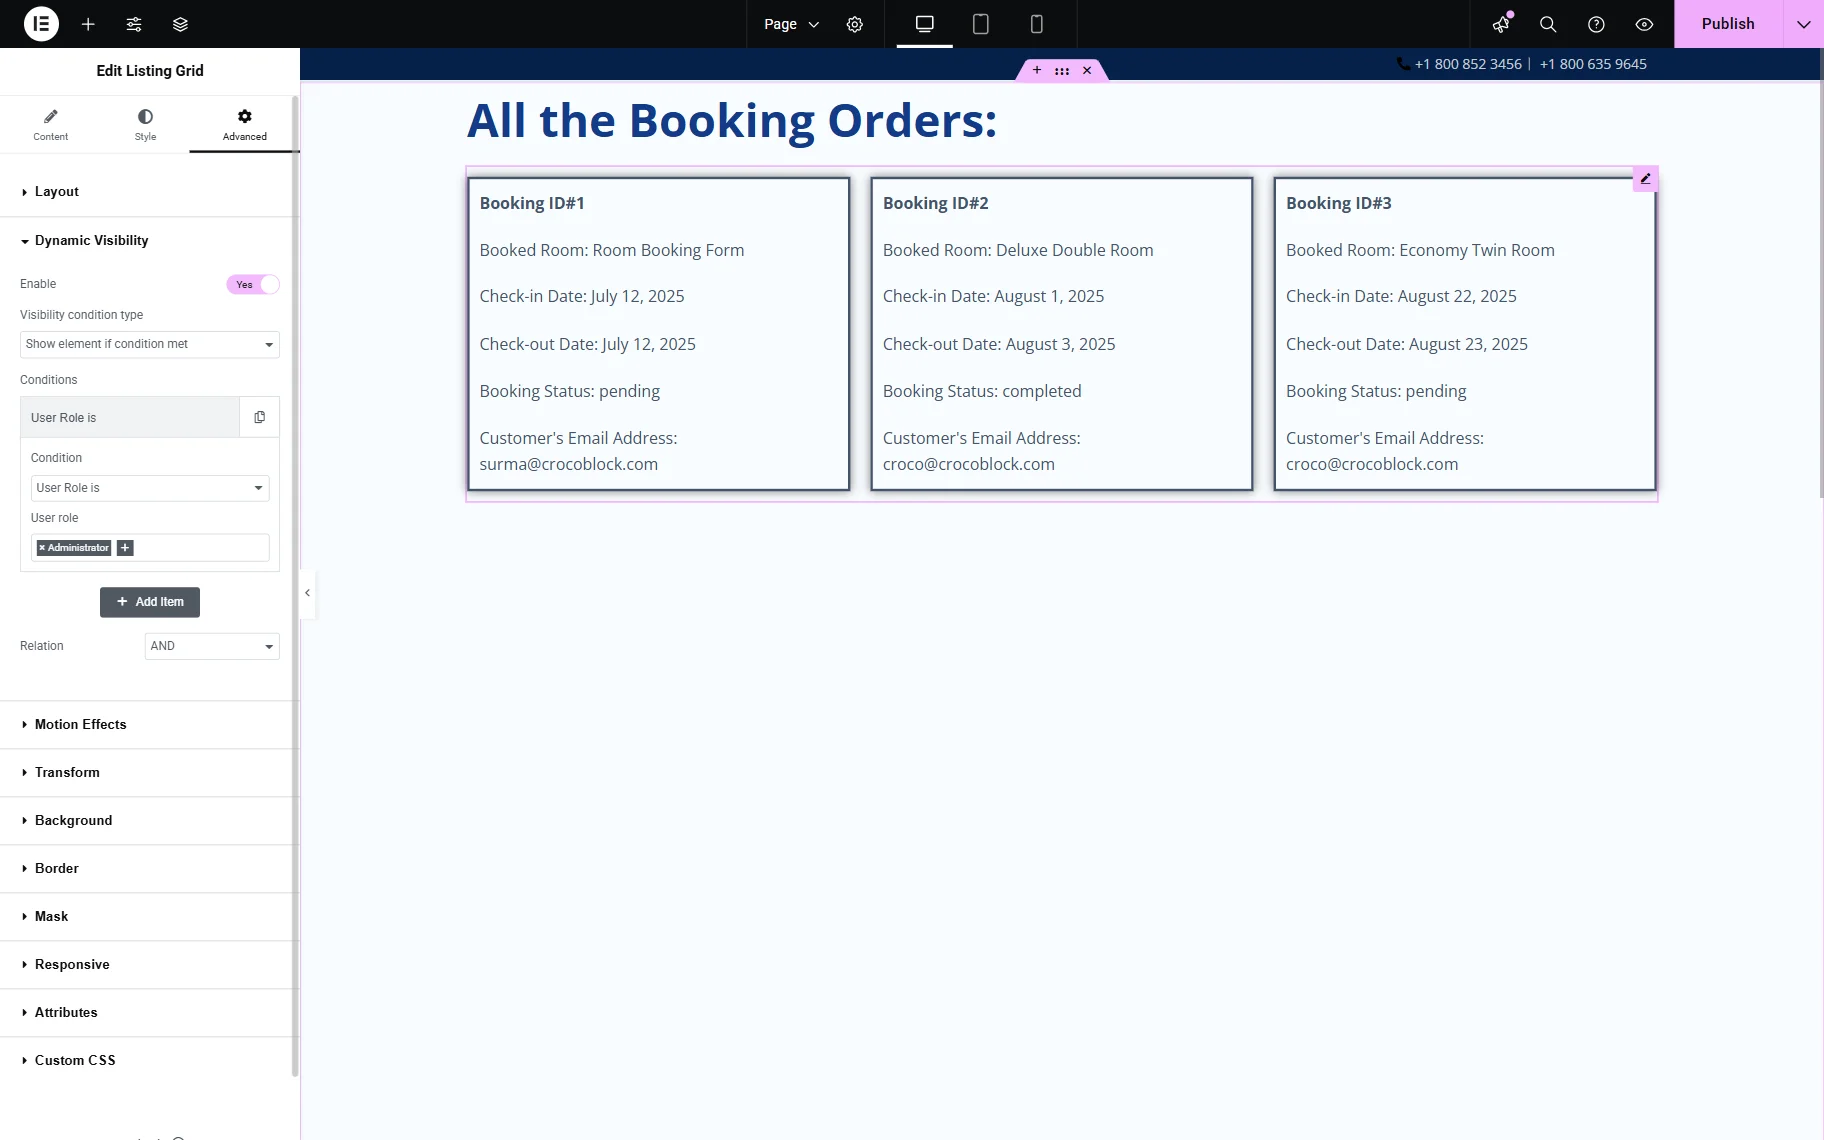
Return to the editing page and select the Listing Grid widget on the page and go to Advanced > Dynamic Visibility. Enable the toggle.
Select the needed Visibility condition type to show or hide the element. Then click on the Condition drop-down and choose the “User Role is” option in the User section. In the User Role field, add the “Administrator” option.
Click the “Publish” button, and let’s move to the front end page.
Being logged in as an admin on the site, we can view the orders.

However, when we log out of the site, the orders are no longer visible.
That’s it. Now you know how to create the “Orders” CPT, manage and update the orders, and display them on the front end with the help of JetEngine and JetBooking WordPress plugins.