How to Insert and Edit CCT Items via Form in the Front-End User Dashboard
Discover how to build the JetFormBuilder forms for inserting and editing the CCT items. Develop the front-end user interface by placing forms on the Account page, pop-up, or Single page.
Before you start, check the tutorial requirements:
- Elementor (Free version) or Block editor (Gutenberg)
- JetEngine plugin installed and activated with the Custom Content Type created and the Account page set
- JetFormBuilder plugin installed and activated
Generate a Form for Inserting the CCT Items
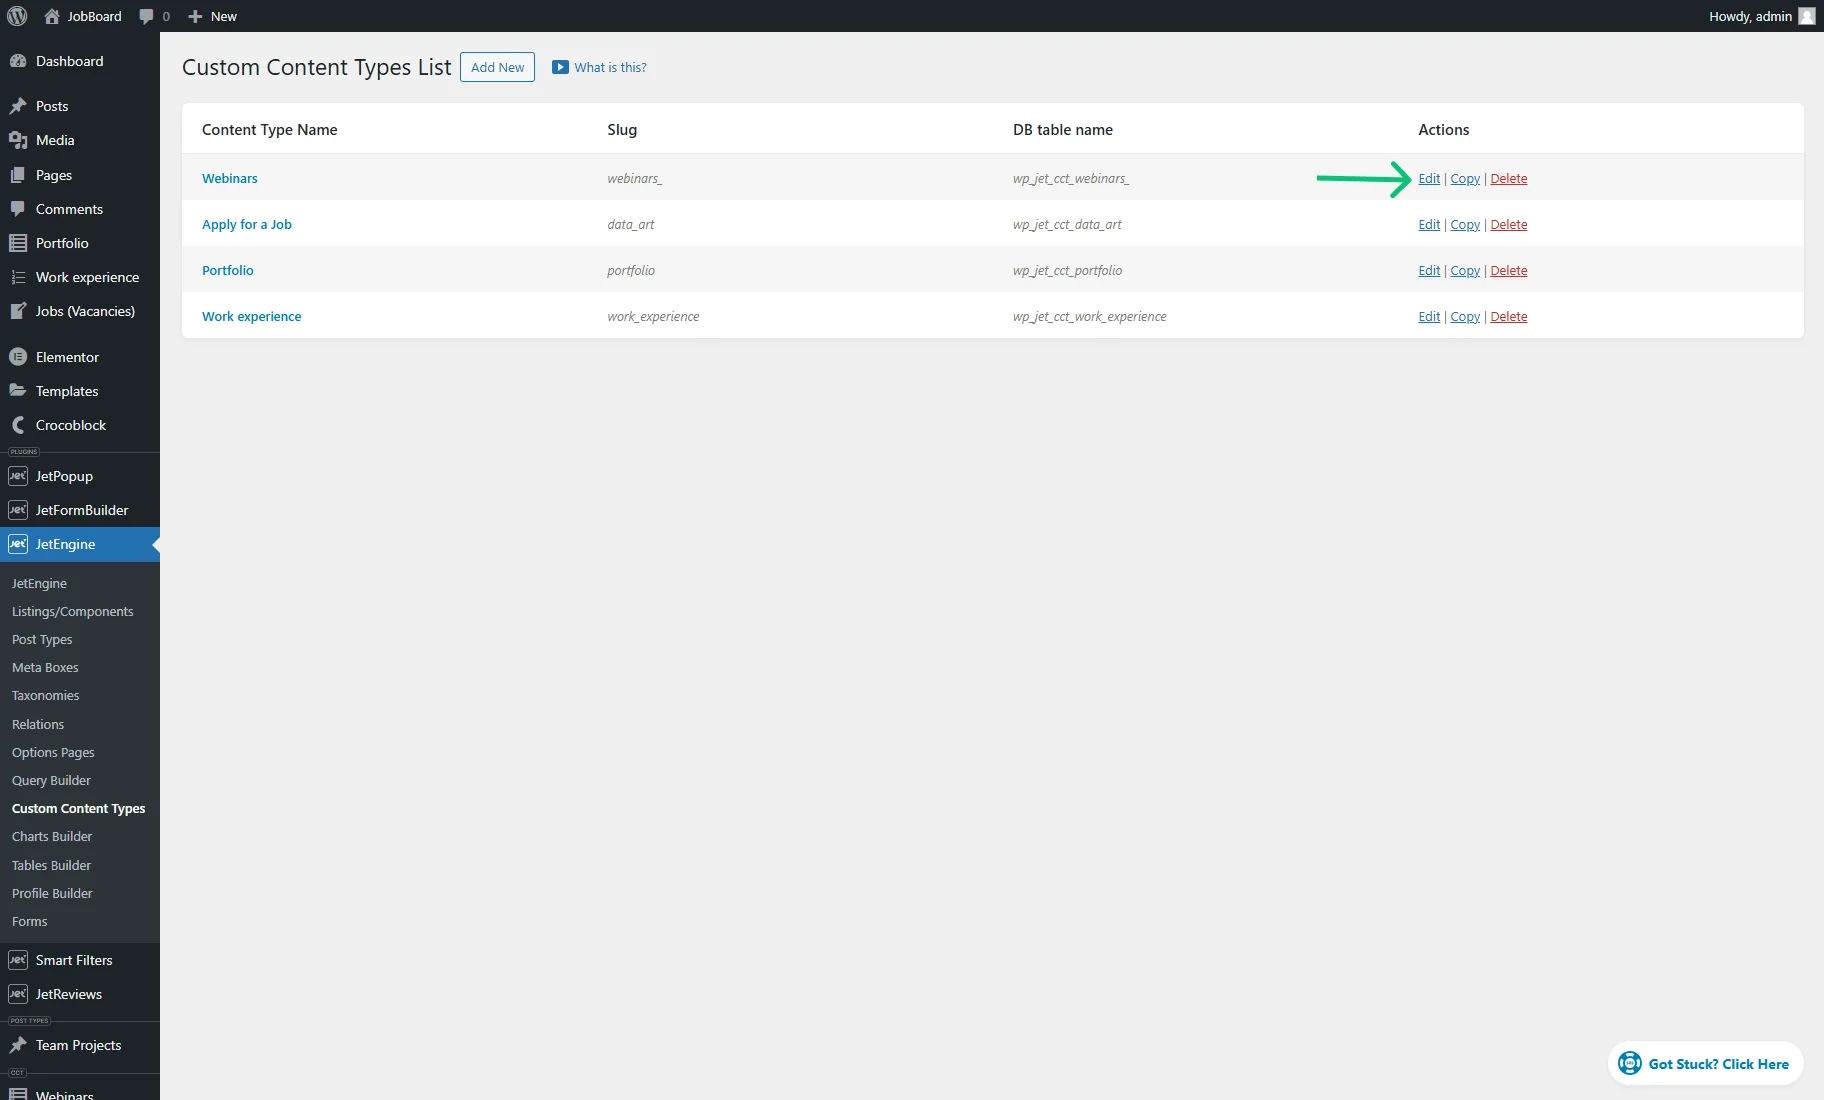
To generate a form for CCT item creation, head to the WordPress Dashboard > JetEngine > Custom Content Types and open the required CCT (“Webinars” in our case) settings by clicking the “Edit” action.
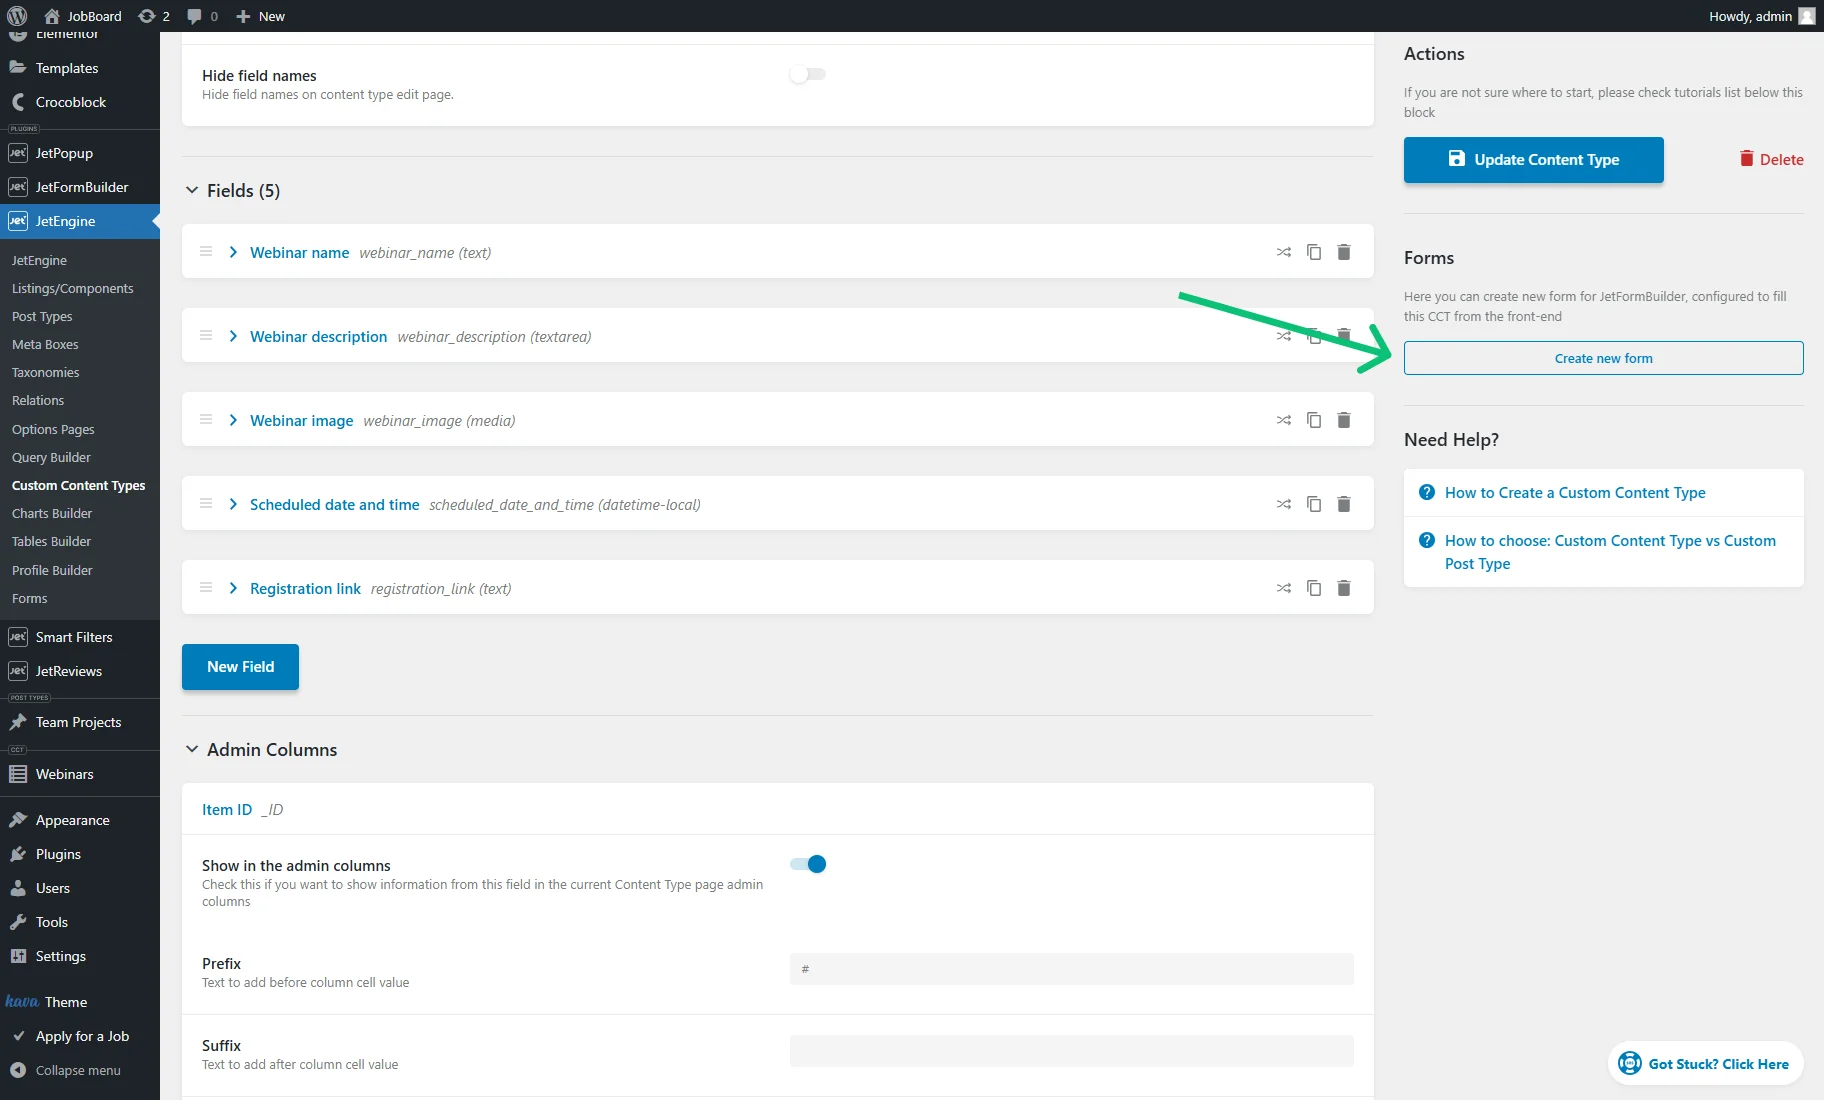
On the CCT editing page, hit the “Create new form” button from the right Actions section.
After clicking the button, you will be redirected to the editing page of the created form. If needed, alter the form title.
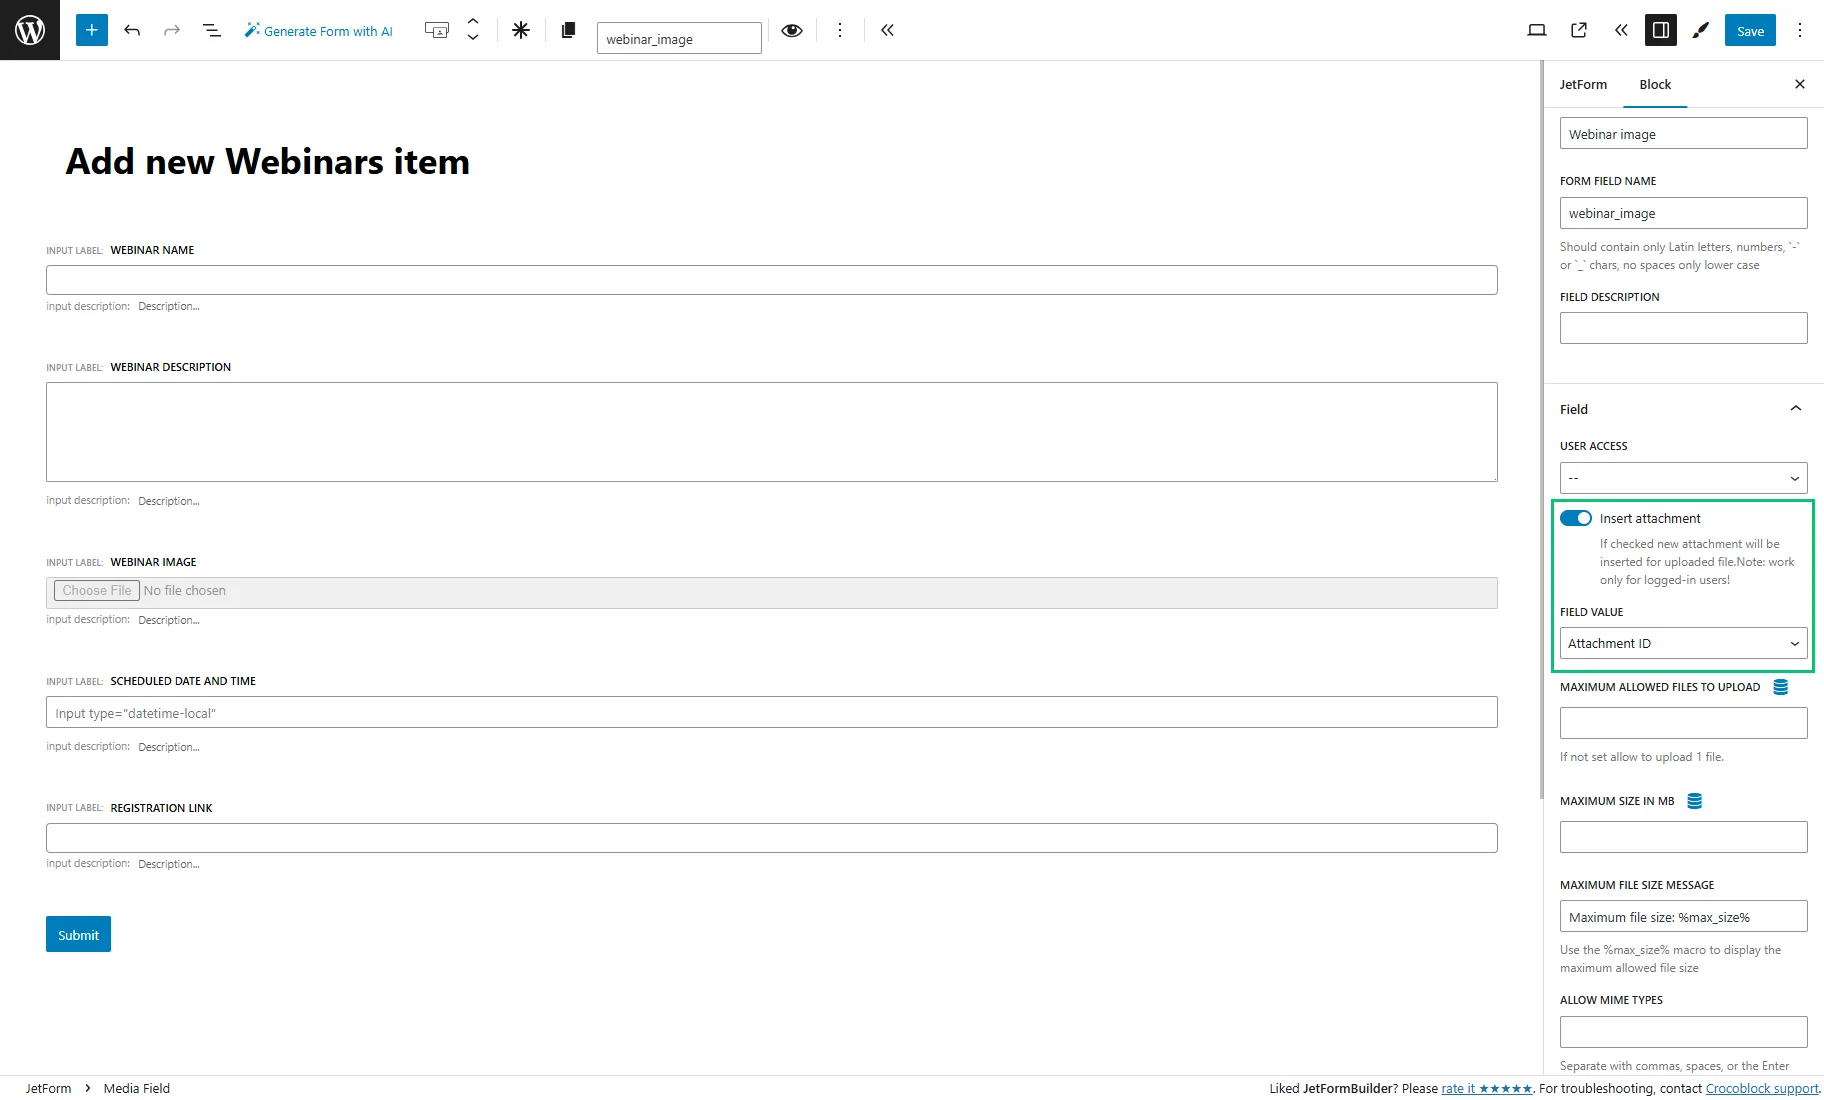
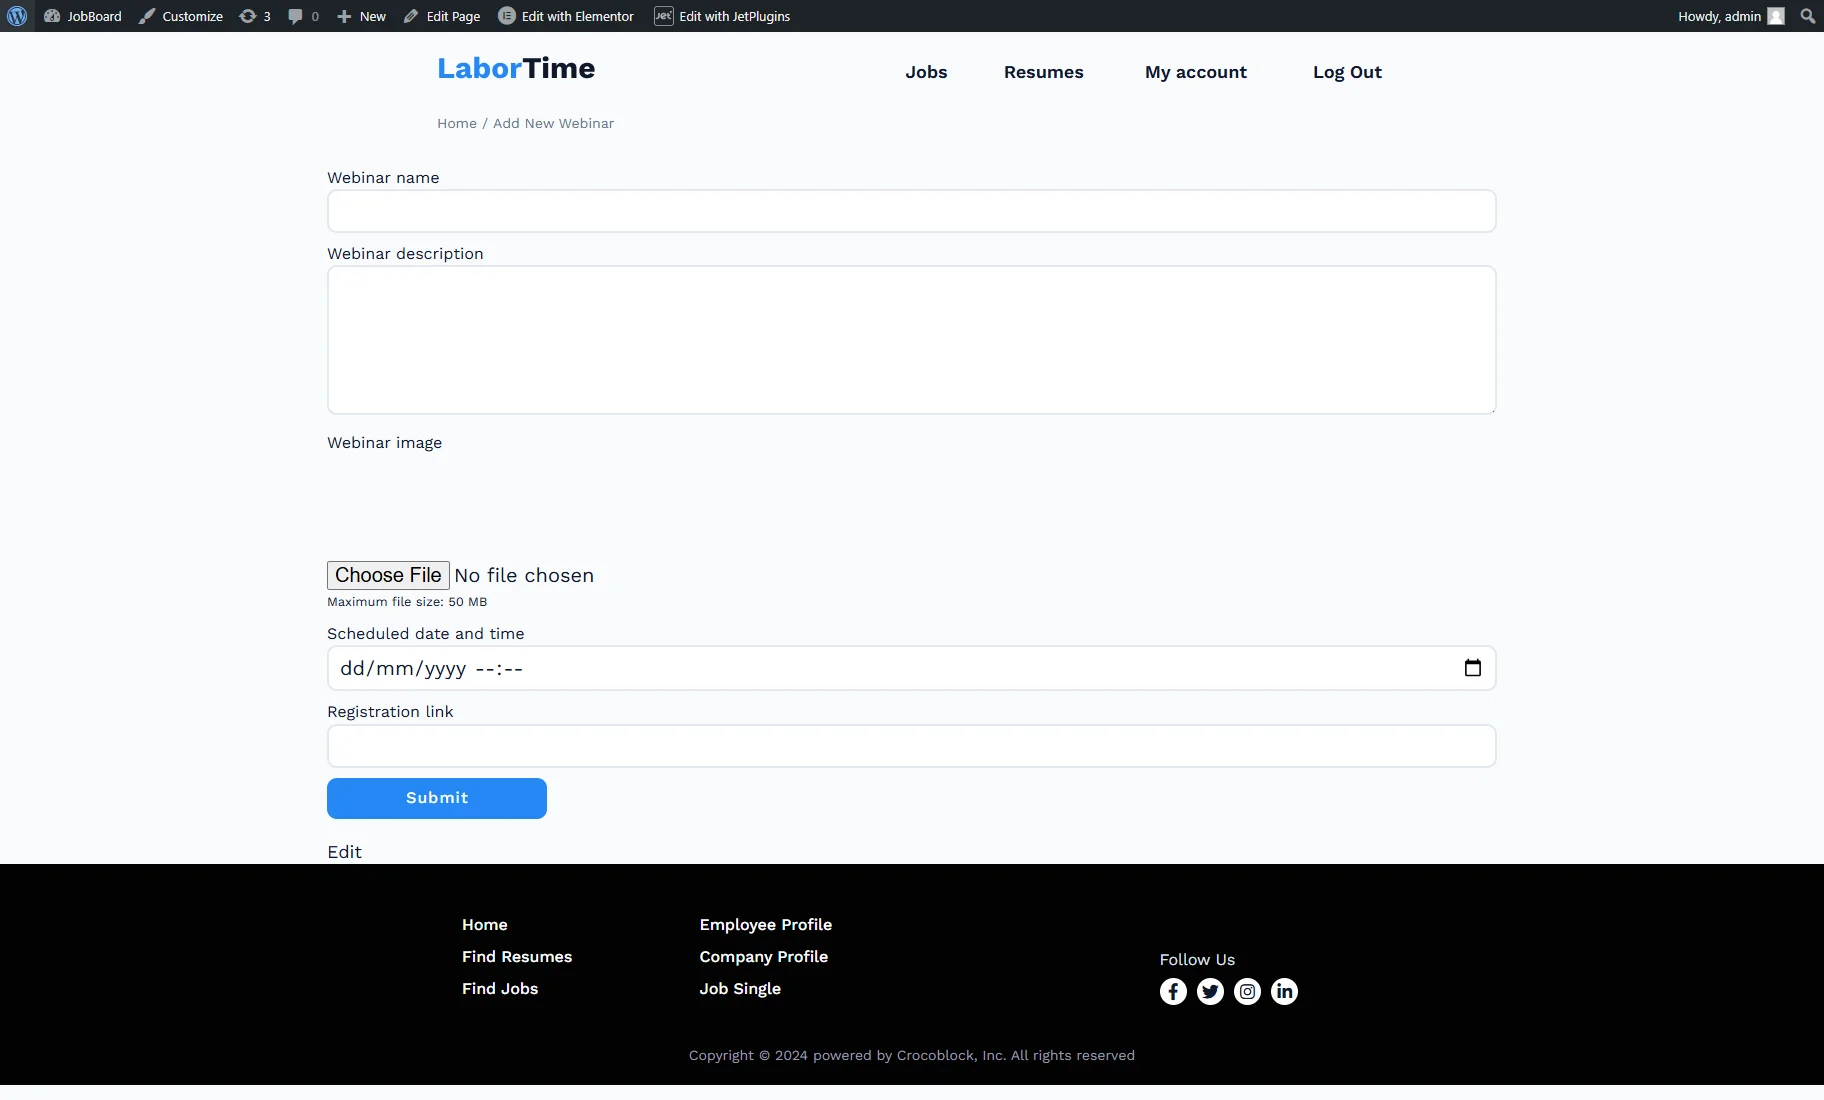
The form contains fields with the same labels, names, and types as the CCT custom meta fields.
In our case, it’s the “Webinar name” Text Field, “Webinar description” Textarea Field, “Webinar image” Media Field, “Scheduled date and time” Datetime Field, and “Registration link” Text Field. Also, the form contains the Action Button.
If the form contains the Media Field blocks, proceed to the Block settings tab and open the Field tab. Here, enable the Insert attachment toggle and set the FIELD VALUE according to the “Media” meta field settings. For example, we selected the “Media ID” Value format for the meta field, so we set the “Attachment ID” FIELD VALUE for the form field. Without these settings, users cannot add files via the form. Also, you can set the User access.
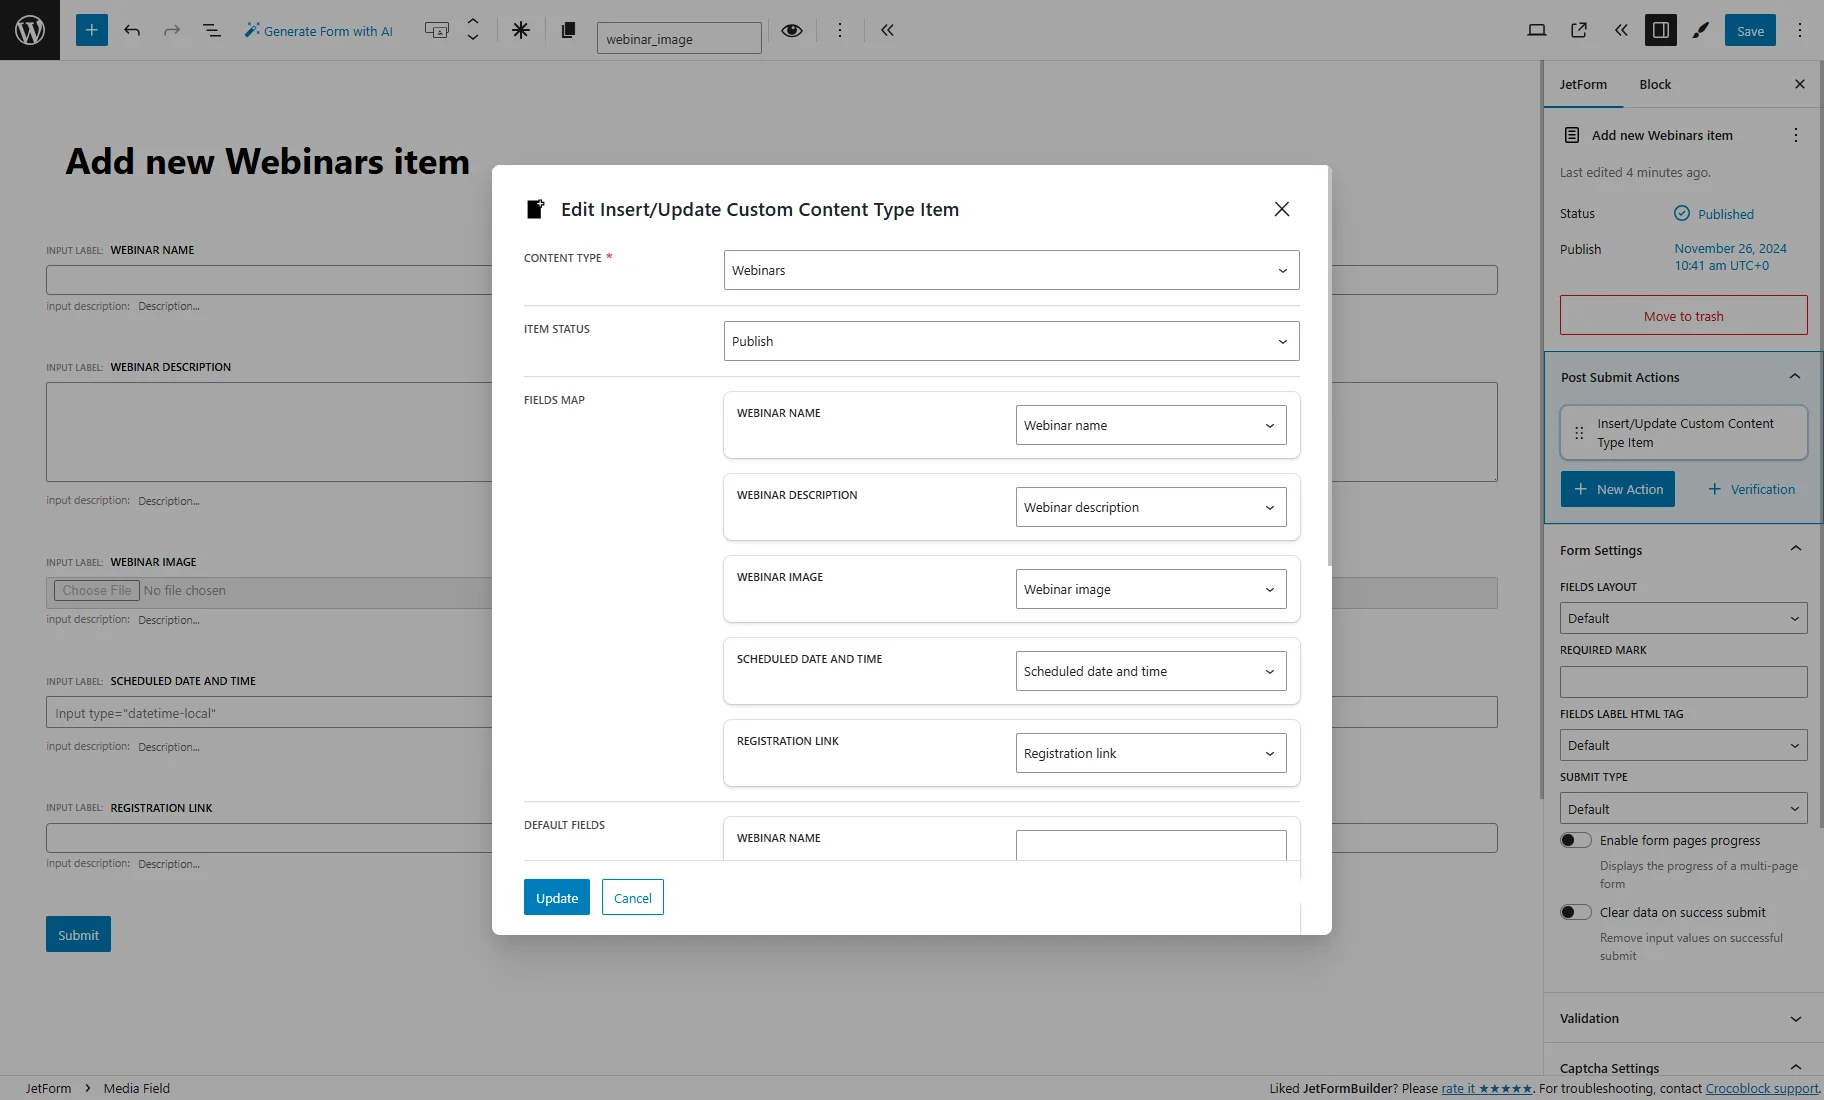
Then, proceed to the Post Submit Actions section of the JetForm tab, where the “Insert/Update Custom Content Type Item” action is set by default. To check its settings, hover over it and press the “pencil” icon.
The Edit Action pop-up contains such settings:
- CONTENT TYPE — a dropdown menu where the recently created “Webinars” CCT is set by default;
- ITEM STATUS — a dropdown menu where you can decide whether an item will obtain “Draft” or “Publish” status after a user submits the form;
- FIELDS MAP — these settings show the connection of the form fields with the CCT meta fields. After a user fills in the form fields and clicks the “Submit” button, the CCT item will be created with the corresponding values in the meta fields;
- DEFAULT SETTINGS — here, you can define values for the CCT default fields.
If you change any action settings, hit the “Update” button. Then, save the form.
Now, you have a ready-made form that you can add to any page or template you need using the JetForm widget/block. To complete that, check the How to Display a Form on the Front End tutorial.
Create a Form for Editing CCT items on the Account Page
Create a form
To enable users to edit CCT items directly from the listing, you need to create a form that retrieves data from a specific CCT item, allowing users to view and modify its content.
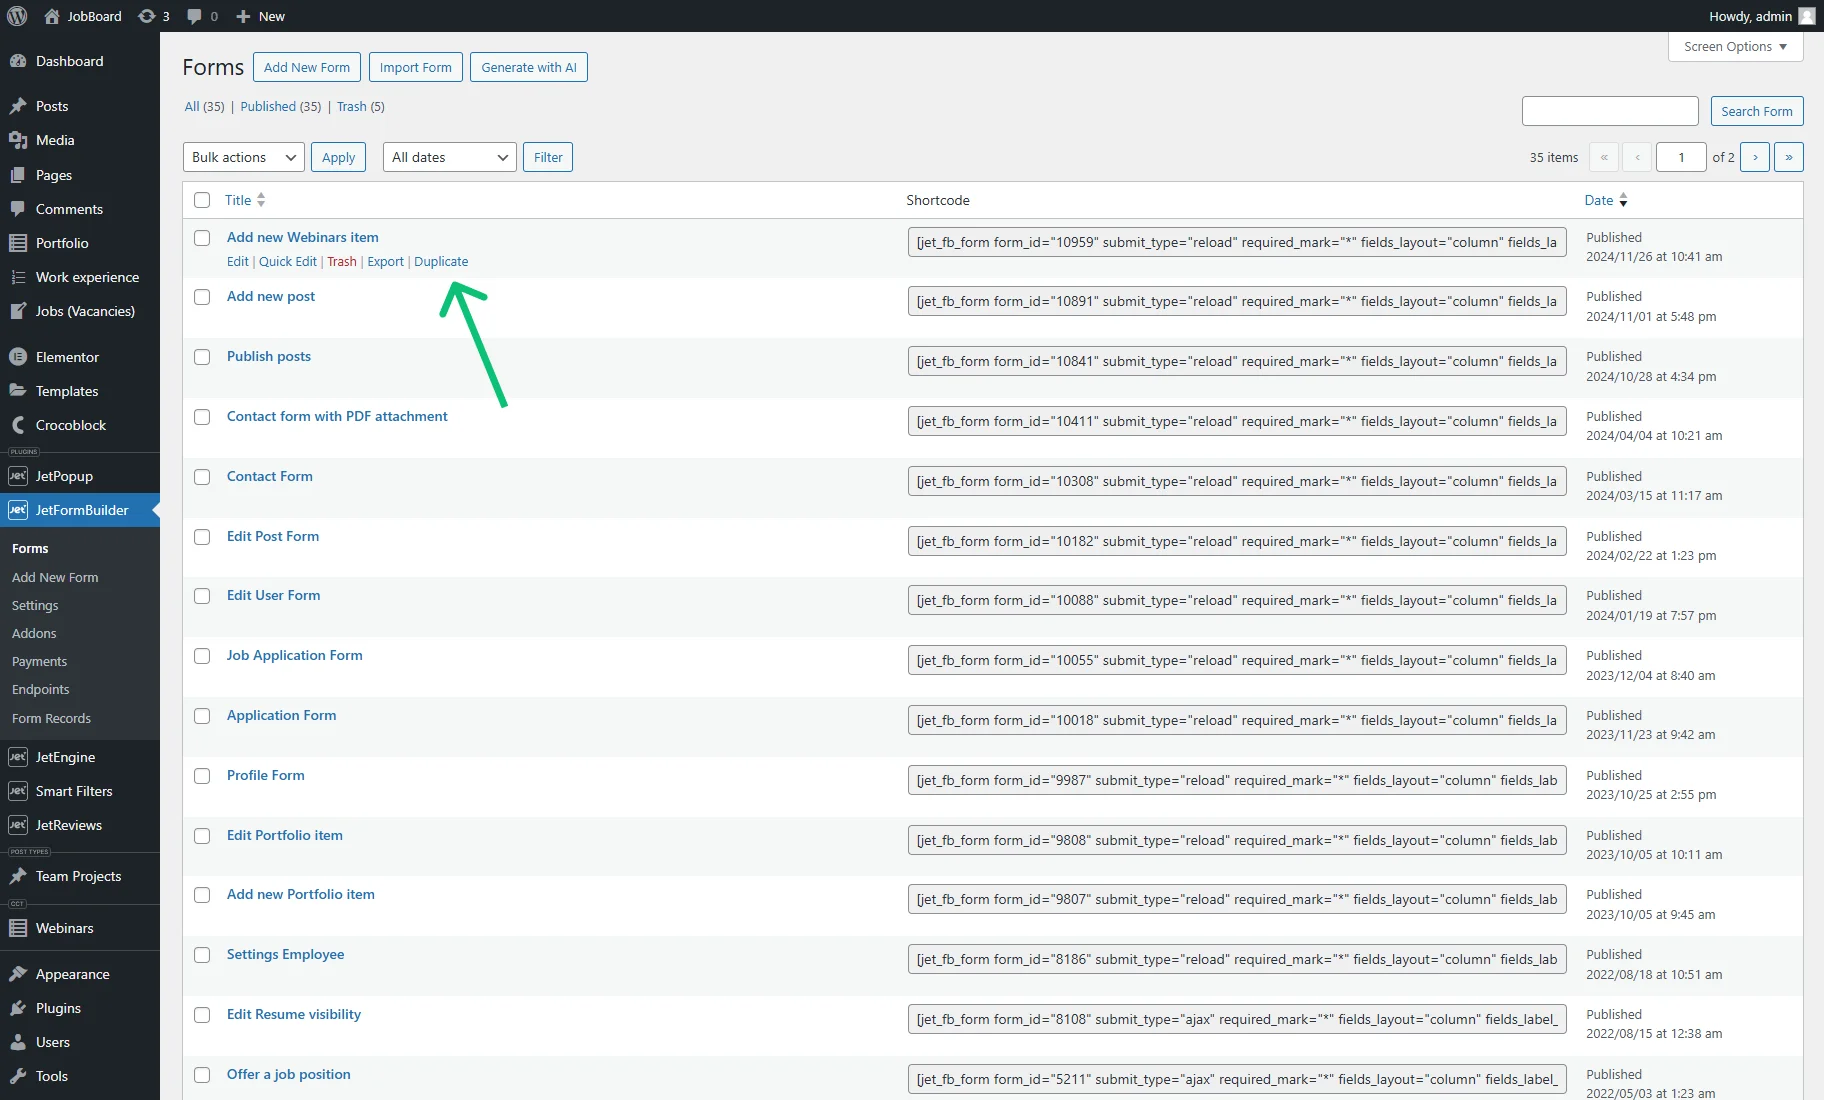
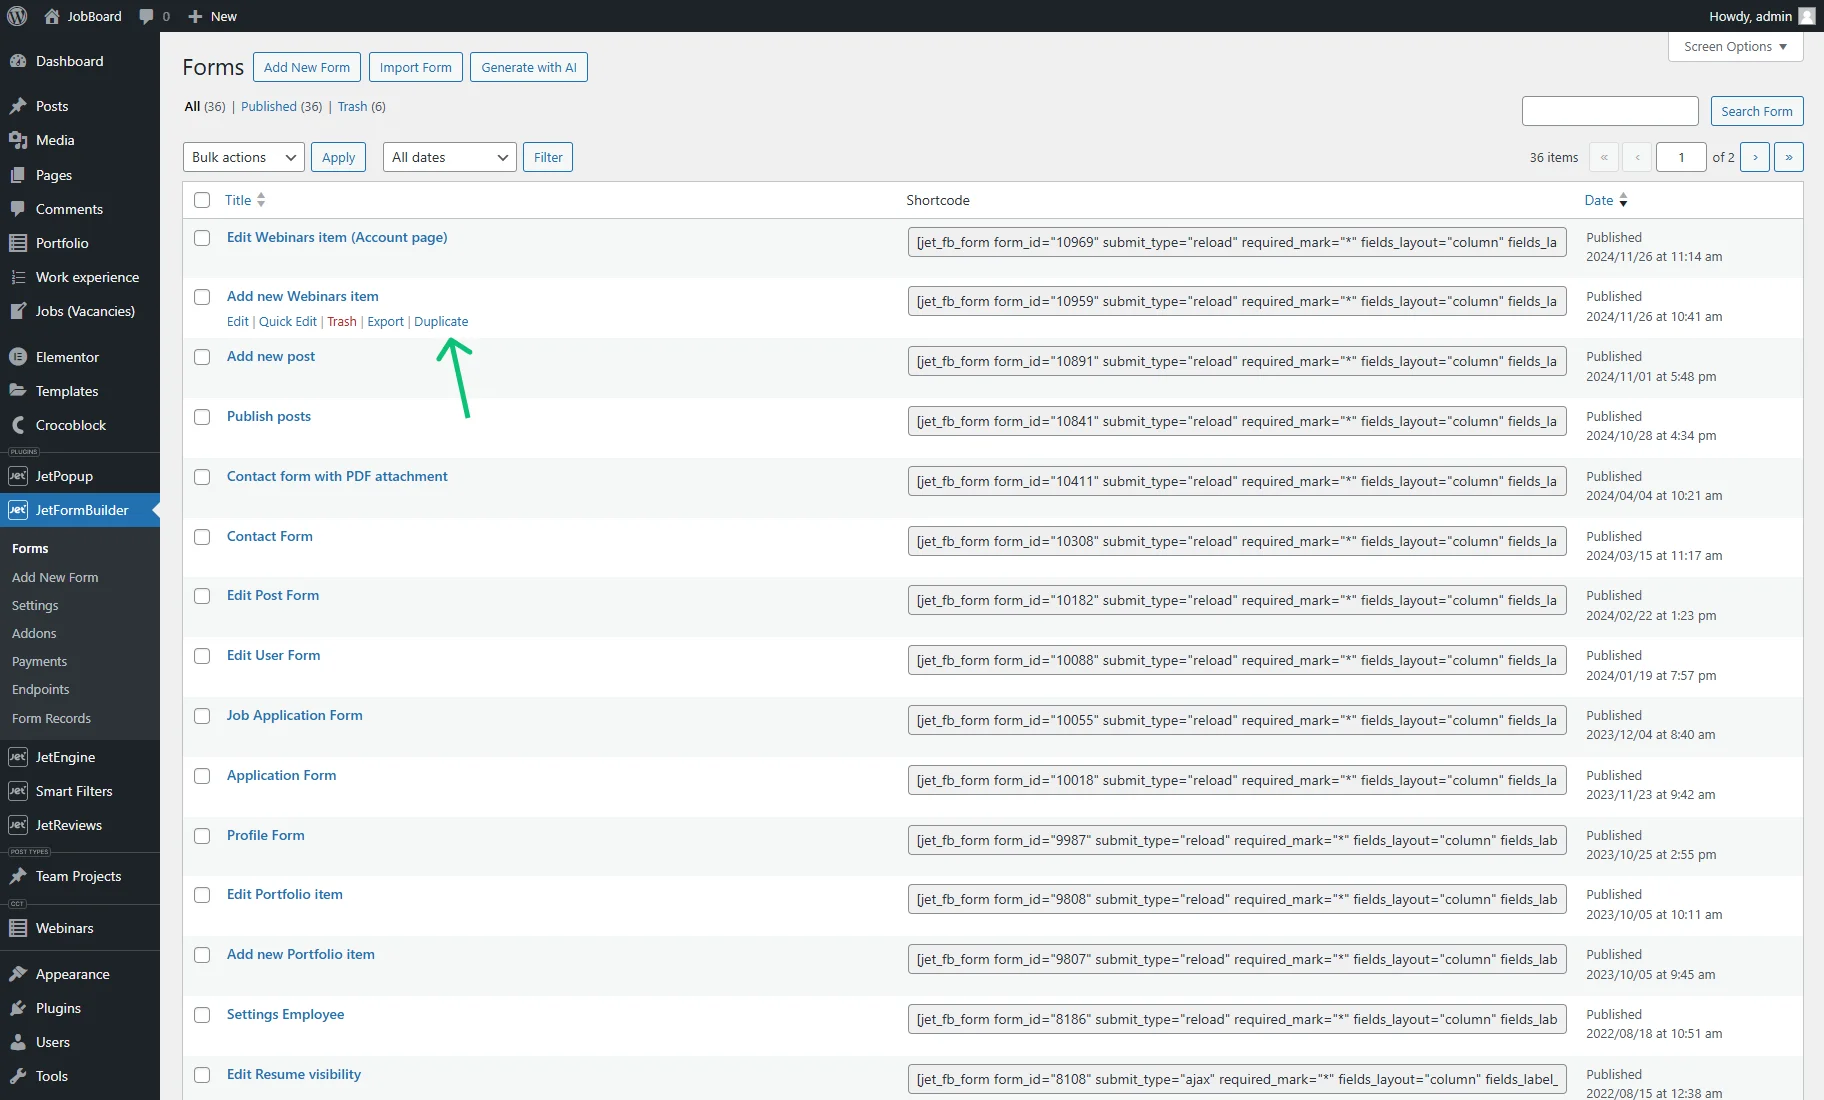
Let’s begin with creating a new form. To speed up the process, go to the WordPress Dashboard > JetFormBuilder > Forms tab and duplicate the previous form by pressing the corresponding button.
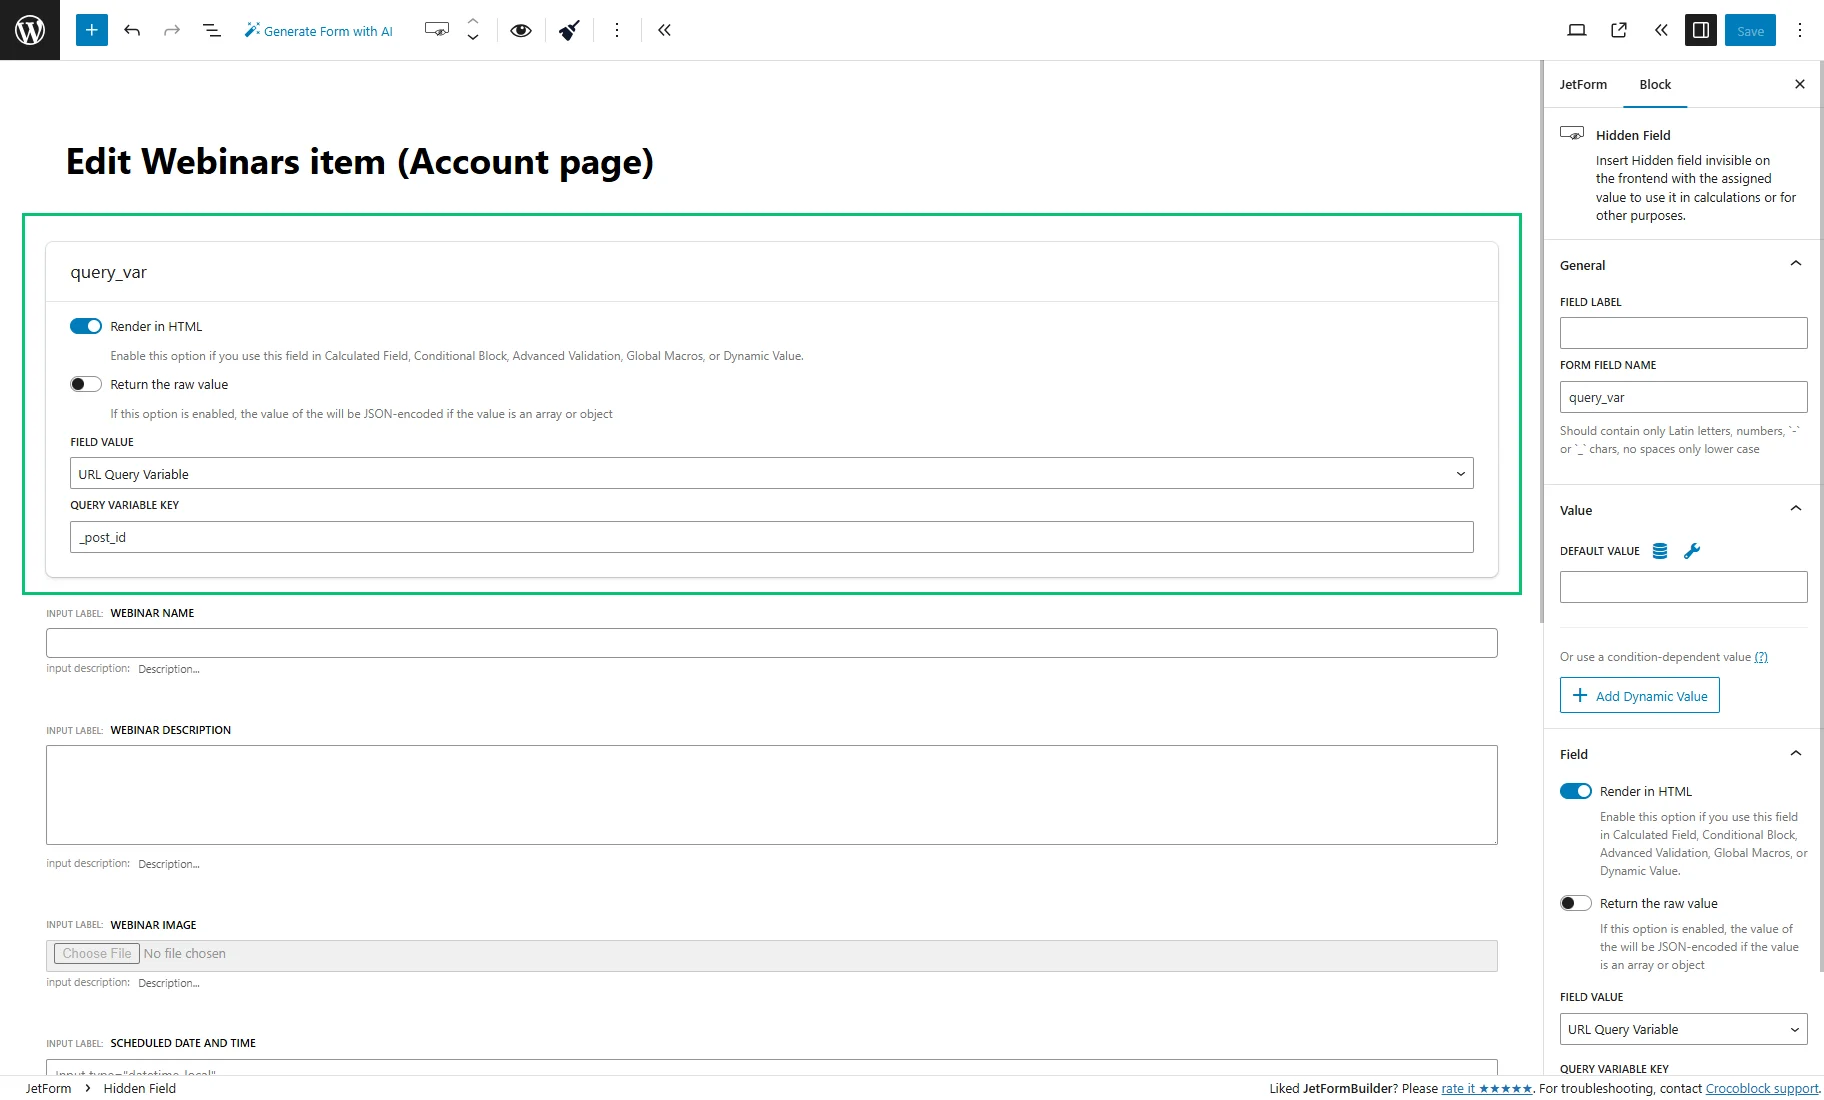
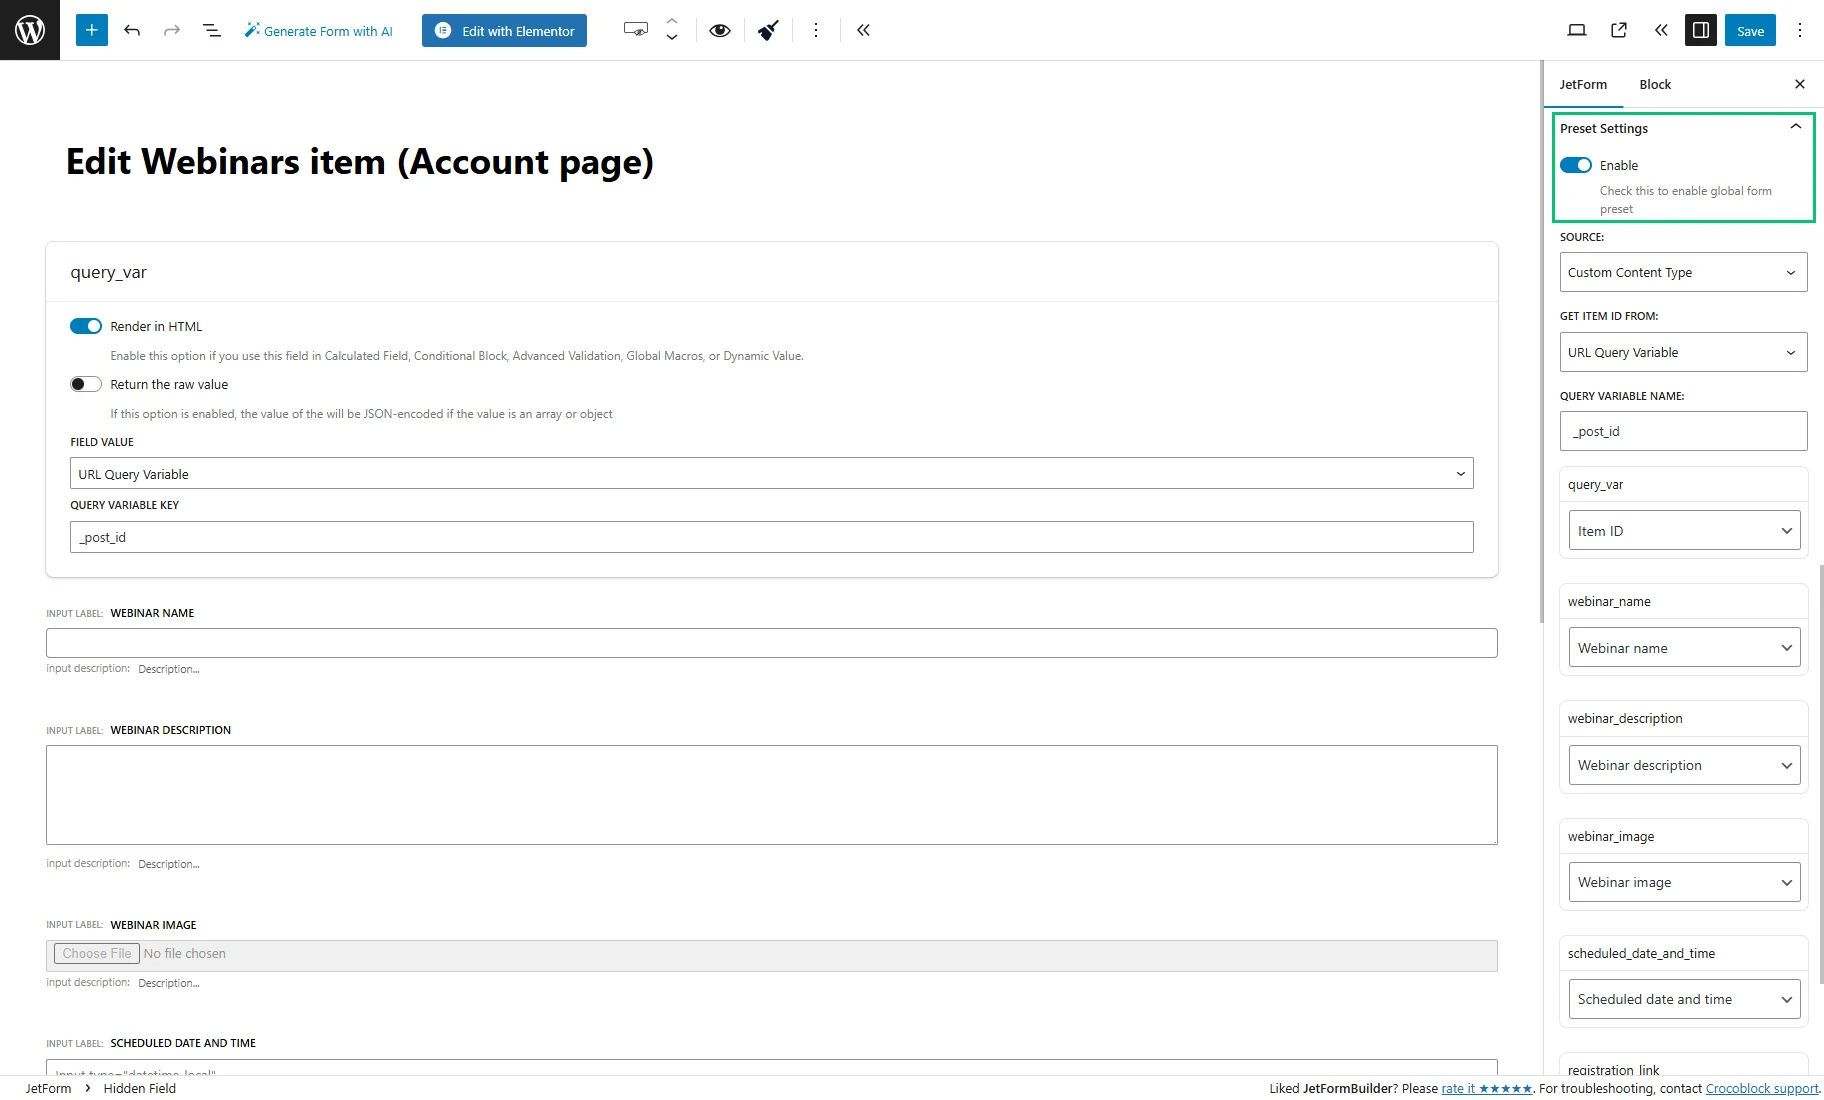
Change the form title and add a Hidden Field block.
Set the FIELD VALUE to “URL Query Variable” and enter the “_post_id” QUERY VARIABLE KEY.
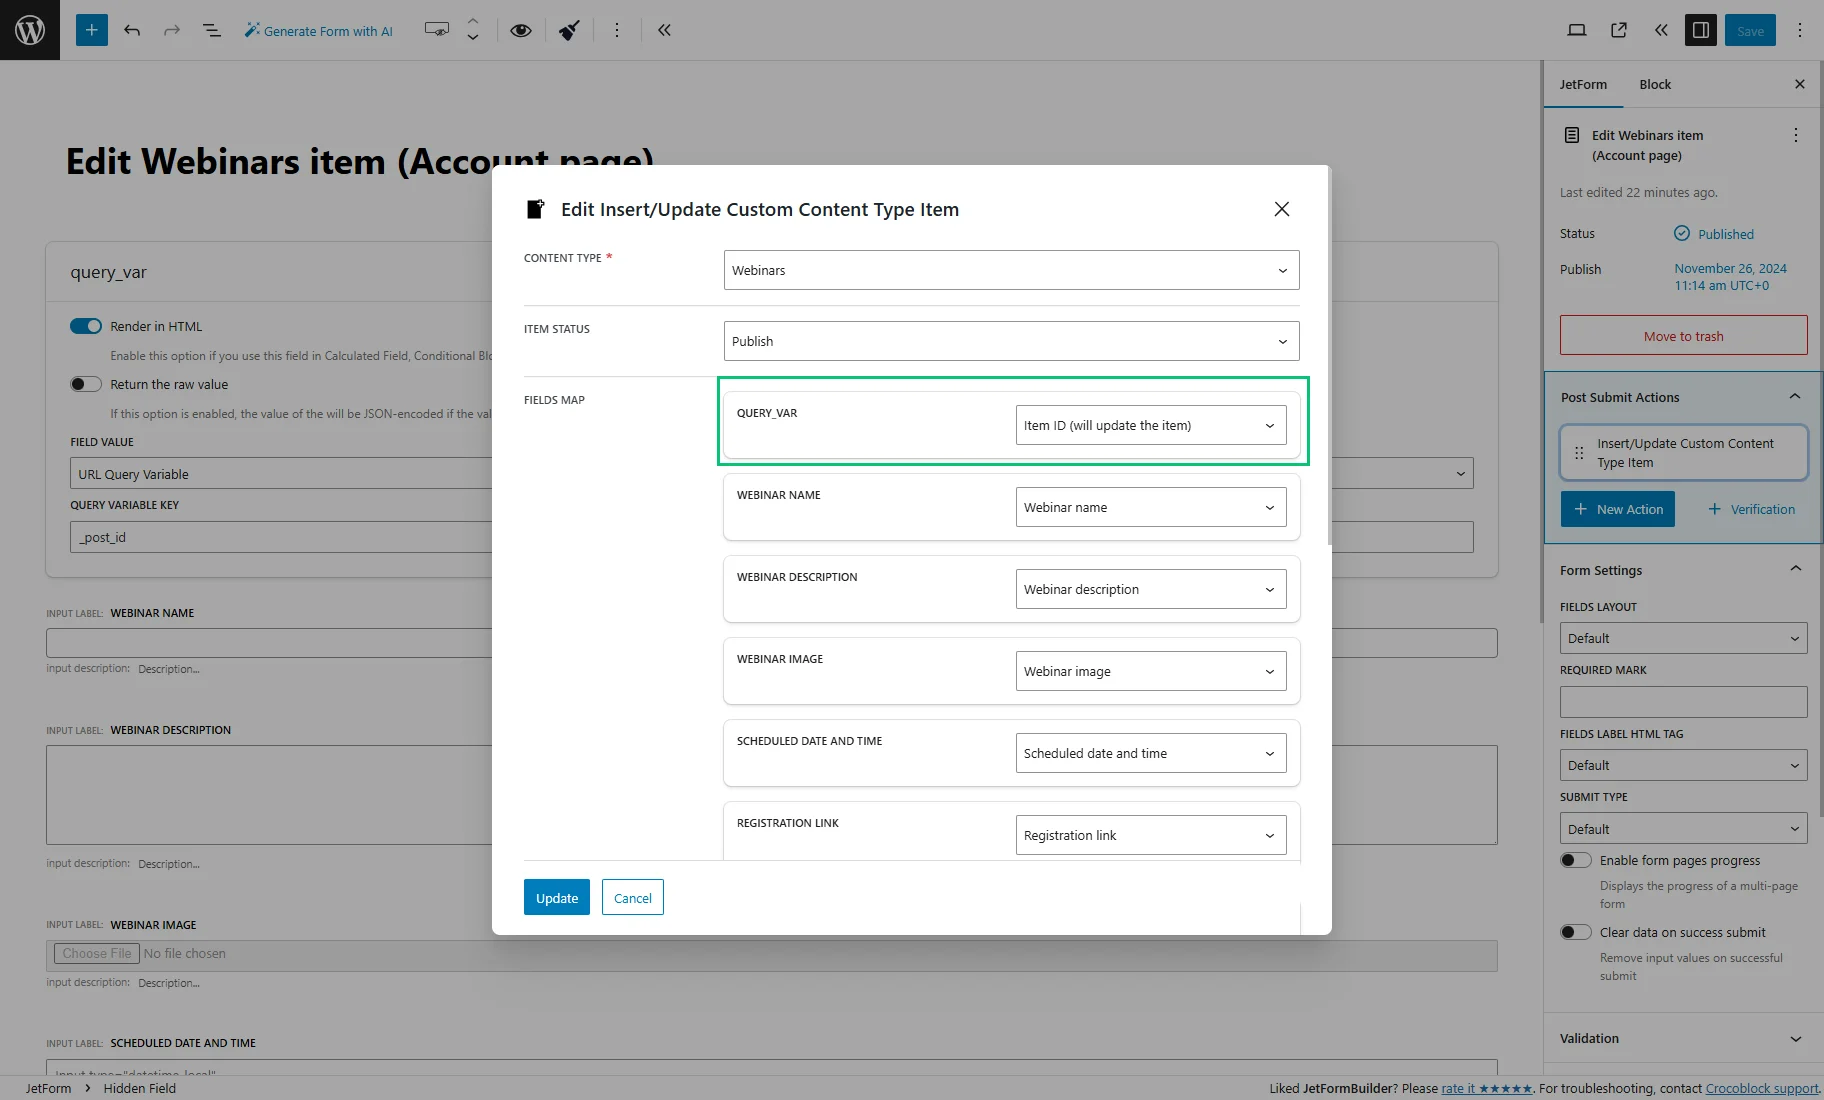
Now, move to the Post Submit Action tab of the JetForm section, hover over the “Insert/Update Custom Content Type Item” action, click the “pencil” icon, and map the Hidden Field with “Item ID (will update the item)” in the FIELD MAP section. Then, push the “Update” button.
Eventually, we need to set the preset in order to get pre-filled data in our form.
Unfold the Preset tab in the JetForm section and activate the Enable toggle.
The SOURCE, in our case, will be “Custom Content Type,” GET ITEM ID FROM — the same as in the Hidden Field — “URL Query Variable” and the QUERY VARIABLE NAME is “_post_id”.
We also need to map all CCT meta fields with form fields. For the Hidden Field, choose the “Item ID” option.
After finishing customizing the form, hit the “Save” button.
Place the form on the Account subpage template
We’re done with the form; now, let’s create an Account subpage template.
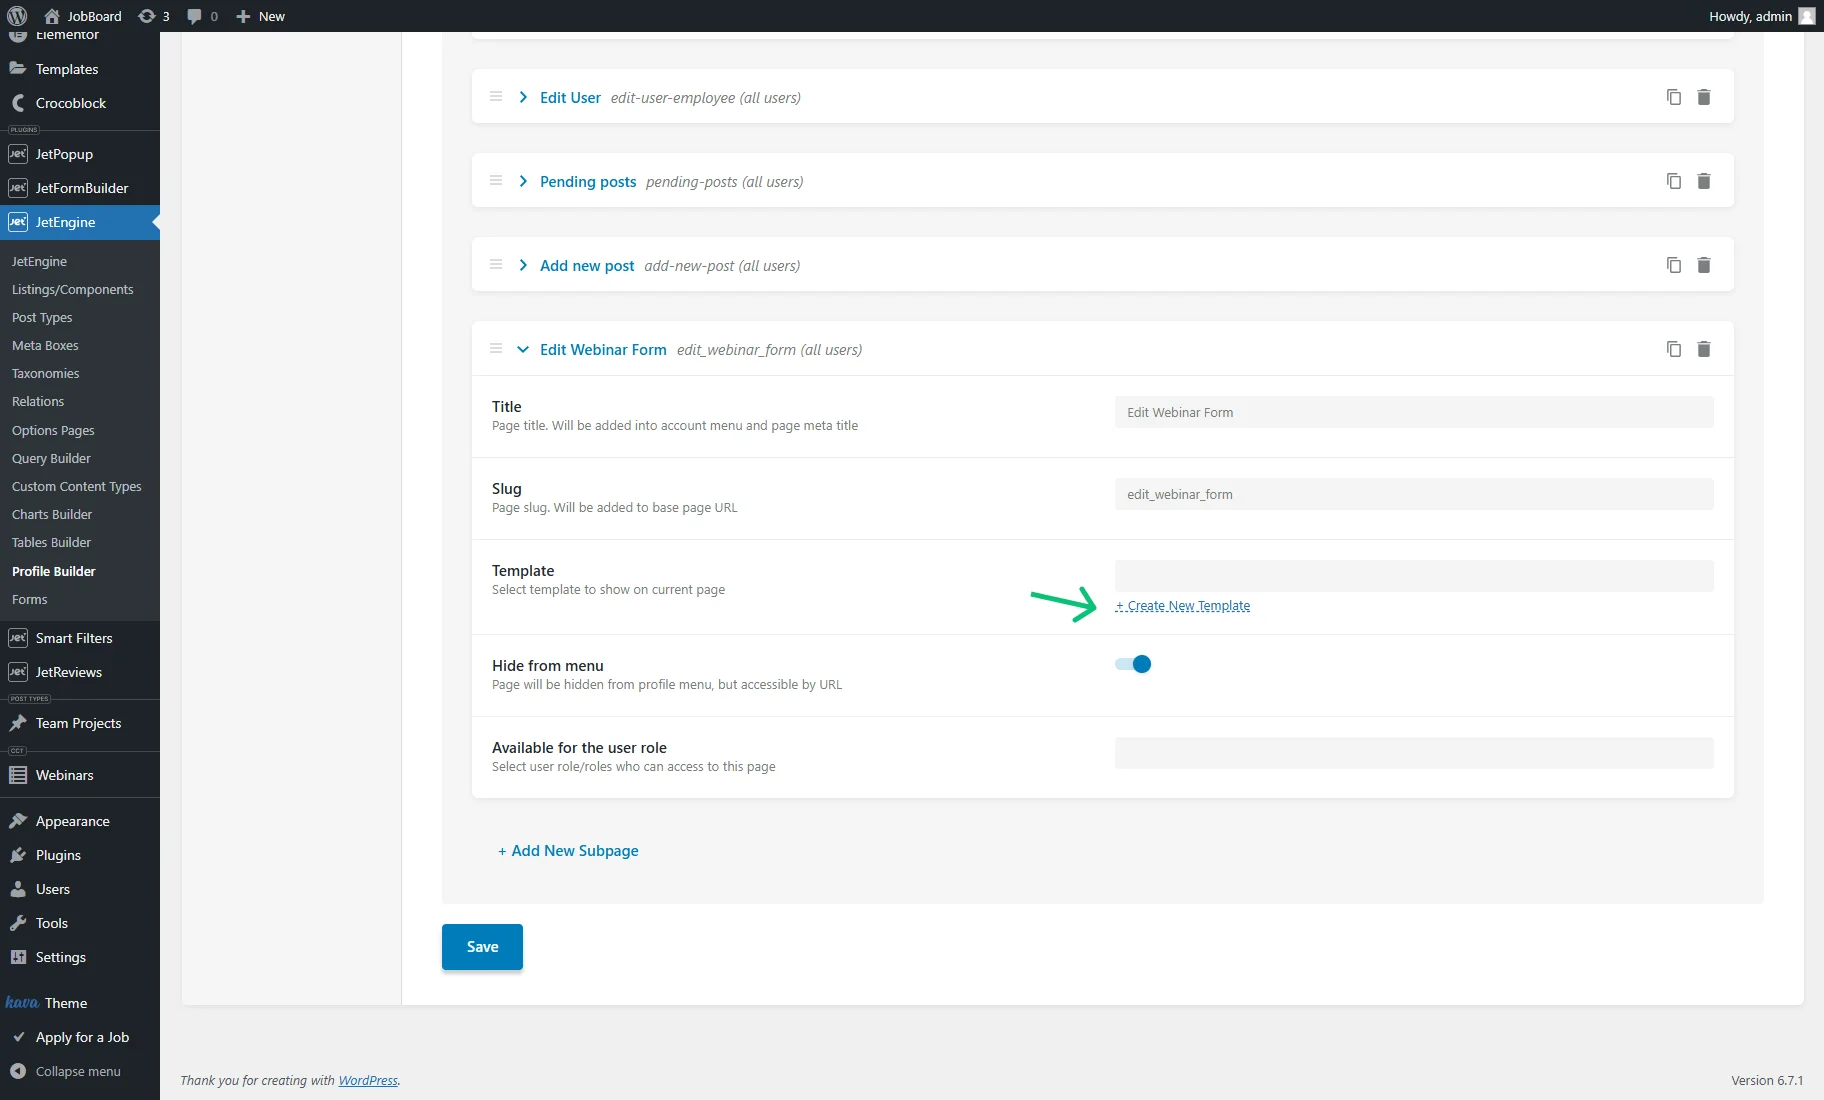
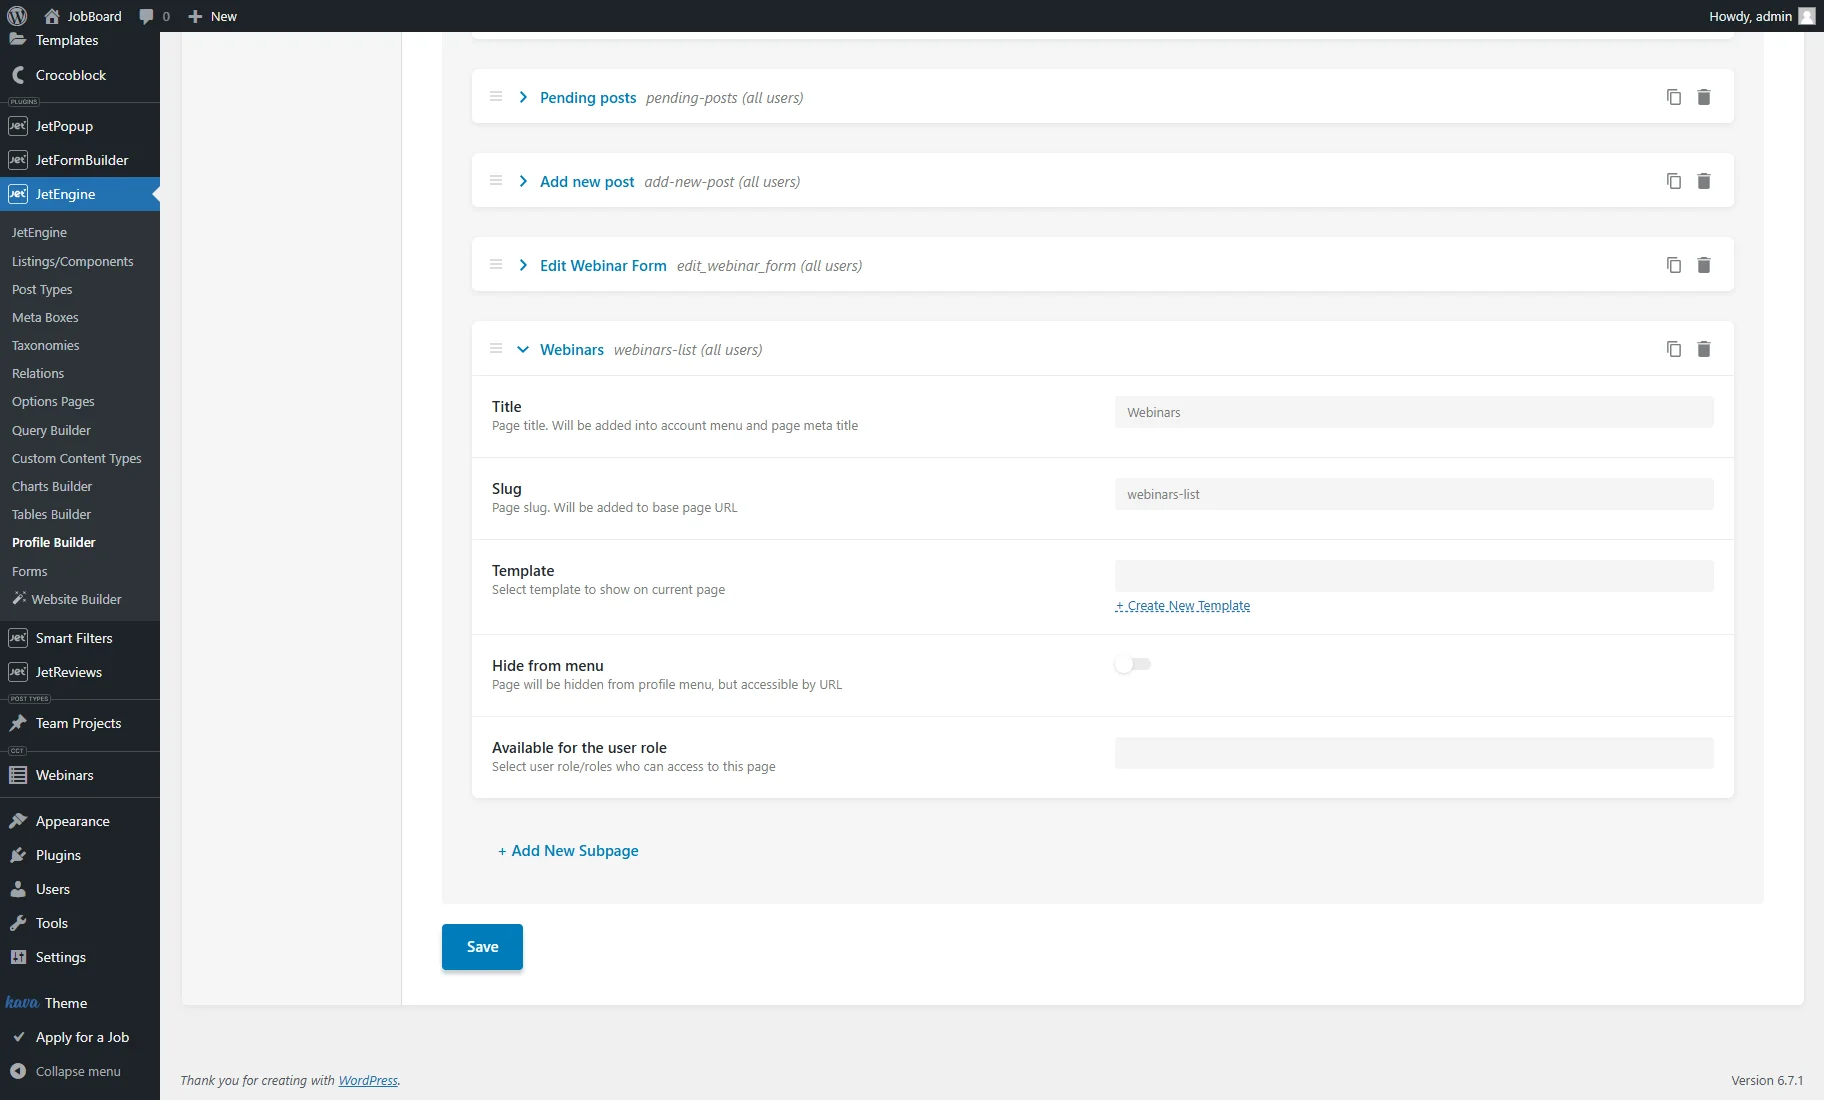
Navigate to the WordPress Dashboard > JetEngine > Profile Builder tab, open the Account Page section, and press the “+ Add New Subpage” button.
Set the Title and Slug. It’s better to hide this template from the Profile Menu by activating the Hide from menu toggle so this page will be accessible only with a redirect link.
Then, press the “+ Create New Template” link under the Template link to trigger a pop-up.
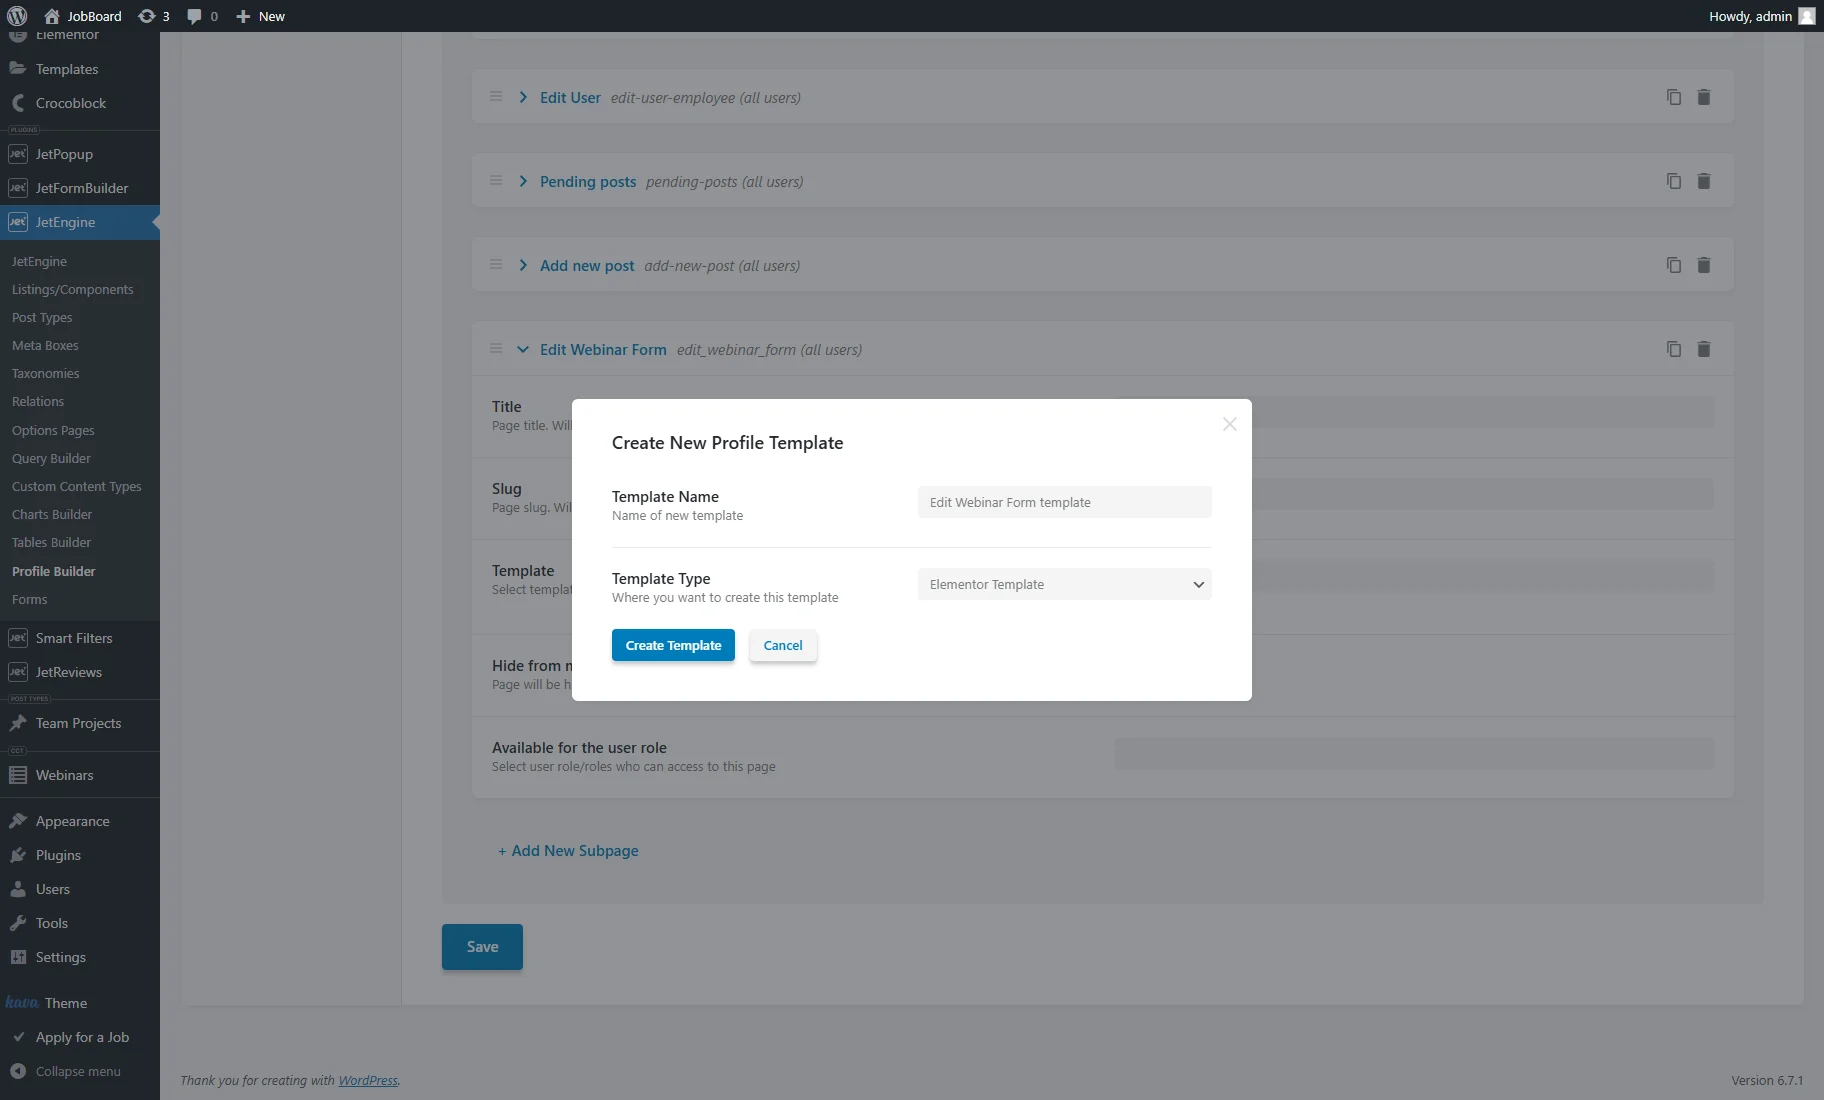
Enter the Template Name and select the Template Type (can be “Listing Item” or “Elementor Template”). If the “Listing Item” option is selected, pick the Listing view as well (“Elementor” or “Blocks (Gutenberg)”).
Then, hit the “Create Template” button to be redirected to the template editing page in a new tab.
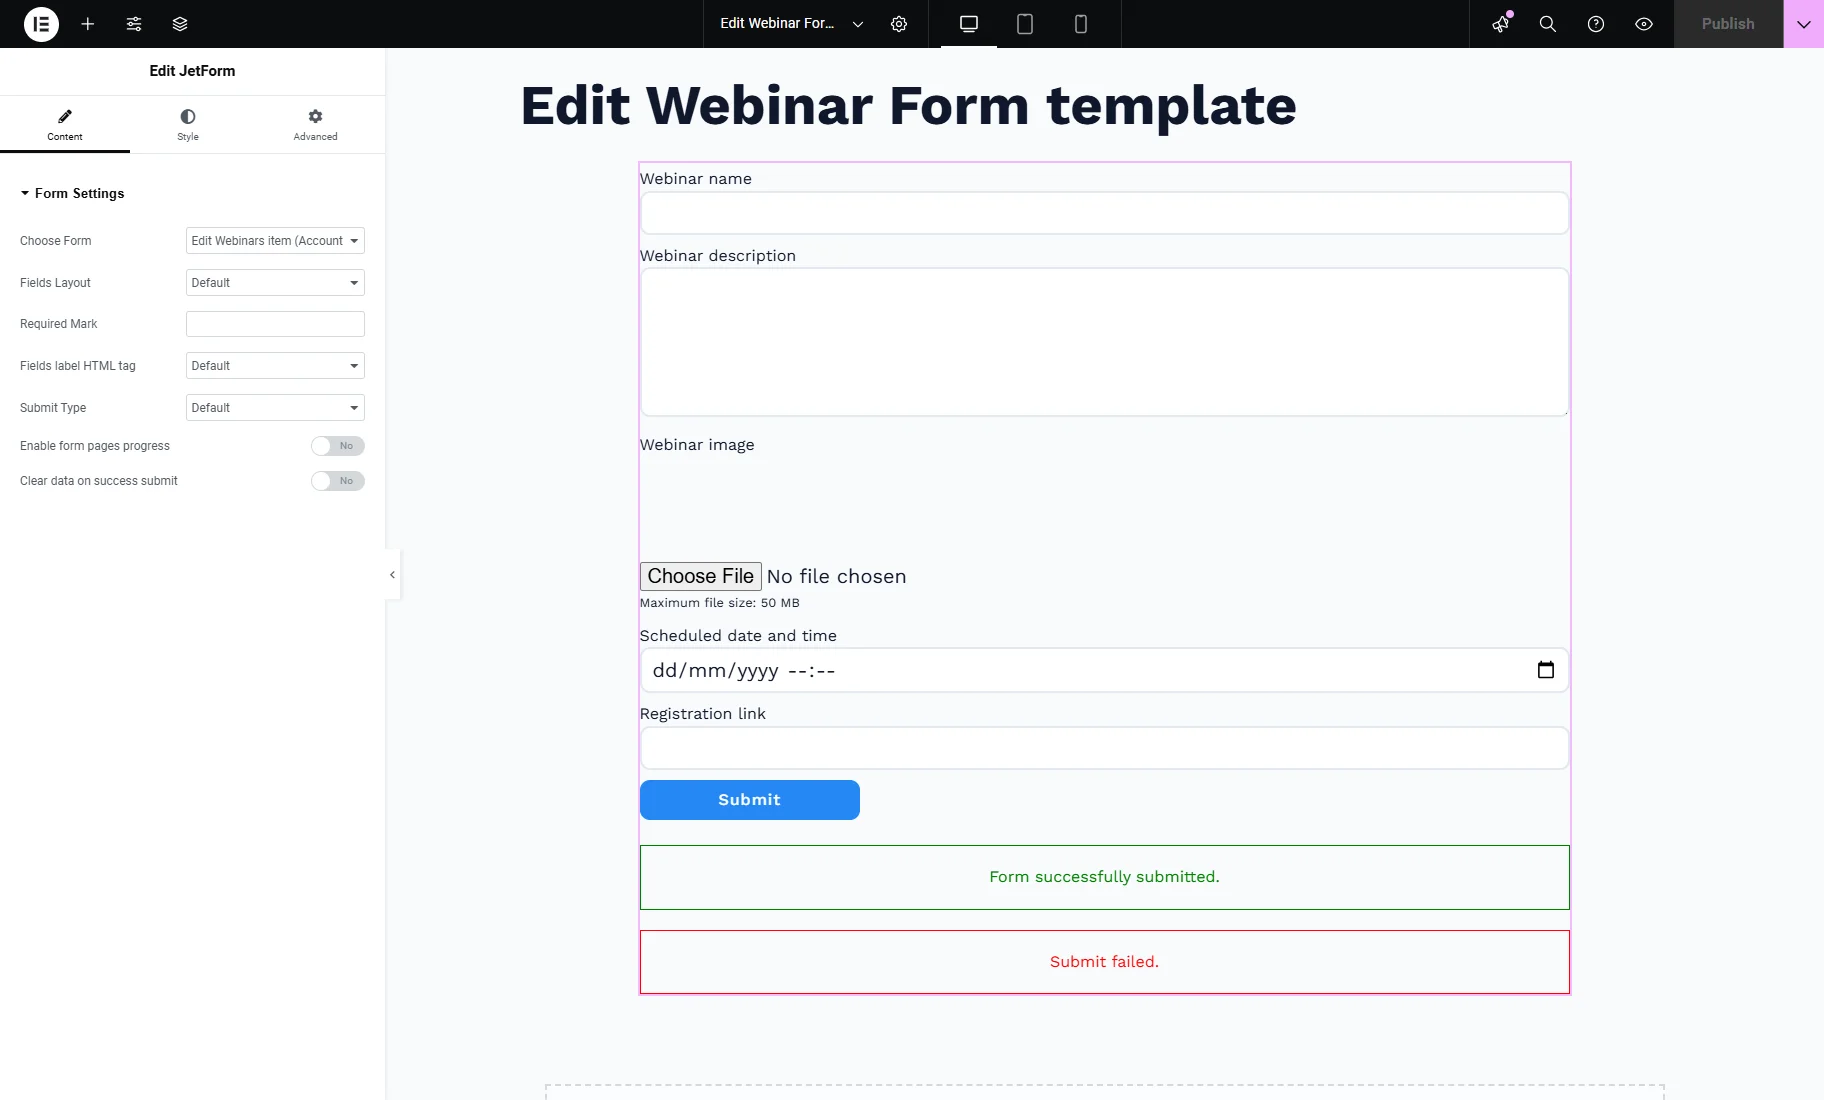
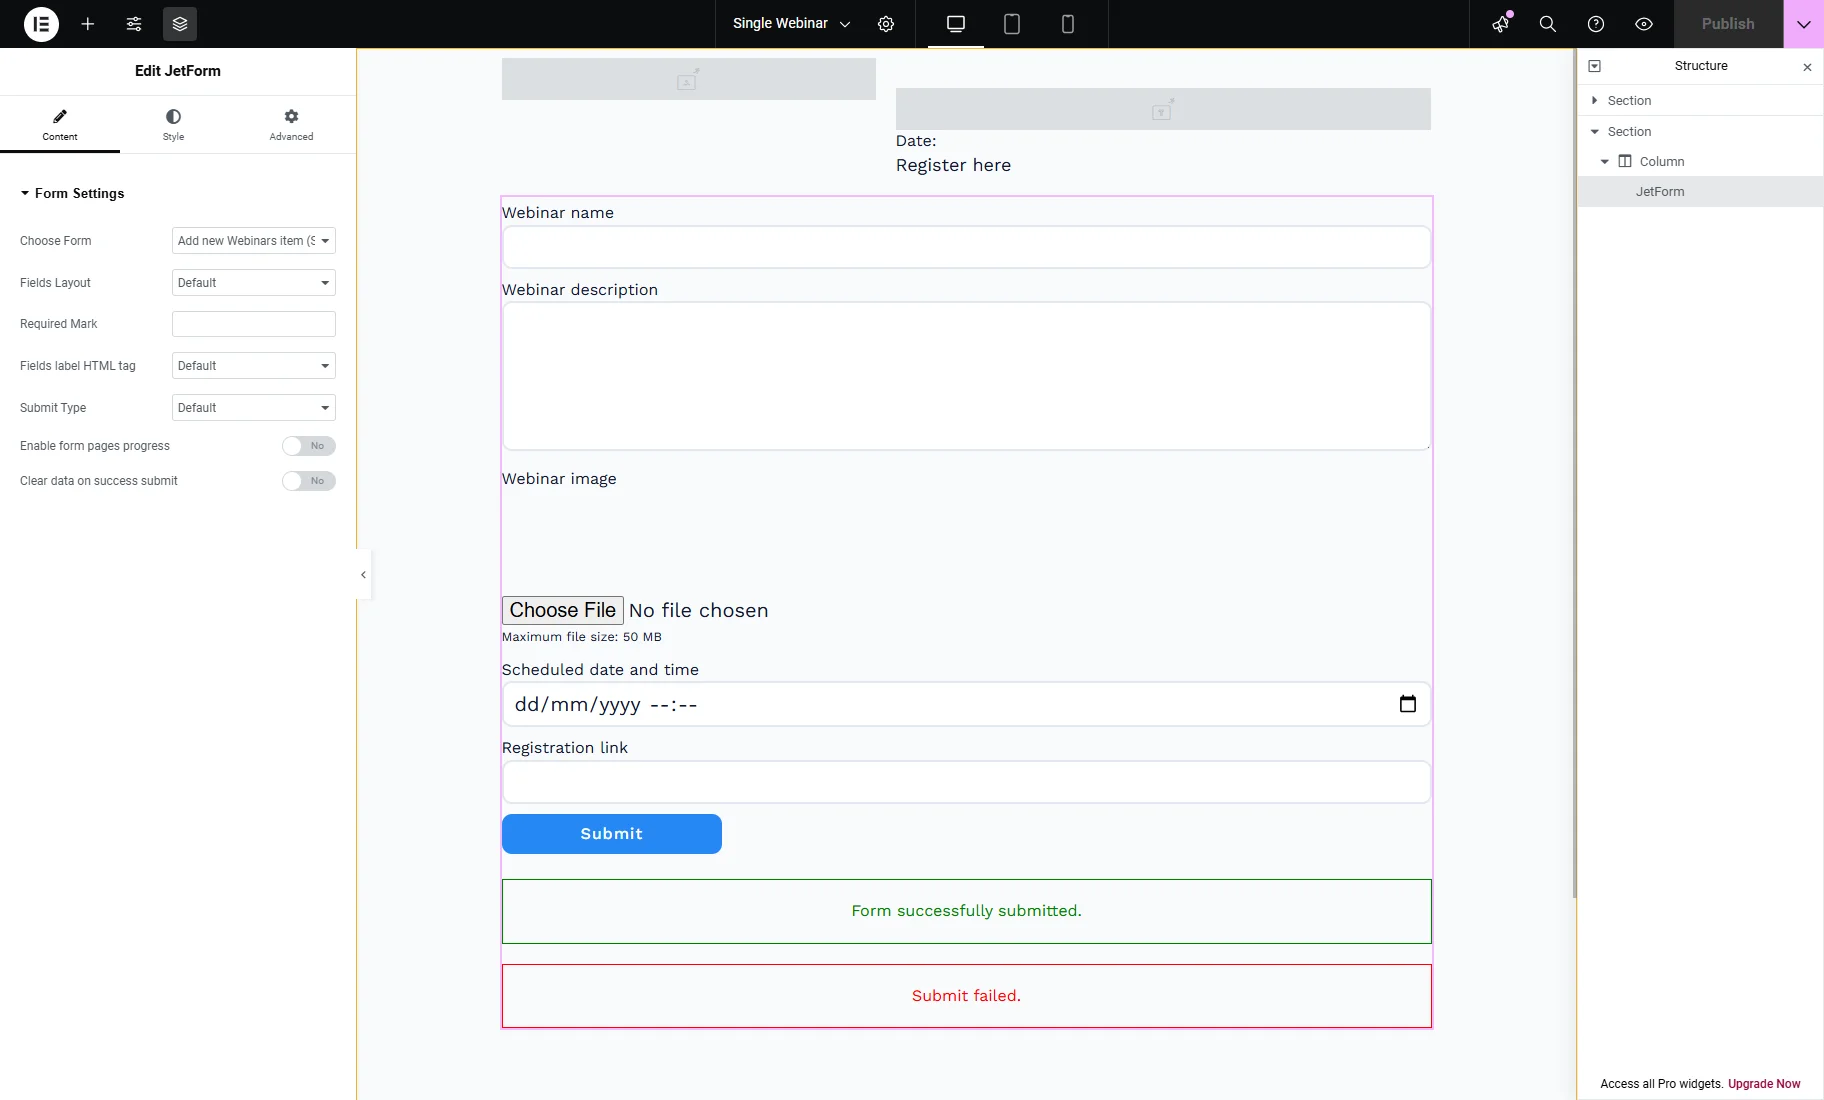
Inside the template, add the JetForm widget/block, select your newly created form in the Choose Form drop-down, and publish the template.
Create a Listing template for CCT items
Now, we need to create a Listing template with a link to the “Edit CCT Items” page.
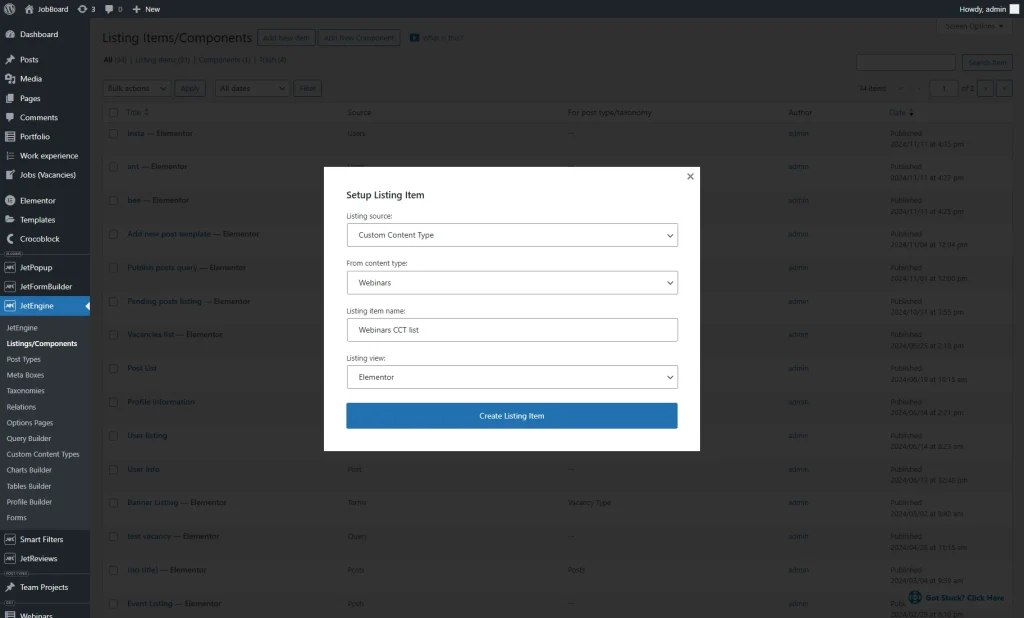
Go to WordPress Dashboard > JetEngine > Listings/Components and press the “Add New Item” button.
Select the “Custom Content Type” as the Listing source, pick your CCT name in the From content type drop-down, enter the Listing item name, and select the preferred Listing view.
Then, push the “Create Listing Item” button.
Add all the necessary Dynamic Widgets & Blocks to display the CCT items data. Check the How to Create Custom Content Type Listing Template tutorial for more details.
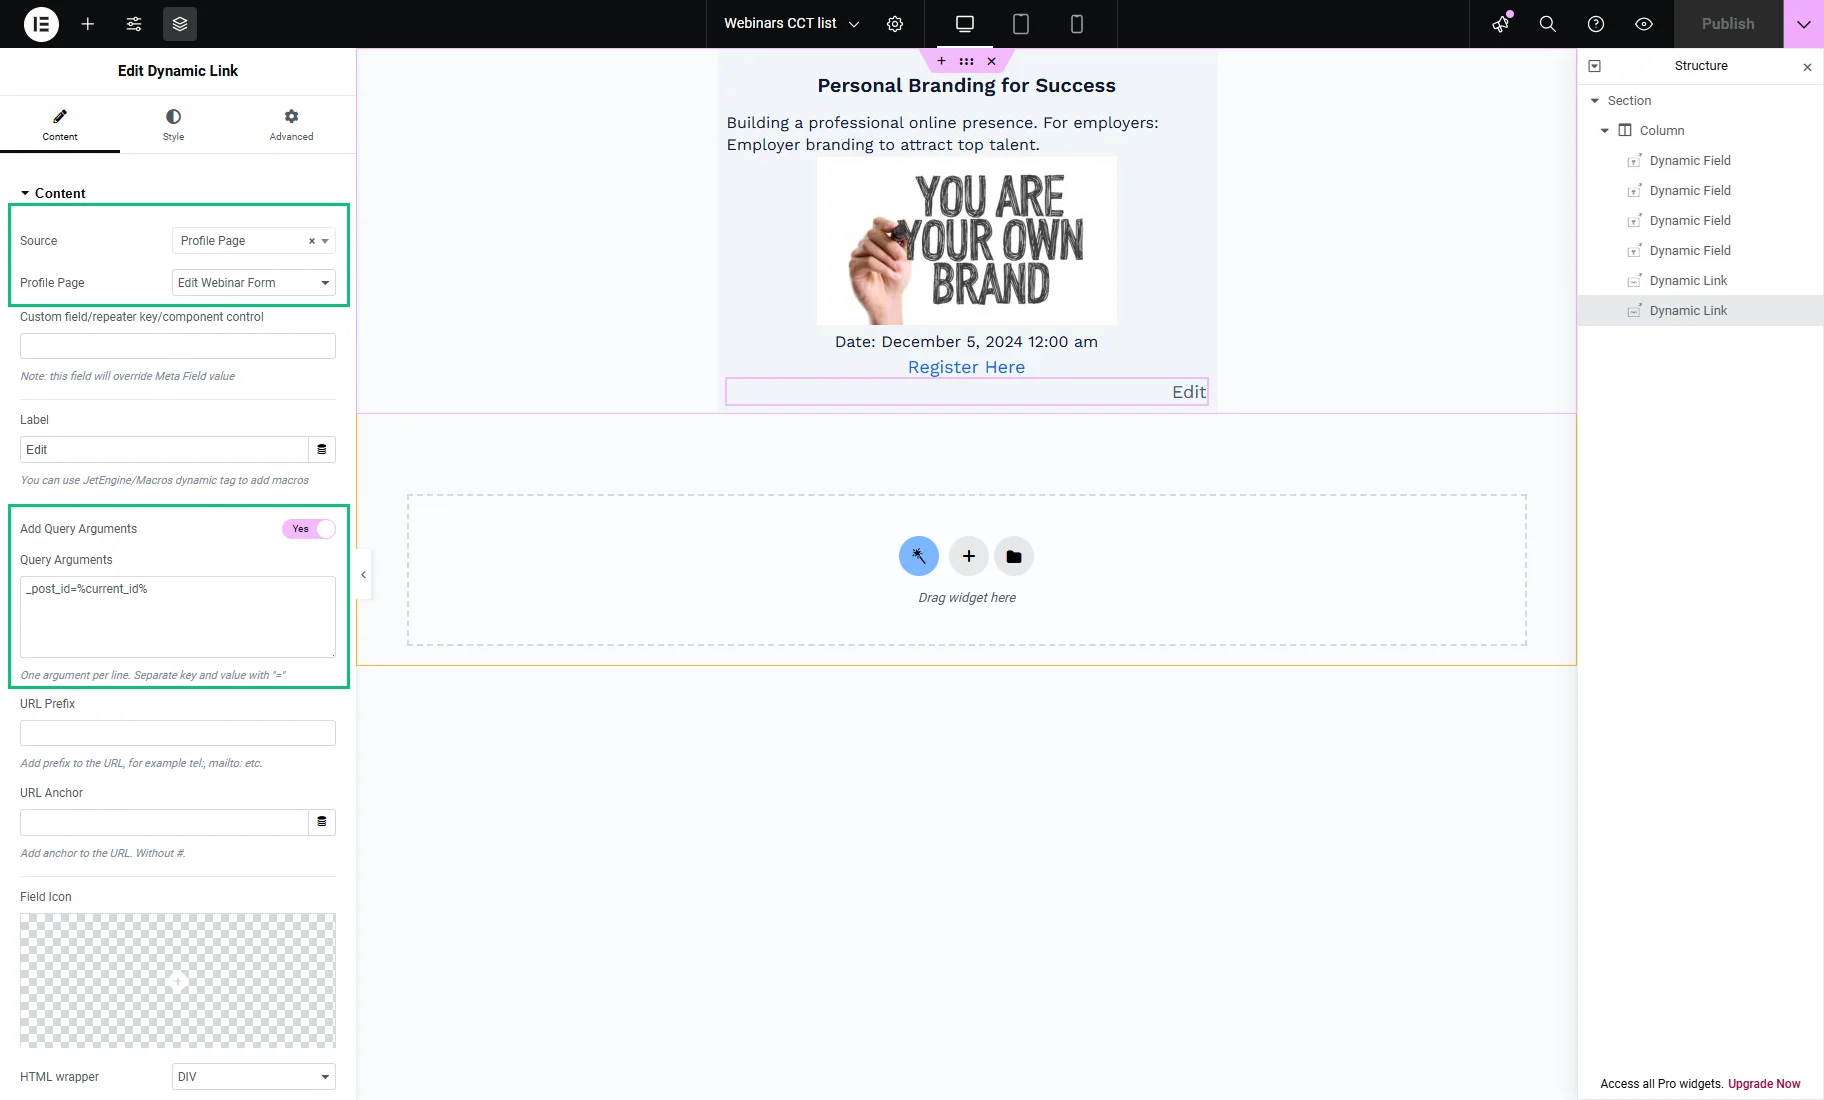
Then, place the Dynamic Link, select the “Profile Page” Source, and pick the recently created template as the Profile Page.
Then, enable the Add Query Arguments toggle that activates the Query Arguments textarea with such text:
_post_id=%current_id%
After finishing customizing the Listing item, hit the “Publish” button.
Place the Listing Grid to the Account template
The last step is to create a new Account subpage template with the listing we just created.
Navigate to the WordPress Dashboard > JetEngine > Profile Builder tab, open the Account Page section, and press the “+ Add New Subpage” button.
Set the Title and Slug and click the “+ Create New Template” link.
In the Create New Profile Template pop-up, enter the Template Name and select the Template Type.
Then, hit the “Create Template” button.
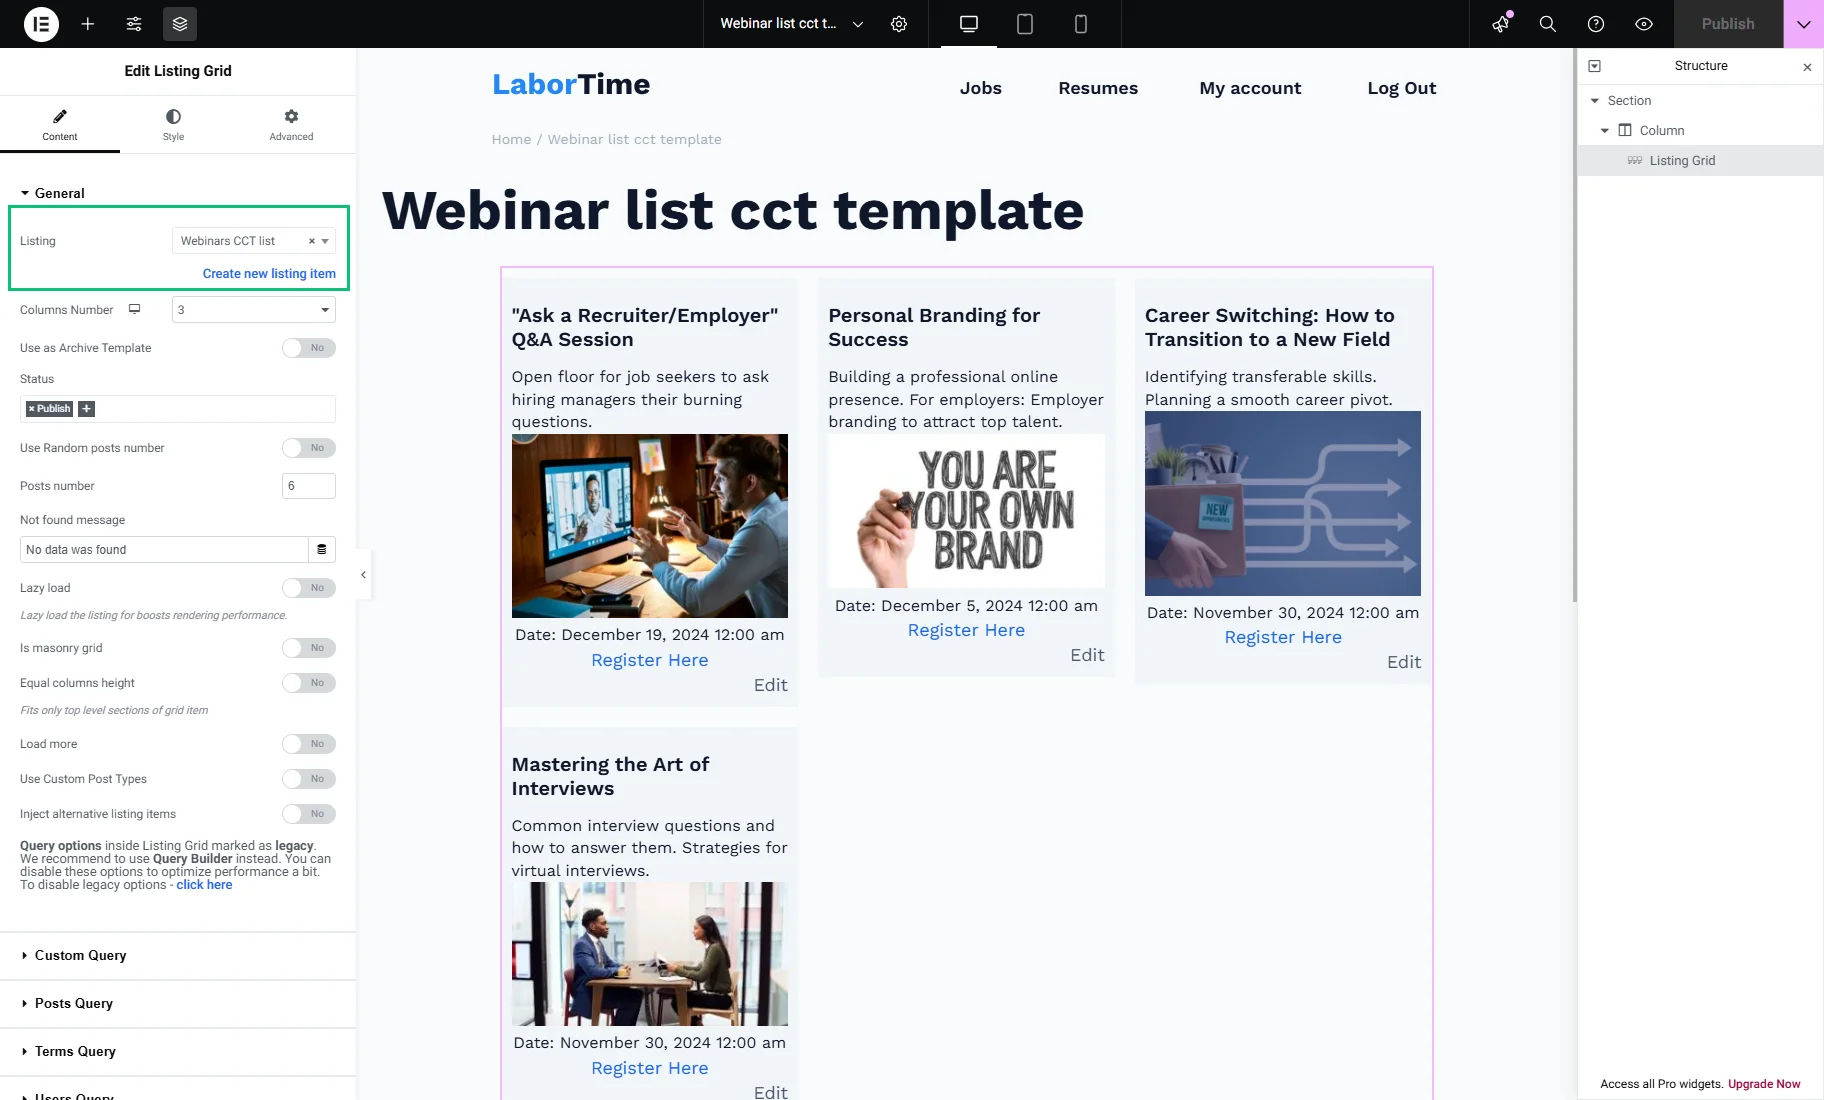
Place the Listing Grid, select the created Listing, and publish the template.
Check the result
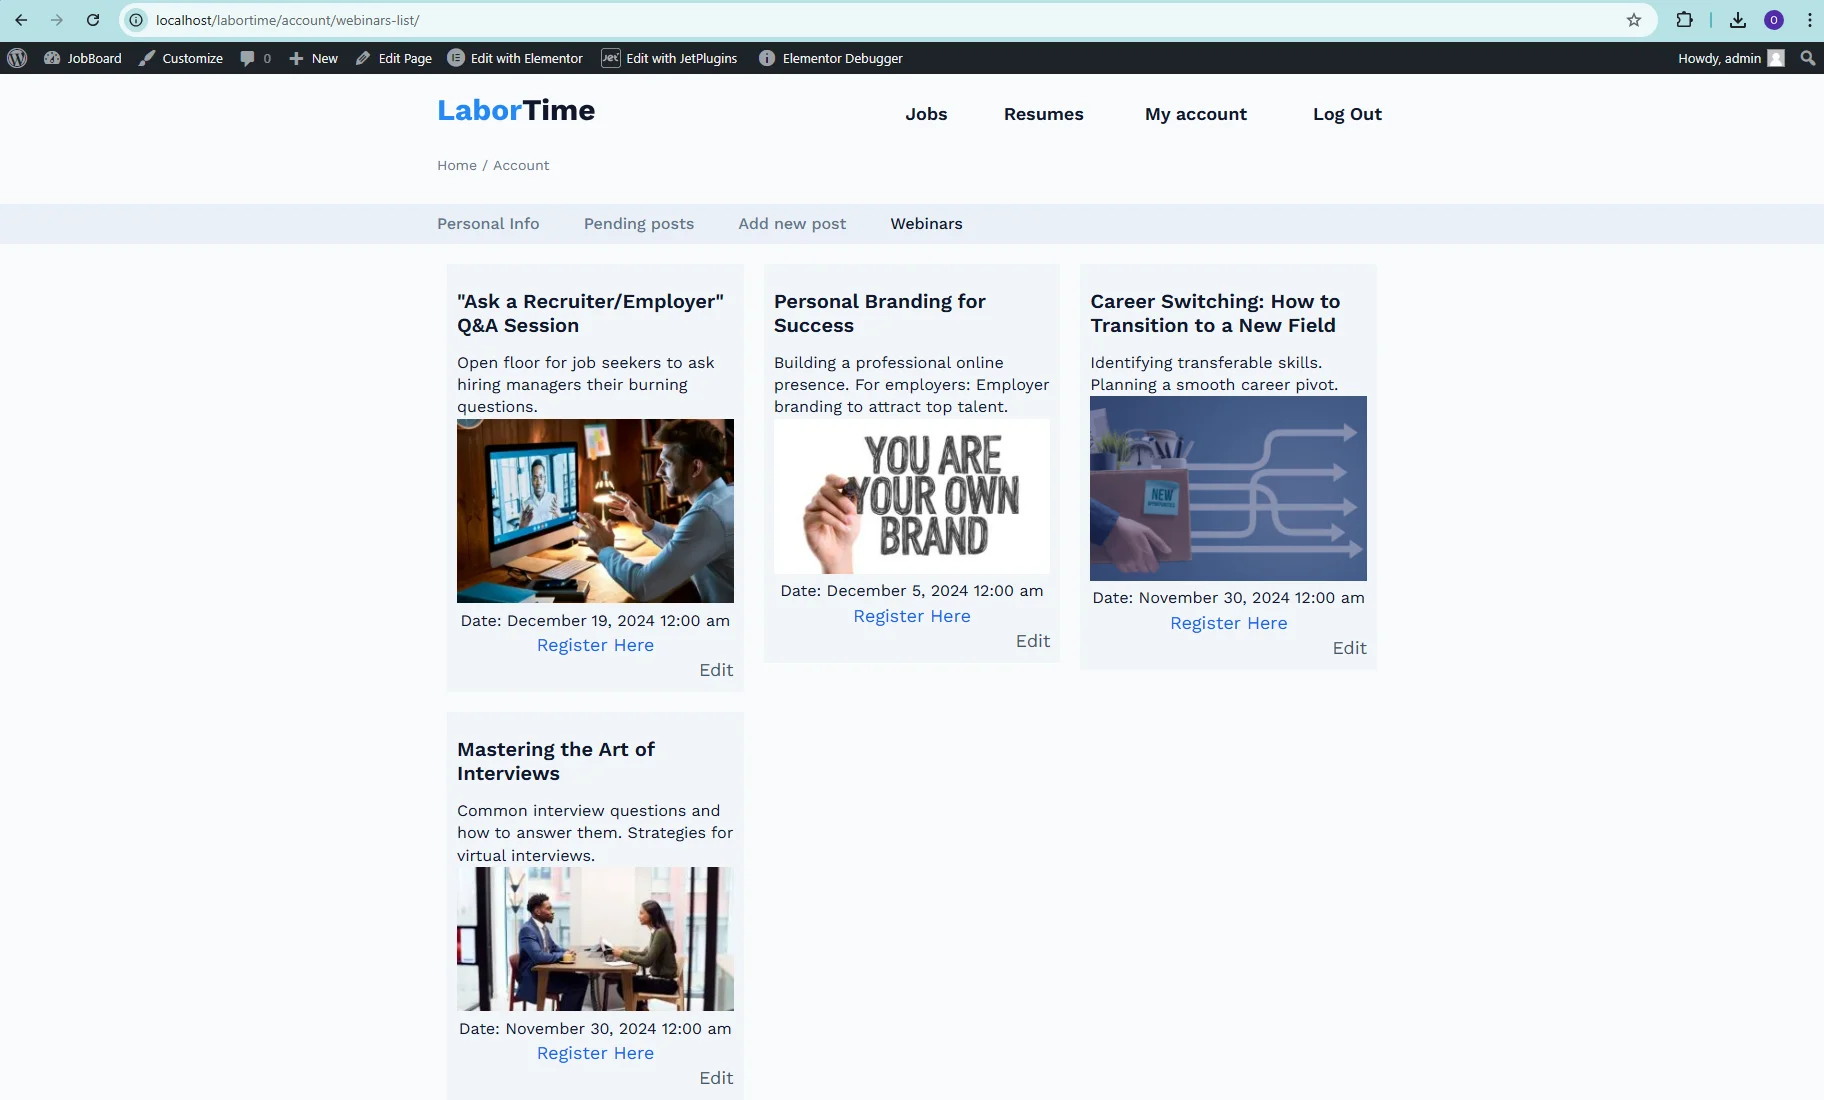
Let’s check our results. Navigate to the Account page on the front end, open the subpage with a listing, and then click on the “Edit” button.
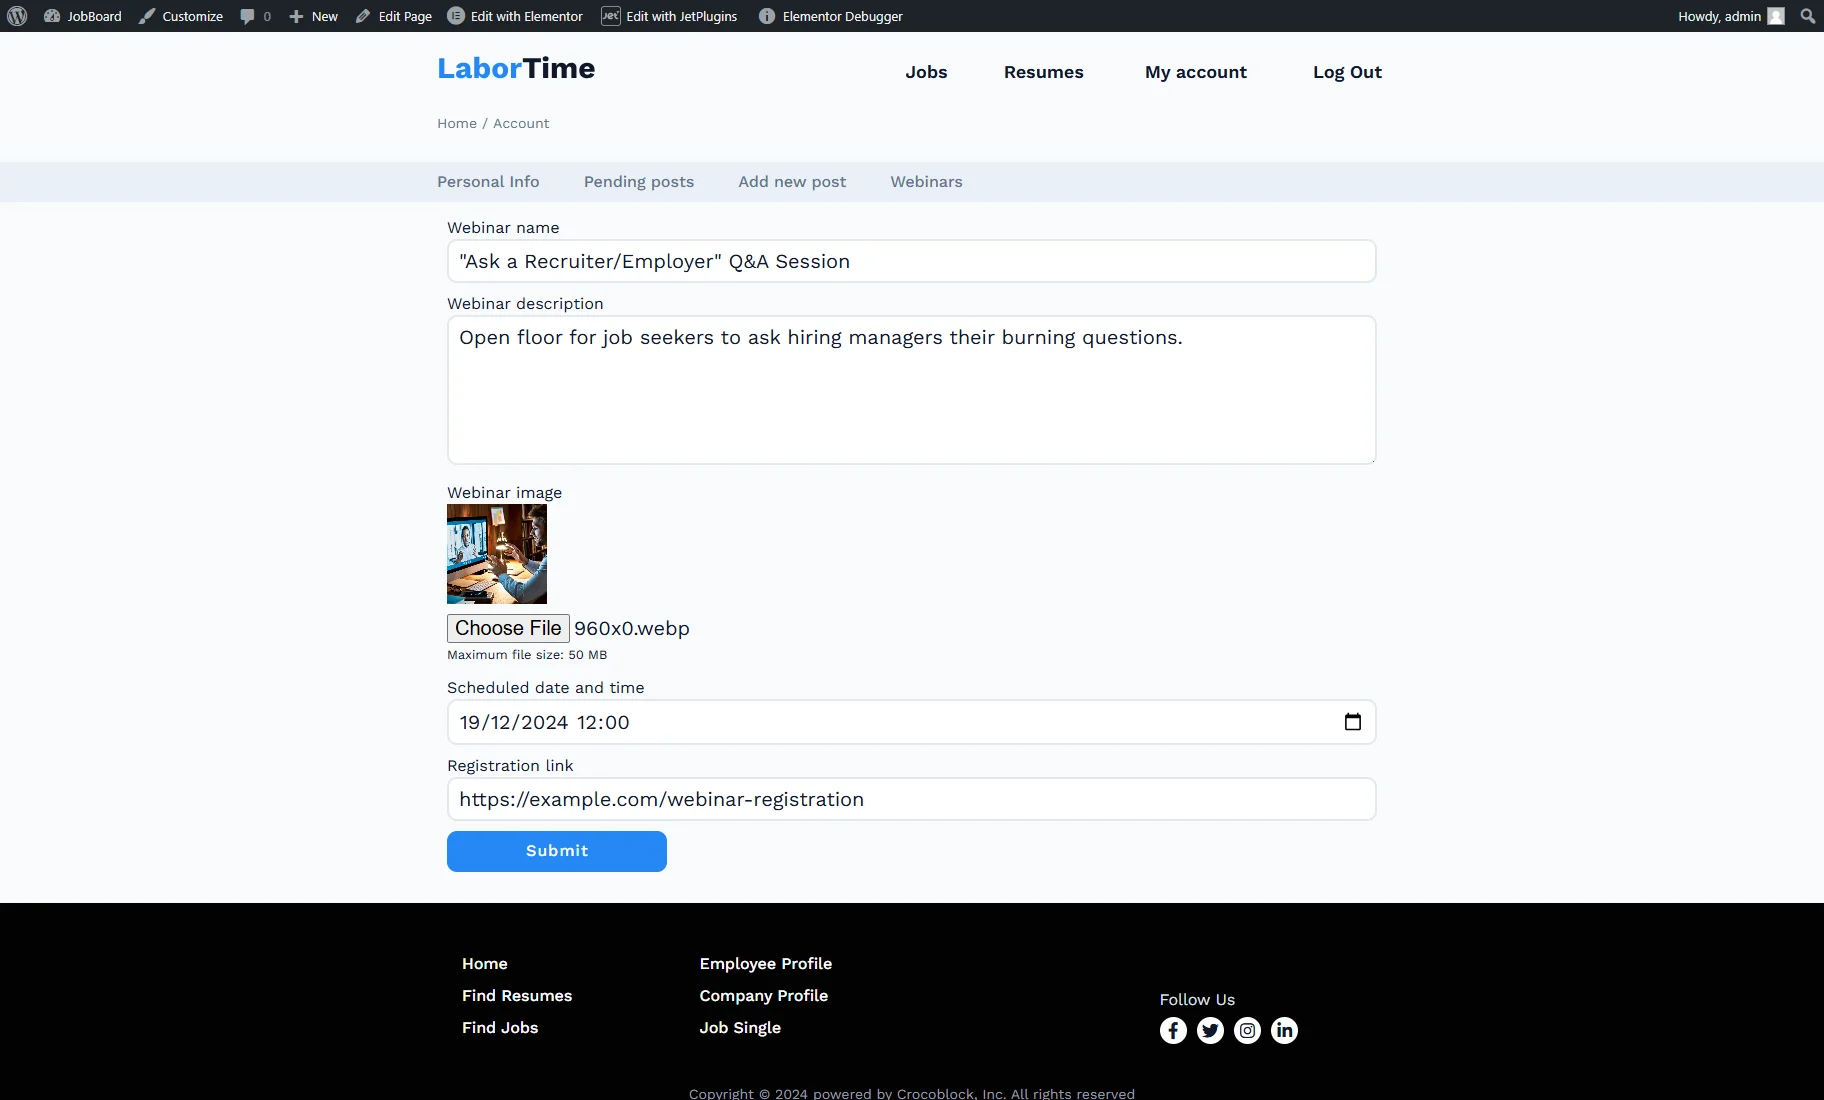
After clicking the “Edit” button, the page is redirected to the one with the “Edit CCT Items” form and predefined data.
Create Form for Editing CCT Items in Pop-up
Now, let’s look at how we can add the “Edit CCT Items” form in a pop-up.
Set up a form
Initially, create a new form or duplicate the first “Create CCT Item” form.
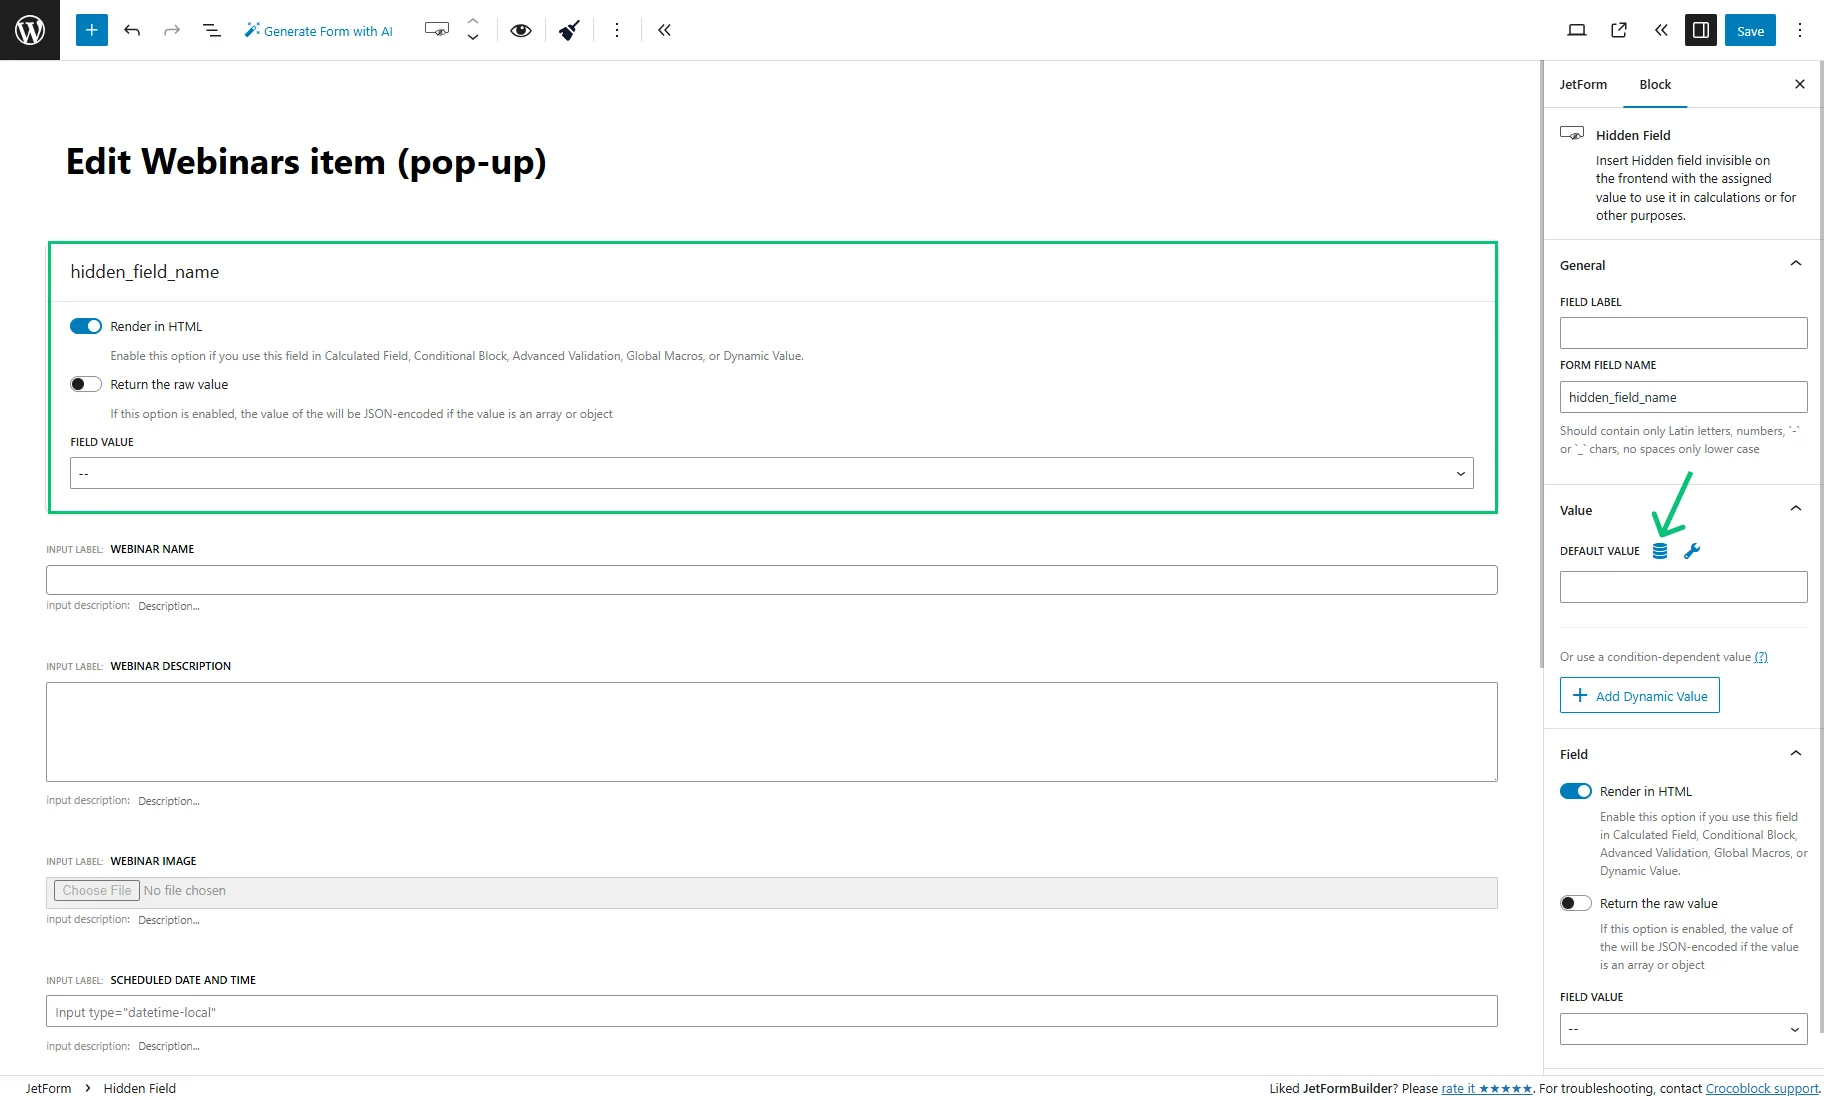
Rename the form. Place the Hidden Field and leave the FIELD VALUE unselected.
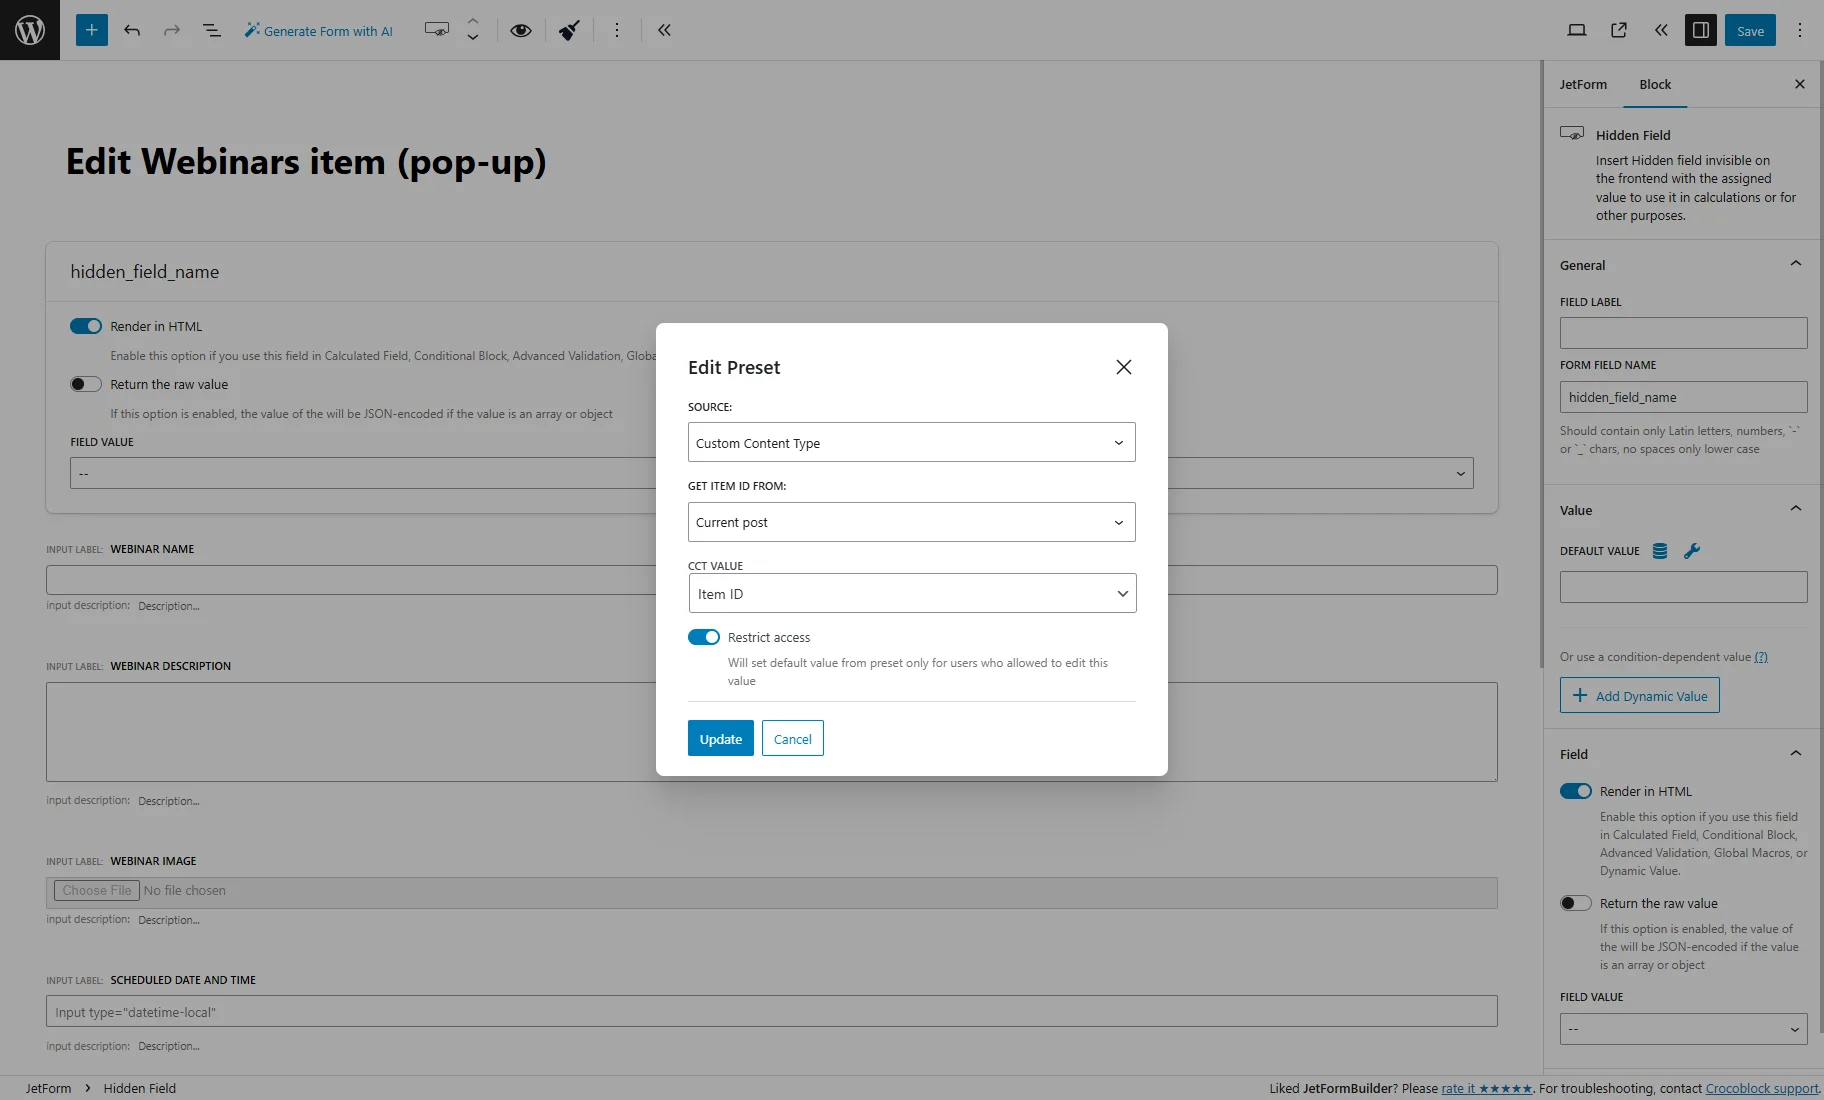
Open the Block settings tab in the right panel, scroll down to the DEFAULT VALUE field, and click the “database” icon.
Pick the “Custom Content Type” SOURCE, “Current post” from the GET ITEM ID FROM field, and “Item ID” CCT VALUE. Then, click the “Update” button.
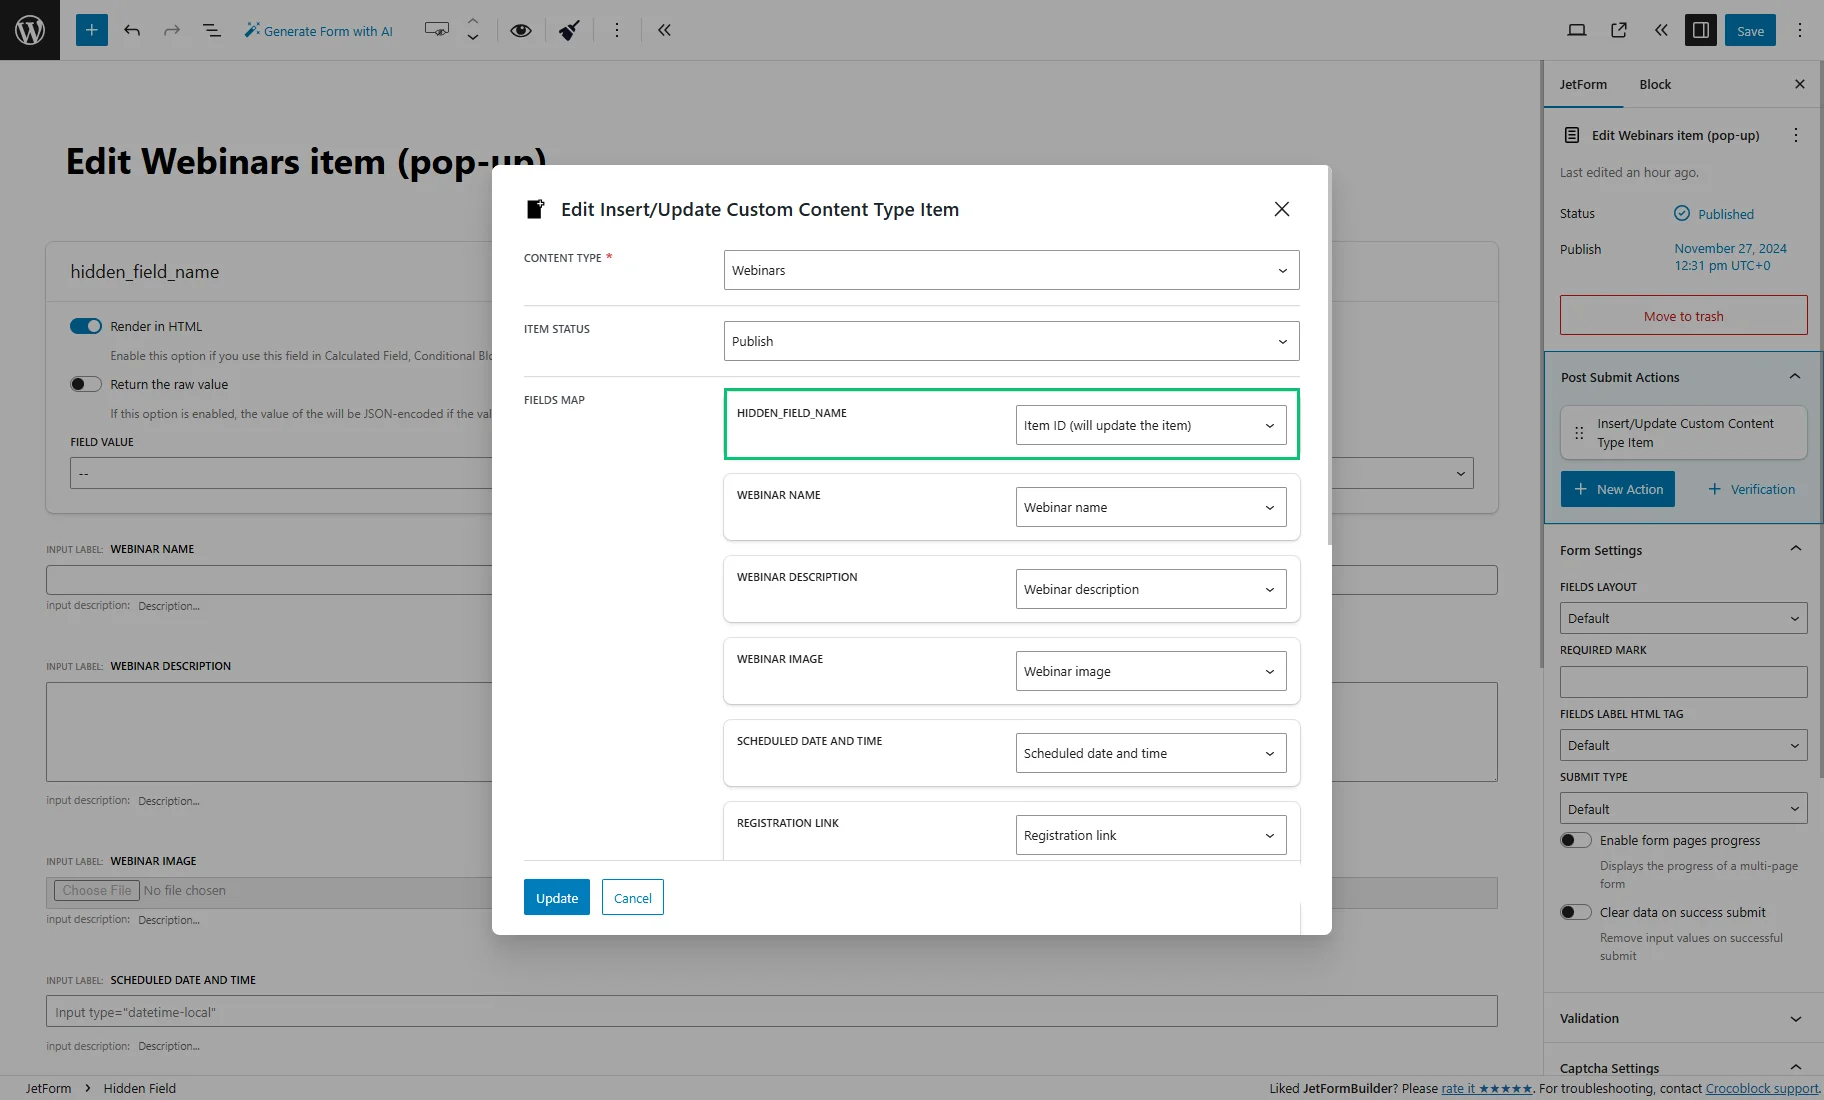
In the “Insert/Update Custom Content Type” Post Submit Action editing window, connect the Hidden Field with the “Item ID (will update the item)” option in the FIELDS MAP section and press the “Update” button.
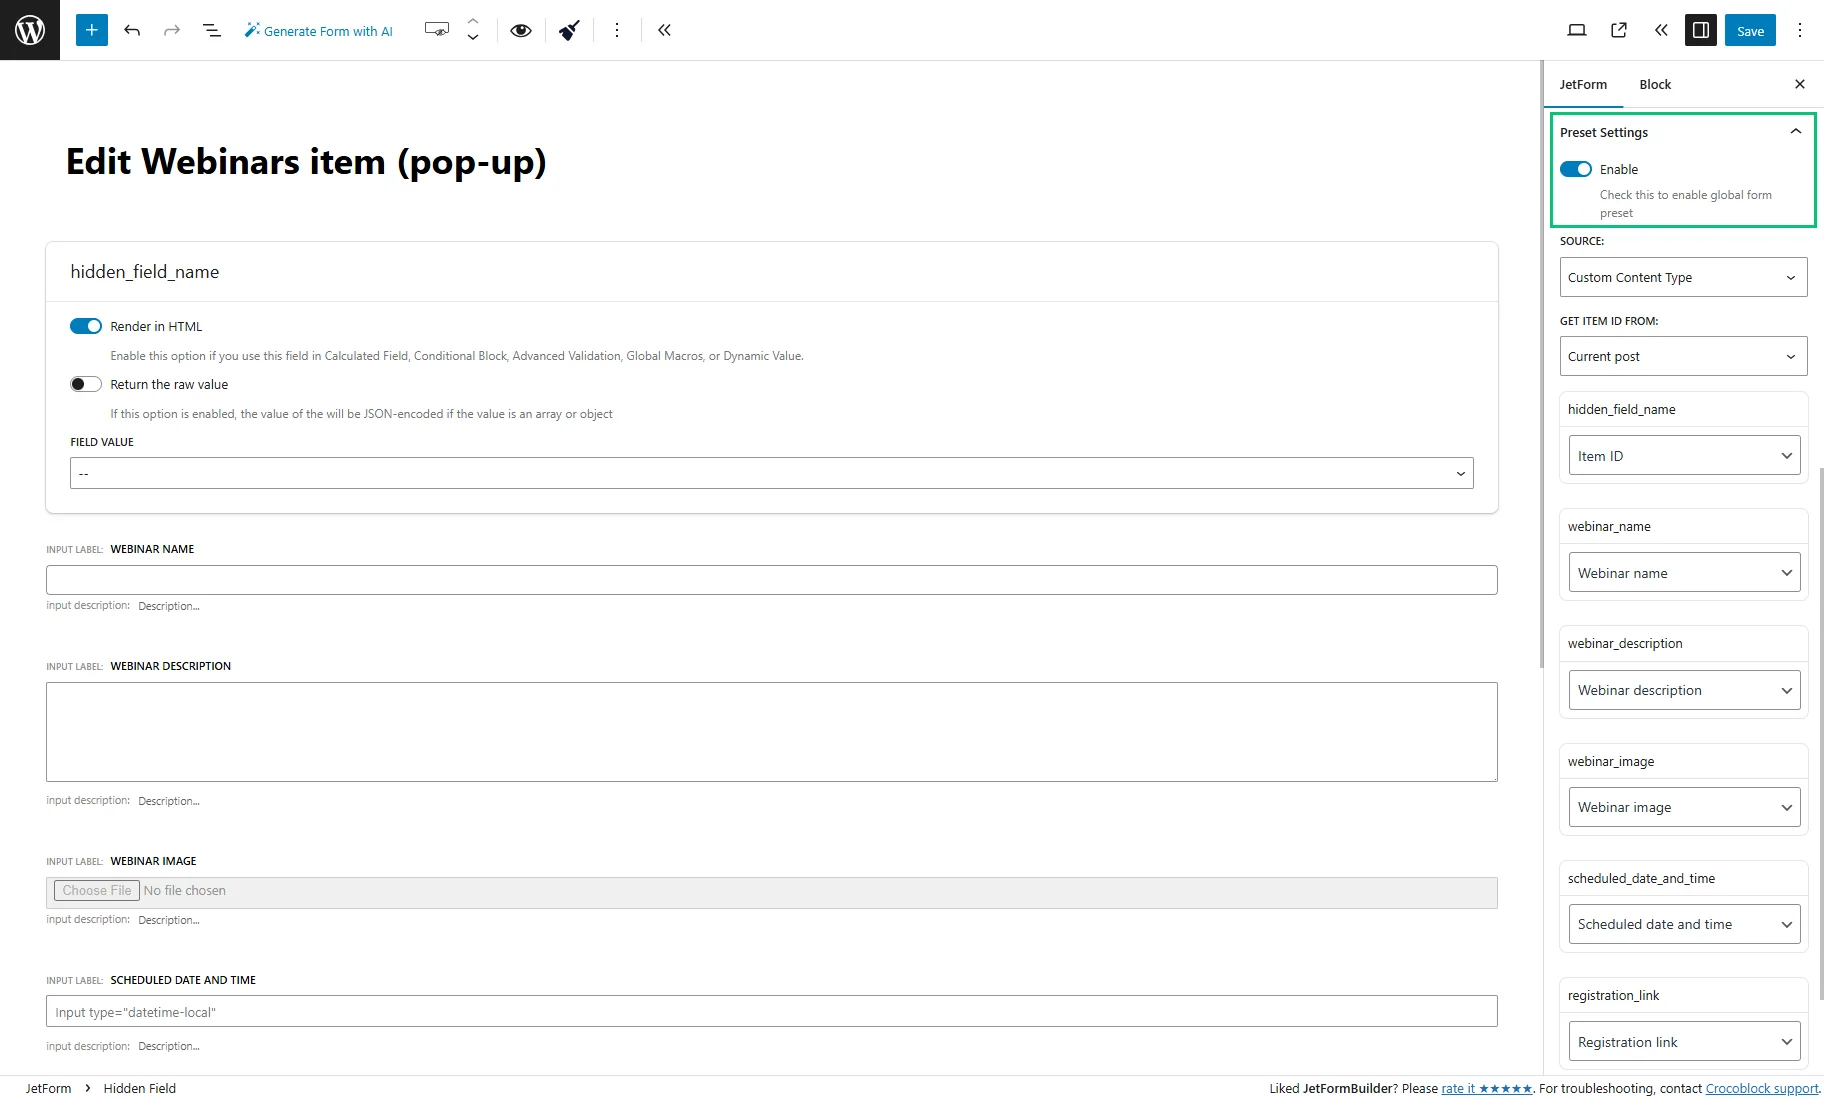
Then, unfold the Preset tab in the JetForm section and activate the Enable toggle.
Here, choose the “Custom Content Type” SOURCE and “Current post” in the GET ITEM ID FROM field.
As before, we need to map our form fields with the CCT meta fields.
Eventually, save the changes.
Place the form in the pop-up
Save changes and create a dynamic Popup to add this form inside.
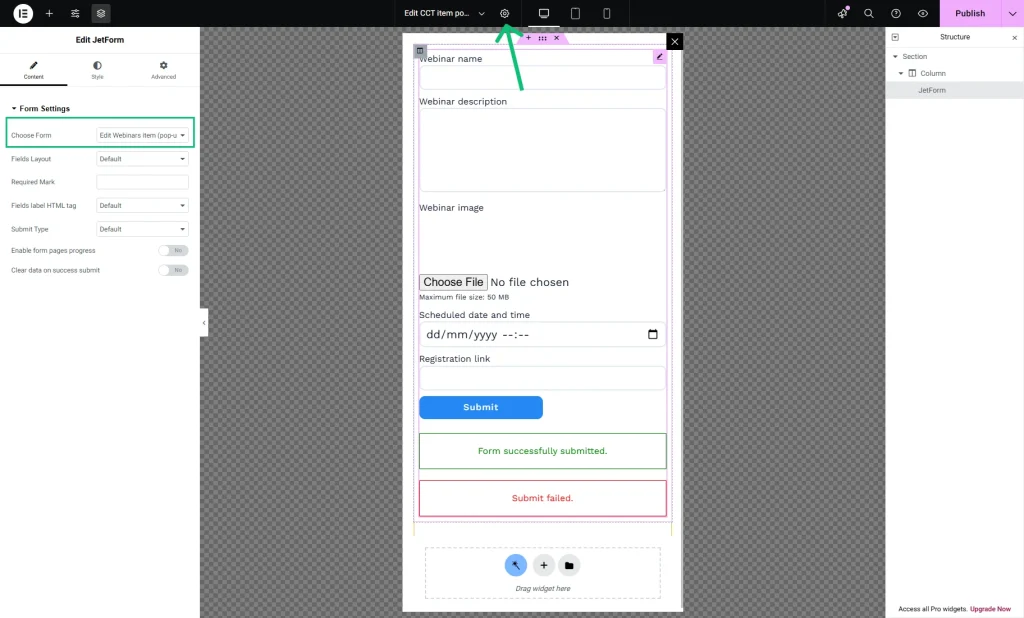
Add the JetForm to the pop-up and select the form in the Choose Form dropdown menu.
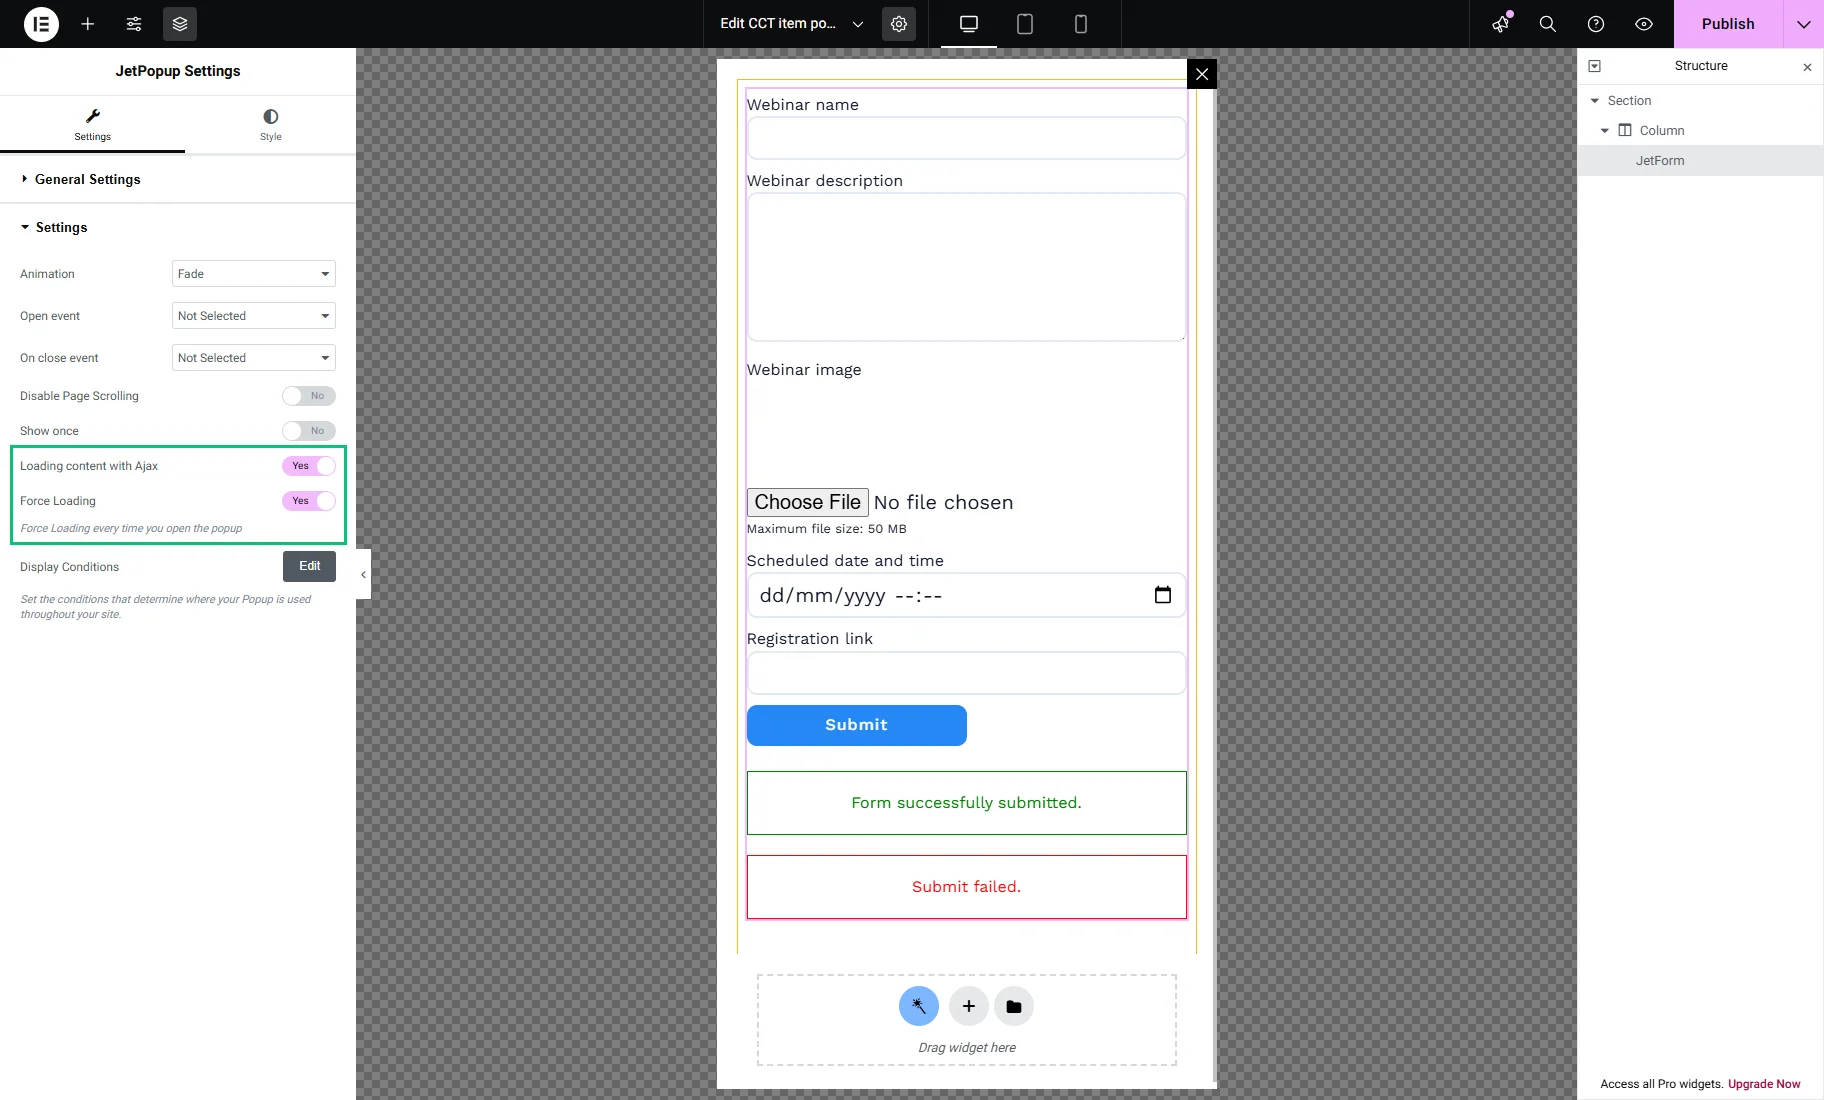
Then, click the “gear” icon to open the pop-up settings.
In the Settings tab, enable Loading content with Ajax and Force Loading options and publish the pop-up.
Adjust the Listing template
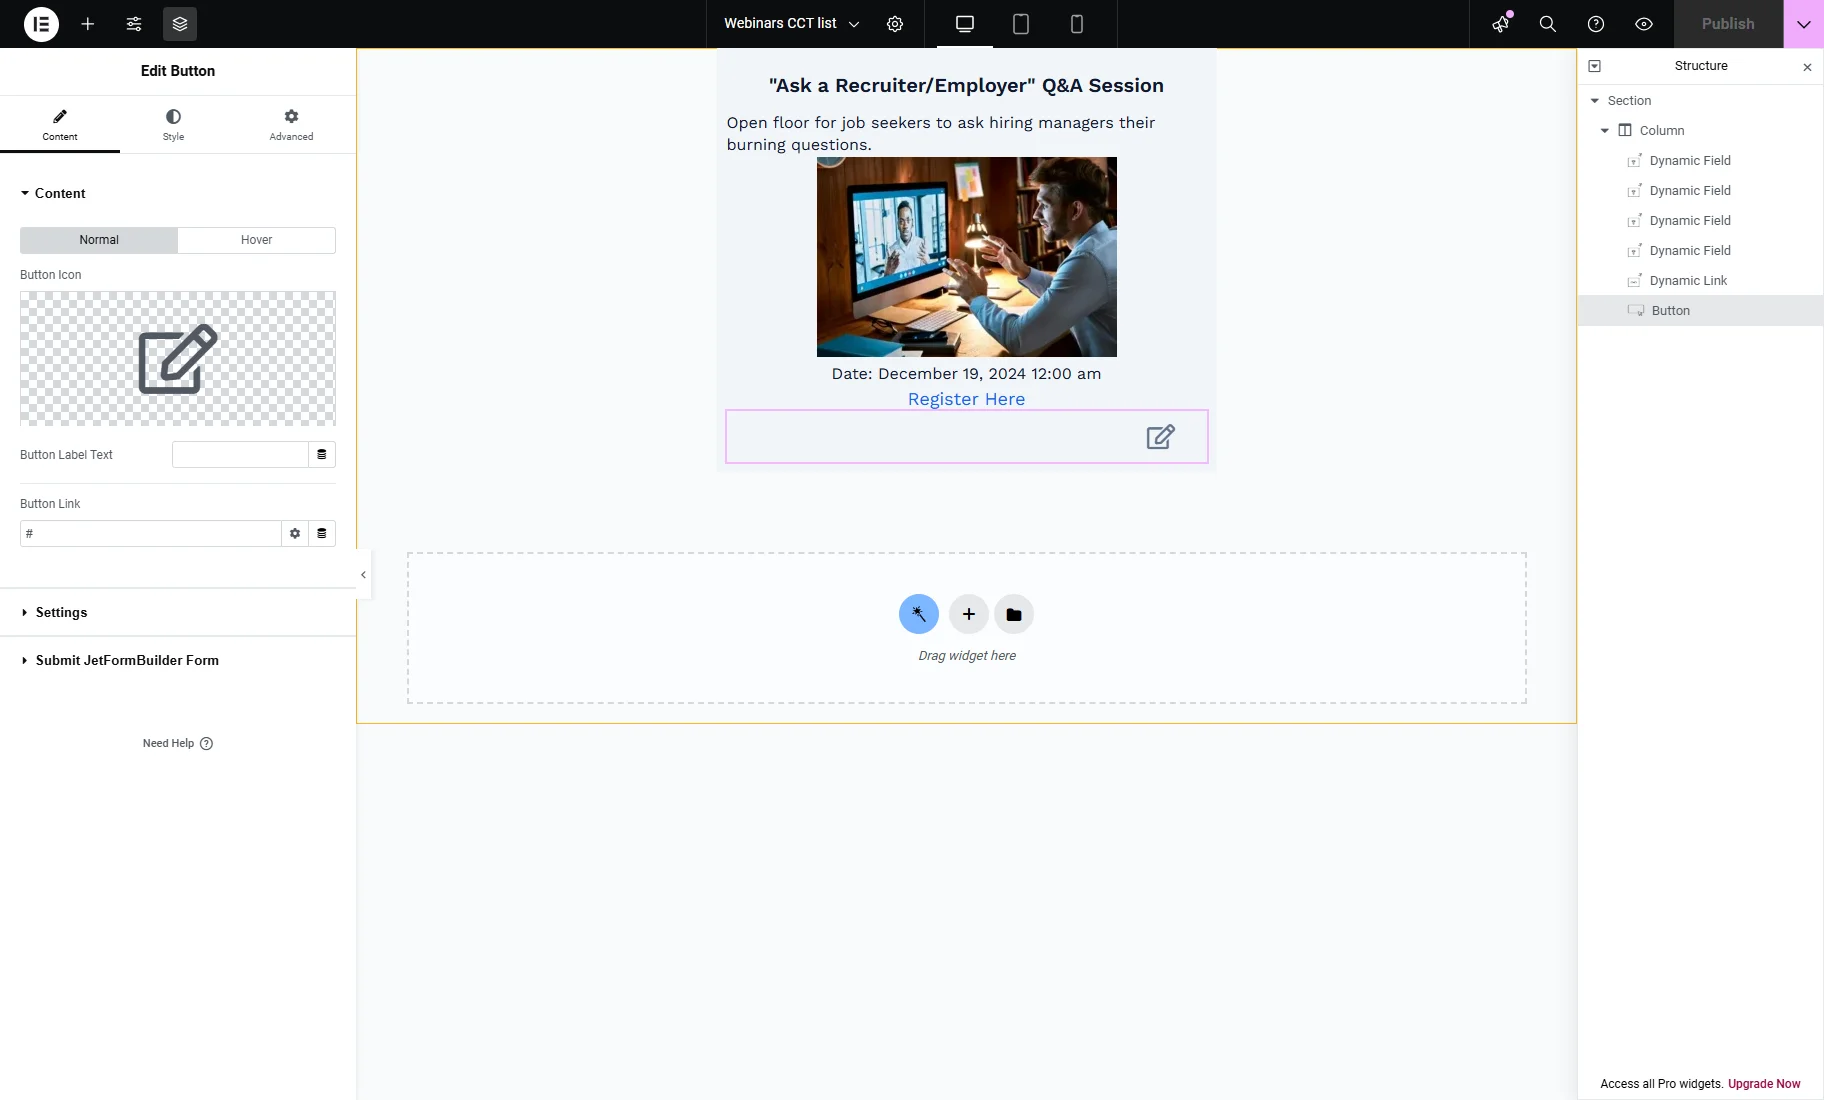
Open the Listing for CCT items and add a Button (by Elementor) or Button (by the JetElements plugin).
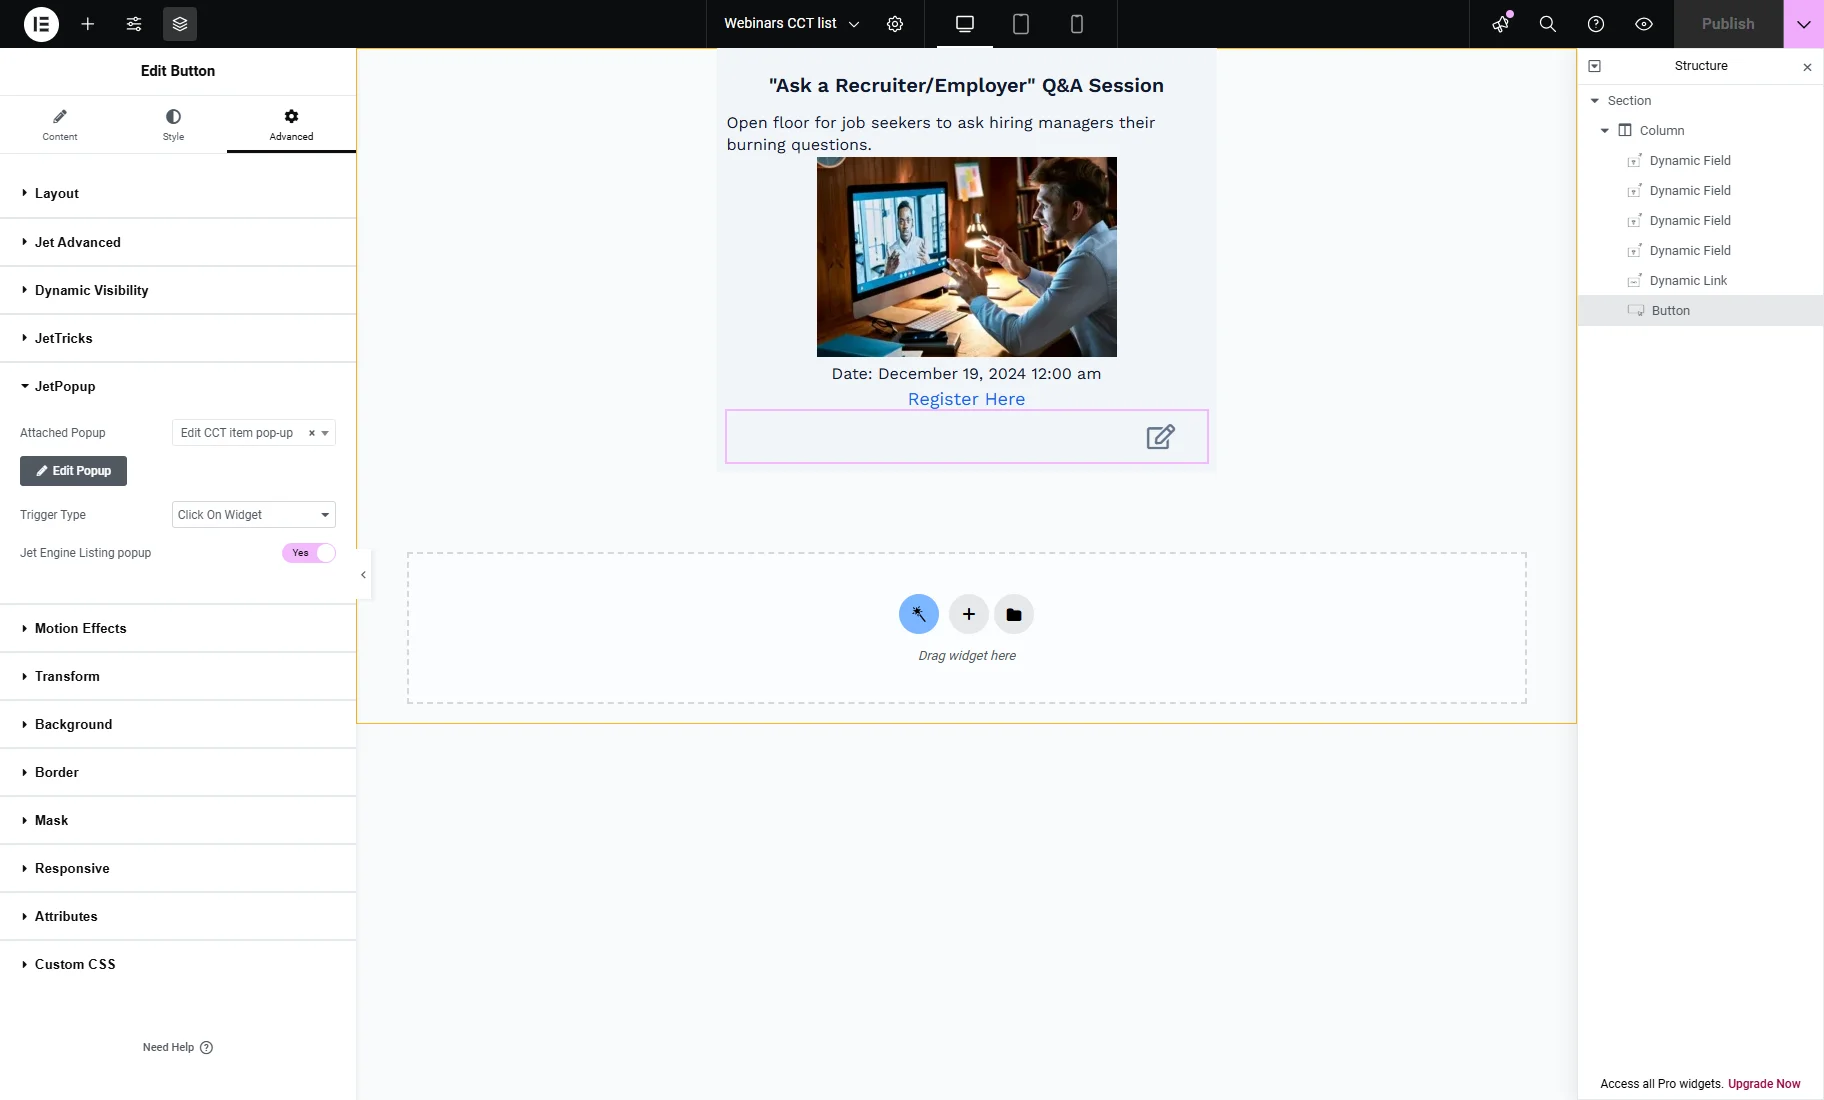
In the Advanced settings tab of the widget, unroll the JetPopup tab, select the needed pop-up from the Attached Popup dropdown, “Click On Widget” Trigger Type, and enable the Jet Engine Listing popup toggle.
Save the changes and add the Listing Grid with this Listing template on any page you need. In the described example, it will be again the Account page.
Checking the result
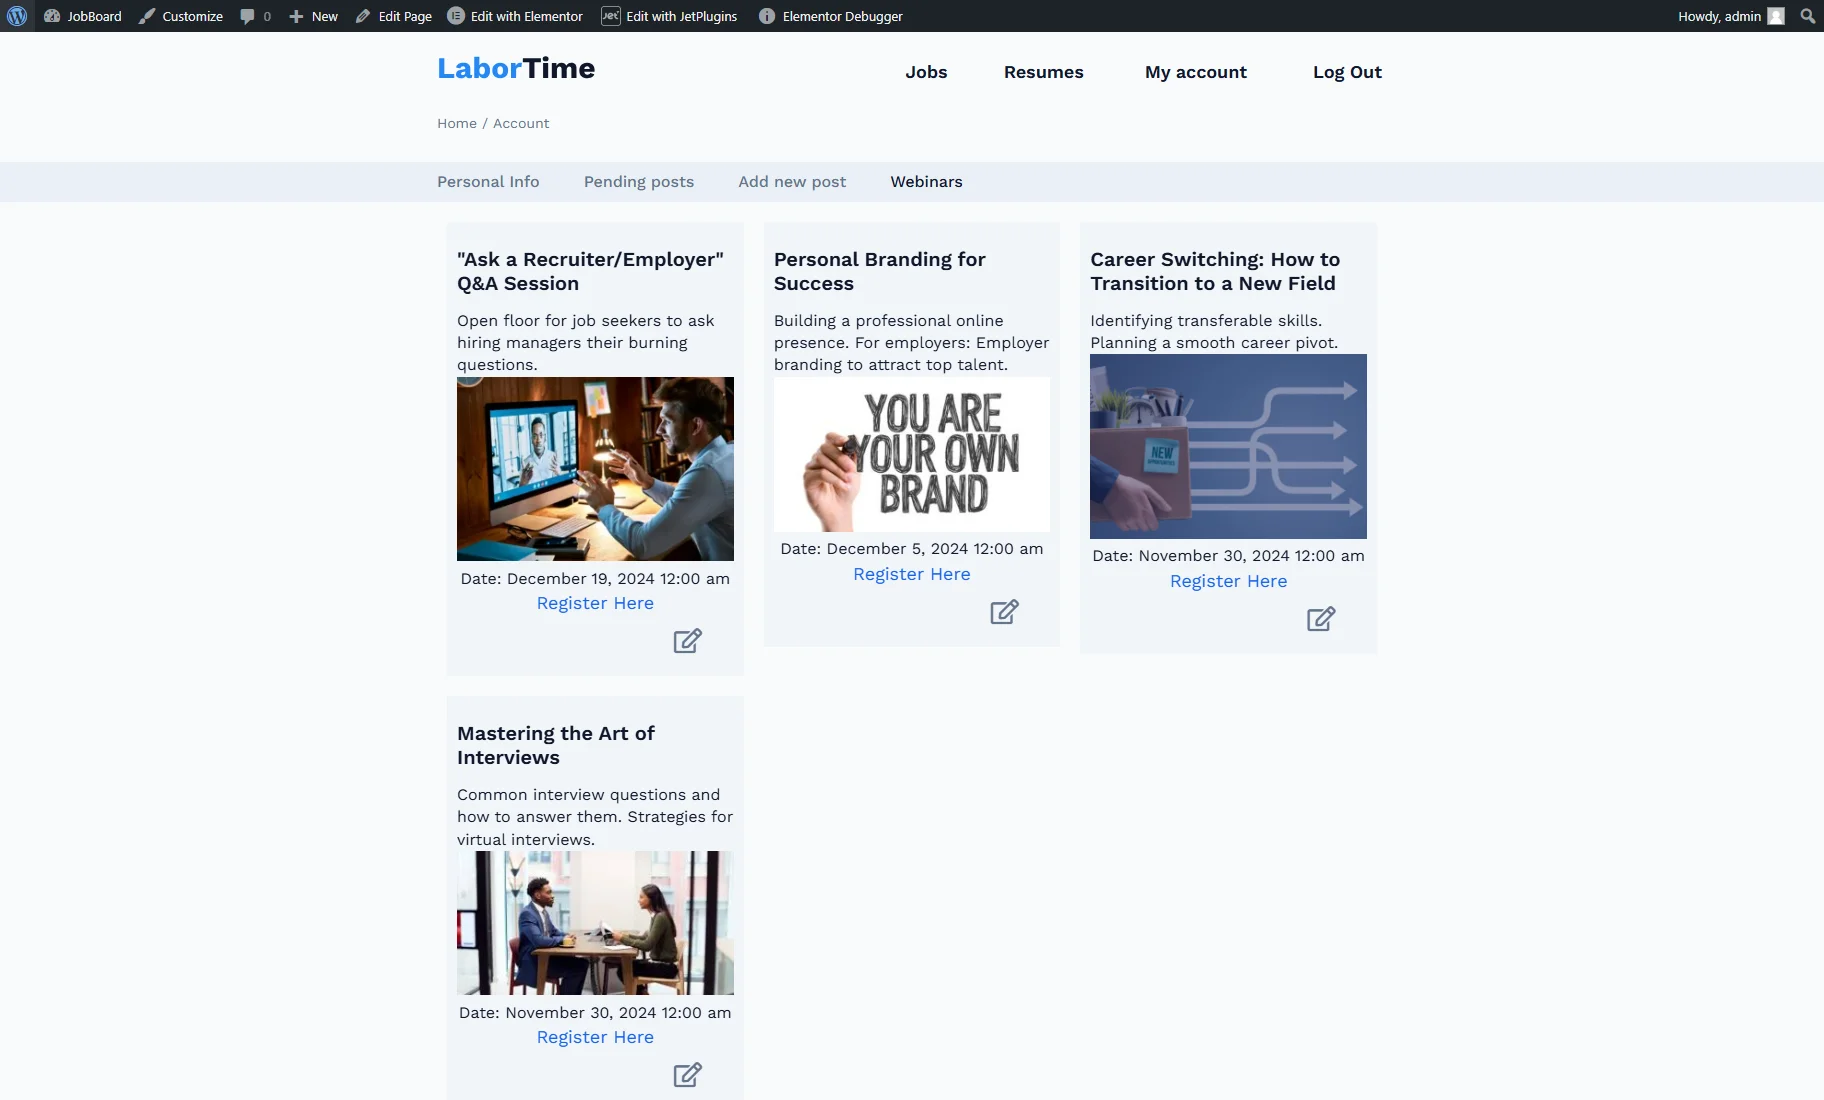
Head to the Account page on the front end, open the subpage with a listing and then click the “Edit” button.
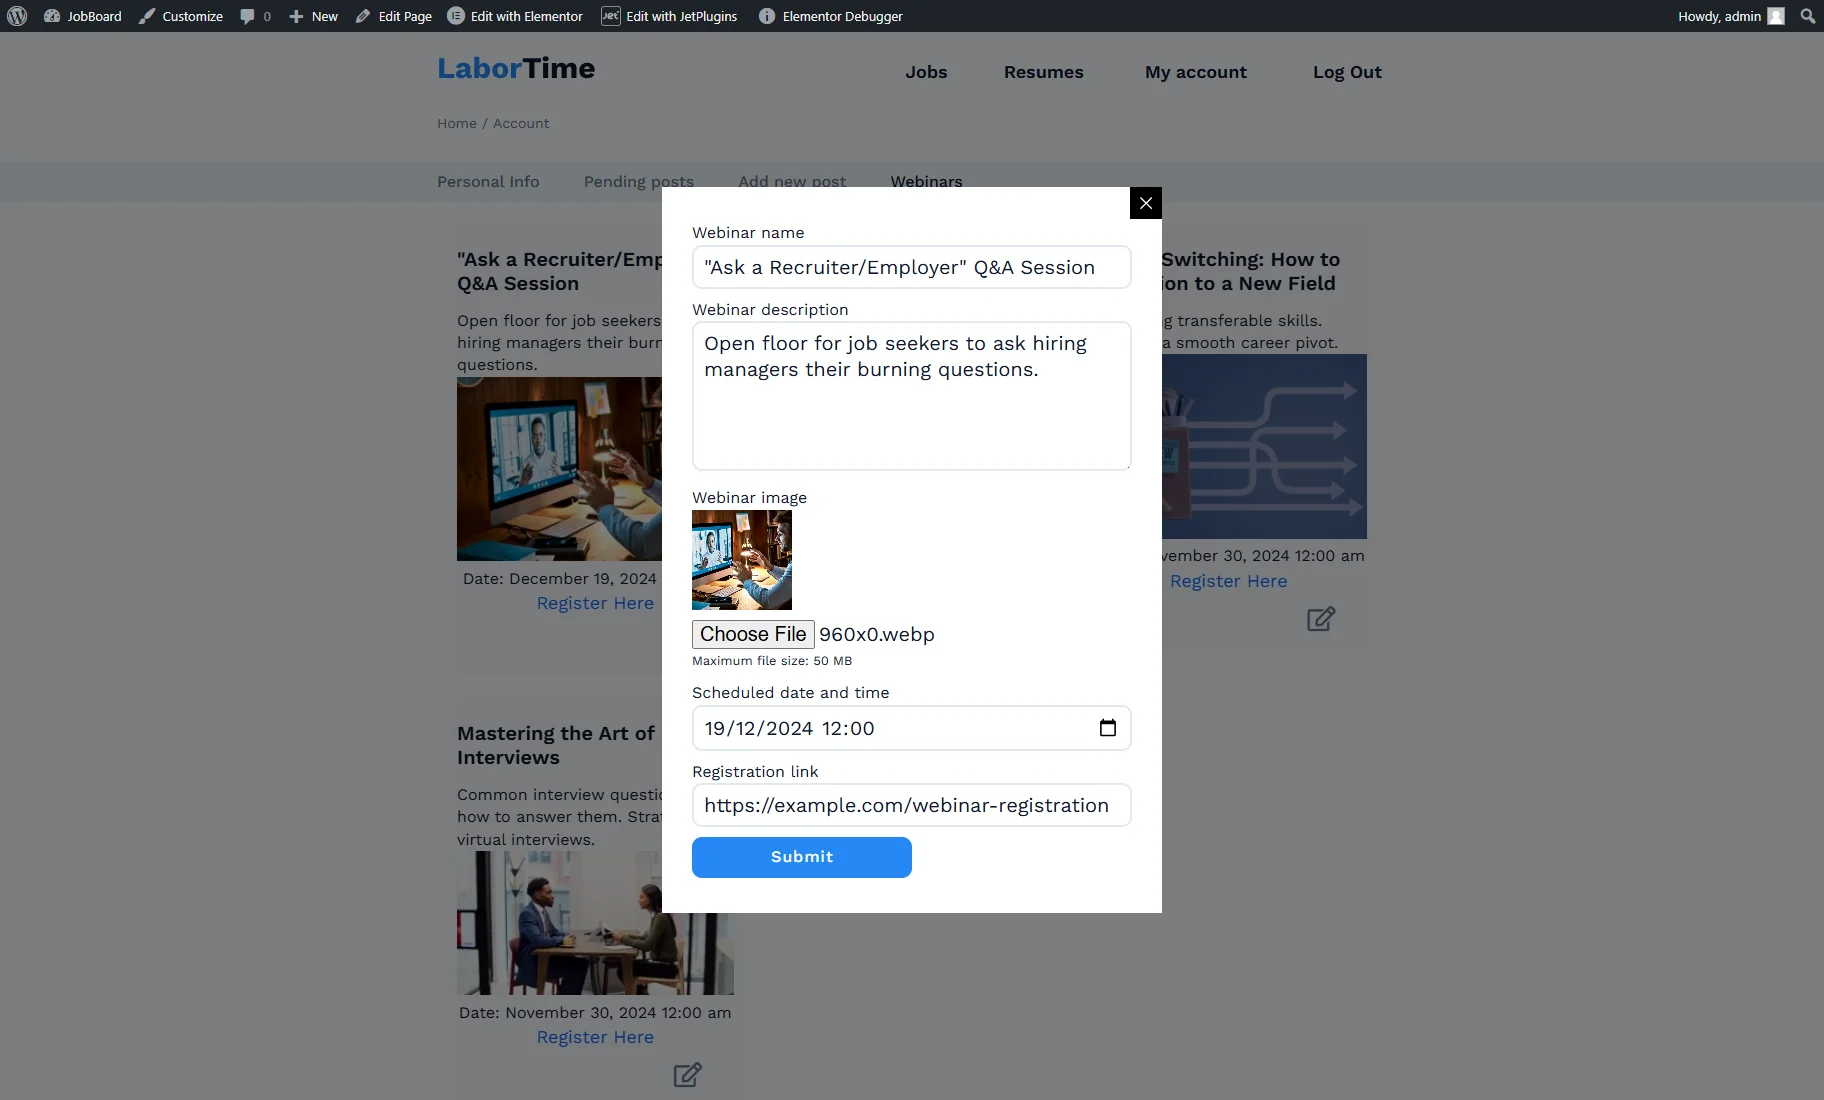
It opens the pop-up with the pre-filled “Edit CCT Items” form.
Create Form for Editing CCT Items on the Single Page
Craft a form
For the Single page, you can use the form for the pop-up or create a new one with similar settings.
Place the form to the Single page
Open the Single CCT template, place a JetForm, and select the recently created form. Save the changes.
Examine the result
Proceed to the CCT’s Single page on the front end.
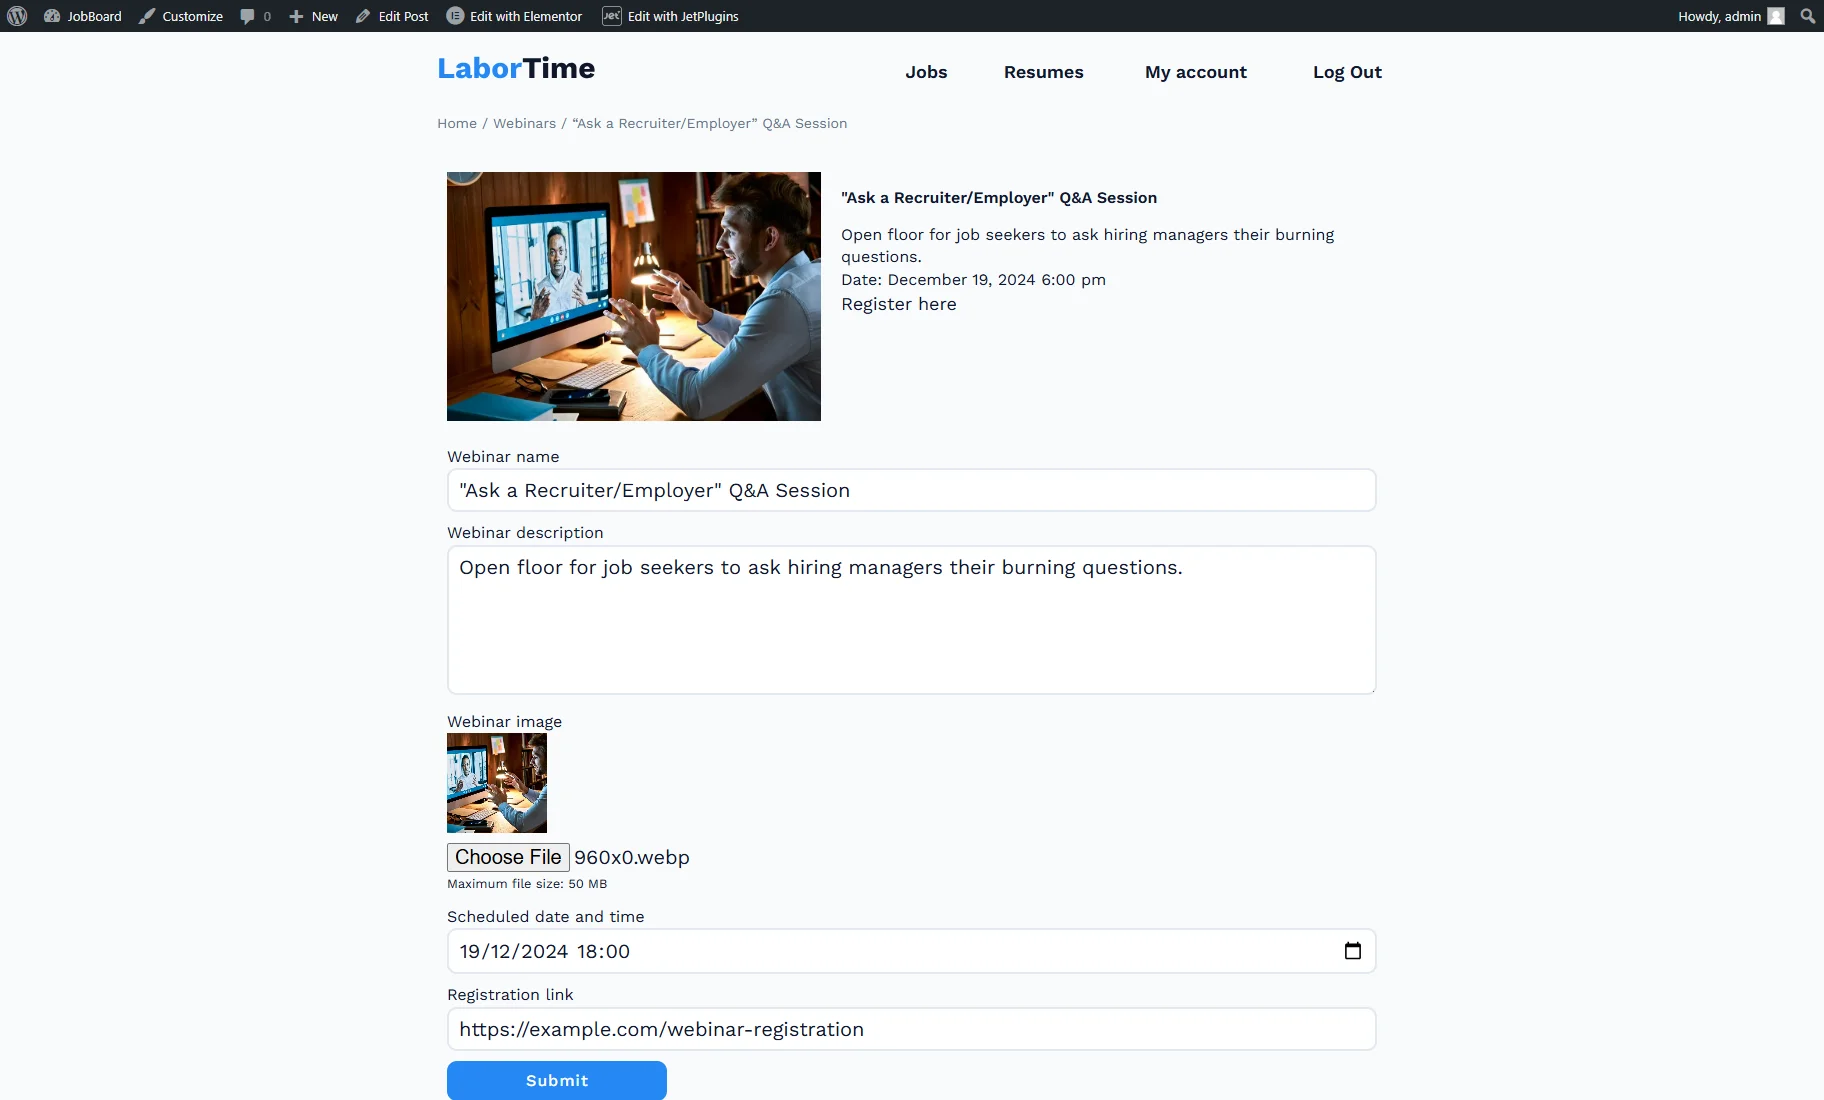
The form is pre-filled as intended. You can change the CCT details and submit the form to test how it works.
That’s all for now. Now you know how to insert and edit JetEngine Custom Content Type items from the WordPress front end.
