Applying Price Filter Based on Seasonal and Weekend Rates
This tutorial shows how to create a dynamic price filter for a WordPress website that reflects seasonal and weekend pricing in JetBooking.
Before you start, check the tutorial requirements:
- Elementor (Free version) or WordPress Block editor (Gutenberg)
- JetBooking plugin installed and activated
- JetSmartFilters plugin installed and activated
This tutorial addresses the challenge of creating an accurate price filter for apartment listings when using advanced pricing rules in JetBooking. Since pricing can vary depending on the specific weekdays and seasonal periods with custom rates, a standard price filter may produce misleading results. We’ll show how to set up a dynamic filter that reflects true prices based on the seasonal settings.
Create Filters
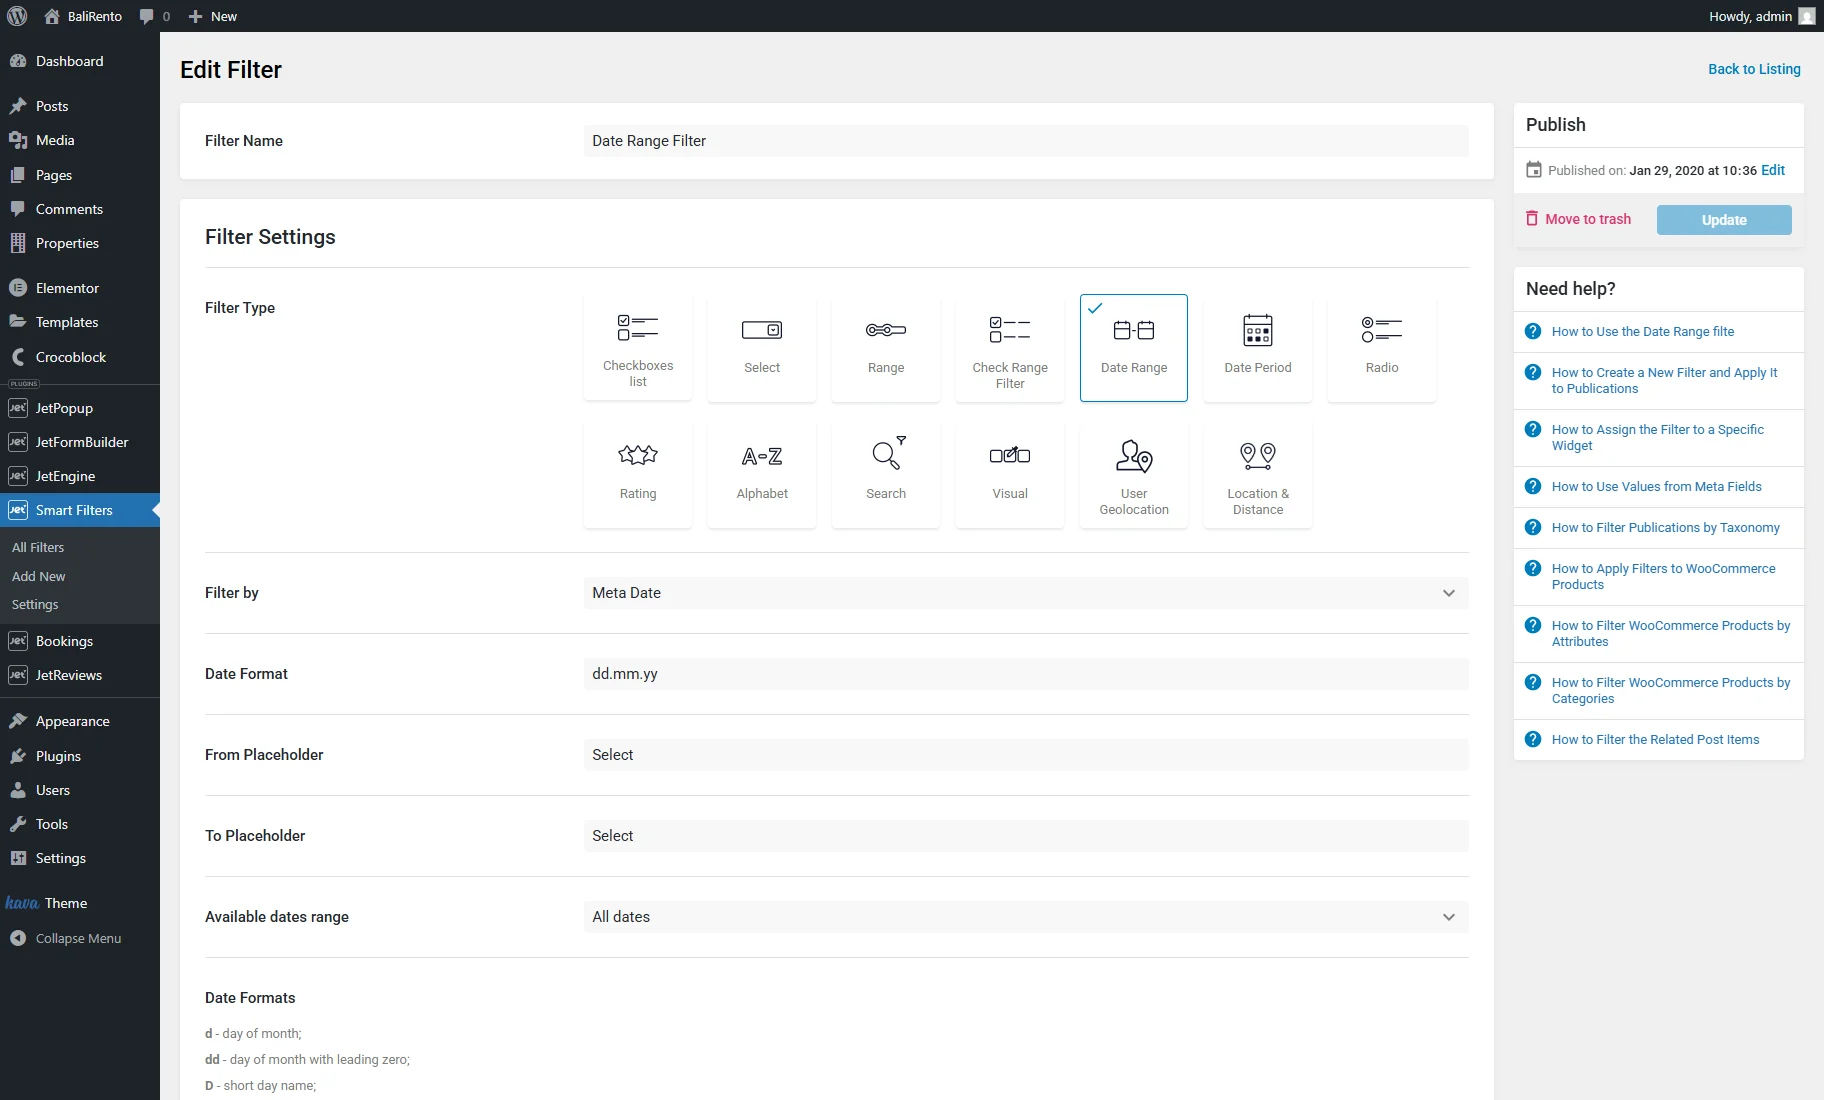
For this case, the “Date Range” and “Range” filters must be created.
First, you can create a “Date Range” filter, which can be done by following the How to Apply JetSmartFilters to Your Booking Website tutorial.
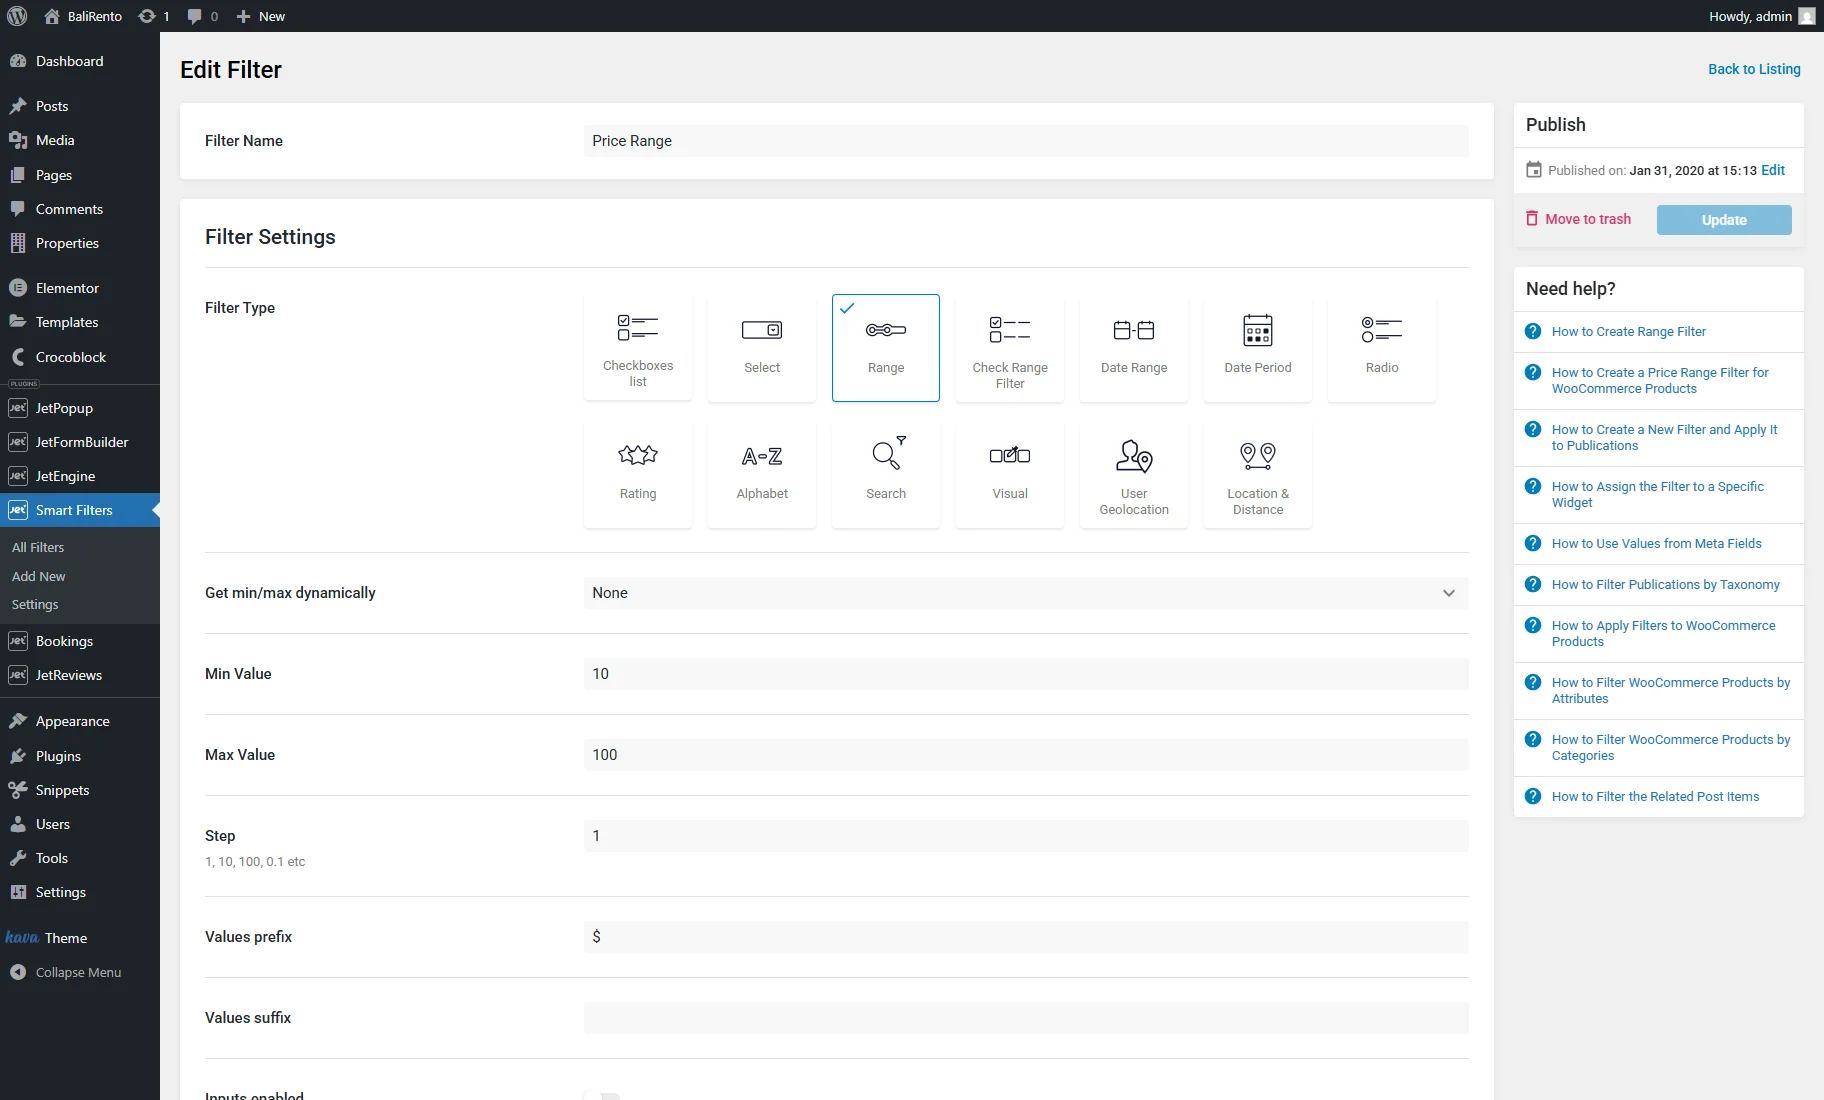
Next, you need to create a filter for the price range.
Open the WordPress Dashboard > Smart Filters > Add New page again. Enter the Filter Name (e.g., “Price Range”) and select the “Range” Filter Type.
The general filter settings can be customized based on the specific values you intend to filter.
However, for proper functionality and further processing, you should set the Query Variable parameter. This should be a unique key, such as ‘_seasonal_price’.
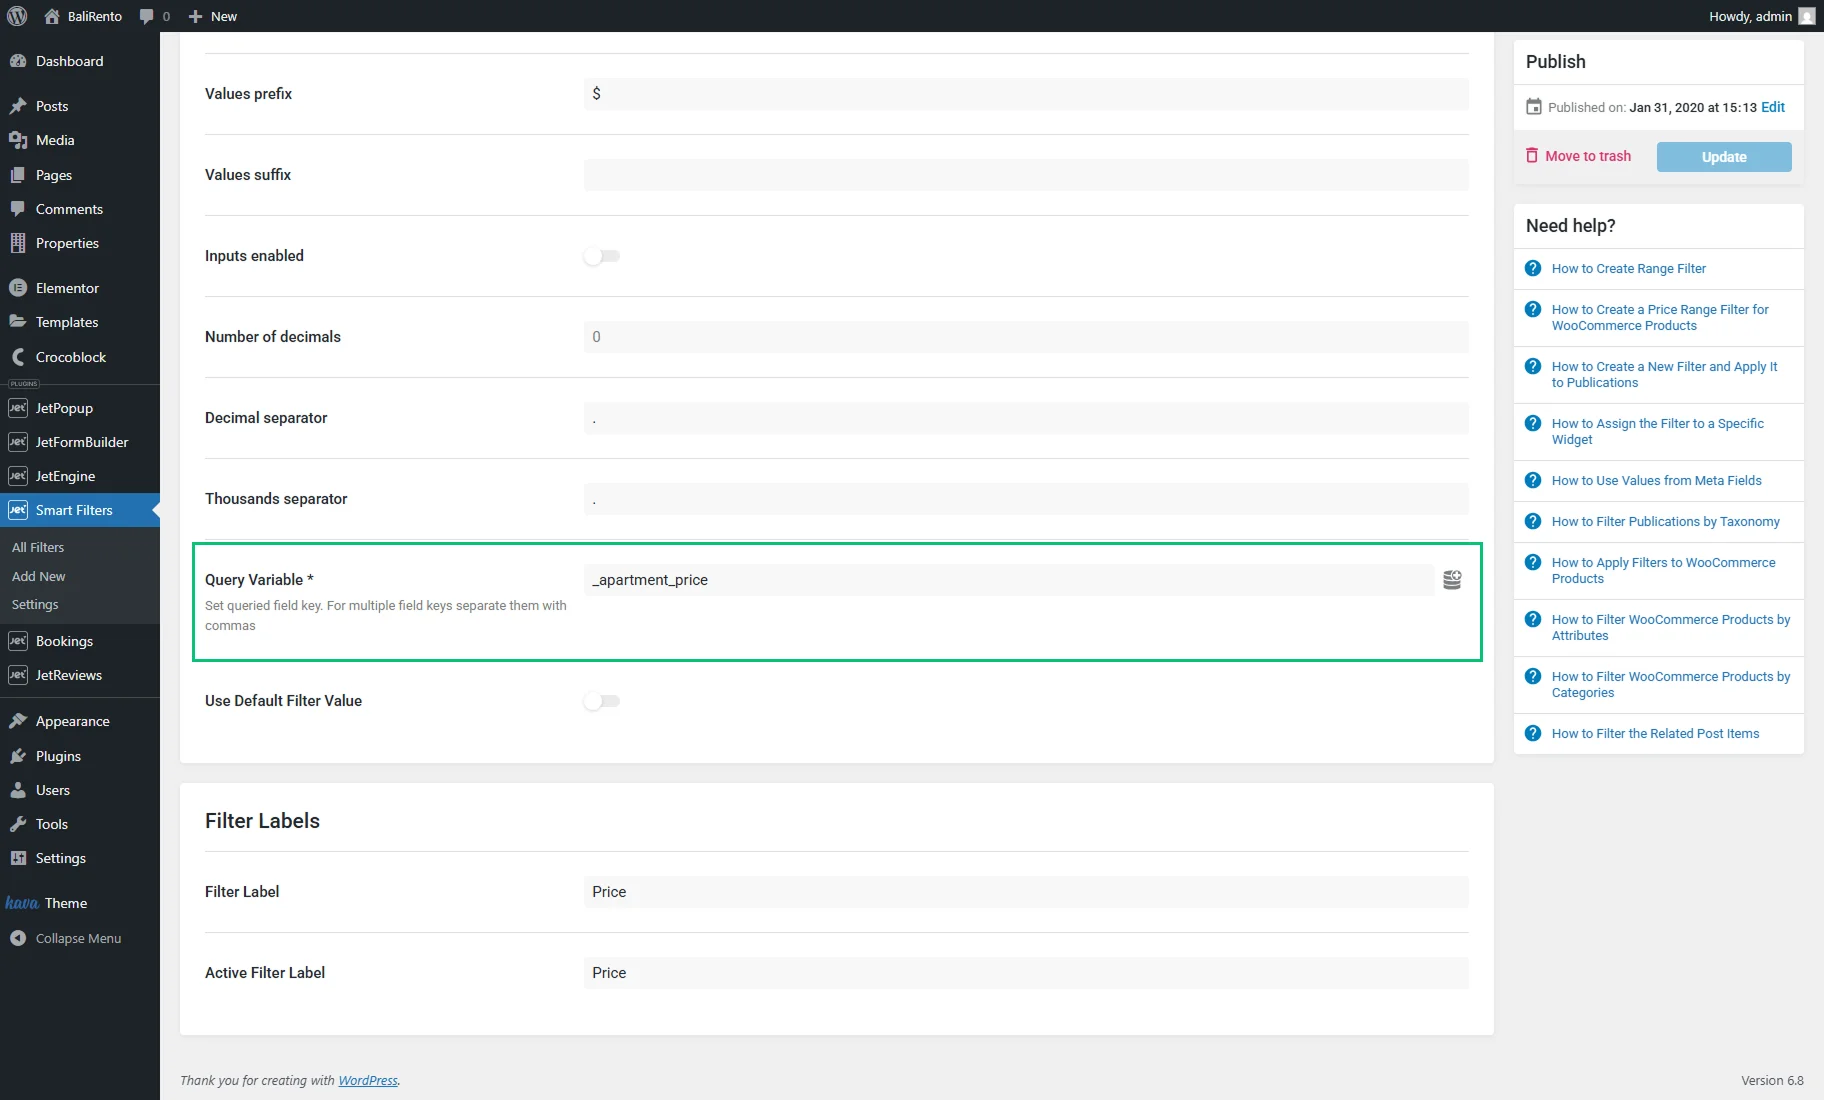
Save the filter settings by pressing the “Update” button.
Add a Snippet
The hook can be added either via a custom code snippets plugin (like Code Snippets) or directly in your theme’s functions.php file (preferably in a child theme to prevent changes from being overwritten on updates).
For example, we install and activate the Code Snippets plugin, then proceed to the WordPress Dashboard > Snippets tab and click the “Add New” button.
We type the hook name into the title bar (e.g., “JetBooking – Price Filter Based on Selected Date Range”) and enter such code into the Functions (PHP) textarea:
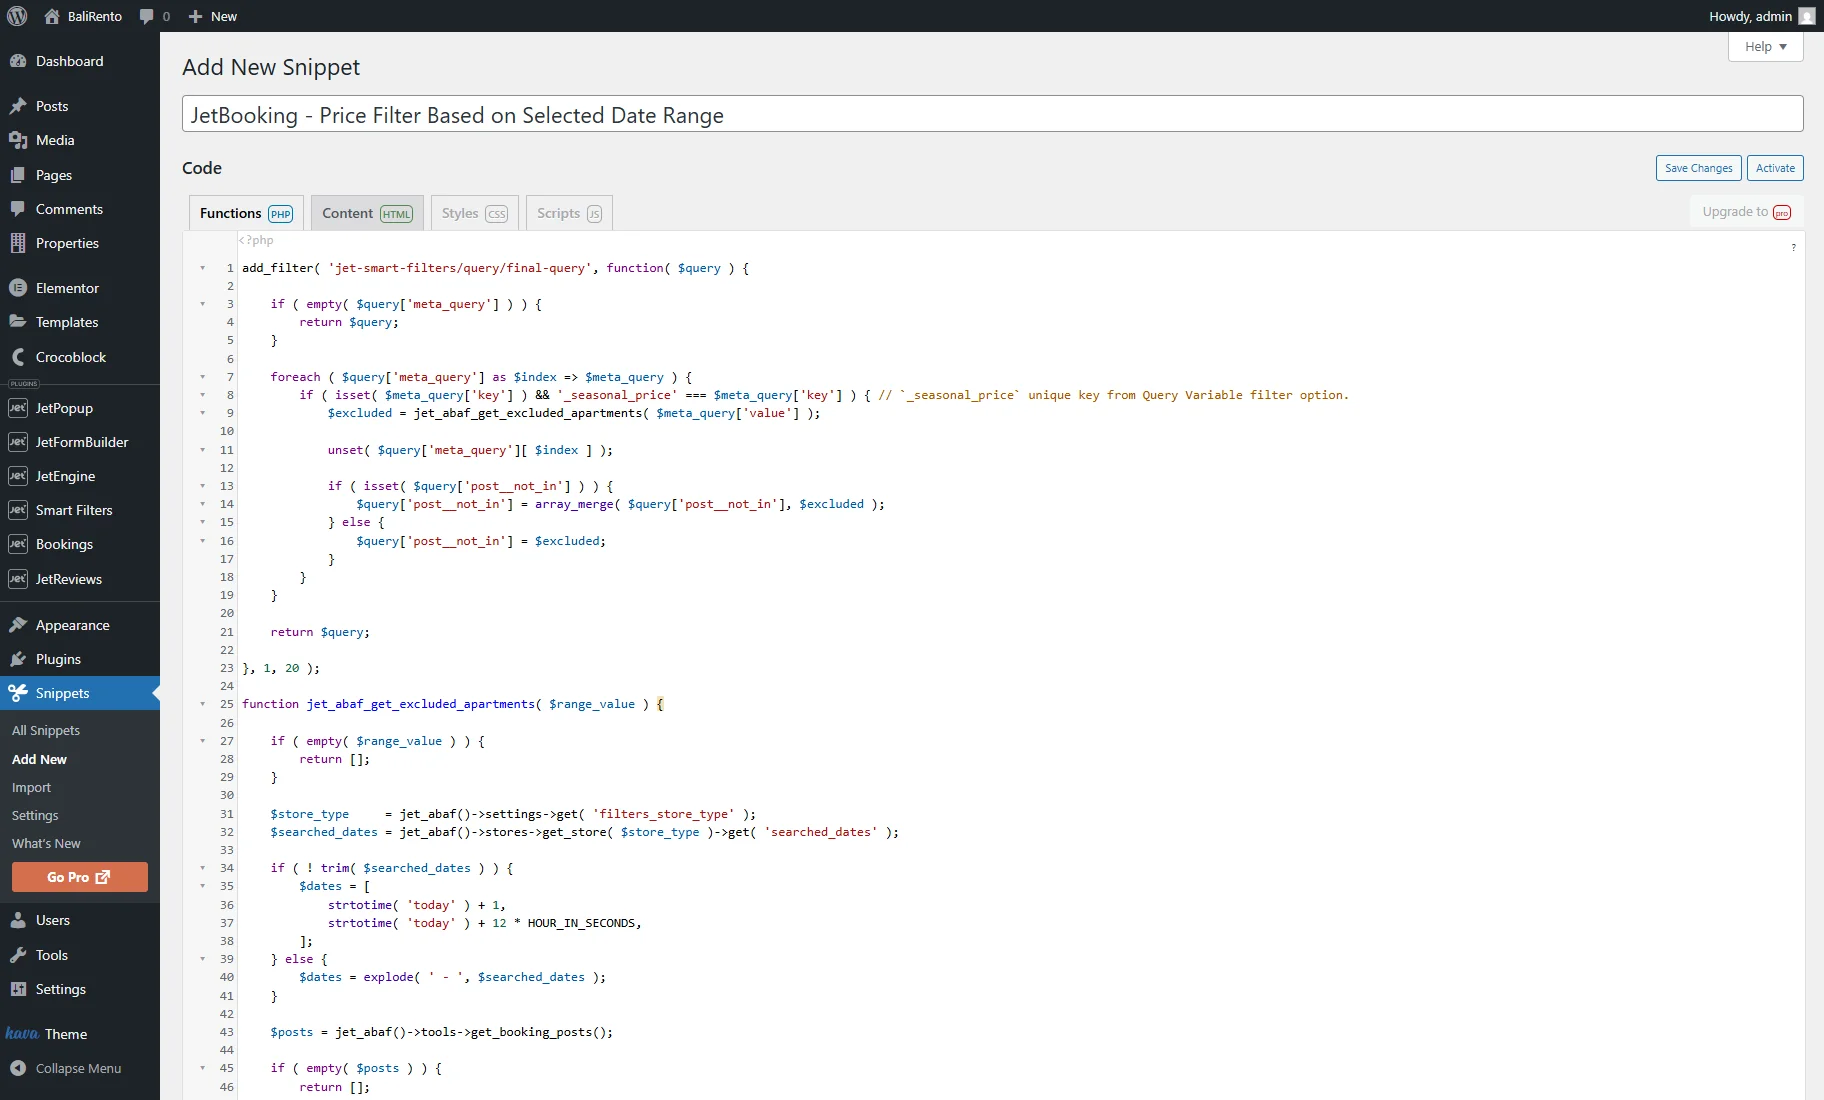
Now, we press the “Save Changes and Activate” button to save the snippet.
Place the Filters on the Archive Page
Edit the Archive page, where the list of booking properties is located.
For our case, we will use the page created in Elementor with the JetThemeCore plugin. For more details, see the How to Create an Archive for a Custom Post Type tutorial.
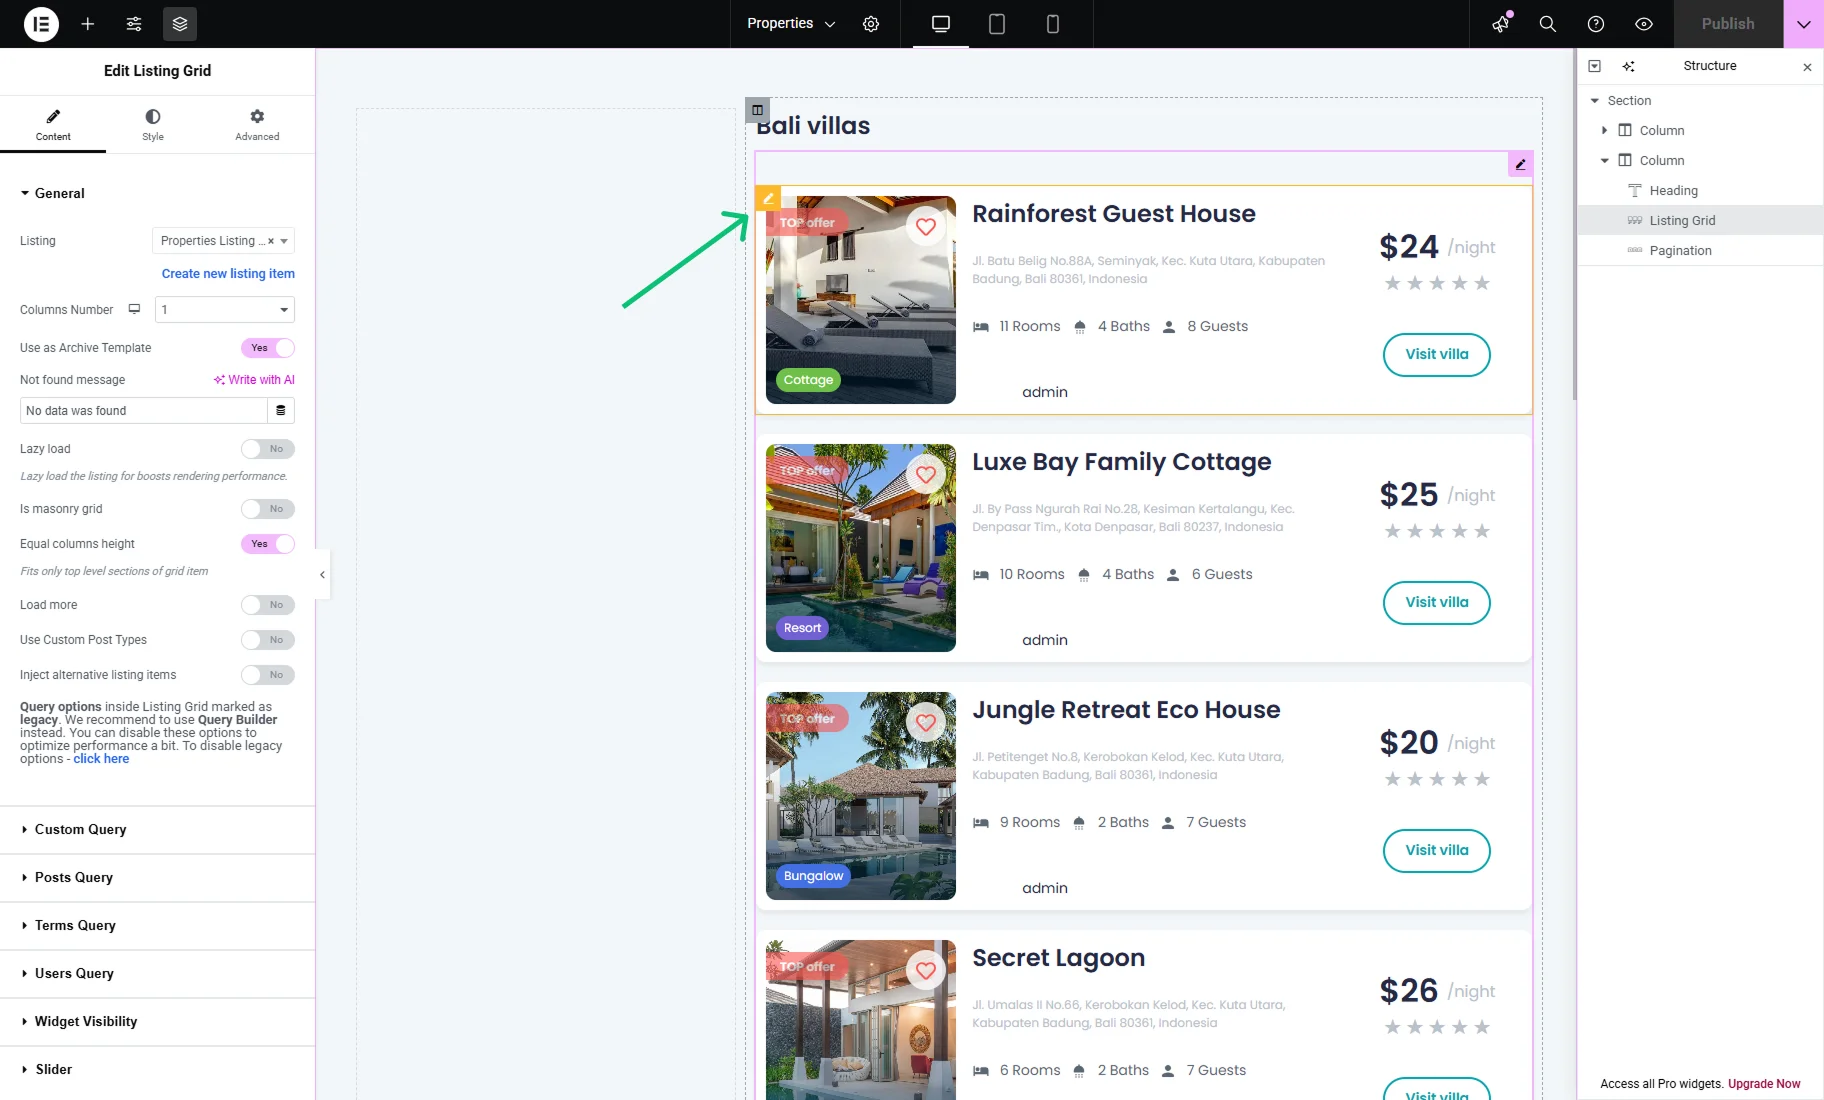
On the Archive page, we displayed a list of properties using the Listing Grid from the JetEngine plugin.
To show the range between the default and seasonal/weekend price in the Listing Grid, you can use the “Price per day/night” JetBooking Dynamic Tag. To apply it, we hover over the first listing item and press the “pencil” icon.
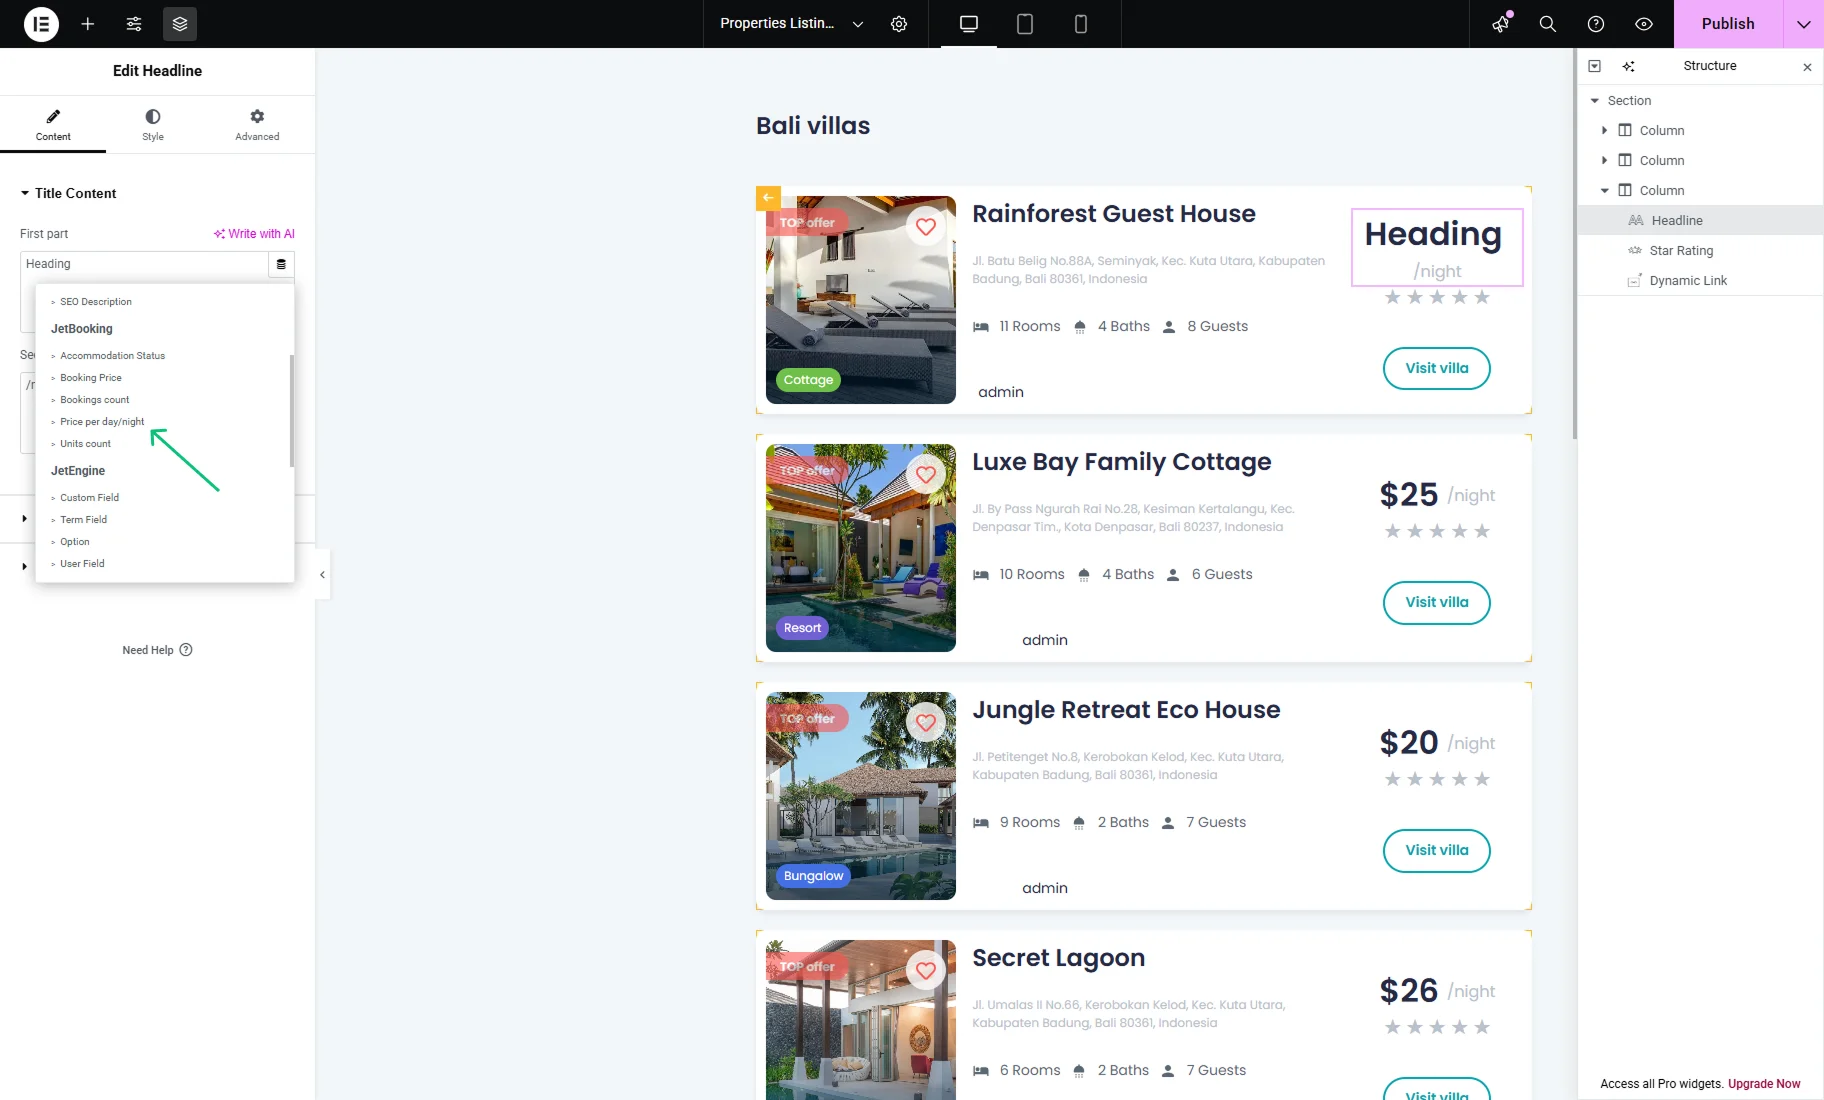
Now, we can edit the Listing Item template. Use a widget or block here that supports dynamic tags (e.g., Headline widget from JetElements or Heading).
Press the “database” icon and select the “Price per day/night” option in the JetBooking section from the dropdown menu.
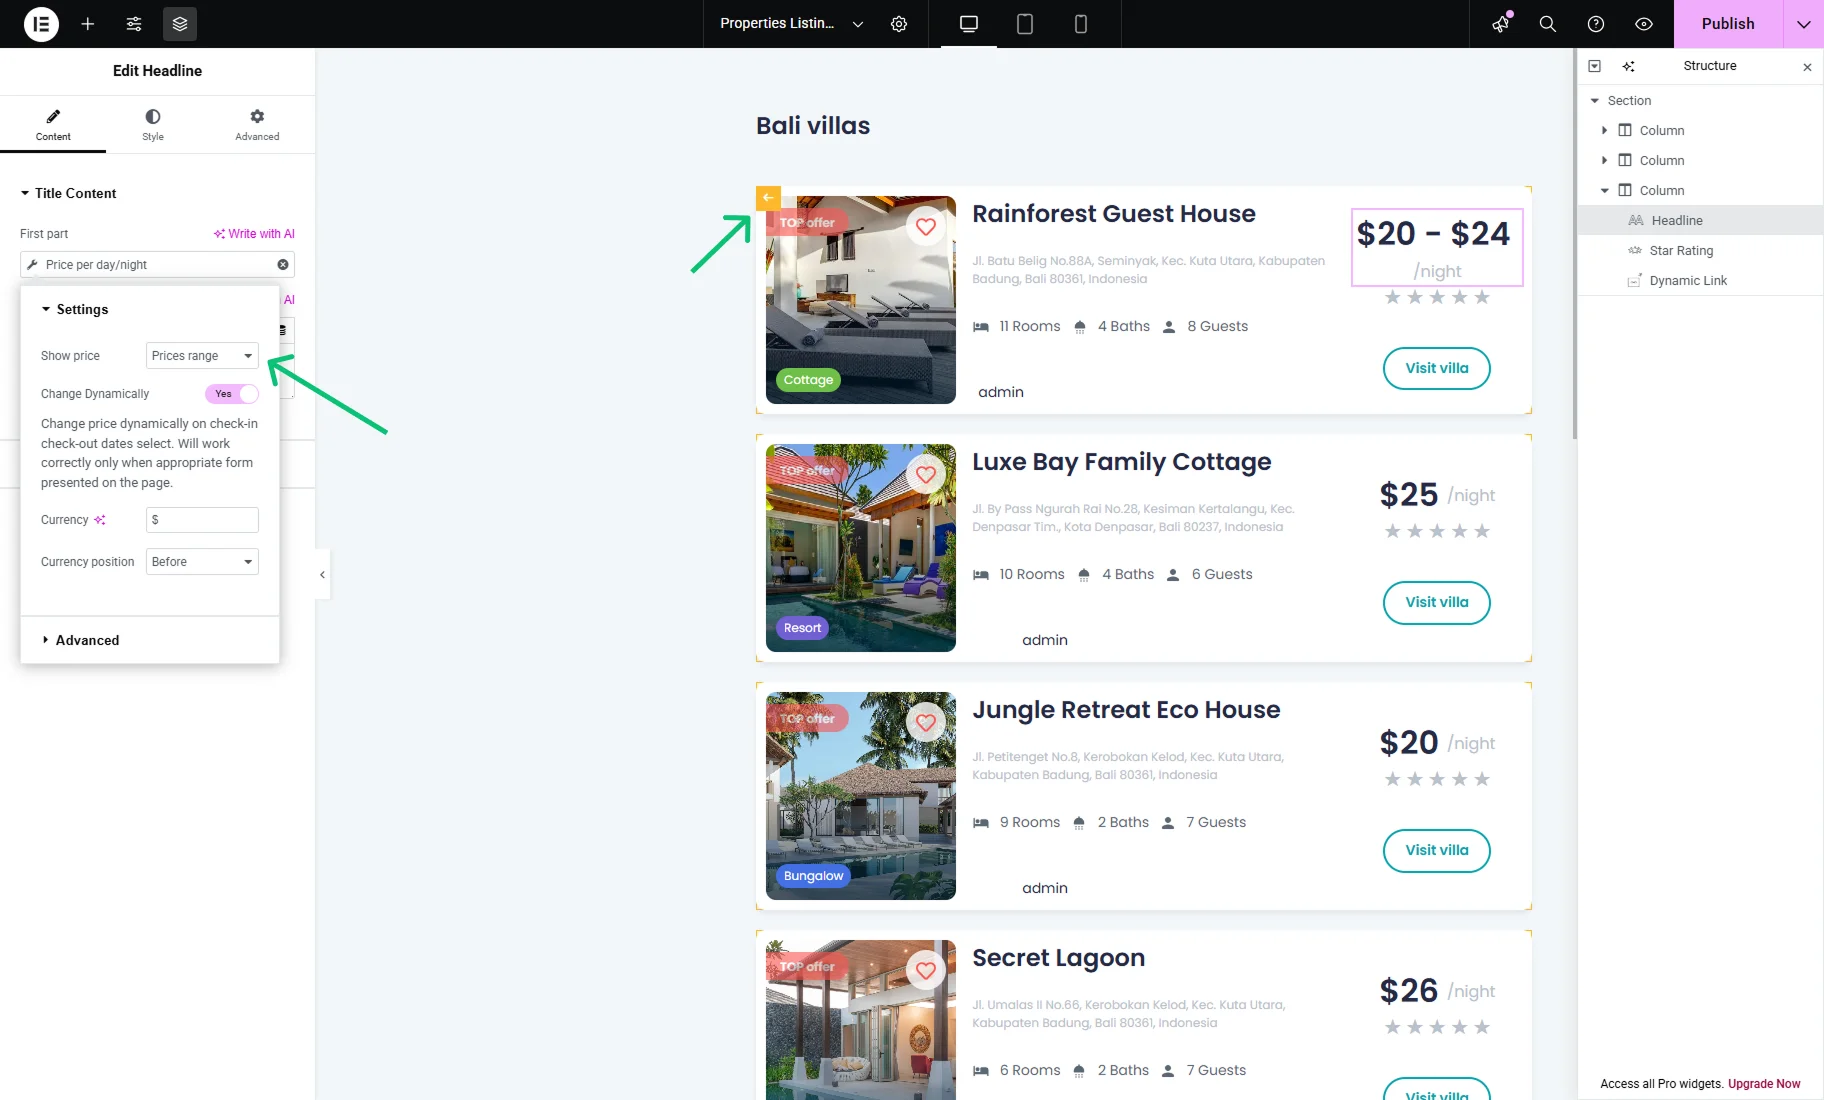
In the settings pop-up, pick the “Prices range” option from the Show price dropdown. In this way, the min and max property prices will be displayed.
Press the “Publish” button to save the changes, hover over the first listing item again, and push the “return” icon to go back to the Archive page.
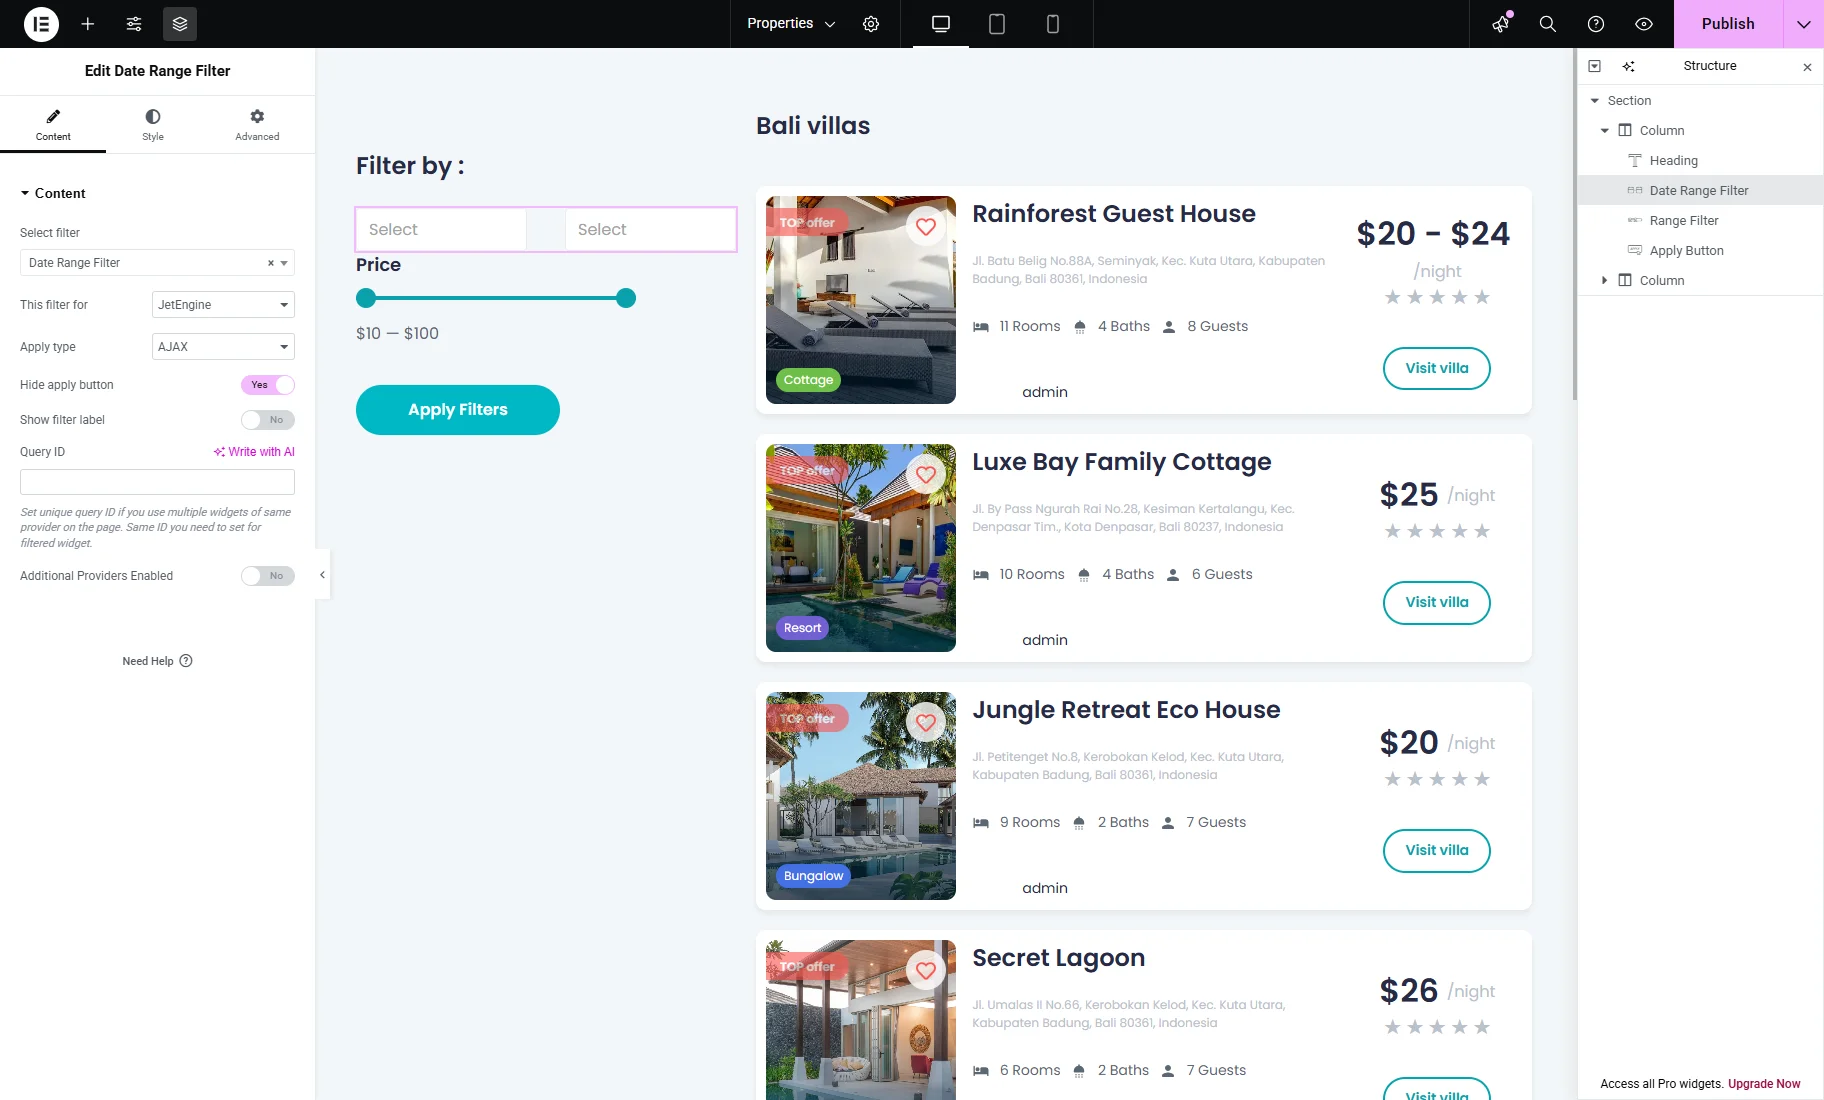
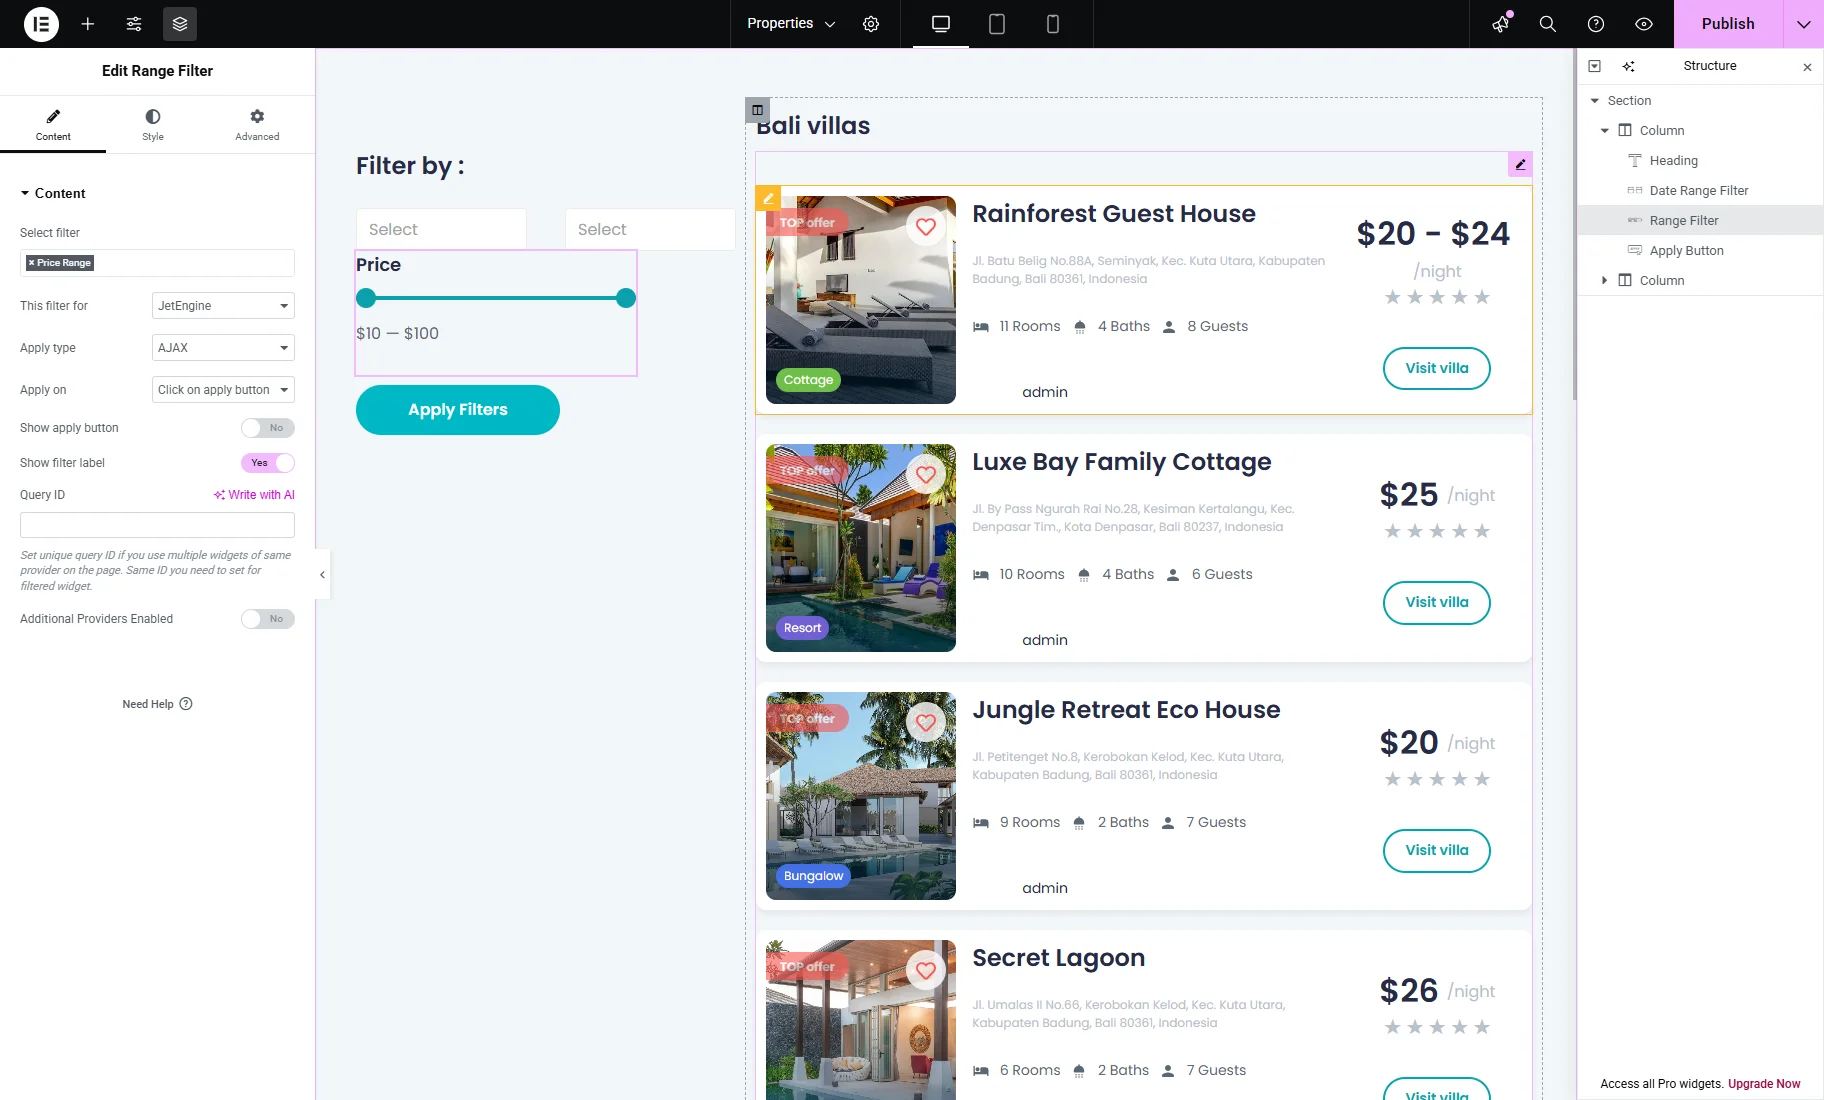
Then, add the Date Range Filter, Range Filter, and Apply Button to the page.
For the Date Range Filter, set the required filter in the Select filter dropdown, pick the filter provider from the This filter for dropdown (“JetEngine” in our case), and enable the Hide apply button toggle (since we use a separate widget as an “Apply Filters” button, we don’t need another one for this filter).
For the Range Filter, set the required filter in the Select filter dropdown, pick the filter provider from the This filter for dropdown (“JetEngine” in our case), and select the “Click on apply button” option from the Apply on dropdown.
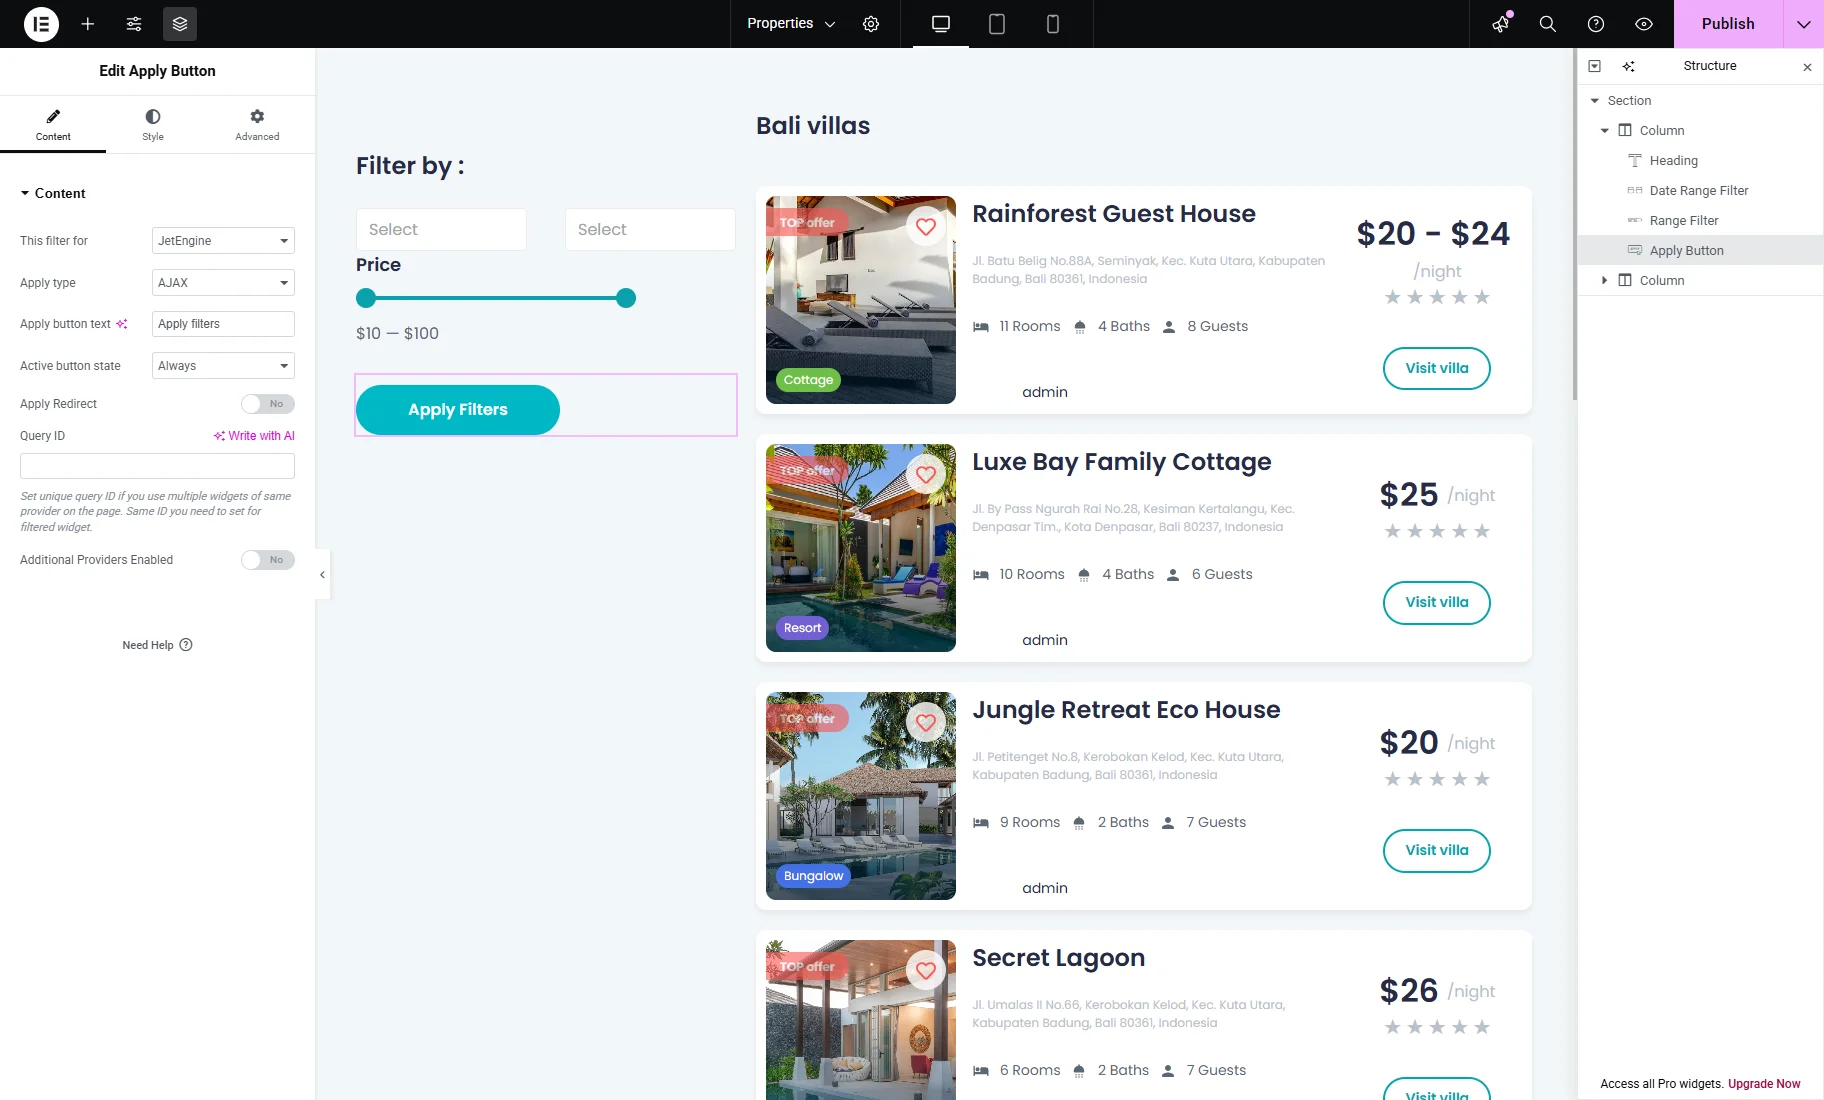
For the Apply Button, only the filter provider should be chosen from the This filter for dropdown.
After the Archive page is set, you can save the modifications.
Check the Results
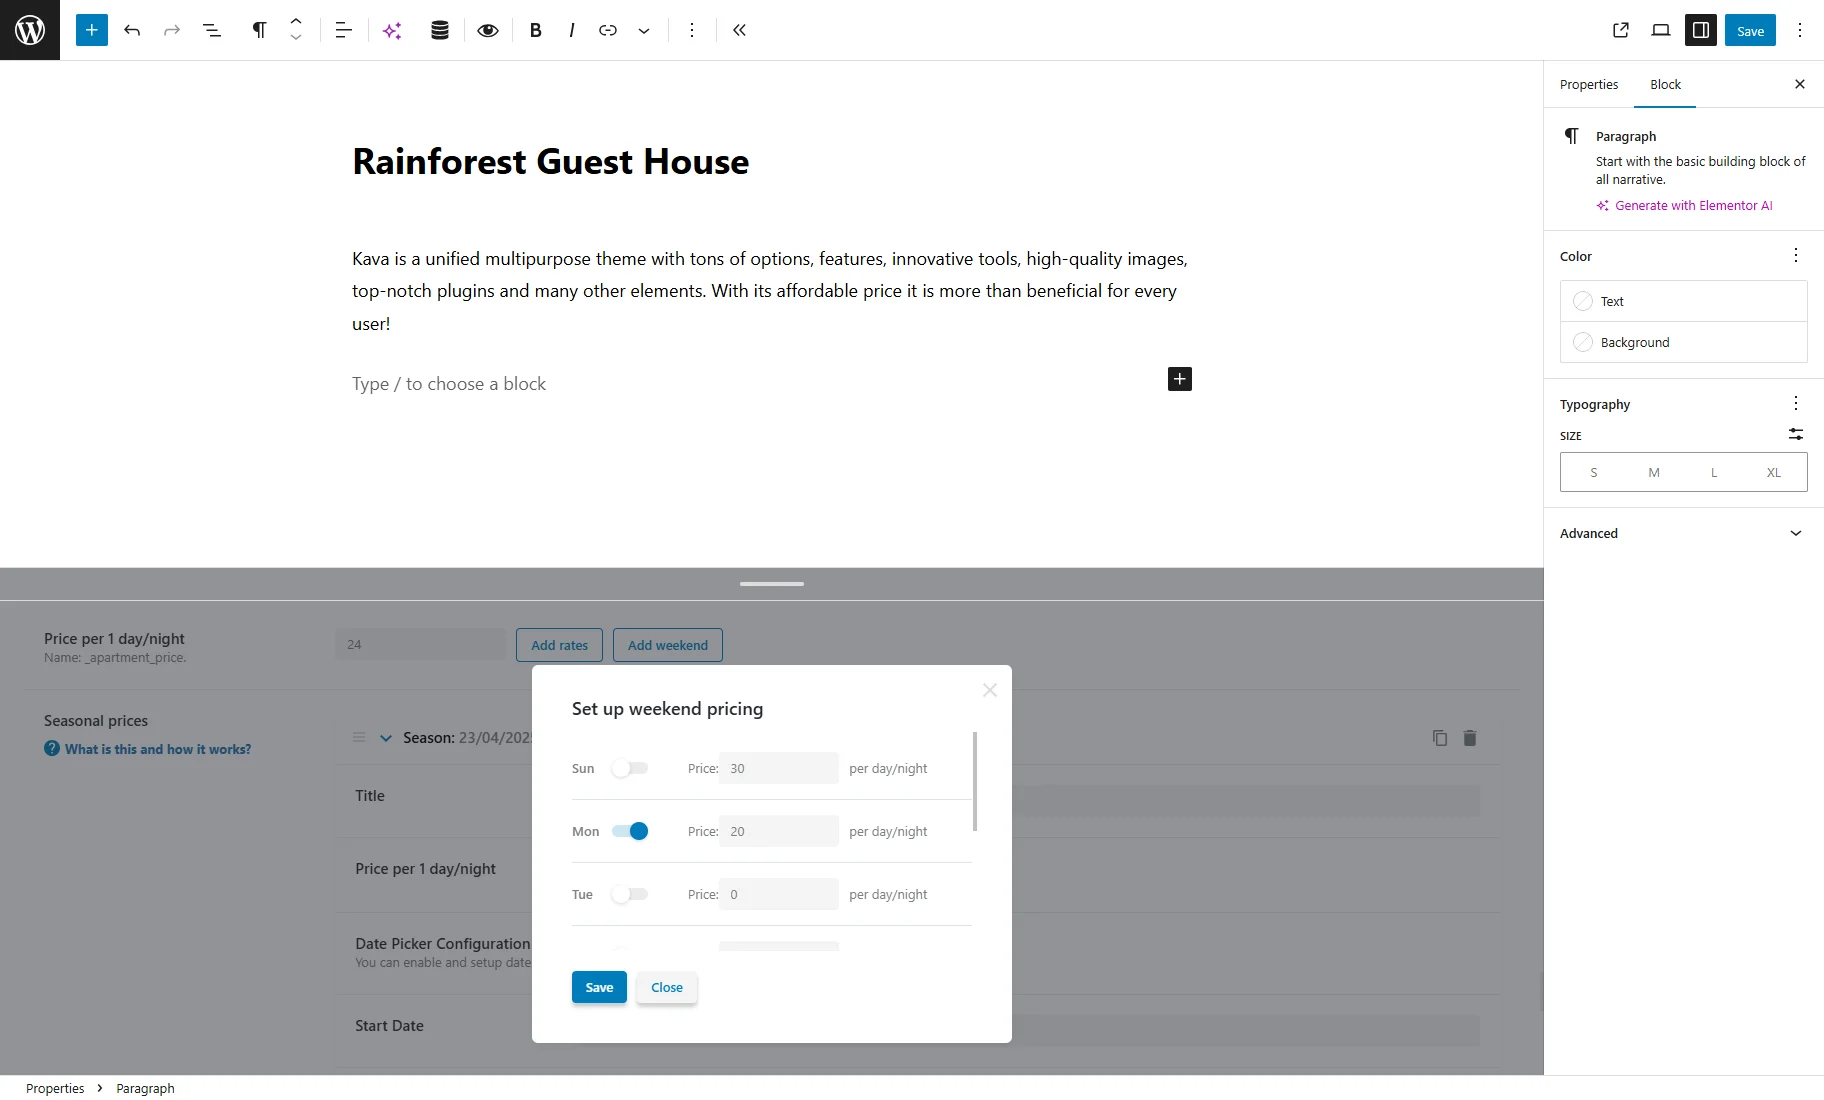
Proceed to the properties list on the front end to test the filters. For one of the properties, we set the weekend price: on Mondays, the price is $20, and for other days, it’s $24.
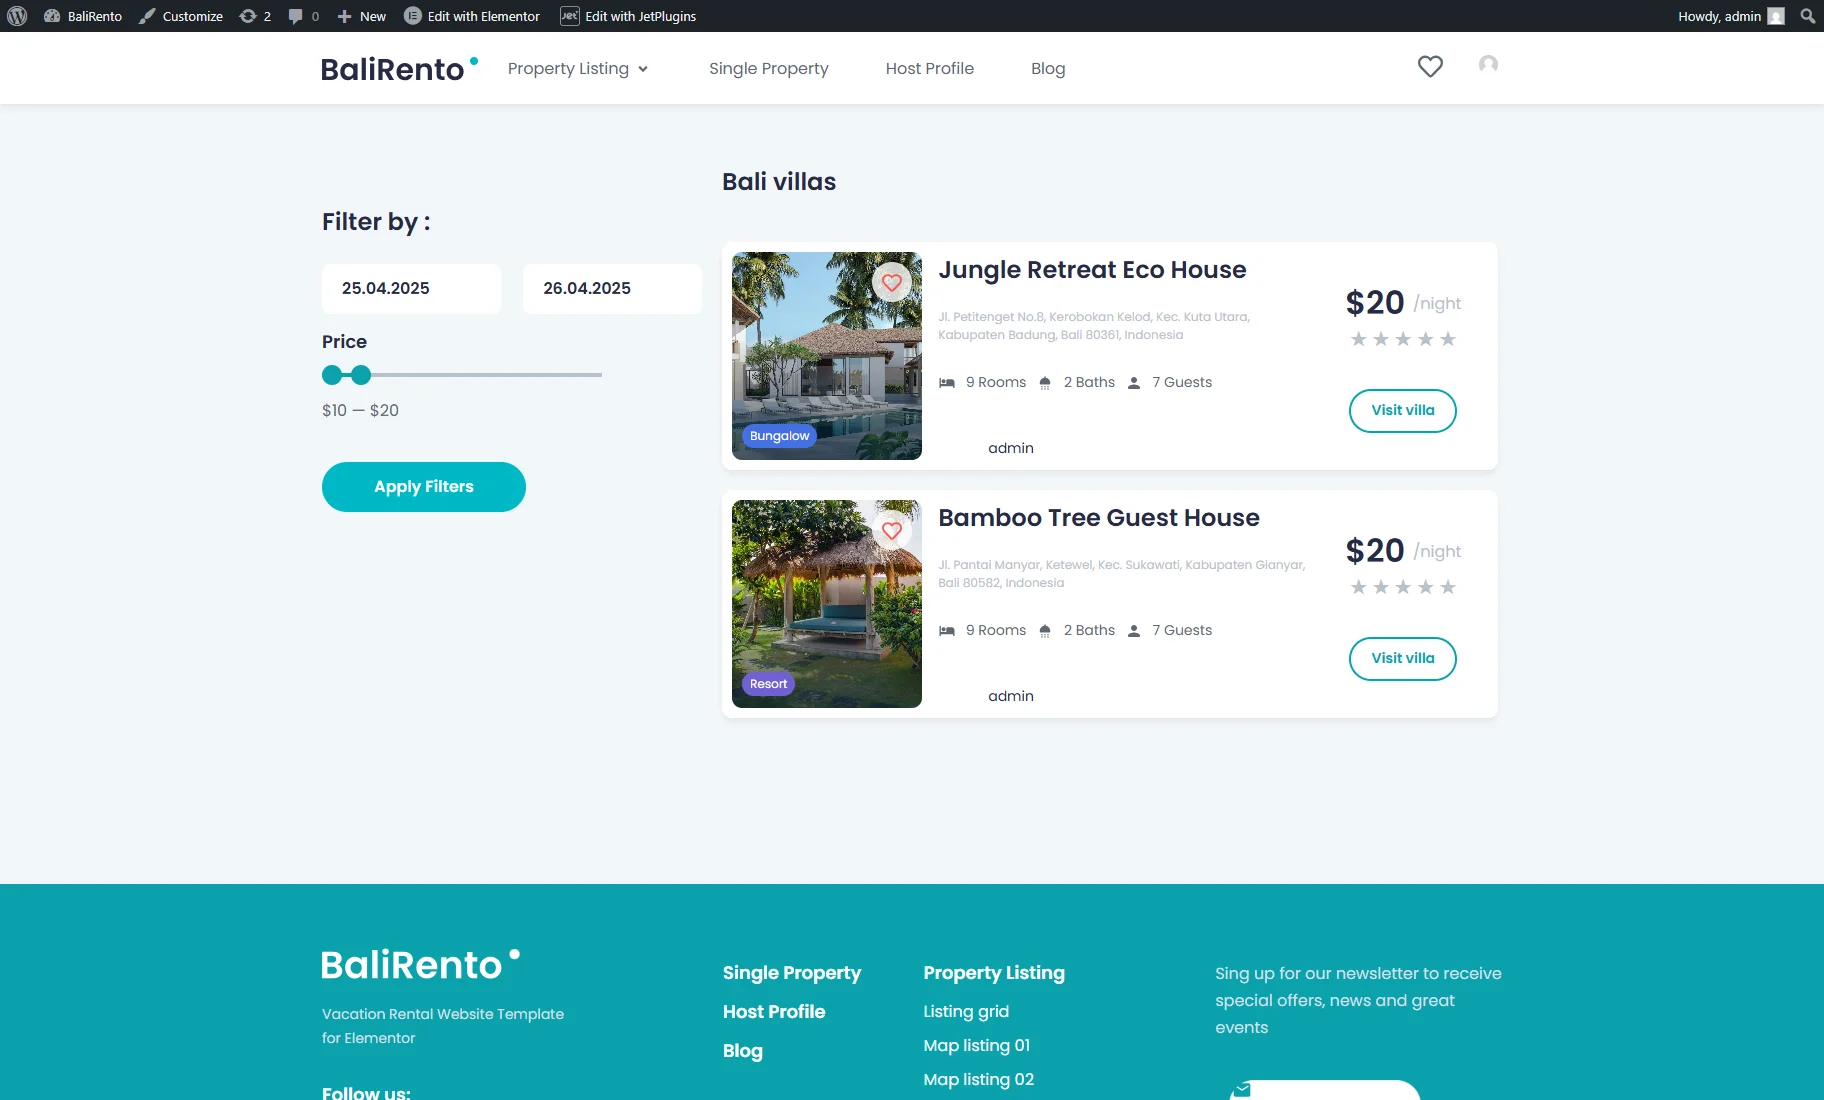
Let’s imagine we want to rent a property for no more than $20 per night, but only on Friday.
We apply the filters and see that the “Rainforest Guest House” property is not available for Friday at the desired price.
That’s all. Now you know how to create a dynamic price “Range” filter for a WordPress website that reflects seasonal and weekend pricing in JetBooking.