Booking functionality has become an inevitable part of modern business. Today, there are dozens of options for creating a booking form. And finding an effective plugin is the key to begin with. In this article, you will learn how to create a booking form using JetFormBuilder and JetBooking plugins by Crocoblock and find useful tips on how to make the form more efficient, as well. If you are more interested in appointment functionality, where time slots are involved, the process will be quite similar, but another Crocoblock plugin, JetAppointment, should be used to manage the bookings/appointments under the hood.
Let’s dive in.
Table of Contents
- 12 Steps to Create Effective Booking Forms
- Before You Start
- Creating a Booking Form with JetFormBuilder
- FAQ
- Conclusion
12 Steps to Create Effective Booking Forms
Here are some tips for creating effective booking forms from the UX perspective:
- Keep it simple and user-friendly. Minimize the number of fields to only what’s necessary.
- Use clear labels and instructions. Each field should be labeled clearly, and if needed, provide instructions or examples to guide the user through the process.
- Organize fields logically. Group similar information together (e.g., contact details, payment details, booking preferences) to make the form flow naturally.
- Offer dropdown or date pickers. For dates, times, and locations, dropdown (select) fields or calendar/date pickers can streamline the process and reduce errors.
- Highlight mandatory fields. Clearly mark required fields with asterisks (*) or a different color so users can easily see what’s needed.
- Consider pre-populated fields. If you have returning customers, allow them to autofill certain fields (like their name or email) to save time.
- Add a progress bar. If your form is long, a progress bar lets users know how much longer they need to complete it.
- Ensure mobile compatibility. Many users will book via their phones, so your form should be responsive and easy to complete on smaller screens.
- Include a confirmation page or message. After submission, provide users with a confirmation page or message that reassures them the booking went through.
- Test for errors. Make sure that all fields work correctly, and that there are no broken links or issues with the form submission.
- Offer different payment options. If you require a payment, provide various payment methods (credit card, PayPal, etc.) and a secure payment gateway.
- Add a cancellation and privacy policy and terms of service. It’s important to include privacy and cancellation policies and terms of service, ideally with a checkbox for agreement before submission.
These tips should help you create a seamless and professional booking experience for users.
Before You Start
Before you start designing a form, you need to figure out what specific information you need to collect from the user. For example, if you’re creating a form for a hotel booking, it should include contact details, the number of nights, and certain additional services. If you’re creating an appointment form for a spa, you need contact information, a list of services, the preferred time, etc.
Spell out the specific data you need before you start creating the form.
Let’s break down the process of creating a user-friendly hotel booking form for using JetFormBuilder.
Creating a Booking Form with JetFormBuilder
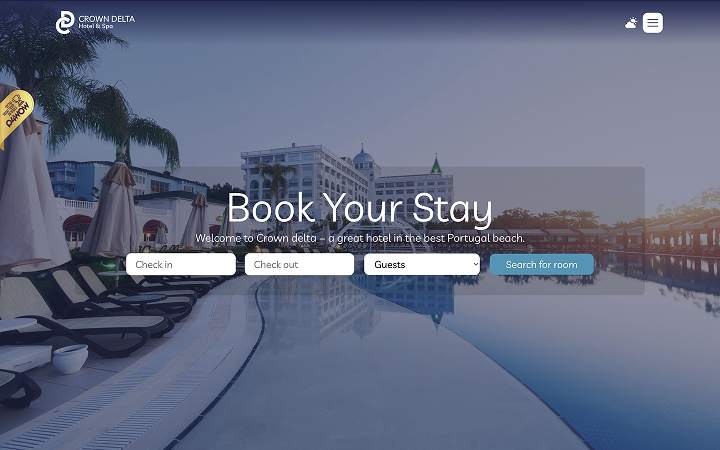
Let’s imagine we’re creating a booking form for a hotel room.
Before creating a booking form, we need to set up the JetBooking plugin, which will process the booking and provide the data for the form.
To do this, install and activate the JetBooking plugin and go to the Setup Wizard. There, you can choose between a Plain mode and a WooCommerce-based one.
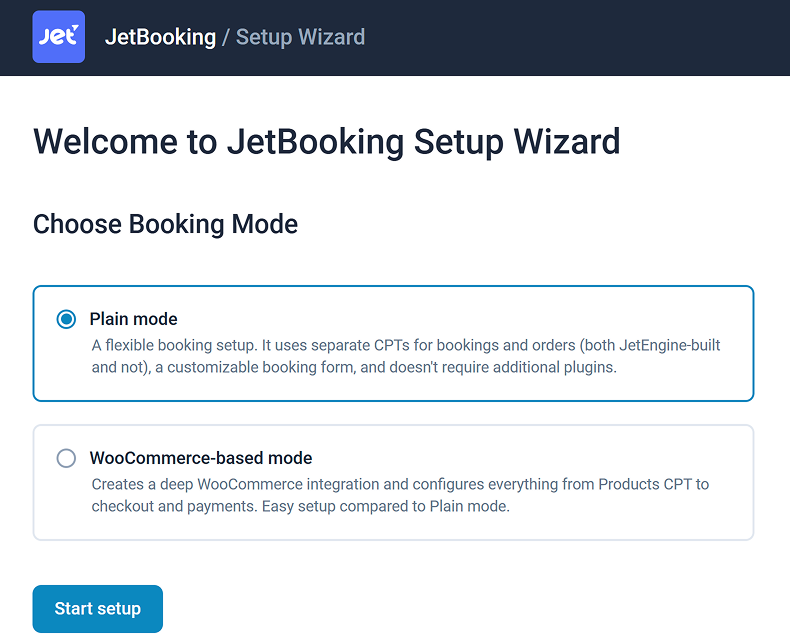
- The Plain mode offers a flexible booking setup. It uses separate CPTs for bookings and orders (both JetEngine-built and not), a customizable booking form, and doesn’t require additional plugins.
- The WooCommerce-based mode creates a deep WooCommerce integration and configures everything from Product CPT to checkout and payments. It is faster to set compared to the Plain mode but offers less control over customization.
NOTE
WooCommerce-based mode works more as an add-on for WooCommerce, adding the JetBooking product type and some other settings.
If you use Plain mode, it can either work entirely without WooCommerce, or just partly use it, delegating the job of receiving payments and managing orders on the Set Up Orders step of the Wizard.
‼️ If you choose the WooCommerce-based mode, you will have a typical WooCommerce product purchase, cart, and checkout workflow and won’t need custom booking forms. But if you prefer to have more control over the booking interface, choose the Plain mode. If you want, you can combine it with WooCommerce order monitoring and checkout functionality.
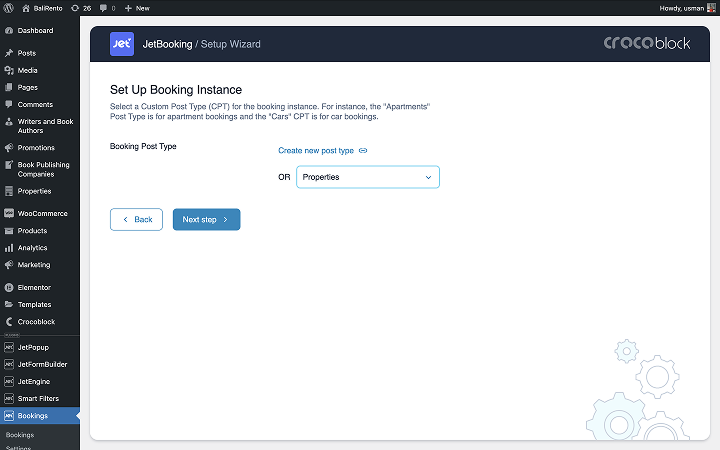
Further in this article, I will talk about the Plain mode. In the Plain mode, you will need to choose the appropriate Booking Post Type – in my case, Properties, which I’ve already created using JetEngine (any other tool for CPT is supported).
Next, you can choose Order Post Type (or use another name), the CPT for handling your orders that you should create beforehand. It will store information about all the order details, and you will be able to map fields of the booking form with meta fields of the Orders CPT.
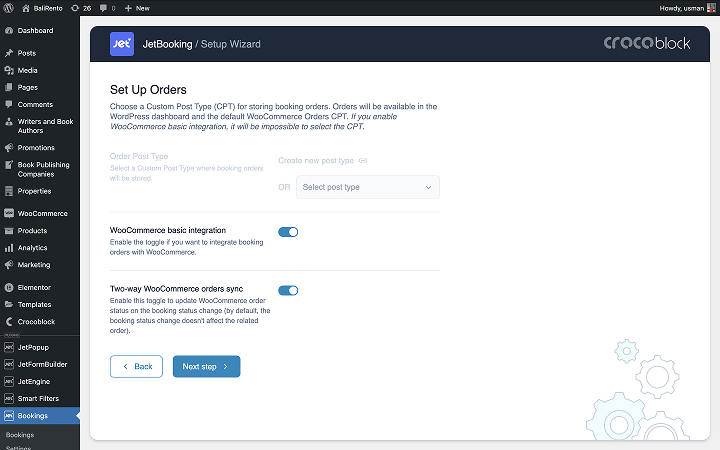
As I’ve already mentioned, you can integrate WooCommerce partly at this stage of the booking setup. To do it, choose one or both of these options:
- WooCommerce basic integration. You won’t need to create a separate custom post type for orders. It will use the WooCommerce native Orders functionality but will let you create a custom booking form, add additional fields, etc., and, certainly, use WooCommerce checkout and Thank You pages. It’s a great solution if you prefer to use payment gateway integrations for WooCommerce instead of integrations directly with the form builder and handling orders via Woo Analytic Dashboard.
- You can leave it as is or also enable the Two-way WooCommerce orders sync toggle to be able to change the status of bookings automatically after the booking item is updated.
I will choose the WooCommerce basic integration method with orders sync.
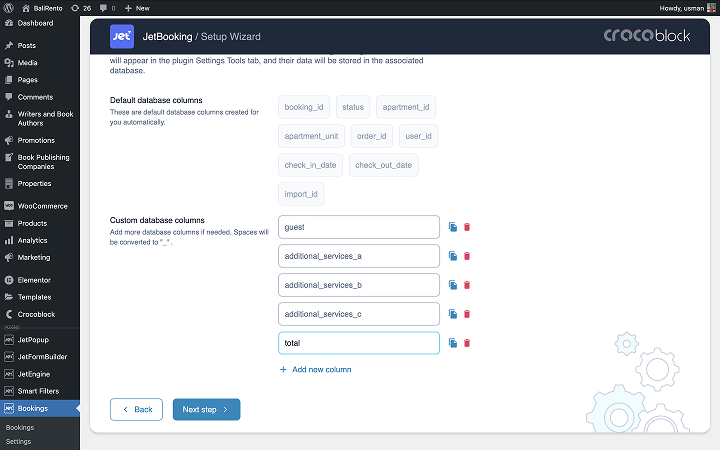
The next step is altering database columns, or, in simple words, fields, where information about the booking will be stored. Basically, here, you can add fields for additional information you will need for your booking.
Now, let’s set up the guest columns for additional services.
The JetBooking plugin allows you to create a form with JetFormBuilder automatically.
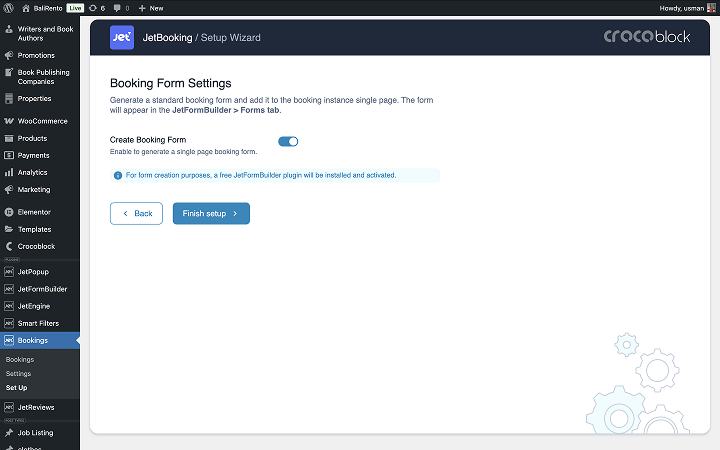
If JetFormBuilder is not installed on your site, it will be installed automatically. The plugin is free and fully functional, so there’s nothing to worry about. If needed, you can easily edit it and customize its appearance as desired.

On the final screen of the wizard, you will see everything related to bookings. From here, you can navigate to the desired section and make edits as needed:
- Manage bookings leads to the Properties post type, where booking conditions and prices are set.
- Related product is an empty WooCommerce product with no details about your rooms or bookings. However, you shouldn’t delete it, as the WooCommerce checkout will not work without it. It works as a “bridge” to collect all booking information and display it on the checkout page.
- Manage Orders takes you to the WooCommerce Orders dashboard.
- Link to created form shows an automatically generated form. It contains only basic fields, but you can edit, delete, or add new ones if needed.
Next, we will show you how to create a convenient and functional form using JetFormBuilder.
If you don’t like the pre-made standard form, you can modify it by changing its layout and adding necessary fields.
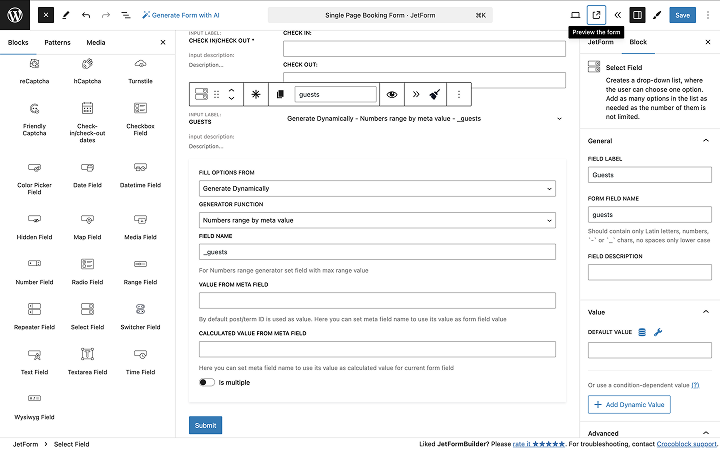
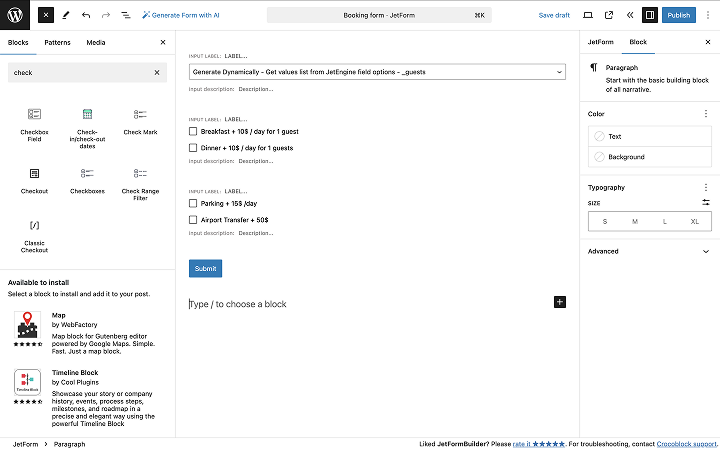
For example, add an option to select the number of guests and any additional services. As any property can’t accommodate an unlimited number of guests, you should have a field in your Properties post type that indicates the maximum number of guests that can be accommodated. So, to select the number of guests willing to book, add the Select Field block. Choose Generate Dynamically > Numbers Range from the meta value, and specify the meta field name that you used in the Properties post type for the maximum number of guests (_guests, in my case).
It will generate a range from “1” to this number, and you will get a nice dropdown where customers can choose a number of guests.
Next, you need to add additional possible services. Choose Checkbox Field and fill in all the fields. Don’t forget to add additional prices to the Calculate input, as it will be used in the final price calculation.
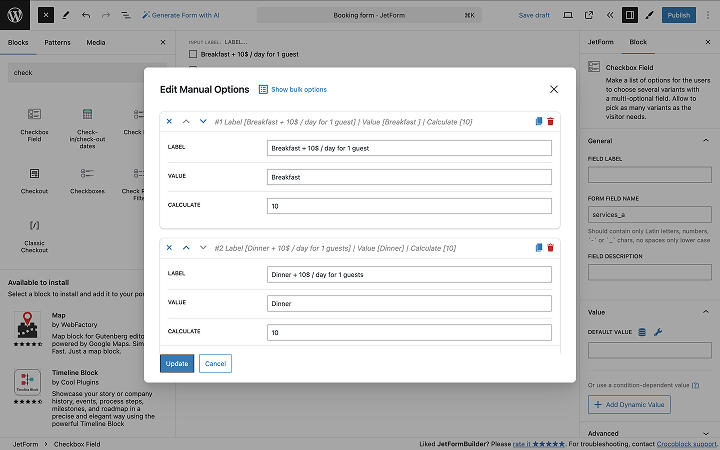
They will look like this:
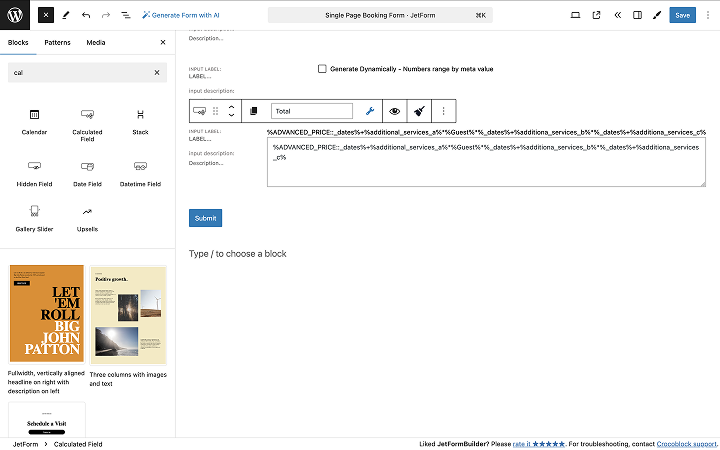
Next, add a Calculated Field so users can see the final cost of their booking. Customize the formula used to calculate the price by adding dates, services, number of people, and other relevant details.
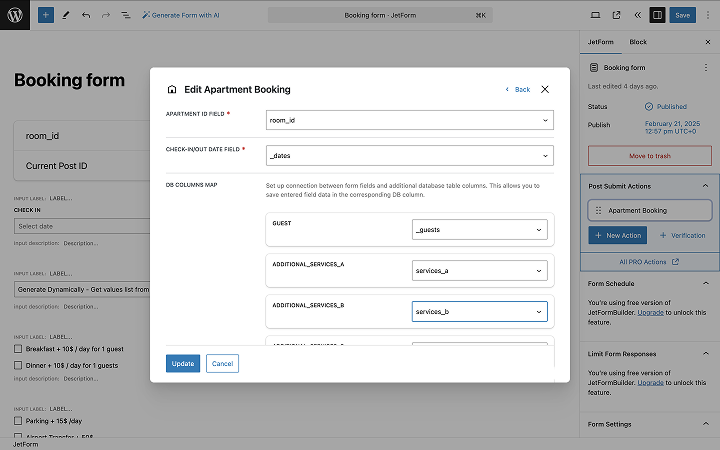
We just need to configure the Post Submit Action. To do this, go to JetFormBuilder > Booking Form > Post Submit Actions > Apartment Booking.
There, map the required fields.
If you have WooCommerce integration activated, you can also customize the form to autofill more details during checkout.
You can find more detailed instructions in this video:
FAQ
JetFormBuilder allows you to add different payment methods to your booking form, such as Stripe or PayPal. You can integrate secure payment gateways to ensure smooth and safe transactions. If you use WooCommerce checkout by JetBooking, all the payment methods installed for WooCommerce will be available.
To ensure your WordPress booking form is mobile-friendly, choose a plugin like JetFormBuilder that automatically adjusts to different screen sizes. If you use Elementor or Bricks, use a dedicated JetForm widget to style the form. Test your form on various devices to ensure the fields, buttons, and layout appear correctly and are easy to navigate on smaller screens.
Using a WordPress booking form plugin offers several benefits, including ease of use, time-saving features like pre-populated fields, integration with payment gateways, and automatic scheduling.
Conclusion
In conclusion, JetFormBuilder, in conjunction with JetBooking, provides a powerful, user-friendly solution for creating customized booking forms on WordPress. By following the step-by-step process described in this article, you can build a booking form that meets your business’s specific needs, whether you offer hotel bookings, spa appointments, or tours.
Remember to keep your form simple, mobile-friendly, and easy to navigate while offering important elements such as payment integration and cancellation policies.

