Timelines are known to every web designer and developer as a cool way to present data, and, in particular, we know various WordPress timeline plugins or elements for doing so.
However, this article is on a mission to show that by using the JetElements and JetEngine plugins from Crocoblock, you can go far beyond traditional use cases and discover much more creative ways to use timelines.
I will demonstrate not only how to use the widget to build flexible timelines in Elementor, but also how to populate timelines with dynamic data and custom queries that fetch very specific information directly from your website’s database.
Horizontal and Vertical Timeline Widgets by JetElements
JetElements is a plugin for Elementor with a set of highly customizable widgets that support dynamic content. That’s why you have a choice: either just design something cool with static data or fetch content from not only custom fields of the current post but even get it from anywhere on your website with the help of custom queries.
Of course, not all JetElements’ widgets support custom queries: e.g., if it’s a Heading or Countdown Timer widget, there’s simply nothing to query.
But Horizontal Timeline and Vertical Timeline widgets are among those that offer you the proper flexibility when it comes to dynamic content: they support dynamic tags and custom queries. I will discuss it in the next section, but for now, let me show you the basic settings of the widgets.
Vertical Timeline widget
The Vertical Timeline widget is built around a simple idea: a central (or side-aligned) line with individual cards placed along it. Each timeline item is a self-contained block, which makes the layout easy to read and flexible enough for content-heavy entries.
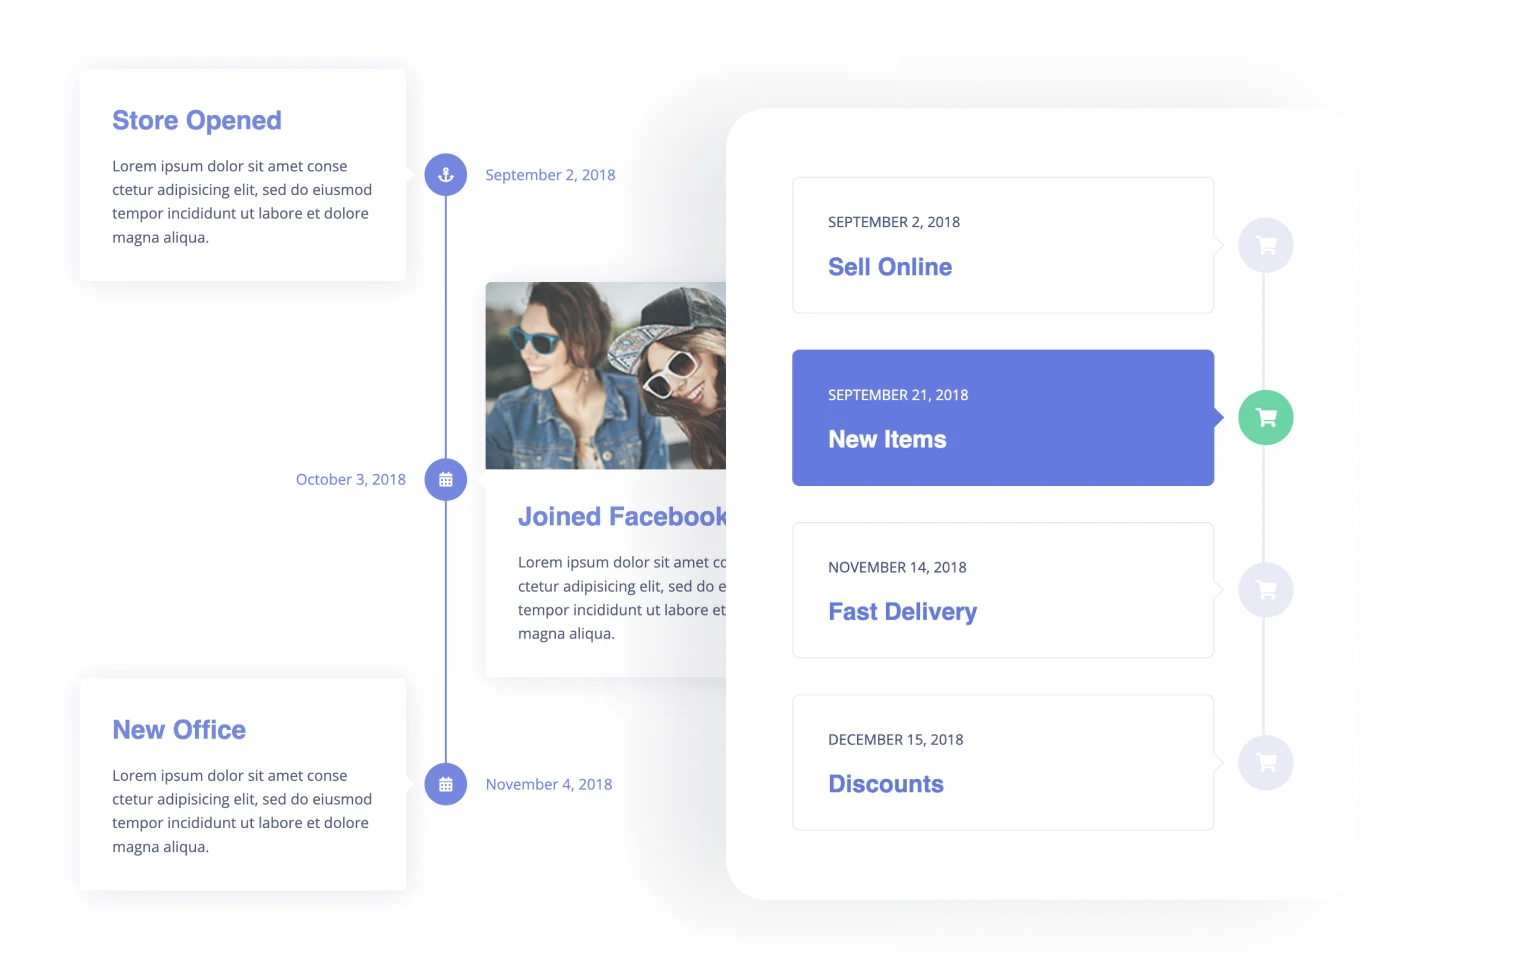
Essentially, this widget is about putting related pieces of content in the right order and making that order obvious. So, you don’t show posts or entries as a flat list or grid, a timeline lets you guide the user through the content step by step.
This solves a familiar problem: when content has a sequence, but the layout doesn’t reflect it.
You can add as many cards as you want, and each card includes:
- a title;
- a meta – typically for a date, but can be used for anything;
- a description or text content;
- an image;
- a point – to display a point on a timeline, can be an icon or text;
- a button to add a link.
From a layout perspective, the widget allows you to control:
- alignment (left, right, or alternating);
- spacing between items;
- the position of the marker relative to the content card;
- and the width of the content area.
Of course, in the Style tab, you can style every detail, change colors and typography, and add or remove entrance animations. The vertical line can change color to appear active when scrolling the timeline.
When to use the Vertical Timeline widget
The Vertical Timeline widget is the better choice whenever content needs space and attention. If each item includes more than just a title, for example, a description, image, or additional context, the vertical layout keeps things readable and avoids cramming information into a narrow area.
It works especially well for:
- progress tracking or milestone-based content;
- event histories or project timelines;
- learning paths or lesson sequences;
- contest or assignment listings with descriptions;
- any situation where users are expected to scroll and actually read.
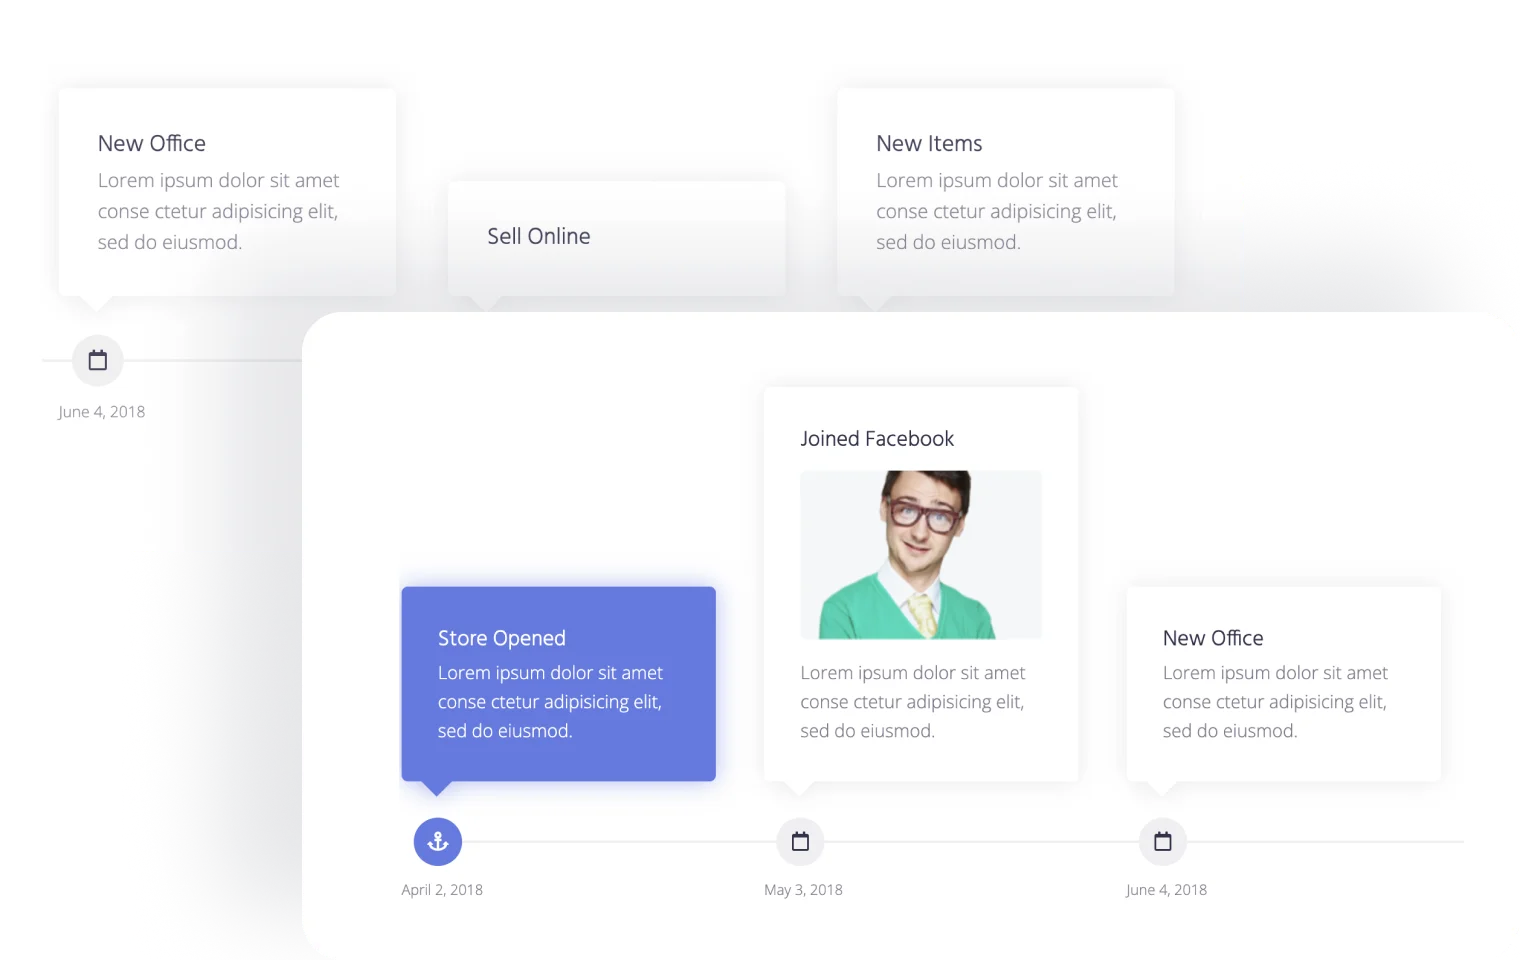
Horizontal Timeline widget
The Horizontal Timeline widget uses the same core elements but arranges them along a horizontal axis. Users navigate the timeline horizontally, making the layout compact and ideal for short, step-by-step content.
The widget has the same elements and controls as the Vertical Timeline, but also these specific settings:
- number of columns;
- alignment of content above or below the timeline, plus the alignment of date points;
- navigation behavior (such as arrows or scrolling) with the number of cards to scroll;
- responsive adjustments for smaller screens.
Because horizontal space is limited, this widget is better suited to concise entries, such as steps in a process, project phases, or key milestones. It communicates progression quickly, without encouraging long-form reading.
When to use the Horizontal Timeline
The Horizontal Timeline widget works best when the goal is to show progression at a glance rather than detailed content, and is meant to explain how something works rather than tell a story.
It’s ideal for short, clearly defined steps where the structure matters more than the amount of text.
Typical use cases include:
- step-by-step processes;
- onboarding or registration flows;
- project phases or roadmaps;
- feature development stages;
- quick overviews or summaries.
Dynamic Use Cases for Vertical and Horizontal Timeline Widgets by JetElements
Probably everyone has seen timelines on the About Us page, but what if we use them more creatively and display dynamic content within their cards?
Even without JetEngine, the JetElements plugin offers dynamic tags that can fetch data from the current post’s objects (e.g., title, content, date, user) or custom fields.
However, if you have JetEngine installed as well, it’s skyrocketing the number of available options for dynamic content. The main game-changer here is the possibility to use custom queries: you pull some content from the database and then display it within the timeline.
Below, I will give you some use cases. There can be much more, and it’s up to your fantasy and creativity to find your own. Also, keep in mind that I have intentionally chosen quite complex examples to demonstrate the potential.
Displaying medical content reviews and approval steps
Medical articles, including those published on clinic blogs, are subject to strict search engine requirements. This content falls under the YMYL (Your Money or Your Life) category because it directly impacts a reader’s health and well-being. Consequently, it must adhere to E-E-A-T (Experience, Expertise, Authoritativeness, and Trustworthiness) principles.
Long story short, you must demonstrate that your articles are both written and reviewed by medical professionals. Even if the author is a doctor, the content should ideally be peer-reviewed or vetted by a specialist with advanced credentials.
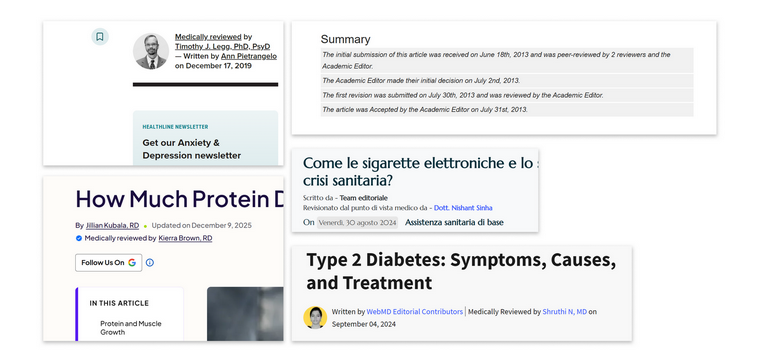
The most impressive layout for such approvals I’ve ever seen was made as a tiny timeline. So, how to implement it using the Timeline widgets?
Of course, you can add custom fields to the Article post type, where names and dates will be filled out manually. But I have a more structured and dynamic solution that would create a dynamic approval system on the website.
How to build an article review system and display it as a timeline
These are the content entities, fields, and relations I need to implement my approval system:
- Article custom post type;
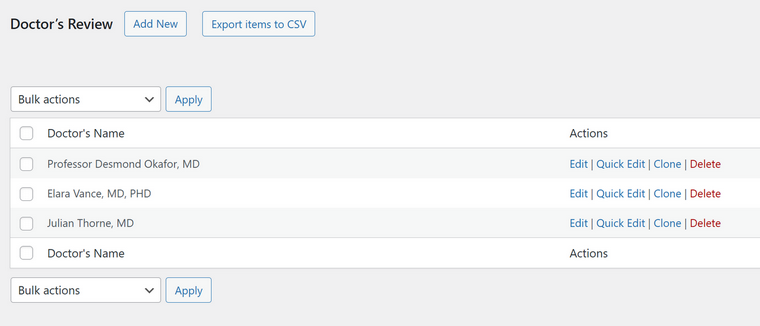
- Doctor’s Review custom content type with the Doctor’s Name and the Photo custom fields;
- A Relation between Article (parent) to Doctor’s Review CCT (one-to-many), where the relation has a meta field for a date. (Pay attention: the meta field belongs to the relation, not to the Article CPT or Doctor’s Review CCT).
Small details to make things look good on the backend:
- In CPT settings, choose to display the Doctor’s Name field in the admin columns.
- In Relation’s settings, choose Doctor’s Name as a title for a relation. Also, activate “Register controls for parent object.”
Now, add CCTs with the doctor’s names who will approve the articles. Let’s add three CCTs and fill in doctors’ names.
Now, when the particular doctor reviews the article, they add the connection by selecting their name from a dropdown at the bottom of the page and entering the date it was done (that’s why I’ve created a meta field that belongs to the relation).
This way, all of the doctors can add their connections when approving papers.
Custom query for Relations
Now, I need to build a custom query to display related items (reviews) based on the articles.
Starting with JetEngine 3.8, it’s a dedicated query type – the Relations query, and it’s very easy to build, with no macros needed anymore.
Displaying doctors’ reviews for the current article
Now, when I have all the content and the query to display exactly what I need, it’s time to finally show it on the front end.
Because we are talking about timelines, I will demonstrate how to do it inside the Timeline widgets, but it can work with other dynamic widgets from JetElements. And, of course, you can display things in any layout you want using JetEngine’s Listing Template – first, create a template, and then display it on the Article template using the Listing Grid widget.
When you add the Vertical or Horizontal Timeline widget, there’s a toggle to choose JetEngine’s query as a data source. After choosing the query, map the source field for every field in the timeline. Map only the first card; the rest will be added dynamically, just like repeaters do. In my case, I have three doctors’ reviews for this article, so three cards appeared.
For most cases, you should choose the Current Object Field option and then the particular field. For example, I chose the Current Object Field and then the Doctor’s Name field.
Remember that in the previous steps, I created the meta field for the Article-to-Reviews relation? This field is created only when we establish the relation, and it’s perfect for the review date. To display it on the timeline, choose the Related Item Meta option and then the field. Ensure you’ve chosen Default WordPress Object (for current page) in the Parent Object ID From control, otherwise the system can’t figure out which field to fetch.
This video shows all the details.
As the very last step, I’ve added a line of CSS to make cards look more compact. However, the widget has a lot of styling settings; feel free to play with them.
Also, in many cases, the Horizontal Timeline would look even better.
Displaying contest submissions on the Contest page using Timeline widgets
This case is similar to the previous one but has some specific details. Imagine an educational platform website with a list of different contest topics where students can submit their assignments. We can display them in a timeline with links to the full posts and the complete assignment content.
This is what we need for such a configuration:
- Contest CPT with different contest topics;
- Assignment CPT that will be dynamically populated from the JetFormBuilder form using the Insert/Update Post action;
- A Relation between Contest CPT (parent) and Assignment CPT (child), one-to-many;
- A custom query, the Relations Query type to display Assignment – use the same settings as in the previous case.
When a user submits their assignment, a new post is generated (Assignment post type) using the Insert/Update Post action. But you should use one more action: Connect related item (it appears in the actions list only if your website has relations). In this action setting, ensure the post connects to the corresponding Contest post.
As a result, we have Assignment posts already connected to the relevant Contest posts.
Let’s build a template for Contest CPT using JetThemeCore’s Theme Builder and add the Timeline widget where cards will be populated dynamically based on the query. In the previous example, I used CCT as the content type to display, but here I have CPT, so the settings differ slightly. I will also demonstrate how to create dynamic links to related posts within the Timeline cards.
As you can see, I used the Meta field (which normally contains a date) for the student’s name.
Also, to generate a dynamic link to the related item, choose Current Object Field > Post slug and add your website’s URL in the “Before” field.
Vertical and horizontal timelines with sortable dynamic content
The previous cases were all about related items – meaning they aren’t just showing data from the current post, but using the current post to display other posts or content connected to it. There are plenty of other ways to use this setup as well.
But you don’t always have to go that far. In simpler cases, you can just display certain fields dynamically, for example, pulling some custom fields from a CPT or specific fields from option pages. This way, editors can update content without touching the page itself, and it will automatically appear in the right place.
Courses sorted by difficulty level
The previous two cases with related items have one small drawback: items are automatically sorted by when the relation was created. So, in a Vertical Timeline widget, the newest connected item appears at the top, and in a Horizontal Timeline, it appears on the left. To change the order, you must disconnect the items and reconnect them in the desired order.
But for the rest of the query types, you have full control over sorting.
Let’s say I have a list of courses (Course CPT) with two numeric fields: Difficulty Level and Duration. I want to display the courses as a timeline, from the easiest to the most difficult course.
First, create a query for Course CPT and add sorting by the Difficulty Level meta field. You can add other settings: choose only certain course categories, exclude certain posts, etc.
Then, use this query as a source for a Vertical Timeline.
Past and future events in a timeline
You can add two Vertical Timeline widgets and style them a bit differently: one is for future events and the other for past ones. Of course, you should have an Event CPT with a field for an event date. Using these instructions, create a query for future events and another for past events. Populate your timeline widgets using these queries and enjoy the beautiful results.
Product adoption or feature rollout timeline on WordPress
Create a Milestones CPT with meta fields such as Milestone Date, Region, etc. You can also create a taxonomy and in the custom query for the Milestone CPT select only posts belonging to certain categories of this taxonomy: e.g., UX improvements, AI integrations, etc.
Set up sorting by date, and create a timeline based on this query.
FAQ
A timeline widget lets you display content in chronological or other kinds of step-by-step order, making sequences and milestones visually clear. It’s perfect for events, roadmaps, or any content that has a natural flow.
Vertical timelines are best for detailed, content-heavy entries that require scrolling. Horizontal timelines work well for concise steps, quick overviews, or processes you want to show at a glance.
Yes, timelines can fetch content from custom post types, including fields, relations, or queries. This allows content to update automatically when new posts or entries are added.
Wrapping Up
Timelines and, in particular, the functionality timeline plugins/widgets offer us, are not about displaying a history or company milestones. What if I want to display anything that has a sequence using this layout? The great news is that I can, because the JetElements + JetEngine combo offers a lot of different options. Create various content entities, add meta fields, and then build custom queries that retrieve exactly what you want.
After that, simply make these queries a source for fields within the Horizontal or Vertical timeline widgets, and voila – a cool layout that tells the story is ready! You set it up once, and it will get updated dynamically.
