Floating forms are an excellent tool that helps to interact with users. These forms “float” above your content, making it easy for visitors to take action – whether it’s subscribing to a newsletter, contacting you, or filling out a quick survey. The beauty of floating forms lies in their ability to capture attention without disrupting the user experience.
In this article, we’ll discuss what floating forms are, establish why they’re valuable, and highlight several WordPress plugins that can help you implement them on your website.
What Are Floating Forms?
Floating forms are dynamic elements on a website that “float” over the content, typically positioned at the side or bottom of a page. Unlike traditional forms that are embedded within the page’s content, floating forms remain visible as the user scrolls through the site, offering an unobtrusive yet highly visible way to interact with visitors. These forms are designed to capture user attention without overwhelming or disrupting the browsing experience.
The primary benefit of floating forms is their ability to maintain visibility without interrupting the user’s journey. They offer a convenient, non-intrusive method for visitors to take action, such as signing up for a newsletter, reaching out for inquiries, or engaging with your content in other ways. You’ve probably seen examples of such forms – when you scroll through the page content, the form stays in a visible spot.
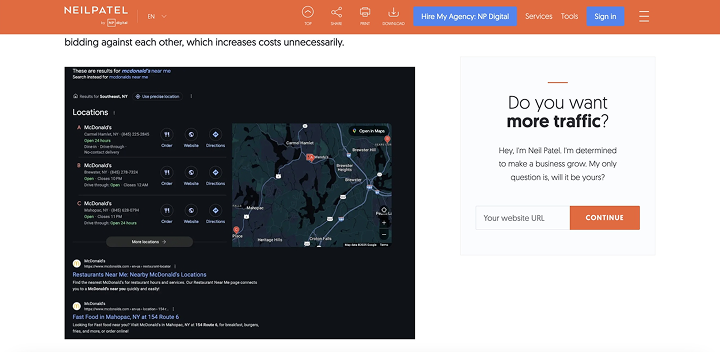
Floating forms are often customizable, allowing website owners to adjust the position, size, appearance, and behavior of the form to align with the site’s design and goals. Whether triggered by user actions or displayed automatically after a set period, floating forms are an essential tool for increasing conversions and engagement on a website.
Use Cases for Floating Forms
Floating forms can be used across various scenarios. Here are some common use cases where floating forms can make a significant impact:
One of the most popular uses of floating forms is to capture leads. By placing a floating form on your site, you can collect visitors’ contact details, such as email addresses, to receive newsletters, promotions, or free resources. Floating forms are effective for turning passive visitors into potential customers by offering something in exchange for their information.
- Newsletter sign-ups
Floating forms can be used to drive newsletter subscriptions. Since these forms stay visible as users scroll, they remind visitors to subscribe. They can appear after a user has spent a certain amount of time on the page or scrolled through a specific portion of the content, increasing the chances of conversion.
- Feedback and surveys
Floating forms are ideal for collecting feedback or running short surveys. Place a feedback form or survey button and make it visible to prompt users to share their opinions or experiences.
- Event registrations
If you’re hosting an event, a floating form can be a great way to make more registrations. Streamline the registration process for potential attendees and allow them to sign up quickly without leaving the page they’re currently on. Floating forms for event registration can also feature countdown timers to create a sense of urgency.
- Promotions and special offers
Use floating forms to offer exclusive discounts, promotions, or special offers to your website visitors. These forms can be configured to appear when a visitor is about to leave the page (exit intent) or after they’ve been on the page for a certain amount of time. Offering a limited-time discount or special deal through a floating form can encourage users to take immediate action.
Floating forms are not just about convenience – they’re a strategic tool for engaging visitors and improving user experience. Their versatility and adaptability make them a must-have feature for many WordPress websites.
How to Create a Floating Form on Your WordPress Site: 3 Methods
Let’s explore three methods to create floating forms: using the Sticky Floating Forms Lite plugin, JetFormBuilder and JetPopup, and by adding custom code.
1) Creating a floating form with the Sticky Floating Forms Lite plugin
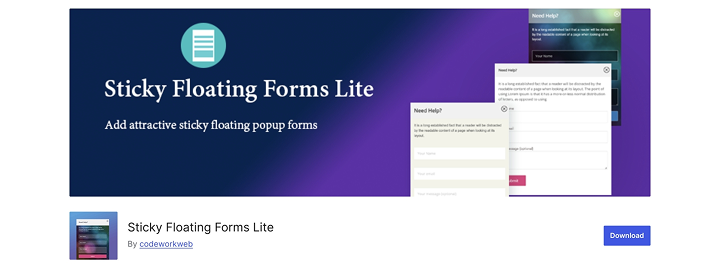
The Sticky Floating Forms Lite plugin is a simple and effective way to create floating forms on your WordPress website. Here’s how to get started:
- Go to your WordPress dashboard, navigate to Plugins > Add New, search for “Sticky Floating Forms Lite,” and click “Install Now.” Once installed, click “Activate.”
- Create a form with your form plugin. The Sticky Floating Forms Lite plugin is compatible with Contact Form 7, WPForms, and some other plugins.
- After activating the plugin, go to Sticky Floating Forms in your dashboard menu. Choose the created form and add rules and triggers for the floating form. Specify where you want to see this form and which trigger will help to show it.
- Once you’re satisfied with your form, save it and publish.
This plugin is ideal for those who want an easy, no-code solution for creating floating forms with customization options.
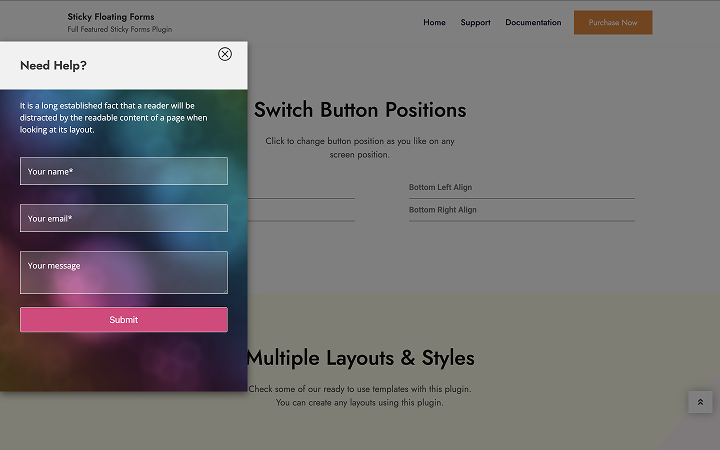
2) Creating a floating form with JetFormBuilder and JetPopup
For more flexibility, you can use a combination of JetFormBuilder and JetPopup to create advanced floating forms that integrate seamlessly into your website.
- Go to the Crocoblock website and buy the JetPopup plugin.
- Install JetFormBuilder and activate JetFormBuilder and JetPopup plugins.
- Go to JetFormBuilder > Add New Form to start building your form. Customize the fields (e.g., name, email, message) and design the layout to your liking. You can set up form actions, such as submitting data to an email address or a database.
- Go to JetPopup > Add New Popup.
- In the JetPopup editor, create a new pop-up. Use the JetFormBuilder shortcode to embed the form you created within the pop-up.
- Add triggers, animation, and conditions.
- After configuring the pop-up and form, publish the pop-up and assign it to specific pages or the entire website.
This method provides more control over how and when the form appears, giving you a lot of flexibility in terms of design and functionality.
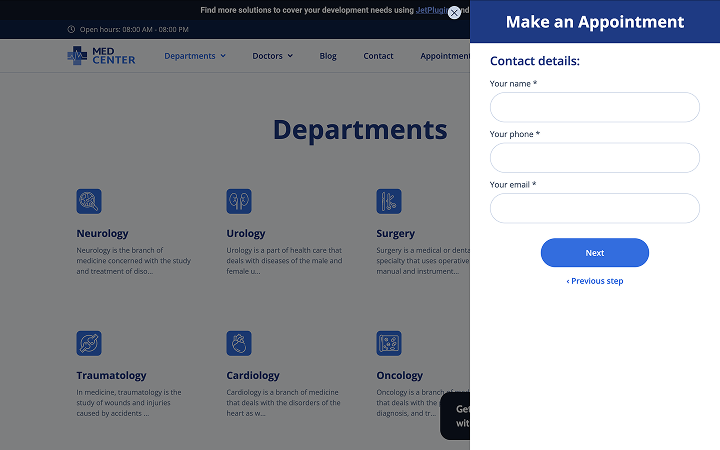
3) Creating a floating form with custom code
For those who prefer to add a floating form manually and have control over every aspect of the form, writing custom code is a great option. Here’s how to create a simple floating form with HTML, CSS, and JavaScript.
First, follow the steps in the video to create the HTML and CSS for your contact form:
Then, add some animation with JavaScript by following:
Bonus: Floating Labels – What Are They and How to Create Them?
Floating labels are a design trend that has become popular for forms, especially for input fields. Instead of traditional labels placed above or below the input fields, floating labels appear inside the input field and “float” above it when the user starts typing. This clean, minimalistic design not only saves space but also improves the user experience by keeping the form elements compact and easy to read.
Labels help to avoid the clutter of having multiple labels in a form, especially when there are several fields. To create your own floating labels, follow the steps outlined below:
Step 1. Create a form using a form builder plugin like JetFormBuilder.
Add all necessary fields.
Step 2. Wrap input fields in a floating label container.
To correctly style the floating labels, do the following:
- Select the Group block in the WordPress Block editor.
- Assign it the class “form-floating” in the Advanced > Additional CSS class settings.
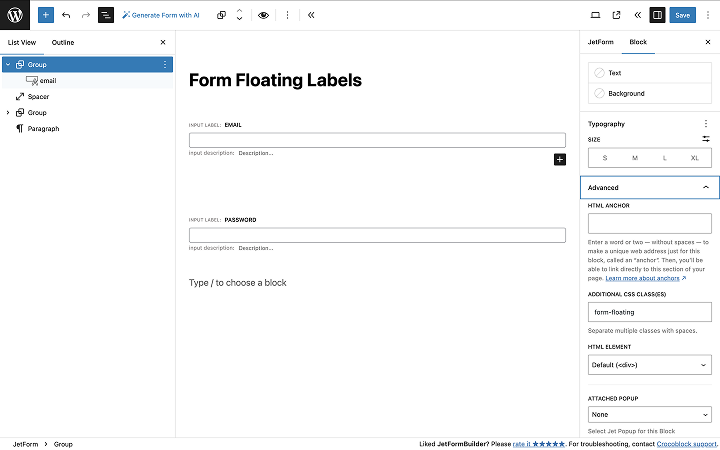
Step 3. Add CSS for floating labels.
Now, let’s style the form so that labels float properly. Go to Appearance > Customize > Additional CSS and insert the following code:
.form-floating {
    position: relative;
}

.form-floating .jet-form-builder__field-wrap {
    margin-top: 0;
}

.form-floating .jet-form-builder__label-text {
    position: absolute;
    z-index: 1;
    top: 0;
    left: 0;
    height: 100%;
    padding: 1rem .75rem;
    pointer-events: none;
    transform-origin: 0 0;
    transition: opacity .1s ease-in-out, transform .1s ease-in-out;
}

.form-floating .jet-form-builder__field {
    height: 3.5rem;
    padding: 1.625rem 0.75rem 0.625rem;
}

.form-floating.float .jet-form-builder__label-text {
    opacity: 0.6;
    transform: scale(.85) translateY(-.5rem) translateX(.15rem);
}

.form-floating.float .jet-form-builder__field {
    padding-top: 1.625rem;
    padding-bottom: 0.625rem;
}
NOTE:
Each theme has its own style scripts for inputs. Keep this in mind when creating the form.
Step 4. Add JavaScript for floating label animation.
To make labels float when entering text, go to Appearance > Theme File Editor. Open the functions.php file and add this code:
function custom_form_scripts() {
    wp_enqueue_script('custom-form-js', get_stylesheet_directory_uri() . '/form.js', array('jquery'), null, true);
}
add_action('wp_enqueue_scripts', 'custom_form_scripts');
Create a new file form.js in your theme folder (wp-content/themes/your-child-theme/). Add the following code to this file:
document.addEventListener("DOMContentLoaded", () => {
    document.querySelectorAll(".form-floating .jet-form-builder__field").forEach(input => {
        const fieldWrap = input.closest(".form-floating");
        const label = fieldWrap?.querySelector(".jet-form-builder__label-text");

        if (!label) return;

        const toggleWrap = () => {
            fieldWrap.classList.toggle("float", input.value.trim() !== "" || input.matches(":focus"));
        };

        ["input", "focus", "blur"].forEach(event => input.addEventListener(event, toggleWrap));

        input.dispatchEvent(new Event("input"));
    });
});
Finally, enjoy the result:
FAQ
A floating form is a type of form that remains visible on the screen even as a user scrolls through the page. It can appear as a sticky element (such as a sidebar, pop-up, or floating widget) that stays in a fixed position. These forms are often used to capture user attention for lead generation, signups, or calls to action without disrupting the user experience.
Floating forms are effective for capturing user attention and increasing conversions. They are less intrusive than pop-ups because they don’t take over the entire screen, yet they remain visible, encouraging users to take action. They are particularly useful for:
– Lead generation (newsletter signups, special offers);
– Exit-intent forms (appearing when users try to leave the page);
– Contact forms (easy access for users to reach out or make inquiries);
– Calls to action (promoting a product or service).
Floating forms improve user experience by being persistent and easily accessible. Since they follow the user as they scroll, the form is always available without disrupting the page’s content. This accessibility encourages users to interact with the form at their convenience, leading to better engagement without being intrusive.
Bottom Line
In this article, we’ve explored different methods to create floating forms on WordPress, including plugins like Sticky Floating Forms Lite, JetFormBuilder combined with JetPopup, and even custom coding. Each approach offers flexibility, allowing you to customize the form’s behavior, design, and triggers to match your website’s needs.
We also discussed the concept of floating labels, which provide a minimalist design approach by keeping input field labels visible and reducing clutter. While floating labels focus on form usability and design, floating forms are more about maintaining visibility and encouraging user interaction.
Whether you’re looking to capture leads, promote offers, or boost engagement, floating forms offer a great solution.
