The price filter in WooCommerce serves as a guiding light, steering customers toward their ideal choices amidst a vast ocean of products. Frankly, the majority of shoppers have little interest in conducting extensive searches to locate the needed product on a site. Without this navigational aid, they might leave the page in the blink of an eye. The price filter makes it easier to find products by allowing users to select products by price range, which significantly speeds up the time it takes to find the desired option.
Without plugins, to create a WooCommerce price filter in the form of a slider, the developer needs to complete several complex tasks: developing the slider user interface using HTML, CSS, and JavaScript for graphical presentation and interactivity, writing backend logic in PHP to integrate the slider with WooCommerce, providing filtering products by price in real-time, setting up AJAX requests to dynamically update the filtered product list without reloading the page. It sounds tedious, to be honest. In this article, we will look at the features, tips, and plugins that can make it easy to implement a price filter for WooCommerce.
Table of Contents
- What Is Price Filter and Why Use It?
- Why WooCommerce Price Filter Falls Behind
- 3 Best WordPress Plugins for Implementing a Price Filter
- How to Add a Price Filter Using JetSmartFilters
- FAQ
- Conclusions
What Is Price Filter and Why Use It?
Imagine the situation: a user is looking for new sneakers on a sportswear website. Instead of scrolling through hundreds of models, the user can use a price filter, setting a range of, say, $200 to $250. The system, using JavaScript to process the user’s request and AJAX to send it to the server without reloading the page, will instantly filter and show only those sneakers that fit the given price criterion. Now, let’s determine what features are important when choosing a price filter plugin for WooCommerce.
- Filtering algorithm. Some plugins use AJAX to display dynamic content, while others do not; this factor can significantly affect the plugin’s convenience.
- Performance. Long loading times repel customers and reduce the time spent on your website. For instance, if you have integrated AJAX for instant loading, users will find the website more convenient, spend more time on it, and, consequently, improve its SEO.
- Design and customization. Unfortunately, the built-in WooCommerce price filter has a design that’s too rigid, which will work against you. You need to create a filter that is pleasing to the eye, responds to clicks, features smooth slider animation, and is seamlessly integrated into your website’s overall aesthetic.
Why WooCommerce Price Filter Falls Behind
Initially, it might seem like you have nothing to worry about since WooCommerce has a built-in price filter, but unfortunately, that’s not the case. The reality is the built-in price filter within WooCommerce offers minimal functionality, which could negatively impact the user experience.
Long loading of filters
After using the price filter, the page takes a long time to load, up to 3 seconds. This might seem like a minor downside to some extent, but it’s not. The customers will use the filter 20-30 times during a single website visit, and such prolonged loading times will irritate them, leading to a loss of profits.
Simplistic design
The design comes off as basic and somewhat juvenile, almost as if a child sketched it. WooCommerce does a great job emphasizing templates and various site aspects, but unfortunately, they’ve neglected the filter designs, which is a missed opportunity. It lacks engaging animations, offers limited customization options, and falls short on slider variety.
User interface
Plugins are created to simplify developers’ work, but not in the case of the WooCommerce price filter. Using the interface is objectively difficult, and it is not immediately clear how. Many users note that due to the vague interface, they cannot even customize the filter normally.
3 Best WordPress Plugins for Implementing a Price Filter
So, it’s clear that there are better alternatives to the WooCommerce price filter due to its various limitations. This naturally leads to the question, “What to do?” Thanks to WordPress plugins, you can not only eliminate the shortcomings of a default WooCommerce filter but also increase user engagement. Now, we will look at the best price filter options for WooCommerce.
JetSmartFilters
🏆 Best for high-speed AJAX filtering.

JetSmartFilters needs no introduction. It is an advanced filter plugin for WordPress that offers 13 types of filters, advanced customization settings, the ability to create a permalink structure, and much more. The plugin is well-suited for advanced users and beginners alike. The user interface is highly intuitive, featuring numerous filter types and straightforward filter customization. Should you have any additional questions about the plugin’s operation, Crocoblock offers advice and technical documentation describing the functionality of each filter in detail.
One of JetSmartFilter’s key advantages is its performance. Thanks to built-in AJAX, the page updates quickly without needing to reload. Using such a filter certainly gives the impression of genuine care for the user experience.
Key features:
- 13 different filter types (range selection, text search, date selection, drop-down list, etc.);
- easy to use UI for beginners;
- permalink structure (URL address management);
- advanced filter settings customization;
- the ability to set a hierarchy;
- ability to set user ratings;
- AJAX filtering without page reload;
- well-documented;
- pleasant animation of the price filter slider.
HUSKY
🏆 Best for quickly setting up a price filter.
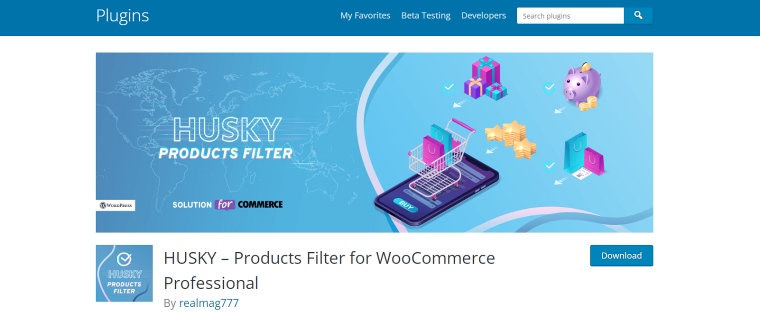
Husky (formerly WOOF) is a powerful and versatile plugin that allows for the easy creation of search and filtering tools on WooCommerce.This plugin isn’t just ideal for adding price filters; it also lets you quickly set up other filter types on the website. You can categorize products for easier searching, create SEO-friendly links within filters for promotions, and vary the types of filters to your heart’s content. In addition, the plugin supports product shortcodes, which you can use to display a specific product wherever you want. Thanks to its tips and integrated ChatGPT assistant, the plugin is also perfect for beginners.
Key features:
- front-end filter builder to create a price slider;
- performance analytics and stats;
- hierarchy drop-down;
- ChatGPT-compatible;
- filtering by meta fields;
- advanced customization settings.
Filter Everything — Product Filter & WordPress Filter
🏆 Best for flexible filter customization.
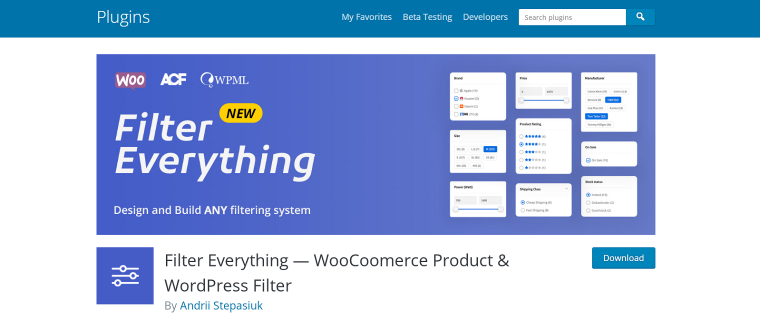
Filter Everything is a universal plugin for setting filters on WooCommerce. It supports AJAX, allowing information to update without page reloads. The plugin offers an easily customizable Price Range slider with pleasant animation that can be effortlessly worked into any website design. Besides Price Range, Filter Everything includes a variety of other filter types, such as choices by categories, tags, WooCommerce product attributes, custom fields, and many more.
Key features:
- dynamic page updates with AJAX;
- the ability to use filters on any page, including product singles;
- clean and attractive permalinks;
- vertical and horizontal layouts;
- the possibility to display filters via shortcodes.
How to Add a Price Filter Using JetSmartFilters
Now, I will show you how to create a price filter for your WooCommerce project. With JetSmartFilters, it does not require special knowledge and is not difficult.
Step #1: Install the JetSmartFilters plugin
First, you’ll need to buy the JetSmartFilters plugin and then download and install it. After that, the plugin will be ready for use.
Step #2: Preparing and setting up the filter
Before moving on to the next step, you need to go to JetSmartFilters, and a window with available fields will open. Select Range Filter and proceed to its configuration.
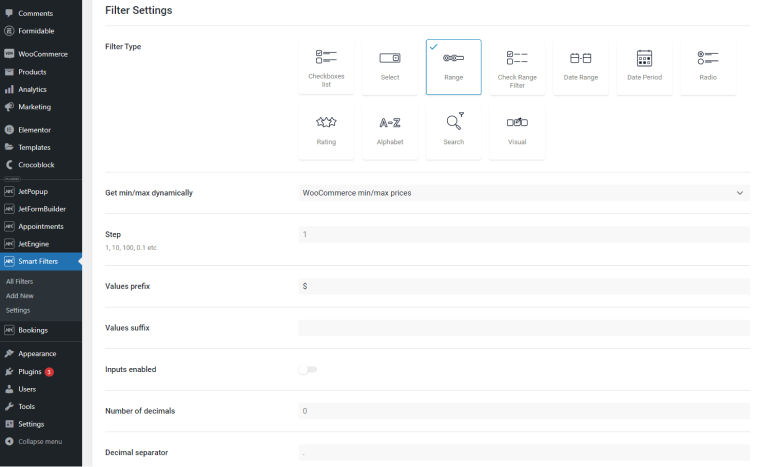
- Get min/max dynamically – set the “WooCommerce min/max prices” option.
- Step – the number of conditional units by which the slider value will minimally change (if it’s 5, then it will change by 15,20,25).
- Values prefix – the sign that is indicated before the value, for example, $.
- Values suffix – the sign that is indicated after the value, for example, kg or % (if you don’t need to specify anything there, leave the field empty).
- Input enabled – whether the user can enter values (besides using the slider).
- Number of decimals – this parameter determines how many digits will be displayed after the decimal separator.
- Decimal separator – this parameter specifies the symbol that will be used to separate the whole part of the number from the decimal part.
- Thousands separator – this parameter determines the symbol for separating groups of digits by thousands, which makes reading large numbers easier.
- Query variable – type the “_price” value.
Once configured, save the filter. Then, navigate to Pages and open the one you wish to edit in Elementor.
Step #3: Add the Range filter to the page
Use the left Elementor sidebar to find the needed widget, Range Filter. Drag and drop it onto the page and configure the widget settings. In the Select filter field, pick the previously created range filter. Set the Apply type to “AJAX,” so the page does not reload when the filter is applied. Lastly, make sure the Apply on field is set to “Value change.”
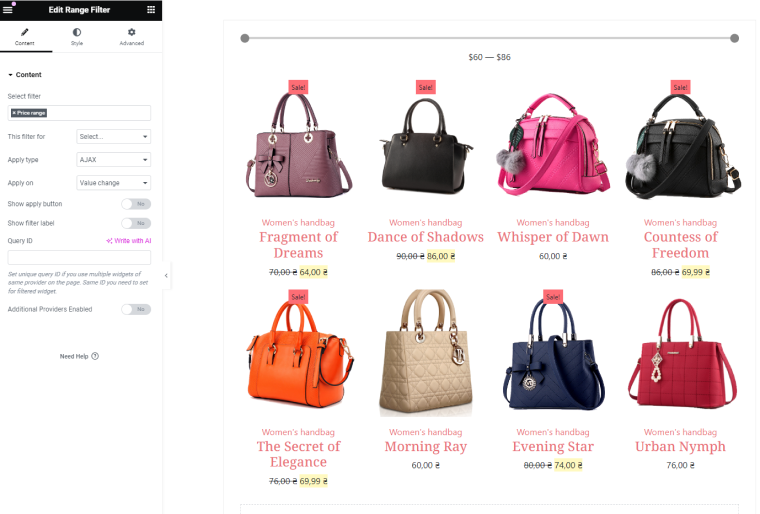
You can use the Product Grid widget to showcase products on the page and place the range filter next to it for a seamless visual experience.
Save the changes and check out the filter on the front end. Congratulations, the price filter is working successfully, and users can now filter by price WooCommerce products. Using the same principle, you can implement other filters from JetSmartFilters.
If you suddenly dislike the design, you can customize the filter’s appearance. To do this, go to the Style section of the filter settings. Here, you will see options to change the background and other elements so that they fit perfectly into the site’s overall design. Read the full routine for creating a range filter for product prices in this tutorial.
FAQ
Filters are a key tool for any WooCommerce site, as customers can simply get tired of combing through numerous website pages searching for the product they need, and filters make this task much easier. Also, filters say a lot about the attitude towards the client. When you see multifunctional and complex filters on the site, you understand that the developers wanted to ensure convenient browsing.
Providing the ability to filter products by price, category, brand, ratings, and other criteria greatly simplifies the purchasing process and makes it more targeted and less time-consuming. This reduces customer churn and increases conversions as customers can find exactly what they are looking for.
In this article, we’ve looked at the disadvantages of WooCommerce default filters. As you can see, they lack functionality and design and will benefit neither the developer nor the website owner. In the first case, implementing them can be counterintuitive; in the second case, such filters can turn customers away from the business owners.
Conclusions
After reading this article, you’ll understand that WooCommerce price filters are a vital element of a successful online store. They can and should be combined with other filter types to provide the best user experience.
WooCommerce gives you standard filtering tools that will not attract clients and will not impress them with functionality. In this case, it would be more appropriate to explore other plugins:
- JetSmartFilters — best for high-speed AJAX filtering;
- HUSKY — best for quickly setting up a price filter;
- Filter Everything — best for flexible filter customization.
Remember that customers’ satisfaction should come first. 👆

