How to Use Sorting Filter with Repeater Field
Learn how to use the JetSmartFilters Sorting Filter with the Repeater meta field created with JetEngine or ACF on your WordPress website.
Before you start, check the tutorial requirements:
- Elementor (Free version), Block editor (Gutenberg), or Bricks
- JetEngine plugin installed and activated
- JetSmartFilters plugin installed and activated
In this tutorial, we will describe how to use the Sorting Filter to sort the repeater items.
In our example, we will create a “Tour Packages” repeater field and will filter the packages by their name, price, and tour duration.
Creating Repeater
First, you need a “Repeater” field created for default or custom post types, Custom Content Types, taxonomies, relations, users (in meta boxes), and options pages. It can be crafted with the JetEngine and ACF plugins.
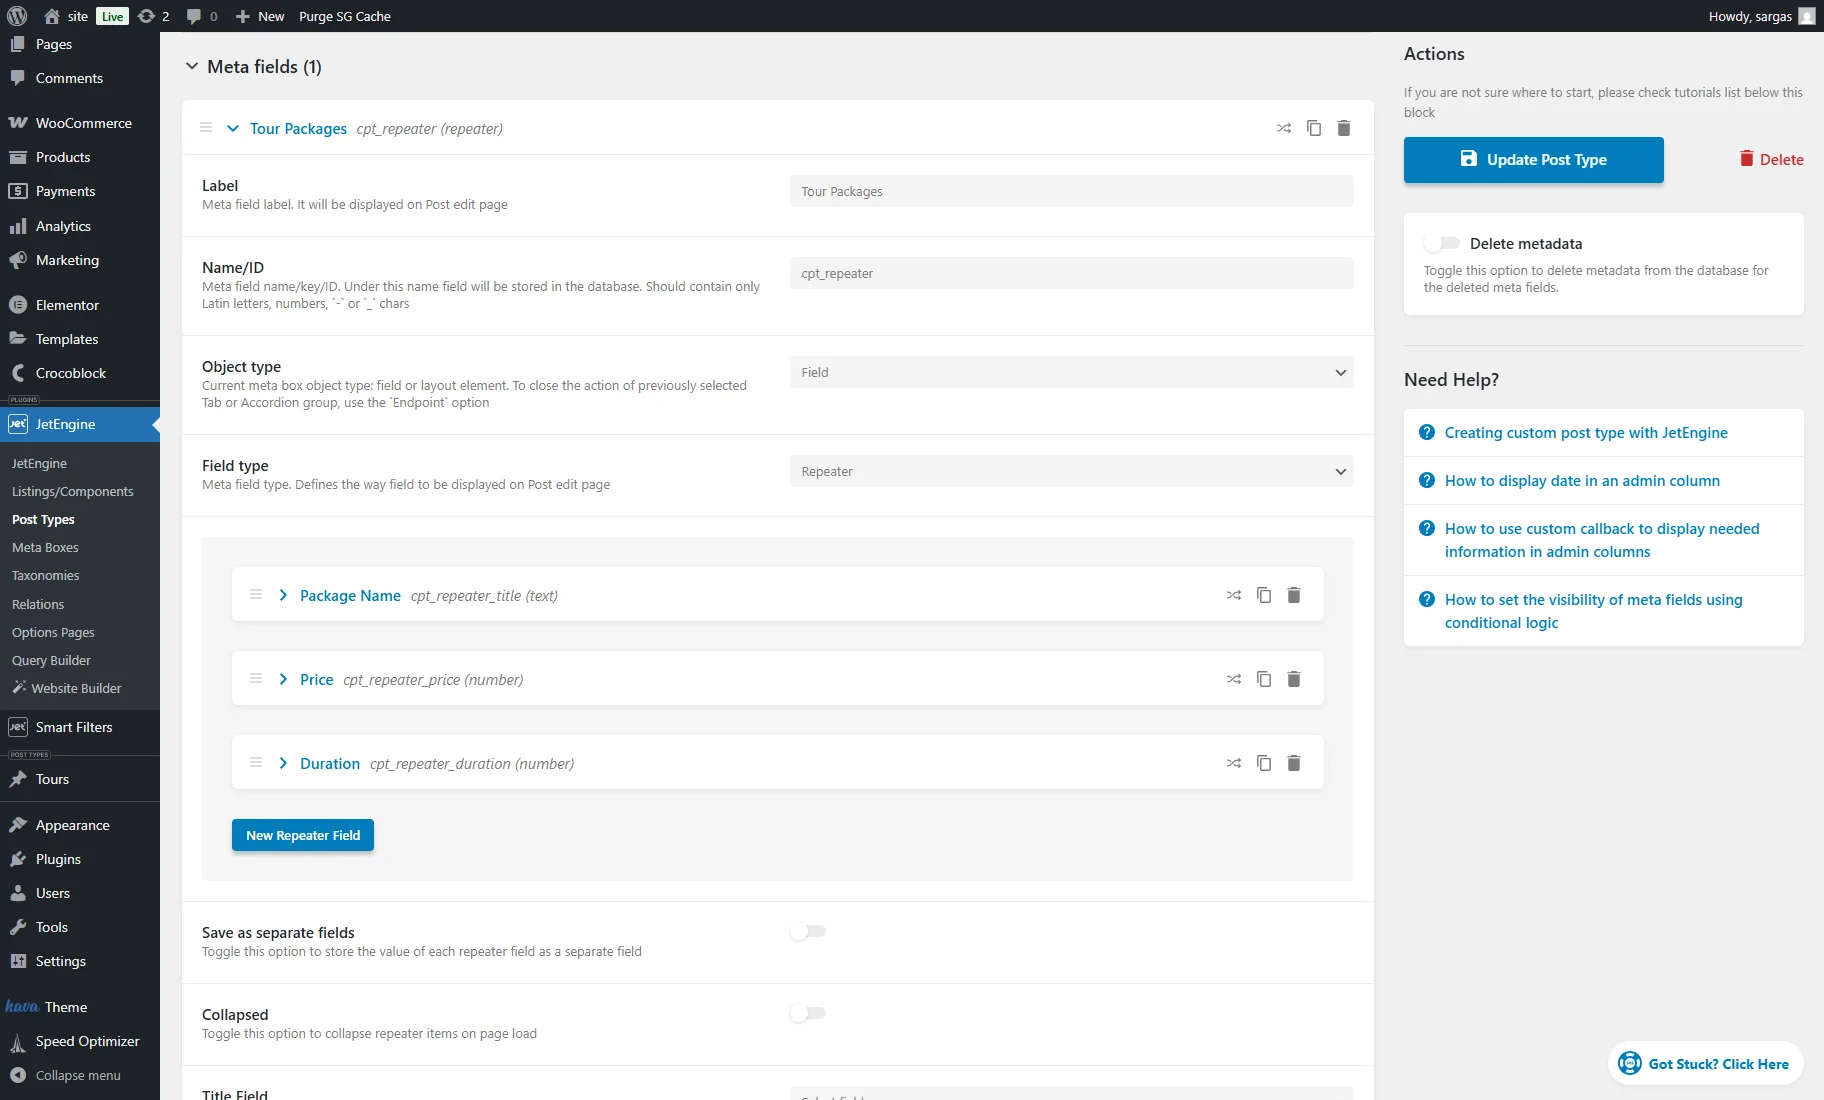
For our case, we go to the WordPress Dashboard > JetEngine > Post Types and open a “Tours” CPT to edit it.
We unroll the Meta fields tab and press the “New Meta Field” button.
We fill in the Label and Name/ID and pick the “Repeater” Field type.
By clicking the “New Repeater Field” button, we add three fields: “Package Name” with “Text” type, “Price” with “Number” type, and “Duration” with “Number” type.
Then, we save the settings by pressing the “Update Post Type” button.
Filling in the Repeater Fields
Next, we head to the CPT tab on the WordPress Dashboard and create a “Bali Tour” custom post.
We add four tour packages (repeater items) by filling in the repeater fields and save the post.

Creating a Listing with the Repeater Source
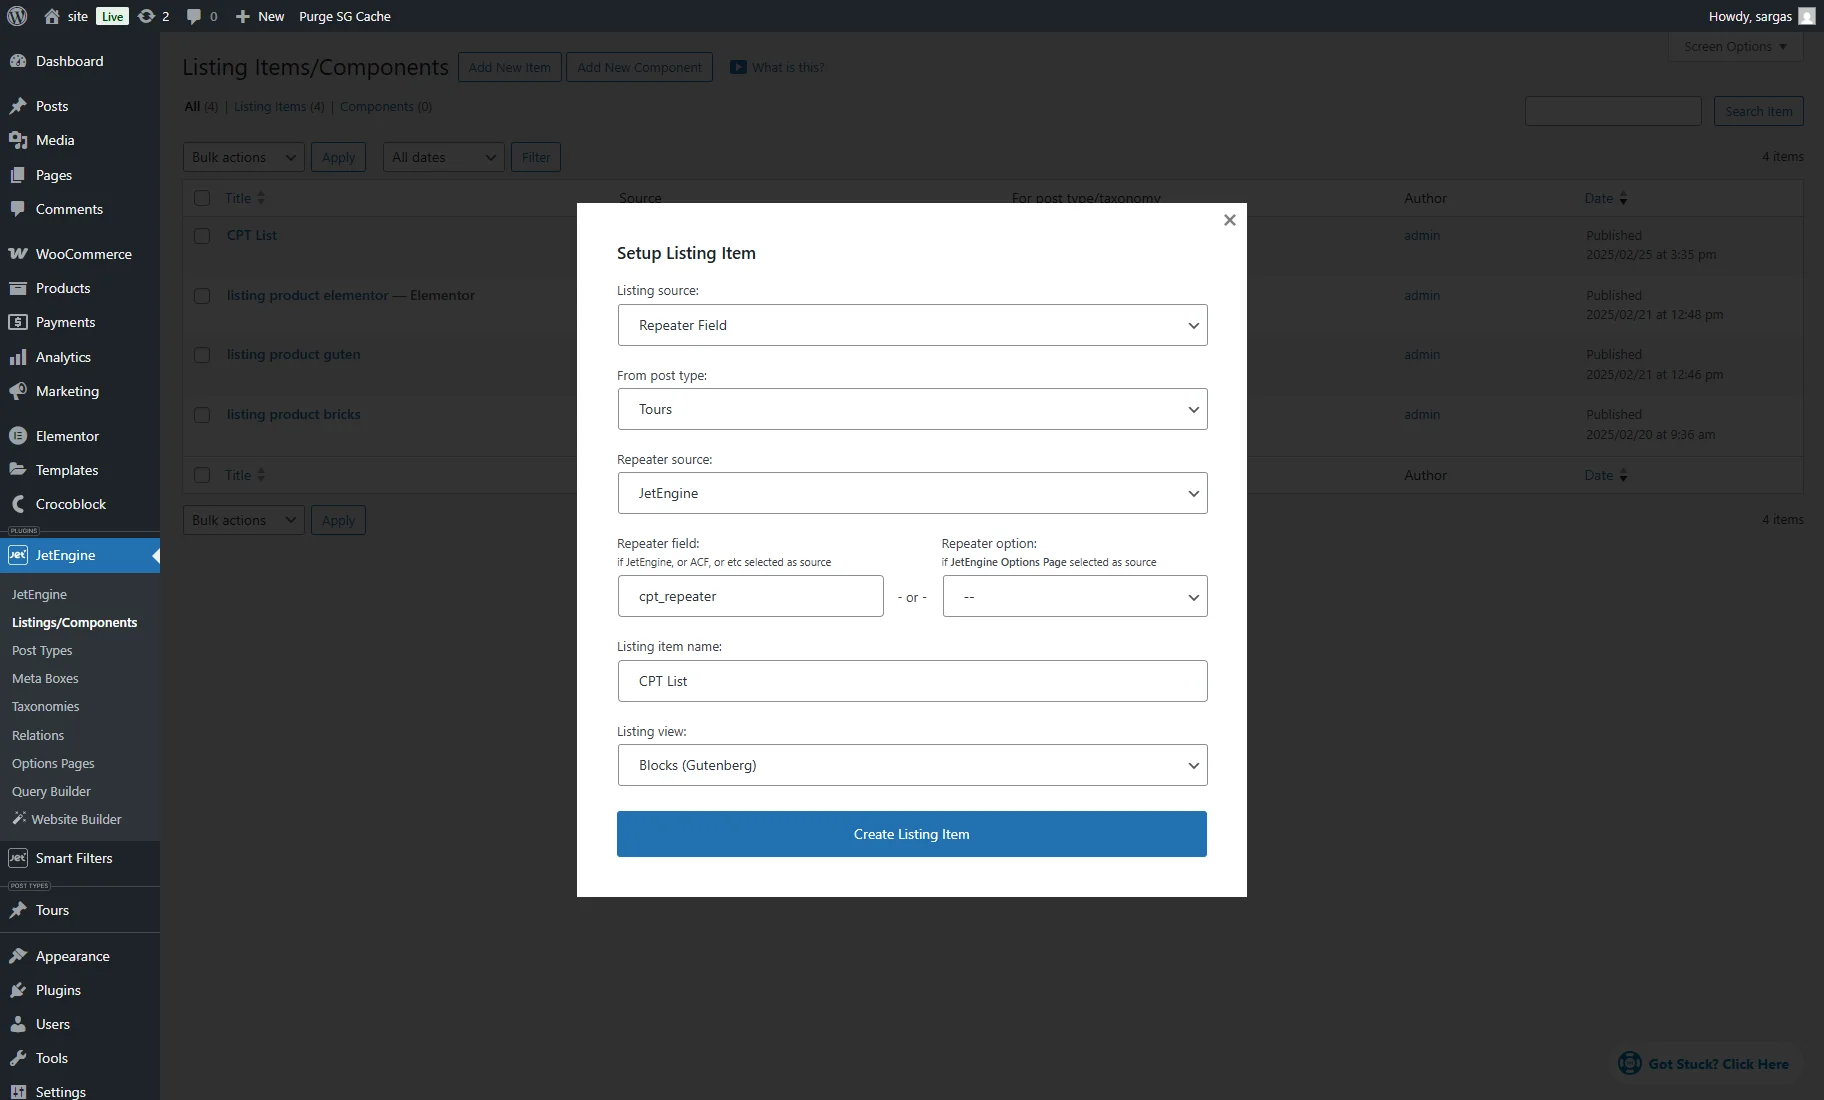
Go to WordPress Dashboard > JetEngine > Listings/Components and push the “Add New Item” button.
Choose the “Repeater Field” as the Listing source, pick the post type in the From post type field, choose the Repeater source (“JetEngine” in this case and set the field name in the Repeater field (or Repeater option if it’s from the JetEngine Options Page).
Afterward, enter the Listing item name, select the Listing view (“Blocks (Gutenberg)”, for example), and hit the “Create Listing Item” button.
In the editor, display the values from the repeater fields, using the Dynamic Field. Select the “Repeater Field” SOURCE and enter the field names within the “Repeater” to the OBJECT FIELD / META FIELD / REPEATER KEY / COMPONENT PROP field.
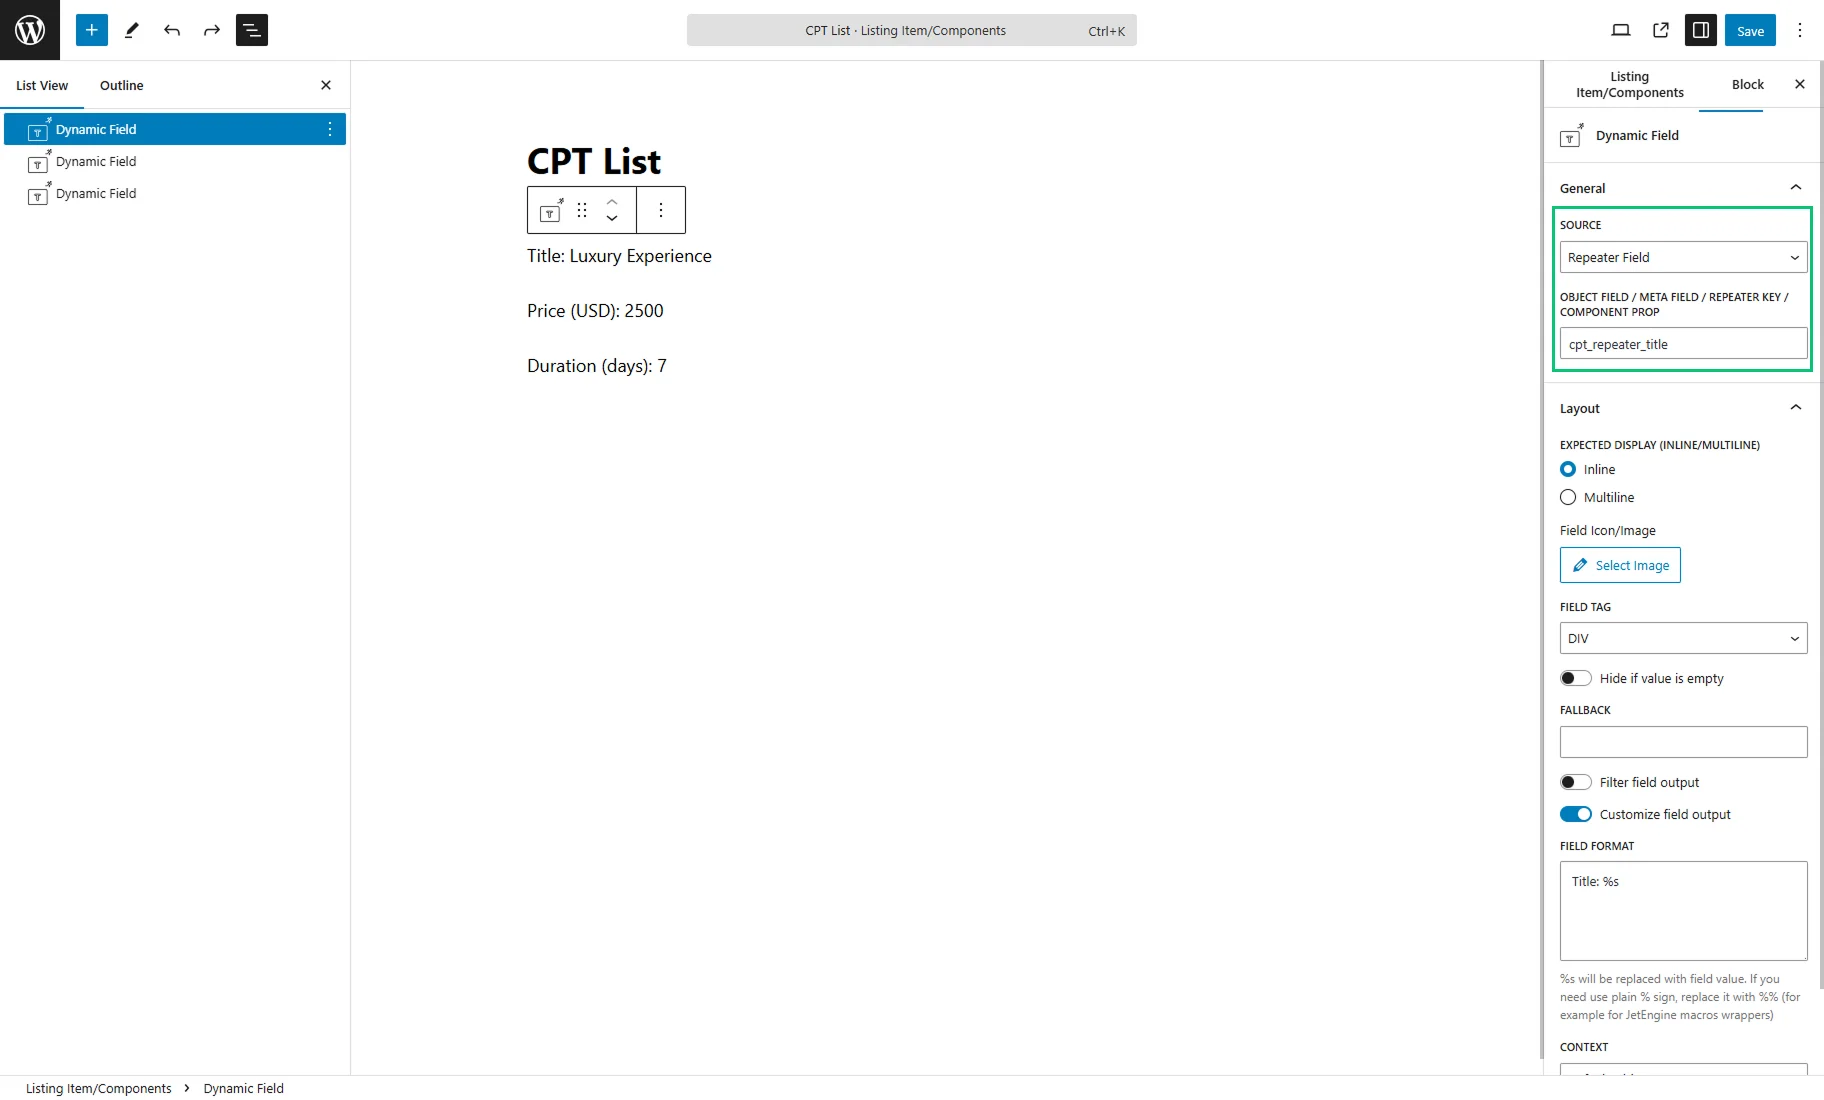
Customize the Listing template according to your needs and save the settings.
Creating a Repeater Query
Custom query creation is mandatory to filter the repeater items.
Navigate to the WordPress Dashboard > JetEngine > Query Builder tab and press the “Add New” button.
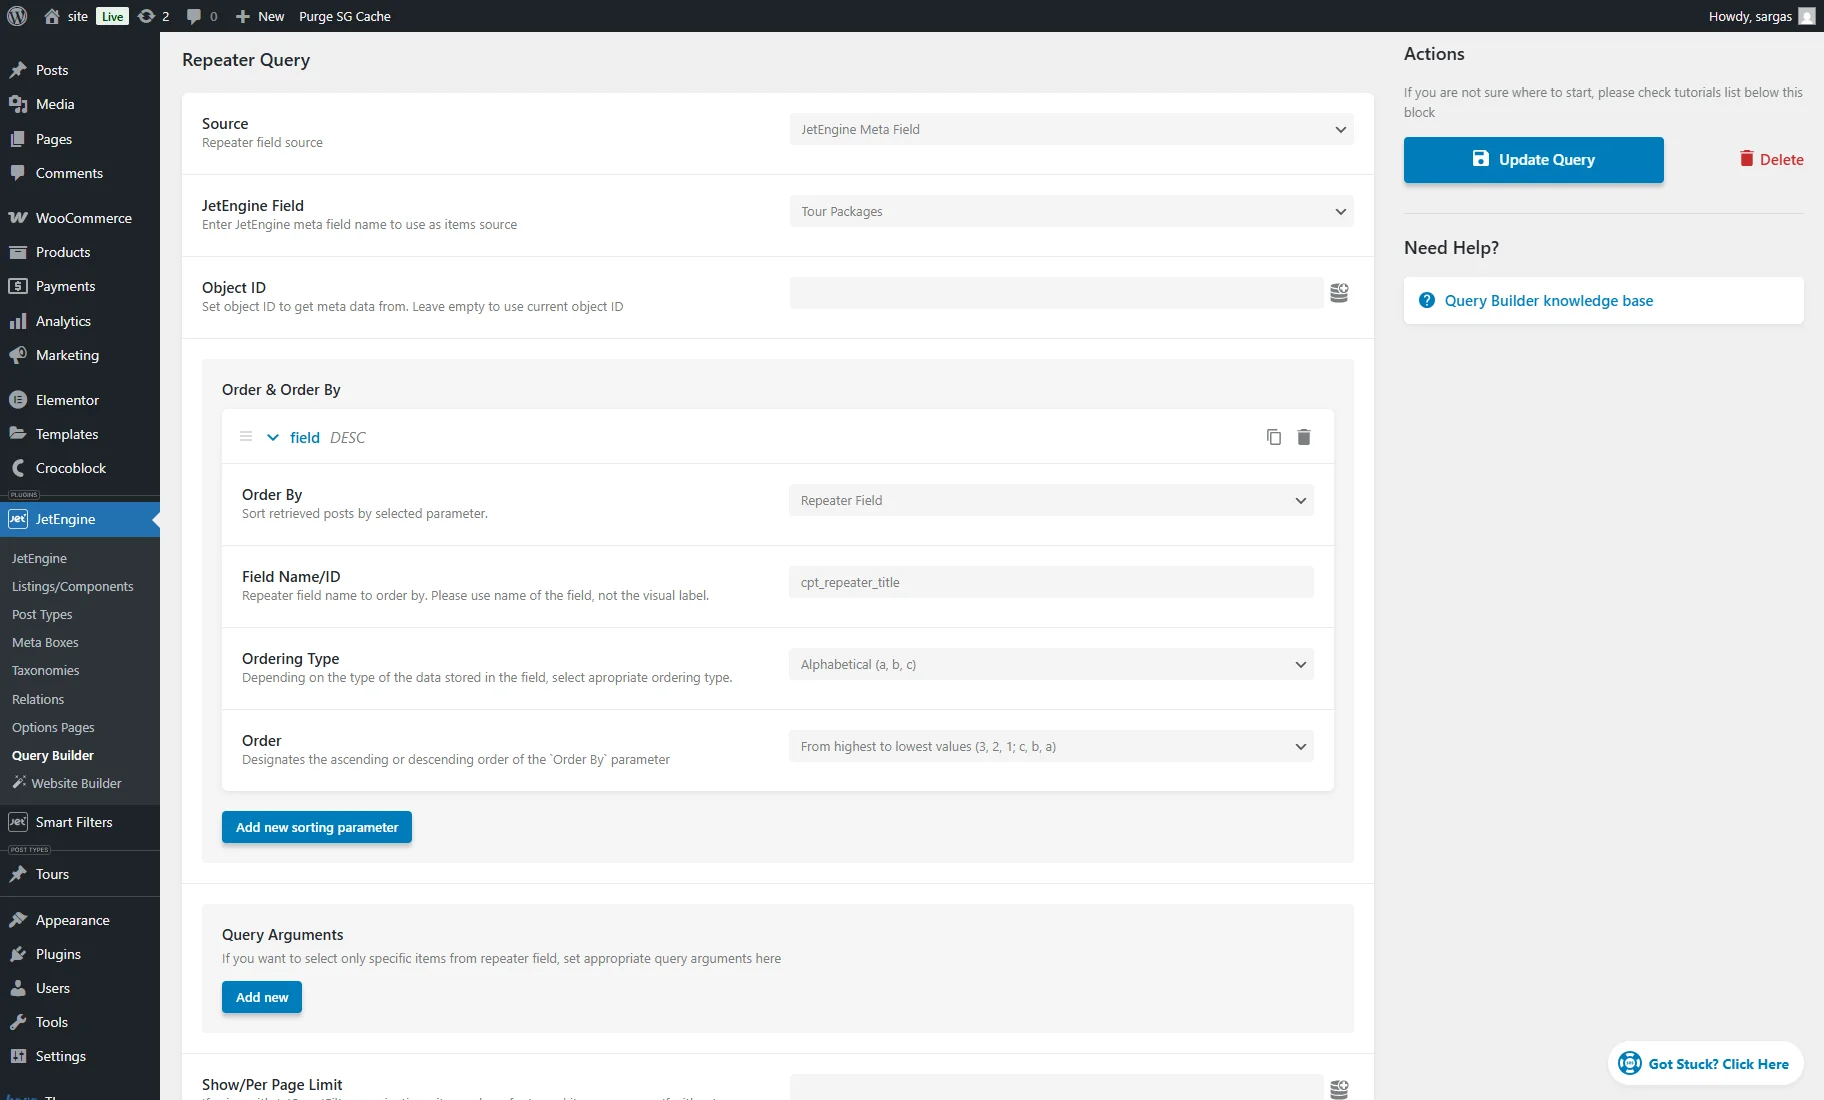
Enter the Name and choose the “Repeater Query” Query Type.
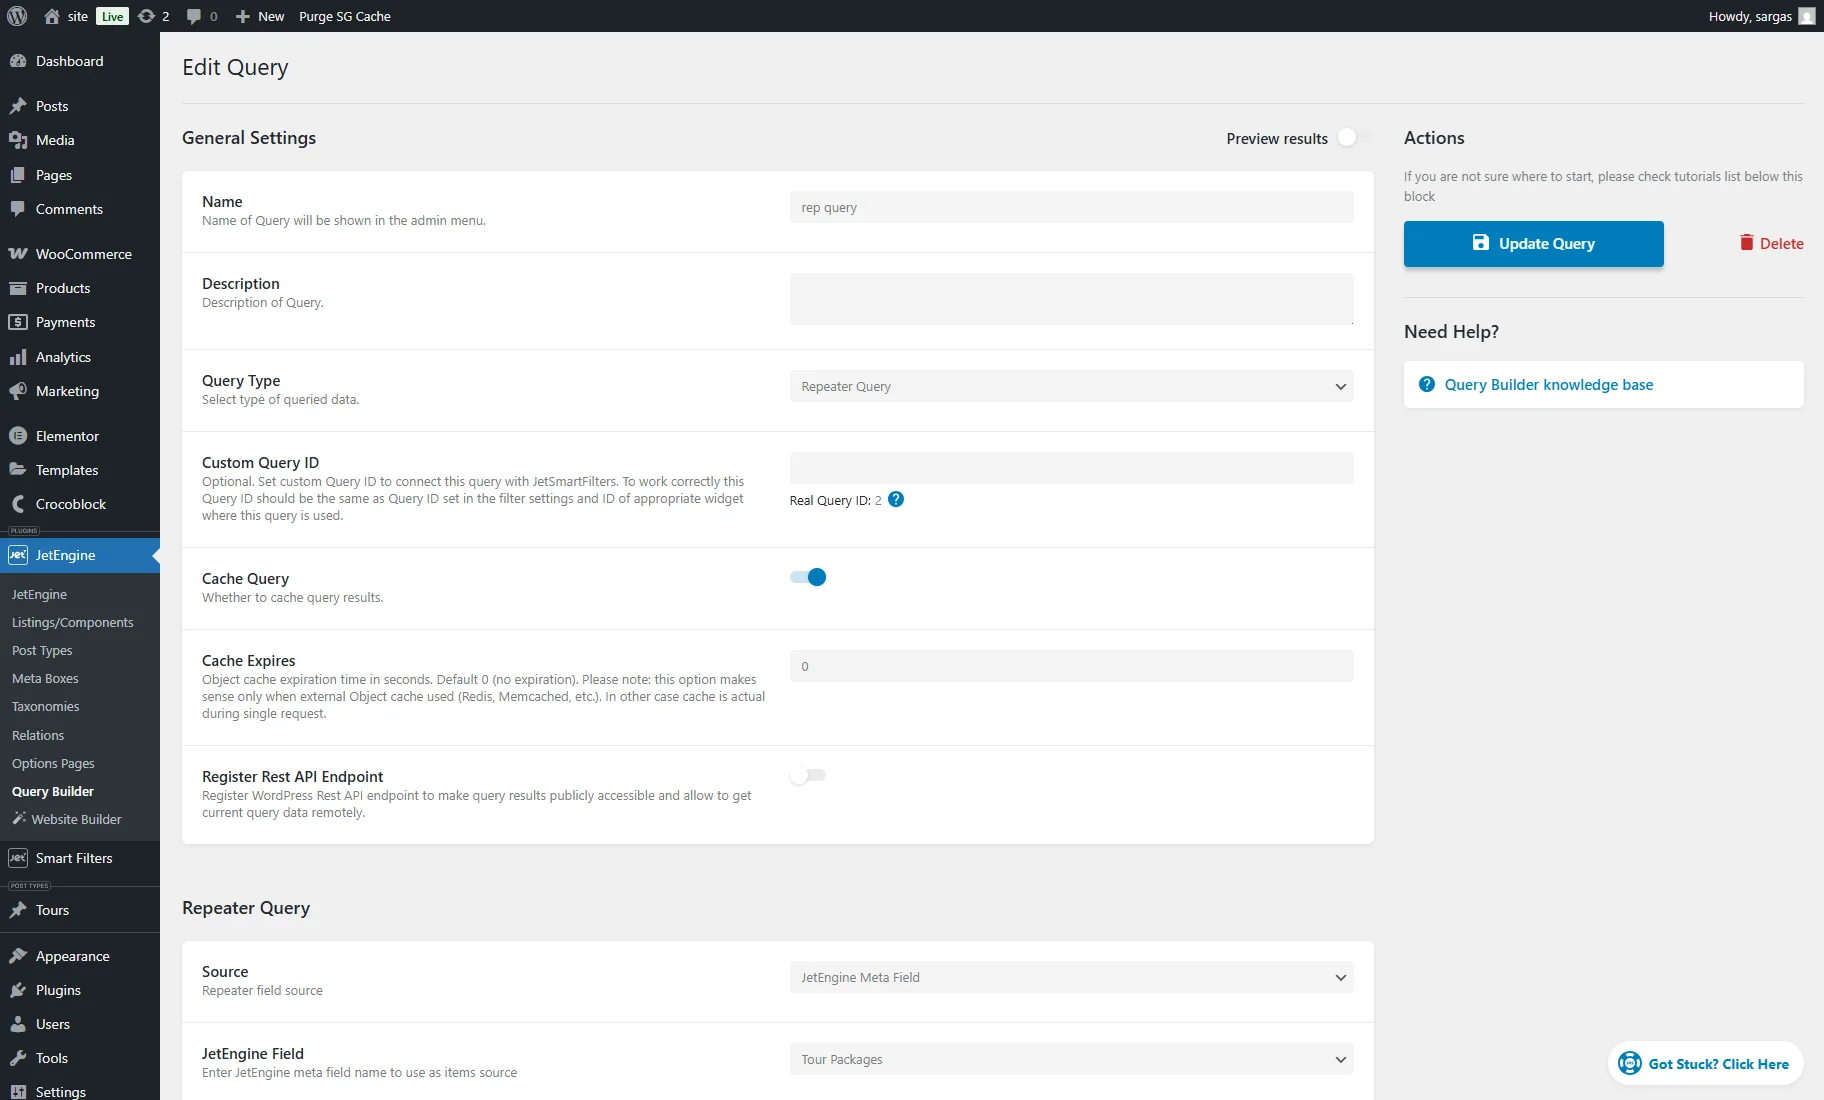
Then, scroll down and set the query source. In our case, we pick the “JetEngine Meta Field” Source and select the required JetEngine Field.
If you want to display repeater items on the Single Post page, leave the Object ID field empty.
To display repeater items on a static page, enter the post ID in the Object ID field to pull them from the specified source.
That’s all about the required query settings. Now, you can set additional settings as you wish.
For instance, you can define a custom order for items before applying the sorting filter.
To do this, in the Order & Order By section, we press the “Add new sorting parameter” button.
We set the “Repeater Field” option in the Order By field, enter the “Package Name” field name in the Field Name/ID field, and pick the “Alphabetical (a, b, c)” Ordering Type and the “From highest to lowest values (3, 2, 1; c, b, a)” Order.
In that way, the repeater items will be ordered in the reverse alphabetical order by the text in the “Package Name” field (by the titles).
Placing the Sorting Filter and Listing Grid on the Single Post Page
A custom Single Post page template can be created with the JetThemeCore plugin, as described in the How to Create a Single Template for Custom Post Type article.
Open a Single Post template in any editor. You can add two columns to the layout.
In the second column, we add the Listing Grid and set the just-created Listing in the General settings tab.
Then, unroll the Custom Query tab, activate the Use Custom Query toggle, and set the just-built CUSTOM QUERY.
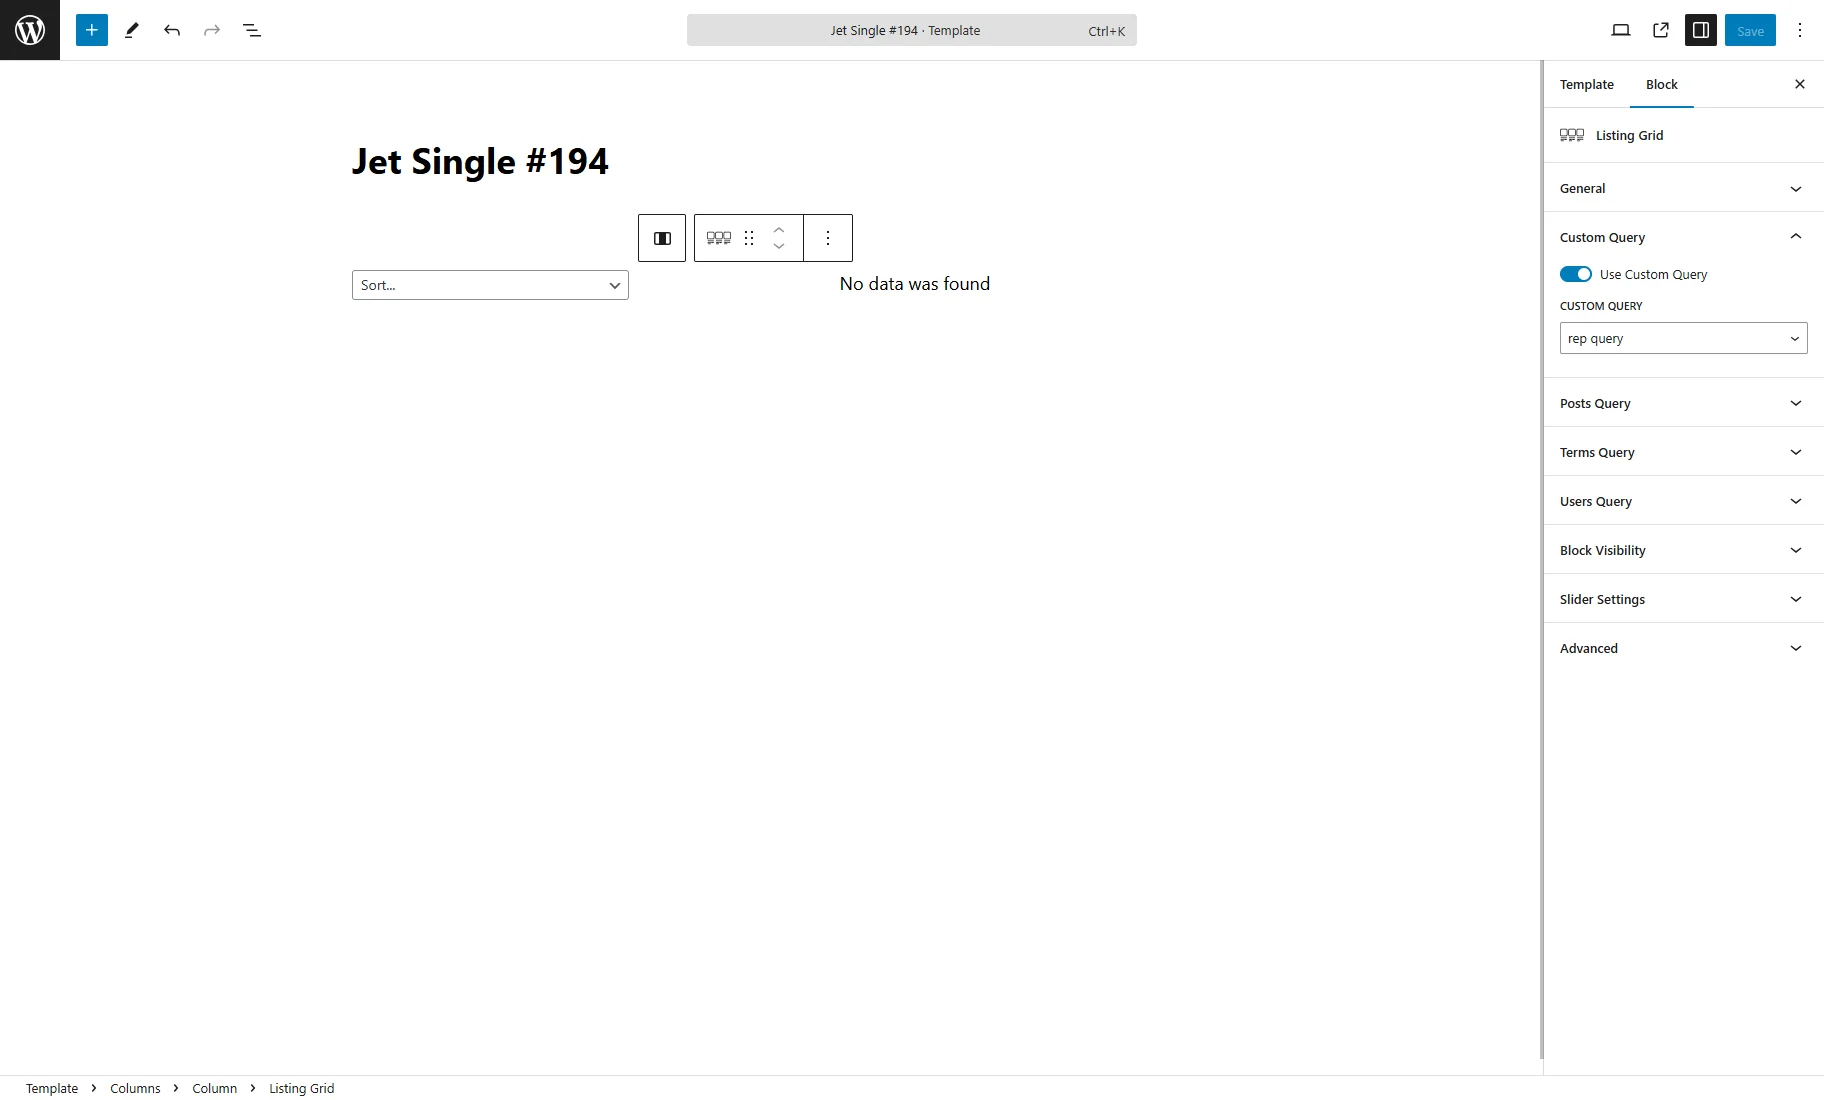
Next, place the Sorting filter on the page and pick the “Listing Grid” option in the THIS FILTER FOR field in the General setting tab.
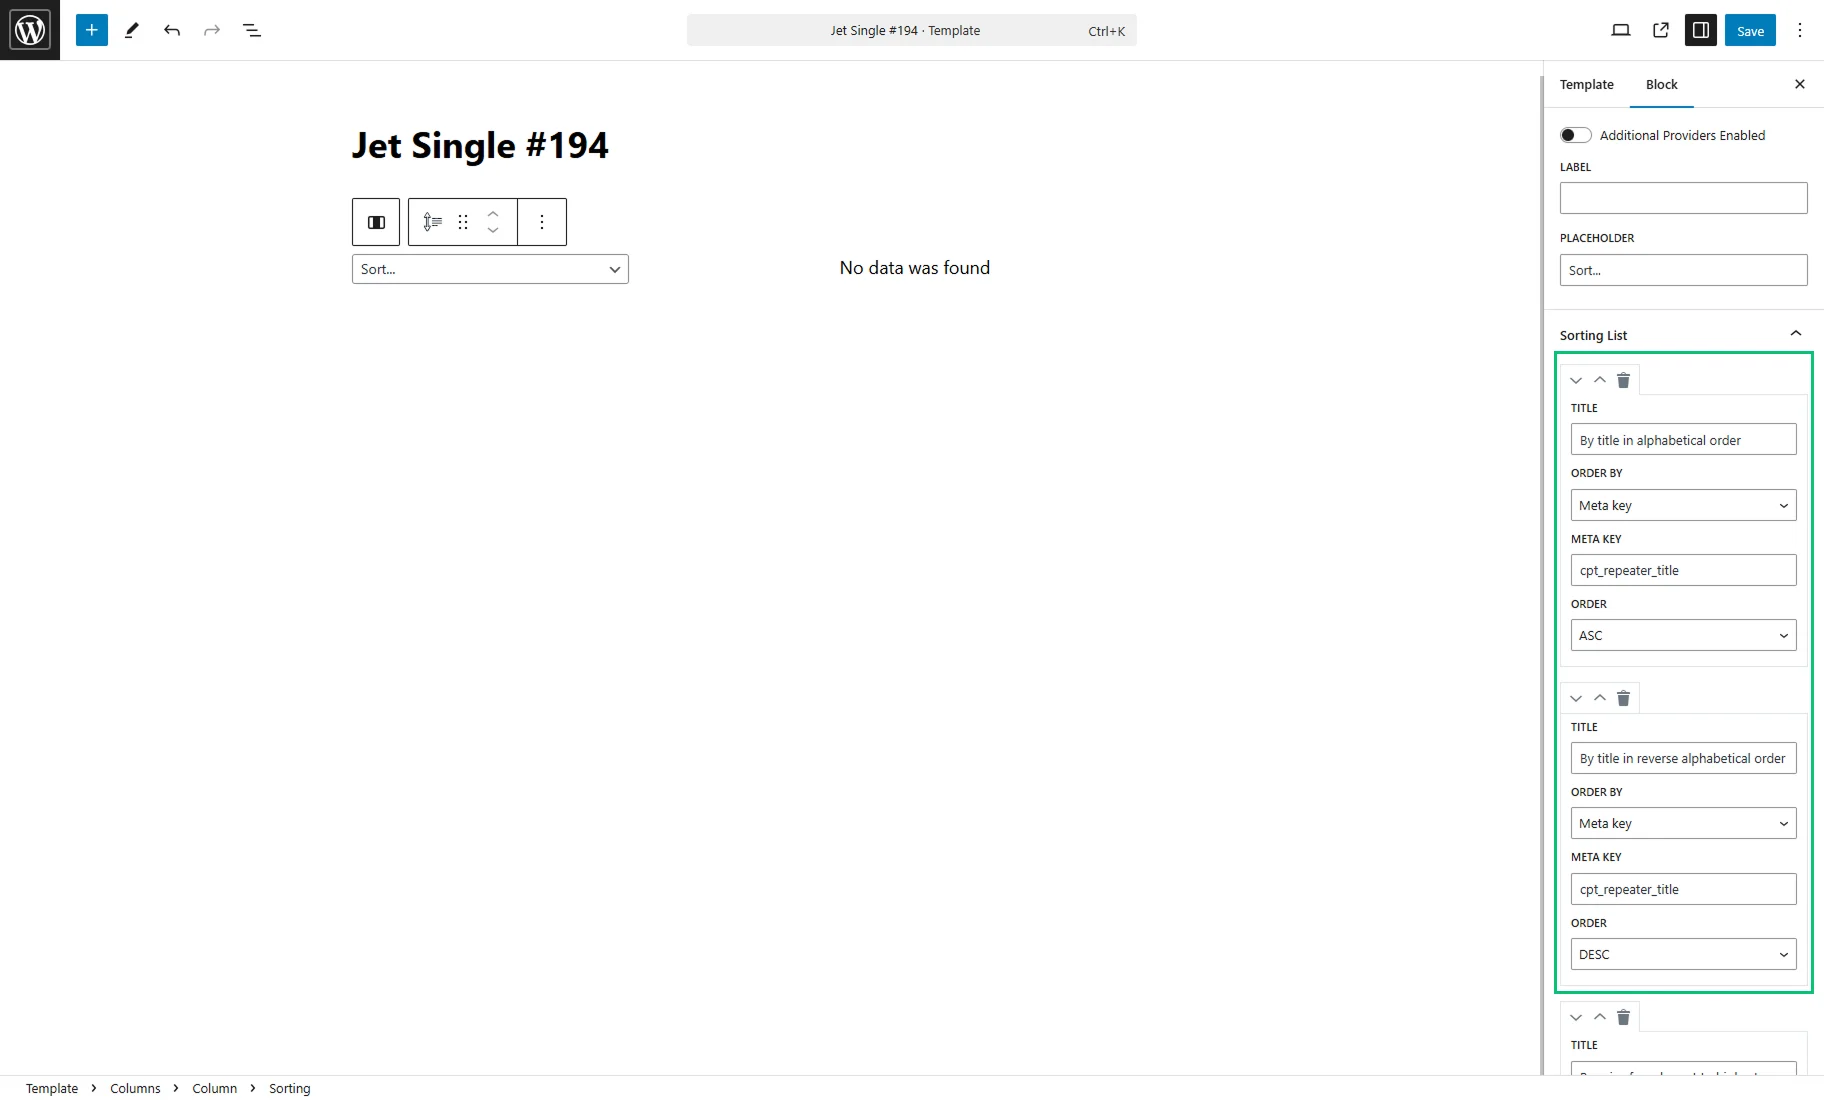
Unfold the Sorting List tab, where you can set the sorting parameters.
To set the sorting by the “Text” field values, select the “Meta key” option in the ORDER BY dropdown.
For example, we adjust two criteria to sort by title with such settings:
- TITLE — we enter “By title in alphabetical order” and “By title in reverse alphabetical order” accordingly;
- ORDER BY — we choose the “Meta key” option;
- META KEY — we enter the name of the “Package Name” meta field with the “Text” type;
- ORDER — we select the “ASC” and “DESC” accordingly.
To set the sorting by the “Number” field values, use the “Meta key numeric” option.
To sort items by the price, we configure such settings as an example:
- TITLE — we enter “By price from lowest to highest” and “By price from highest to lowest” accordingly;
- ORDER BY — we choose the “Meta key numeric” option;
- META KEY — we enter the name of the “Price” meta field with the “Number” type;
- ORDER — we select the “ASC” and “DESC” accordingly.
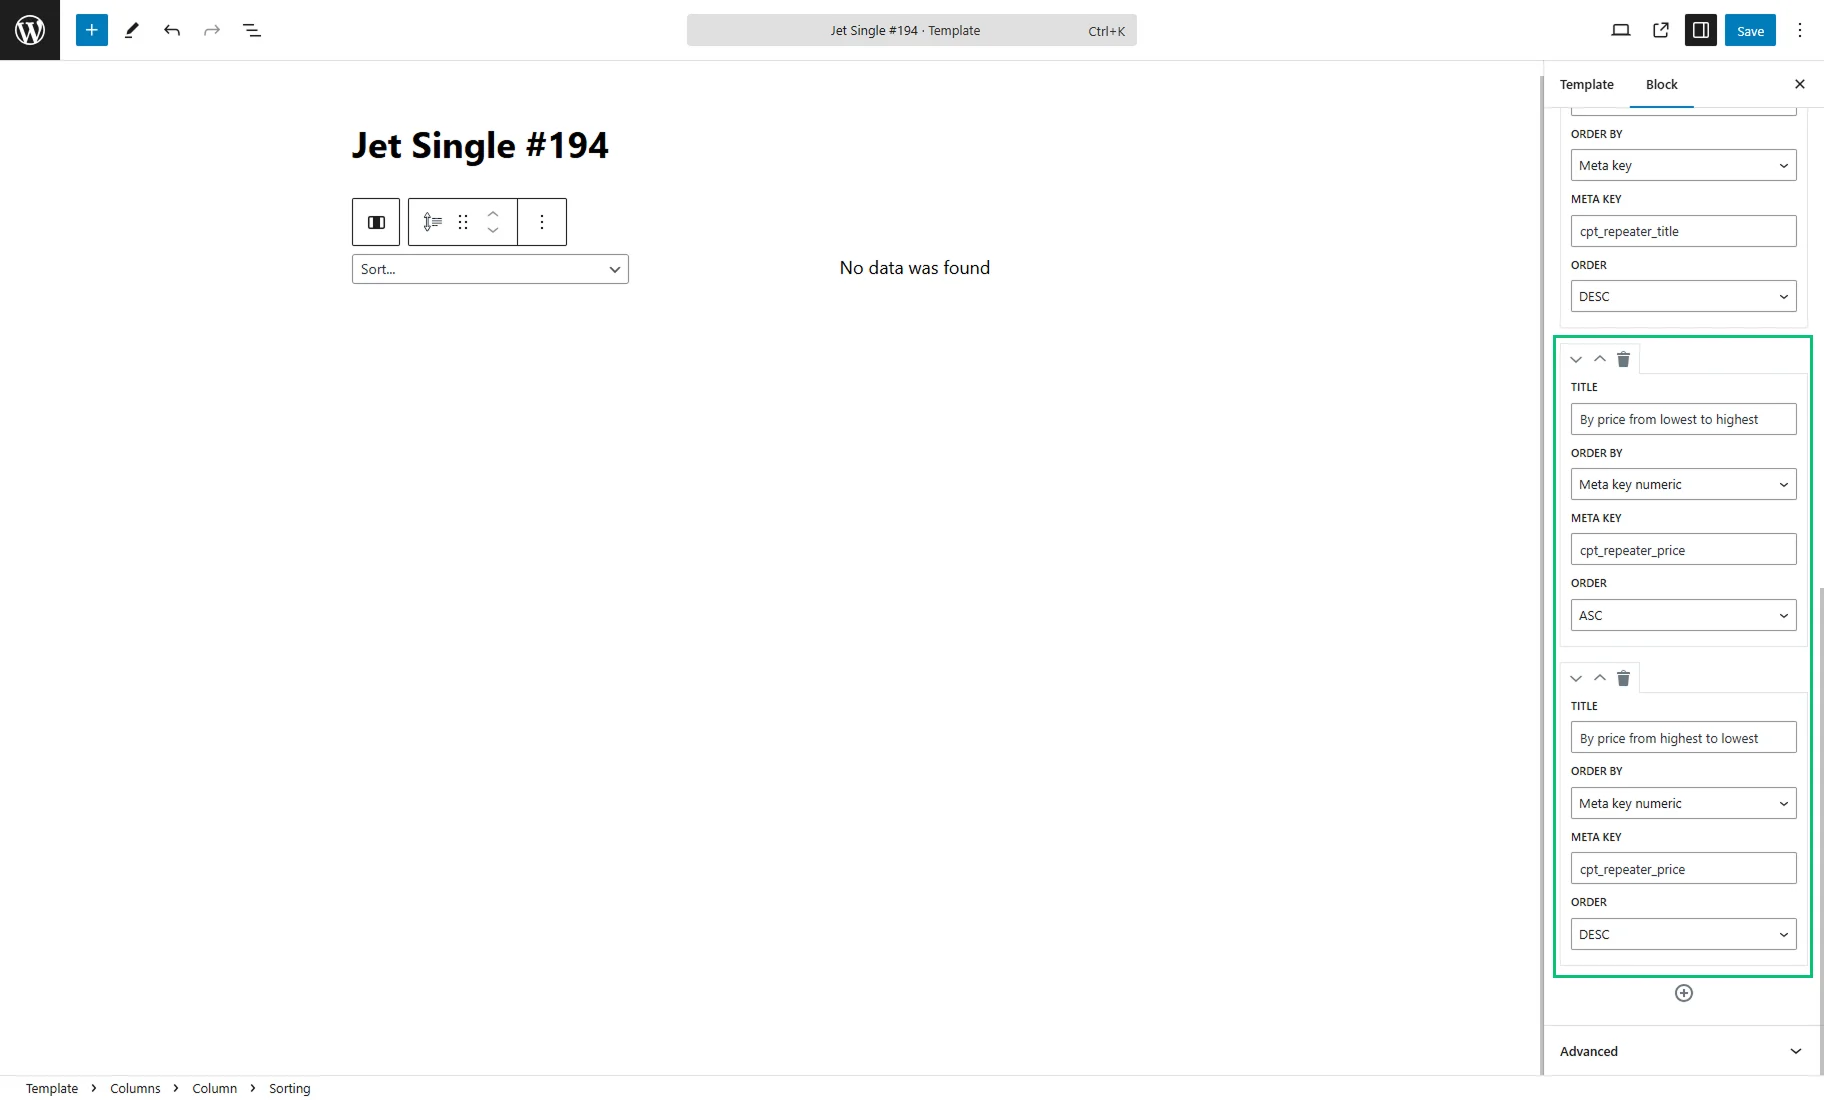
In the same way, we set two criteria to sort by duration.
Finally, we press the “Save” button.
Checking the Result
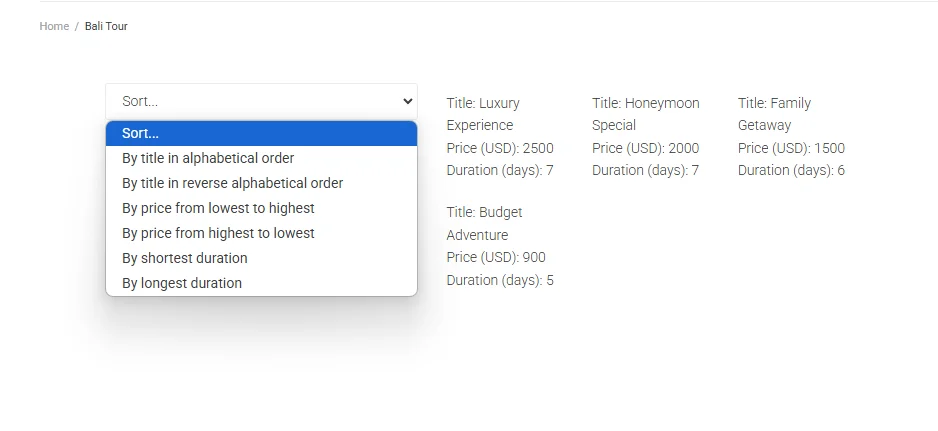
Open the post with repeater items on the front end to check how the Sorting Filter works.
According to the query settings, the items are displayed in the reverse alphabetical order by title.
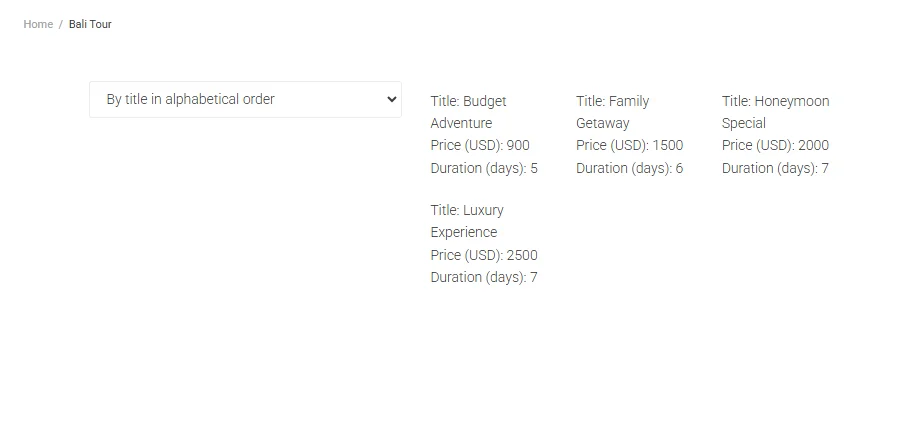
After we select the “By title in alphabetical order”, the items are arranged correspondingly.
That’s all. Now you know how to use the JetSmartFilters Sorting Filter with the “Repeater” meta field created with JetEngine or ACF on your WordPress website.