How to Build Advanced WooCommerce Filters
This guide focuses on setting up the advanced filters for WooCommerce products with WordPress JetSmartFilter and JetEngine plugins. It explains how to filter the products by the category, “on sale” parameter, and users’ behavior.
Before you start, check the tutorial requirements:
- Elementor (Free version), Block editor (Gutenberg), or Bricks
- WooCommerce plugin installed and activated
with the basic store set up
- JetEngine plugin installed and activated
with the Query Builder module enabled and Data Store activated and set up
- JetSmartFilters plugin installed and activated
Combining the Query Builder, Data Store, Listing Template, and filters features from JetEngine and JetSmartFilters allows you to create advanced WooCommerce product queries (including on‑sale products and personalized recommendations) and use them as data sources for filters and listings.
Such functionality is typically used when you need dynamic ‘On Sale’ sections, product recommendations such as ‘You might also like’, or complex filter logic that goes beyond the default WooCommerce options. This setup works with Elementor, Gutenberg (Block Editor), and Bricks using JetEngine listings and JetSmartFilters providers.
When Advanced WooCommerce Filters for On‑Sale Product Queries Might Be Needed
Advanced filters might not be necessary for each store. Talking about realistic use cases when this approach might be useful, consider the following:
- When you need a WooCommerce On Sale section that correctly includes variable products and respects the sale end date.
- When you want to build a ‘You might also like’ block based on product attributes or user behavior, instead of static upsells.
- When your default sale filters or queries ignore discounts from third‑party plugins, and you need full control over the query logic.
- When you want to combine JetSmartFilters with custom queries.
You may have a different scenario where you can find the following solutions useful.
Creating an On‑Sale WooCommerce Query
When you need to display the list of the WooCommerce products that are on sale, follow the next guide. It allows you to query not only simple products, but also to include variable products in the list. To learn more about WooCommerce product types, refer to the WooCommerce official documentation.
Proceed to WordPress Dashboard > JetEngine > Query Builder and click the “Add New” button.
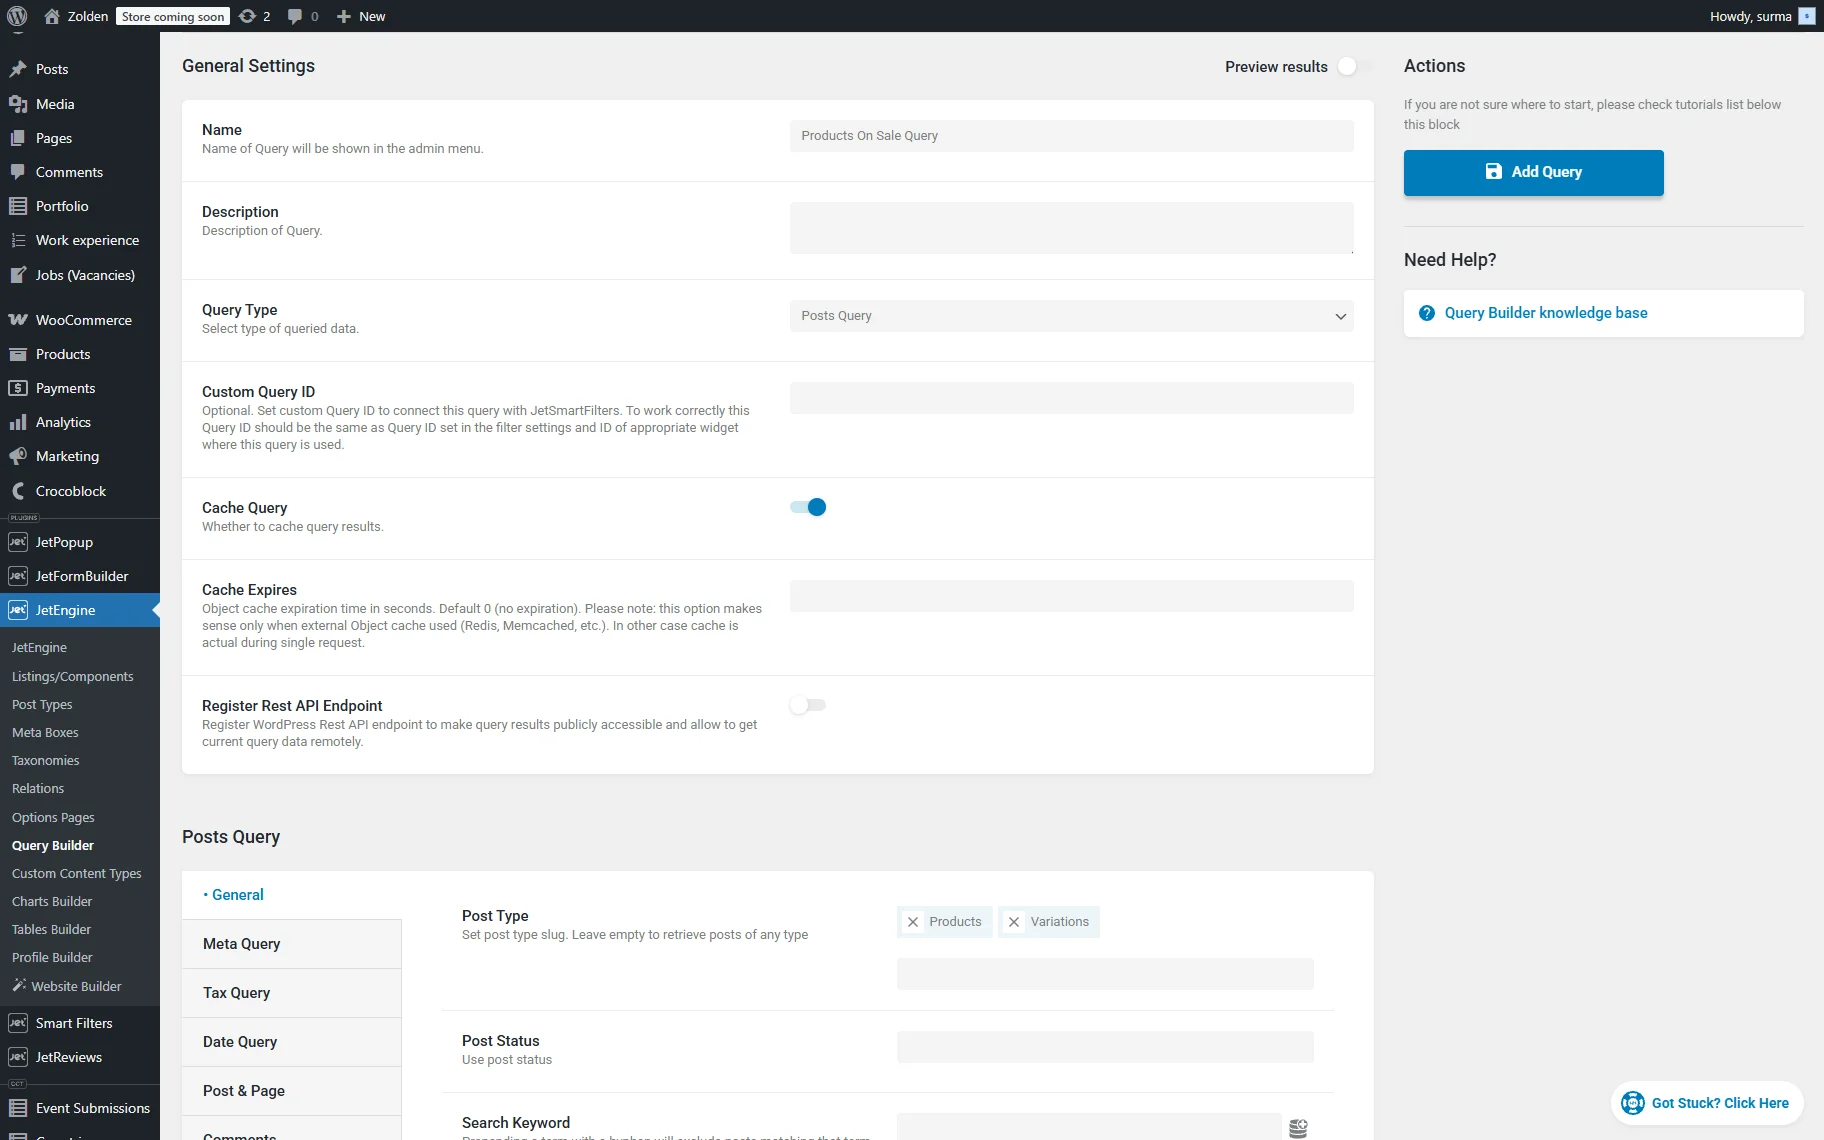
Enter the Name for the query and select the “Posts Query” Query Type.
In the General settings section, select the “Products” and “Variations” options for the Post Type field.
Proceed to the Post & Page tab and click the “Dynamic Tag” icon next to the Post In field. Select the “WC Products On Sale” macro.
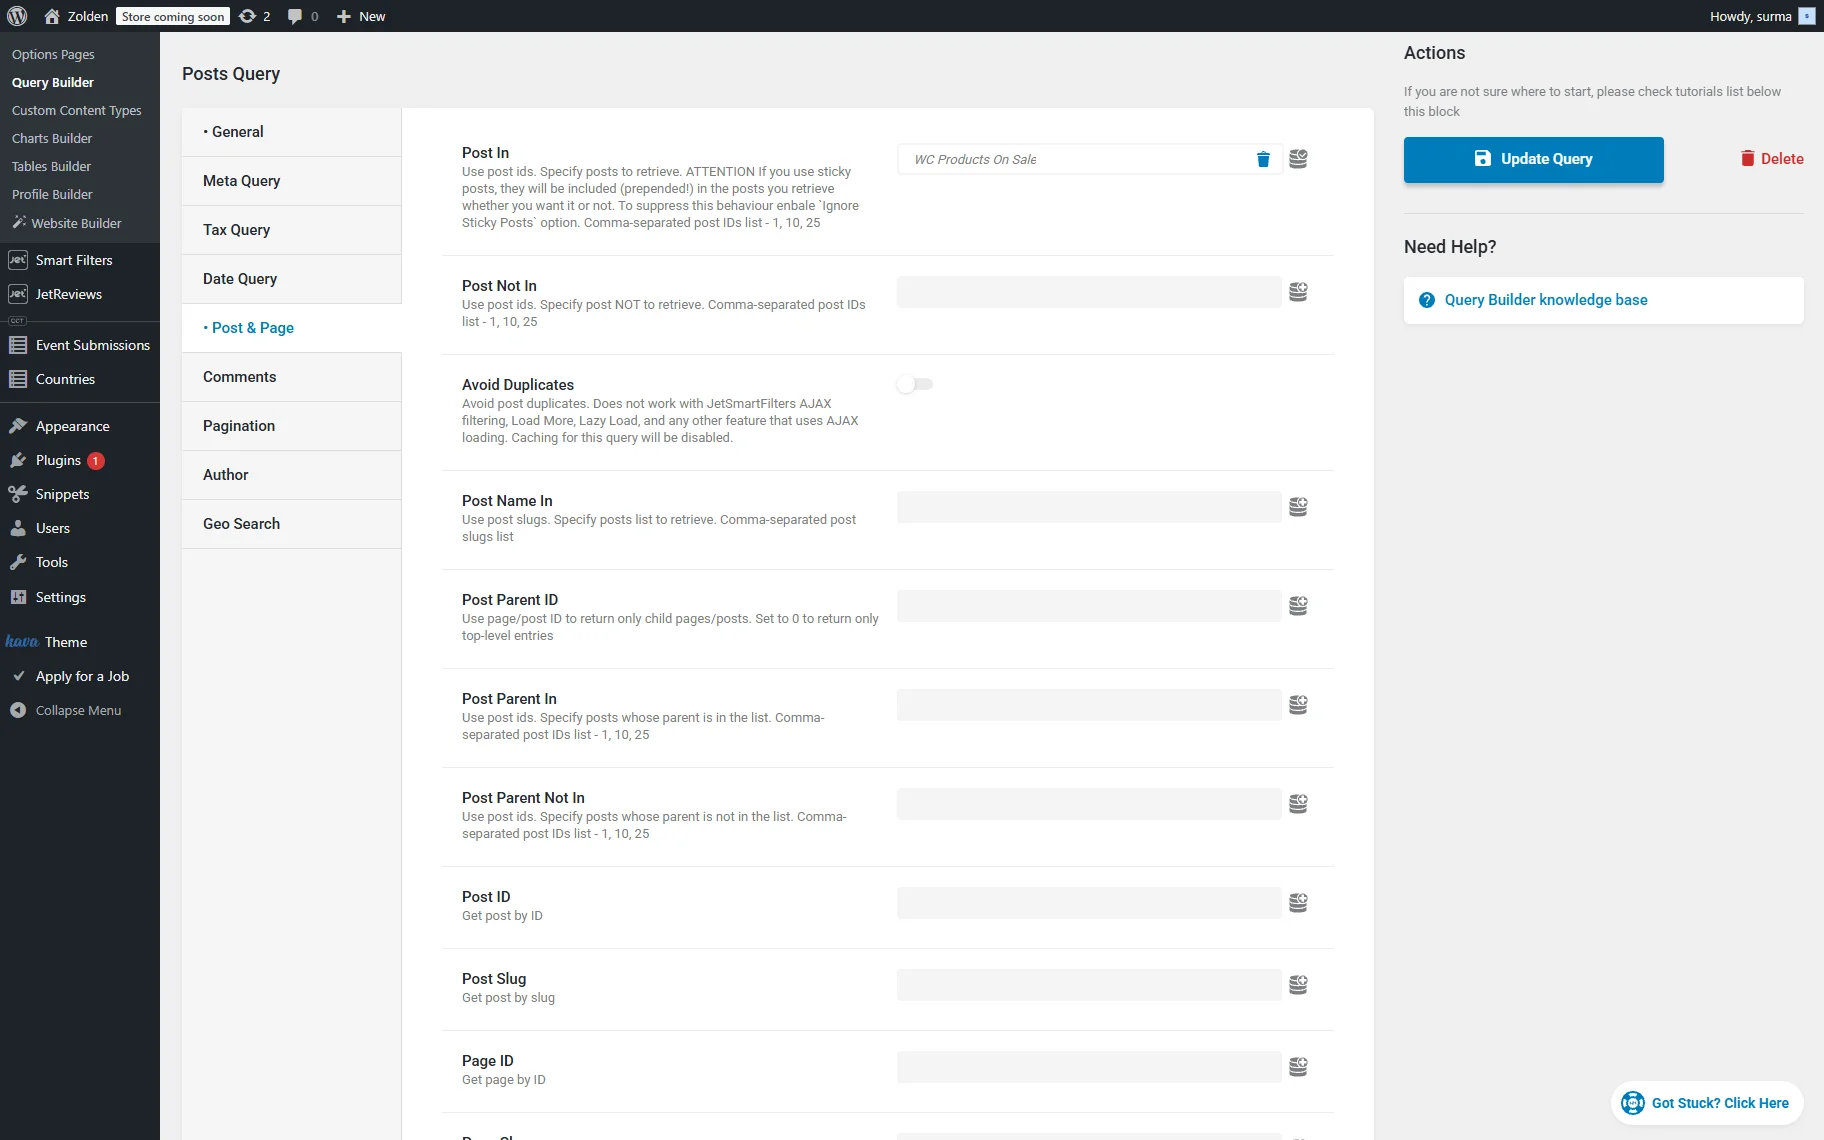
Click the “Add/Update Query” button once you are ready.
Creating ‘You Might Also Like’ Recommendations
Although JetWooBuilder provides a ready solution for displaying the WooCommerce products of the same category with the Single Related Products widget, you can set separate rules for displaying the recommendations based on.
Currently, you can show the products either from the same category, even if you do not use the JetWooBuilder, or based on the user’s behavior, displaying recently viewed posts. We will have a look at the query settings for both cases. Feel free to choose the one that suits you best.
Show recommendations from the same category
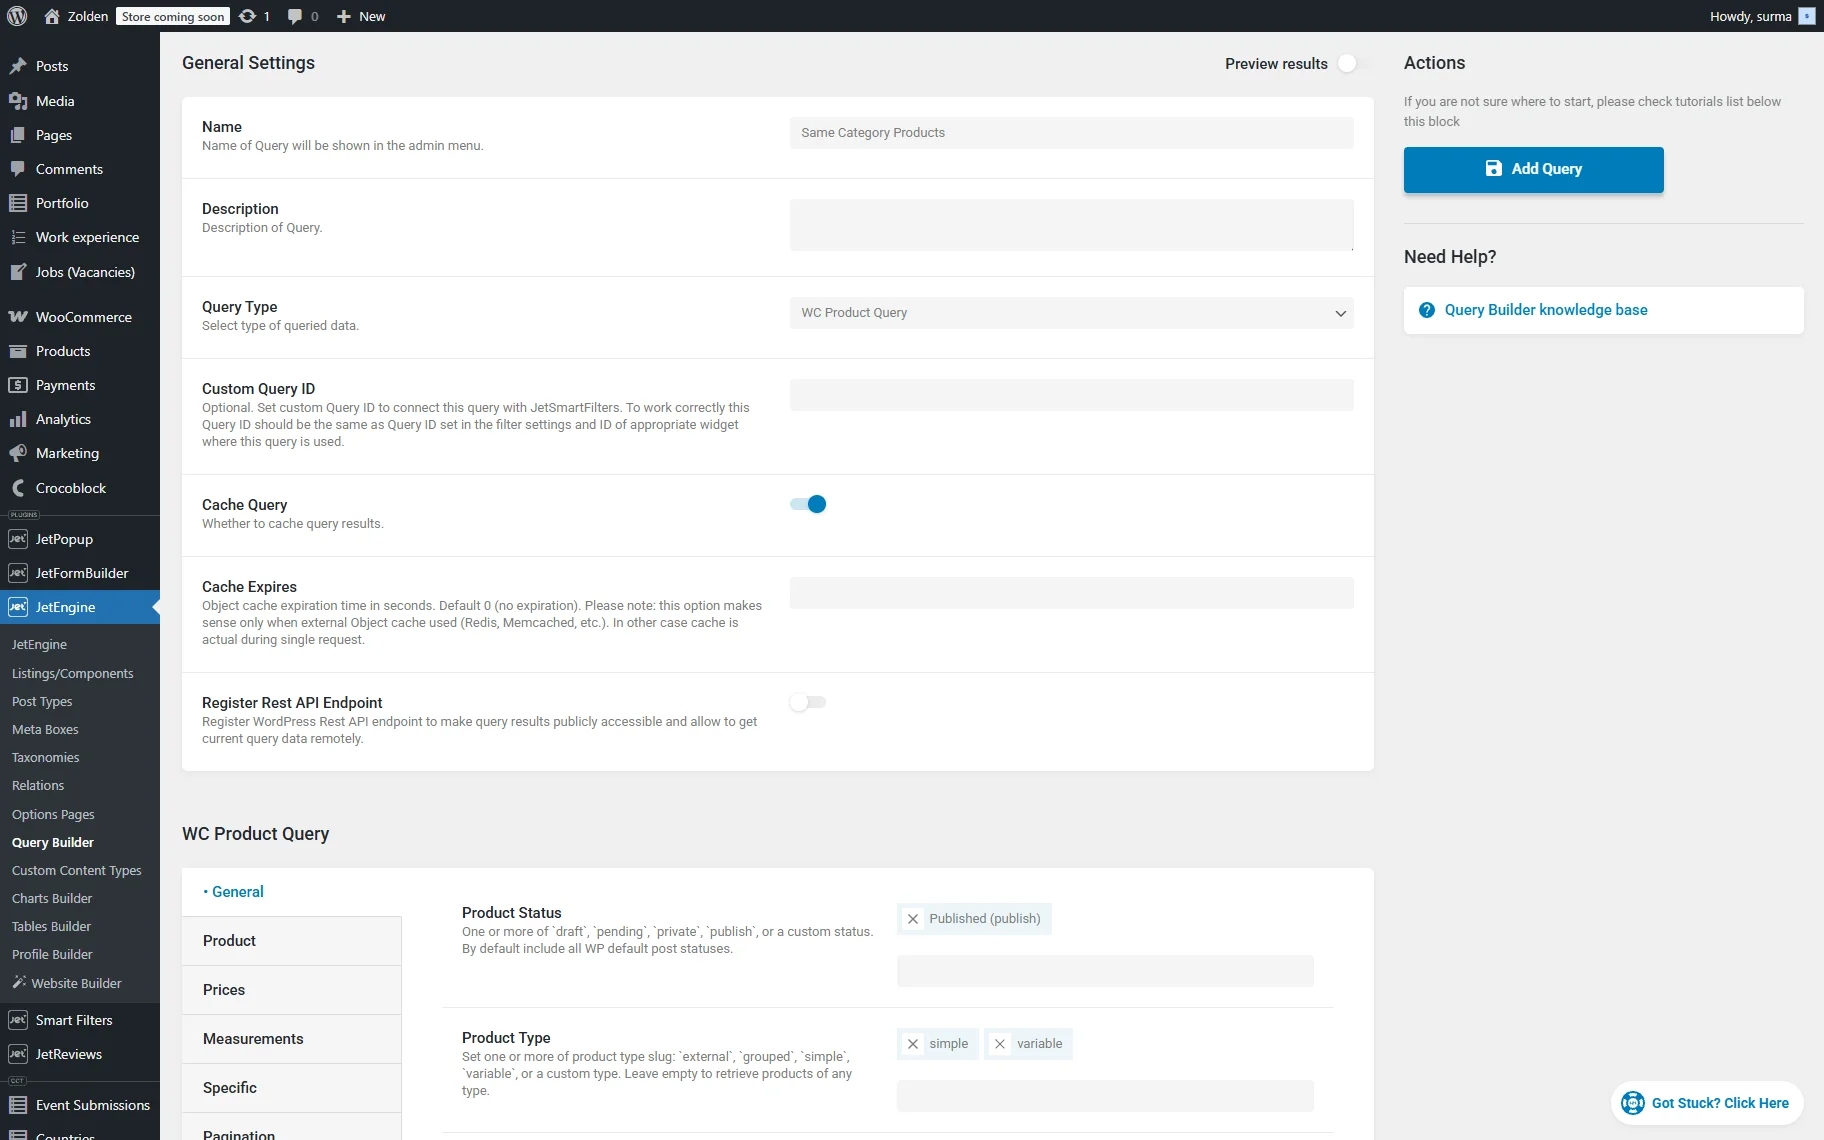
Create a “WC Product Query” and select the desired Product Type and Status.
Proceed to the Tax Query tab and click the “Add new” button. In the newly created window:
- select the desired product taxonomy in the Taxonomy field;
- choose “Term ID” option in the Field dropdown;
- click the “Dynamic Tag” icon next to the Terms field, select the “Current terms” option, and then select the same category you have selected in the Taxonomy field;
- select the “IN” option for the Compare operator field.
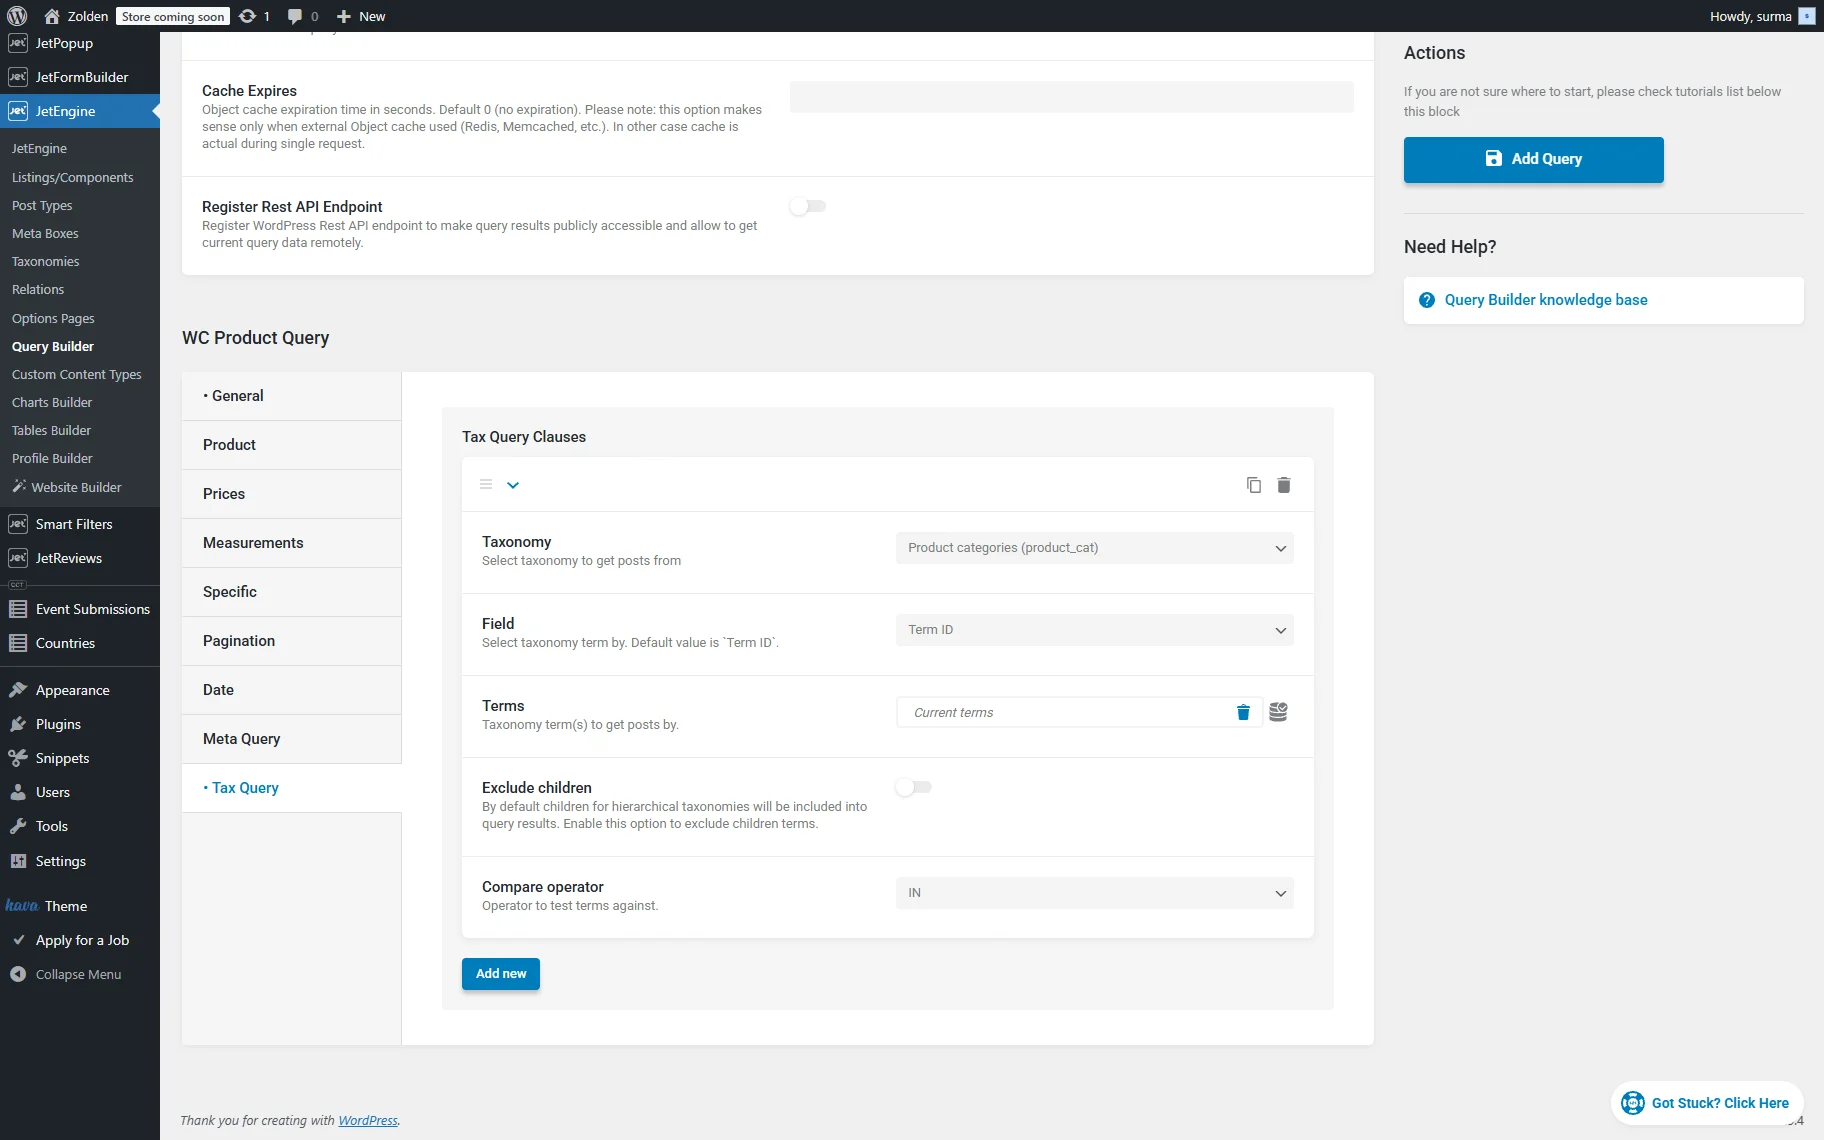
Click the “Add/Update Query” button once you are ready.
Show recommendations based on the user’s behavior
You can display the recently viewed products, for example. For a more detailed guide, refer to our How to Create “Recently Viewed” Section Using the Data Stores Module tutorial.
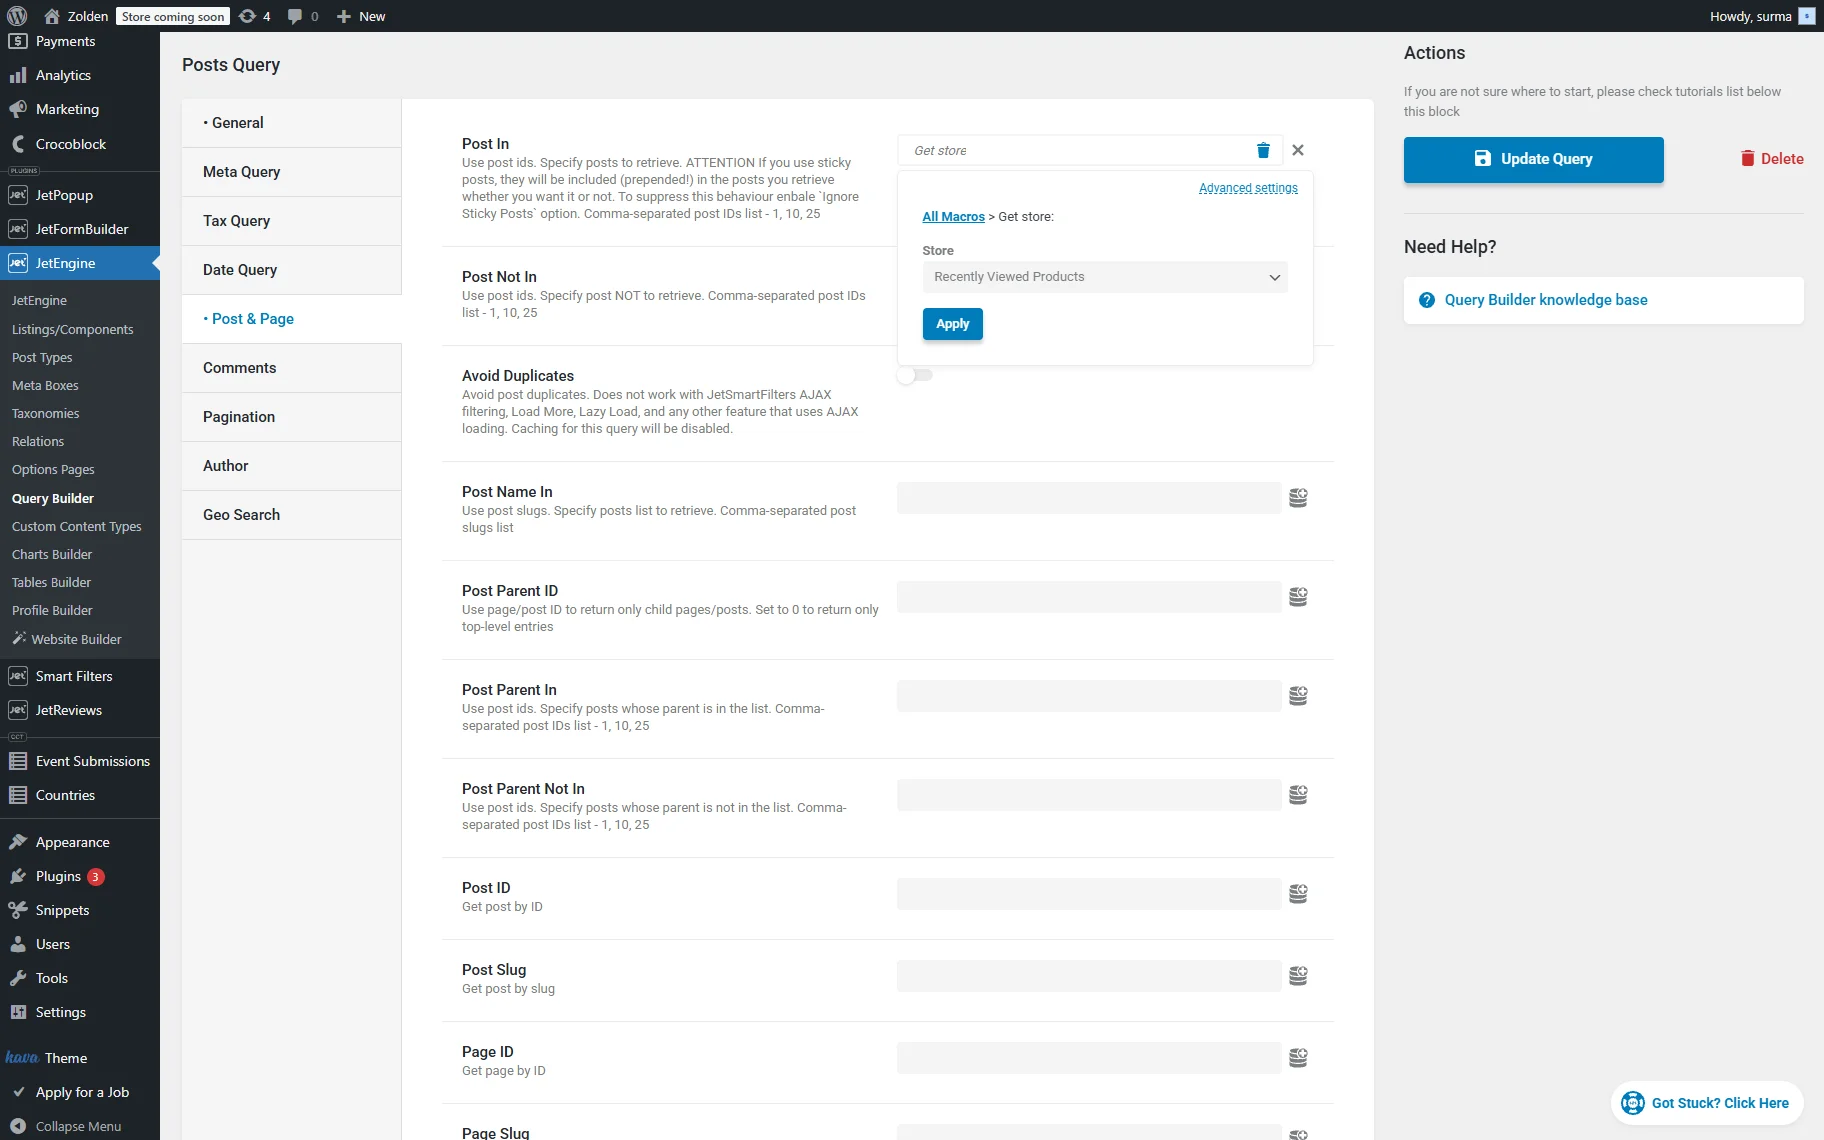
Here, we will shortly remind you that you will need to create a Posts Query for the WooCommerce products added to the Data Store. In the Posts In field, select the “Get store” option and choose the needed store.
Click the “Add/Update Query” button once you are ready.
Exclude current product and limit results
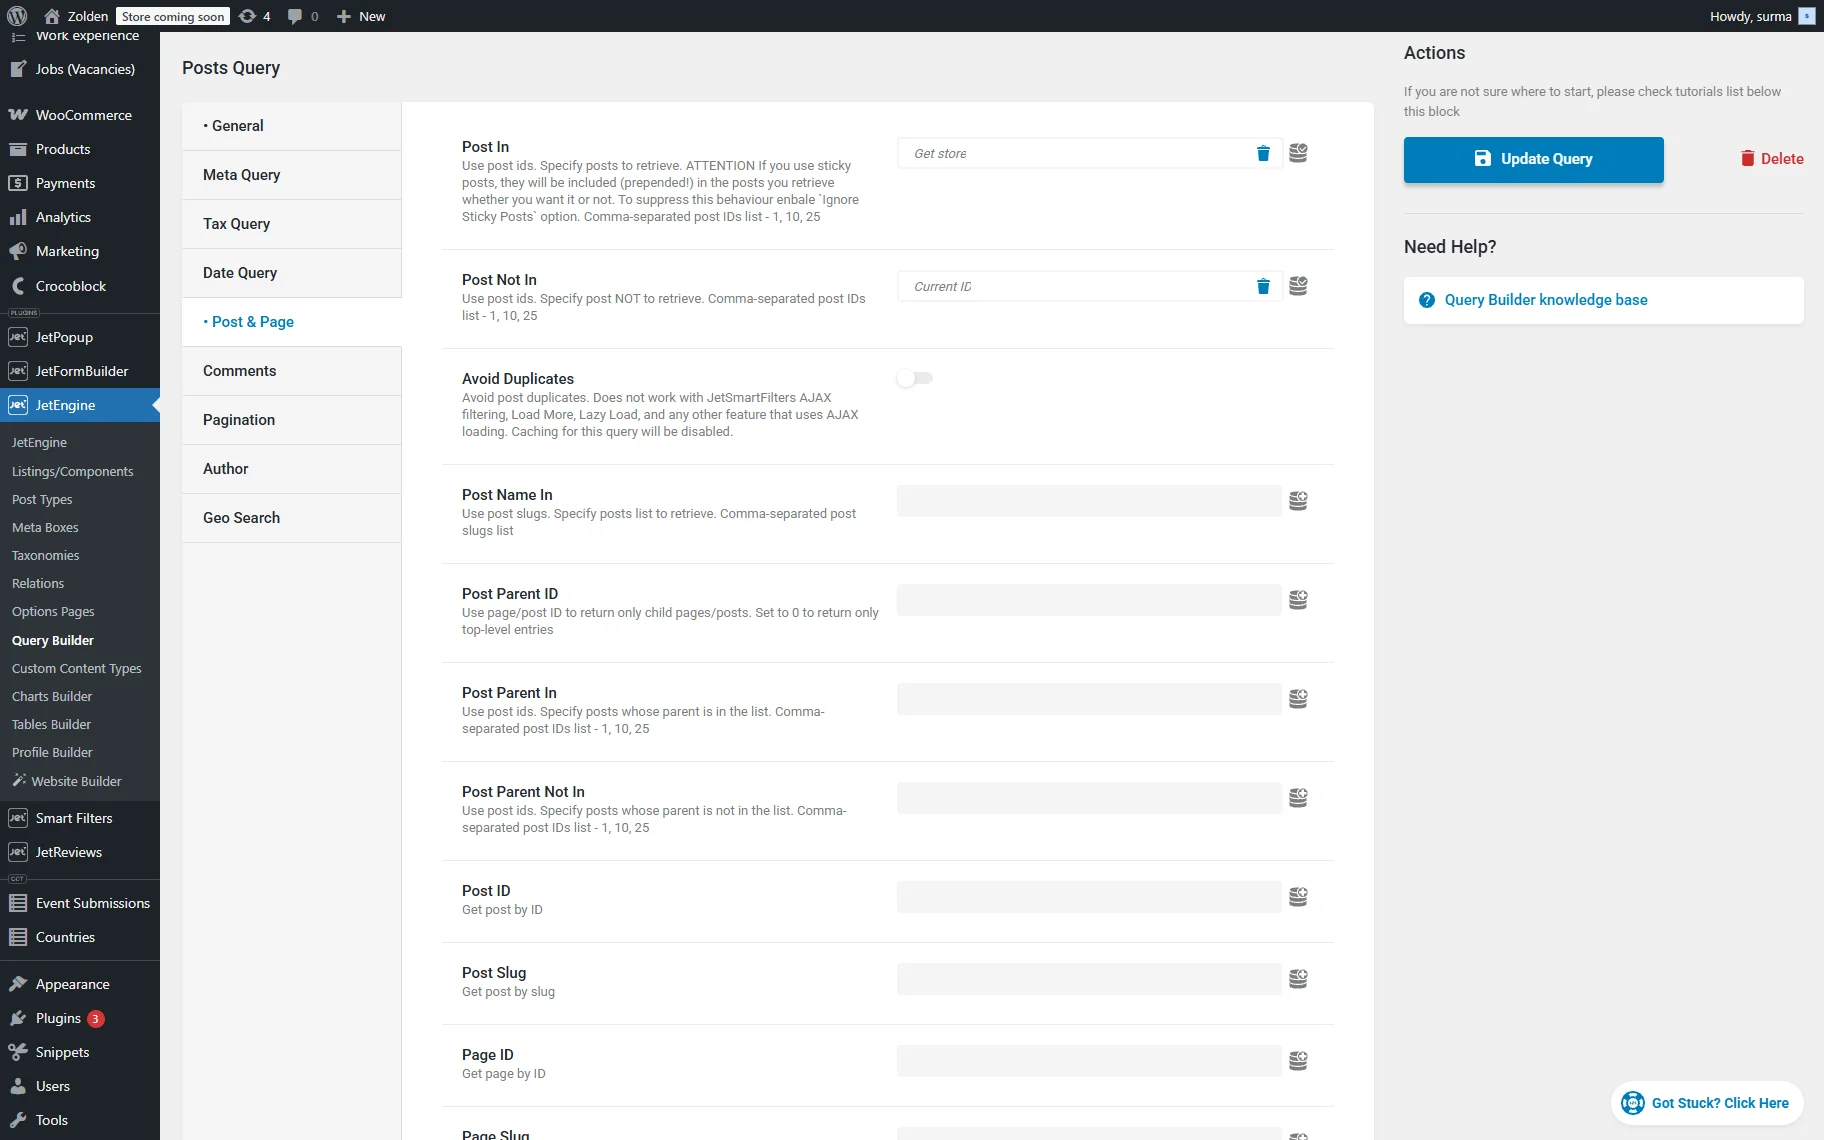
Usually, you also need to exclude the current post from the recommendations. This can be set in the query as well. For that, proceed to the Post & Page section and in the Post Not In field, click the “Dynamic Tag” icon. Select the “Current ID” option.
If you need to set the number of posts/products shown in the recommendations, proceed to the Pagination tab and set the desired number of posts in the Posts Per Page field. Use the “-1” value if you need to show all the posts.
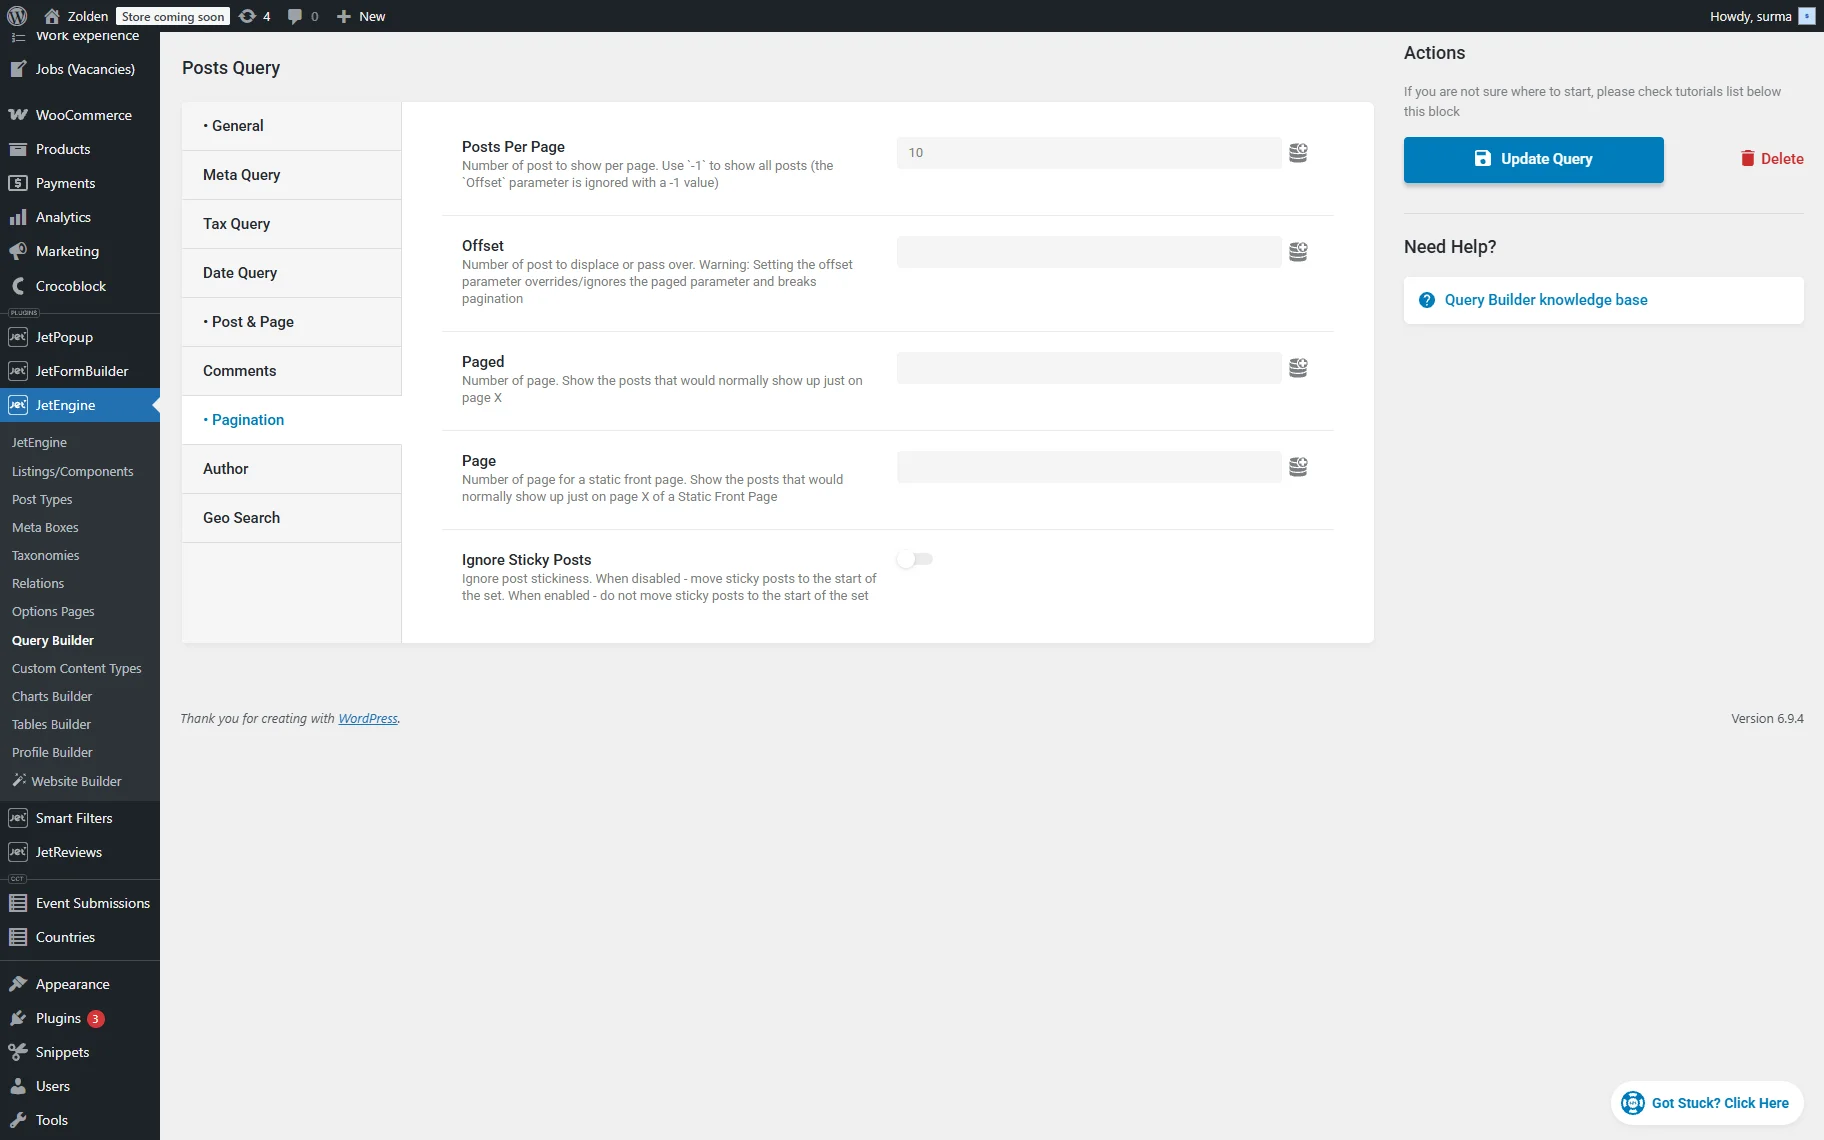
Remember to click the “Add/Update Query” button once you are ready.
Connecting Custom Queries to JetSmartFilters
You can use these queries simply by applying them to the lists. Further, we will learn how to filter the lists according to the queries we set earlier.
Set up the filter
Proceed to WordPress Dashboard > Smart Filters > Add New. Enter the Filter Name and select either “Radio” or “Select” Filter Type (we use “Select” in this case).
Select the “JetEngine Query Builder Switcher” Data Source. Then, select the needed queries. It can be the query that returns all the products and another one for the recommended ones. You can also add more options so users can choose what exactly they want to see.
In the Query Variable field, select the “Switch JetEngine query” option.
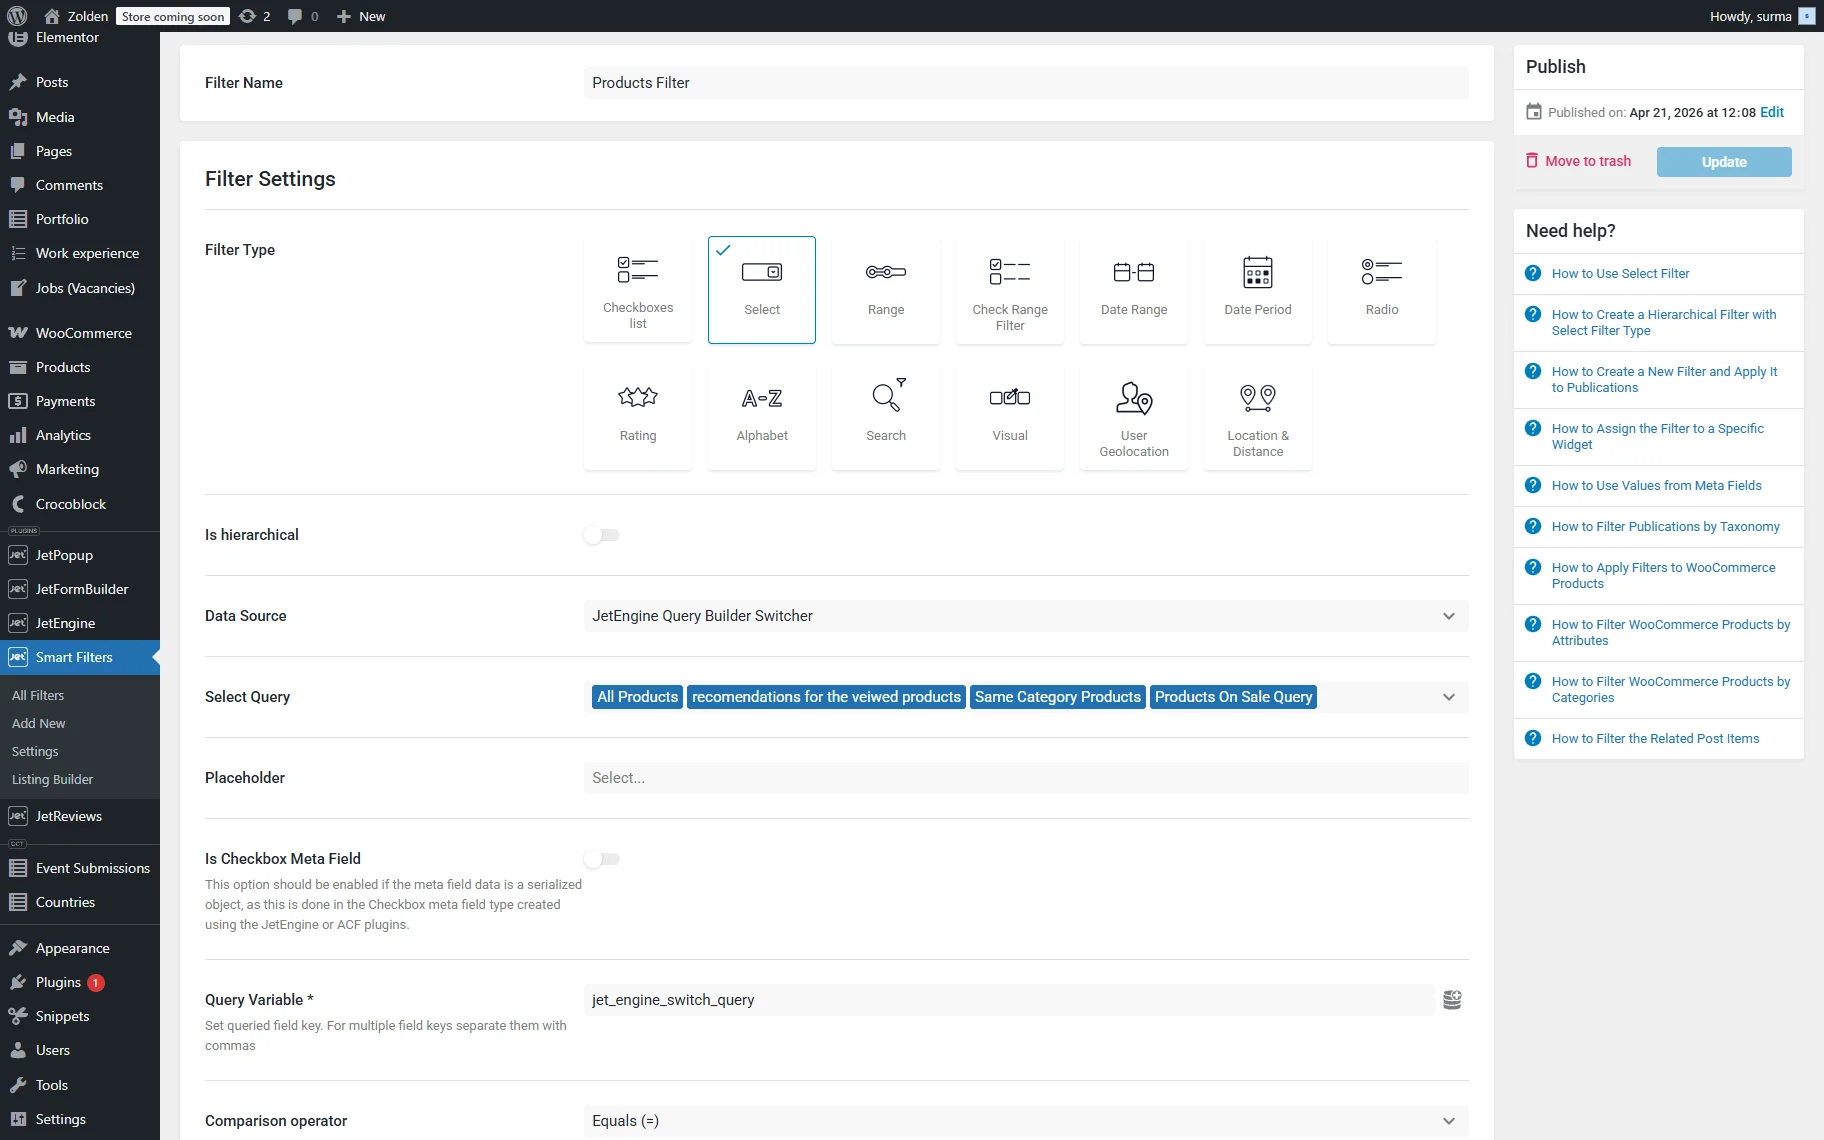
Click the “Update” button once you are ready.
Assign the custom query to the Listing Grid
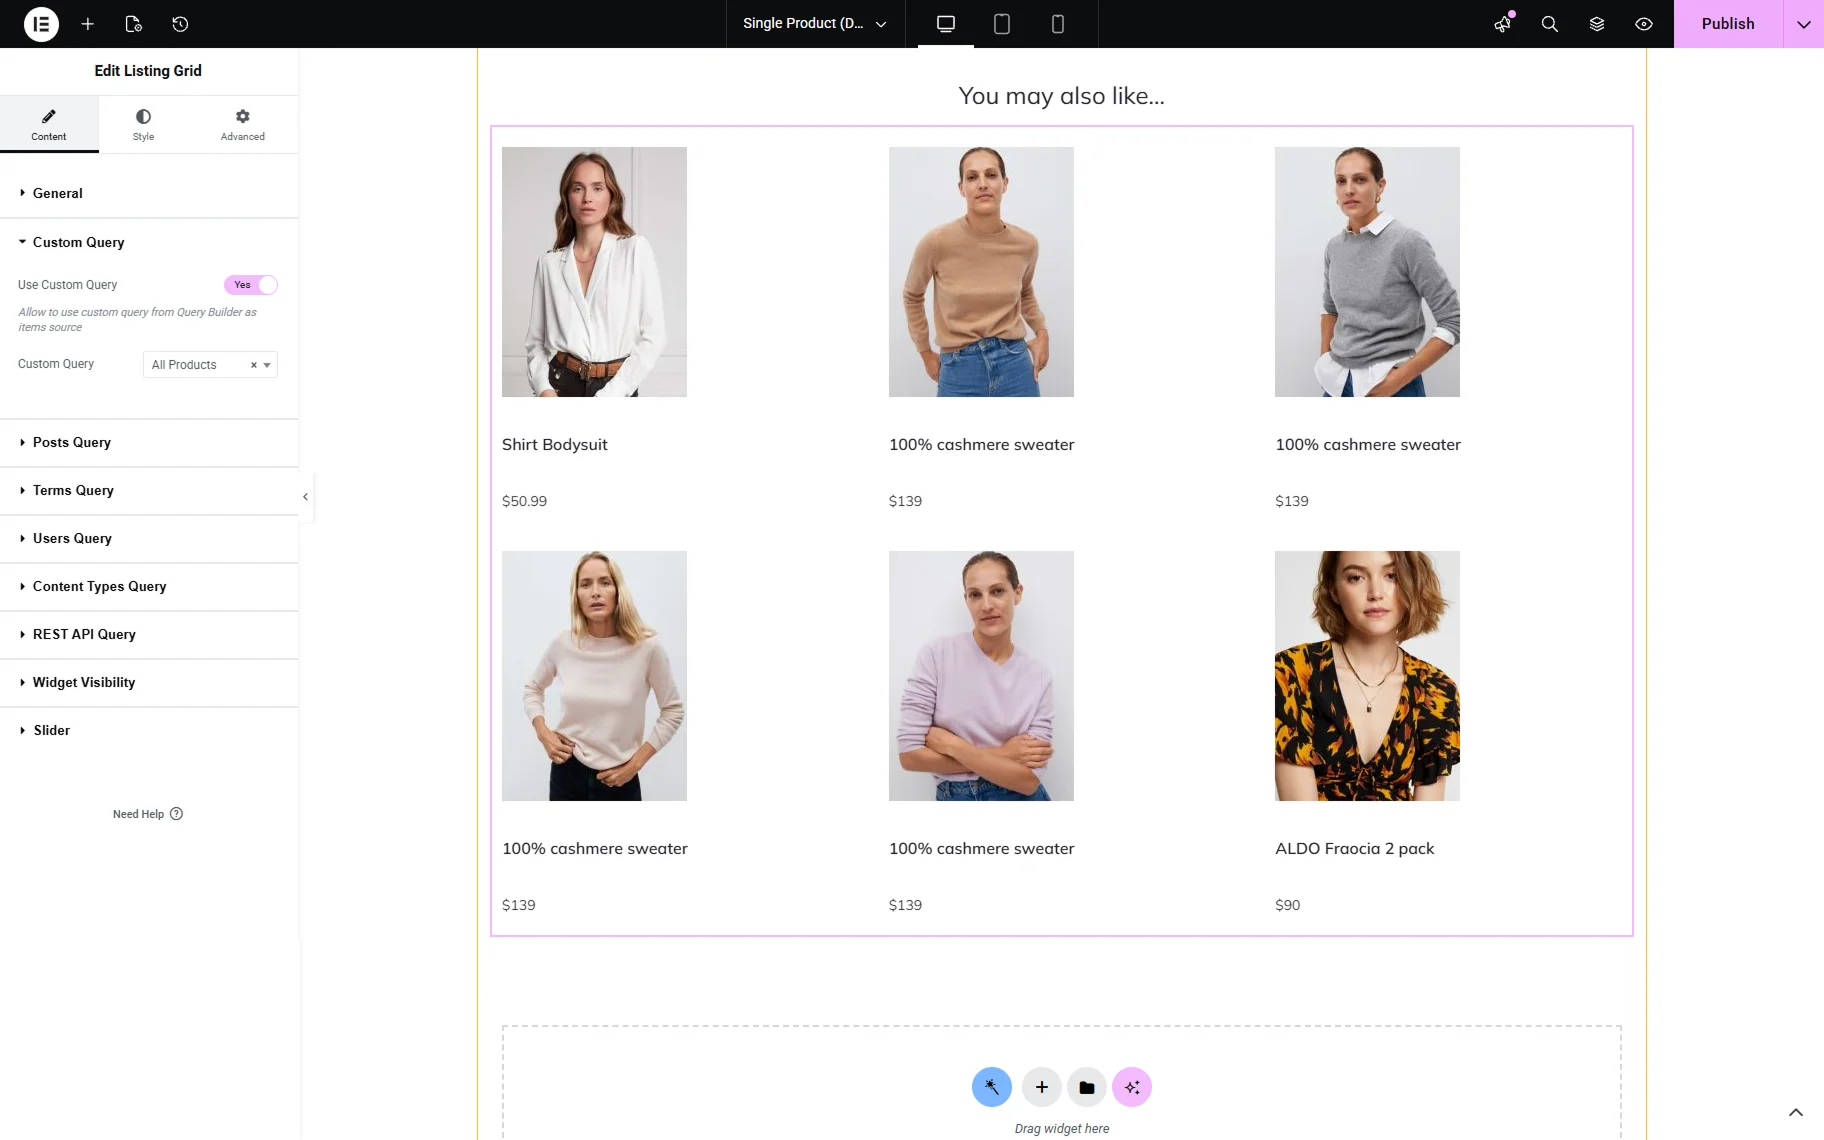
Proceed to the page where the needed list of products is displayed – in this guide, we assume this is a single product page. Add the Listing Grid widget and select the needed Listing Template.
In the Custom Query tab, enable the Use Custom Query toggle and select the needed query.
In the Advanced tab of the Listing Grid’s settings, enter the unique Query ID in the CSS ID field.
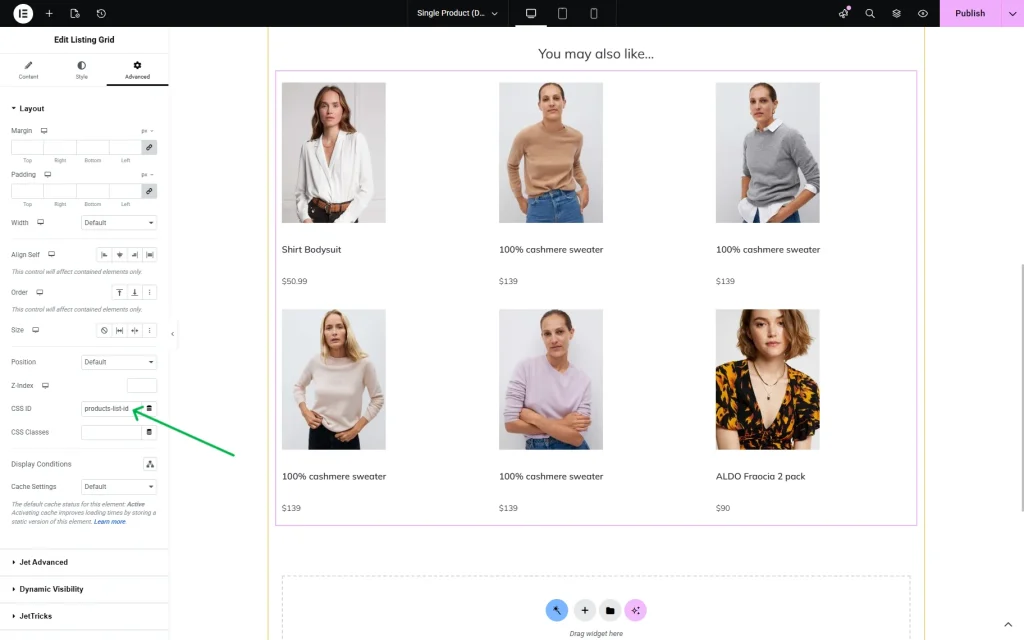
The same Query ID should be applied to all the custom queries you are using to filter this listing. Enter it in the Custom Query ID field in the query’s settings.

Update the queries to save the settings.
Assign the filter to the Listing Grid
Return to the page where the Listing Grid is added. Add the filter widget – it is a Select Filter in our case, and select the filter you created.
In the This filter for field, select the “JetEngine” provider.
Enter the same Query ID as you used for the Listing Grid and all the queries in the dedicated field.
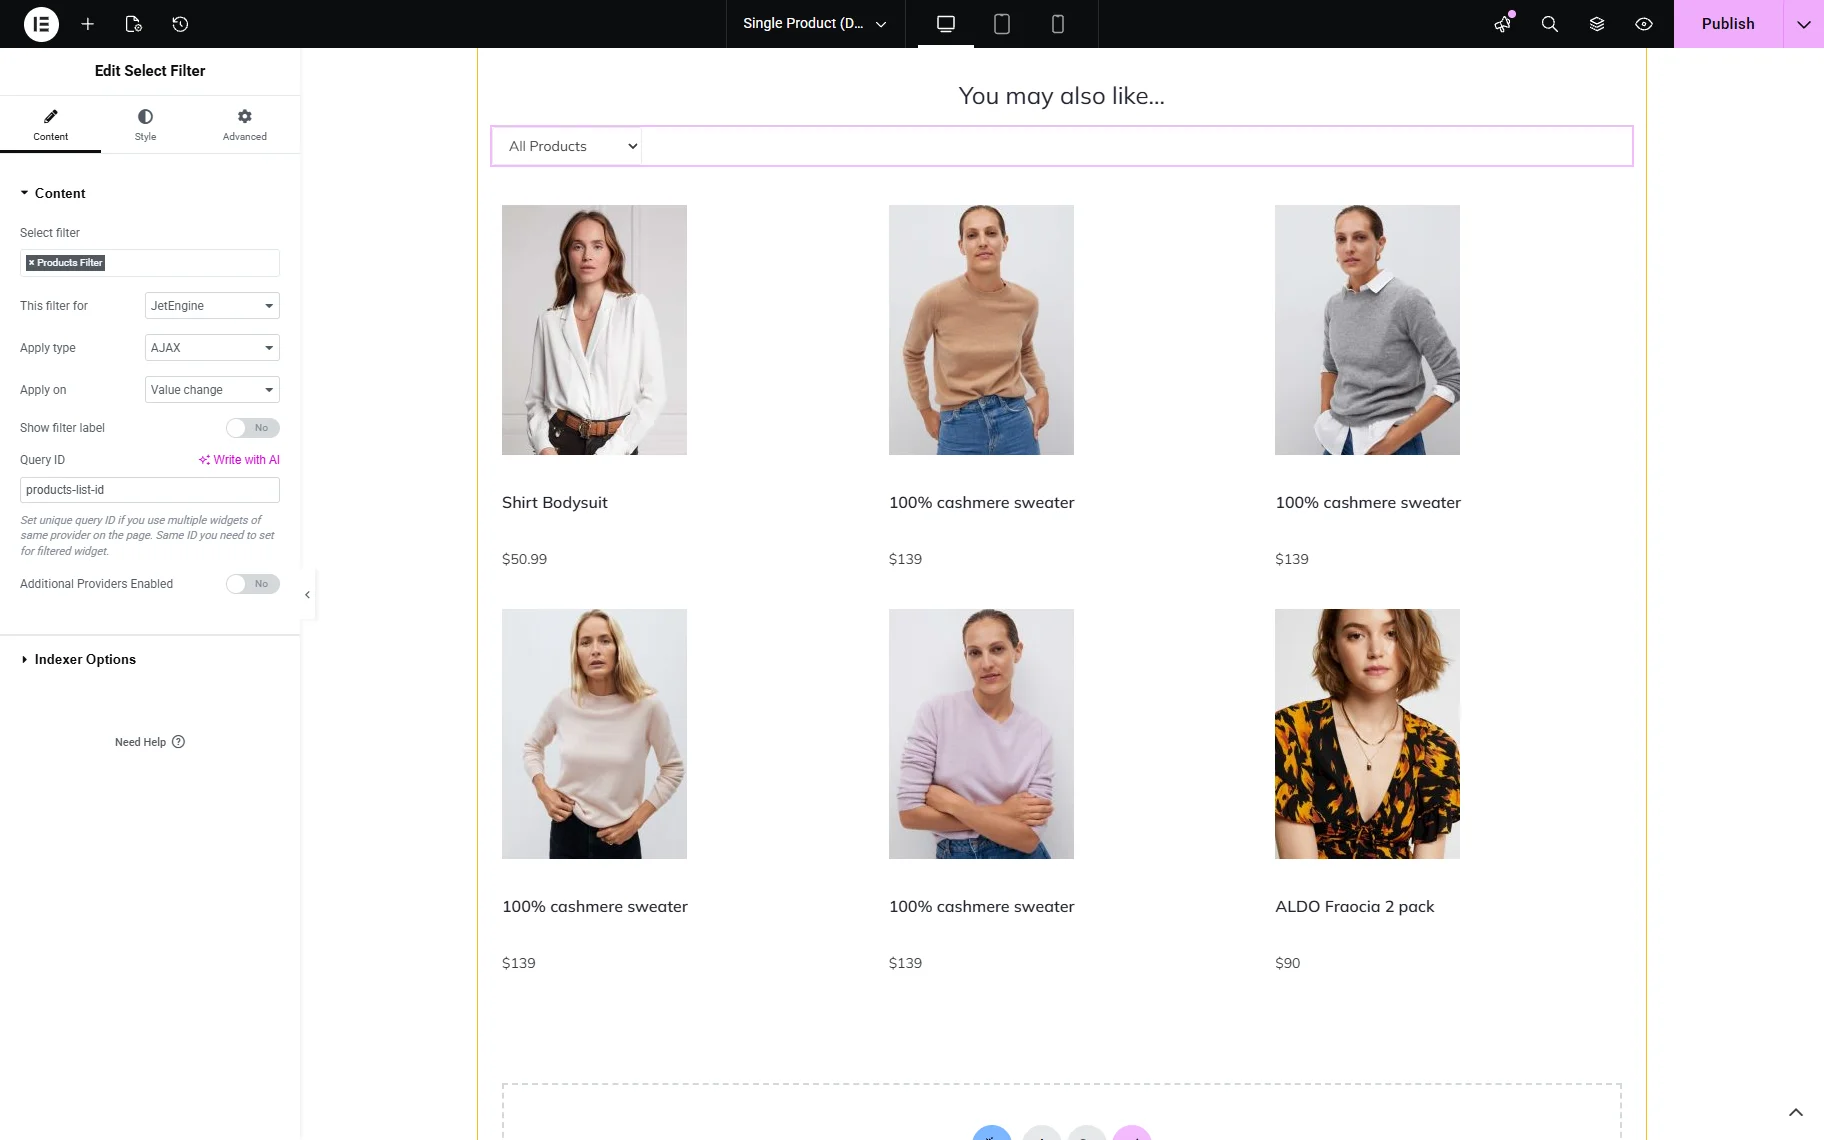
Click the “Publish” button once you are ready.
Check the Results
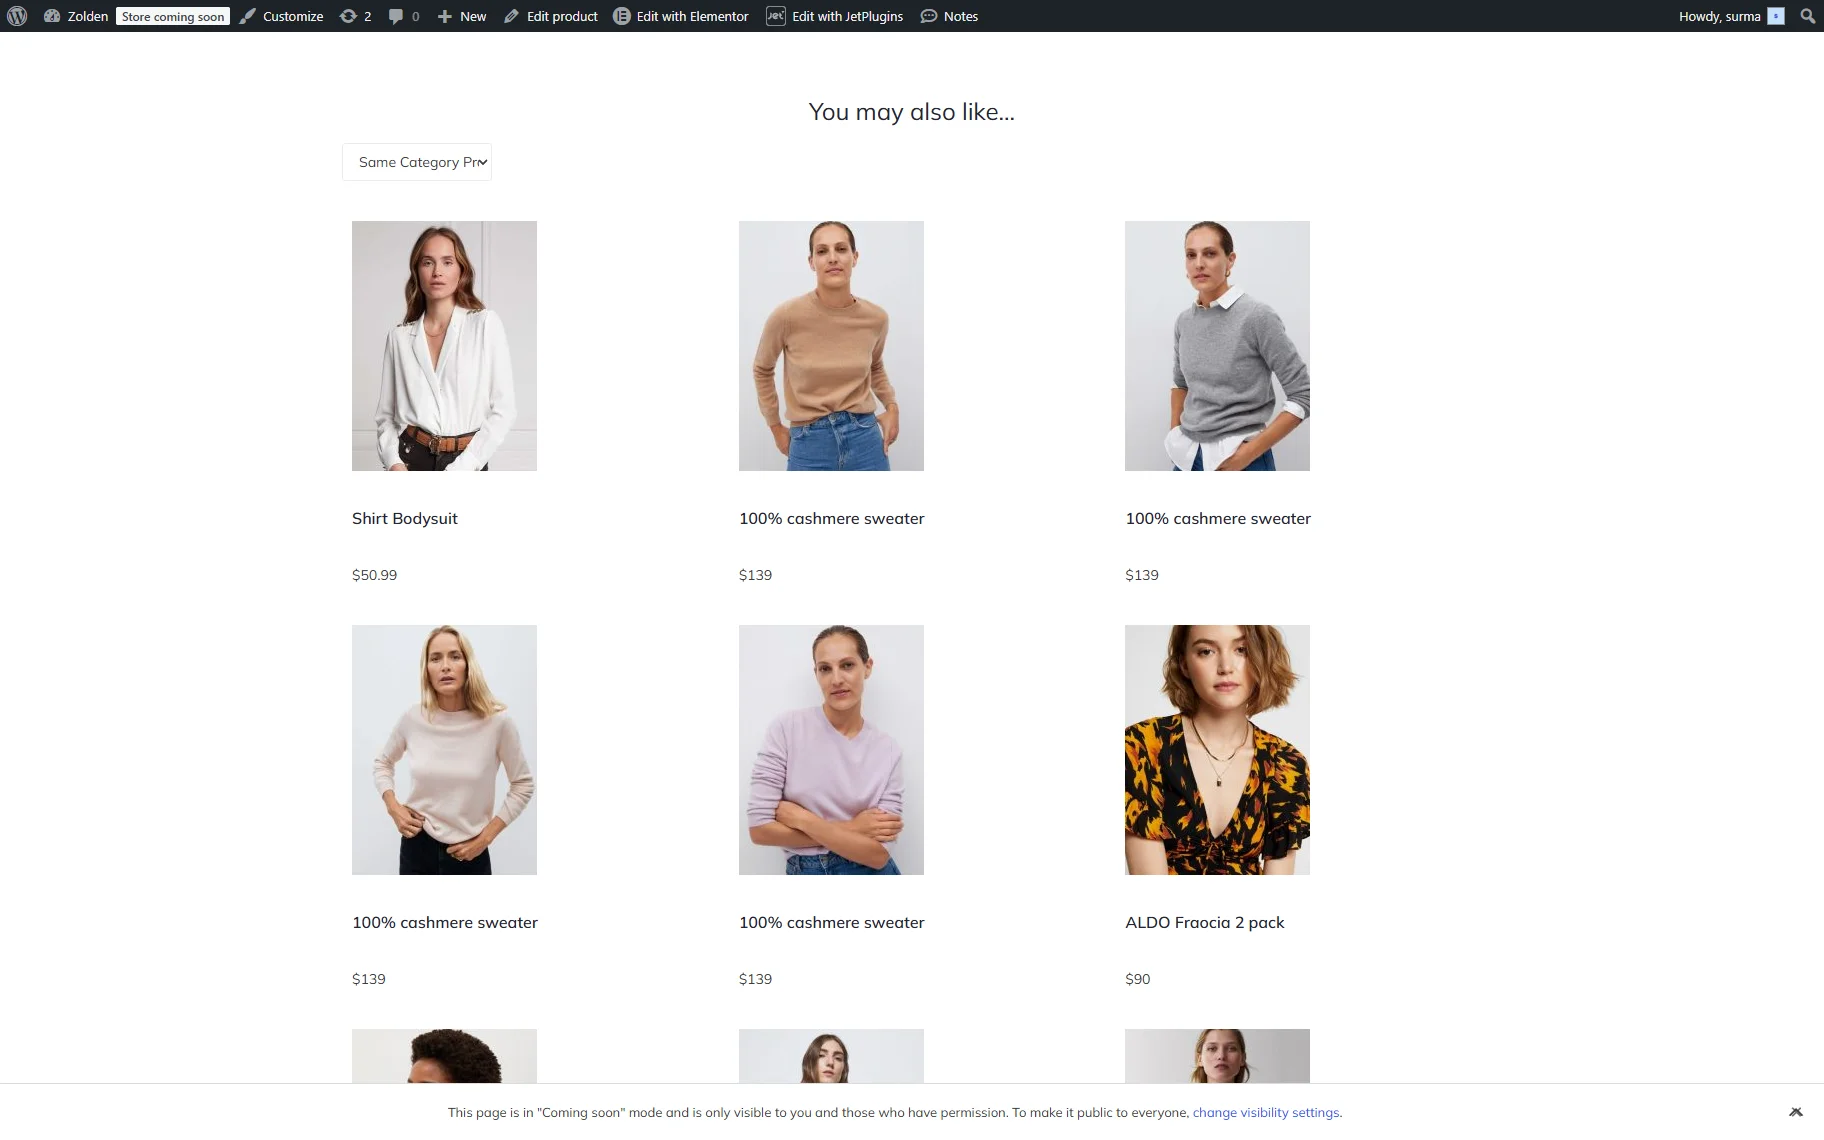
Proceed to the front-end page. In the “You may also like…” section, all products are displayed.

Now, we can choose to see the products we have already viewed before.
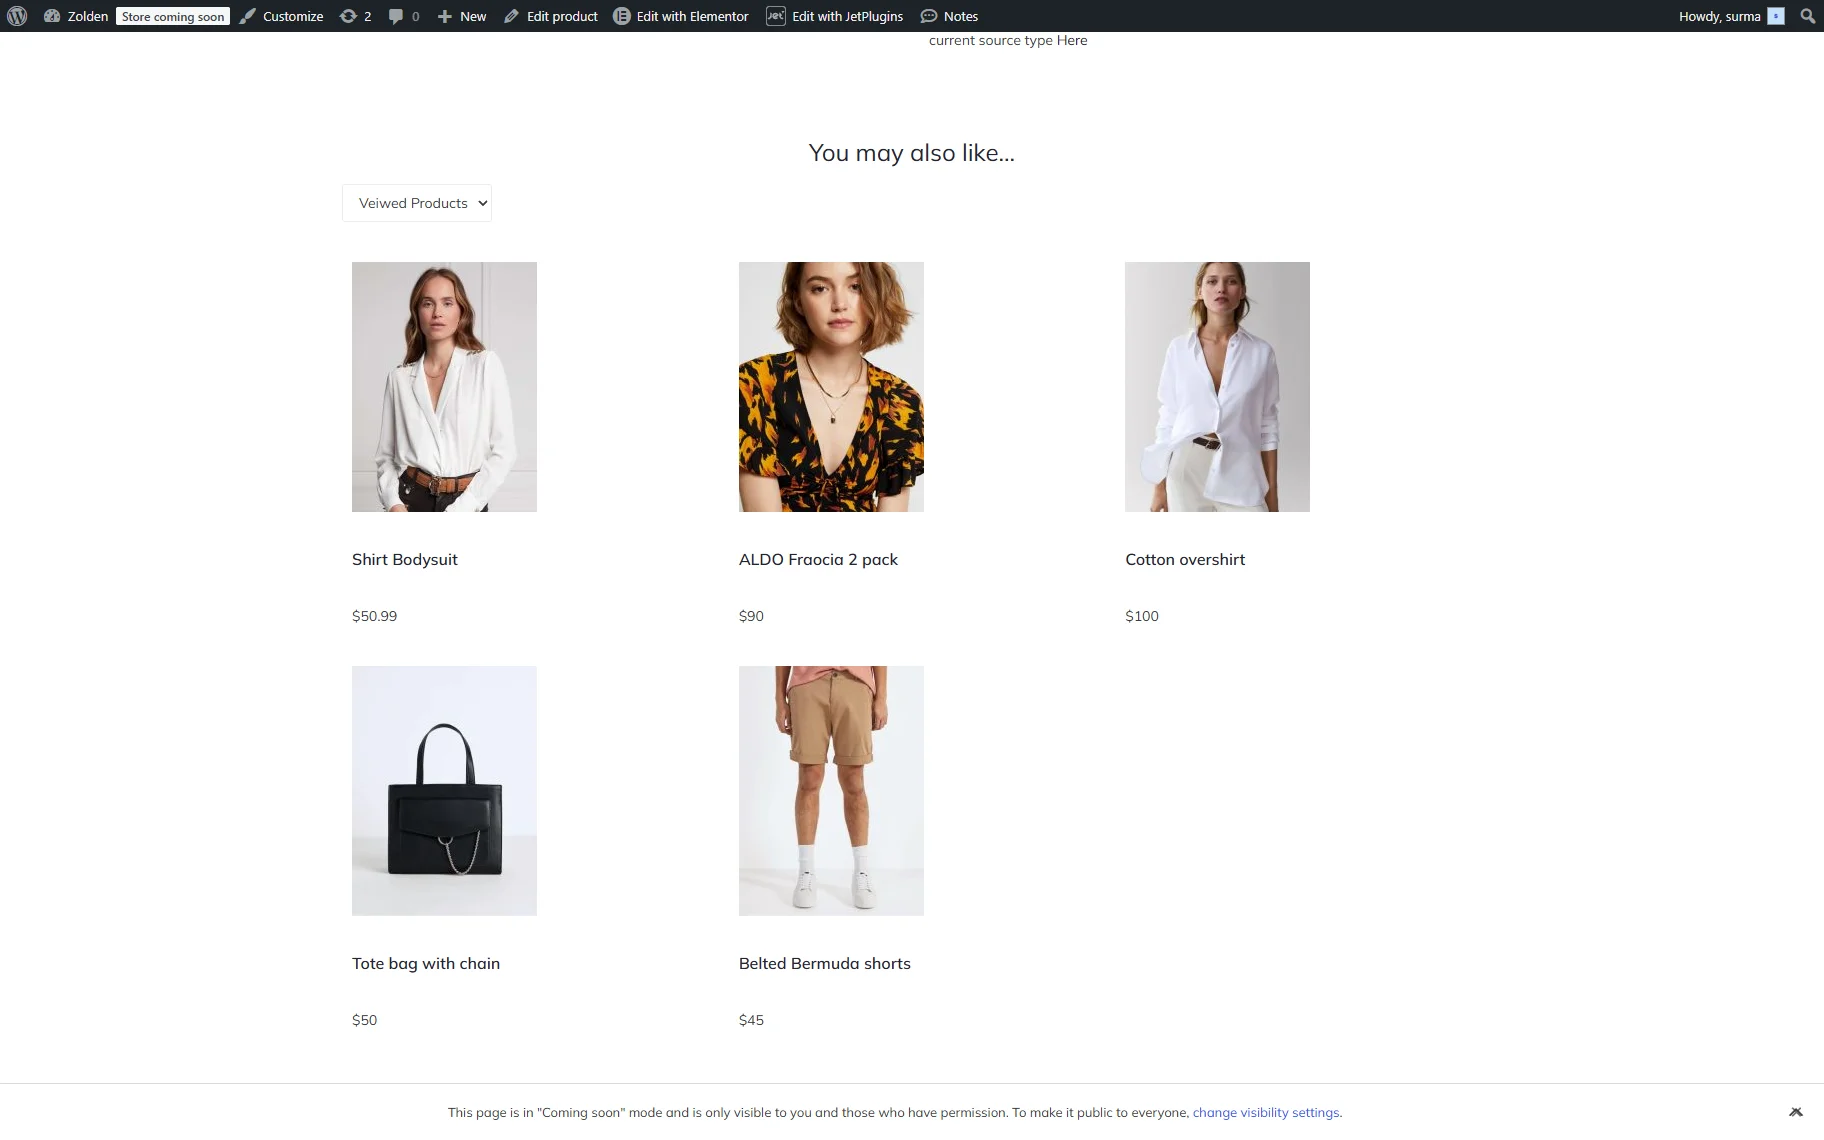
When we select the “Same Category Products,” we get the products from the same category. In this case, we get the products from the “Women’s Collection” category.
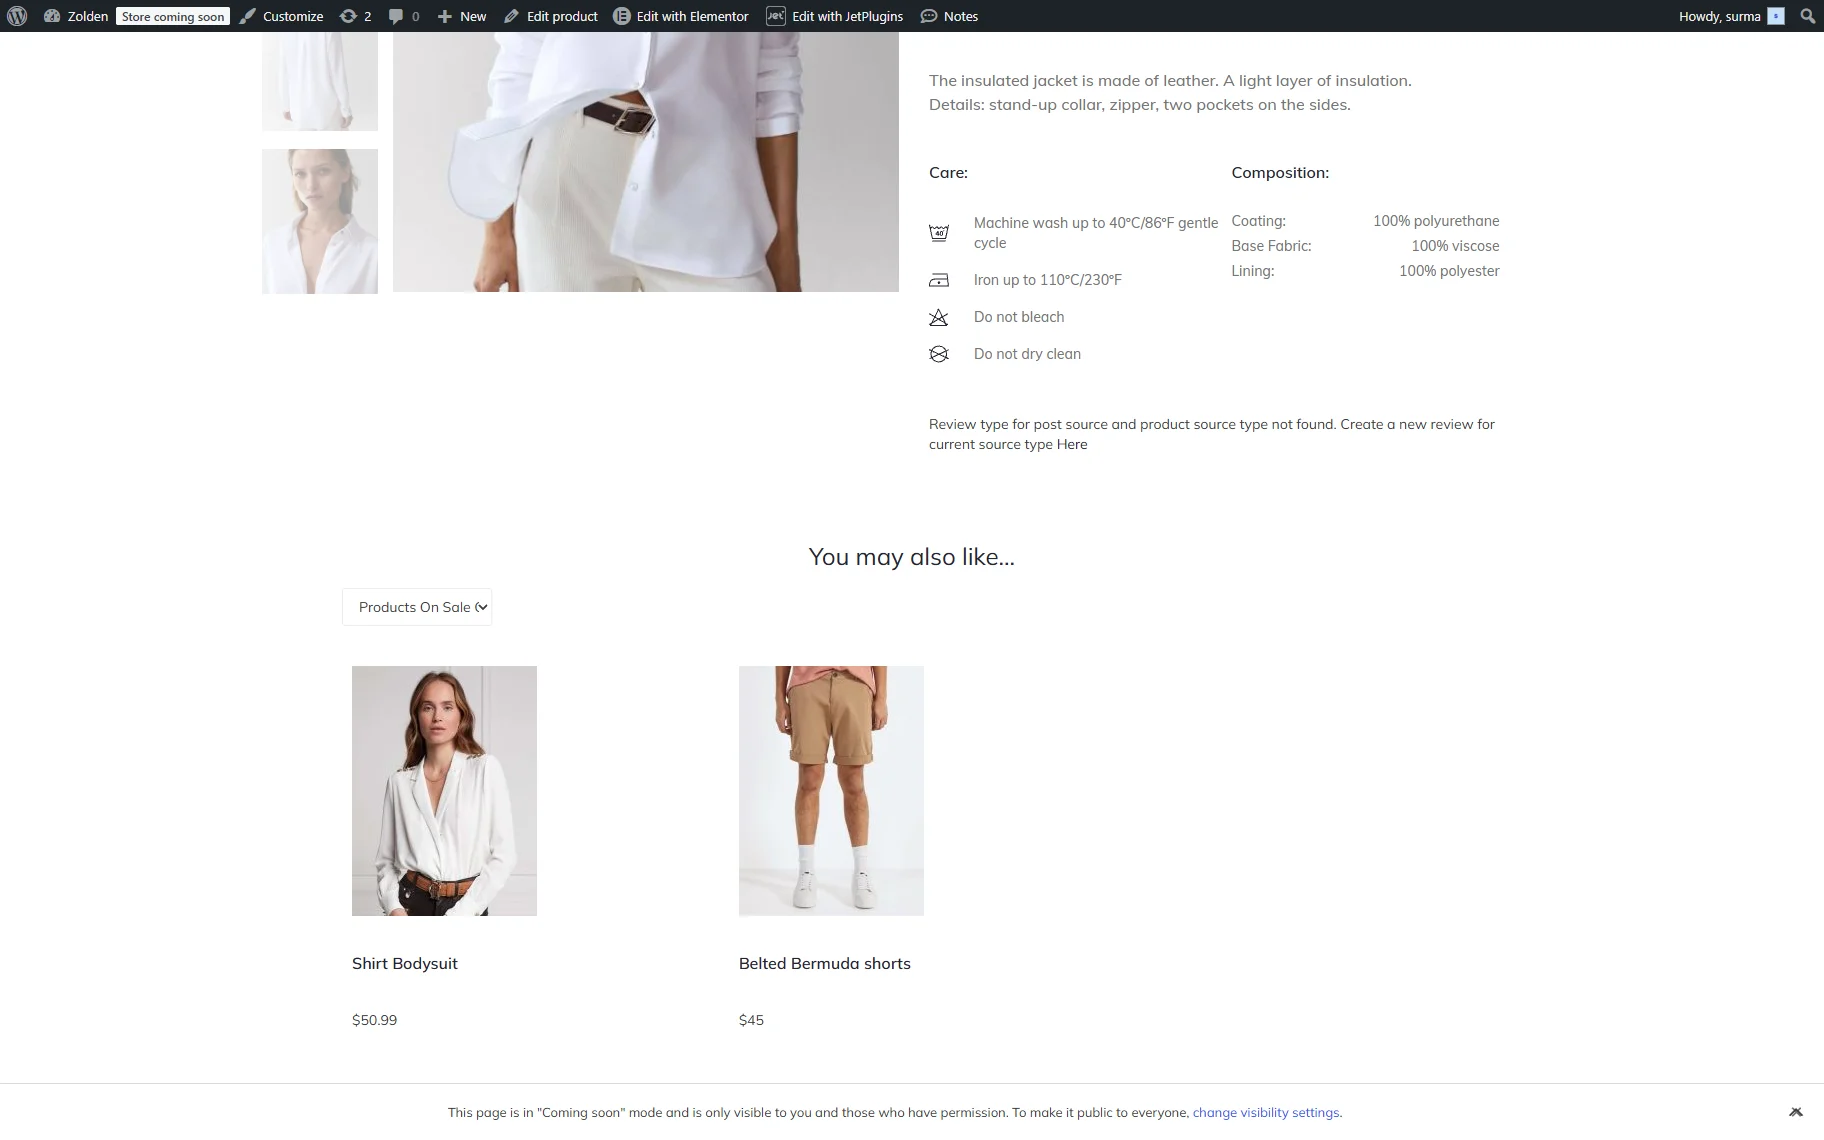
In the same way, when we select the category “Products On Sale”, we can see the correct products shown.
Related JetPlugins Features
The described feature can be used together with the following Crocoblock plugins:
- JetWooBuilder — to customize Shop, Cart, and Single Product templates and display dynamic product data.
- JetEngine Data Stores — to implement behavior-based recommendations (e.g., recently viewed or favorited products).
- JetSmartFilters Indexer — to improve filtering performance for large product catalogs.
FAQ
Yes. By including the Variations post type in the query, the setup ensures that variable products are correctly recognized as “on sale,” even when the discount is applied only to specific variations.
It depends on how the plugin stores pricing data. Some third-party plugins do not use standard WooCommerce sale fields, so additional custom query conditions may be required to include those discounted products.
Most commonly, this is due to a mismatch in the Query ID. Ensure that:
– the Listing Grid,
– all custom queries, and
– the filter itself
use the same Query ID value without spaces or special characters.
Yes. Using the “JetEngine Query Builder Switcher” as the filter data source allows you to switch between multiple queries (e.g., all products, on-sale products, or recommended products) within a single filter.
You can use the “Current ID” Dynamic Tag in the Post Not In field of the query. This prevents the currently viewed product from appearing in the recommendation list.
Yes. You can build custom recommendation queries using JetEngine Query Builder, such as:
– products from the same category, or
– recently viewed products via Data Stores.
This approach gives you more flexibility compared to the default WooCommerce widgets.
For large product catalogs, you can enable the Indexer feature in JetSmartFilters. It stores preprocessed filter data in a dedicated database table, allowing filters to return results faster and reducing the need for complex real-time queries. This significantly improves filtering performance, especially for large datasets.
Yes. Use the Posts Per Page setting in the query’s Pagination tab. Set a specific number to limit results or use “-1” to display all matching products.
That’s it. Now you know that JetEngine’s Query Builder allows you to build precise on‑sale sections and personalized product recommendations. This feature works with Elementor, Gutenberg (Block Editor), and Bricks when combined with JetSmartFilters and listings.