Creating dynamic WordPress sites and setting up effective filtering systems for Custom Post Types (CPTs) are often crucial tasks. Whether you’re designing a real estate directory, an eCommerce platform, or a content hub, the right WordPress filter plugin can significantly enhance both user experience and query efficiency.
In this guide, we’ll explore how JetSmartFilters and competing solutions handle WordPress CPT or page filter requirements, with a focus on what matters to WordPress users.
CPT Filtering in Action with JetSmartFilters
First, let’s explore real-world scenarios where JetSmartFilters outshines other WordPress plugins for filtering CPTs.
Multi-vendor real estate platform
A hypothetical real estate agency may filter properties by location, price range, property type, number of bedrooms, price, custom amenities, and other criteria.
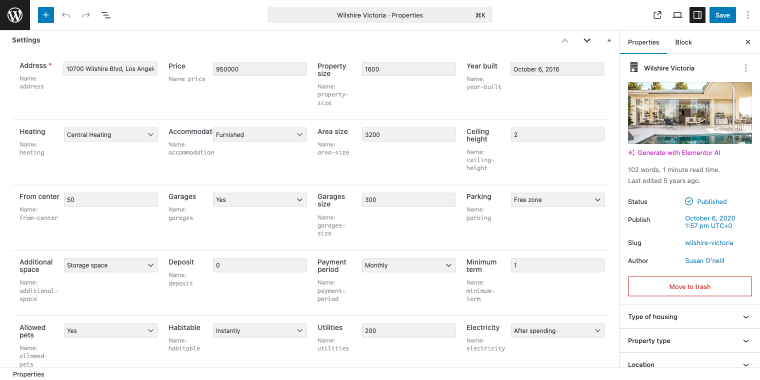
All of these data points can be stored in custom fields and used not only to create custom filters but also to generate dynamic listings or custom queries when we need to display a specific set of items for a particular use case.
Based on the data stored in the custom fields, we can create filters that help users find what they’re looking for with just a few clicks.
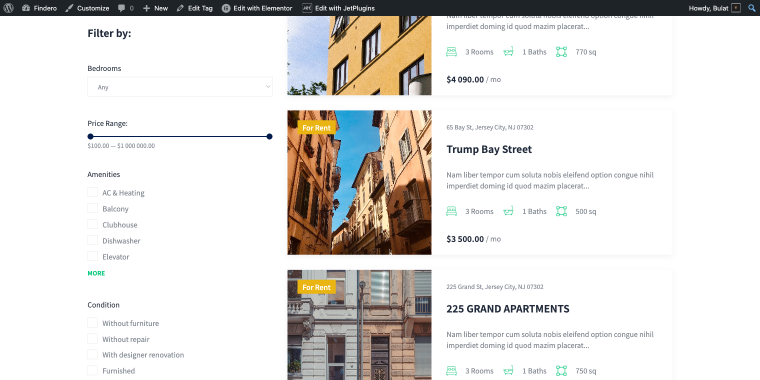
Filters for real estate listings
To create a new filter with the JetSmartFilters plugin, go to WordPress Dashboard > Smart Filters > Add New.
Select filter for the number of bedrooms custom field
Using the Select filter type, we can filter the listings by the number of bedrooms. When creating a new Select filter, you may apply the following set of settings:
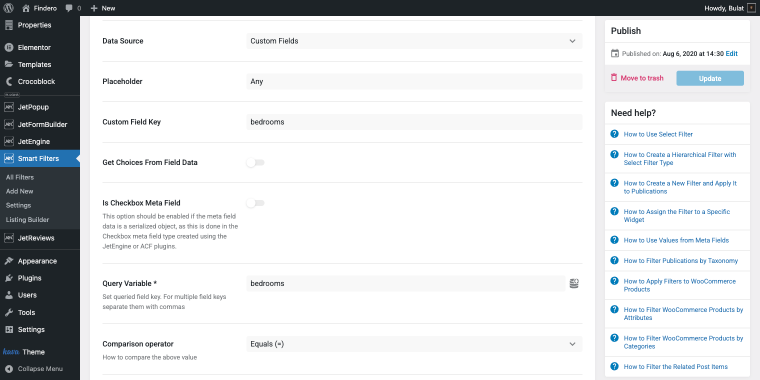
- Data Source — set to “Custom Fields” since the source of the fetched data;
- Custom Field Key — set to “bedrooms” as it defines the exact custom field where the data is pulled from;
- Query Variable — allows you to set the filter more precisely, since we don’t need anything fancy here, feel free to add the same value as in the previous field;
- Comparison operator — depending on which operator you select in this field, you can either broaden the search results or make them more precise. Let’s say a user selects “4” bedrooms in the filter, and these are the results they will see depending on the operator:
- Equals (=) — shows only listings that have exactly four rooms;
- Less than or equals (<=) — shows listings with four rooms or fewer (1–4);
- Greater than or equals (>=) — shows listings with four rooms or more (4–7), and so on.
To add a dropdown filter for the number of bedrooms, insert the Select Filter widget and apply the following settings:
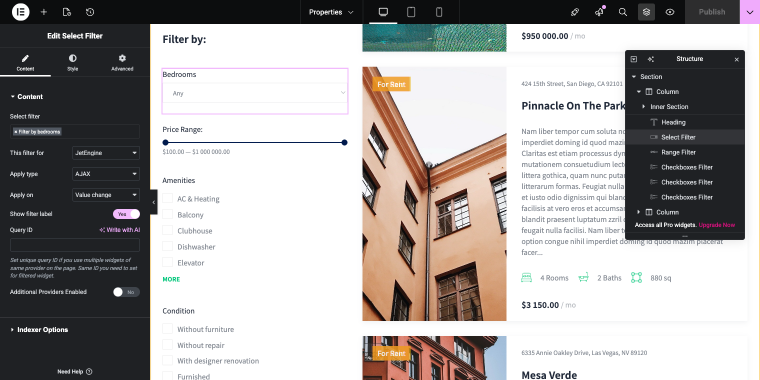
- Select filter — set to “Filter by bedrooms” (or any other that in your case corresponds to the bedroom number filter), this connects the widget to the specific filter you’ve created for bedroom filtering;
- This filter for — set to “JetEngine,” which indicates the filter works with JetEngine content;
- Apply type — set to “AJAX,” the filter updates results dynamically without reloading the page;
- Apply on — set to “Value change,” filtering occurs immediately when an option is selected from the dropdown;
- Show filter label — set to “Yes,” the filter label will be visible to users above the dropdown menu;
- Query ID — this field lets you specify a custom query identifier when advanced filtering is needed.
As a result, users will be able to filter results by the number of bedrooms available in property listings.
Range filter for the price custom field
The Range filter may be suitable for the price and estate size values. When creating a new Range filter, you can apply the following settings.
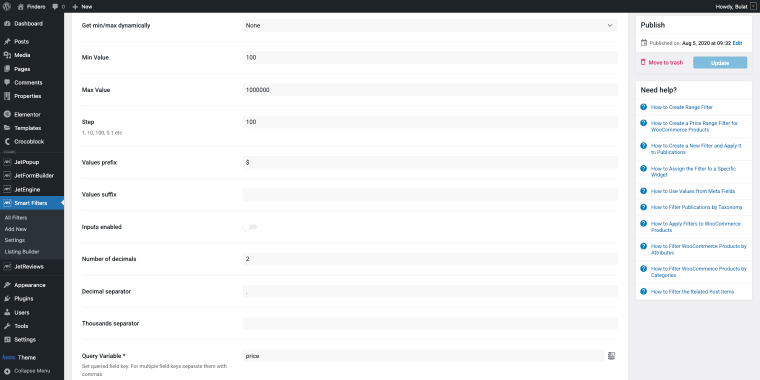
- Get min/max dynamically — set to “None,” meaning the filter uses fixed values rather than reading limits from database content;
- Min Value — set to “100,” the lowest price the slider can show;
- Max Value — set to “1,000,000,” the highest price available for selection;
- Step — set to “100,” the slider moves in increments of 100;
- Values prefix — adds a dollar sign before each number;
- Query Variable — the meta field key “price” used in the database for filtering.
To enable price filtering on the properties archive, add the Range Filter widget and configure it with the following settings:

- Select filter — set to “Price range filter,” this connects the widget to the specific filter you’ve created for price filtering;
- This filter for — set to “JetEngine,” which indicates the filter works with JetEngine content;
- Apply type — set to “AJAX,” the filter updates results dynamically without reloading the page;
- Apply on — set to “Value change,” filtering occurs immediately when the slider values are adjusted;
- Show filter label — set to “Yes” to make the filter label visible to users above the range slider.
As a result, users will be able to sort our properties by price in $100 increments using this filter.
Checkboxes list filter for CPT taxonomies
JetSmartFilters allows us to filter CPTs by all kinds, including taxonomies, so the next filter we’ll create will allow users to sort properties by housing type.
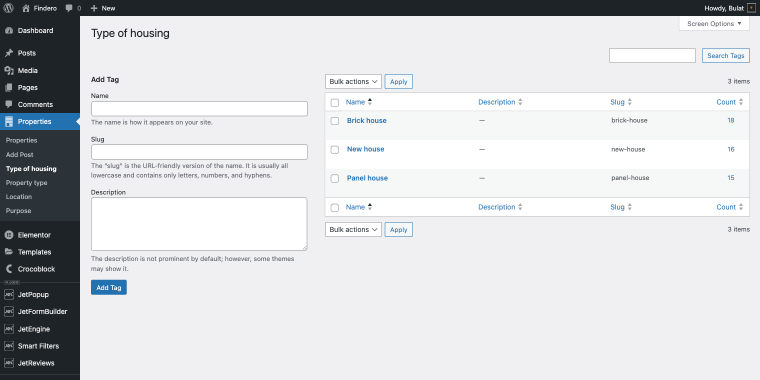
After creating a new Checkboxes list filter, feel free to adjust the following settings.
- Data Source — set to “Taxonomies” for the filter to pull its options from a taxonomy;
- Taxonomy — set to “Type of housing,” this taxonomy provides the list of terms shown as checkboxes;
- Terms Order By — set to “Name,” terms are sorted alphabetically;
- Terms Order — set to “ASC,” terms are displayed from A to Z;
- Relational Operator — set to “Union,” selecting several checkboxes returns posts matching any of the chosen terms.
To add this filter to the properties archive, we’ll use the Checkboxes Filter widget. Feel free to apply the following set of settings:
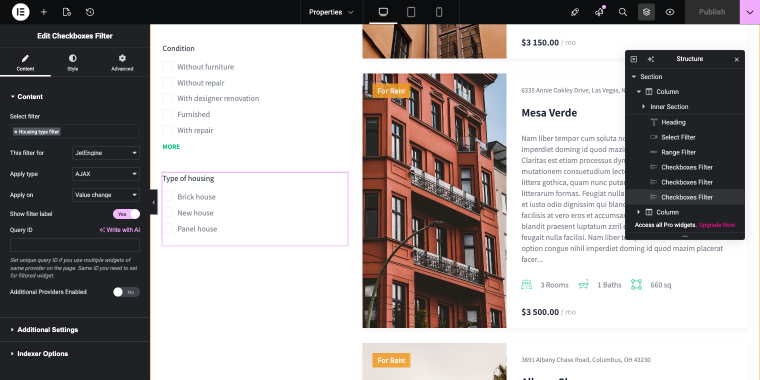
- Select filter — set to “Housing type filter,” this connects the widget to the specific filter you’ve created;
- This filter for — set to “JetEngine,” which indicates the filter works with JetEngine-powered content;
- Apply type — set to “AJAX,” the filter updates results dynamically without reloading the page;
- Apply on — set to “Value change,” filtering occurs immediately when a checkbox is selected or deselected;
- Show filter label — set to “Yes,” the filter label will be visible to users;
- Query ID — this field lets you specify a custom query identifier when advanced filtering is needed.
As a result, users will be able to select one or several housing types and instantly narrow down the list of properties.
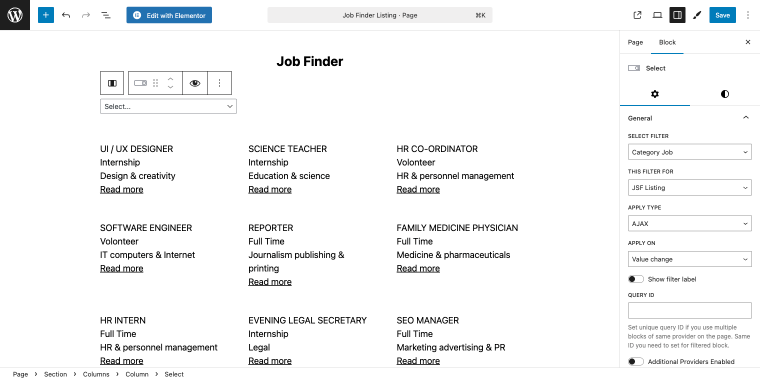
Job board website
A hypothetical recruitment platform may filter jobs by industry, location, salary range, employment type, experience level, custom skills, and other job features or parameters. Let’s have a look at some filters that we can easily create with JetSmartFilters.
Filters for job listings
The job board website hosts job listings as CPT, including taxonomies such as location, type (full-time, part-time, and so on), and category. Also, the CPT has a set of meta fields to store job listing information, like:
- Salary (we can use this field for the Range filter);
- Job description;
- Requirements;
- Work conditions;
- Responsibilities.
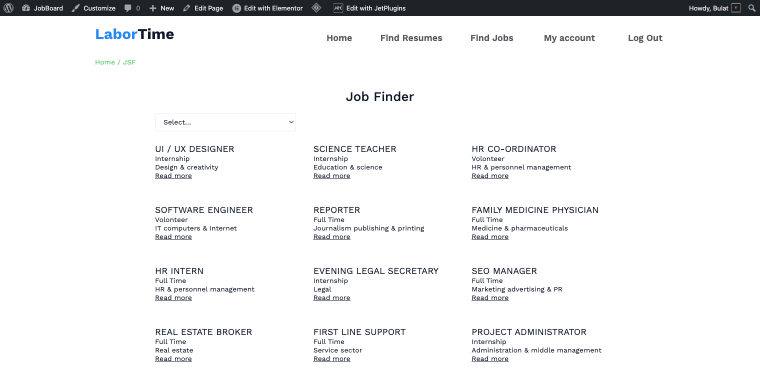
Select filter for the job category taxonomy
Using the Select filter type, we can filter the job listings by their category. When creating a new Select filter, you may apply the following set of settings:
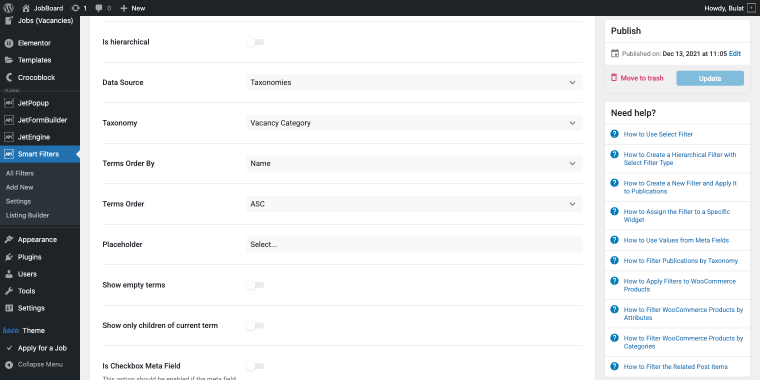
- Data Source — set to “Taxonomies”;
- Taxonomy — “Vacancy Category,” this taxonomy provides the categories used to filter job listings;
- Terms Order By — set to “Name,” categories are sorted alphabetically;
- Terms Order — set to ASC, so categories appear from A to Z.
To add the Select filter for the job categories dropdown, insert the Select Filter widget and apply the following settings:
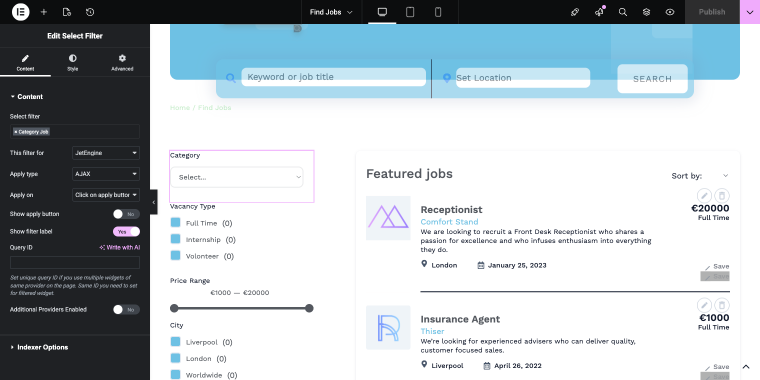
- Select filter — set to “Category Job,” the name of the corresponding filter that was created for the Vacancy Category taxonomy;
- This filter for — set to “JetEngine,” as the filter will control JetEngine listings on the page;
- Apply type — set to “AJAX,” the results will update instantly without reloading the page;
- Apply on — set to “Click on apply button,” the filter is triggered only after clicking the “Apply” button, you set to “Value change” option, and the filter will fire instantly, and so on.
As a result, users will be able to filter job vacancies by their category.
Checkboxes filter for the vacancy type taxonomy
The Checkboxes list filter allows users to filter job listings by category. The filter may have the following settings:
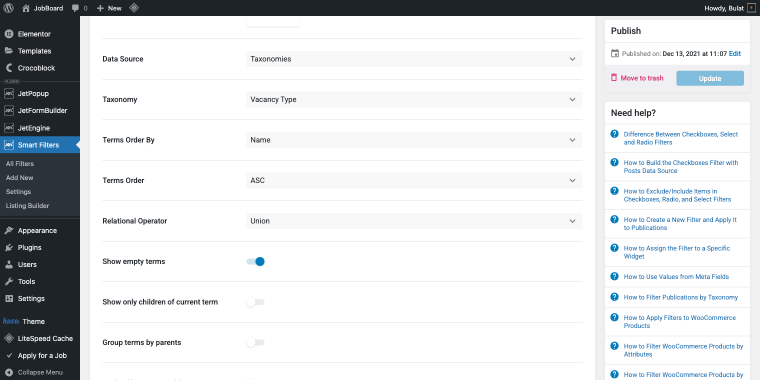
- Data Source — set to “Taxonomies”;
- Taxonomy — set to “Vacancy Type,” as this taxonomy provides the list of terms shown as checkboxes;
- Terms Order By — set to “Name,” terms are sorted alphabetically;
- Terms Order — set to “ASC,” terms are displayed from A to Z, and so on.
To display the Checkboxes list filter on the front end, insert the Checkboxes Filter widget and apply the following settings:
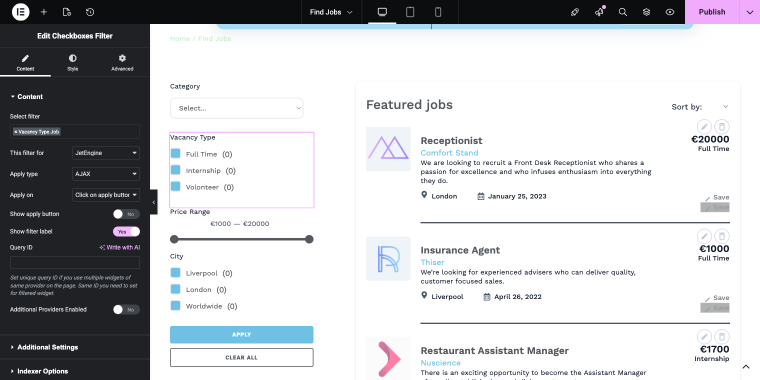
- Select filter — set to “Vacancy Type Job,” this connects the widget to the filter we’ve created in the previous step;
- This filter for — set to “JetEngine,” as the filter works with JetEngine content;
- Apply type — set to “AJAX,” the filter updates results dynamically without reloading the page;
- Apply on — set to “Click on apply button,” filtering occurs only when users click the “Apply” button after making their selections, and so on.
As a result, users will be able to filter job vacancies by their type.
Range filter for job salaries
The Range filter lets users filter job listings by the salary amount specified in the _salary meta field. The filter may have the following settings:
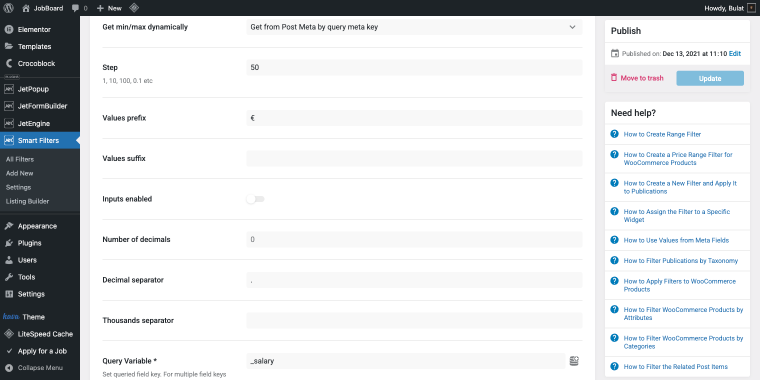
- Get min/max dynamically — set to “Get from Post Meta by query meta key,” the filter automatically determines the minimum and maximum values from the post meta field;
- Step — set to “50,” this defines the increment value for the slider (e.g., 50, 100, 150, etc.);
- Values prefix — set to “€,” this symbol appears before the numerical values to indicate currency;
- Number of decimals — set to “0,” values are displayed as whole numbers without decimal places;
- Decimal separator — set to “.”, this character separates the decimal portion (if decimals were enabled);
- Query Variable — set to “_salary,” this specifies the meta field key used to filter salary values.
To display this filter on the front end, we’ll use the Range Filter widget.
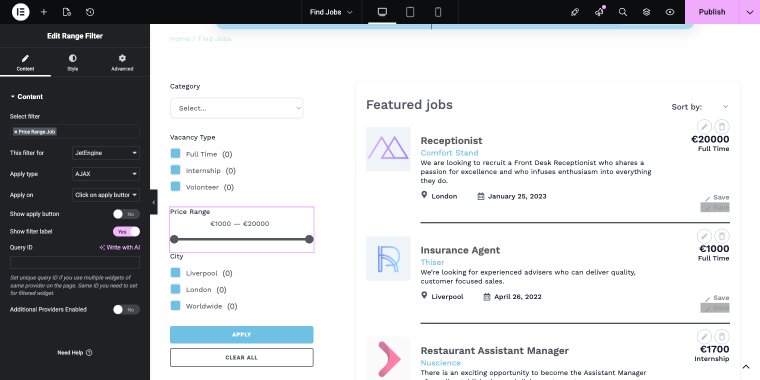
- Select filter — set to “Price Range Job” to connect the widget to the specific filter for job salary filtering;
- This filter for — set to “JetEngine”;
- Apply type — set to “AJAX” for updating results dynamically without page reloads;
- Apply on — set to “Click on apply button,” filtering occurs only when users click the “Apply” button after adjusting the slider;
- Show apply button — set to “No,” the apply button is hidden from view;
- Show filter label — set to “Yes,” the filter label will be visible to users above the range slider;
- Query ID — this field allows you to specify a custom query identifier if needed for advanced filtering scenarios;
- Additional Providers Enabled — set to “No” to keep the filter working only with the primary data source.
As a result, users will be able to filter job vacancies by salary.
Universal use case using Listing Builder
The release version 3.7.0 introduced a new feature, Listing Builder in JetSmartFilters, that enables creating dynamic listings without relying on JetEngine. With its help, one might display a CPT grid, a blog archive grid, a product catalogue, or a portfolio listing.
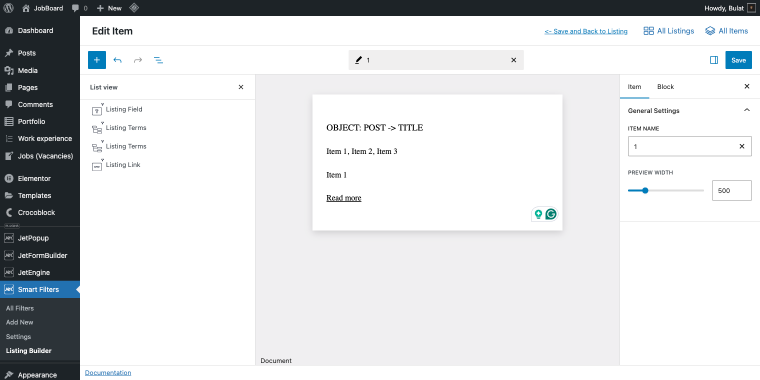
To create a new listing, go to WordPress Dashboard > Smart Filters > Listing Builder and click “Add New Lisitng.” In the listing interface, you’ll see three tabs with a simple set of options.
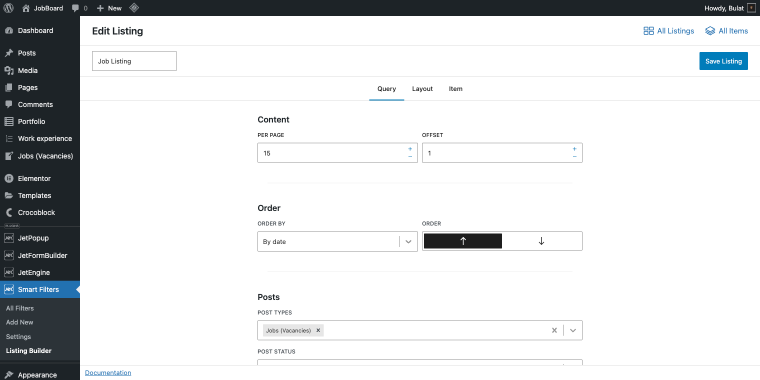
Using Listing Builder, you need to define a listing Item (how each loop element looks) and then a Listing (query, layout, item selection); everything renders in a dynamic grid and can respond to filters via AJAX. For this purpose, we have a set of four widgets that can display title, image, taxonomies, and a dynamic link.
When adding the listing to the destination page, you can include all kinds of filters and connect them to the listing so visitors can narrow down posts without reloading the page.
The Listing Builder is a valuable feature of the JetSmartFilters plugin, enabling you to create customizable post loops and grids while maintaining seamless filtering.
Now, let’s look at some alternative plugin options that enable filtering CPTs.
Top 8 WordPress Custom Post Type Filter Plugins
While JetSmartFilters offers extensive features, it’s worth considering other plugins based on your specific needs. Here’s a detailed comparison:
Filter Everything (Freemium)
🏆 Best for developers needing maximum flexibility with any post type and filtering criteria without page builder dependencies.
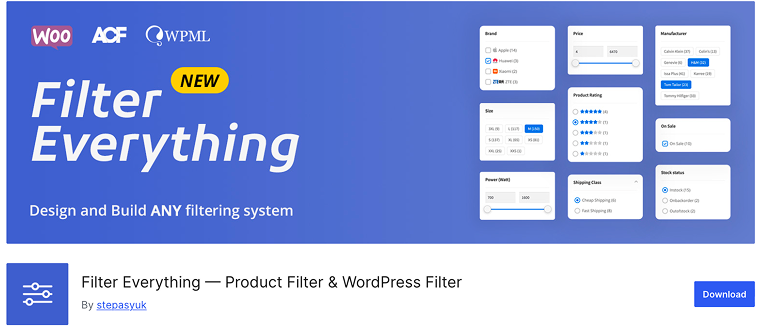
Filter Everything is a versatile WordPress filter plugin that lets you filter any post type by various criteria, making it perfect for developers who need detailed control without being tied to a specific page builder ecosystem. The plugin works with native WordPress loops and integrates smoothly with most themes and page builders.
Pricing: a free version with essential features is available; the PRO version starts at $40 single payment.
Key features:
- filters any post type, including WooCommerce and custom taxonomies;
- supports custom fields, ACF fields, product attributes, and metadata;
- AJAX filtering without reloads;
- works with Elementor, Oxygen, Divi, WPBakery (Pro);
- custom titles and descriptions for filter result pages;
- compatible with WPML and Polylang.
Pros:
- very flexible for most filtering needs;
- works with native WordPress loops;
- solid SEO options with custom URLs and metadata;
- compatible with major builders and themes;
- reasonable Pro pricing.
Cons:
- learning curve is higher than that of visual-focused tools;
- page builder support locked behind Pro;
- the interface is less intuitive than drag-and-drop tools;
- few ready-made design presets.
JetSmartFilters (Premium)
🏆 Best for Crocoblock ecosystem users and developers building sophisticated filtering systems with Elementor, Gutenberg, or Bricks.
JetSmartFilters is a robust CPT filter plugin that integrates smoothly with Elementor, Gutenberg, and Bricks, providing a wide range of filter types and advanced features for dynamic content. As part of the Crocoblock ecosystem, it works very well with JetEngine for handling complex data relationships, and now it also includes standalone Listing Builder functionality.
Pricing: $43/year for a single site; unlimited sites available; part of Crocoblock All-Inclusive subscription ($199-$399/year).
Key features:
- 12 filter types, including checkboxes list, radio, visual, range, date picker, alphabet, rating, and search;
- native listing builder that works without JetEngine;
- AJAX filtering with instant content reload;
- indexer showing counts per option;
- supports WooCommerce price and attribute filters;
- loop grid functionality with Listing Builder.
Pros:
- wide set of filter types for most tasks;
- fast operation with optimized AJAX queries;
- smooth Elementor, Gutenberg, and Bricks integration via built-in widgets;
- solid WooCommerce filtering tools;
- active development and frequent updates;
- flexible logic with and/or rules and hierarchy.
Cons:
- still tied to the Crocoblock ecosystem;
- too advanced for simple setups;
- learning curve for features like Query Builder.
Post Grid (Freemium)
🏆 Best for devs seeking a modern React-based builder with comprehensive layout options and built-in filterable grids.
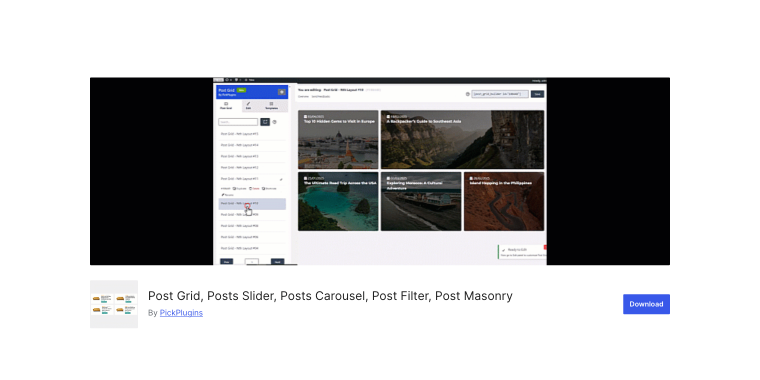
Post Grid is a versatile WordPress plugin filter posts solution featuring a React-based builder for creating grids, sliders, masonry layouts, and filterable content displays. It offers extensive customization options with a visual no-code interface while maintaining developer-friendly hooks and templates.
Pricing: a free version with core features is available, and a Premium version with extra functionality begins at $19/year.
Key features:
- React-based builder with live preview and no-code styling;
- multiple layouts: grid, slider, masonry, and filterable grid;
- supports any CPT, including WooCommerce;
- advanced queries with meta conditions and custom params;
- built-in search field for grids.
Pros:
- wide layout control without custom CSS;
- supports hover, before, and after states;
- compatible with WooCommerce, ACF, EDD, and Events Calendar;
- template library for quick setup;
- active development with steady updates.
Cons:
- filter tools are less extensive than in dedicated filter plugins;
- focused mainly on layout display, not deep filtering logic;
- requires getting used to the custom builder;
- some advanced options are available only in the Premium tier.
Post Grid and Filter Ultimate (Freemium)
🏆 Best for small businesses needing a simple, straightforward filtering solution with minimal setup.
Post Grid and Filter Ultimate provides basic grid and filter functionality through simple shortcodes, making it accessible for developers who need quick implementation without extensive configuration. It offers two designs for both grids and filters with Gutenberg block support.
Pricing: sufficient free version, Pro starts at $99/year.
Key features:
- two ready layouts for post grid and post filter;
- category filtering with AJAX;
- pagination with numeric or prev/next;
- customizable post elements (date, author, content, categories);
- works with Elementor, Beaver Builder, SiteOrigin, Divi, and Fusion.
Pros:
- quick setup through shortcodes;
- easy to use for basic tasks;
- good for simple blogs and portfolios.
Cons:
- very limited design options (only two layouts);
- basic filtering compared to advanced tools;
- no support for custom fields or advanced taxonomies;
- limited styling without custom CSS;
- no extra features like geolocation or range filters;
- the development activity seems lower than that of the alternatives.
Category Ajax Filter (Freemium)
🏆 Best for developers needing simple taxonomy-based filtering with extensive pre-built layout options.
Category Ajax Filter focuses specifically on taxonomy-based filtering with AJAX functionality, offering numerous pre-built filters and post layouts. It supports CPTs and provides a user-friendly admin panel for controlling front-end appearance.
Pricing: the free version includes core features; the Pro version starts at a one-time payment of $33.
Key features:
- AJAX-powered filtering without page reload;
- multiple pre-built filter and post layouts;
- supports CPTs and custom taxonomies;
- compatible with Elementor, Divi, and WPBakery builders;
- WooCommerce support for product filtering.
Pros:
- many ready layouts that speed up setup;
- simple admin panel for styling;
- AJAX filtering for smoother interaction;
- works with CPTs immediately.
Cons:
- mostly limited to taxonomy filtering;
- Pro needed for multi-taxonomy and advanced options;
- custom field filtering is modest;
- some layouts look a bit outdated;
- not ideal for complex filter rules;
- documentation could be clearer.
Ajax Search Pro (Premium)
🏆 Best for enterprise developers requiring comprehensive search functionality with advanced filtering and indexing capabilities.
Ajax Search Pro is a premium live search and filter plugin offering extensive customization options and powerful indexing capabilities. The plugin delivers instant search results with sophisticated filtering, making it ideal for large content databases and eCommerce sites.
Pricing: starts at €24/year.
Key features:
- index table engine for fast search across all content types;
- filters by categories, tags, taxonomies, custom fields, authors, and more;
- indexes document content (PDF, Excel, Word, TXT);
- Elementor integration for live filtering;
- WooCommerce support with SKU search.
Pros:
- very strong search engine thanks to indexing;
- document indexing for broader search coverage;
- developer-friendly with hooks and JS API;
- solid WooCommerce and builder support.
Cons:
- higher upfront price than subscription tools;
- focused mainly on search, not full filtering;
- large settings panel can feel heavy for simple needs;
- learning curve due to many options;
- advanced PDF indexing may require an extra add-on.
Filter & Grids (Free)
🏆 Best for developers needing a completely free, flexible solution with modern features and page builder integration.
Filter & Grids is a powerful, free plugin that offers responsive grid layouts with customizable filters for posts and CPTs. It provides an intuitive interface with advanced features, including dependent filters, masonry layouts, and multilingual support, all without requiring any premium upgrades.
Pricing: completely free and open-source with no paid version.
Key features:
- supports CPTs and taxonomies;
- various templates available for filters and post cards;
- frontend sorting and search bar;
- integration with Elementor, WPBakery, and Gutenberg.
Pros:
- fully free with no upsells;
- flexible grids with masonry;
- works with WPML and Polylang;
- export/import for settings;
- active ongoing development.
Cons:
- documentation mainly on GitHub;
- fewer ready templates;
- support through WordPress.org and GitHub issues;
- advanced setups may need technical skills.
Better Post & Filter Widgets for Elementor (Free)
🏆 Best for Elementor users wanting pro-grade filtering without subscription costs or artificial limitations.

Better Post & Filter Widgets for Elementor provides unlimited advanced filtering capabilities specifically designed for Elementor, including support for ACF, custom fields, and numeric ranges. It’s completely free while offering features typically locked behind premium paywalls in competing plugins.
Pricing: completely free with no premium version or paid features.
Key features:
- works with Elementor Pro post widget and third-party widgets;
- filter types: checkboxes, radio, dropdown, select, numeric range, label list;
- dynamic carousel or grid layouts at breakpoints;
- loop grid functionality without Elementor Pro;
- ACF repeater field support with a dynamic tag.
Pros:
- fully free with no upsells;
- seamless Elementor integration;
- loop grids without Elementor Pro;
- clean interface with no branding;
- developer-friendly with hooks;
- lightweight design using Elementor resources.
Cons:
- only works with Elementor;
- pagination is only fully supported on native widgets;
- smaller user base than commercial alternatives.
FAQ
A filter plugin works with predefined options, such as taxonomies, custom fields, and price ranges, allowing visitors to narrow results step by step. A search plugin relies on keyword input and relevance rules to function effectively. Some tools combine both, but filters are more effective when users require structured attribute-based narrowing.
Yes, most filter plugins work with WooCommerce because products are custom post types. Premium tools, such as JetSmartFilters and Ajax Search Pro, typically provide comprehensive support for attributes, variations, stock, and pricing. Simpler plugins may show products but often lack eCommerce-specific filtering logic.
Many filter plugins support ACF, though the setup varies across tools. Plugins with built-in ACF data sources (JetSmartFilters, Filter Everything, Better Post & Filter Widgets) read ACF meta fields directly. If configured manually, you must target the correct meta key and field type for the query to function properly.
Conclusion
Different filter plugins suit different workflows, so the best choice depends on your project setup and the way you build your pages. JetSmartFilters suits complex Elementor- or Crocoblock-based sites thanks to its extensive set of filter types, integrations, and robust performance. At the same time, tools like Filter Everything, Ajax Search Pro, or block editor solutions are well-suited for other development styles.
Whichever option you pick, check how it handles your data structure, custom fields, and overall load on real datasets. A well-implemented filter system makes large collections of posts or products easier to explore and supports long-term site stability.

