If you run an online store, you’ve likely faced the challenging task of managing vast product catalogs. While a diverse product range is essential for attracting customers, it can also lead to issues with organization and accessibility. Customers may find it difficult to locate specific items they’re looking for.
So imagine if shoppers could easily navigate your store, effortlessly sorting and browsing your products. Wouldn’t it be great if they could quickly find exactly what they’re interested in without having to scroll through endless pages?
That’s why Crocoblock never stops on the way to simplifying your lives, guys. In this article, we’ll explore two methods for creating product tables using Crocoblock plugins: JetEngine for more complex setups and JetProductTables for simpler, streamlined solutions. With JetEngine’s Dynamic Tables Builder, you can build a WooCommerce product table in a matter of minutes. JetProductTables here is specifically designed to offer a more straightforward way to create lightweight, user-friendly product tables in WooCommerce.
So, let’s wait no longer and create a WordPress product table together.
Table of Contents
- What Is a Product Table?
- Method #1: Product Table Creation with JetProductTables
- Method #2: Create WooСommerce Product Tables Using JetEngine
- FAQ
- Conclusion
What Is a Product Table?
A product table is a digital representation of a physical product catalog. It’s a structured list that outlines the essential details of each item offered for sale on an online store. This table typically includes key information such as product name, description, price, quantity, category, and image.
The primary purpose of a product table is to provide potential customers with a clear and concise overview of the products available for purchase. By organizing this information in a tabular format, online shoppers can easily compare different options, identify desired features, and make informed buying decisions.
Furthermore, eCommerce product tables play a crucial role in inventory management and order fulfillment. By accurately tracking product details, businesses can ensure that they have sufficient stock to meet customer demand and avoid stockouts. Additionally, these tables streamline the order processing and shipping process, as they provide essential information for packaging and delivery.
Method #1: Product Table Creation with JetProductTables
To create a simple Gutenberg product table, we’ll start with the basic setup, creation, and showcasing on the front end, guiding you step-by-step on how to build an organized category table with JetProductTables.
Setting up and creating a product table
First, head to the WordPress Dashboard and navigate to WooCommerce > Settings, then open the Product Table tab. This is where the magic begins!
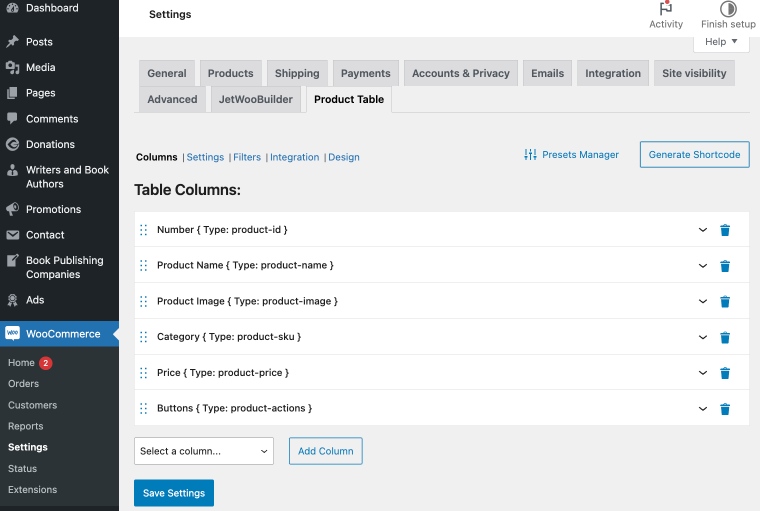
In the Columns section:
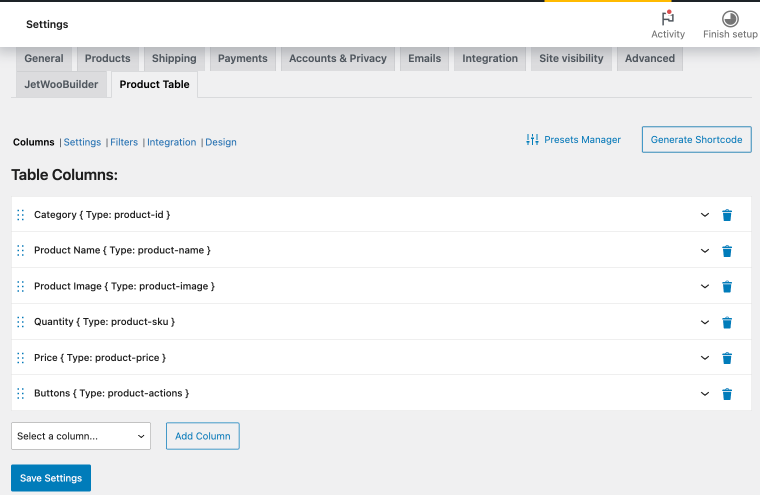
You can easily customize your table by adding, removing, or rearranging columns. By default, columns like “Product ID,” “Product Name,” “SKU,” “Price,” and “Button” are included. You can:
- Remove, for example, “Product ID” and “SKU” and add new columns, like “Categories,” “Type,” or “Quantity.”
- Move the “Button” column to the end for better organization.
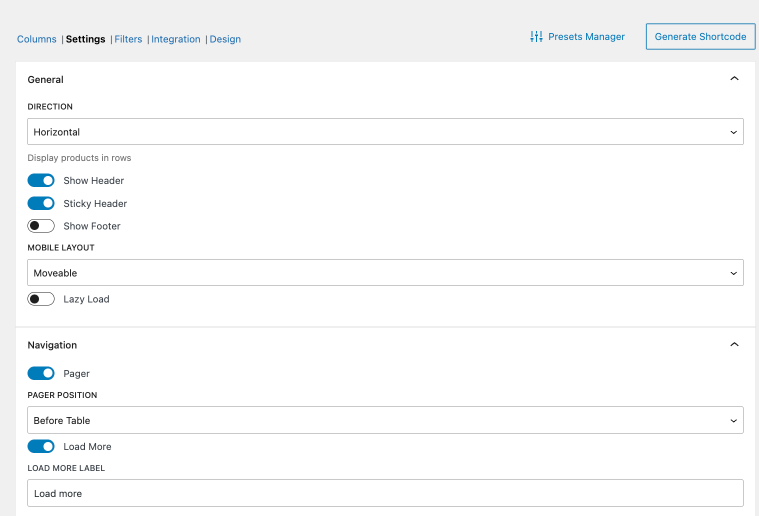
In the Settings section:
- Enable Sticky Header to fix the table header during scrolling.
- Show Footer adds a footer with column names.
- In Mobile Layout, you can choose options such as: “Moveable,” “Shorten,” “Transform,” or “Collapse.”
- For Lazy Load, enable the loading of content on a scroll or turn it off for immediate loading.
- Next, open the Navigation tab. Here, activate the Pager option to display page navigation, set the Pager Position to “Before Table,” and enable the Load More toggle to display the Load More button.
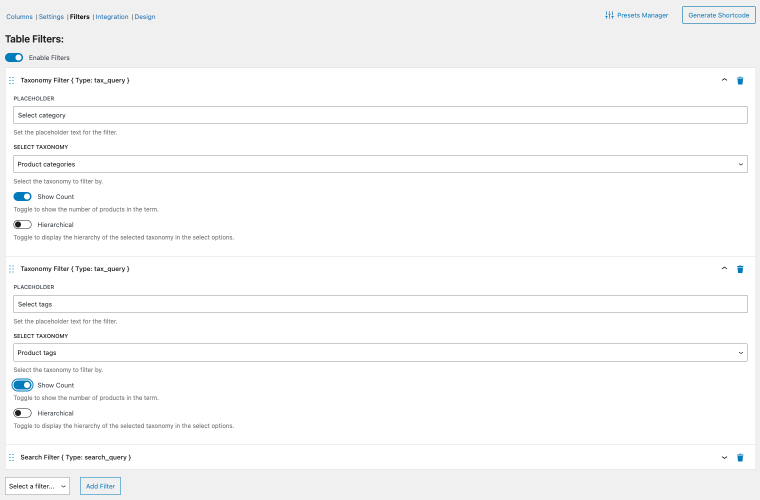
In the Filters section:
In the Filters section, activate the Enable Filters toggle to add product filters. Currently, you can filter by taxonomies, attributes, or text search.
- Add two taxonomy filters and a search filter.
- In the first Taxonomy Filter tab, set the placeholder to “Select category” and choose “Product categories” in the Select Taxonomy drop-down. Enable the Show Count toggle to display the product count.
- In the Search Filter tab, you can keep the default settings, which work well for many cases. However, feel free to adjust these settings to fit your specific needs better.
- Add another Taxonomy Filter, set the placeholder to “Select tags,” choose “Product Tags,” and turn on Show Count.
In the Design section:
In the Design section, you can customize various aspects of your WooCommerce product table appearance, including colors, fonts, and more. Choose text and background colors that align with your brand, and set fonts to enhance readability and style. These settings let you personalize the look and feel of your site to match your vision.
Once everything is done, hit “Save Settings.”
For variations in design, refer to the How to Create a Preset for Product Table tutorial. This guide gives you the essentials for setting up and styling a WooCommerce Product Table using JetProductTables.
How to showcase a product table on the front end
You can display your product table on the front end in several ways: by using the Product Table block, the shortcode generator, or through WooCommerce integration. The simplest way to showcase the product table is by navigating to the WordPress block editor (Gutenberg) and adding the Product Table block. If you’re looking for a more detailed tutorial on displaying WooCommerce products with the Product Table block and customizing its appearance, follow our tutorial.
Once you’ve finished customizing the block and the page or template, simply click the “Save” button to apply your changes.
We also offer a guide that explores other methods for displaying your category table, providing you with flexible options.
Method #2: Create WooСommerce Product Tables Using JetEngine
JetEngine Dynamic Tables Builder module overview
As you may know, our favorite plugin has Default and External modules. Dynamic Tables Builder can be found in the latter list. In addition, we have our JetTalks series on YouTube, where Crocoblock’s CTO gave an overview of JetEngine features, so don’t hesitate to check the stream record.
Because JetEngine is growing, becoming a more powerful plugin that can replace 10+ other third-party plugins, particularly the WooCommerce product table plugin, and not overload your website. Moreover, it provides more possibilities for your projects. You can showcase products within a wide variety of online WooCommerce stores featuring different catalog display requirements.
It can be a basic price list or tables with product property columns, or you can add restaurant menus, catering price lists, co-op wholesale, order options, etc. Or you can launch an online store with electronics and present gadgets in a table layout. With JetEngine, it is possible to build any WooCommerce product list table.
By the way, an excellent tool for any eCommerce project is WhatsApp Business, which allows you to get in touch with your clients and provide good customer service. However, it is important to understand the difference between WhatsApp and WhatsApp Business.
The WhatsApp Business API is good not only for marketers but also for customer support and service staff, as it provides more opportunities to build stronger relationships with customers through WhatsApp conversations. This can be done by sending personalized messages and offers to customers at the right time while also being able to conduct short surveys and provide instant customer support.
Now, let’s take a sneak peek at the JetEngine functionalities under the hood you can use to build a WooCommerce product table.
Dynamic Tables Builder features
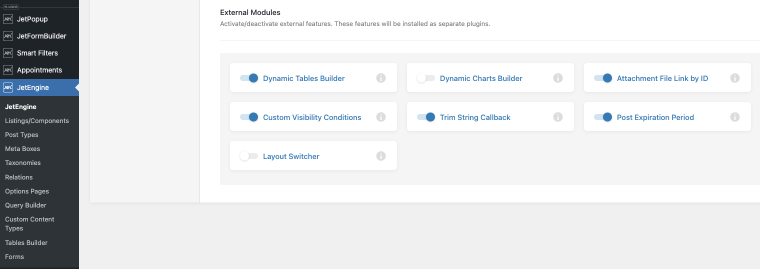
To get started, you need to navigate to the WordPress dashboard and click on JetEngine. In the External Modules section, enable the Dynamic Tables Builder module so the Tables Builder becomes available in the JetEngine menu.
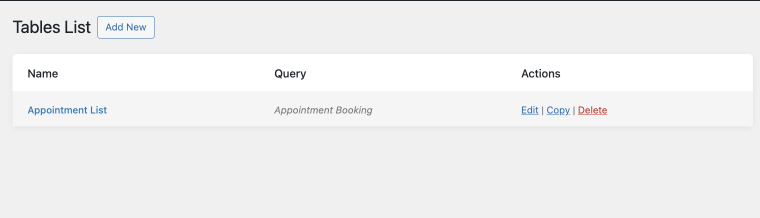
Go to “Tables Builder” and then click the “Add New” button to create a new table.
Now you are in Tables Builder settings, which include three tabs: General Settings, Columns, and Table Styles.
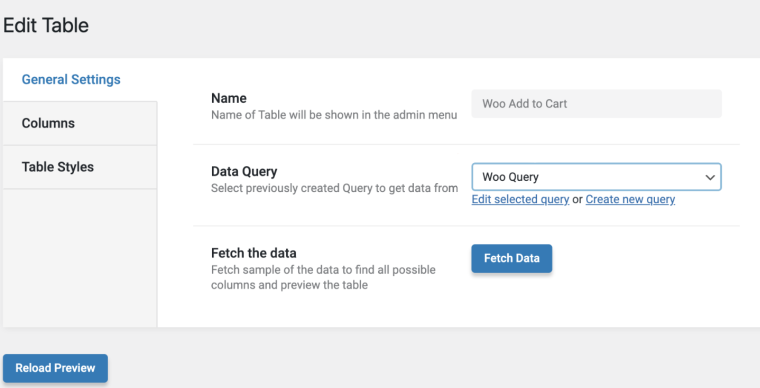
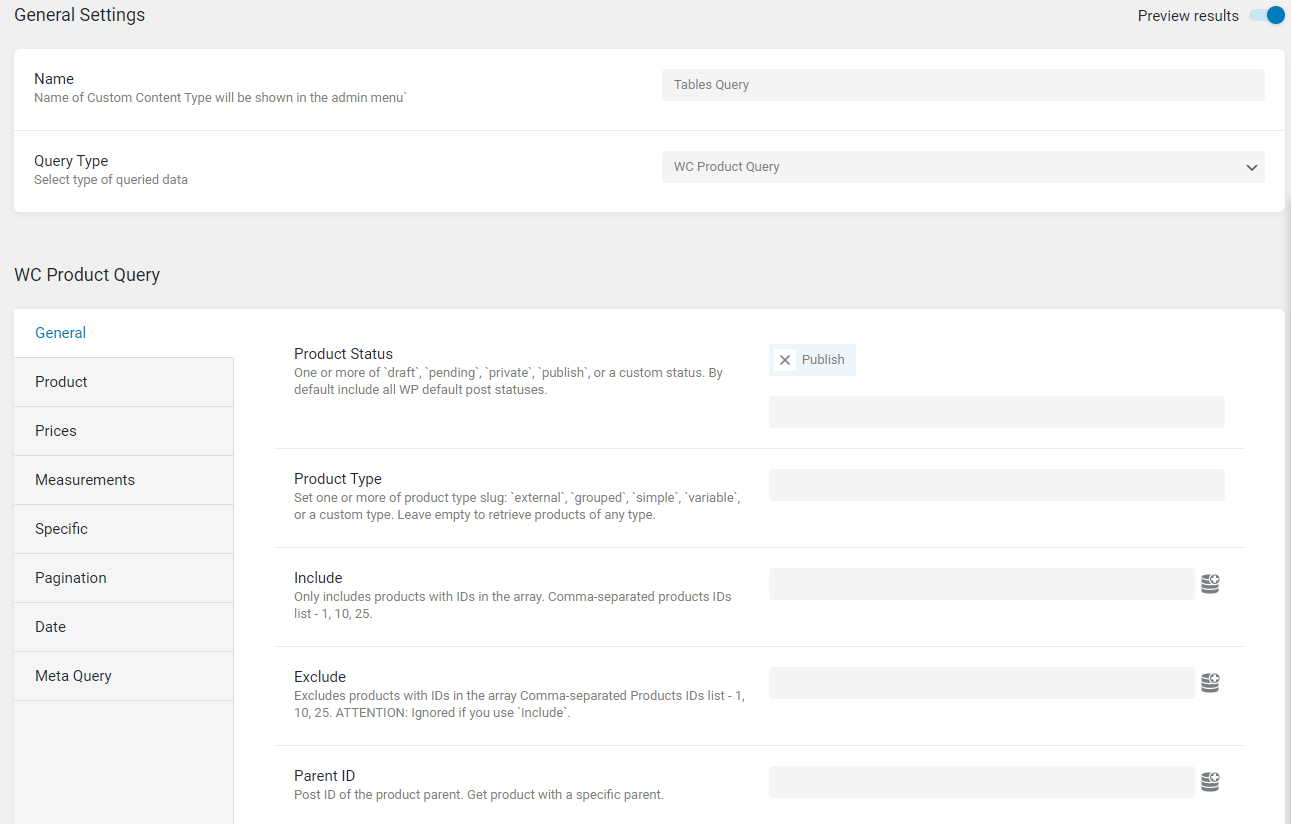
General Settings tab
Here, you can see three options: Name, Data Query, and Fetch the data. There are short hints accompanying all the options to make things clearer. The general settings here allow you to name the future WordPress table and choose the source query.
Columns tab
It is self-explanatory: here, you create and add columns for the future table. As for the Raw Value content, it works similarly to meta fields.
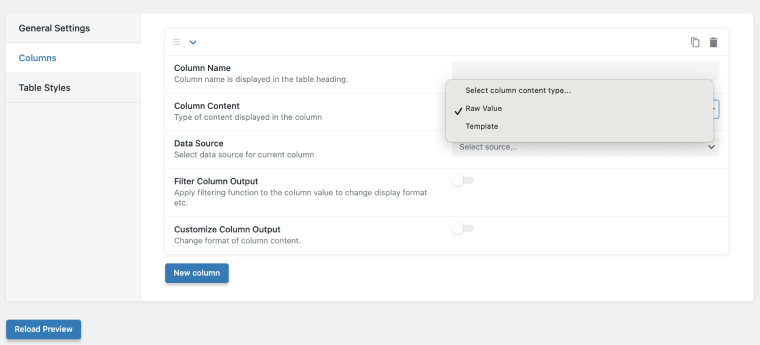
Here, you insert the name for a column, choose the content type to display, filter, and customize the column output, or use a previously created template (listing item) to incorporate its settings into the current columns. Furthermore, you can click the Reload Preview button to see your table.
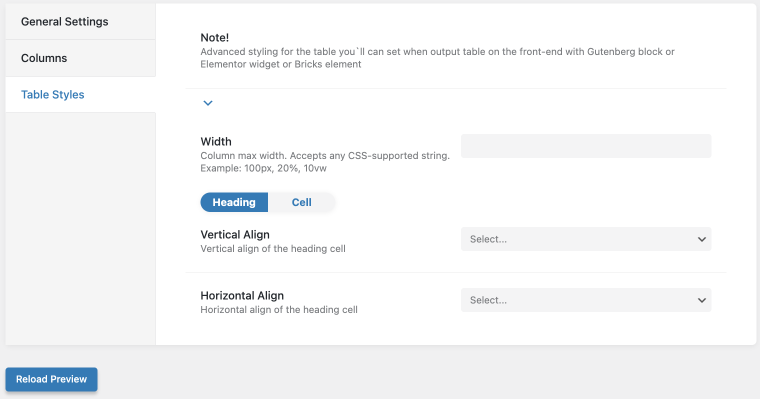
Table Styles tab
This tab is responsible for table width and vertical/horizontal alignment, which you can set up both for title and column content.
You are always welcome to check the detailed article in our Knowledge base, explaining all the options and settings.
Using Tables Builder to create a product table
You don’t need to be a genius to build a basic WooCommerce product database table with the Dynamic Tables Builder. Thankfully, the settings are intuitive enough to make the process easy.
1. Enable the Dynamic Tables Builder module
As it’s mentioned before, you need to enable the Dynamic Tables Builder toggle to activate it. Go to WordPress Dashboard > JetEngine > Tables Builder to proceed with your future table.
2. Create a Query
Creating a query is a crucial step because Dynamic Tables rely on the Query Builder to function. This connection ensures that your data is accurately fetched and displayed in your tables. Because query serves as the foundation for organizing and retrieving the specific data you want to showcase in your table, making the entire setup efficient and tailored to your needs.
Quick reminder:
Query determines how and what data should be pulled from the database. If we want a table, we can’t do without the Query Builder.
Stop here to remember how to create a query and then go straight to creating a products table. One more scenario where Query Builder is helpful is displaying the desired number of items on the table per page. This can be done in the Pagination tab by filling in the Limit field. Here, you can modify the row quantity on the table’s first page.
3. Name your table
Open the General Settings tab, find the Name placeholder, and give the name to your table. In Data Query, choose the one you’ve created before, and don’t forget to skip the Fetch Data step.
4. Create columns
For the next step, you’ll need columns for sure. Go to the Columns tab and give your column an exact and specific name. For instance, if you want to start the table with a product-featured image, name the column “Image.”
5. Create a dynamic Listing template
In the Column Content, let’s choose Template and create a dynamic Listing template for use later in your WordPress tables. Add the JetWooBuilder’s Thumbnail widget to the listing item to output the product’s image. After creating it, you’ll see a product-featured image listing.
The next column will be the Product Name. Choose “Raw Value” as the Column Content; for Data Source, choose “Post/Term/User/Object Field,” and then find the Title field under the WooCommerce Section.

6. Duplicate columns
Note that you need to perform this step as many times as the number of columns you require.
For example, if you want to add a Category column, change the name, choose the Categories Field, leaving Column Content and Data Source the same. Repeat the steps to display product tags, brand, size, availability, and color. Don’t forget to select the appropriate option in the Field dropdown list. For Price, choose “Price HTML String” to display sale prices.
7. Add a purchase button
To add a purchase button, you will need to create a template with an “Add to Cart” button for a single product or a button that redirects to the product’s page (for product variations).
Create a template alias Listing item for Product Purchase with the corresponding button, using the button widget and dynamic tag with WooCommerce > Add to cart URL value. Then, choose the created Listing as the Column Content. Profit!
Click “Reload Preview” to look through the table and check if anything is missing or incorrect.
Style the WooCommerce product table
Style your WooCommerce product table using the Table Styles tab capabilities. In the Table Styles tab, adjust the width of the heading and cell, as well as the vertical and horizontal alignments, individually for each column. For instance, set the width of the first column – Picture – to 180px and set 230px for the Product Name column. Play with those pixels to achieve the required table appearance.
You can change the height of the WooCommerce product table by adding or removing the products or adjusting the top and bottom padding; thus, the height is aligned automatically.
Note that other styling options are available in Elementor, Block Editor, and Bricks editors.
Click on the “Update Table” button and proceed to the Pages Section to output the newly created table on the front end.
If you want to create a WooCommerce variations table to showcase all variations together, the Dynamic Tables Builder displays product variations as text inputs. Crocoblock’s Tables Builder offers a streamlined solution with essential features to meet your needs effectively.
Quick reminder:
If you want to discuss this possibility or add anything else, you’re always welcome to leave a suggestion on GitHub.
Also, please note that you can’t remove the WooCommerce table row within the Dynamic Tables Builder at the moment. To avoid deleting items, we can configure the query to display only what we need.
How to insert a WooCommerce product table on a page?
At this point, you have created a Product Table page. So the next steps are:
- Open your Product Table page with Elementor.
- Find the Dynamic Table widget and drag and drop it onto your page.
Configure the Table Settings
- Go to the settings and choose “Products Table” as the Table source.
- Enable horizontal scroll if you have multiple columns, and choose to show column names.
Style your table
- Open the Style tab to customize your WooCommerce product list table.
- Adjust Table Alignment, tweak Headers with typography settings, and define Weight and Line-Height.
- Choose Background and Text Colors, adjust the top and bottom padding, and align the text as needed.
- Customize Body Style and Border Type, and set Vertical and Horizontal Alignment. Style everything to match your website’s design.
Add pagination
- Use the Dynamic Tables Builder to add pagination, which is especially useful for stores with more than ten items.
- Ensure the JetSmartFilters plugin is installed and activated.
- Find the Pagination widget, place it underneath the table, select “JetEngine Dynamic table” as the Source, and adjust the Controls settings as needed.
Save and preview
Save your changes and preview the table on the front end. You should see a well-styled and functional product table that aligns with your website’s design.
FAQ
JetProductTables is a specialized plugin designed specifically for creating product tables in WooCommerce. It offers a user-friendly interface and a wide range of customization options.
While JetEngine can be used to create product tables, JetProductTables is more specialized and offers a more streamlined experience for this specific task. If you’re primarily focused on building product tables, JetProductTables is the recommended choice. However, if you need more flexibility and control over your WooCommerce store, combining both plugins can be beneficial.
Both JetEngine and JetProductTables offer a variety of customization options, including styling, filtering, and sorting. You can adjust the look and feel of your table to match your website’s design.
Open the Style tab to fine-tune your WooCommerce product list table. Set the Table Alignment and adjust the Weight and Line-Height.
Yes. Just go to GitHub and submit the missing feature.
The Bottom Line
And that’s a wrap on creating WooCommerce product tables! With JetEngine and JetProductTables, building dynamic, customizable tables is easier than ever. Ready to give it a try? We’d love to hear about your experience – let us know how JetProductTables is helping you showcase your products in the Crocoblock Community.
