User registration and login are part of WordPress’s built-in functionality, so at first glance, there doesn’t seem to be much to discuss.
In reality, the default registration and login flow sends users straight to the WordPress backend. No matter how much you restyle or tweak it, it remains a dashboard designed for administrators, cluttered with technical elements and far from intuitive for regular users.
In most real-world projects, what we actually need is a custom front-end experience: a place where users see only what’s relevant to them from the very beginning, without unnecessary UI or distractions.
This is where custom registration and login forms become essential. They allow you to control not only how users sign in or create an account, but also how the entire authentication flow behaves on the front end. And I will demonstrate how to build not just forms but the whole verification and validation process using Crocoblock plugins, JetFormBuilder in particular. It works for registration and login forms of any complexity – including those for paid membership or just registration after a certain payment.
If you search for user registration plugins for WordPress or signup plugins, you will find a lot of those for styling or editing the default registration and login form. But it’s definitely not enough.
WordPress Custom User Registration Flow With JetFormBuilder
JetFormBuilder is one of the most powerful form builder plugins when it comes to handling dynamic data, including creating and processing registration forms.
Create a form either from scratch or using a preset. There’s also an AI assistant.
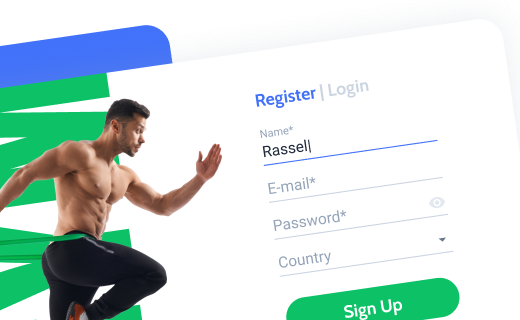
I will create a registration form from scratch.
Two fields are compulsory for WordPress to register a new user: login and email. The password is handled differently – in the default registration workflow, it’s typically generated automatically or set later during the password recovery process.
But it’s not a user-friendly scenario for non-technical users unfamiliar with this WordPress-specific logic. That’s why I want to add a password field as well. Two fields, to be precise – password and confirm password.
🔒 The passwords are stored in a hashed format in a database, so entering them via the JetFormBuilder form is just as secure as a default WordPress registration.
After all the fields are added, switch to the JetForm tab on the right panel, and select the Register User post-submit action. There, map all form fields with mandatory fields for user registration.
I’ve also added a Verification step – it’s an additional, optional step. I will talk about it in more detail in the following section.
NOTE
Unlike many other form builders that have password, email, and other specific text fields as separate field types, JetFormBuilder has them all within the Text field field type.
The Text field handles:
– Simple text;
– Email address;
– URL;
– Password.
Choose the specific one in the Field settings on the right panel. Depending on the field type, it will have corresponding settings, e.g., for autocomplete and visibility.
You can set up rules for this field: maximum and minimum number of characters, and more complex ones in the Validation tab > Advanced.
Verification
Verification, or email verification, is a very useful action that helps register only real users with valid email addresses and prevents fake, temporary, or mistyped emails from being used during registration.
When verification is enabled in JetFormBuilder, the user receives an email containing a unique confirmation link. The account (or specific action in the form workflow) is completed only after the user clicks this link, ensuring that the provided email address actually belongs to the user.
Don’t forget to add a message for a user to check their email to complete the registration.
Here are some important things to know about the Verification:
- In the Verification action settings, you can choose how long the verification link remains valid.
- You can either use the automatic email template or create a custom one to fit more information.
- There are two options for who performs the verification:
- User and Administrator,
- or Administrator (only).
The first option doesn’t mean both must verify – it means that either user clicks the link and gets verified, or an administrator manually clicks the “Verify” button for the particular record in JetFormBuilder > Form Records.
Also, there’s an option that only the Administrator performs the verification, and the user doesn’t need to confirm anything.
Form Security and Field Validation for User Registration and Login Forms
JetFormBuilder has built-in field validation tools and form security features to protect any form, including registration and login forms.
Field validation tools
You can set up validation rules for any form field. It’s especially useful for passwords and logins in registration forms or other fields to be associated with the user.
Except for the maximum and minimum number of characters, you can set up these rules:
- Equals to (can be custom or fetch from existing form fields, or custom fields of the current posts, Options Page fields, etc.);
- Must contain characters / Must not contain characters;
- Matches / Does not match regular expression;
- Server-side callback. This one has a list of options:
- Is user login unique;
- Is user password unique;
- Is field value unique;
- Compare with current user password (for logged-in users);
- Custom PHP function.
You can add as many such verification rules as you need.
As you can see, it’s a really solid verification system with plenty of options.
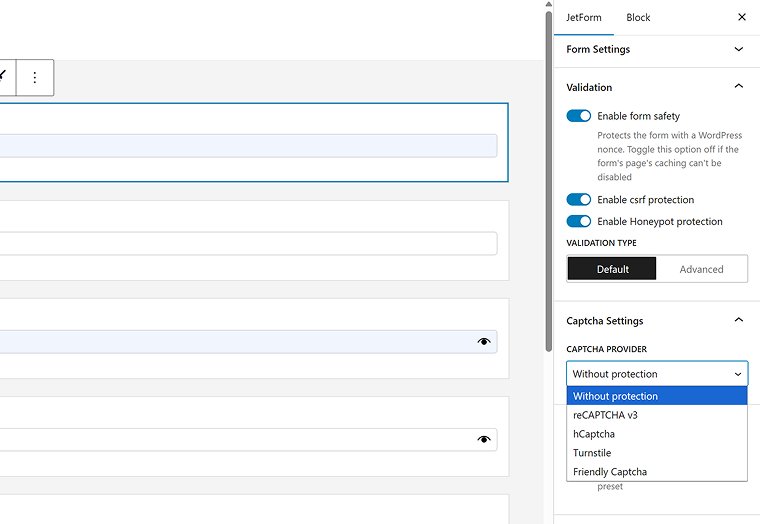
Form validation and security
Now, when individual fields have all the rules set, let’s move on to the form level.
Here, you can find three options for form validation:
- form safety using WordPress nonce;
- CSRF-protection;
- Honeypot protection.
❗ If you use caching plugins, these options may cause an error – it depends on the caching settings.
And, finally, there is a list of CAPTCHA options:
- reCAPTCHA;
- hCaptcha;
- Turnstile;
- Friendly Captcha.
User Login Addon
When a user is already registered, it’s natural also to have a login form built with JetFormBuilder. This is handled by the premium User Login Addon.

This is the functionality it’s responsible for:
- User Login field – lets users sign in using either their username or their email address.
- User Password field – provides a field where existing users can enter their account password.
- Reset Password button – displays a button whose label changes based on the current form state.
- Reset Password fields – shows either two password inputs or a single login field, depending on the active render state.
- Remember field – use a Checkbox Field block to keep the login session stored for up to two weeks.
- Whether to use secure cookies – enable this option to apply secure authentication cookies on HTTPS websites.
Registration, Login, and Reset Password Form Plugin
Let’s elevate the previous examples and not just stop at creating separate registration and login forms; in reality, one form should combine three: registration, login, and password reset.
It doesn’t mean you should have a huge three-in-one form – JetFormBuilder has an amazing feature called Render State. In simple terms, it’s something like layers in Figma or Photoshop – you can hide them and then display them when needed. So, you can create a couple of render states and switch between them using the Switch Render State button. As a result, you will have one compact form that can transform into another.
A detailed video tutorial will cover all the details. If you prefer reading, this tutorial will guide you.
As you can see, with JetFormBuilder, you don’t need a separate user registration or user login plugin – just use its powerful functionality.
How to Create a Custom Front-End Logout Button?
You can add a logout link for Elementor-based pages using the JetBlocks plugin. It includes the Auth Links widget, which provides personalized login, logout, and registration links that you can customize and set up redirects. Thus, it’s a nice go-to solution.
But in case you want to implement it for Block Editor or Bricks, where the JetBlocks plugin doesn’t work, you will need a custom URL to add to a button, icon, or text.
There’s a very straightforward solution – a link like this:
https://example.com/wp-login.php?action=logout
But it has a major drawback: it requires back-end confirmation, and the confirmation step looks similar to an error screen, which is not acceptable for our case.
That’s why we need to create a user-friendly link that doesn’t require any confirmation.
Go to Appearance > Theme File Editor and add this code to your functions.php file or use a code snippet plugin:
add_action( 'init', function () {

    if ( isset( $_GET['logout'] ) ) {

        wp_logout();

        wp_redirect( home_url() );

        exit;

    }

});
Here, logout is a custom link.
Then, add this URL to your logout button: /?logout
This code redirects a logged-out user to a main page – you can see it in this line:
wp_redirect( home_url() );In case you want to redirect a user somewhere else, modify it.
To redirect a user to a custom URL, replace it with this line and your desired redirect address:
wp_redirect( 'https://example.com/thank-you/' );If you want to redirect to a particular URL on your website, replace it with this (and replace the “my-page-slug” with a proper slug from your website):
wp_redirect( site_url( '/my-page-slug/' ) );Bonus: Custom User Registration Forms for Membership Websites
If you combine JetFormBuilder with JetEngine, you can create a powerful membership website with a custom user dashboard.
Here are a few tips and links on doing it:
- Consider using the Meta Box tool by JetEngine to add custom fields for users: e.g., their work experience, photo gallery, CV, etc. Then, add the corresponding fields in the registration form. Finally, map them in the Register User action.
- A Profile Builder module by JetEngine lets you create proper front-end dashboards.
- If you want to hide certain pages from certain user roles, use JetThemeCore’s visibility conditions. If you want to hide only certain blocks – JetEngine’s Dynamic Visibility is what you need.
📌 This comprehensive guide will guide you through the process of creating a full-fledged membership job board website with JetFormBuilder and JetEngine.
📌 If you want to create an Airbnb-like website with cool front-end dashboards, this article will guide you through.
FAQ
The best login WP plugin is one that lets you fully control the front-end experience instead of redirecting users to the WordPress dashboard. Look for solutions that support custom validation, verification, and security layers without relying on the default login screen.
A secure WordPress user registration setup includes email verification, strong field validation, and protection against spam and CSRF attacks. Combining these elements ensures only real users can register and access your site.
Not necessarily. A single, flexible solution can handle WordPress user registration, login, and password recovery within one form by switching states dynamically instead of loading separate pages.
Yes, aggressive caching or JavaScript optimization can interfere with nonces, CSRF protection, or verification links. It’s best to exclude registration and login pages from cache and test forms with all security options enabled.
Takeaway
Default WordPress registration and login are built for site administrators, not regular users. Sending someone to the dashboard to sign in or register can be confusing and unnecessarily complicated; it can simply repel customers.
On the other hand, custom front-end registration and login forms let users see only what matters to them, streamline registration and login, and keep everything secure. For any site with real users, front-end forms make the experience smoother and more professional without overcomplicating things.


