WooCommerce is a plugin that adds a complete eCommerce infrastructure to a WordPress website. It adds a custom post type called Products with a set of custom fields and a template to display them on the front end. Other than that, WooCommerce manages sales, statistics, and payments and can be extended with various add-ons to reach your particular goals.
For example, you can create a catalog website where customers can only explore the product range and send personalized inquiries. Product variations and their combinations are also easy to set up using the core functionality of the WooCommerce plugin.
WooCommerce has quite many fields to fill out information about products, but often, it’s still not enough. That’s why, in this article, I will go through the ways to add custom fields to WooCommerce product pages and fetch them on the front end.
Table of Contents
- Why Do We Need Custom Fields on WooCommerce Product Pages?
- How to Add Custom Fields on WooCommerce Product Pages
- Displaying WooCommerce Product Custom Fields on the Front End
- FAQ
- Wrapping Up
Why Do We Need Custom Fields on WooCommerce Single Product Pages?
To answer this question, let’s look at the default WooCommerce product meta fields and see whether they are enough.
We have three major fields:
- the product name;
- the product description;
- the product’s short description.
Then, we go to the tabs the Product default interface offers. There are six:
- General;
- Inventory;
- Shipping;
- Linked Products;
- Attributes;
- Advanced.
And there is also a tab called “Advanced” for extra add-ons provided by WooCommerce Marketplace.
Now, let’s figure out what all of these tabs contain, and it is really enough:
- General – is all about the price and the sale price.
- Inventory – SKU, stock management (in stock or not), and stock individuality (it’s about limiting purchases per one client).
- Shipping – is all about the shipping class, weight, and dimensions.
- Linked Products – for upsells and cross-sales.
- Attributes – the custom attributes section to define various colors, sizes, and other characteristics. Attributes are WooCommerce-specific custom taxonomies.
There is also an Advanced tab for purchase notes, menu orders, enabling or disabling reviews, and the Get More Options tab for WooCommerce promotions.
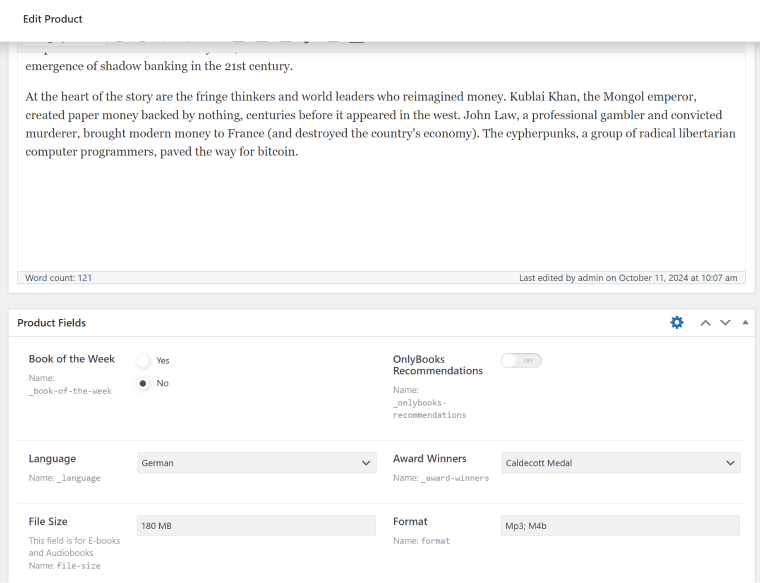
As you can see, the default options for adding specific product details are limited. For example, if I’m selling books, I would want to include fields for the publishing year, format, and language. Selling gadgets might require even more fields to display technical specifications. Many types of products clearly need additional fields to provide essential information. This makes it clear that custom fields are often a necessity for product pages. With that in mind, let’s dive into how to add custom fields to WooCommerce products.
How to Add Custom Fields on WooCommerce Product Pages
JetEngine is definitely a very powerful plugin, and it can help us here. It allows you to add custom fields not only to the product page itself (just like with any other post type) but also to product variations or product data tabs. You can even define which product types these fields apply to, giving you complete control over their availability.
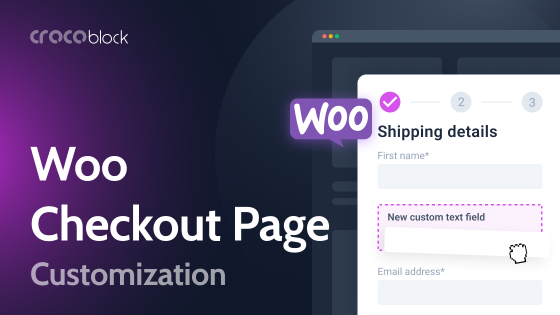
To add custom fields to WooCommerce products (it will work for Checkout and other pages as well), I will use JetEngine’s Meta Boxes tool.
Let me tell you a couple of words about this instrument. So, using JetEngine, you can create custom post types and add custom fields directly to these post types. You can also click the switcher to show default post types and add them to native WordPress posts and pages. Thus, custom fields belong to a particular post type and can’t be reused by others.
Meta Boxes tool, in turn, creates a set of custom fields that can be attached to multiple post types, taxonomies, and users. In addition, you can attach such meta boxes to the Product Data section of WooCommerce products – as a separate tab or as a set of fields in the Variations tab to each variation instance.
These fields can be displayed on the front end using the Dynamic Field widget with JetWooBuilder or Elementor Pro, as well as the Bricks template, using code (hooks or by modifying templates), or the Dynamic Field block in case you prefer the Block Editor for creating WooCommerce product templates instead of shortcodes.
NOTE
The next three sections are about displaying fields on the back end, not the front end. You can fetch them anywhere on the product page on the front end.
Adding custom fields to the Product Description area
There are a few ways to add custom fields to the WooCommerce product page back end using Meta Boxes. If you want the fields to be displayed not in the Product Data tabs but under the Product Description fields, you should go to JetEngine > Meta Boxes; in the Meta Box for field, choose “Post,” and in the Enable For Post Types field, select “Products.” You can add other post types if needed and add extra visibility conditions (Include or Exclude posts by ID, Include or Exclude for User Roles, and choose taxonomies the products belong to).
Then, add the required custom fields.
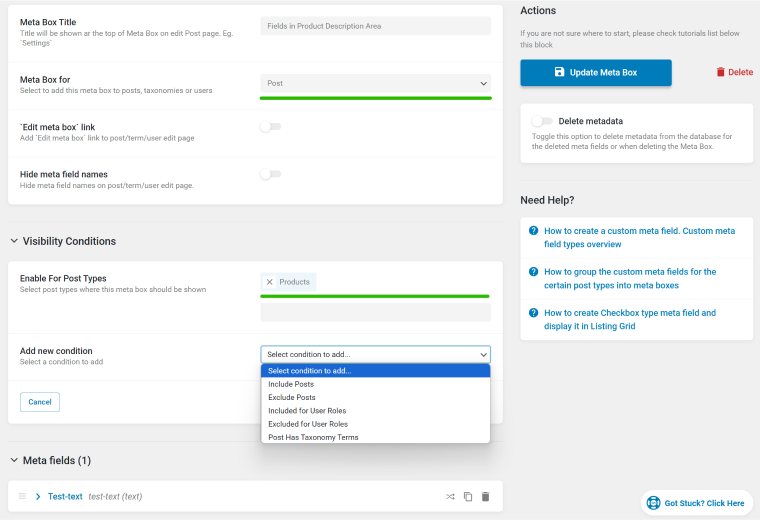
JetEngine offers 17 field types to choose from by default and 18 if the Maps Listings module is activated.
Add the fields you want, and they will appear on the product’s back end.
Adding custom fields to the Product Data area
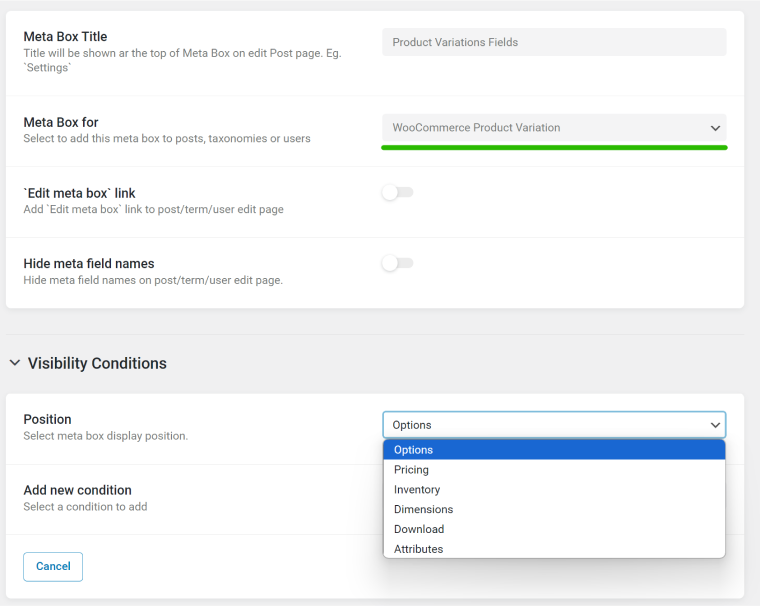
This is a WooCommerce-specific location for custom fields, and it comes with extra visibility conditions to have more flexibility in attaching custom fields. To place meta fields there, go to JetEngine > Meta Boxes; in the Meta Box for field, choose the “WooCommerce Product Data” option. Then, select which tab you want to have your custom fields to be displayed in. You can exclude or include the visibility of these fields for certain user roles.
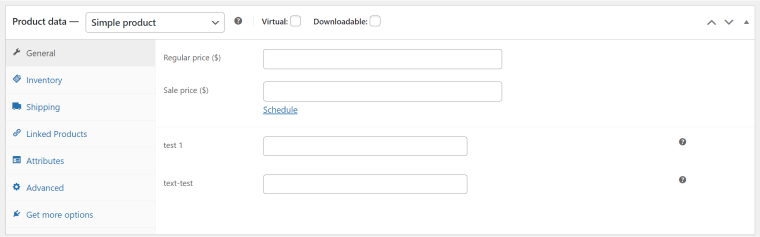
Note that the General tab is not displayed for the “Grouped” products, and the Shipping tab is only displayed for the “Simple” and “Variable” products. That’s why, if the custom fields are not supposed to be displayed in these particular tabs, choose the “Custom” option.
This option also gives extra visibility conditions: you can select product types for these fields to be displayed (Simple, Grouped, External, Variable) and choose the tab priority. By default, it will be the first.
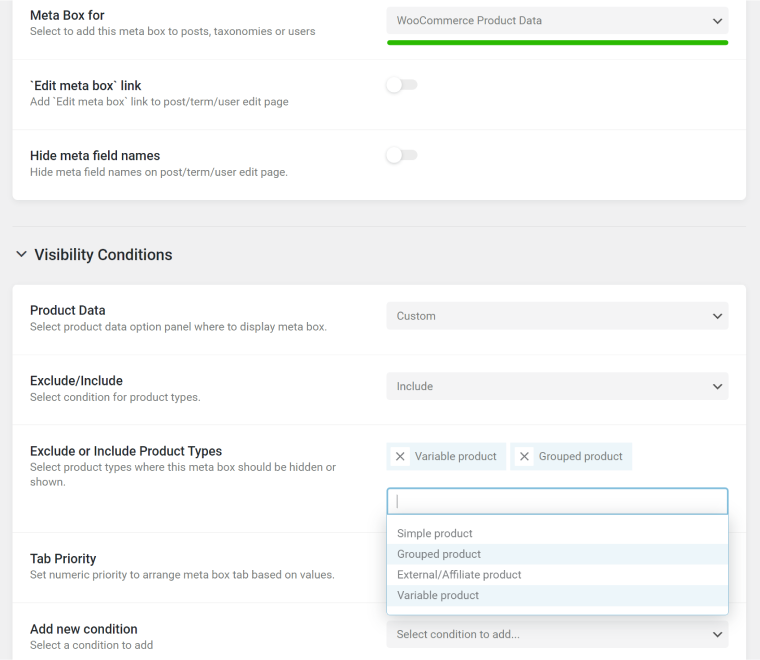
As a result, you will see the fields on one of the tabs if you choose one of them or on a separate tab if the “Custom” option is selected.
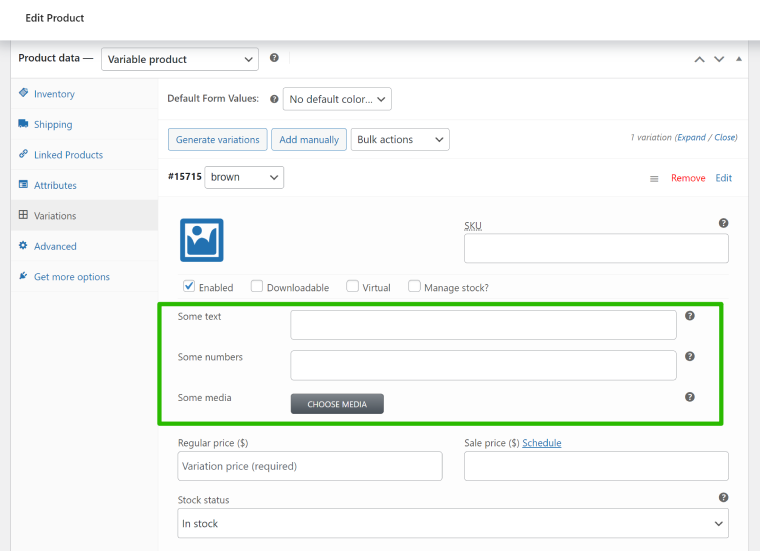
Adding custom fields to product variations
Finally, you can add custom fields to variable products for each product variation. To add meta fields there, go to JetEngine > Meta Boxes; in the Meta Box for field, choose the “WooCommerce Product Variation” option.
In the Position field, you can select where exactly the field group will be placed.
As a result, you will see the custom fields on the editor of each variable product when generating them or adding them manually.
Displaying WooCommerce Product Custom Fields on the Front End
When all the products’ custom fields are being added and filled up, it’s time to display them on the front end. There are a few ways to do this.
Displaying WooCommerce custom fields using JetWooBuilder
JetWooBuilder is a plugin for editing WooCommerce templates in Elementor (free or Pro). While Elementor Pro has widgets for customizing such templates, JetWooBuilder goes beyond and offers more flexibility. You can design the product page layouts without any coding. To replace default templates with the custom ones created with JetWooBuilder, go to WooCommerce > Settings > JetWooBuilder and set custom templates in the corresponding sections. Read this comprehensive documentation on creating custom templates this way. The video below might also be useful.
To display custom fields anywhere in this template, just use the Dynamic Field widget, select Meta Fields as a source, and choose the fields you’ve created.
Displaying WooCommerce custom fields using code
If you don’t use Elementor and build your product fields with the Block Editor, you can use the same Dynamic Field block by JetEngine.
However, this idea might not be for you because the Block Editor does not offer much flexibility. That’s why let me show you how to add the custom fields you’ve created with JetEngine anywhere on the website, no matter which builder you use.
So, JetEngine has a very cool feature called Shortcodes. Go to JetEngine > JetEngine and click the Shortcode Generator tab. There, you can generate a shortcode with all the details, which you can insert anywhere in any builder or the WooCommerce template.
There are two ways: to use hooks or to edit WooCommerce templates. If you want to do it using hooks, follow this logic:
add_action( 'woocommerce_single_product_summary', 'add_custom_shortcode_below_price', 25 );

function add_custom_shortcode_below_price() {

    // Ensure it's only added to product pages

    if ( is_product() ) {

        echo do_shortcode('[jet_engine_data dynamic_field_source="meta" dynamic_field_post_meta="test-text"]');

    }

}
This piece of code inserts the custom field named “test-text” under the price because the price has the priority “25.” Please read this article to learn more about WooCommerce hooks.
If you work with the Product Variations tab and want to fetch them on the front end, consider that they are powered by JavaScript. That’s why the only way to display them is by editing WooCommerce templates. However, you should copy them first to your theme folder so the changes will not get erased when the WooCommerce plugin is updated.
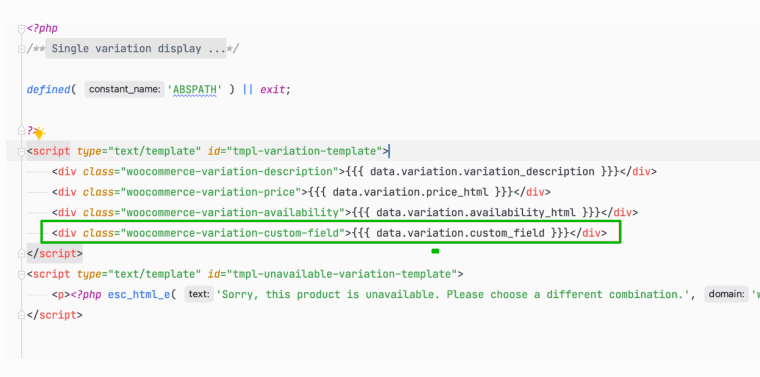
For better compatibility, developers made all the dashes to underscore symbols.
FAQ
Custom fields in WooCommerce are the fields made to display additional information about products.
Use the JetEngine Meta Boxes feature to add some custom fields to WooCommerce products.
Use the JetWooBuilder plugin or read this article to learn how to use WordPress hooks.
Wrapping Up
Most eCommerce shops need custom fields to display full information about the products or services they sell. The core functionality of the WooCommerce plugin doesn’t have these options, so you need to find ways to add them to your products. In this article, I went through the ways of adding custom fields and displaying them. I hope it will help you enhance your productivity by delivering efficient customer-oriented websites.