Listing Template Overview
This guide is about the Listing Template settings available with the JetEngine plugin for WordPress.
First Steps of Listing Creation
The listing can be created in the WordPress Dashboard > JetEngine > Listings/Components directory. Here, one can create a new listing by clicking the “Add New” button or edit the already-built one by hovering over the item and pressing the “Edit with Elementor” button.
Before editing, the primary customizations should be made in the customization pop-up.
Listing Source
The Listing source drop-down list includes the following options for selection:
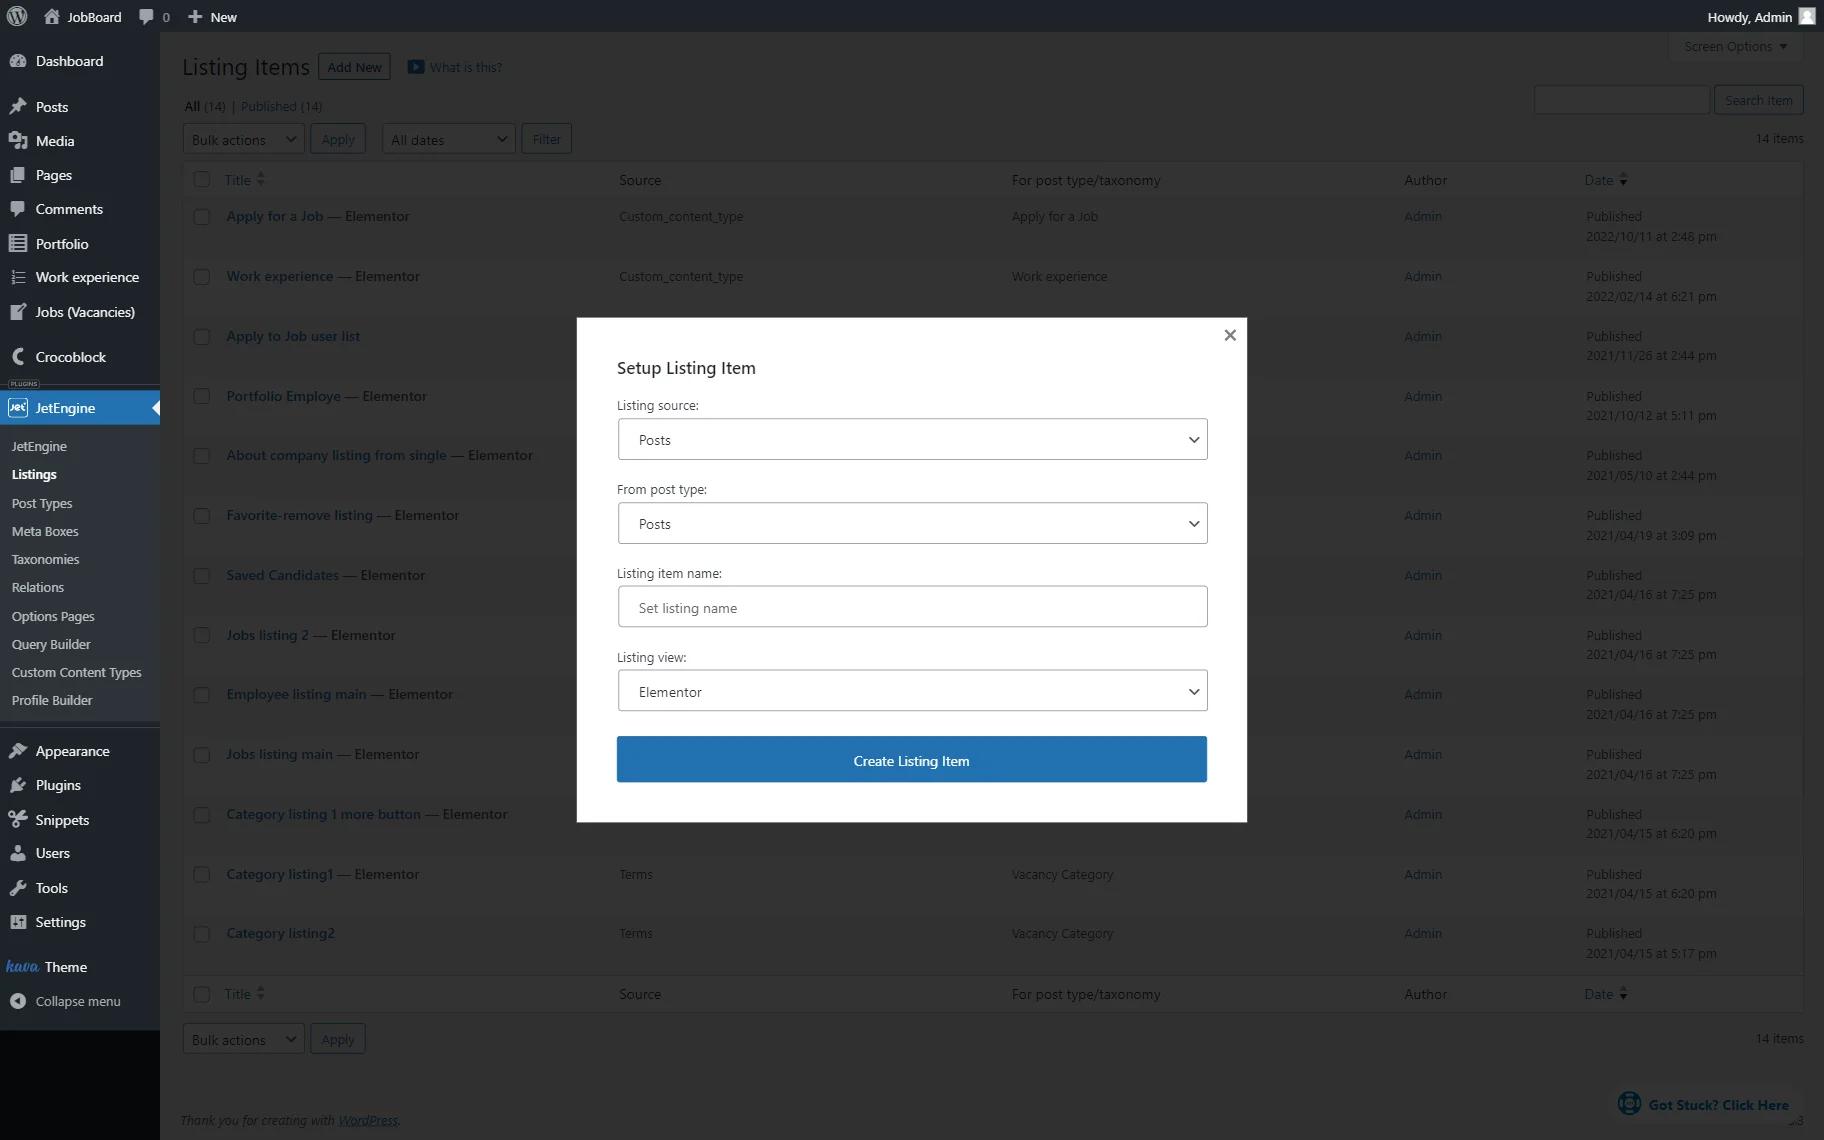
Posts
With the “Posts” source, the From post type drop-down appears to offer the post type source options.
Query Builder
When choosing the “Query Builder” source, the Query field appears with the list of the needed items.

Terms
The From taxonomy field appears if the “Terms” Listing source is picked.

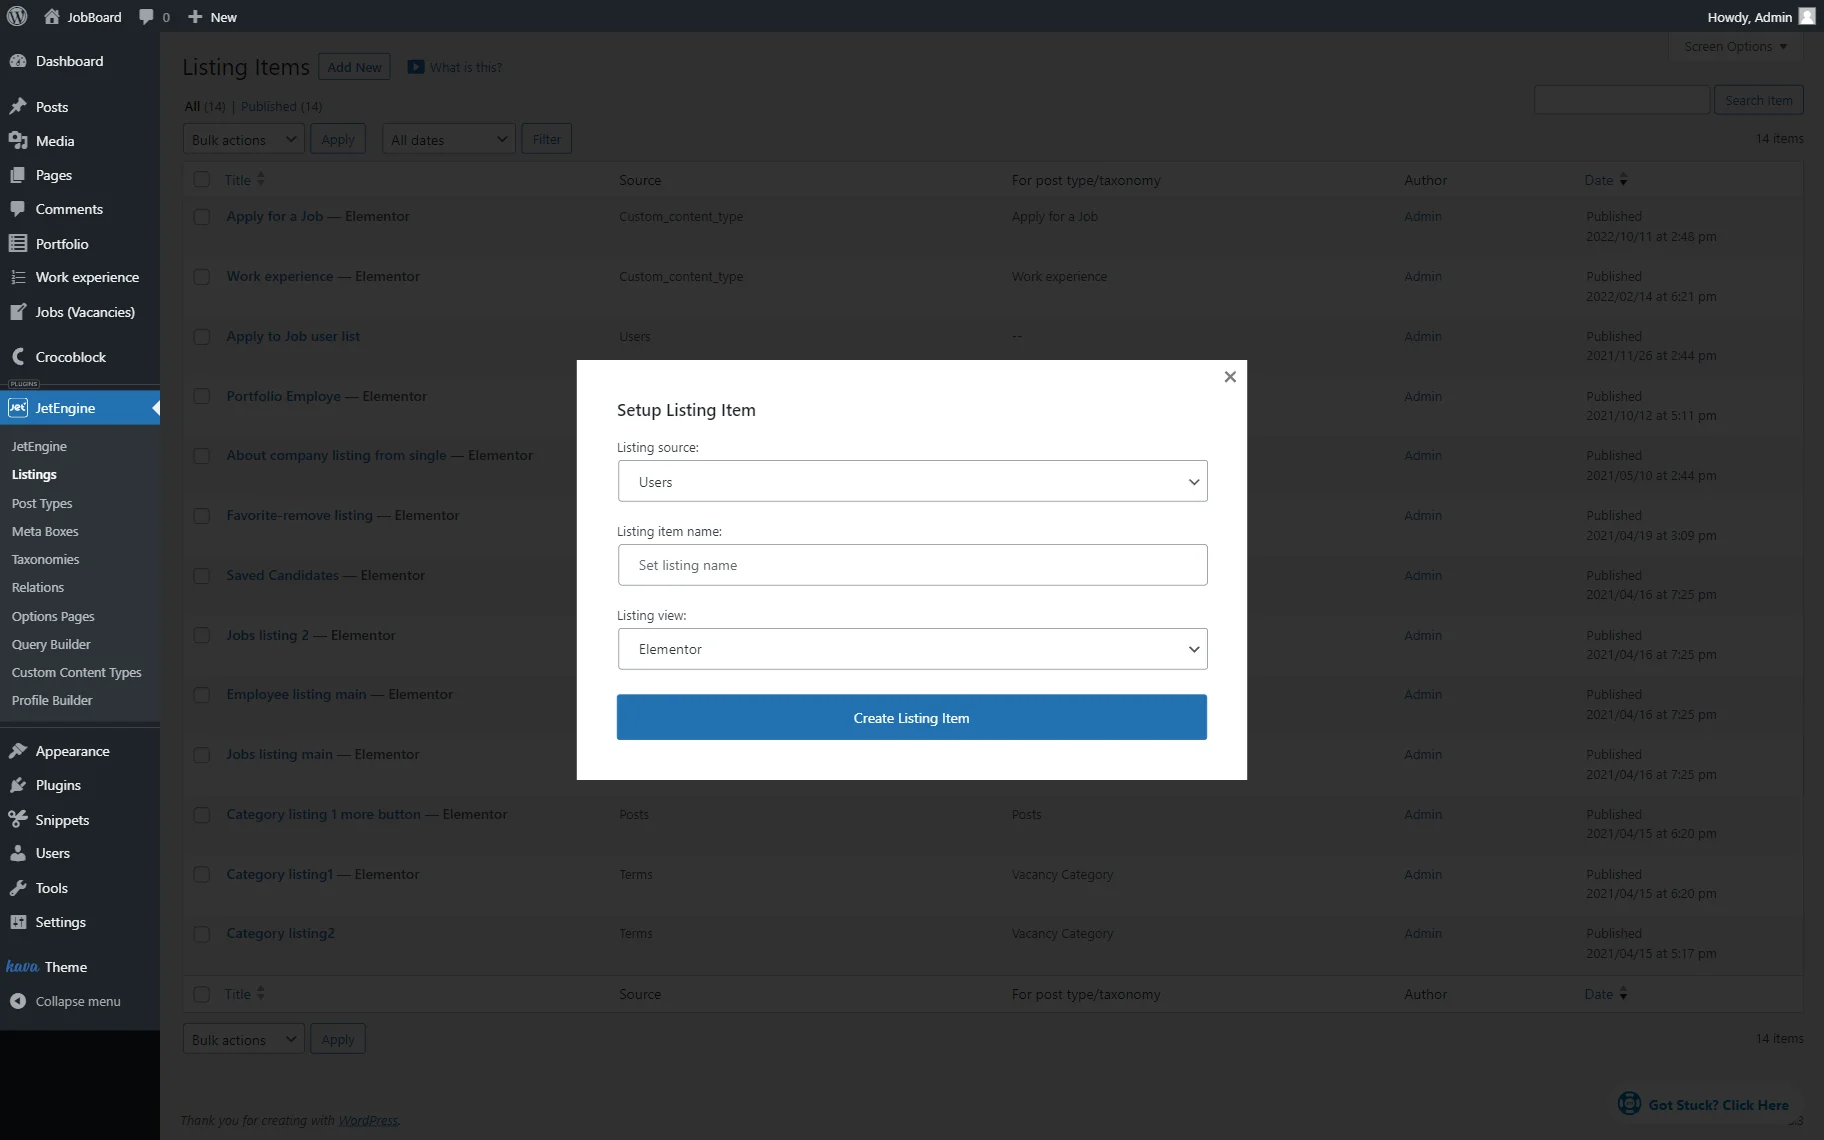
Users
The “Users” Listing source doesn’t need any specification; it works with WordPress users.
Repeater Field
For the “Repeater Field” source, an option should be picked in the From post type list. Then, the Repeater source field follows, where the next options are presented: “JetEngine,” “JetEngine Options Page,” and “ACF.”
The following line includes two fields: the Repeater field and the Repeater option. One should be chosen based on the earlier selected Repeater source, complete the Repeater field for the “JetEngine” or “ACF” Repeater source, and fill in the Repeater option for the “JetEngine Options Page.”

Custom Content Type
The “Custom Content Type” Listing source allows Custom Content Type selection.

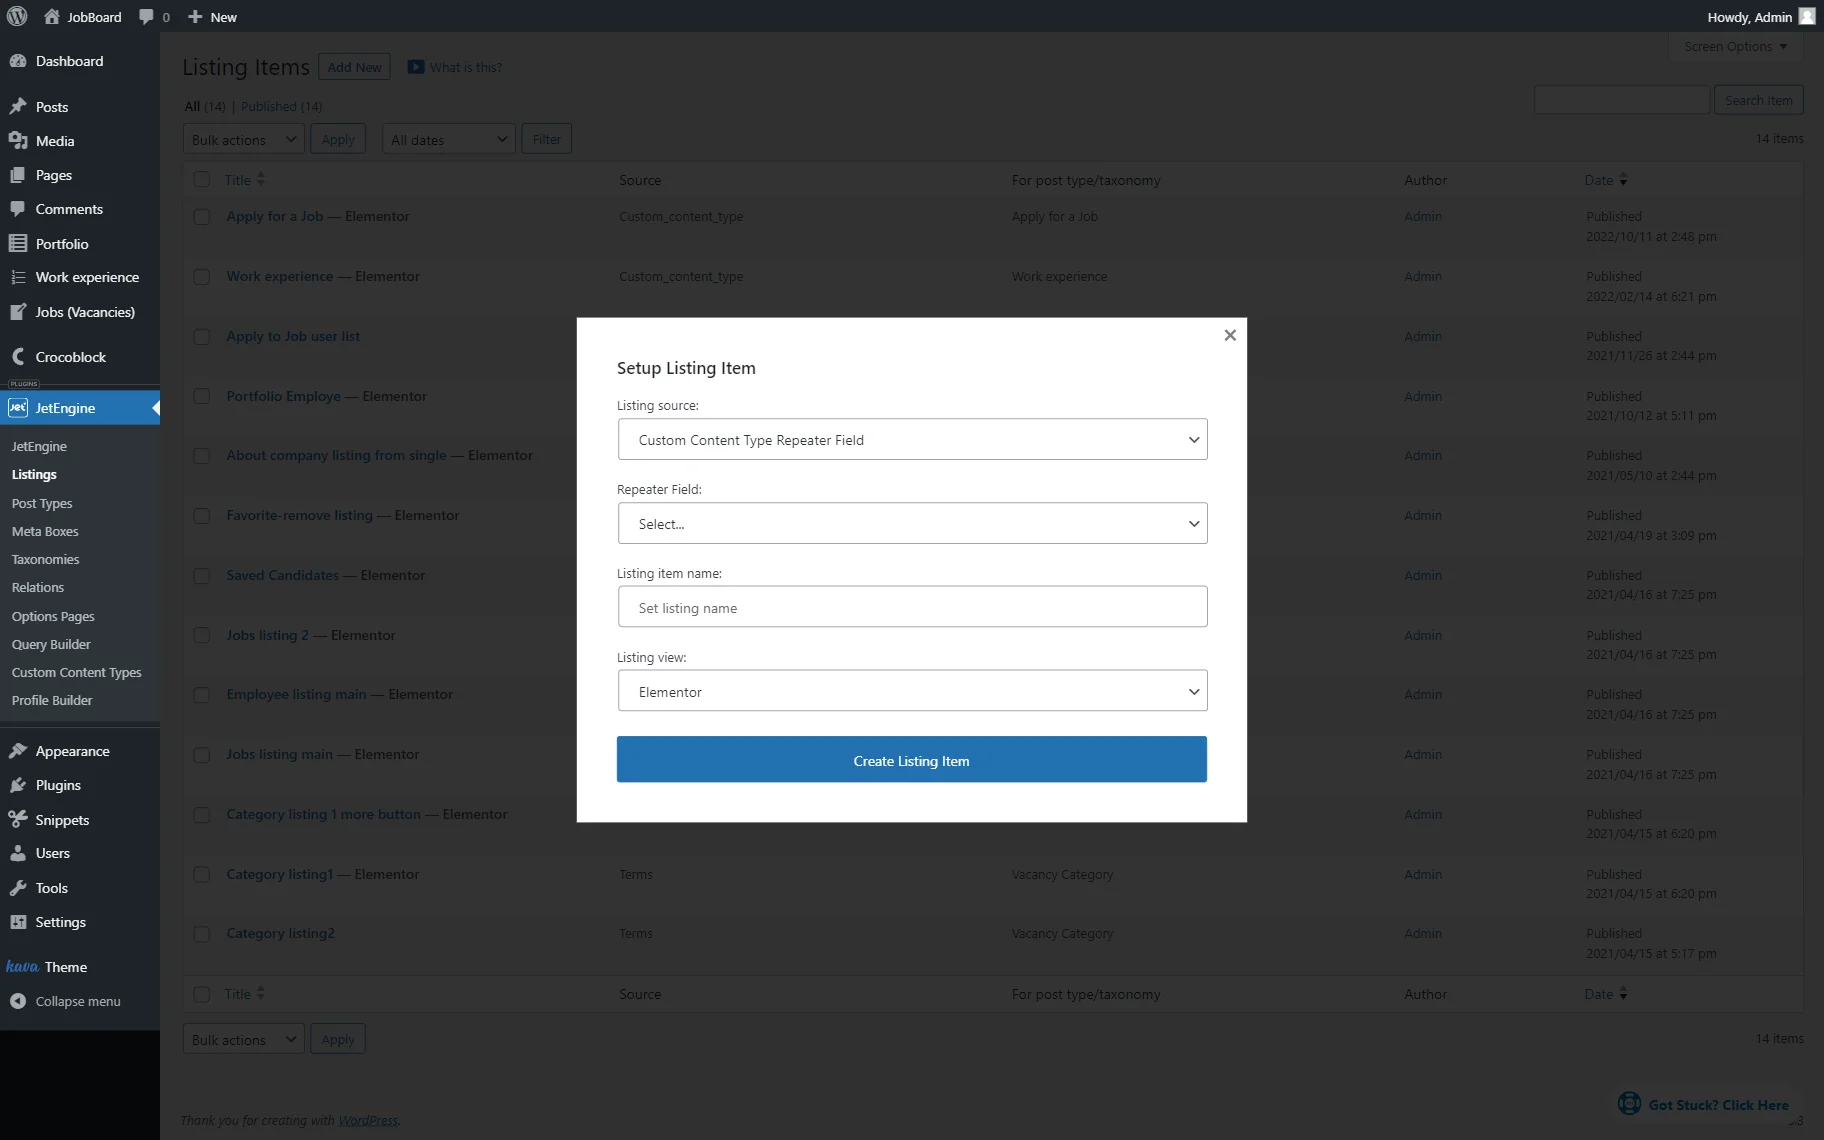
Custom Content Type Repeater Field
This Listing source option reveals the Repeater Field drop-down where the needed option should be chosen.
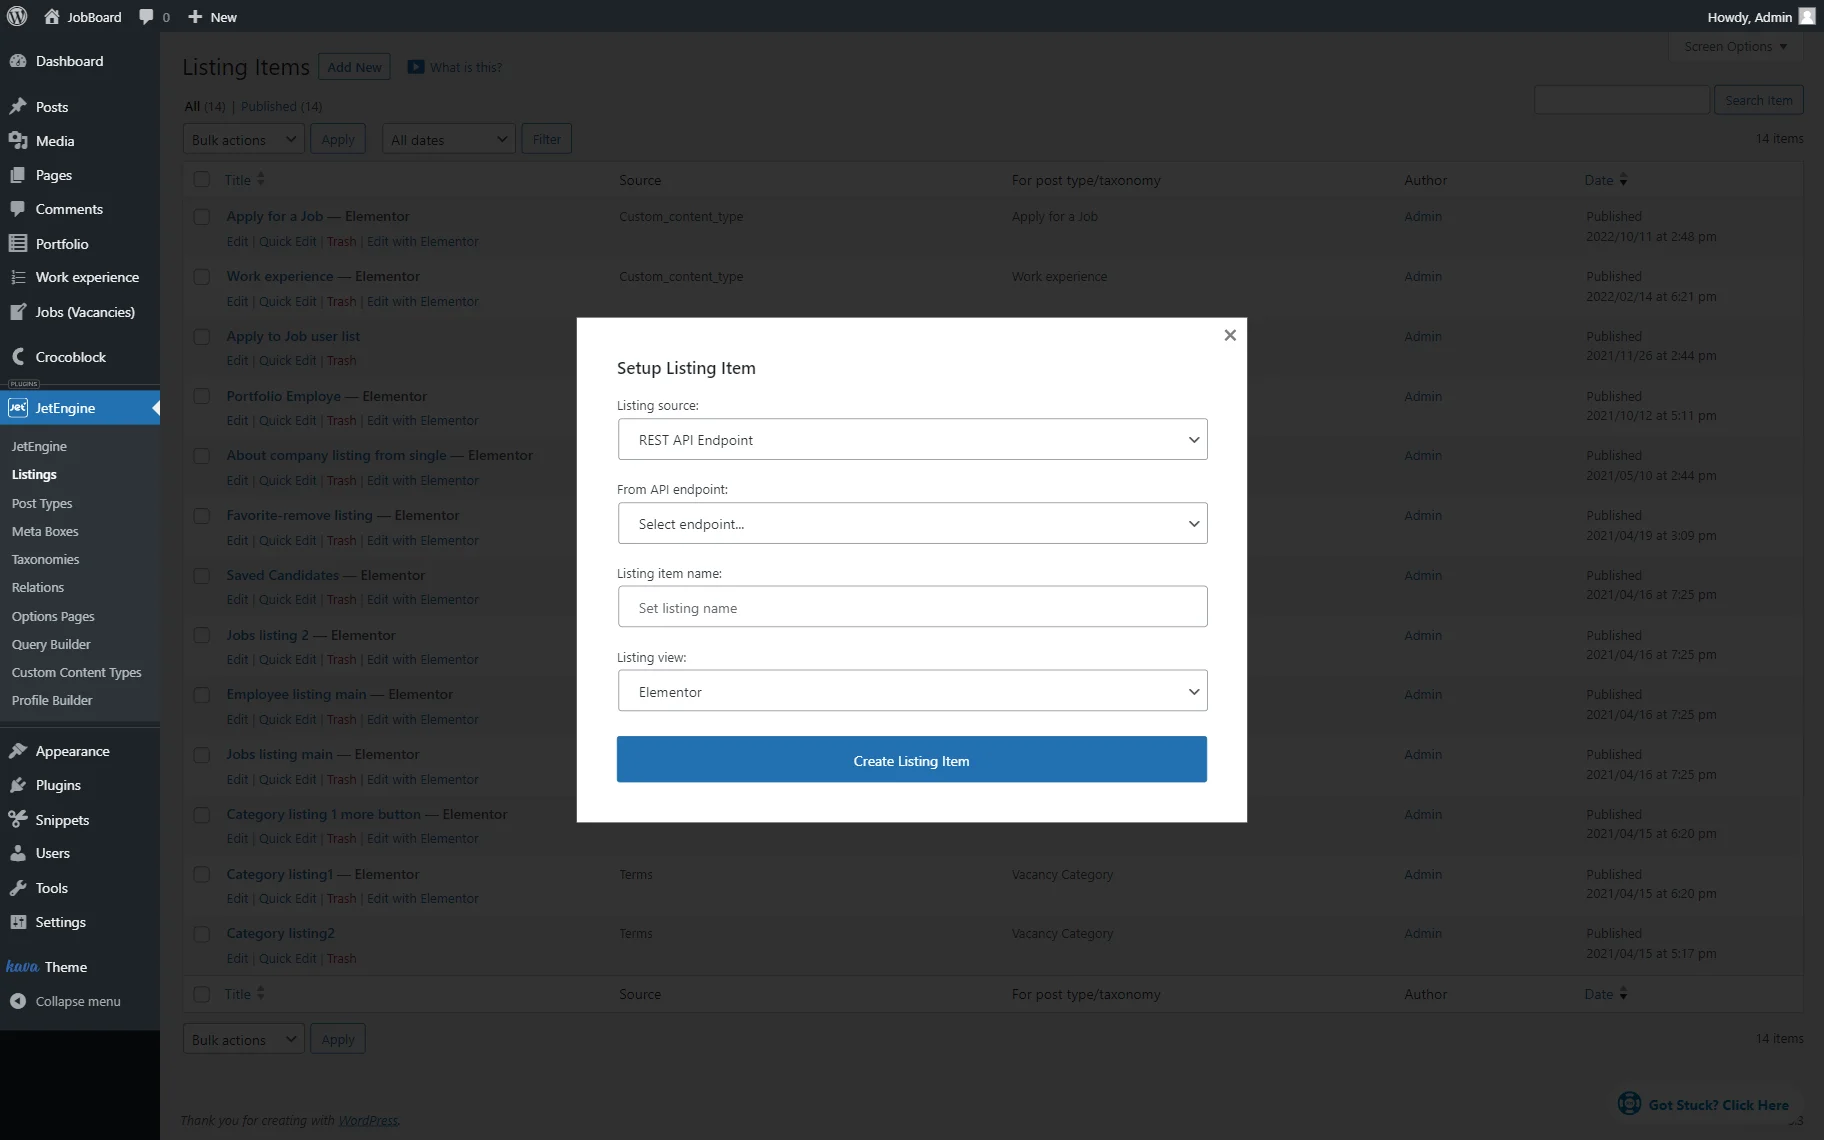
REST API Endpoint
With the “REST API Endpoint” source, the From API endpoint field appears.
JetReviews
The “JetReviews” source pulls out the reviews created with the JetReviews plugin.

Listing item name and listing view
After selecting the needed Listing source, two additional fields appear: Listing item name and Listing view.
The Listing item name is a field for a listing name to distinguish it from other listings; it can be left empty so the name will be generated automatically.
The Listing view has four available options: “Elementor,” “Gutenberg (Blocks Editor),” “Bricks,” and “Timber/Twig.”
Further, the Elementor settings for Listing will be described, so the “Elementor” option should be picked.
The “Create Listing Item” button should be clicked to open the editor.
Listing Item in Elementor
Initially, a listing is empty. The Elementor panel allows adding the desired widgets to the template.

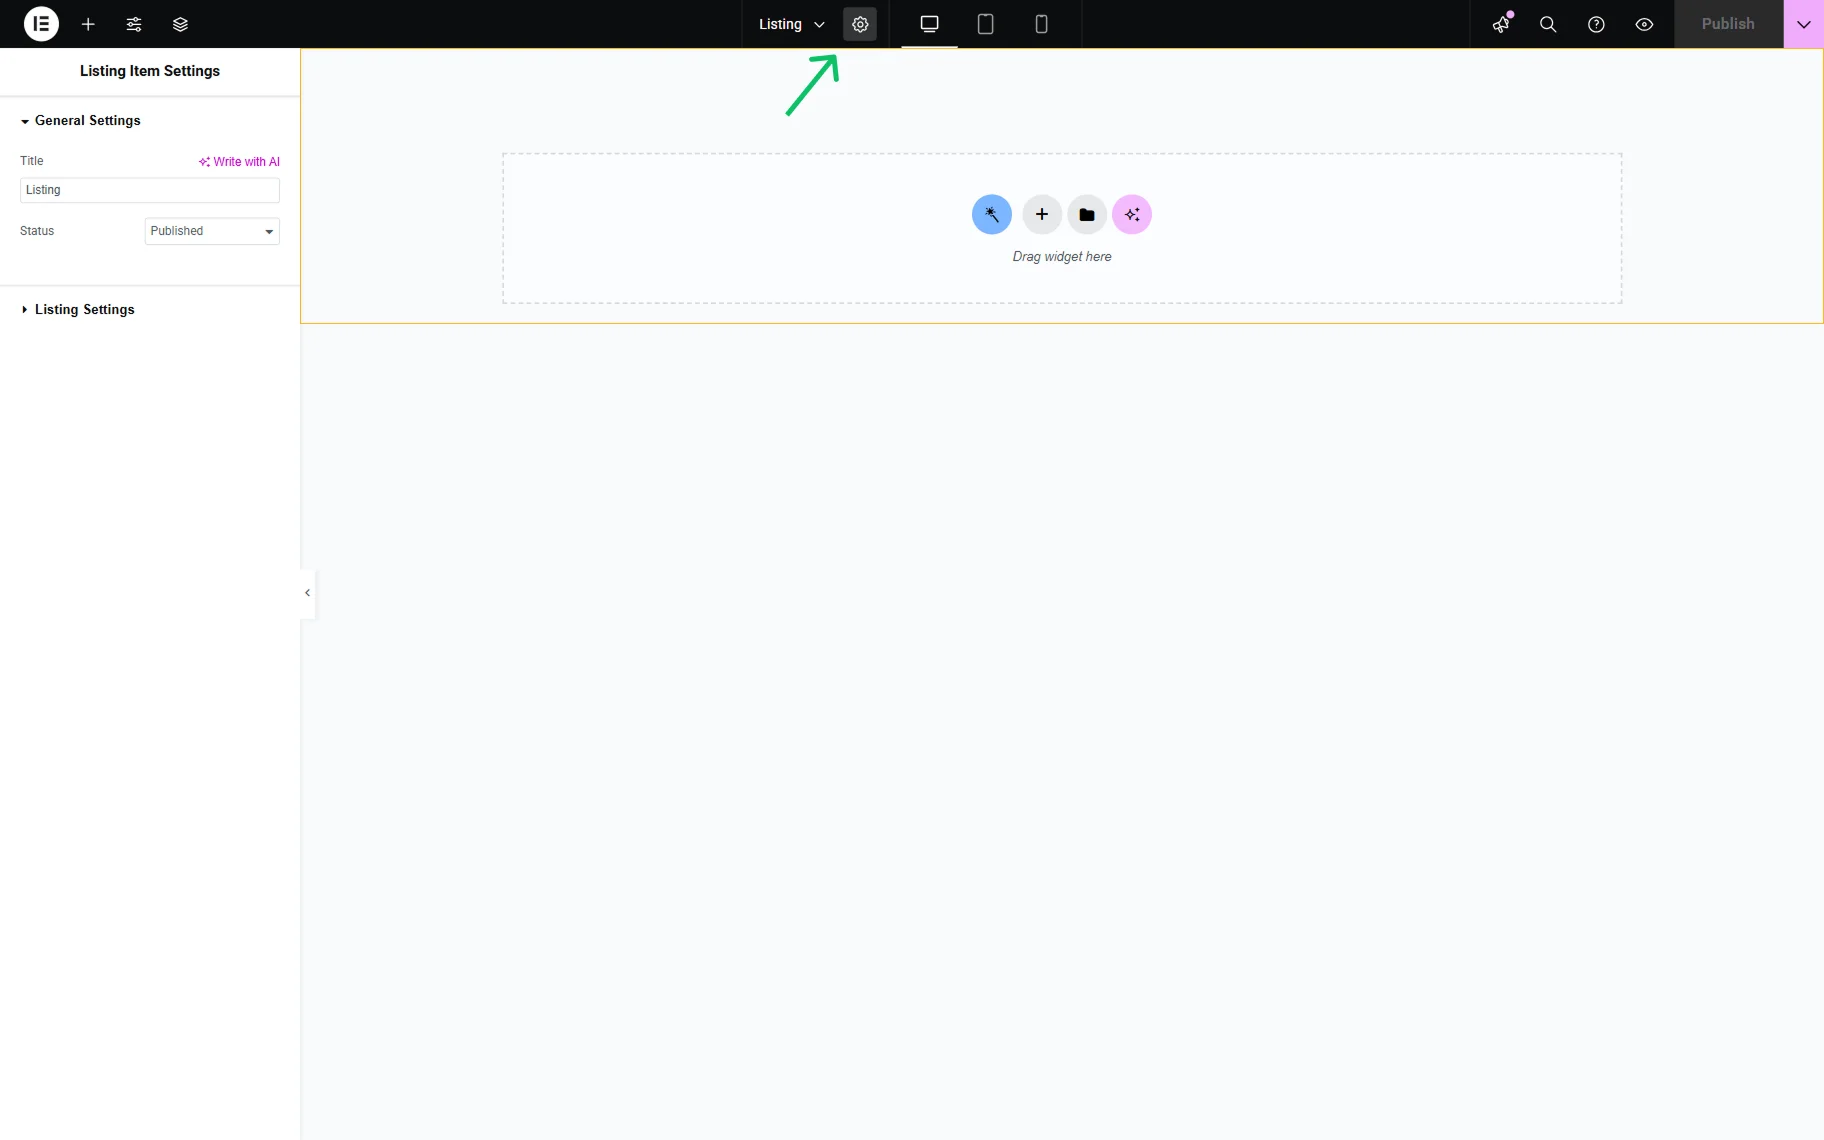
Listing Item Settings
Except for the separate settings for each widget, the listing itself can be adjusted.
General settings
To reach the Listing Item Settings, one should press the “Settings” button in the Elementor panel.
Primarily, the General Settings tab opens where the default Title can be altered, and the Status of the Listing Item can be set. Among statuses are: “Draft,” “Pending Review,” “Private,” and “Published.”
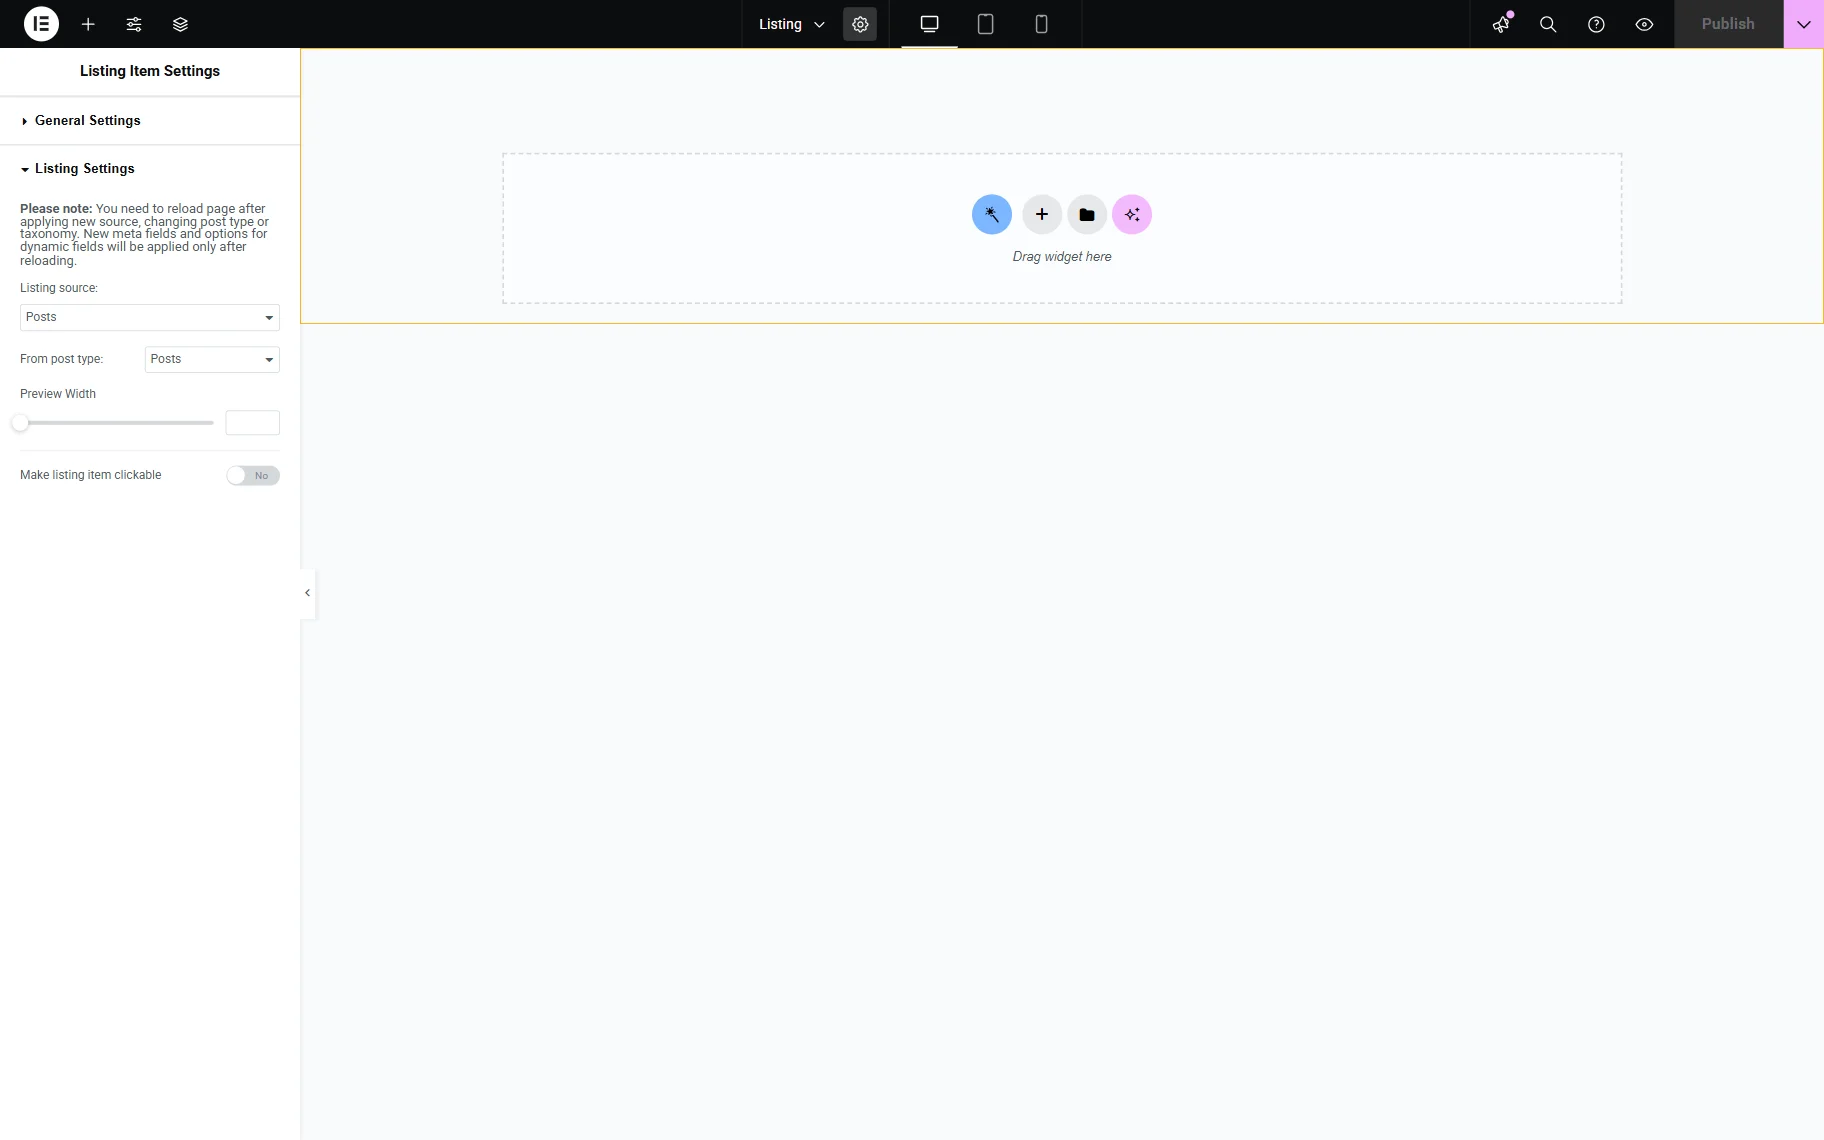
Listing settings
Once the Listing Settings tab is opened, the Listing source can be changed to the ones mentioned earlier in the article.
Depending on the selected source, the following settings may vary.
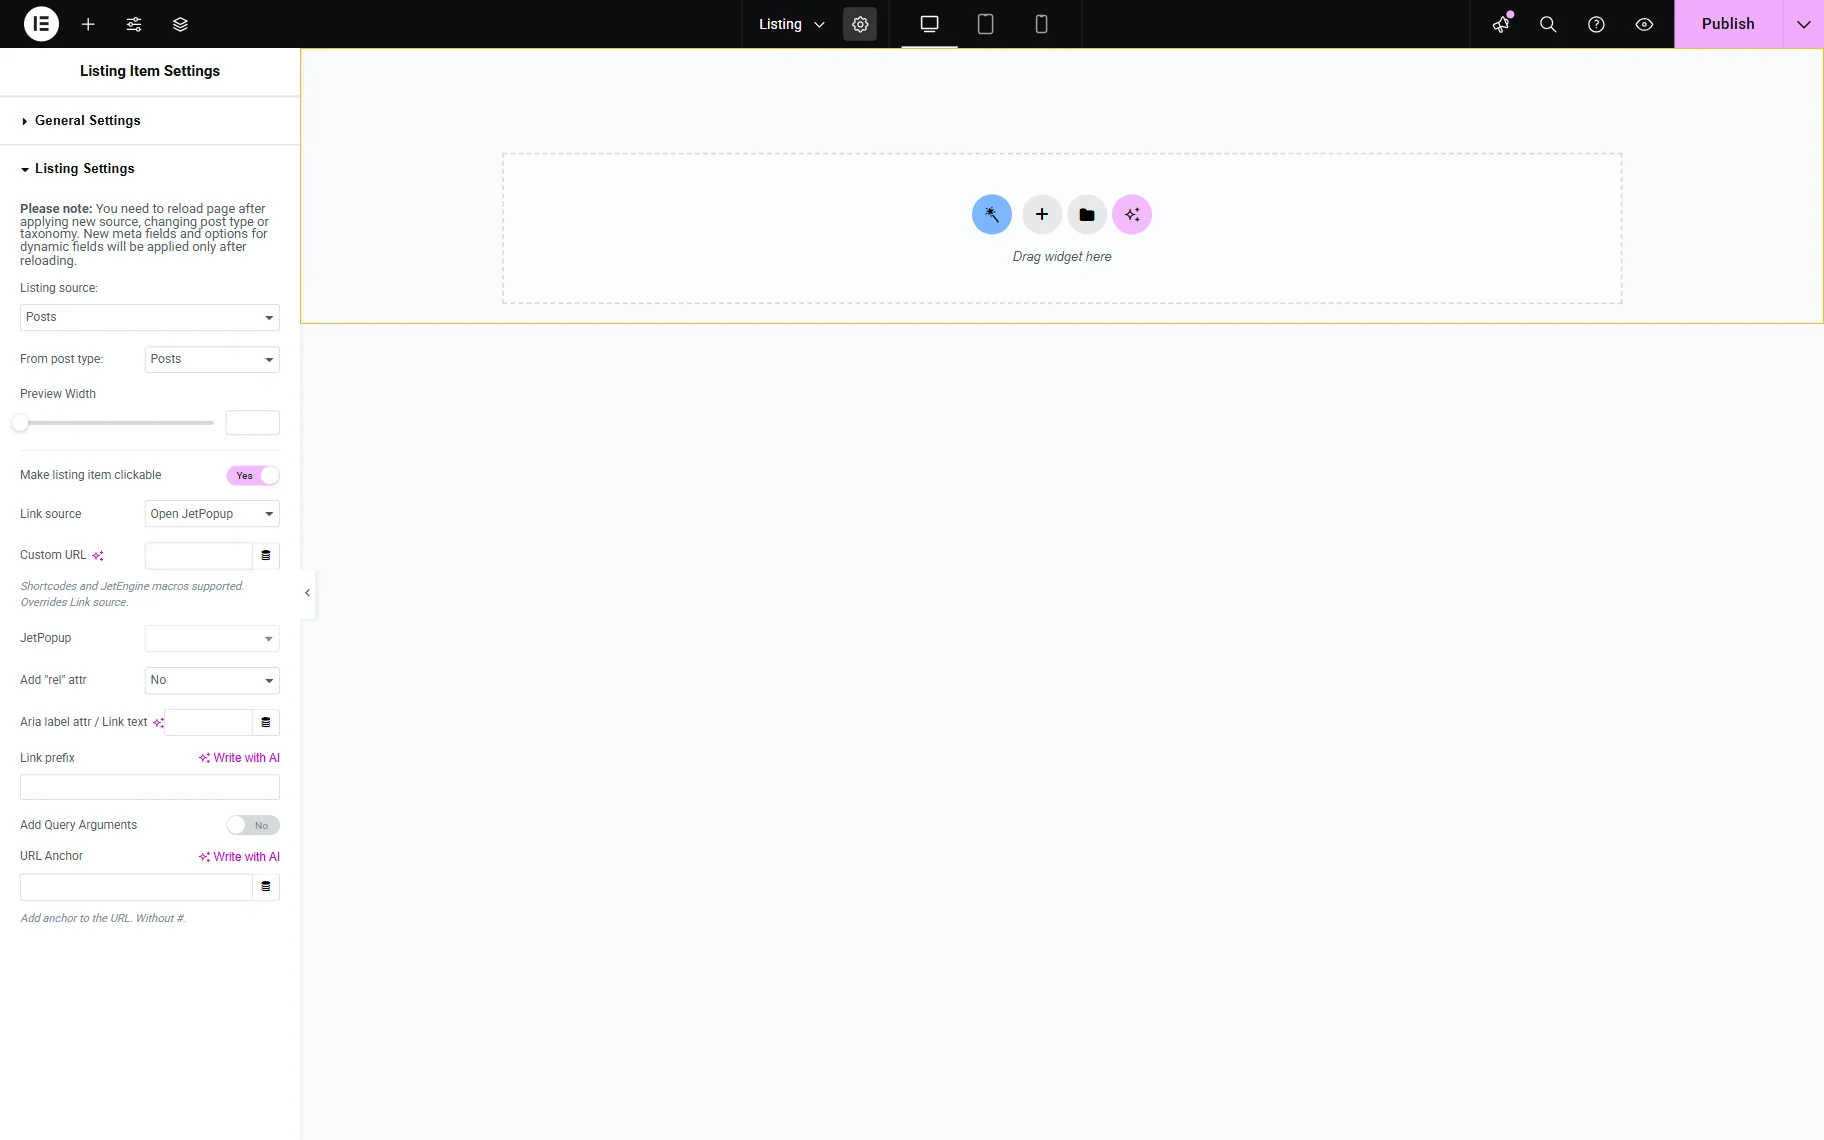
Also, the Preview Width can be specified here either by dragging the range or completing the field manually with the needed value in pixels. The following Make listing item clickable switcher allows clicking on a listing to redirect to another page.
If the last mentioned feature is activated, more settings become visible.
Link source
Firstly, the Link source should be set by selecting the needed option from the drop-down list. The drop-down list is divided into several parts: the “General” one and those concerning categories, user fields, Custom Post Types (CPT), Custom Content Types (CCT), and REST API items.
Here, the “General” section is covered as it is the one that shows further fields for customization.
For instance, the “Permalink” option can be set. It redirects to the single page of the item when its title is clicked.

The “Options” should be picked to redirect to the Options Page created beforehand.

The “Open Map Listing Popup” option is self-explanatory; it opens a pop-up with the Map Listing.
Once it is selected, the Zoom field appears. If it is not empty, the map will be centered on the corresponding marker and adjusted to the Zoom value.
Also, here, the Scroll to map toggle can be activated in order to scroll to the map automatically once the pop-up opens.

The “Open Map Listing Popup on Hover” option works the same as the previous option, but map listing is activated when the cursor hovers over the item.

The “Open JetPopup” option activates the pop-up once pressed (works with the JetPopup plugin) or other custom values.
Then, the Open in new window toggle can be activated to open the selected link on the new page once the listing item is pressed.
In addition, the Add “rel” attr (relation of the link to the current listing) and Aria label attr (text value of the element for accessibility) fields are available.
The Link prefix field can be completed with an additional prefix that will be added to the link. For instance, “mailto” or “tel.”
Dynamic Widgets
JetEngine provides a Listing Elements tab with dynamic widgets included, which are made for pulling data from the source dynamically.
Among them are:

Except for dynamic widgets, there is also a possibility of using the Dynamic Tags feature, which is available for different widgets. With tags, different data can be pulled out.
To access Dynamic Tags, one should click the corresponding button.

Besides these widgets, you can use any other available, but be aware that they will show static data.
For example, suppose the Dynamic Image widget is used; it will show a picture put into the corresponding meta field, and those pictures will differ for every item (if different pictures are added). But if the Image widget is used, all the items of the Listing Grid will show the same picture.
That’s it for the Listing Template settings in Elementor, which are available with the JetEngine plugin for WordPress websites.