Displaying Prefiltered Results from the Menu in Elementor
Read how to add filters and categories (including WooCommerce categories) to the site menu to redirect users to a page with prefiltered results after clicking on a category.
This tutorial details how to add categories (including WooCommerce categories) and checkbox filter(s) to the menu for better site usability. Selecting any category redirects users to an archive page with prefiltered results.
Building a Listing Item for Categories
Create taxonomies
Navigate to JetEngine > Taxonomies of the WordPress dashboard. Click the “Add New” button to create a taxonomy for the CPT you need (here, the Continents taxonomy for the Tour CPT).
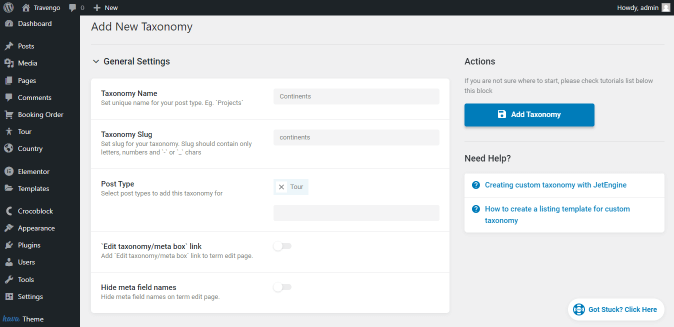
If necessary, add meta fields to the taxonomy you build (here, the Picture meta field).
Press the “Add Taxonomy” button.
Read more about How to Create Custom Taxonomy in this tutorial.
Add the taxonomy to CPTs
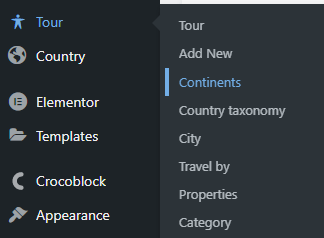
Navigate to the CPT tab you used to build the taxonomy (here, Tour). Select the taxonomy (here, Continents).
Add the Category items.
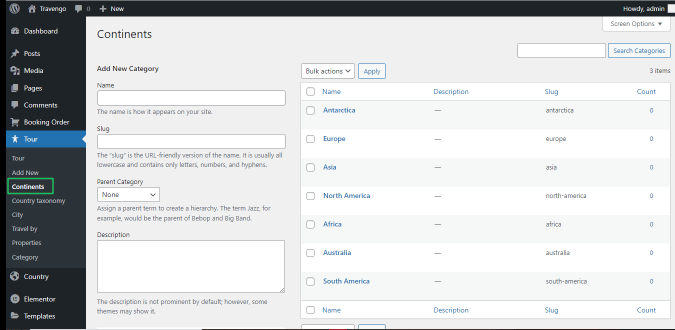
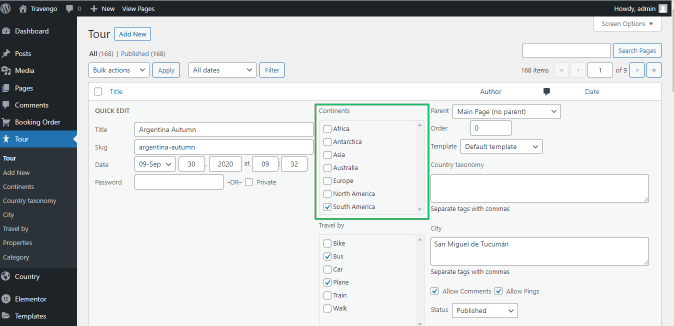
Add the CPTs to the appropriate categories.
Create a Listing item for the categories from a custom taxonomy
Navigate to JetEngine > Listings. Press the “Add New” button and create the listing item (here, Continents list) for the categories from the custom taxonomy with the following settings:
- select the Terms option from the Listing Source drop-down menu;
- select the CPT used for the taxonomy (here, Tours) from the From post type drop-down menu.
Open the listing and add dynamic fields to it.
Read more about How to Create a Listing for the Custom Taxonomy from this tutorial.
Make the listing item clickable
Navigate to the Settings of the Listing item (press the gear sign in the left bottom corner), unroll the Listing Settings tab, and move the Make listing item clickable toggle.
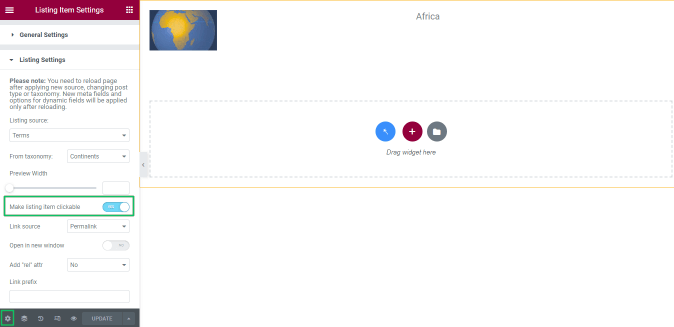
Image Source: A Gateway to Countries and Nations of the World
Building a Listing Item for CPTs
Create the listing item for the CPTs (here, the Listing Tours item is built on the Tour CPTs).
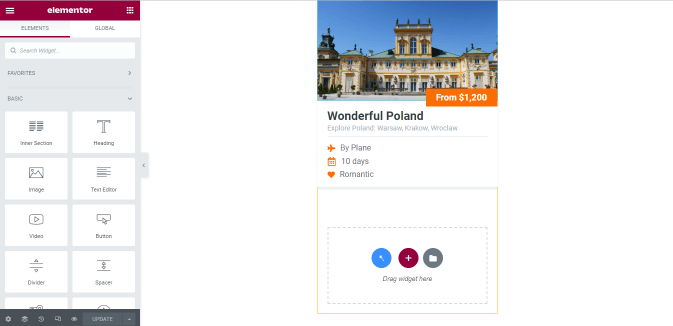
The tutorial details How to Create a Listing Template for Post Types.
Set up a Filter for the Categories
Creating a new checkbox filter for categories
Unroll to the SmartFilters tab of the WordPress dashboard. Click the “Add New” button to create the check-box filter for categories.
Add a name to the Filter (here, filter_for_continents) and tick the Checkbox List filter icon.
Settings of the filter
Create the filter with the following settings:
- select the Taxonomies option from the Data Source drop-down menu;
- select the appropriate taxonomy (here, Continents) from the Taxonomy drop-down menu.

Read How to Build Checkboxes Filter with Posts Data Source in this tutorial.
Press the “Update” button to save the filter.
Design an Archive Template for the CPT
Create the Archive template
Navigate to the Crocoblock > Theme Templates tab. Press the “Add New” button to create an archive template (here, Continent_archive).
Select the Archive option from the Template Type drop-down menu.
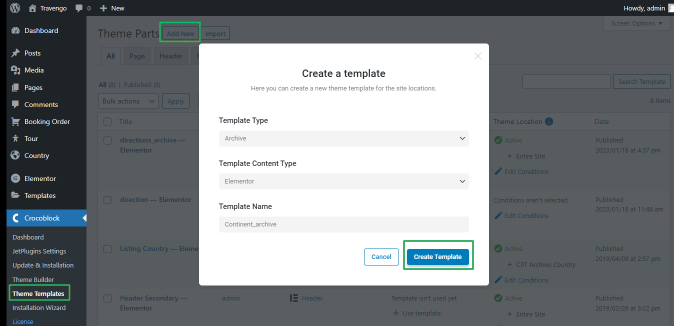
Press the “Create Template” button to save the template.
Read this tutorial: How to Create Archive and Single Templates for Custom Post Type.
Adding the filter to the archive template
To make the archive template more user-friendly, divide it into some parts using the Inner Section widget.
Find the Checkbox Filter widget and drag-n-drop it to the page.

Select the filter (here, filter_for_continents) from the Select Filter drop-down menu. Choose the JetEngine option from the This filter for drop-down menu and the AJAX option from the Apply type drop-down menu.
Read more about Filtering Posts by Taxonomy Guide in this tutorial.
Adding the listing grid widget for CPTs to the archive template
Find the Listing Grid widget and drag-n-drop it to the page. Select the created listing (here, Listing Tours) from the Listing drop-down menu.
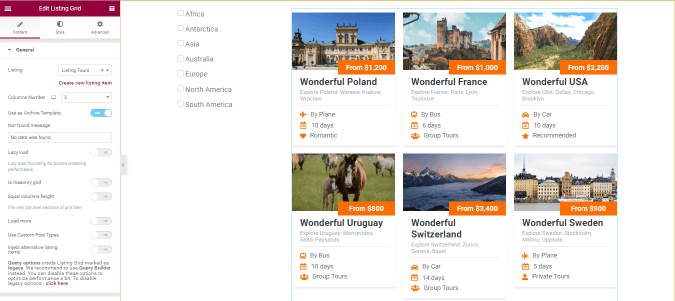
Move the Use as Archive template toggle. Apply stylish options to the listing grid as necessary.
This tutorial overviews All Listing Grid Widget Options.
Update the template.
Menu Settings
Adding the Mega Menu settings
Navigate to the Appearance > Menus tab of the WordPress dashboard. Users can create a new menu or add the filter and the built listing item for categories to a previously developed menu.
Here the Menu_for_prefiltered_results was built based on the Continent page.
Read How to Create Menu in WordPress Dashboard in this tutorial.
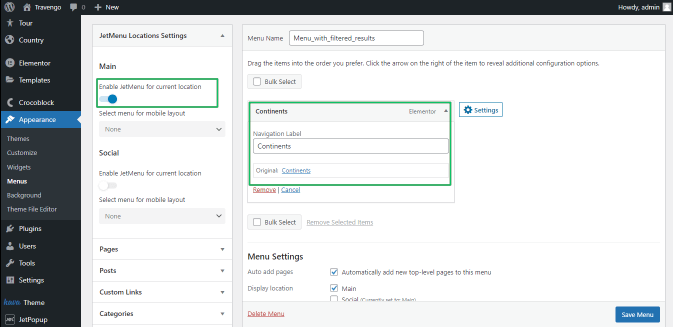
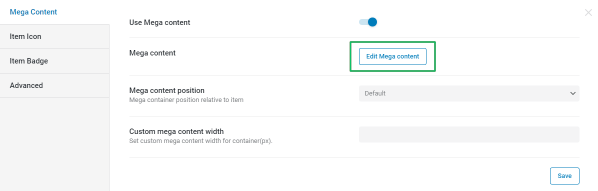
Press the Settings tab to unroll it. Move the Use Mega Content toggle. Press the “Edit Mega content” button.
Adding the filter and the built listing item
The opened pop-up window allows adding widgets to the MegaMenu. Divide the window into sections using the Inner Section widget, and add the built checkbox filter (here, filter_for_continents) and the built listing item for categories (here, Continents list).
Read How to Create a Mega Menu in Elementor in this tutorial.
Apply the redirection to the archive template
Add the Apply Button widget to provide the redirection to the page with pre-filtered results after clicking on the category.
Move the Apply Redirect toggle and add the redirect path to the previously built archive template in the Redirect Path field (here, Continent_archive).
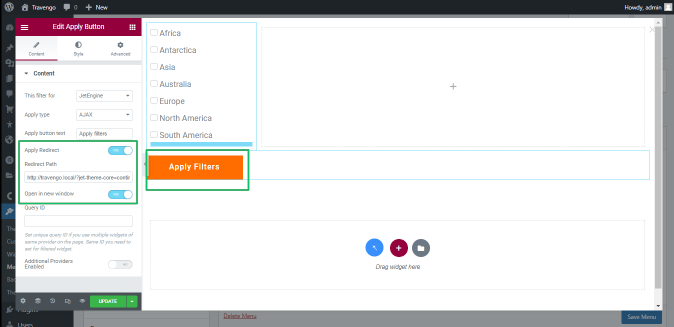
The tutorial explains How to Set Up a Redirect Path to Filter Results Page.
Adding the built listing item for categories
Drag and drop the Listing Grid widget to the mega menu. Add the created listing item for categories to the mega menu.
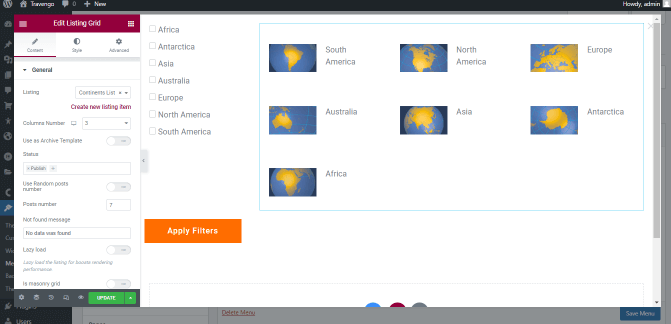
Image Source: A Gateway to Countries and Nations of the World
Close the pop-up window and save the menu.
Adding the menu to the header
Navigate to the Crocoblock > Theme Templates tab. Open the existing header template or create a new one.
Read How to Create a Custom WordPress Header with JetThemeCore.
Here the current template (Header) was used.
Add the Mega Menu widget to the page. Select the previously built menu (here, Menu_for_prefiltered_results) from the Select Menu for Desktop drop-down menu.

Image Source: A Gateway to Countries and Nations of the World
Apply the Header to the Archive Template and Specify the Visibility Conditions
Applying the header to the archive template
Navigate to the Crocoblock > ThemeBuilder tab.
Navigate to the archive template (here, Continent_archive), press the “+Add Header” button, and choose the header from the library.
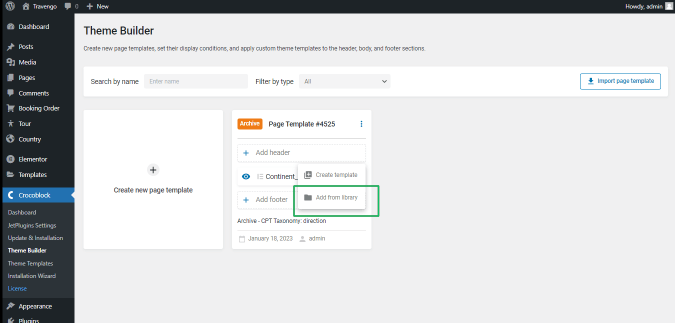
Read How to Create Archive and Single Templates for Custom Post Type in this tutorial.
Applying visibility conditions
Navigate to the Crocoblock > Theme Parts tab. Find the built archive template (here, Continent_archive), and press the “Edit Condition” tab. Select the Include, Entire, and Entire Site settings from the appropriate drop-down menus.
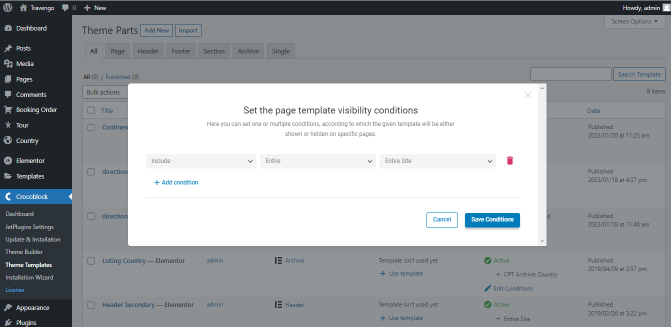
Press the “Save Conditions”button to save changes.
Displaying Prefiltered Results from the Menu
Open any page of the site. Unroll the mega menu and select the appropriate option.
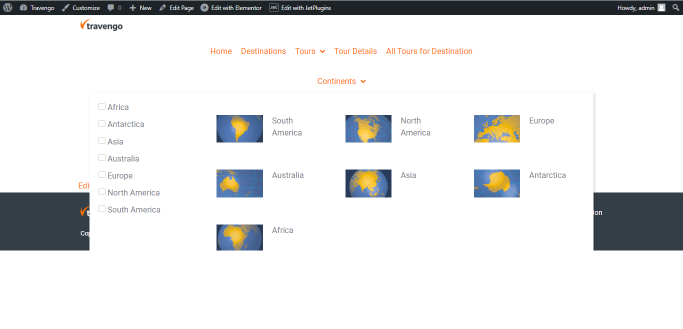
Image Source: A Gateway to Countries and Nations of the World
The page will redirect to the filtered results.
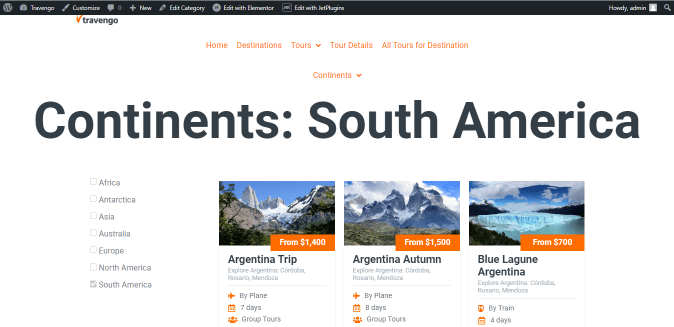
That’s all about displaying prefiltered results from the menu in Elementor.