How to Create a Filter with the Posts Data Source
From this tutorial, you will learn how to create filters with “Posts” Data Source using the “Checkboxes list,” “Select,” “Radio,” or “Visual” filters of the JetSmartFilters WordPress plugin.
Before you start, check the tutorial requirements:
- Elementor (Free version), Block editor (Gutenberg), or Bricks
- JetSmartFilters plugin installed and activated
- JetEngine plugin installed and activated
The JetSmartFilters plugin allows the creation of various filters with different data sources, like “Taxonomies,” “Custom Fields,” “JetEngine Glossaries,” etc.
The “Posts” Data Source allows users to filter items by either the default WordPress post types or the Custom Post Types (CPTs).
There are some use cases:
- Filtering by the JetEngine’s related items. More details are provided in the How to Filter the Related Post Items tutorial;
- Filtering by the JetEngine’s “Posts” custom field. This case is described in this tutorial;
- Filtering by visual options as described in the How to Create Visual Filter with the Posts Data Source tutorial.
We explain how to display post titles using the “Select,” “Radio,” “Visual,” and “Checkboxes list” filters to filter the connected posts. For that, you need two post types, for instance, “Events” and “Speakers,” to filter the posts of the “Events” type by speakers participating or vice versa.
In this guide, we describe how to filter doctors by medical conferences on the Medcenter website.
Setting the “Posts” Custom Field
For our use case, we have two Custom Post Types: “Doctors” and “Medical Conferences.”
We proceed to the WordPress Dashboard > JetEngine > Post Types tab and edit the “Doctors” CPT.
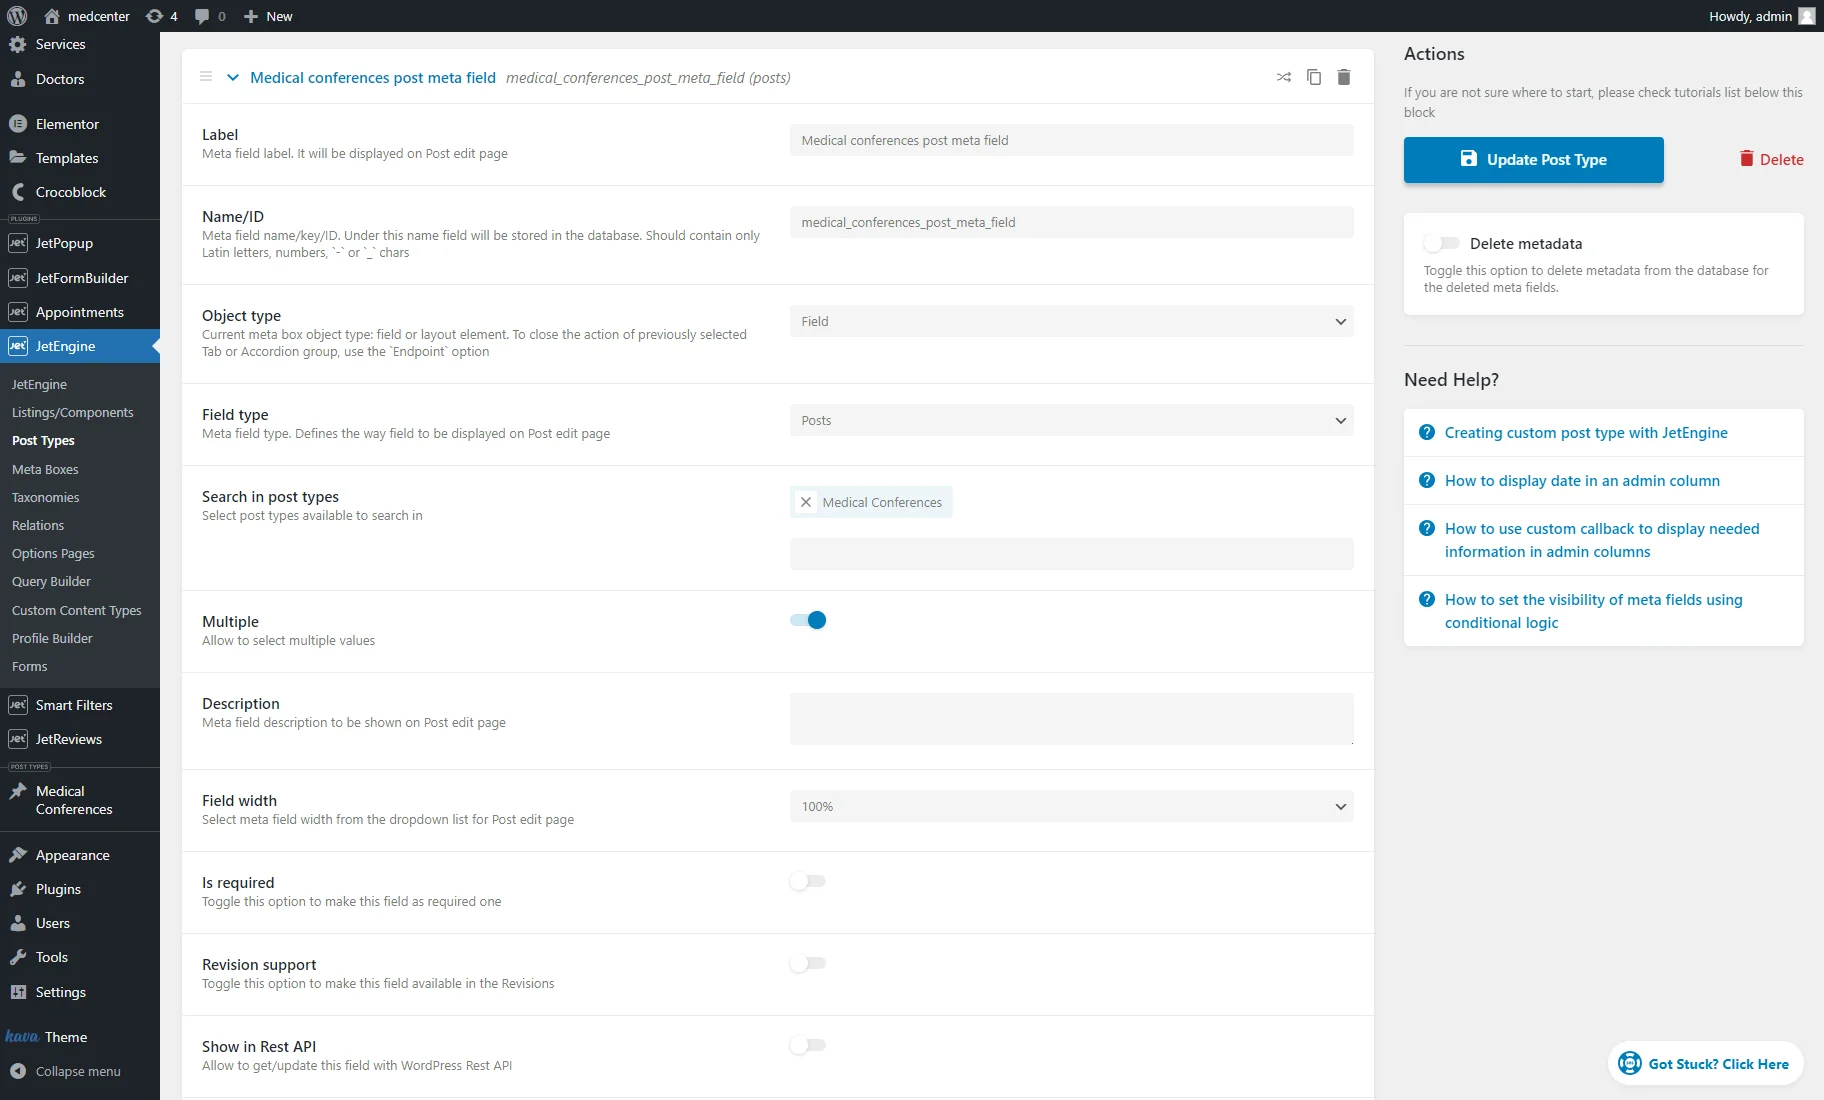
In the Meta fields tab of the CPT, we hit the “New Meta Field” button to add the “Posts” custom field so we can add medical conferences to doctors in which they participated.
For the Search in post types field, we set the “Medical Conferences” CPT.
We enabled the Multiple toggle because we want to be able to add several conferences to one doctor. If you want a one-to-one connection (for example, for adding only one event to one host), keep this toggle deactivated.
Afterward, we hit the “Publish/Update” button.
If you want to add the “Posts” meta field to the WordPress default post type, check the How to Add Custom Meta Fields to WordPress Post via Meta Boxes tutorial.
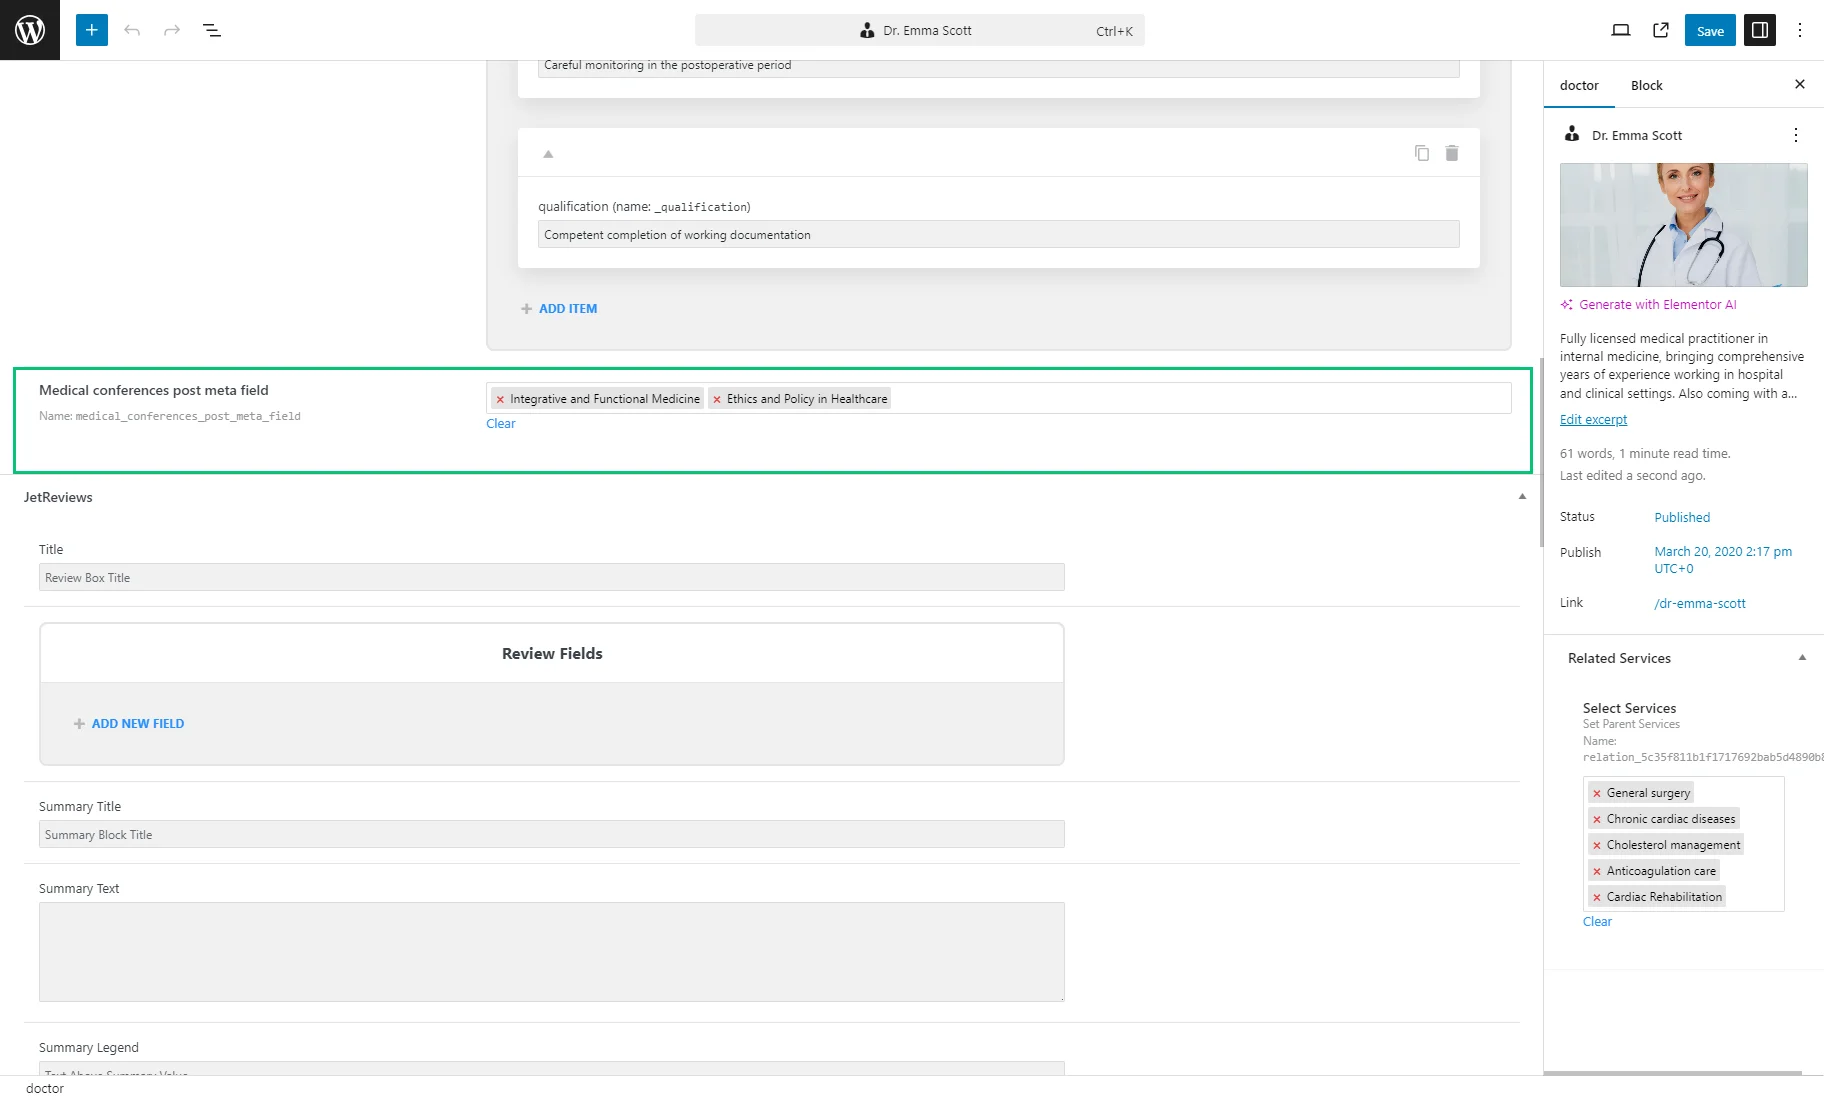
Next, we open the “Doctors” CPT tab on the WordPress Dashboard, edit several posts (doctors), connect several medical conferences to doctors using the “Posts” custom meta field, and save the changes.
Creating a Filter with the “Posts” Data Source
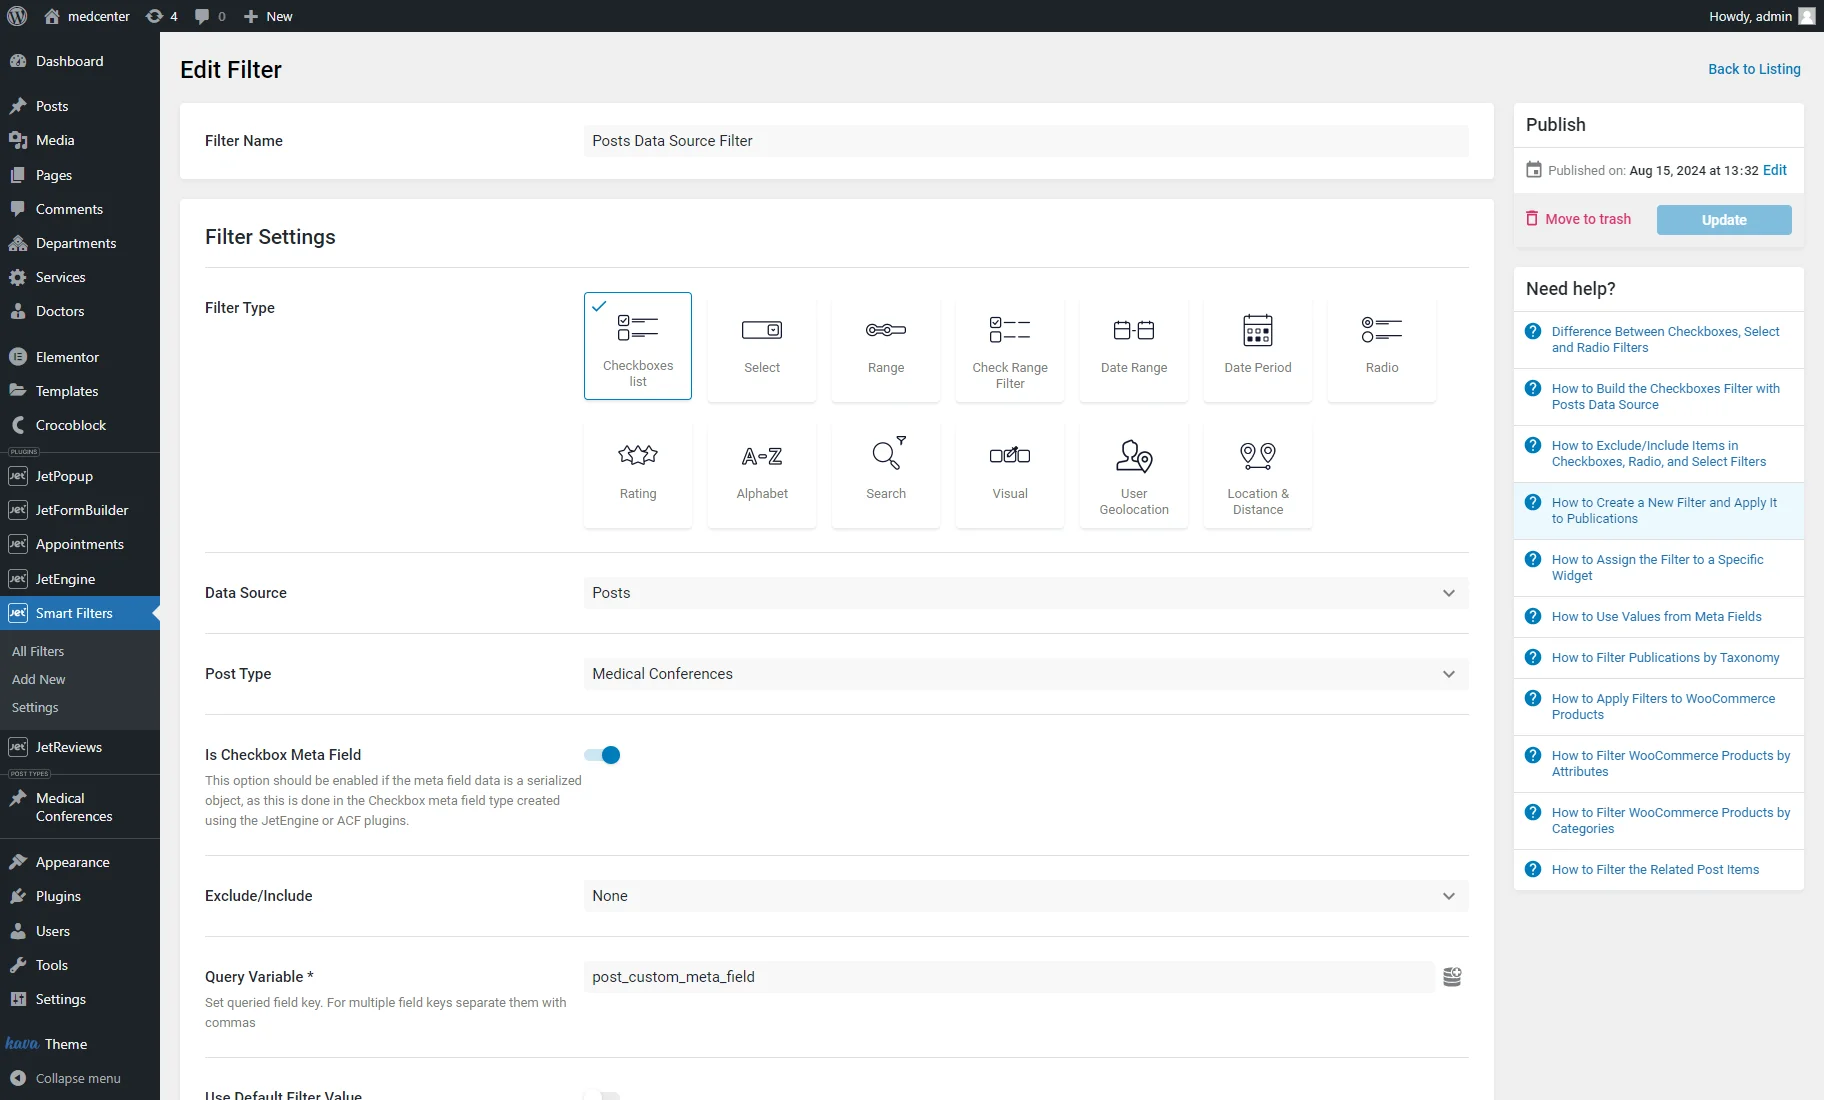
We navigate to the WordPress Dashboard > Smart Filters > Add New and enter the Filter Name.
In the Filter Type field, you can choose the “Select”, “Radio,” “Visual,” or “Checkboxes list” options.
We set the “Checkboxes list” Filter Type.
Then, we pick the “Posts” Data Source.
As the Post Type, we set the CPT which post titles we will use for filtering (“Medical Conferences” in our case).
If you craft the “Checkboxes list” filter or “Visual” with the “Checkbox” Behavior, enable the Is Checkbox Meta Field toggle.
In the Query Variable field, we enter the “Posts” custom field name that we added to the “Doctors” CPT.
Other filter settings can be adjusted to suit you. Afterward, we hit the “Update” button.
Adding the Filter to a Page
Now, you can place the filter on a page or template using Elemenor, WordPress block editor, or Bricks.
For example, we go to WordPress Dashboard > Pages > Add New Page, enter the page title, and hit the “Edit with Elementor” button.
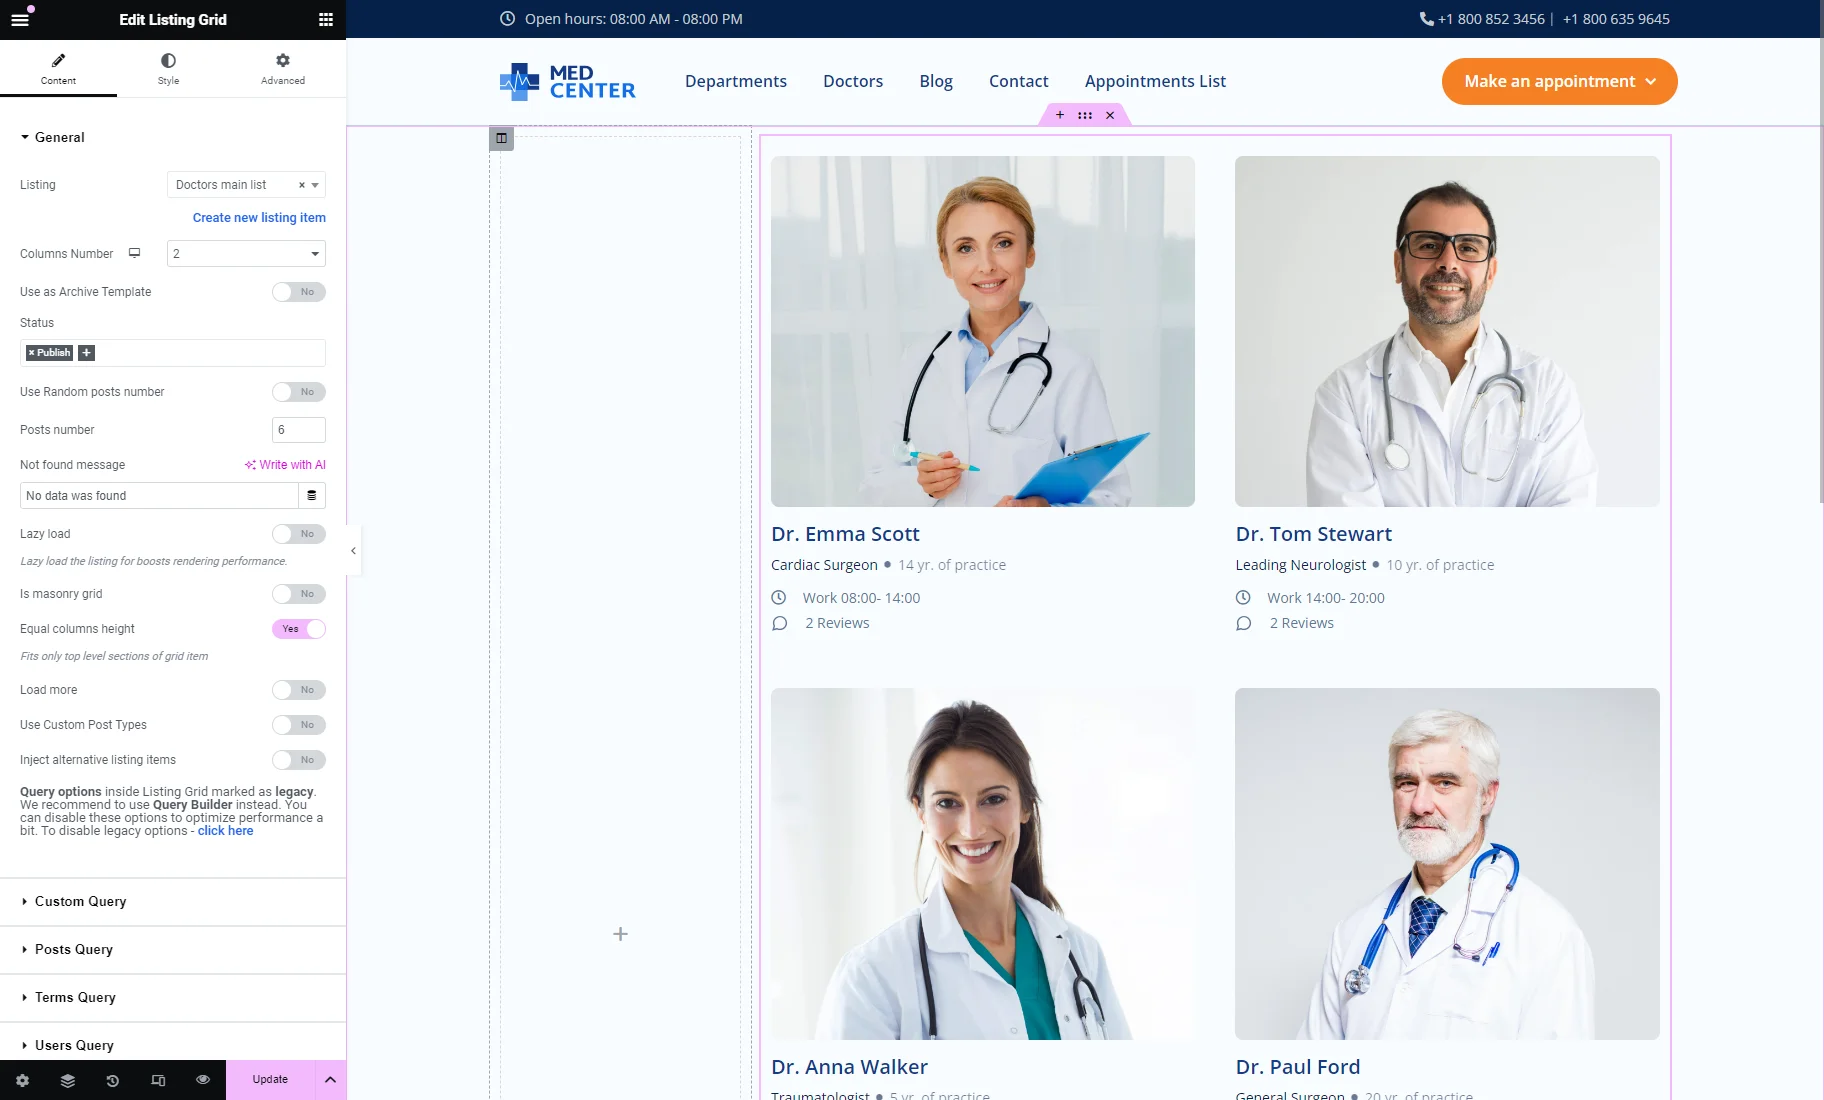
We add two columns to the editing page. In the second column, we insert the Listing Grid widget of the JetEngine plugin to display the doctors that will be filtered by their participation in medical conferences. In the Listing field, we set the listing template created for the “Doctors” CPT. Learn more from the How to Create a Listing Template for Post Types in Elementor tutorial.
To find out what widgets, blocks, or elements can be filtered with JetSmartFilters, proceed to the Filters Providers Overview.
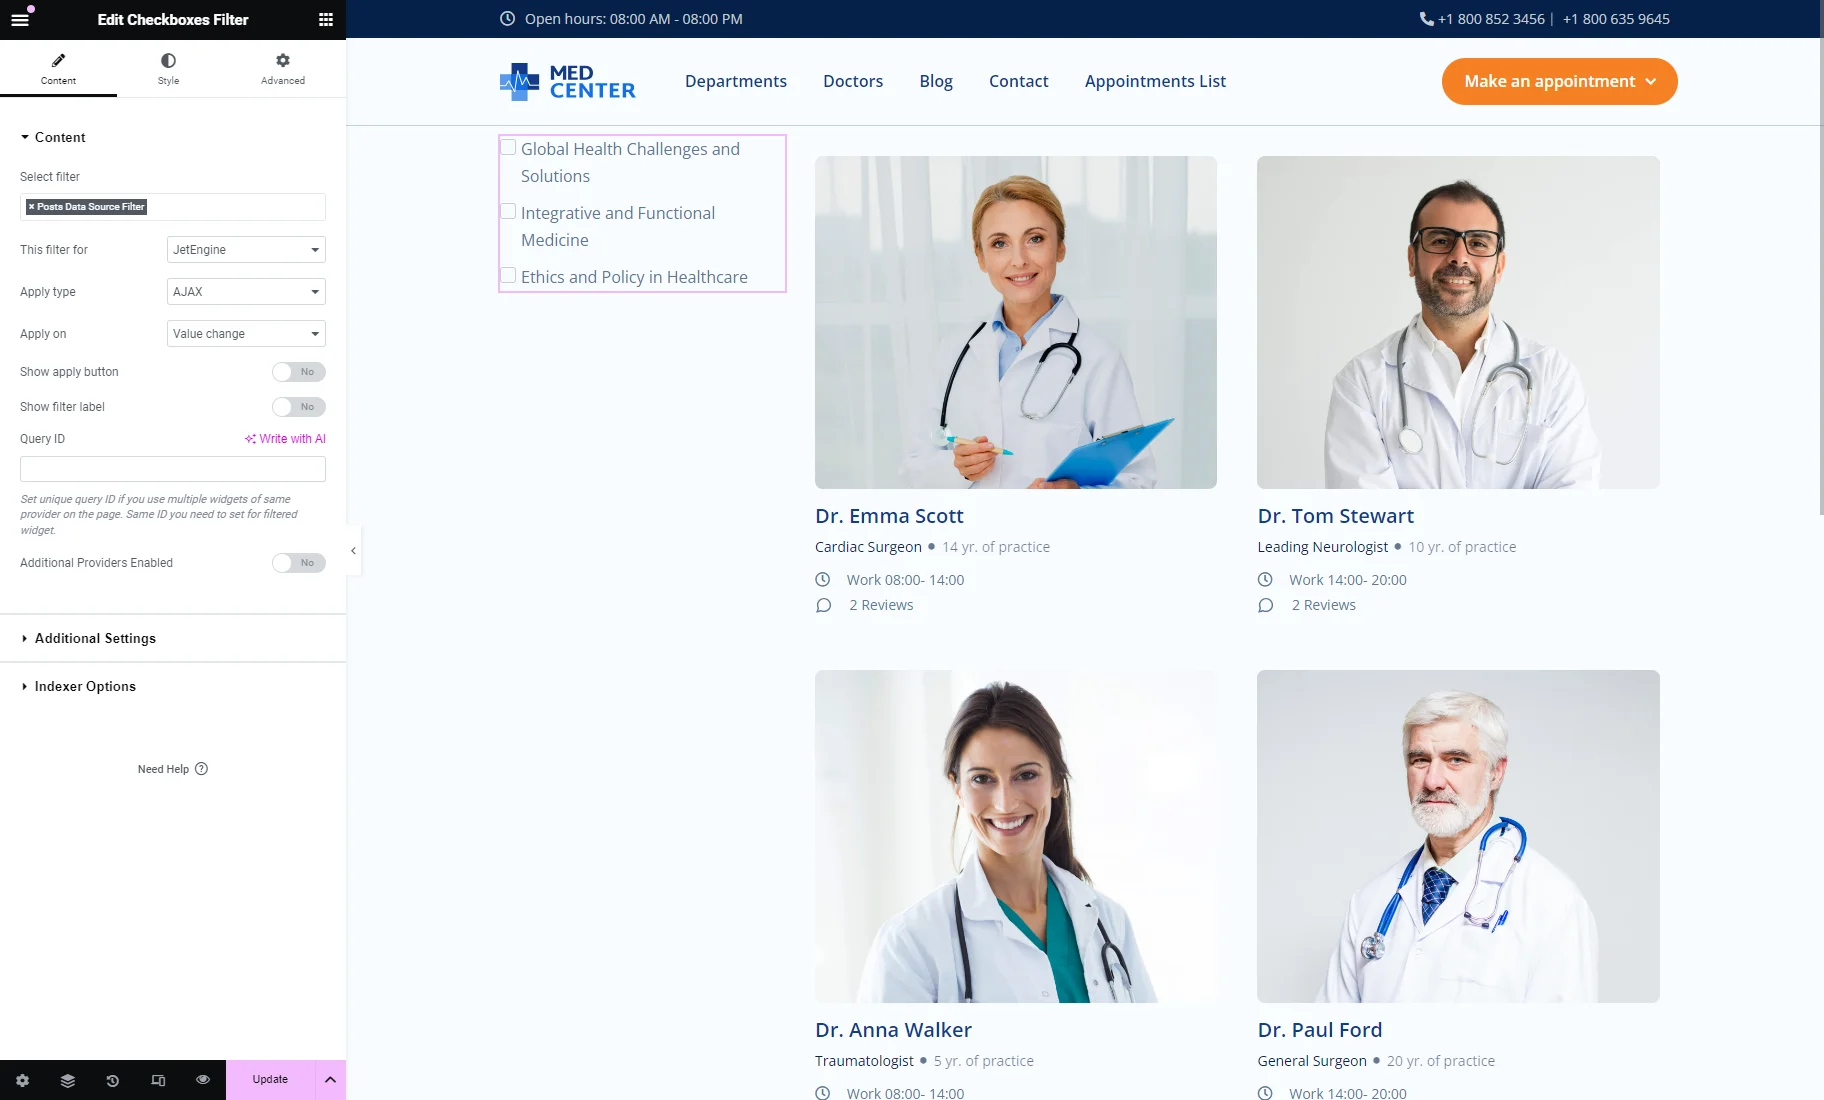
In the first column, we place the Checkboxes Filter widget (if you created a “Radio” or “Select” filter, you should place the corresponding widgets) and set the just-built filter in the Select filter field.
In the This filter for field, we select the “JetEngine” provider.
Other filter settings can be customized as needed.
After adjusting the page, we hit the “Publish/Update” button.
Checking the Results
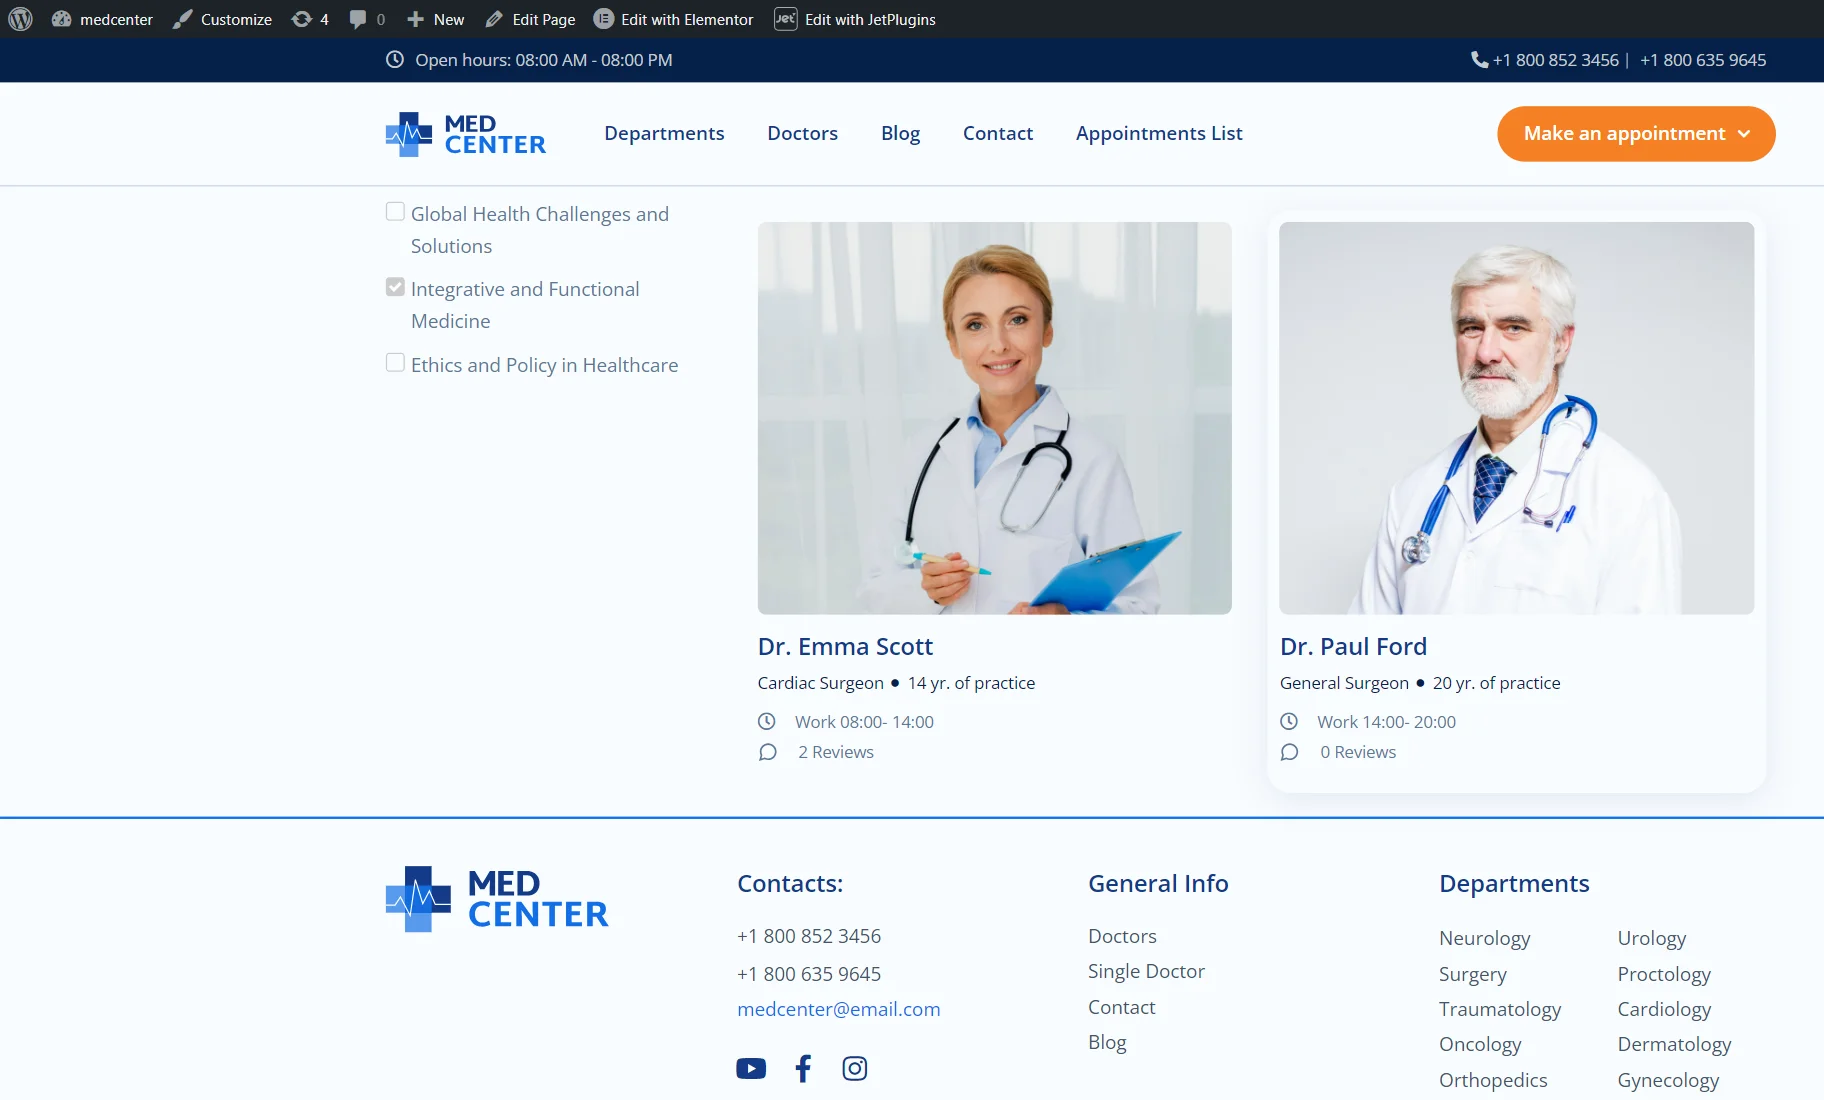
We open the page on the front end to check if the filter works correctly.
If we tick the “Integrative and Functional Medicine,” the filter shows two doctor participants.
If we tick two options of the “Checkboxes list” filter, it shows the participants of both conferences.
That’s all. Now you know how to create the “Checkboxes list,” “Select,” “Visual,” or “Radio” filter with the “Posts” Data Source to filter posts by other connected post titles using the JetSmartfilters and JetEngine plugins on your WordPress website.
