Editing a WooCommerce shop page with Elementor is quite a pleasurable activity, especially if you have all the most efficient instruments for building an eCommerce website at your disposal. In this article, we will talk about them and the best practices for editing the WooCommerce Shop page.
Table of Contents
- What Is a WooCommerce Shop Page?
- WooCommerce Shop Page General Settings
- Shop Page with Elementor Pro
- Shop Page with Free Elementor and JetWooBuilder
- Bonus: JetSmartFilters for WooCommerce Store
- FAQ
- Bottom Line
What Is a WooCommerce Shop Page?
First of all, let’s clarify what a WooCommerce shop page template is. It’s a template for displaying all the products and/or product categories on your eCommerce site.
There are two main product-related templates that WooCommerce has:
- product archive (shop page);
- single product.
There are also account, checkout, cart, and other templates that the WooCommerce plugin provides, but they are not our topic for this article.
However, an understanding of WooCommerce templates is quite useful.
Understanding WooCommerce templates
So, WooCommerce is a plugin that creates a new “Product” custom post type with a specific set of custom fields, such as price, SKU, etc. Just like any other post type, it should have a dedicated template to be displayed on the front end, both the single post and its archive (such as a Shop page). That’s why the WooCommerce plugin comes with its template hierarchy.
However, the default design does not always match your theme. That’s why some themes claim to be “WooCommerce themes.” Actually, since WooCommerce is just a plugin, it can work with almost any theme (starting with version 3.3). So, what does this “WooCommerce theme” statement mean??
Most often, such themes offer their own templates for WooCommerce pages that are made to match the overall theme design. In this case, they override the default WooCommerce templates.
This is an example of code that declares WooCommerce support and sets some properties for the product grid that can later be modified in Customizer:
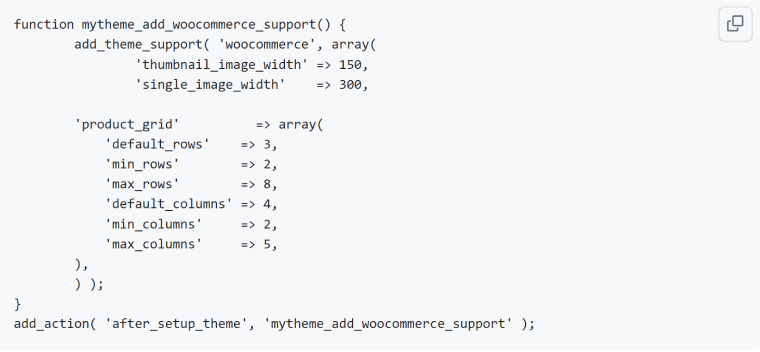
Then, you copy the particular templates from /wp-content/plugins/saved-addresses-for-woocommerce/templates/{your-template}.php to /wp-content/themes/yourtheme/woocommerce/saved-addresses-for-woocommerce/myaccount/{your-template}.php and modify them there. These templates will override the default WooCommerce templates and will not be erased with the next plugin update.
There’s much more to talk about when it comes to theme templates, but when we use Elementor, all this knowledge is not critical because there’s a way to edit every little detail of your store templates using drag-and-drop functionality.
WooCommerce Shop Page General Settings
Don’t forget that Customizer has several very important settings for the Shop page, even if you are creating a shop template with Elementor.
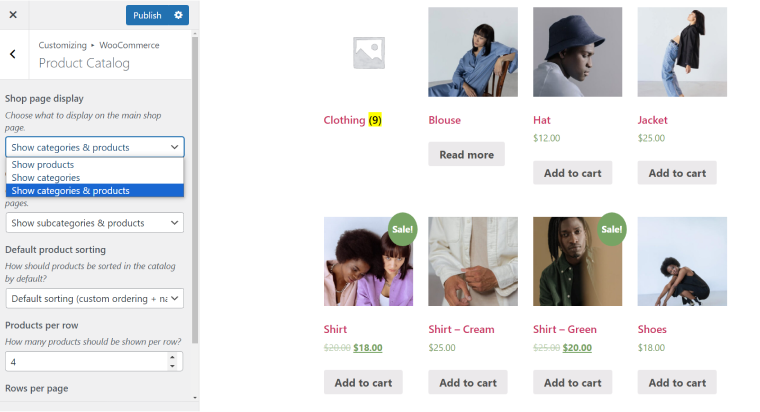
The default settings you can find there are:
- Shop page display. There are three options: to show all the products from all the categories, show only categories (and the user should click on one of them to see products that belong to it), or both categories and products.
- Category page display. Similar settings as for the Shop page, but for individual categories.
- Sorting. Choose a product sorting rules: whether they will be sorted by price, popularity, rating, etc.
- Products per row.
- Rows per page. Pagination will be displayed if the products don’t fit on one page.
These settings will determine how the Product Archive will look, both for default and custom shop page layouts.
Shop Page with Elementor Pro
The most obvious way to customize WooCommerce shop page with Elementor is to use Elementor Pro. Note that WooCommerce widgets and the Theme Builder functionality are not available in free Elementor.
To create a Shop page, go to Templates > Theme Builder, select Product Archive, and add a new template. You can choose from the premade, but they don’t change much in reality because all the styling still depends on the theme’s default settings. So, you will probably have to style the archive grid to match the website’s design guidelines.
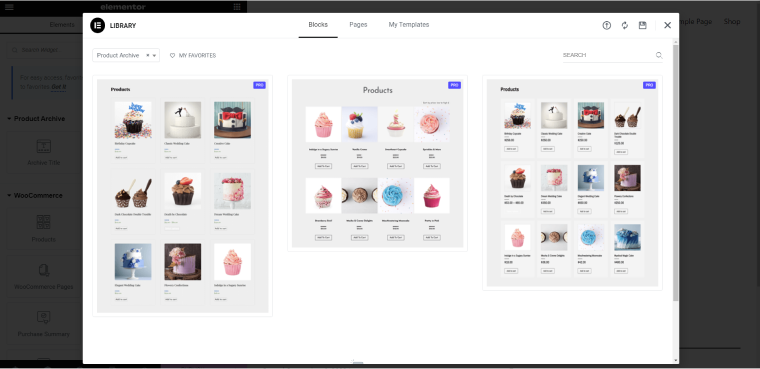
This Elementor Pro template is actually an Archive Products widget that shows the product grid according to the Customizer settings. If you want more handpicked product queries, use the Products widget to select certain categories for display, discounted items, add cross-sells, or pick goods manually.
Also, you can add the WooCommerce pages widget to place other types of pages, such as Single product or Checkout page, as well as the Product categories widget.
That’s pretty much what Elementor Pro can offer you when building a Shop page template. For more options, you will need some add-ons. But, for most of the shops, it might be enough.
💡 Read our comprehensive article about dynamic pricing and plugins for setting it.
I’ve mentioned other options that can be added to the shop page template in WooCommerce. So, what are these things? Well, I’m talking about badges, short or trimmed descriptions, displaying items as tables or carousels, etc.
Shop Page with Free Elementor and JetWooBuilder
In case you want to use an extended toolkit to edit a WooCommerce Shop page with Elementor, Crocoblock has got you covered and developed a JetWooBuilder plugin to add the widgets you might need, which Elementor (even in Pro) doesn’t have. This way, you won’t have to spend money on a bunch of different plugins.
So, what is JetWooBuilder, and how can it bring the process of editing any WooCommerce page to another level? As the name suggests, it’s a WooCommerce builder for Elementor that offers flexibility and control of another level with its 60+ widgets and extensive settings. It can be used with both free and Pro versions of Elementor but doesn’t require Elementor Pro because it doesn’t depend on its premium functionality.
NOTE
Before using JetWooBuilder, go to Crocoblock > JetPlugins Settings > JetWooBuilder and select all the widgets you will use, as well as other settings for enhancing a page speed.
Also, you may want to go to WooCommerce > Settings to enable custom templates for Shop, Archive, and other pages.
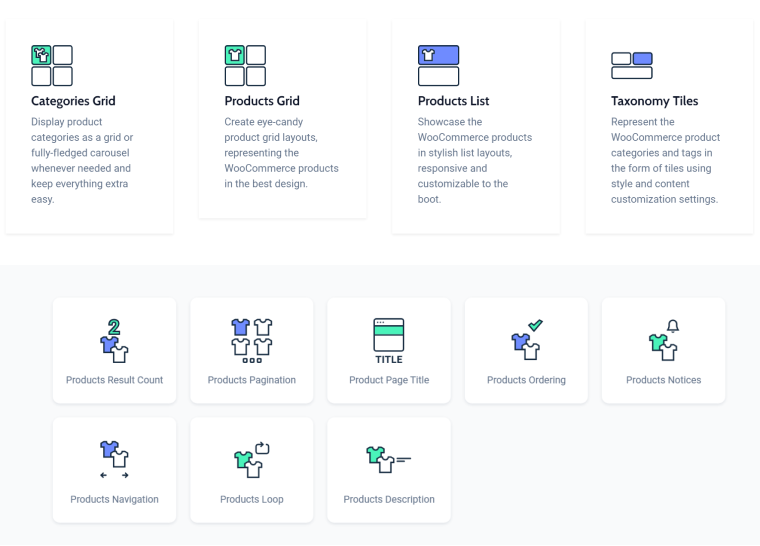
The most straightforward way to set up a Shop page is using a premade template with Products Grid or Products List widgets.
They both have a lot of settings to modify the products’ output:
NOTE
JetWooBuilder displays only the widgets that can be used on that particular page. For example, if it’s a Single template, you will see only the widgets for Single, plus the Global widgets.
These are widgets that are available on the Shop page.
Products Loop widget
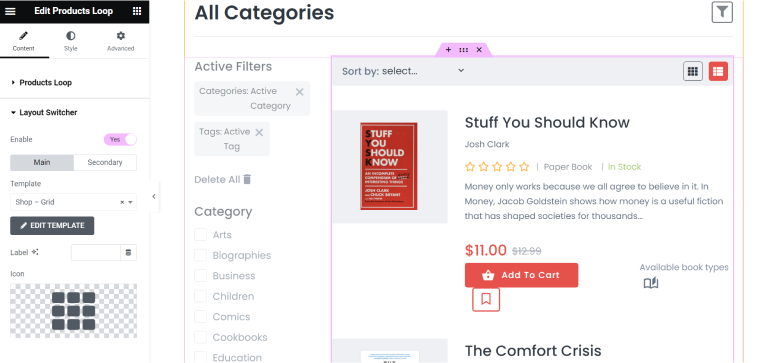
Product Loop widget offers a lot of perks that are not so obvious at first sight. You can modify the archive template and then display it to loop the products. The best feature here is that you can choose the Main and Secondary views and assign a particular template to each of them. Check how it works on this demo site.
By the way, you can use JetEngine dynamic widgets for your templates, such as Dynamic Term, to show categories, tags, and other things. Also, pay attention to the functionality of Crocoblock’s free add-ons for JetWooBuilder, such as the one for custom badges. You can find even more of such add-ons here.
Using JetWooBuilder with JetEngine
I guess every Crocoblock user can confirm that any JetPlugin gets even more powerful with JetEngine. So do your WooCommerce Shop page template with the fully customizable query settings because JetEngine’s Query Builder offers the WC Query Type.
In the screenshot below, you can see some of the queries for the Only Books demo website. Also, check out our brief guide on building this quite complex WooCommerce store.
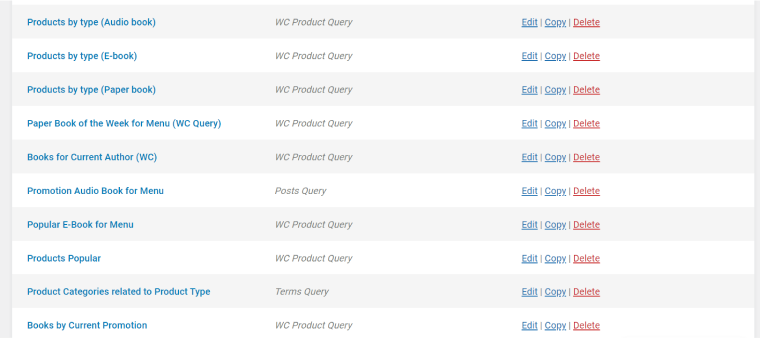
You can use such custom queries both in the Products Grid/List widgets; just select the Custom Query Section and choose the previously created Query Builder WC Product query.
Dynamic product tables
The Dynamic Tables module is another example of how JetEngine can be utilized to customize the Shop page.
But first, go to Query Builder and create a custom query for WooCommerce query type. It doesn’t require any coding; you just choose what you want to have in your table: which categories, SKUs, etc.
First, enable the Dynamic Table Builder module by navigating to JetEngine > JetEngine in the dashboard. A new submenu named Tables Builder will appear under the JetEngine section. Click on it, select “Add New,” assign a name, and choose the query you’ve created for this table. The next step is to configure the columns and the data you wish to display.
You will see a table preview if you click “Re-generate preview,” but don’t forget to press it after each change.
Also, there’s a powerful Filter Callback feature where you can choose the callback you need. For example, if you want the product title to be clickable, select Product ID, activate the “Filter Callback” option, and choose “Get post/page link” from the list.
You can add pagination or filters to such tables.
To add the table to the page, just drag and drop the Dynamic Table widget.
Bonus: JetSmartFilters for WooCommerce Store
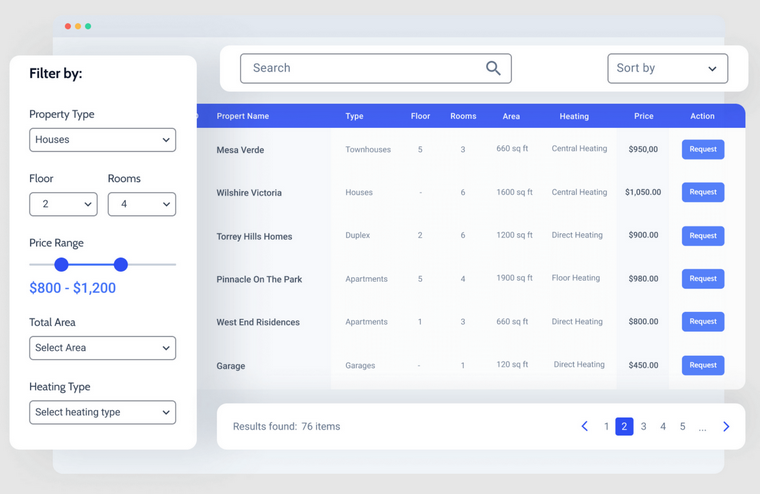
It’s hard to imagine an eCommerce website without product filters. That’s why there’s an advanced JetSmartFilters plugin to set up filters of any type and complexity for your store, showcase categories and tags, sort products, and set up proper URLs for filter results.

FAQ
There are two major ways to do it: use Elementor Pro or JetWooBuilder for more customization.
It’s the main display of your shop and basically the main archive of all the products and categories on your website. To modify its settings, use Theme Customizer.
Yes, it is fully compatible with WooCommerce.
Most probably, you don’t have a plugin like JetWooBuilder for editing such pages.
Bottom Line
Using WooCommerce with Elementor makes the development process visual and user-friendly. Also, there are powerful instruments, such as JetWooBuilder, to modify every WooCommerce page, change the WooCommerce shop page appearance, and make it look exactly the way you want, thanks to 60+ widgets with numerous settings.
