How to Create Custom Commenting System
This detailed guide will help you create a commenting system with a fully customizable comment layout, provided by the CCTs of JetEngine, and an input form from JetFormBuilder, WordPress plugins. Not only for posts — you can add comments to users and terms.
Before you start, check the tutorial requirements:
- Elementor (Free version), Block Editor (Gutenberg), or the Bricks theme
- JetEngine plugin installed and activated, with a Custom Post Type created, Custom Content Type and Dynamic Visibility modules enabled
- JetFormBuilder plugin installed and activated

How to Create Comments
In this tutorial, we will focus on setting up the commenting system, which features a fully customizable comment layout provided by the CCTs. We will create a form for submitting the comments and ensure that only logged-in users can leave comments on the site.
Create a Custom Content Type to store comments
Navigate to the WordPress Dashboard > JetEngine > Custom Content Types and click the “Add New” button to create a new Custom Content Type (CCT), which will store the list of comments.
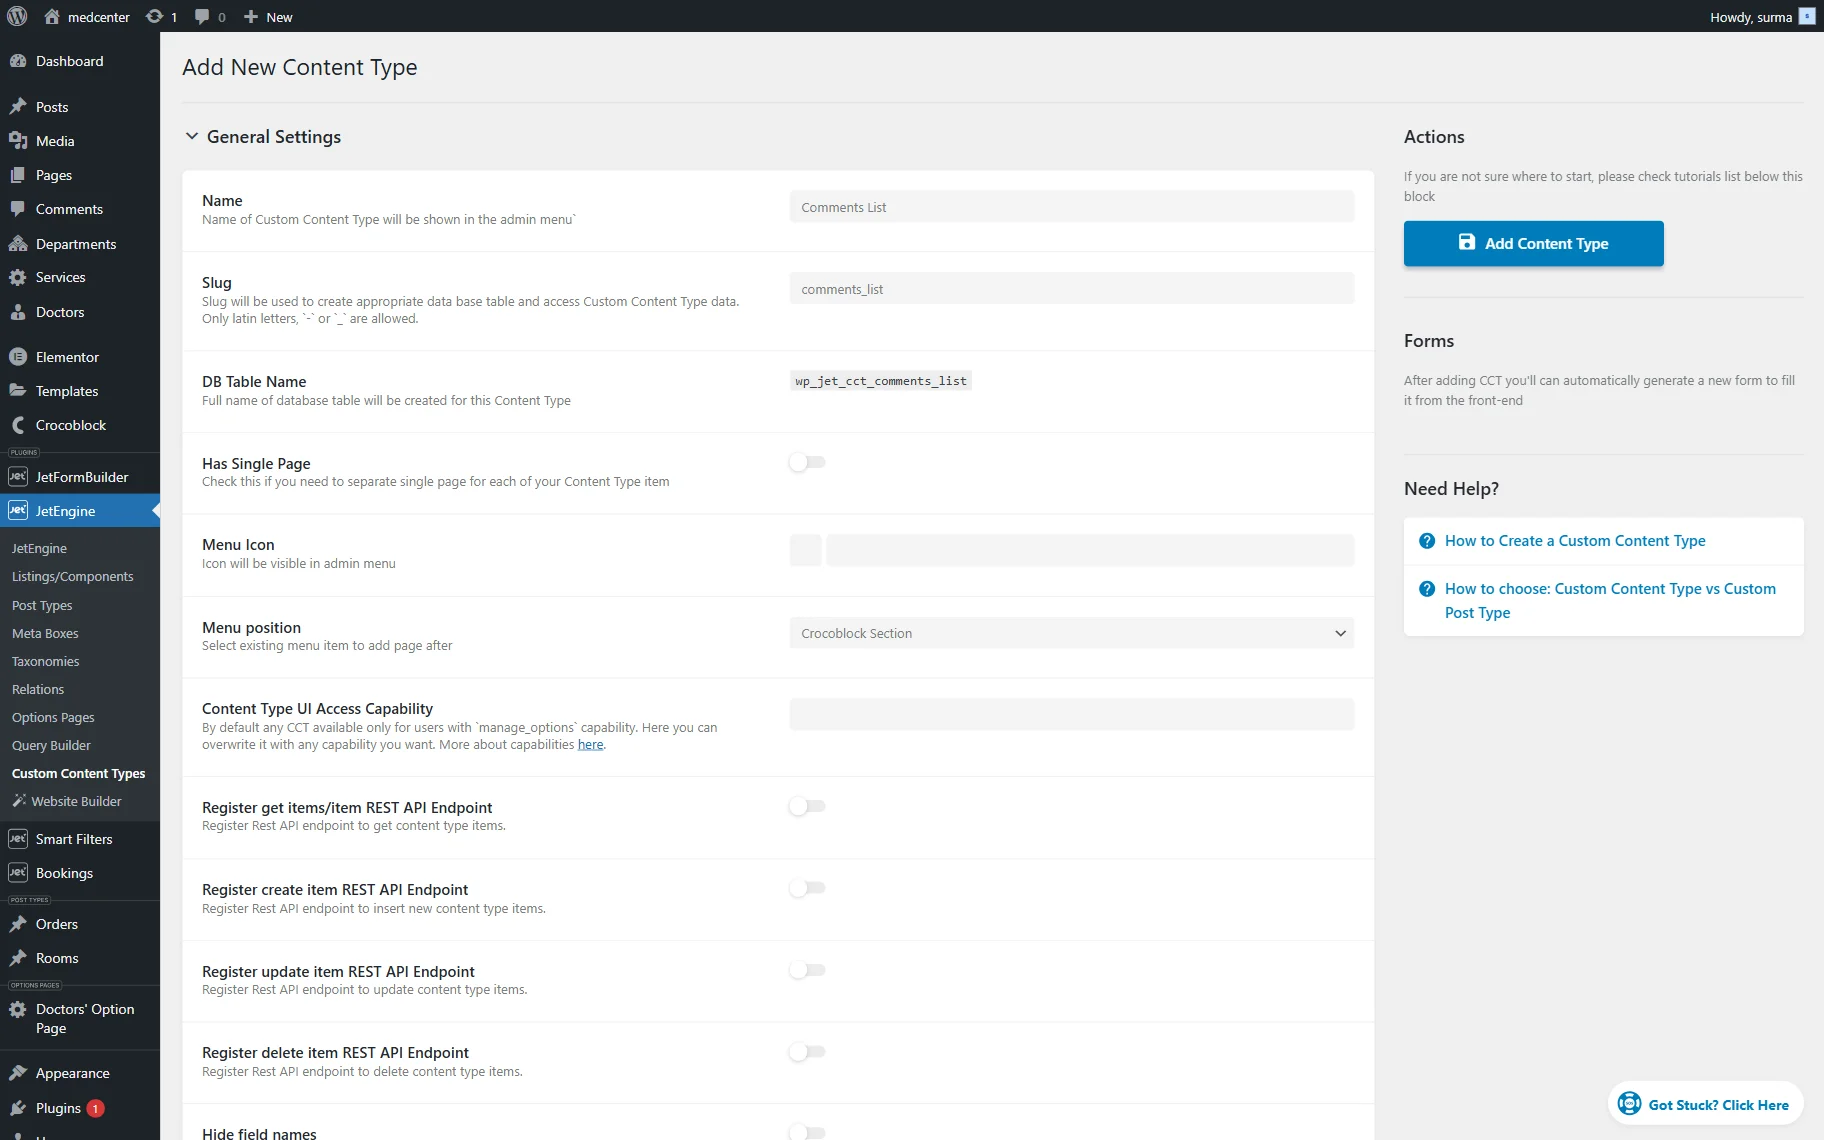
CCTs are similar to CPTs but have two main differences. Firstly, Custom Content Type items do not have Single Pages. Secondly, they have a unique approach to data storage. It makes CCTs an ideal choice for storing comments because new comments will not affect the website’s loading speed.
You will find more information on this topic in our article on Custom Content Type: Brand New Data Storage Approach.
In the same editing screen, scroll down to the Field tab. Add the necessary fields to store the comments’ data. Add a Text field to keep the comment title and a WYSIWYG field to store the comment content.
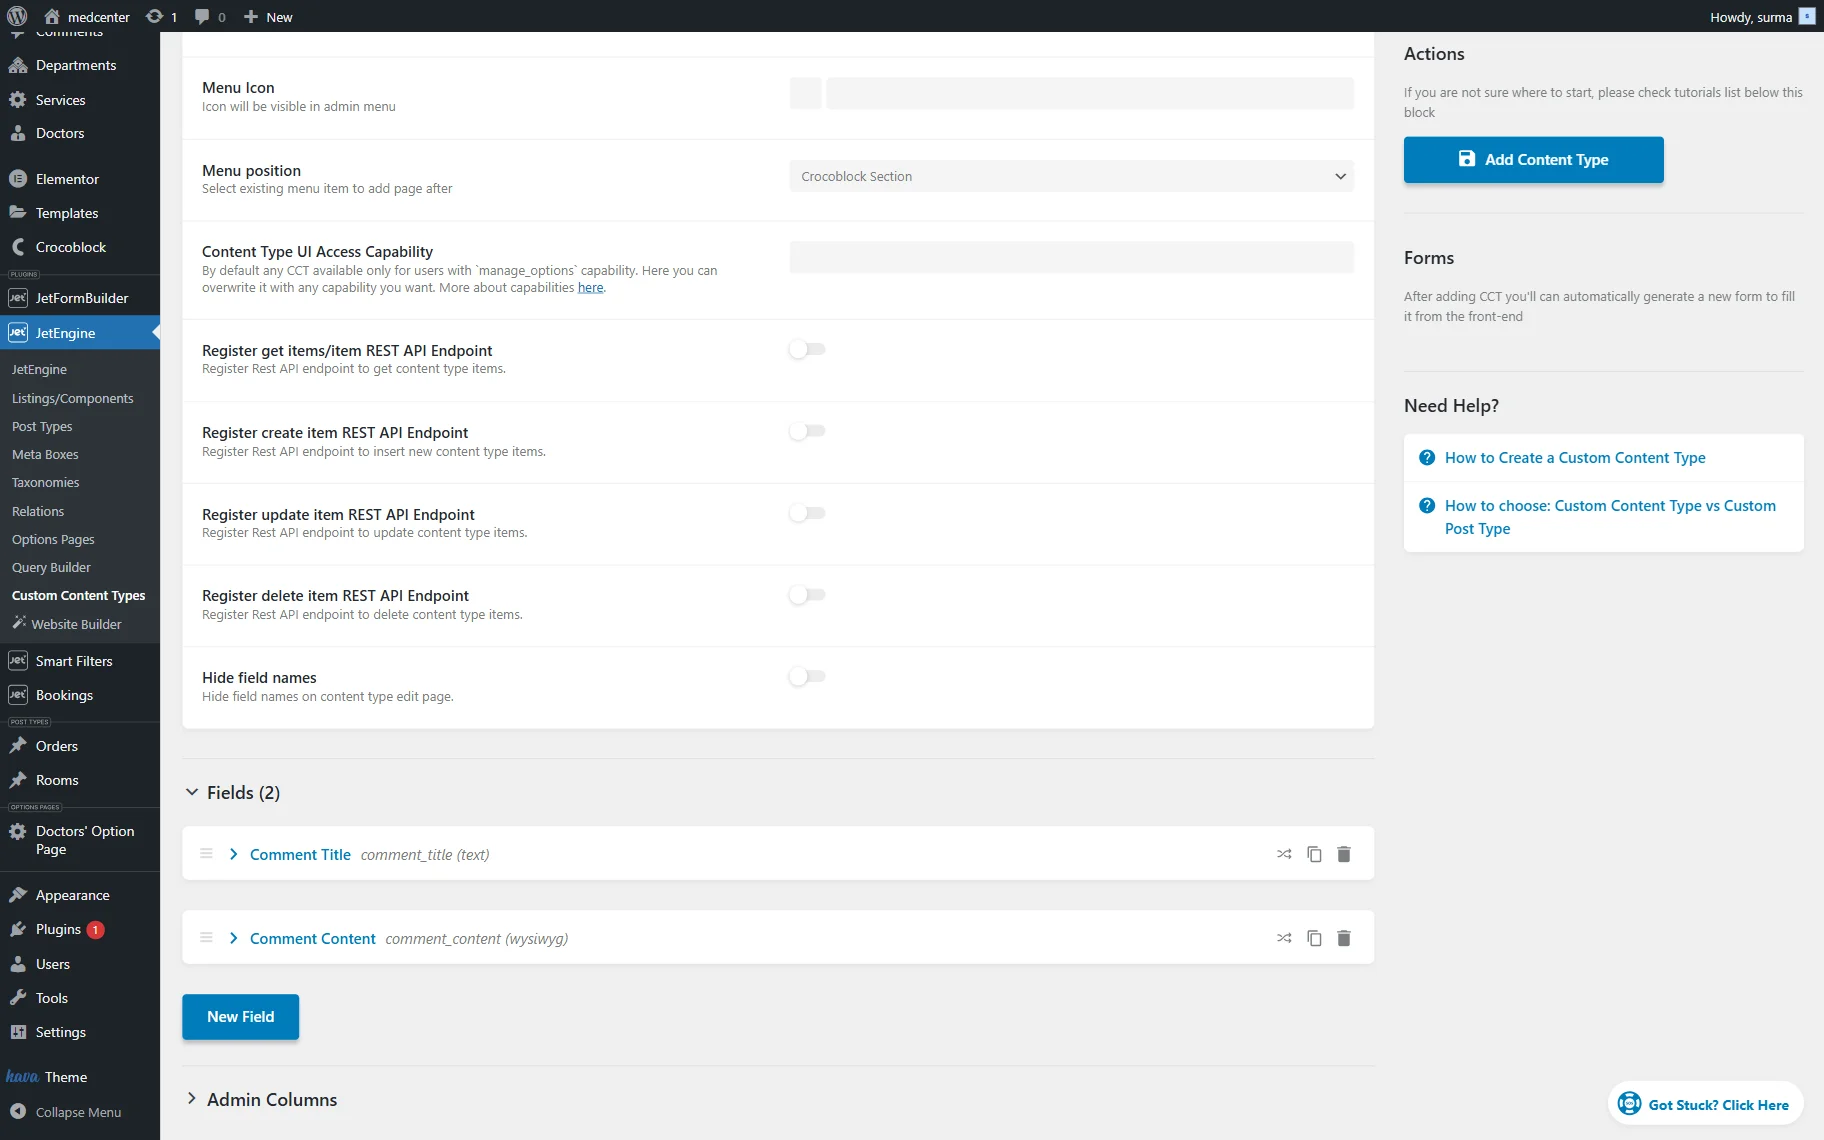
Save the CCT by pressing the “Add Content Type” button once you are ready.
Add a sample comment to the CCT
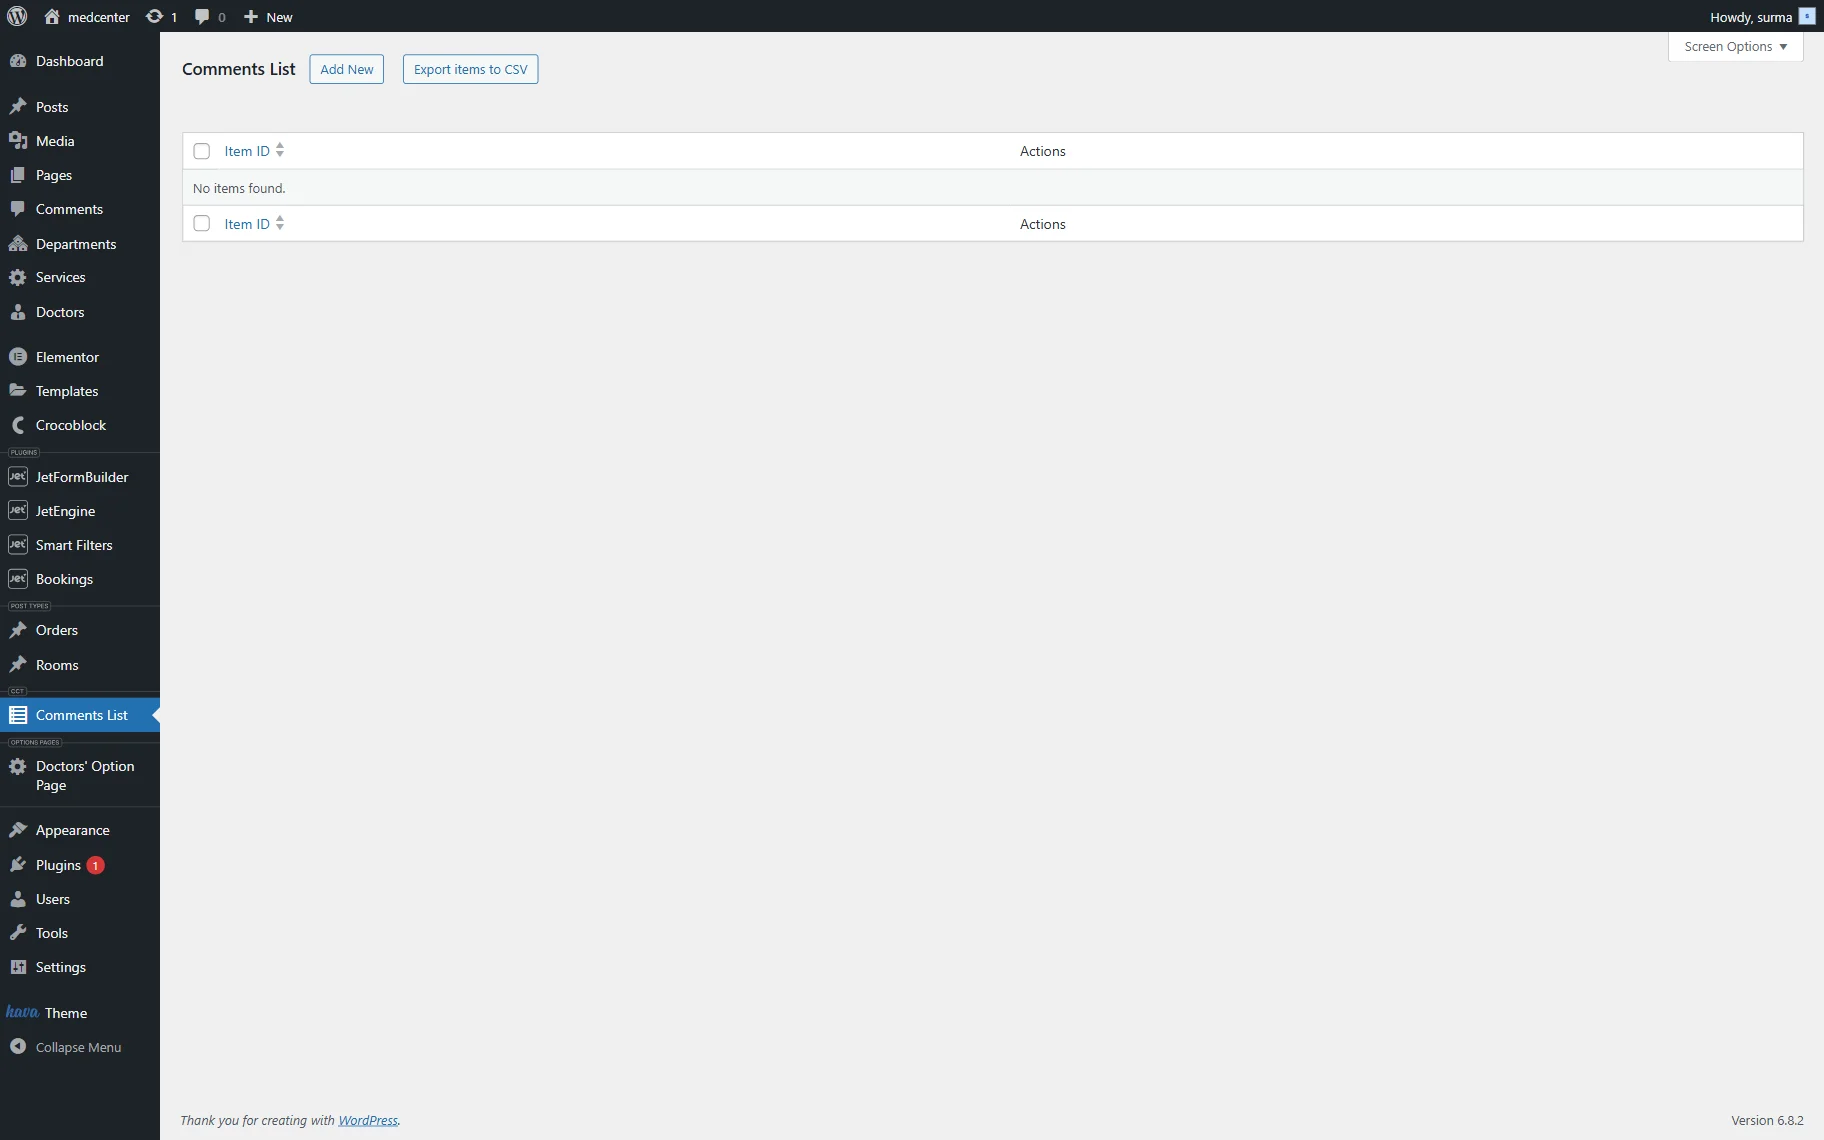
Find the CCT you created in the left sidebar and click on it. Click the “Add New” button to create a new CCT Item.
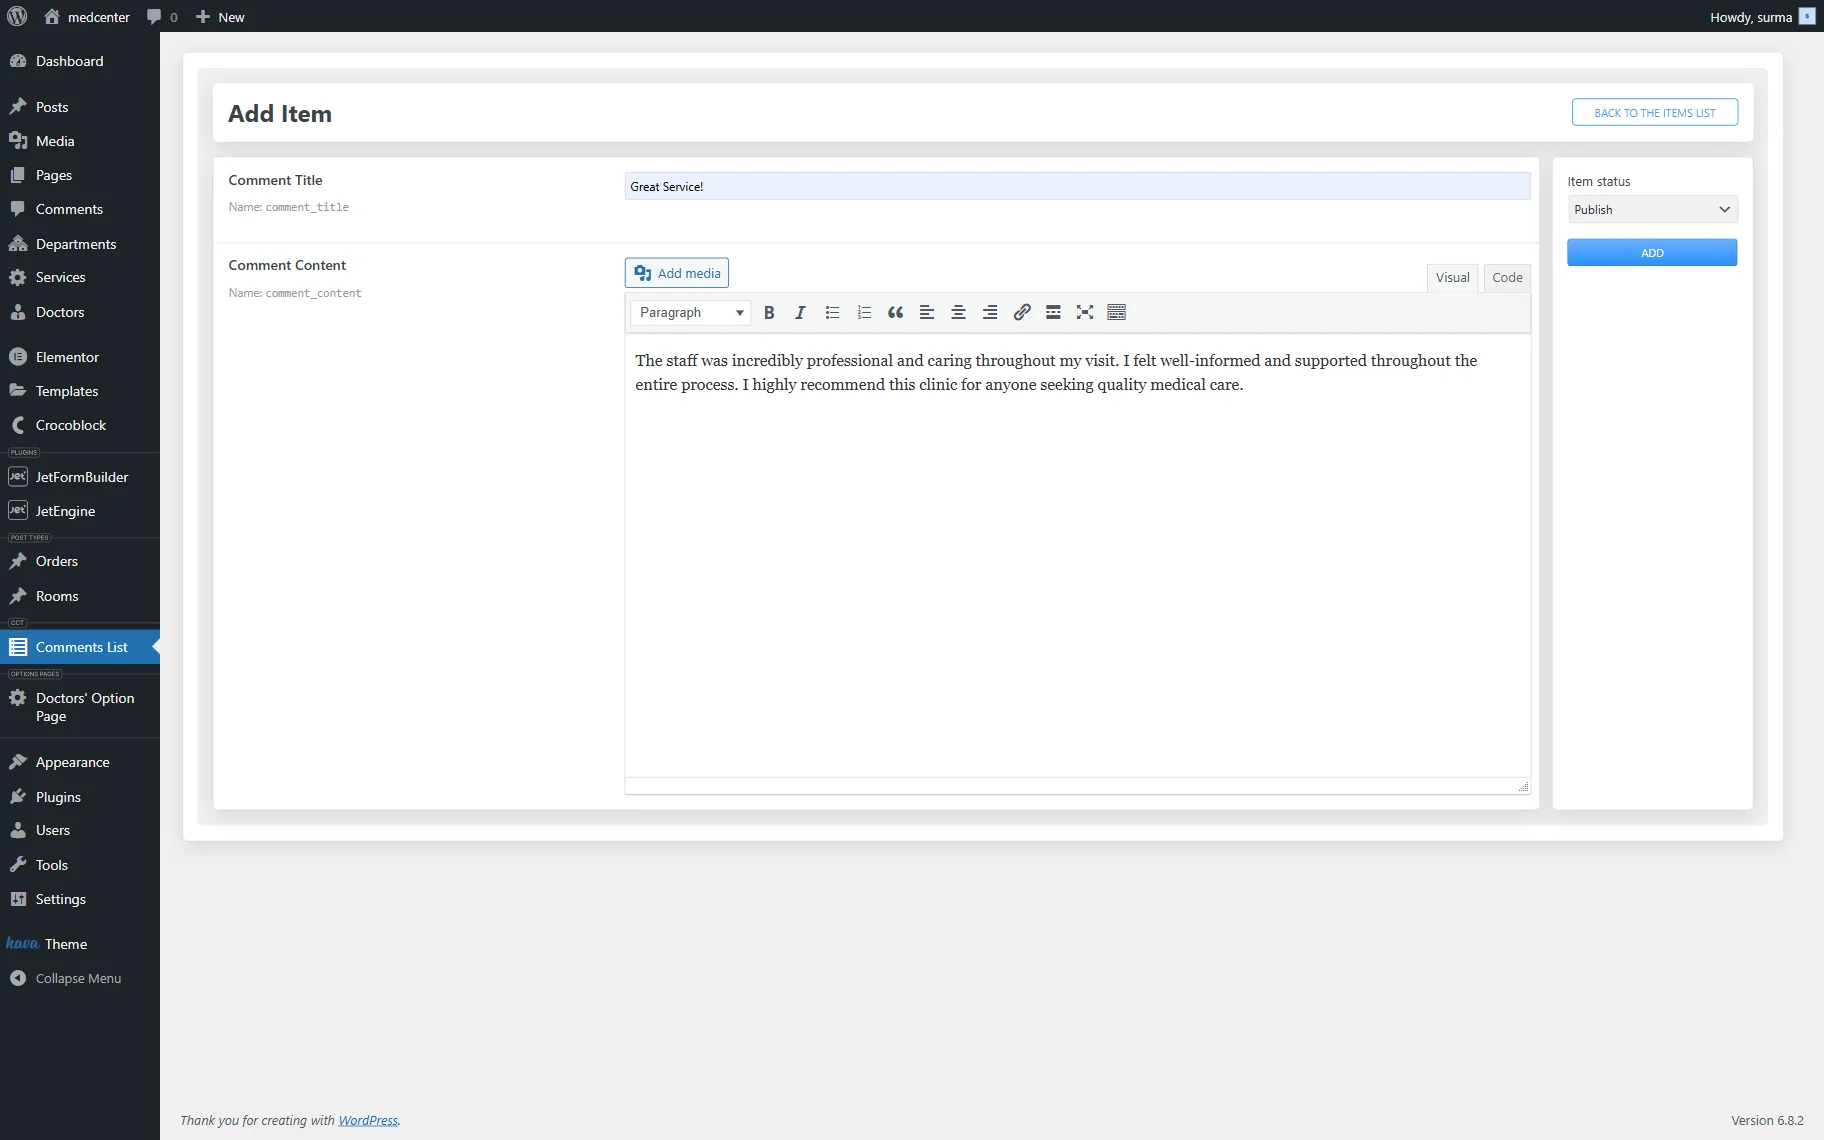
In the newly opened page, fill in the empty fields and click the “Add” button once you are ready.
Create a listing item template for the CCT
To design the comment layout, build a Listing Item template.
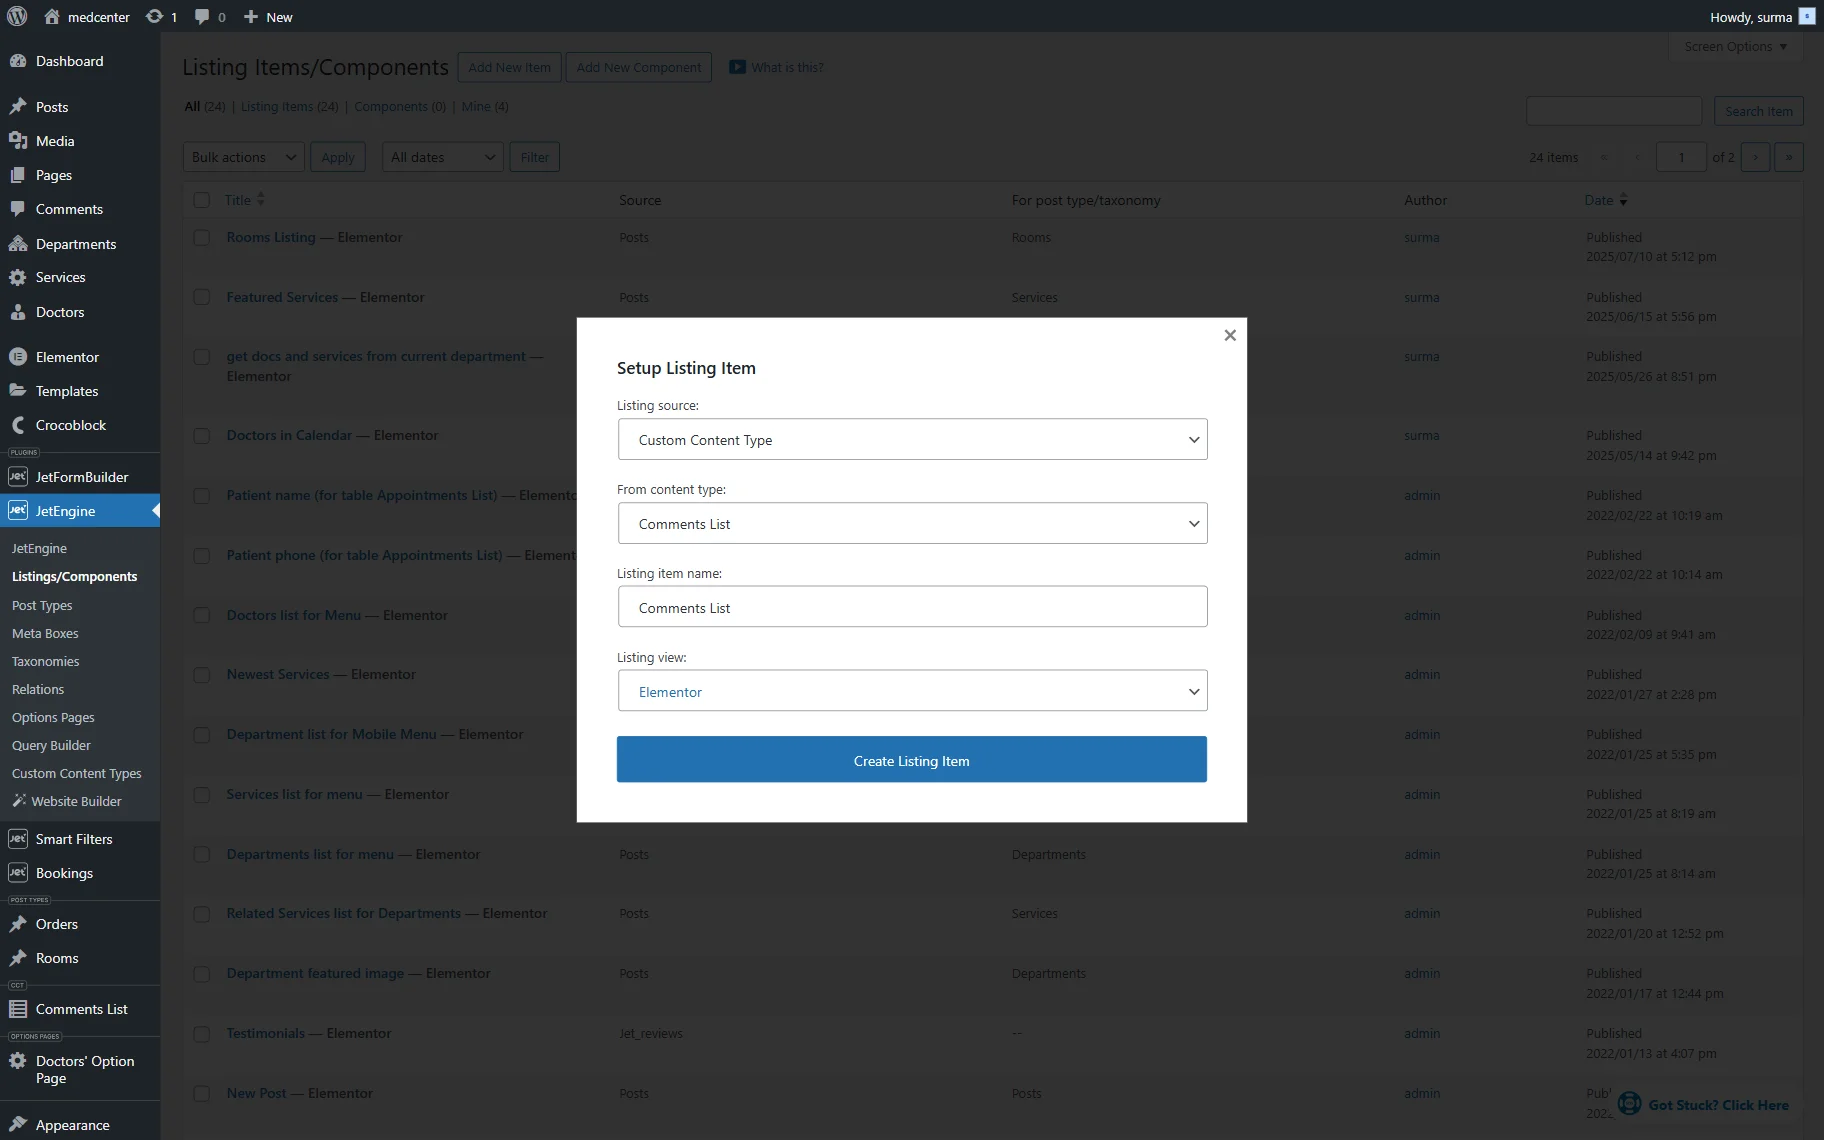
To create a new Listing Item template, head to WordPress Dashboard > JetEngine > Listings/Components and click the “Add New Item” button.
Refer to our How to Create Custom Content Type Listing Template in Elementor tutorial to ensure you have the correct setup.
With the help of the Dynamic Field widgets or blocks, display the comment data. Choose “Post/Term/User/Object Data” as the Source and select the needed field of the CCT from the Object Field dropdown.
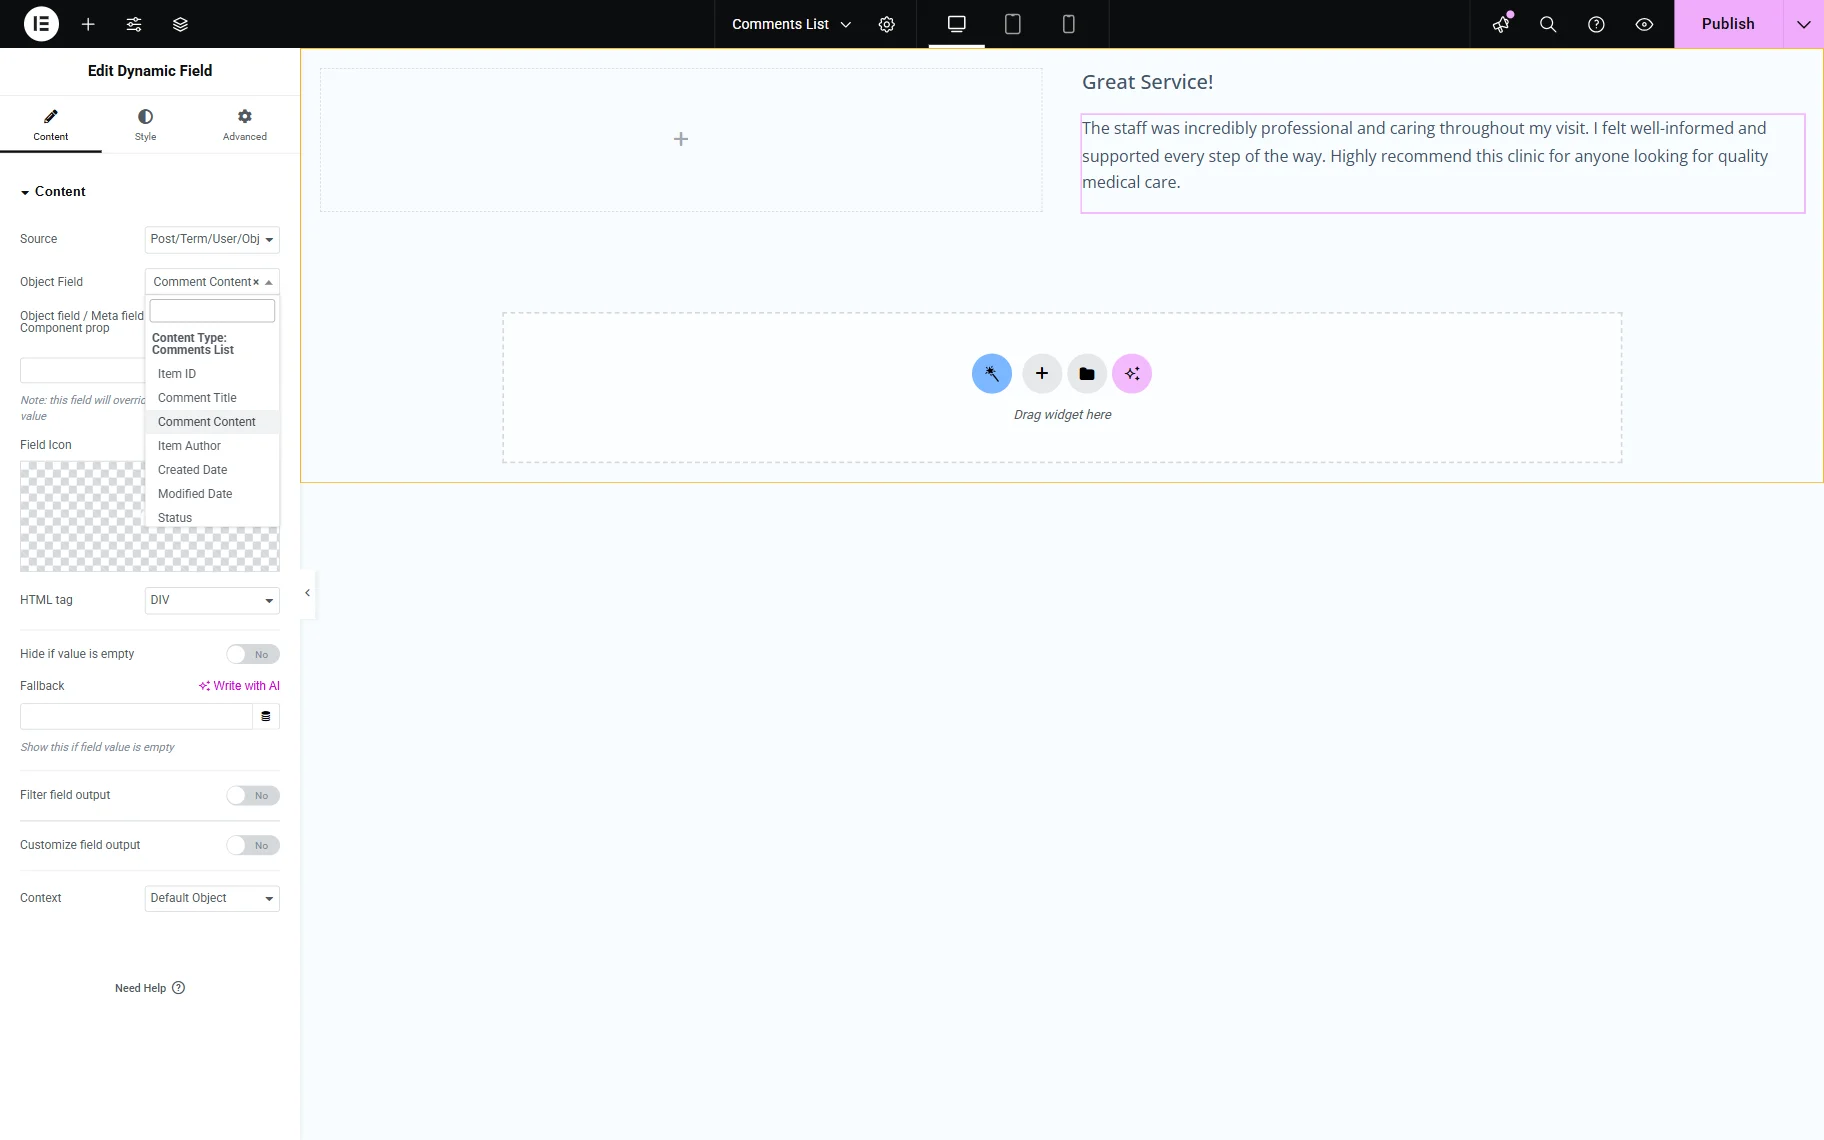
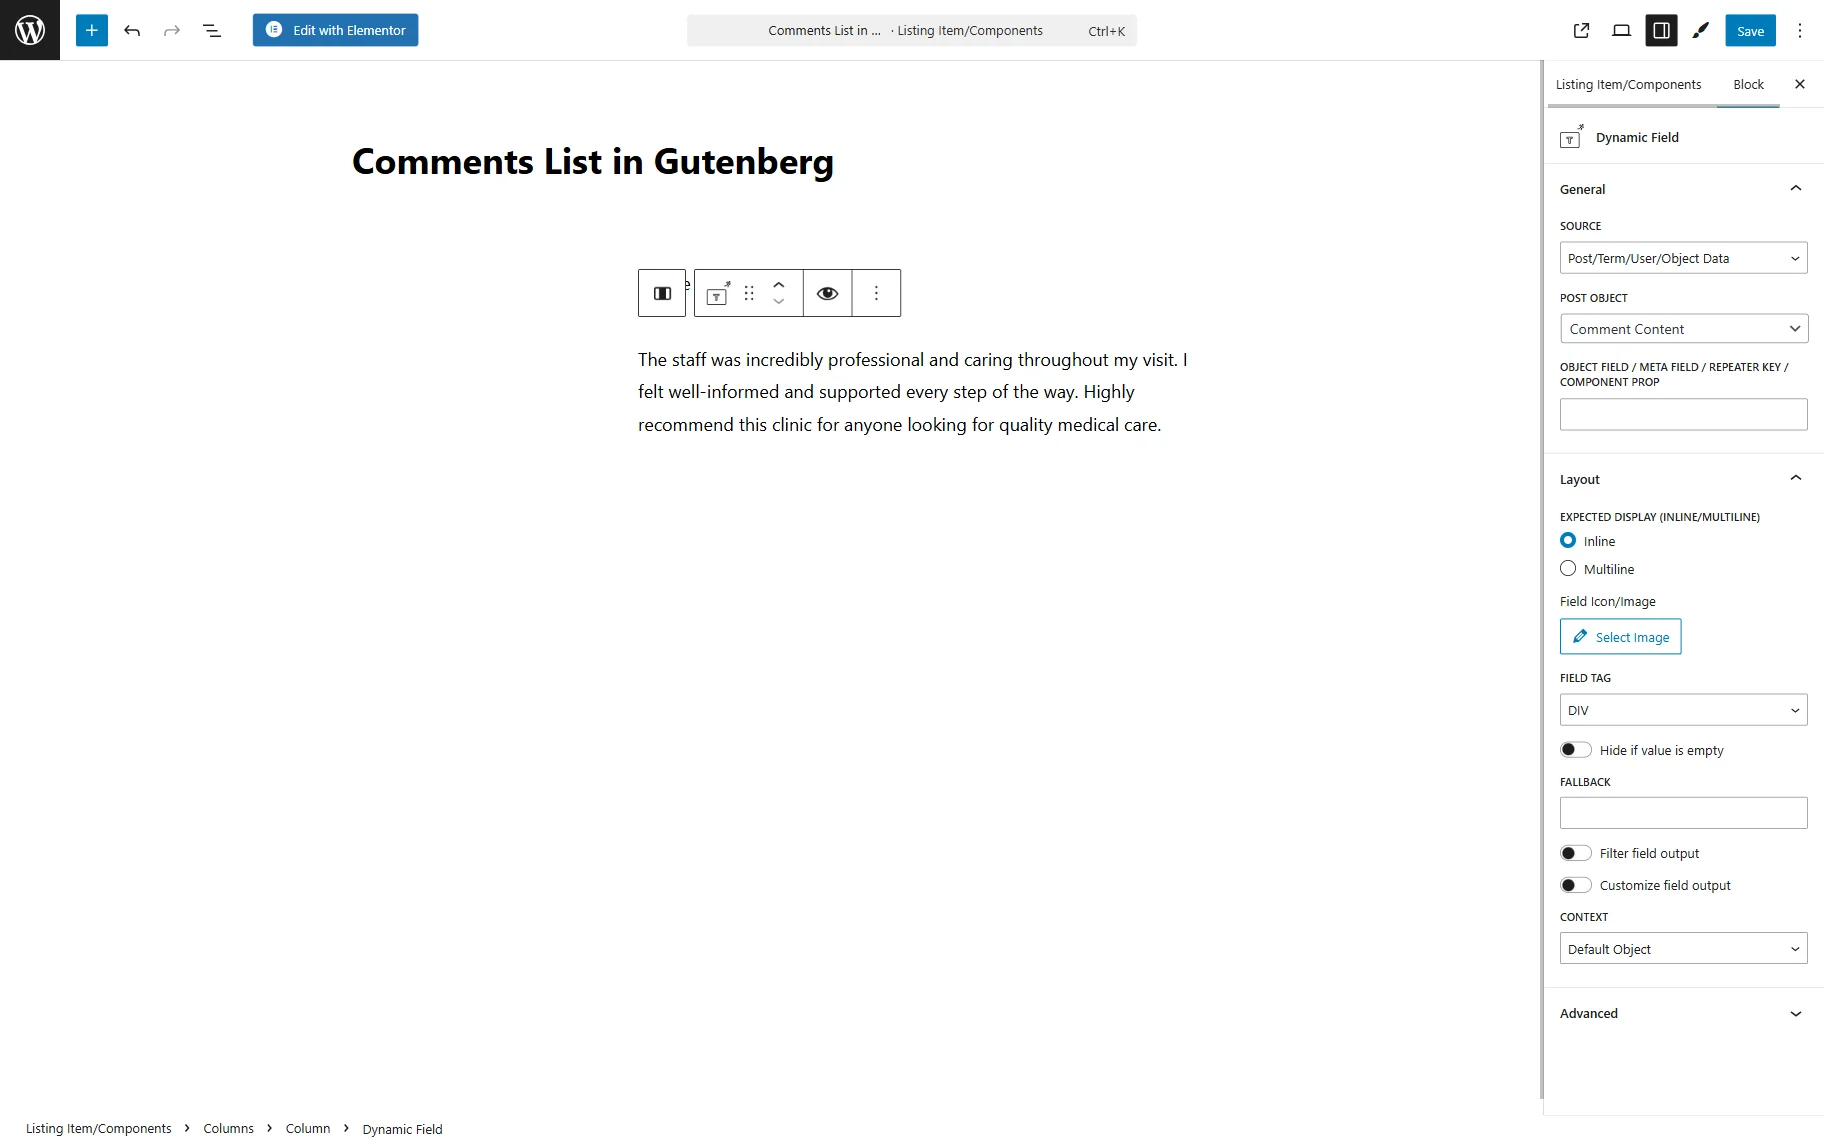
The setup will be the same regardless of whether you use the Gutenberg editor.
Add information about the comment author
It is not enough to display only the title and the body of the comment, as information about the comment author should also be included.
Drag and drop a new Dynamic Field widget or block to the editor to display user data. Choose “Post/Term/User/Object Data” as the Source. After that, open the Object Field dropdown to see the available list of options for user data. For example, output the user’s “Nickname”. Then select the needed user field, scroll down to the Context dropdown, and select “Current CCT item author” from the list. This way, the user information will be queried by the author of the current comment.
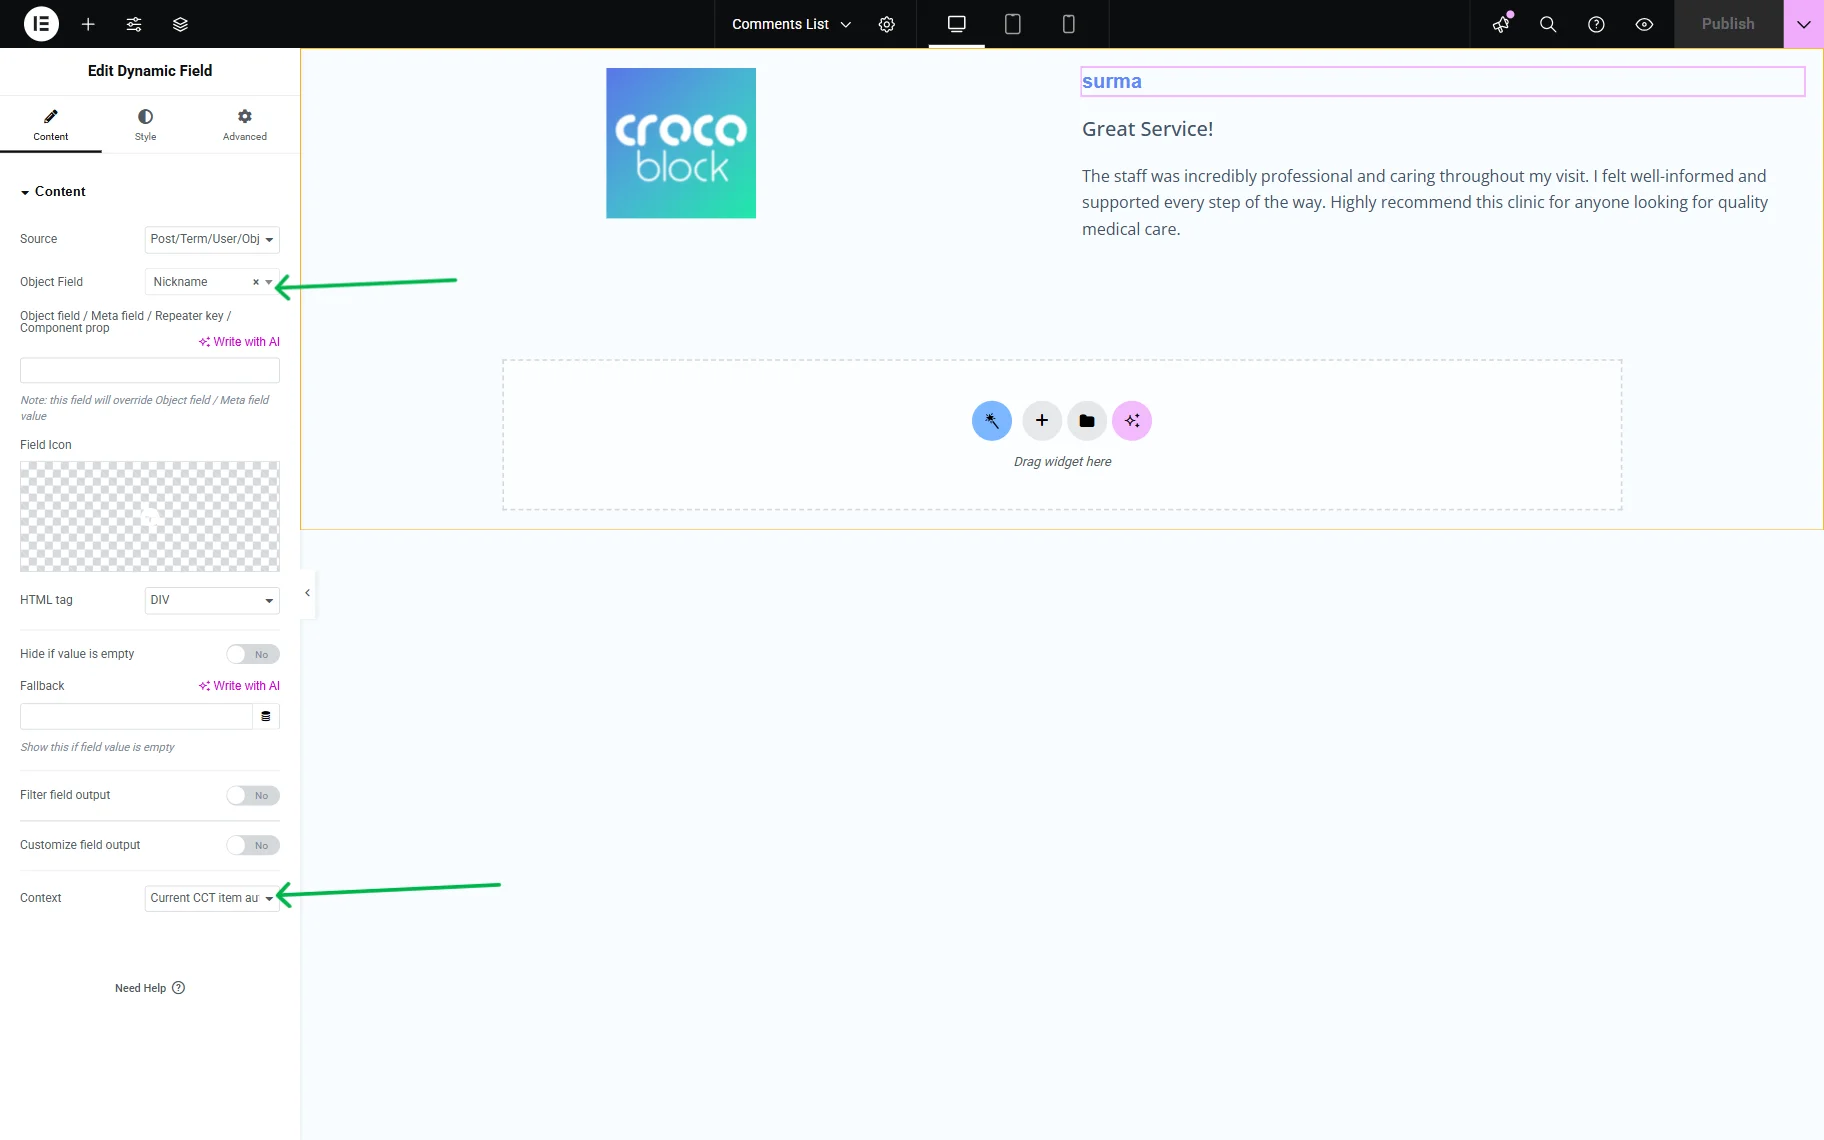
The same workflow should be repeated if you are using the Gutenberg editor.

Display the profile picture of the comment author. For this purpose, use the Dynamic Image widget in the Elementor page builder or the Dynamic Image block in Gutenberg.
Note that you are not limited to the default user fields of WordPress. If you created a Meta Box for users to store additional user information, you can display it through the “Meta Data” Source of the Dynamic Field widget. If you don’t have a user Meta Box yet, you can create one by following our guide on How to Apply Meta Boxes to Users.
After designing the Listing Item template, click “Update” to save the changes and return to the WordPress Dashboard.
Create a relation between the CPT and the CCT
To link the new comments to the commented object, create a Relation between the Custom Post Type and the Custom Content Type. The relation will link a comment to the post under which the comment was left.
Go to WordPress Dashboard > JetEngine > Relations and press the “Add New” button to create a relation. The Related Custom Content Type Items tutorial provides a comprehensive overview of the settings.
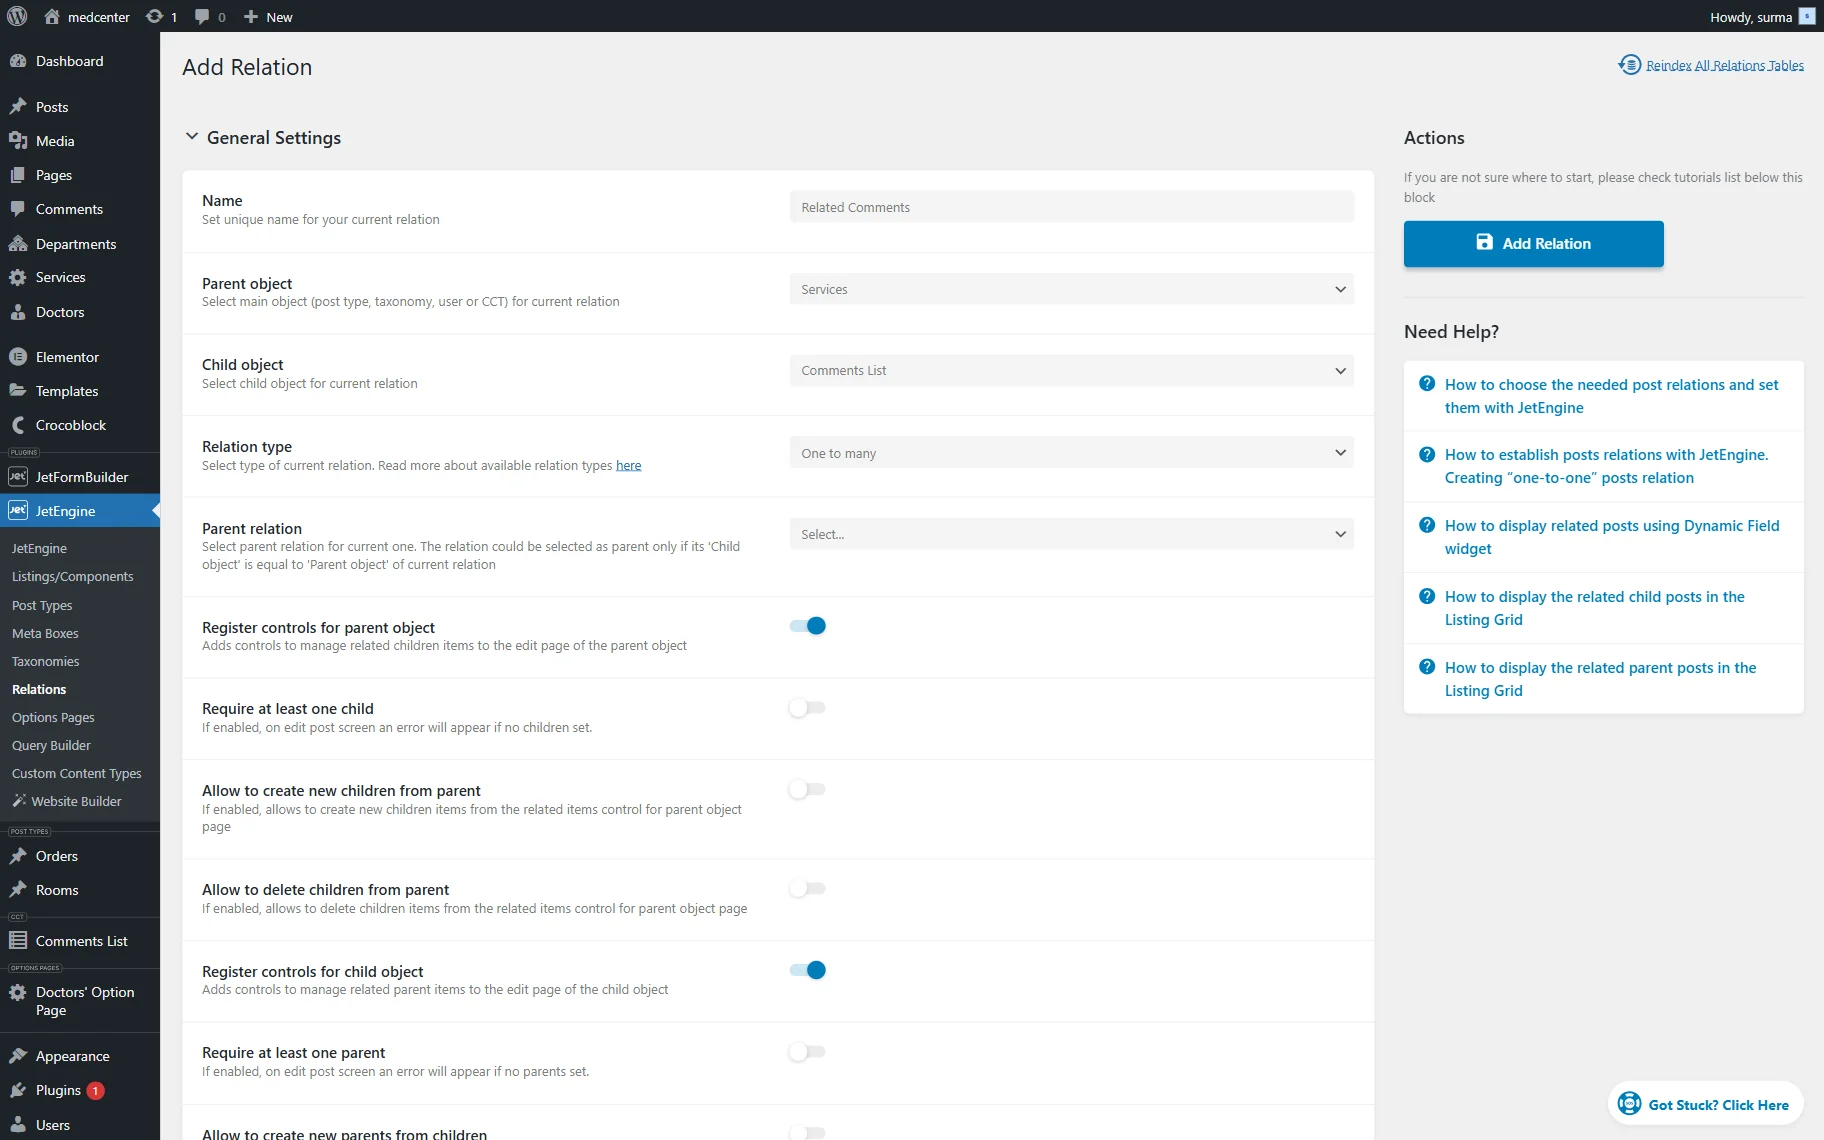
In this case, define comments as the Child object and the CPT (the posts that will have this commenting system) as the Parent object. The Relation type should be set to “One to many” because one post should have multiple comments.
Click the “Add Relation” button to save the changes.
Create a custom query with the related Items macro
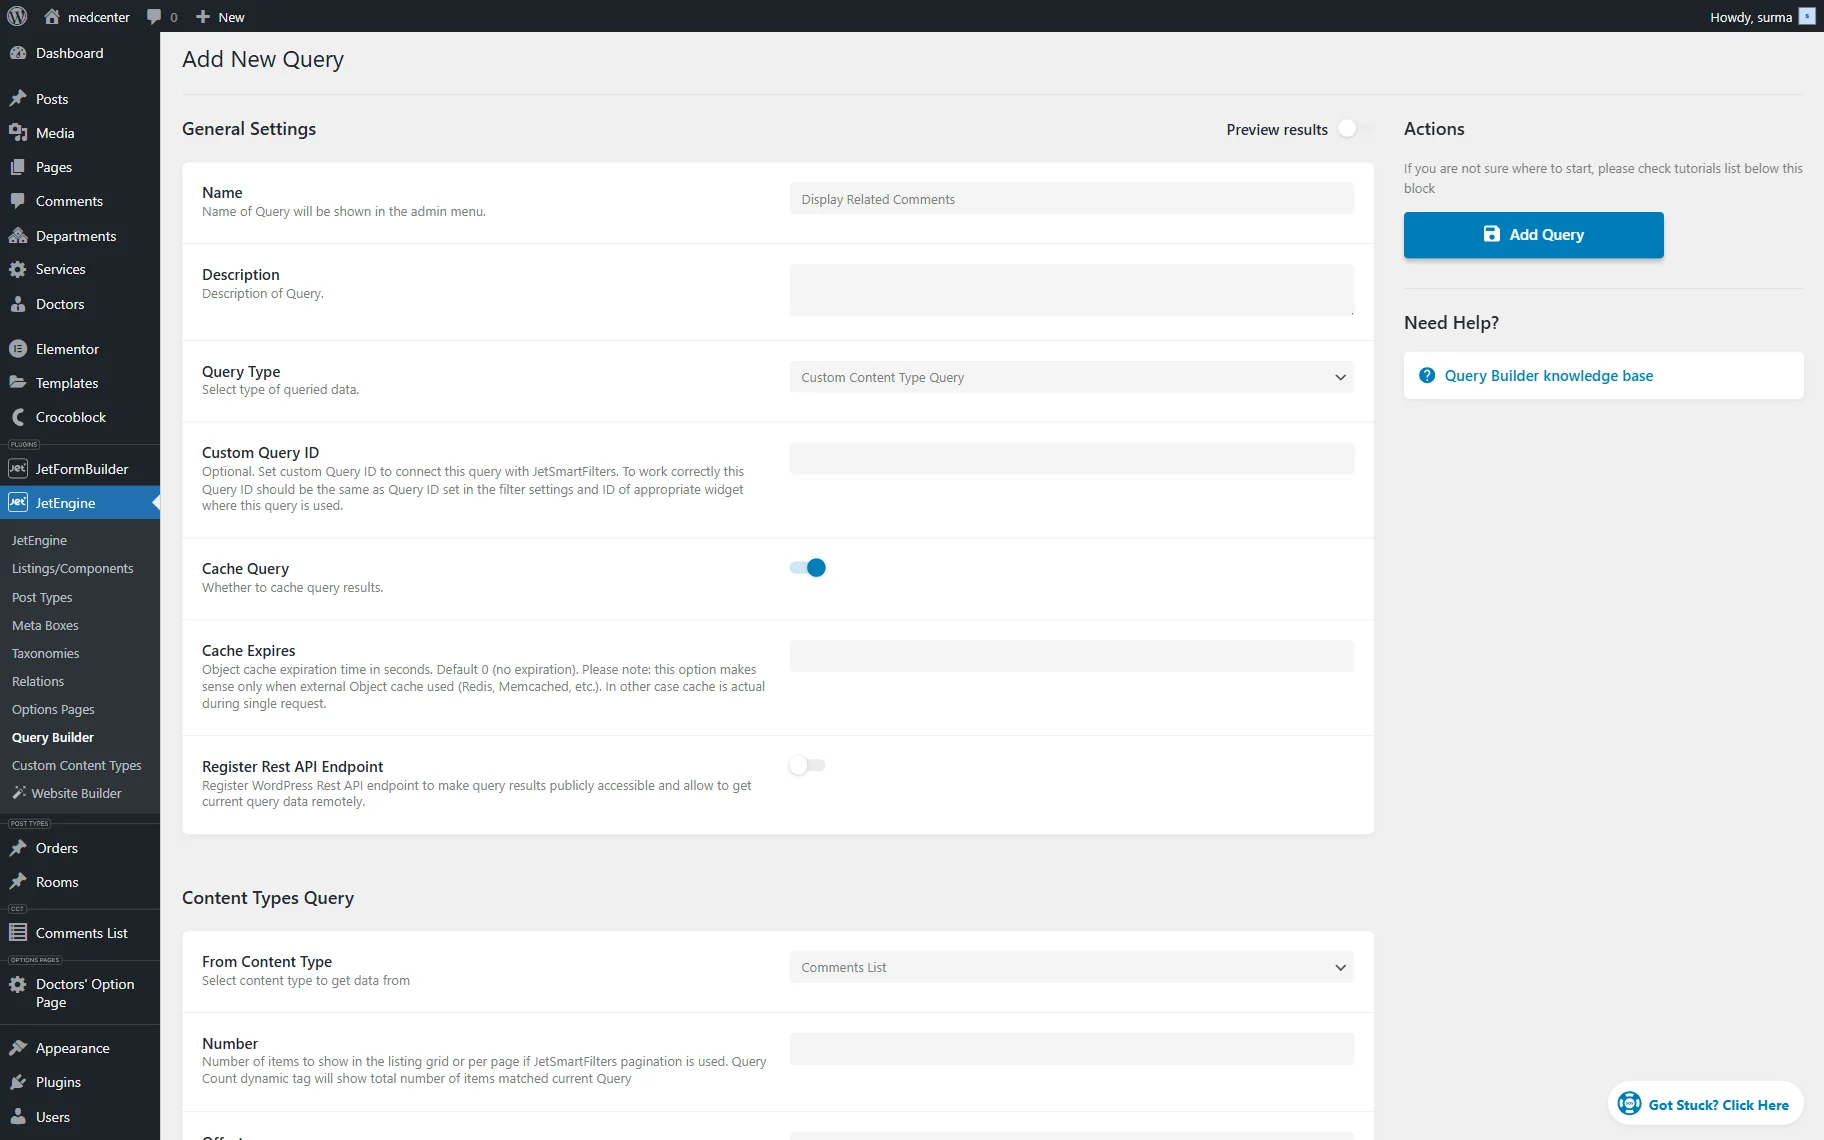
To display only related comments under the post, create a custom query in the Query Builder tool of the JetEngine plugin. Follow WordPress Dashboard > JetEngine > Query Builder > click the “Add New” button.
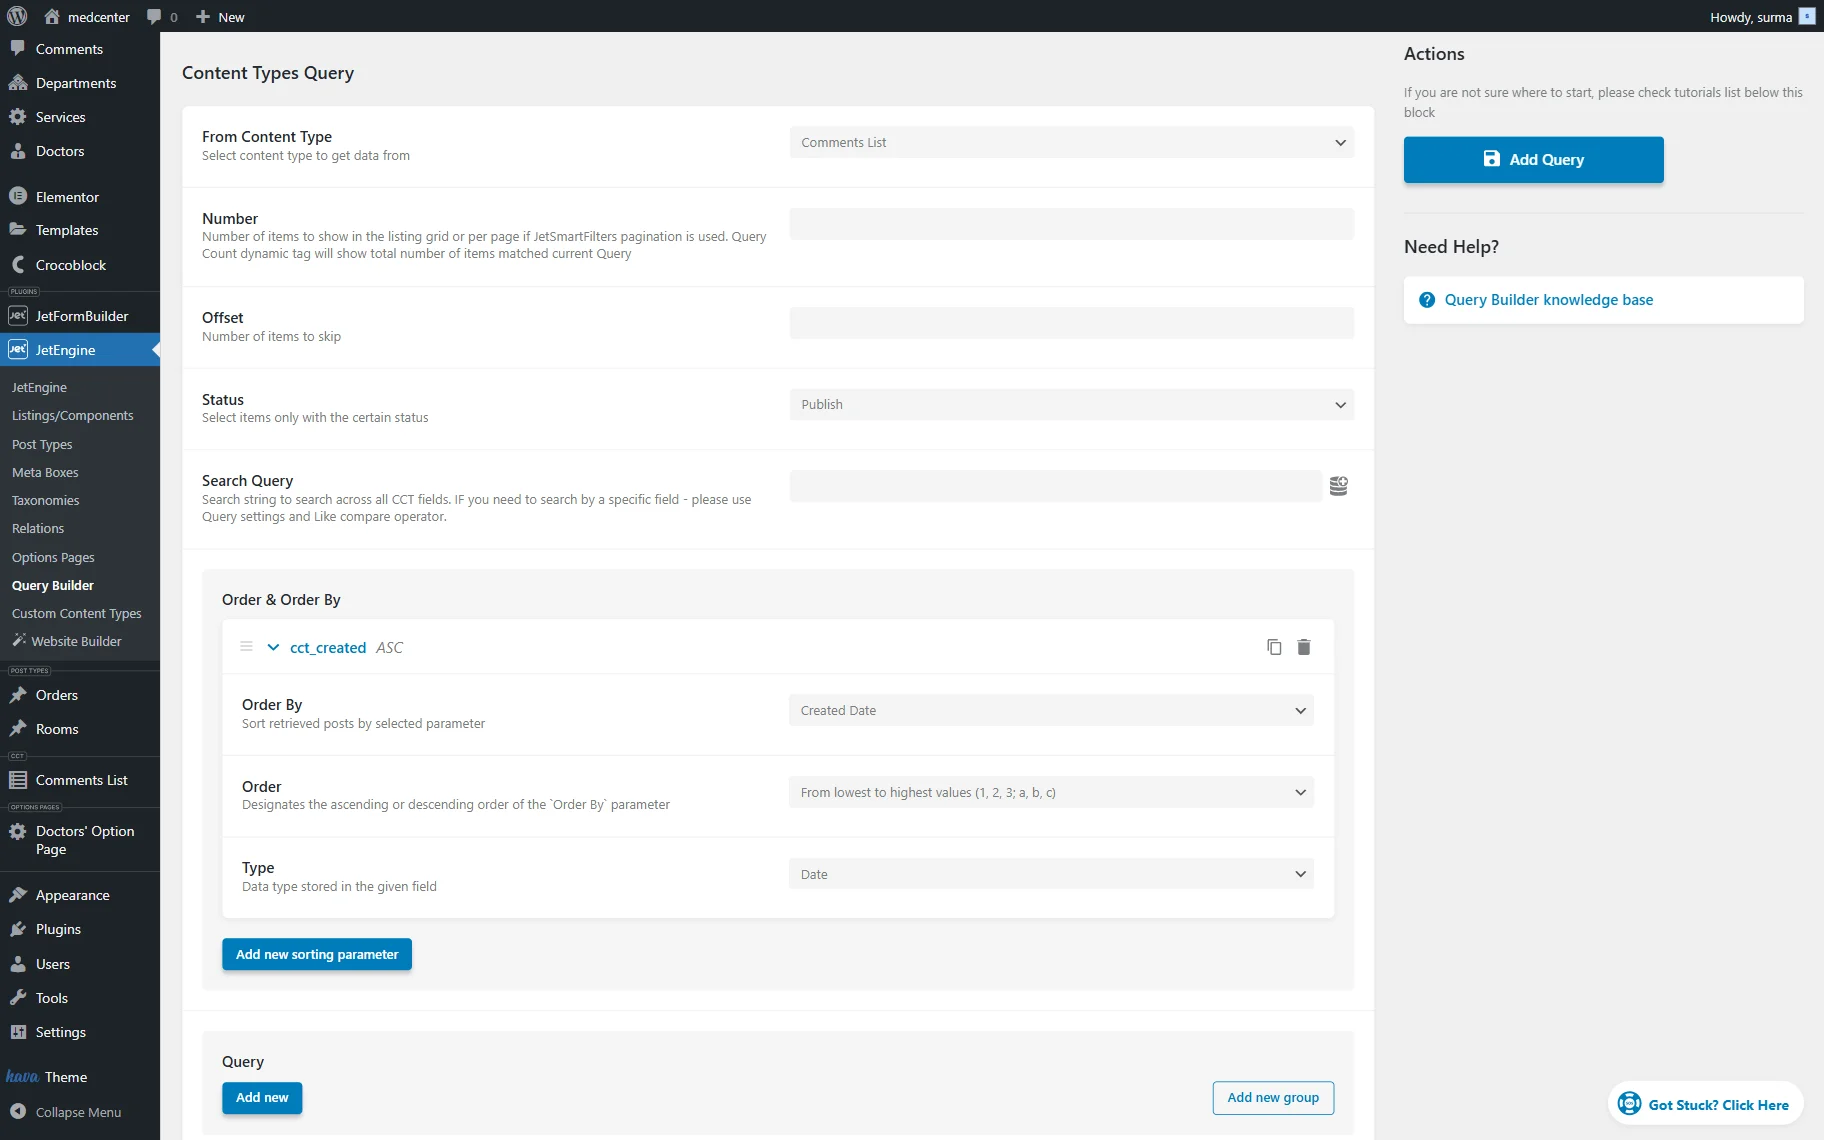
Firstly, give a name to a custom query and choose “Custom Content Type Query” as the Query Type. Scroll down to select the appropriate CCT in the From Content Type dropdown. Set “Publish” in the Status field to show only published comments on the front end.
In the Order & Order By section, click “Add new sorting parameter” to order the comments by date. In the Order By field, select the “Created Date” option. In the Order field, choose the “From lowest to highest values (1, 2, 3; a, b, c)”. Set the “Date” for the Type.
After that, click the “Add new” button in the Query section to query comments by their related post. Use the setup described in the Macros for WordPress Relations guide.
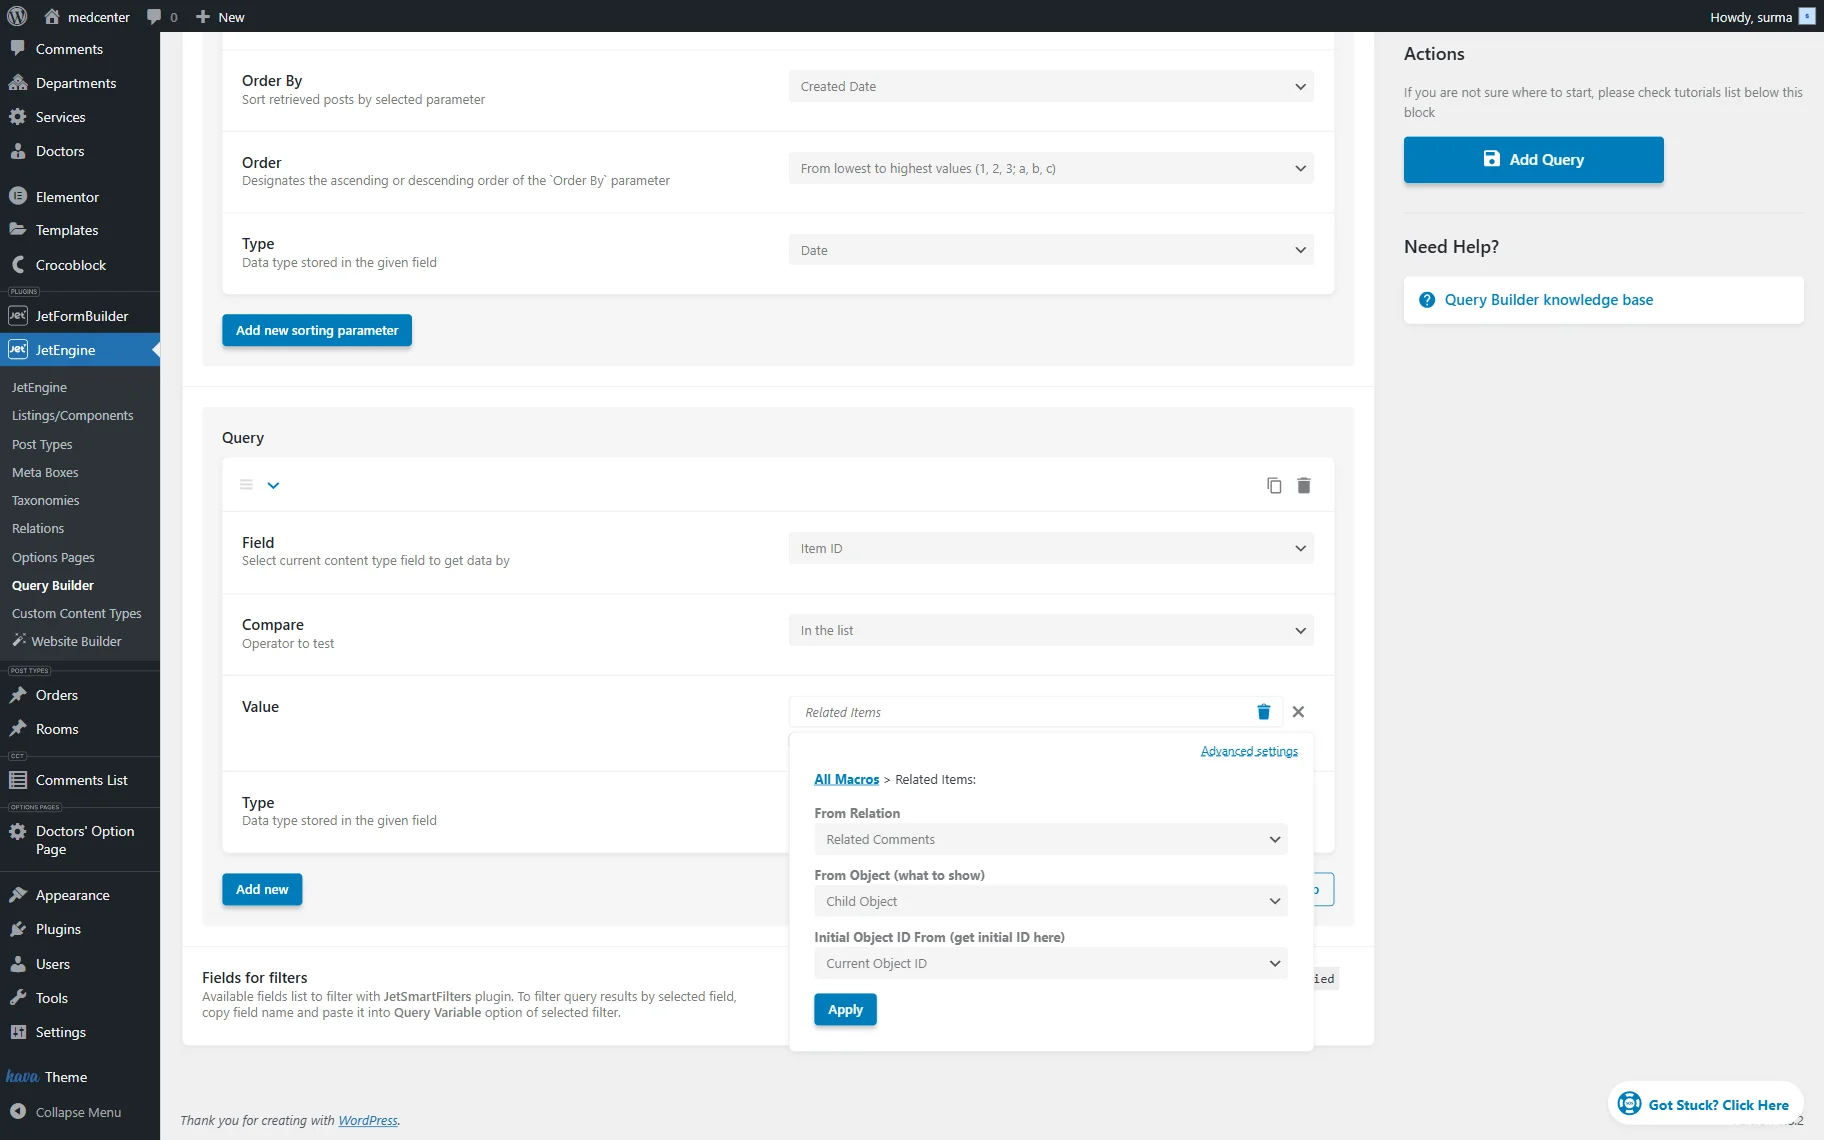
Select the “Item ID” in the Field input and choose the “In the List” Compare operator.
The “Related Items” macro in the Value field will help us get related items from the current post.
In the From Relation dropdown, select the new relation; in the From Object list, choose “Child Object” to get the list of child comments on the current post page; for the Initial Object ID From field, leave the default “Current Object ID” option – it will pull the ID of the current post. Finally, press the “Apply” button.
Choose the “Char” data Type.
Click the “Add Query” button once you are ready with the settings.
Output the related comments on the single post page
Now, it is time to display the comments. If you plan to add the commenting system to a Custom Post Type, head to the Single Post template or the editing screen of a single post. Open it with the Elementor or Gutenberg editor. Find the section in your post’s layout that should contain post comments and place the Listing Grid widget or block in this section.
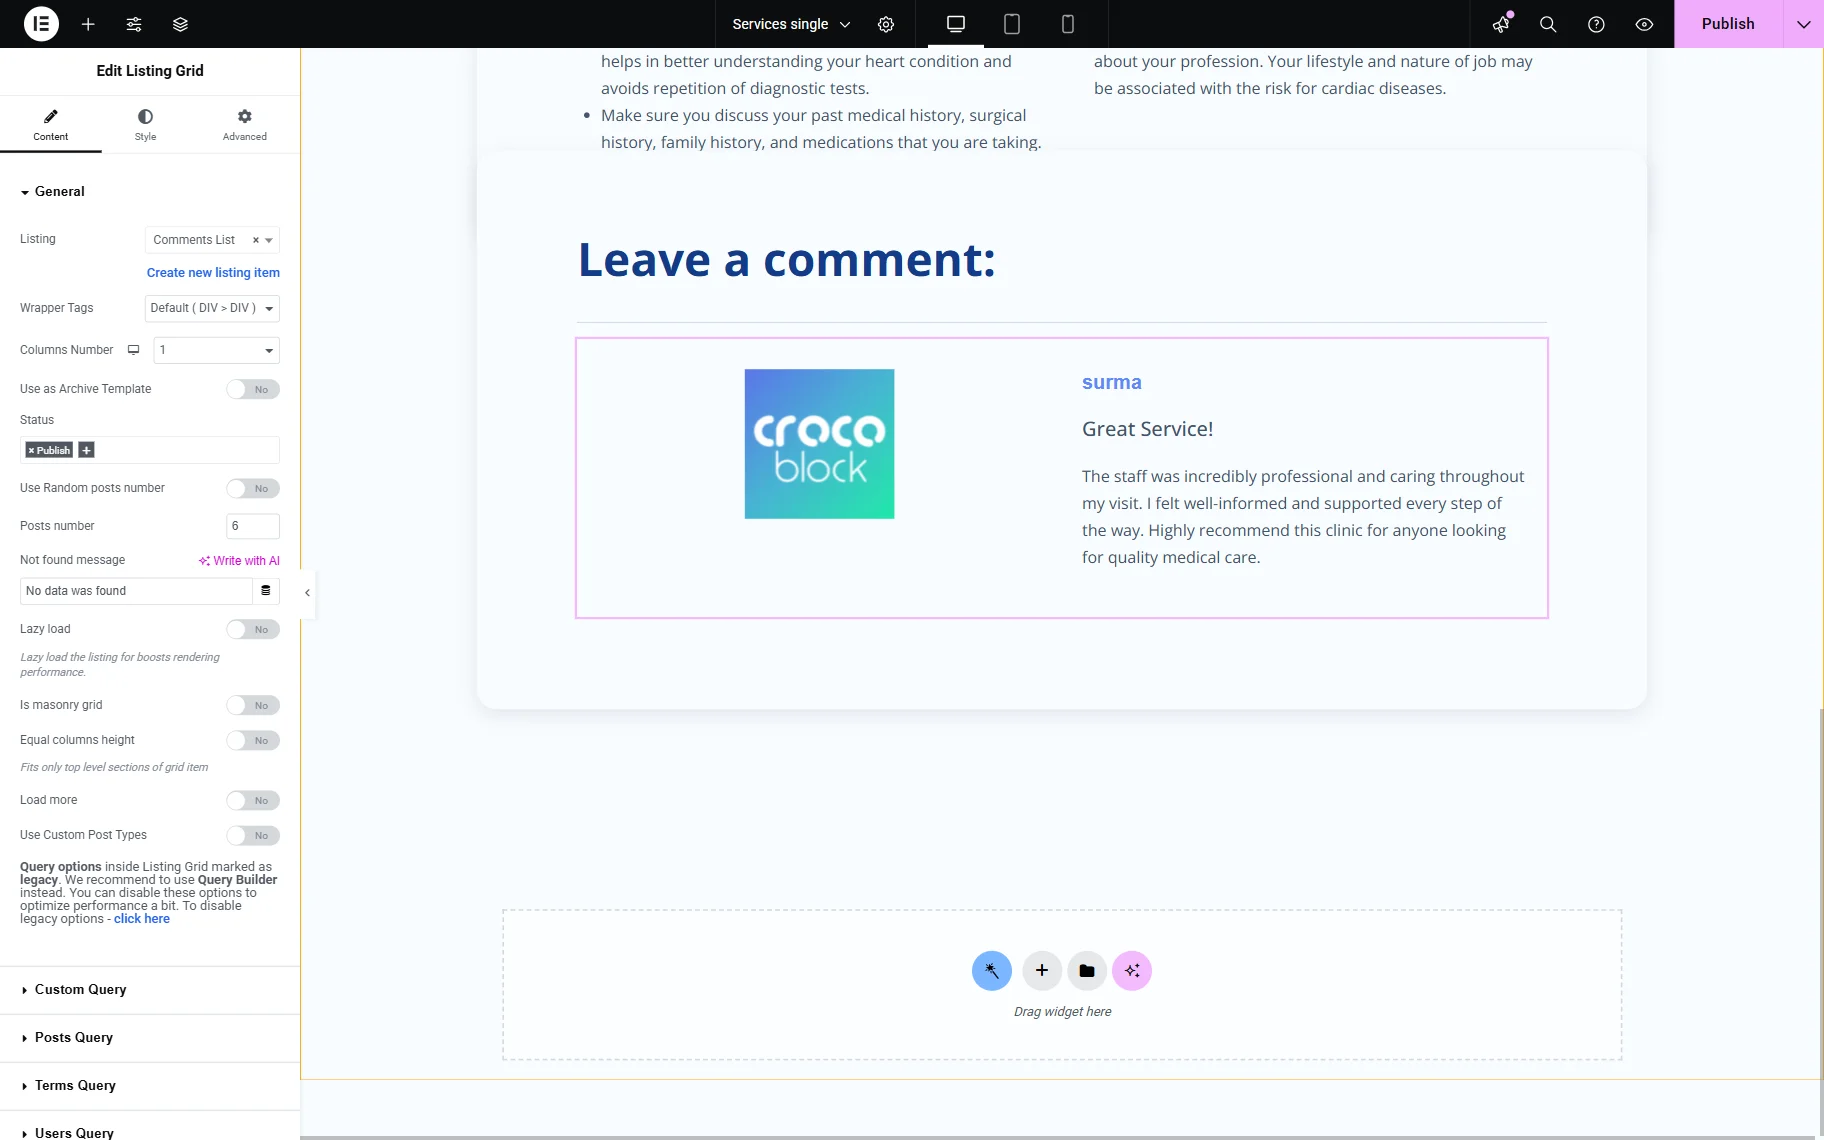
For this Listing Grid widget, select the Listing Item template created before. Set the Columns Number to “1” so that each new comment appears in a new row.
In the Content settings tab of the Listing Grid widget, scroll down to the Custom Query tab and turn the Use Custom Query toggle on and select the query created before in the Custom Query field.
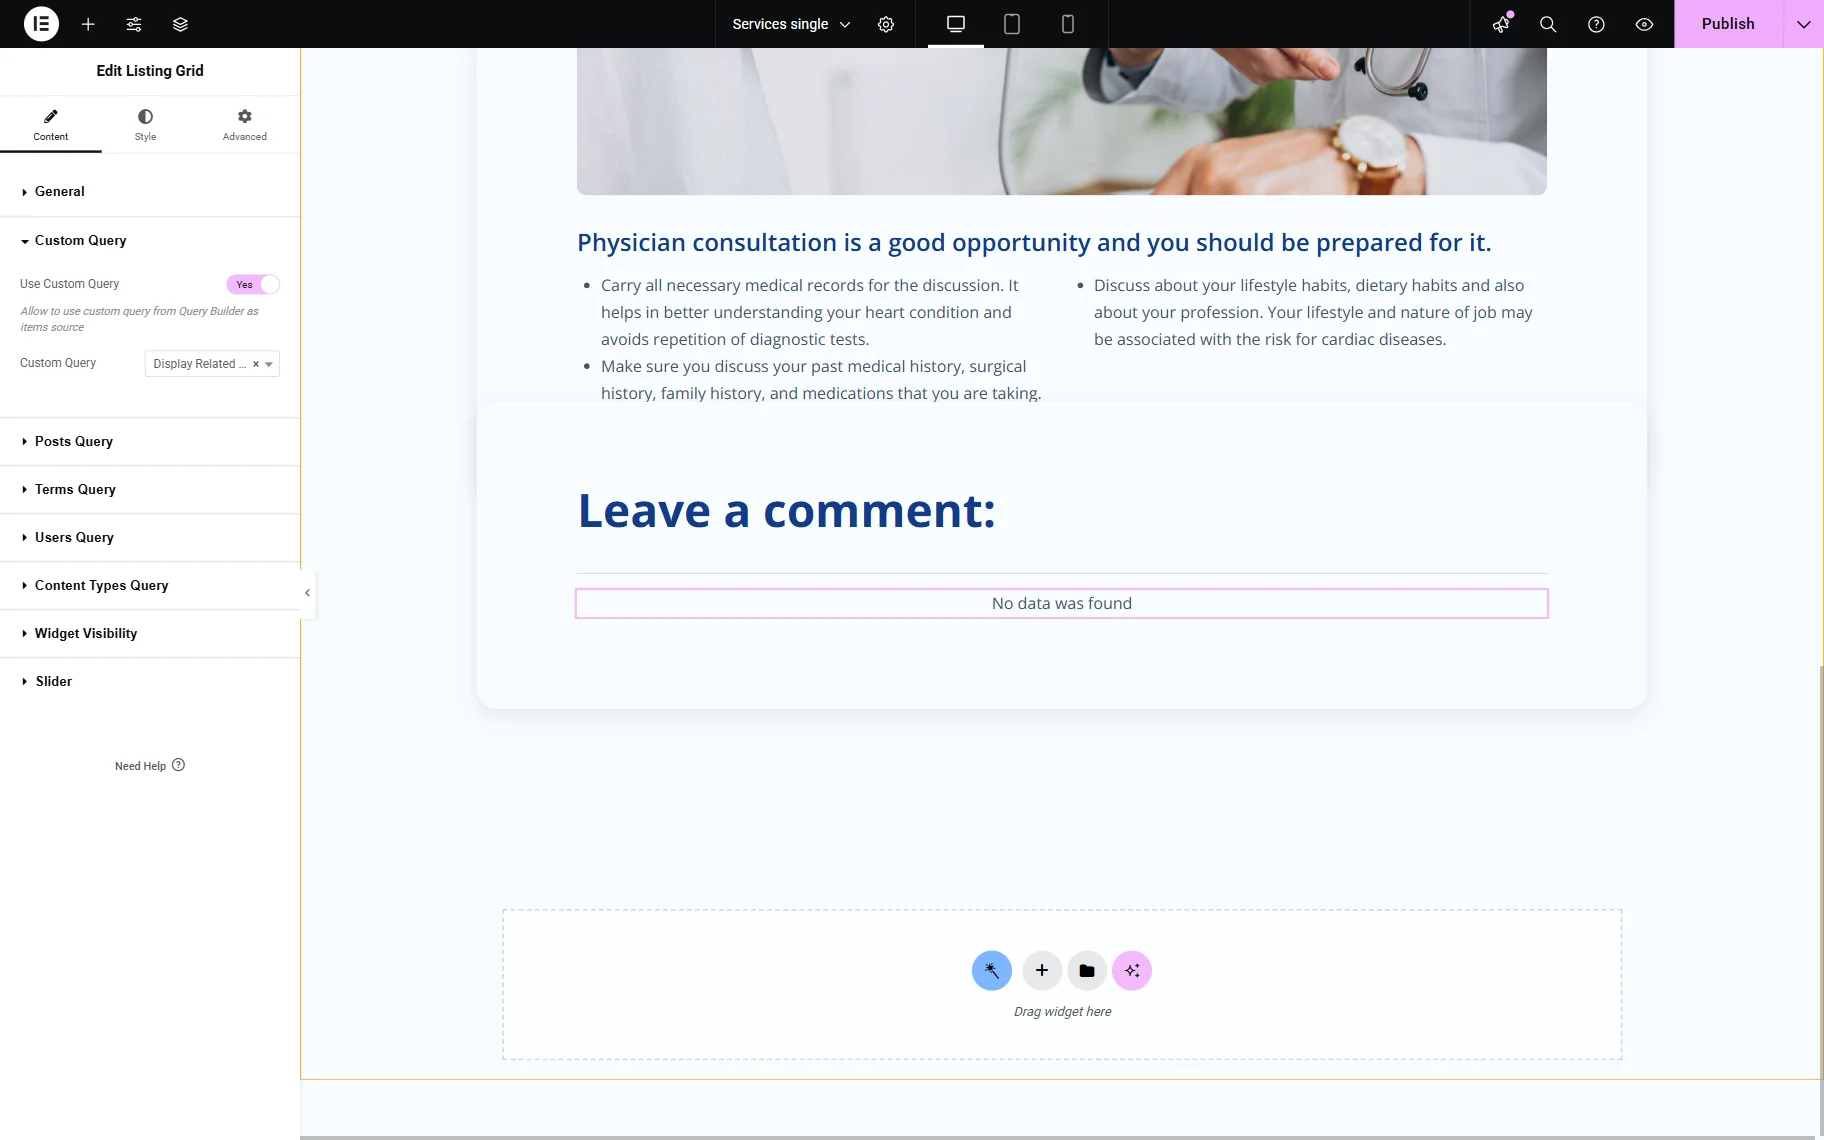
It is completely fine that there is a “No data was found” message — there are no related comments yet. Remember that you can change the message’s text in the General tab of the settings.
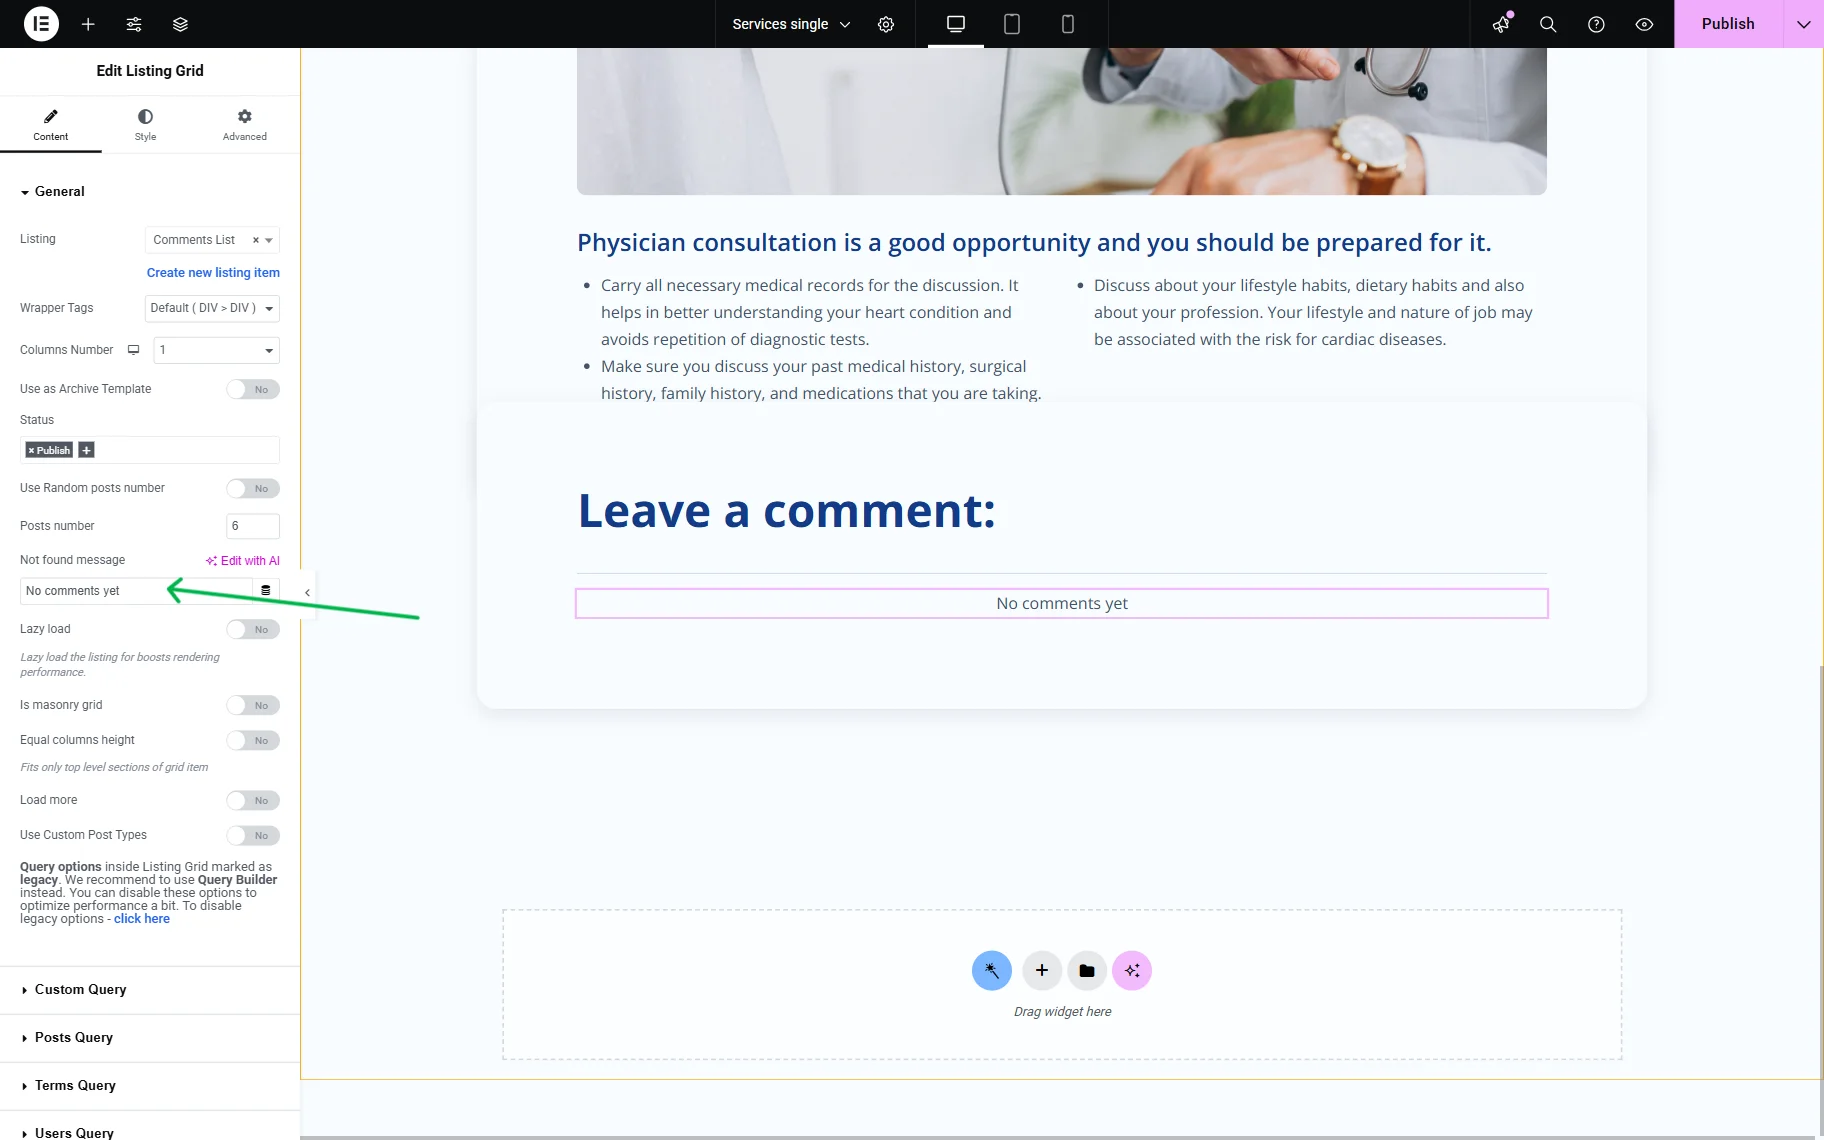
Click the “Publish” button once you are finished.
In the Gutenberg editor, follow the same setup for the Listing Grid block.
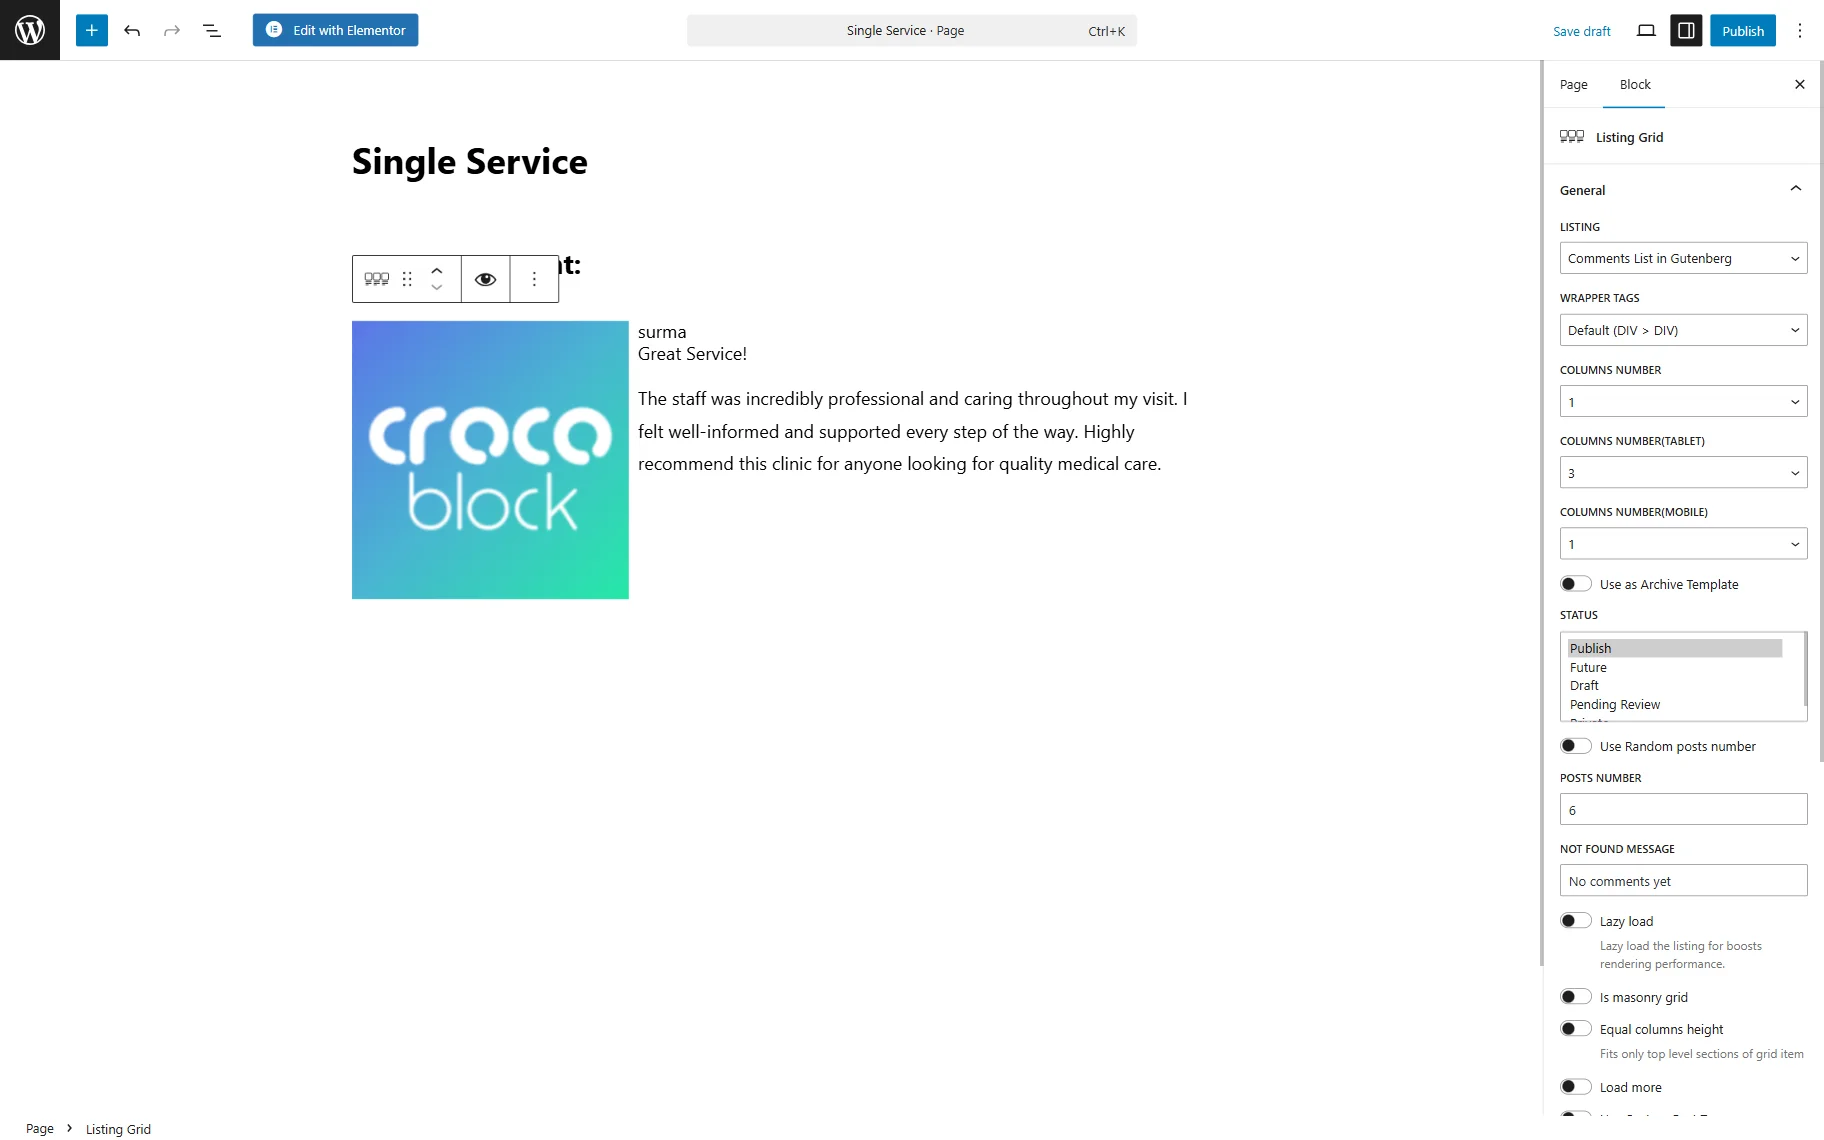
Apply the query you created before in the Custom Query tab.
Click the “Publish” button.
How to Create an Input Form for Comment Submissions
Design the form layout in JetFormBuilder
Head to WordPress Dashboard > JetFormBuilder > Forms > click the “Add New Form” button. The form we are going to create will post a new CCT Item (comment) and link it to the current post with the relation.
Following our How to Insert and Edit Custom Content Type Items via Form guide, we created a form for adding CCT Items.
In this case, we add a Text Field for the comment title, a WYSIWYG Field for the comment body, and a Hidden Field to get the ID of the current post.
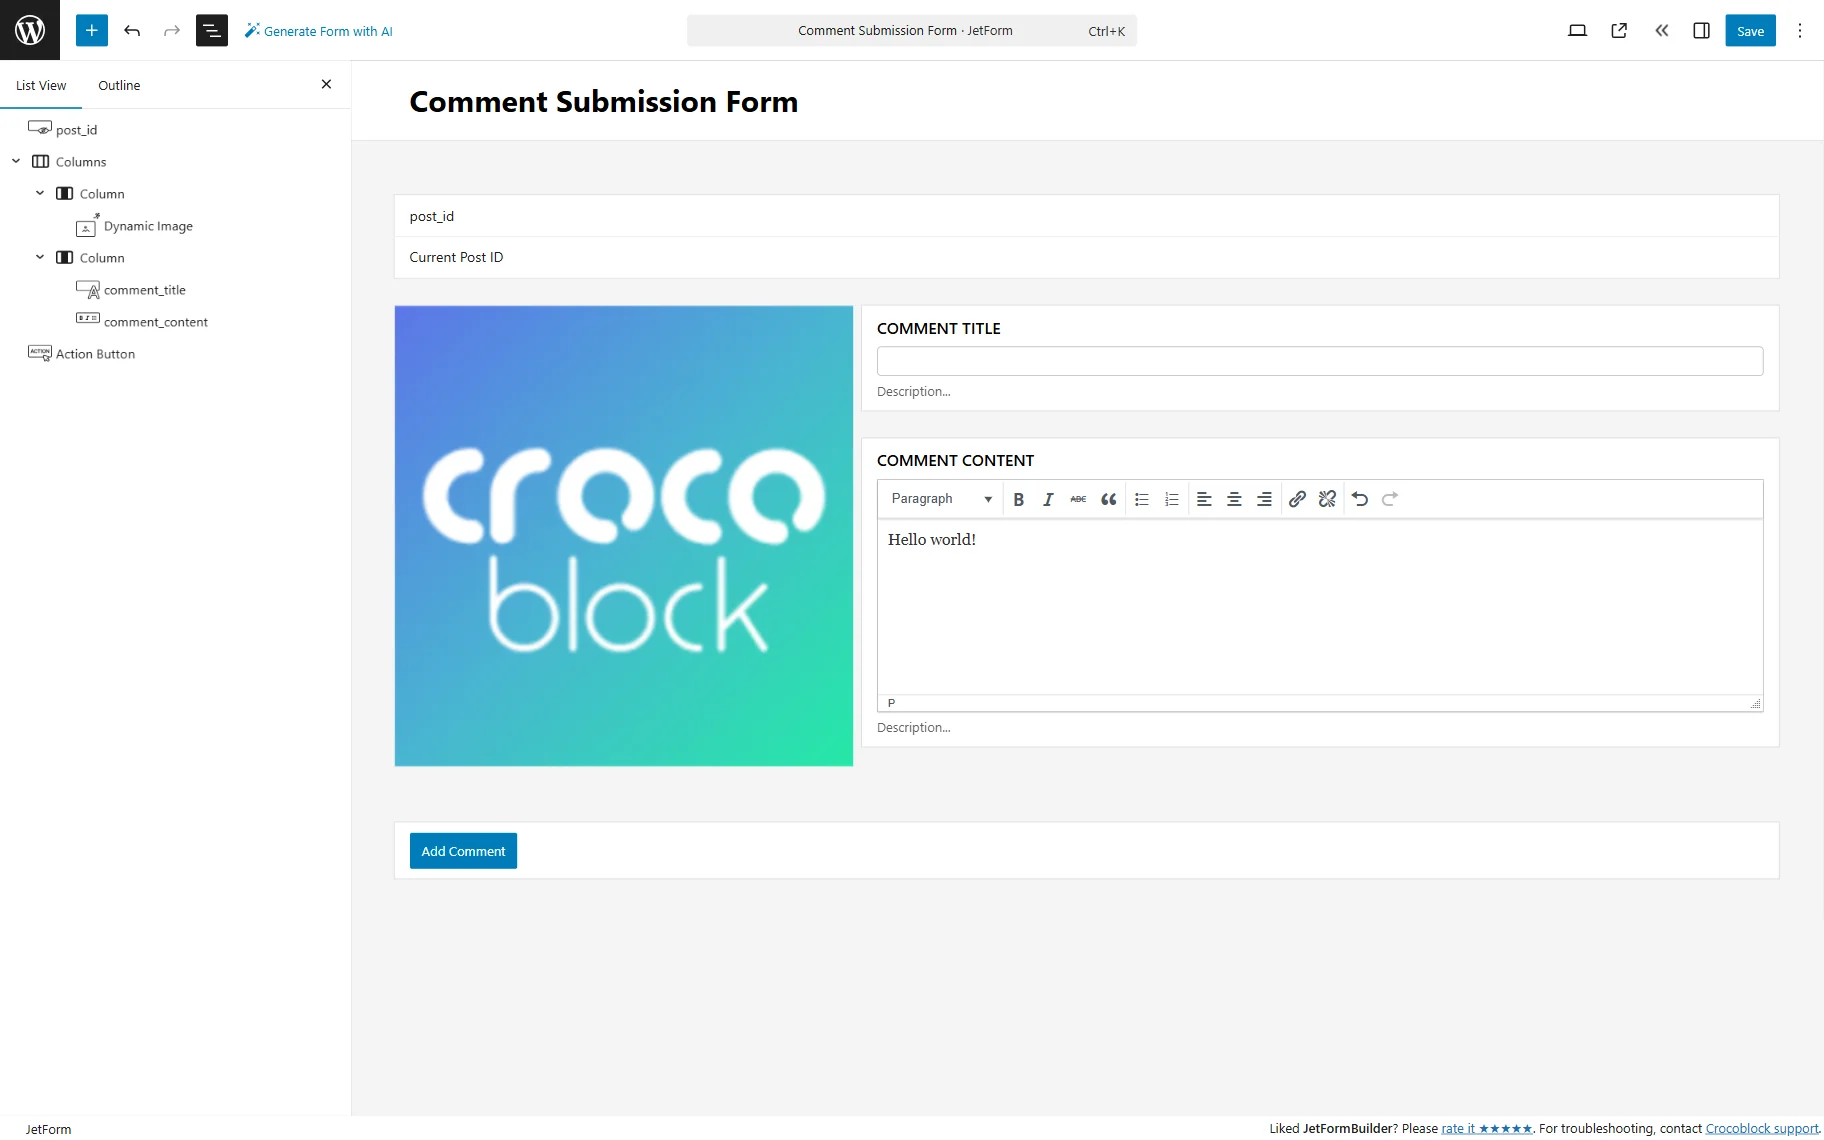
To display the profile picture of the currently logged-in user in the form, add a Dynamic Image block to the editing area, select the needed user field, and set the Context to “Current User (global).”
Add as many field types and block elements as you need for your case. If you are not familiar with JetFormBuilder forms, it is recommended that you review the JetFormBuilder Overview.
Add the Insert/Update Custom Content Type Item action
Once you are done editing the form layout, proceed to the setting of the Insert Custom Content Type Item Post-Submit Action.
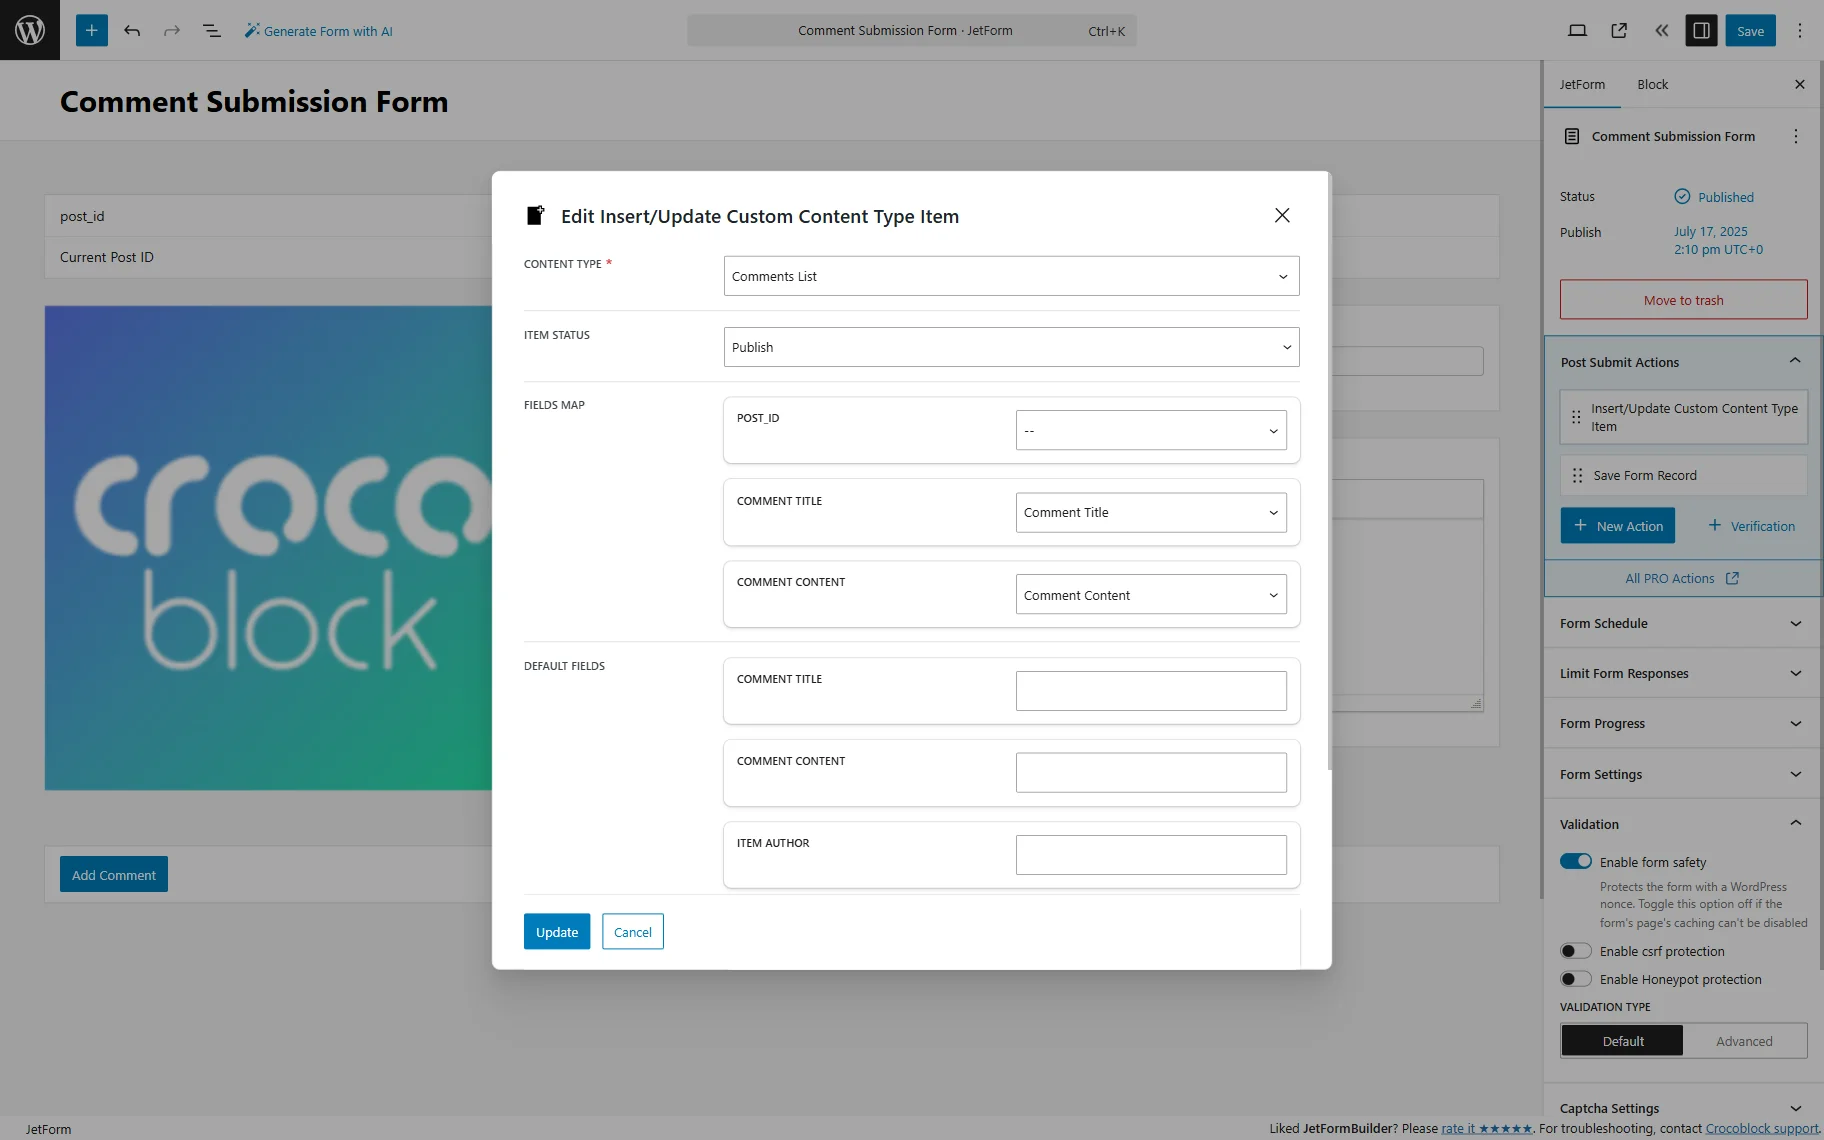
Set the needed CCT in the CONTENT TYPE field. There are two options for the ITEM STATUS: “Publish” and “Draft.” If you wish to approve the comments manually, go for the “Draft” option. Finally, map the form fields with their respective CCT meta fields in the FIELDS MAP section. Ensure that the dropdown near the post_id field is left blank.
Push the “Update” button to save the changes and return to the editing screen.
Add a Send Email action to notify the administrator about the new comment.
Add the Connect Relation Items action
Now, implement logic that connects the created CCT item to the current post.
For this purpose, add a new post-submit action — Connect Relation Items.
Press the “pencil” icon to edit the Connect Relation items action.
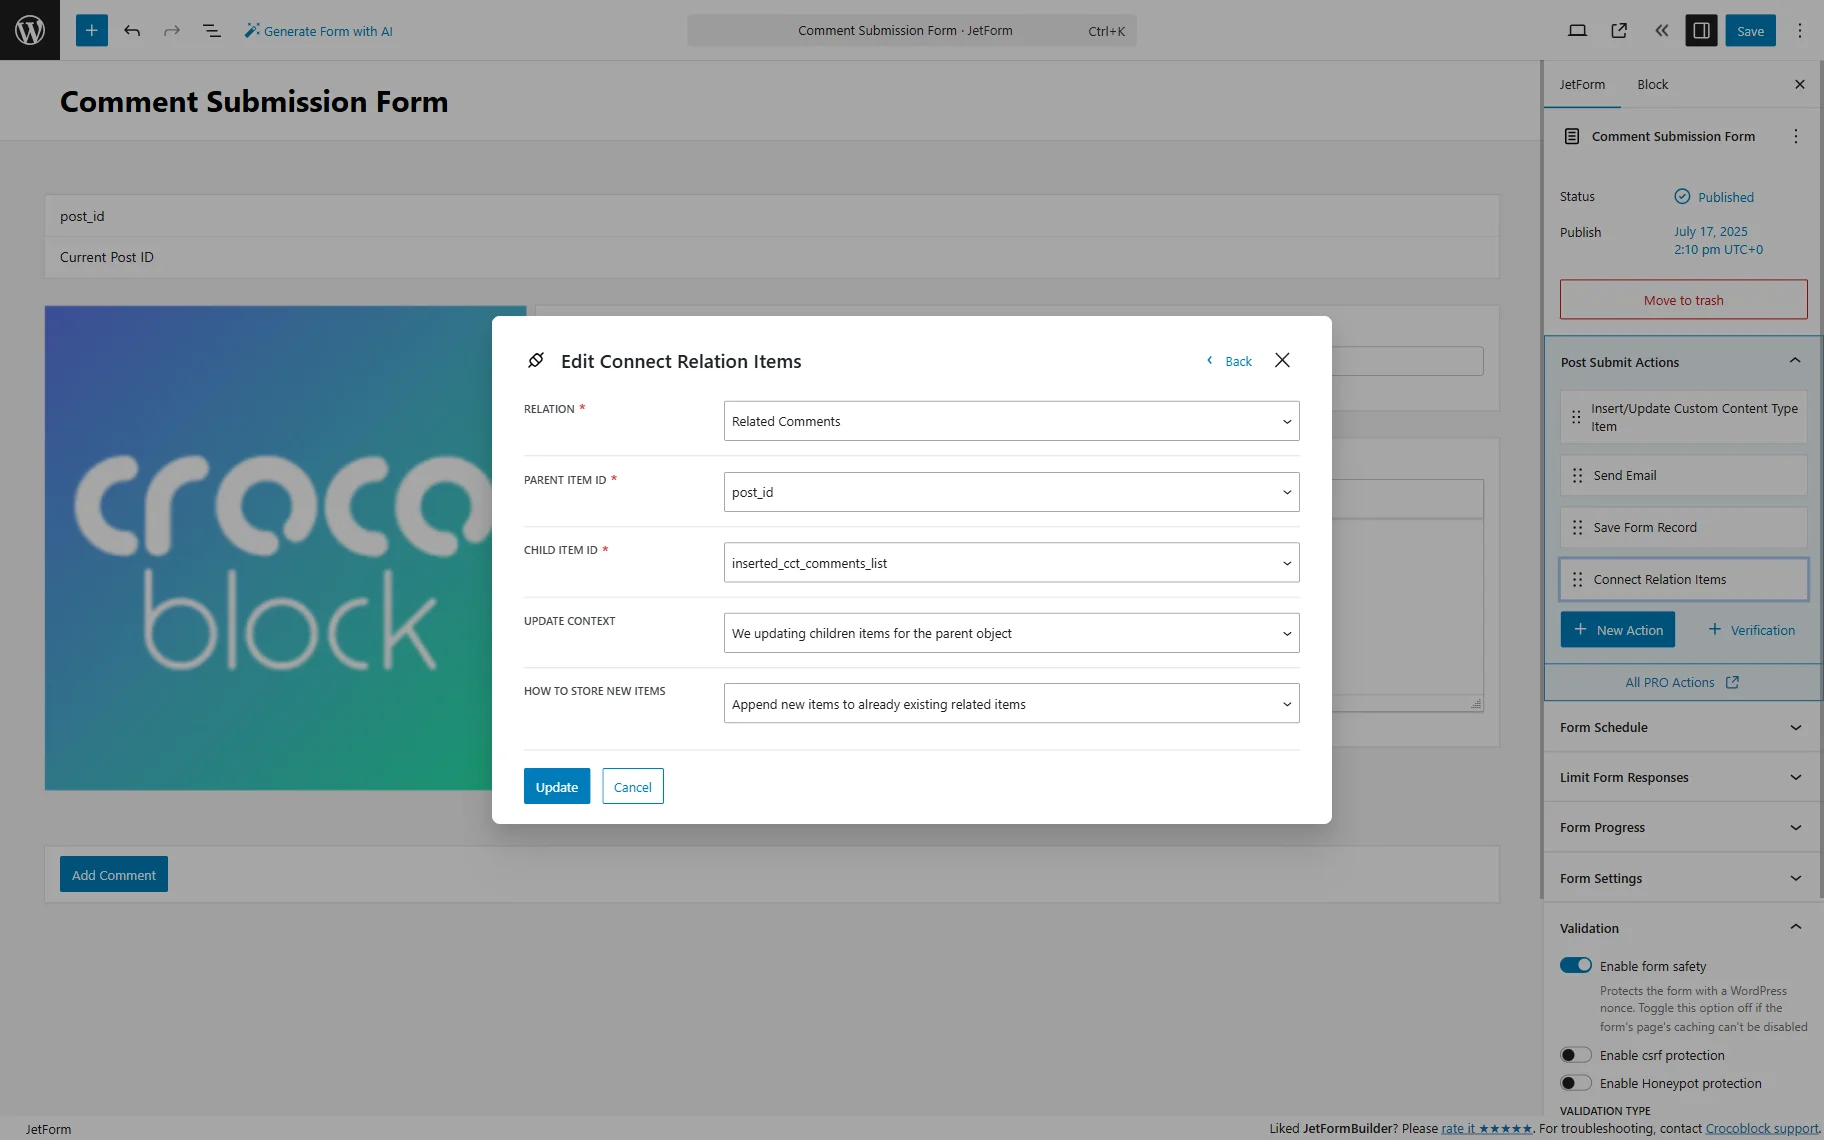
For the RELATION field, select the relation that was created earlier.
For the PARENT ITEM ID field, select the “post_id” form field. Because the “post_id” field has a “Current Post ID” value, the current post will be set as the related parent of the newly created CCT item.
For the CHILD ITEM ID field, select the “inserted_cct_slug” option (in this article, it is “inserted_cct_comments_list”, instead of the “comments_list”, you will see the slug of your CCT).
Then, set the UPDATE CONTEXT to “We updating children items for the parent object” and the HOW TO STORE NEW ITEMS field to “Append new items to already existing related items.”
Now, this post-submit action will relate the new comment to the post that has been commented on.
Don’t forget to press the “Update” button to implement the changes and return to the main editing screen.
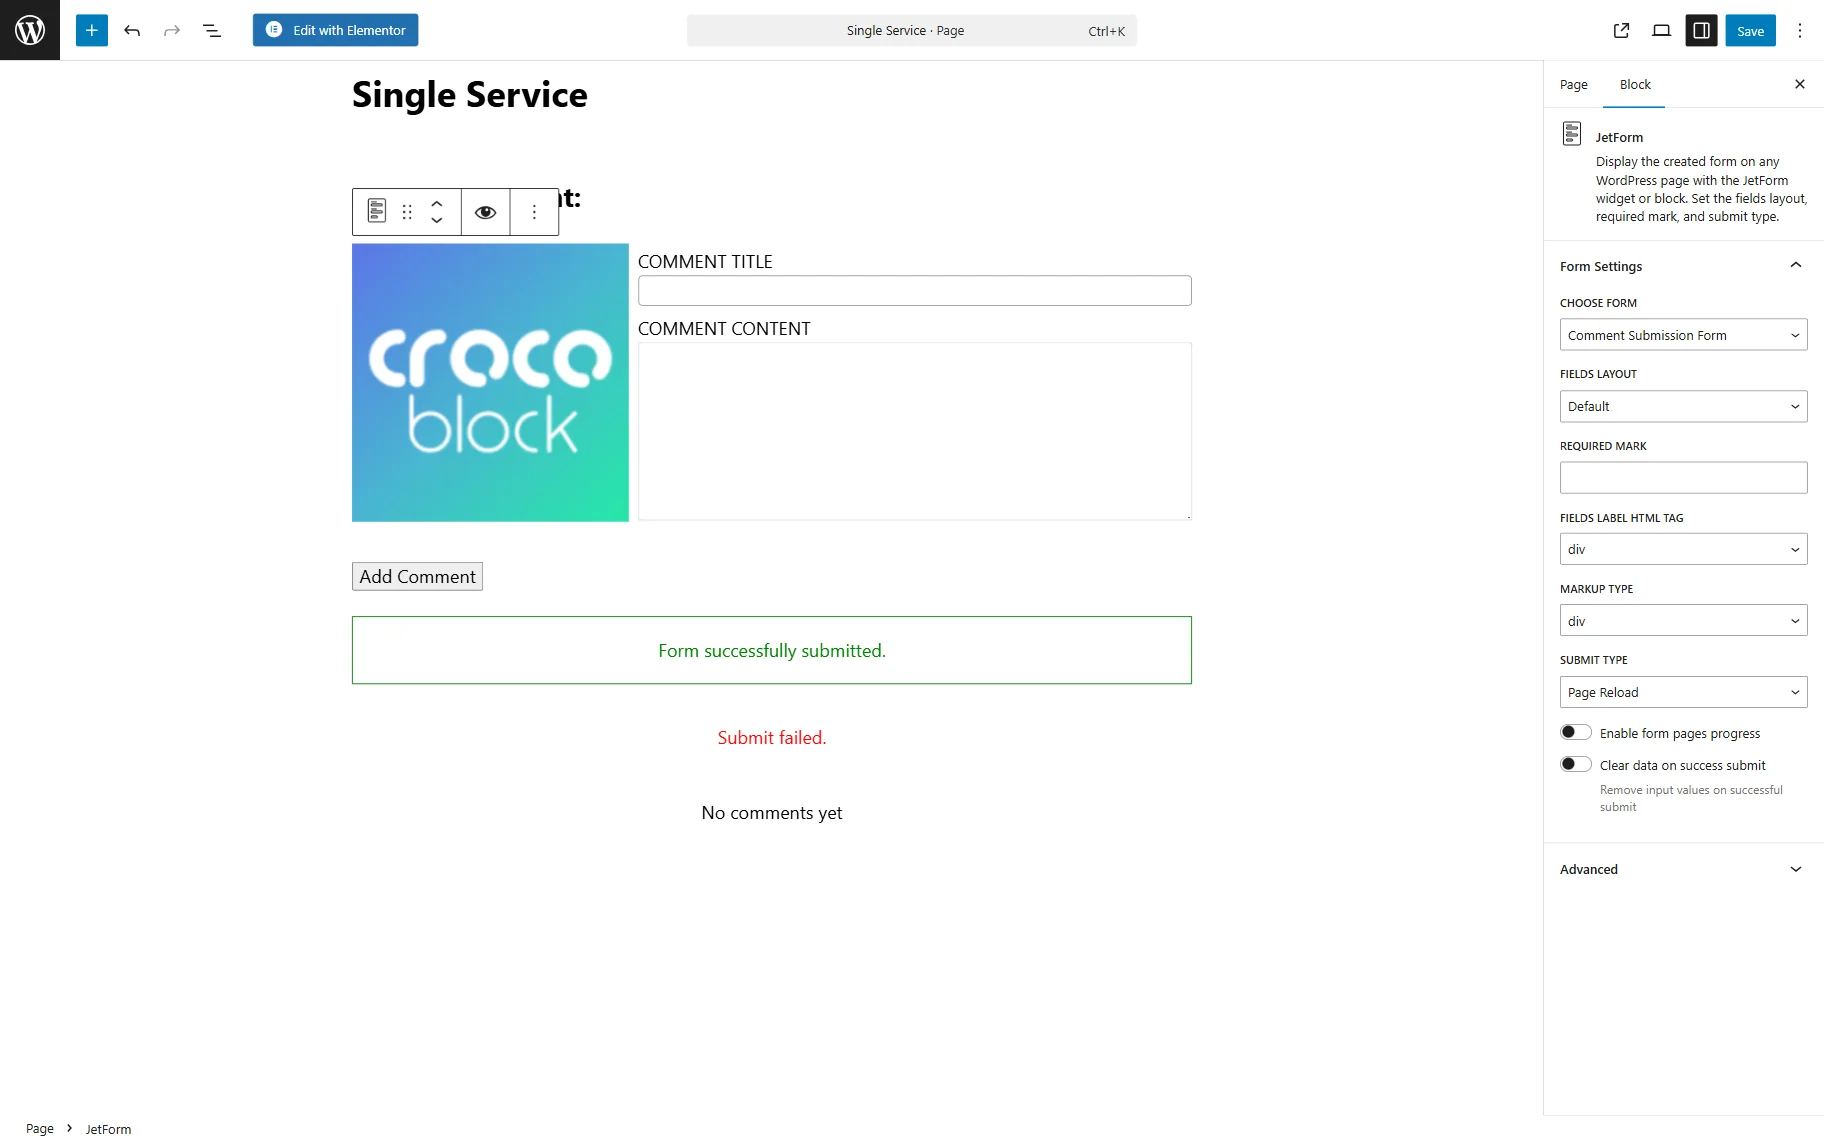
Open the JetForm tab in the right sidebar and unfold the Form Settings tab. Set the SUBMIT TYPE of the form to “Page Reload.”

After that, click the “Save” button.
Add the form to the page
Head to the Single Post template or to the editing screen of a single post that should contain the commenting system. Open it with the Elementor or Gutenberg editor. Find the section in your post’s layout that should contain post comments and place the JetForm widget or block inside.
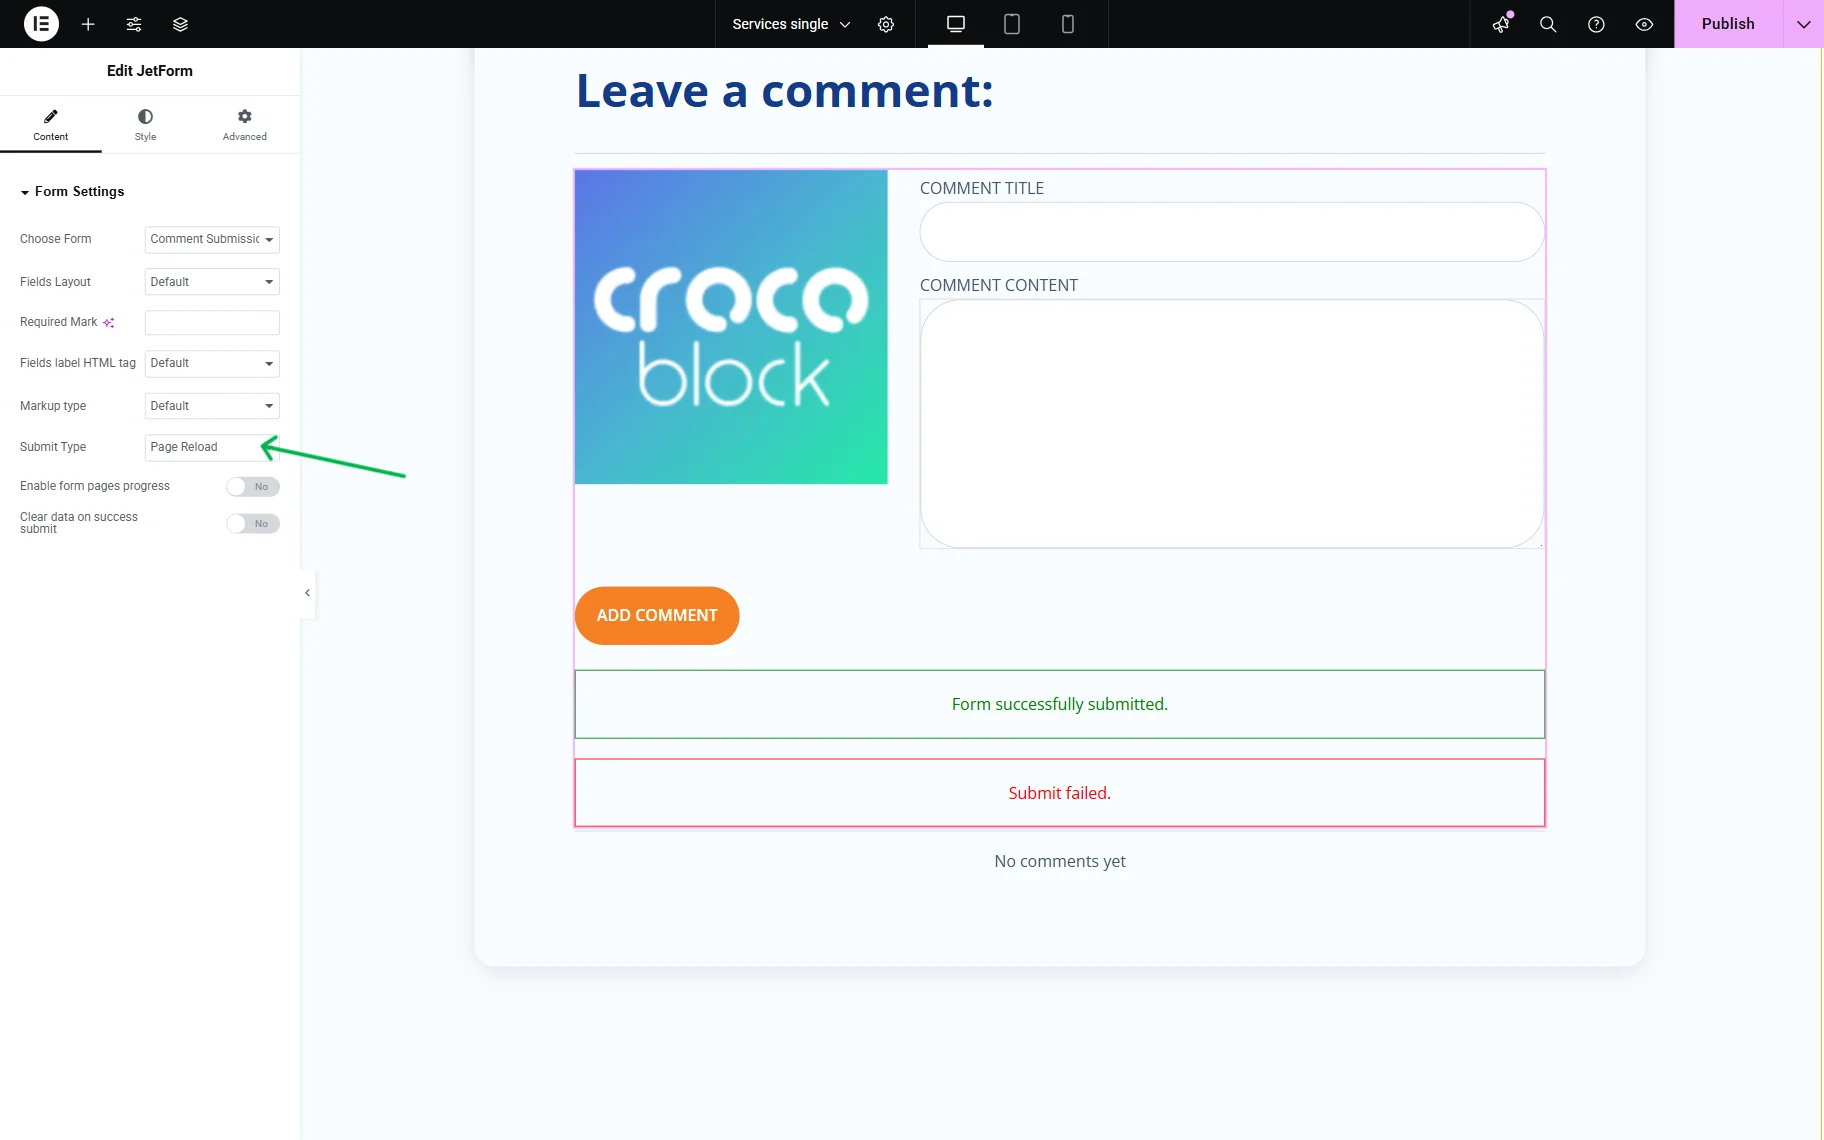
Select the created form and set the Submit Type of the widget to “Page Reload.”
In the Style section, you can set the form design.
Click the “Publish” button once you are ready. If you are working in Gutenberg, add the JetForm block to the editing area and select the created form; set the SUBMIT TYPE to “Page Reload.”
Add Dynamic Visibility rules
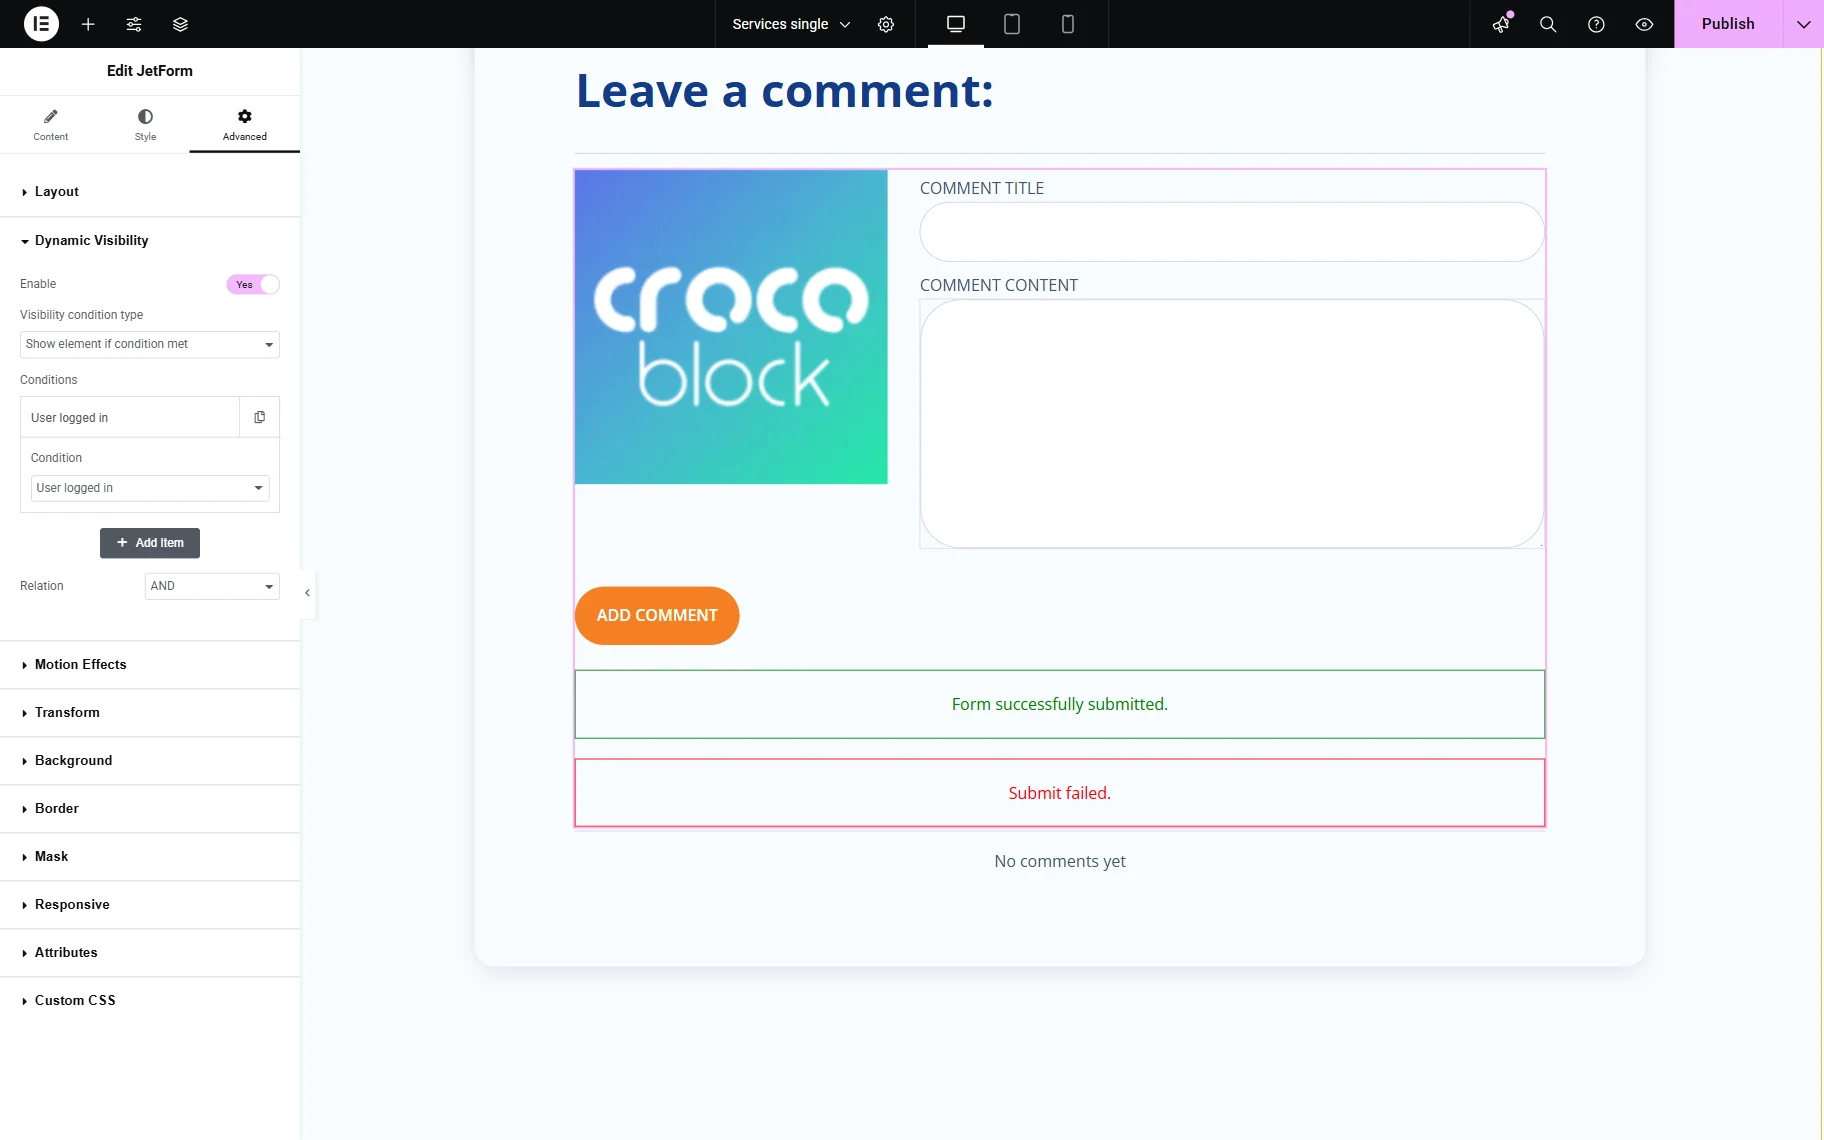
Use Dynamic Visibility to hide the form for guest users. To configure the visibility conditions in the Elementor editor, select the JetForm widget and proceed to the Advanced settings tab. Please scroll down to the Dynamic Visibility section and expand it. Enable the Dynamic Visibility conditions.
Then, add a new Visibility Condition Type — “Show element if condition met”. Add a new condition item and select the “User logged in” option in the User section of the dropdown list.
Click the “Publish” button.
To add visibility conditions in the Gutenberg editor, select the JetForm block in Gutenberg. There will be an eye-shaped icon on the toolbar at the top of the block; click on it.
Add a new VISIBILITY CONDITION TYPE — “Show element if condition met.” Add a new condition item and select the “User logged in” option in the User section of the dropdown list.
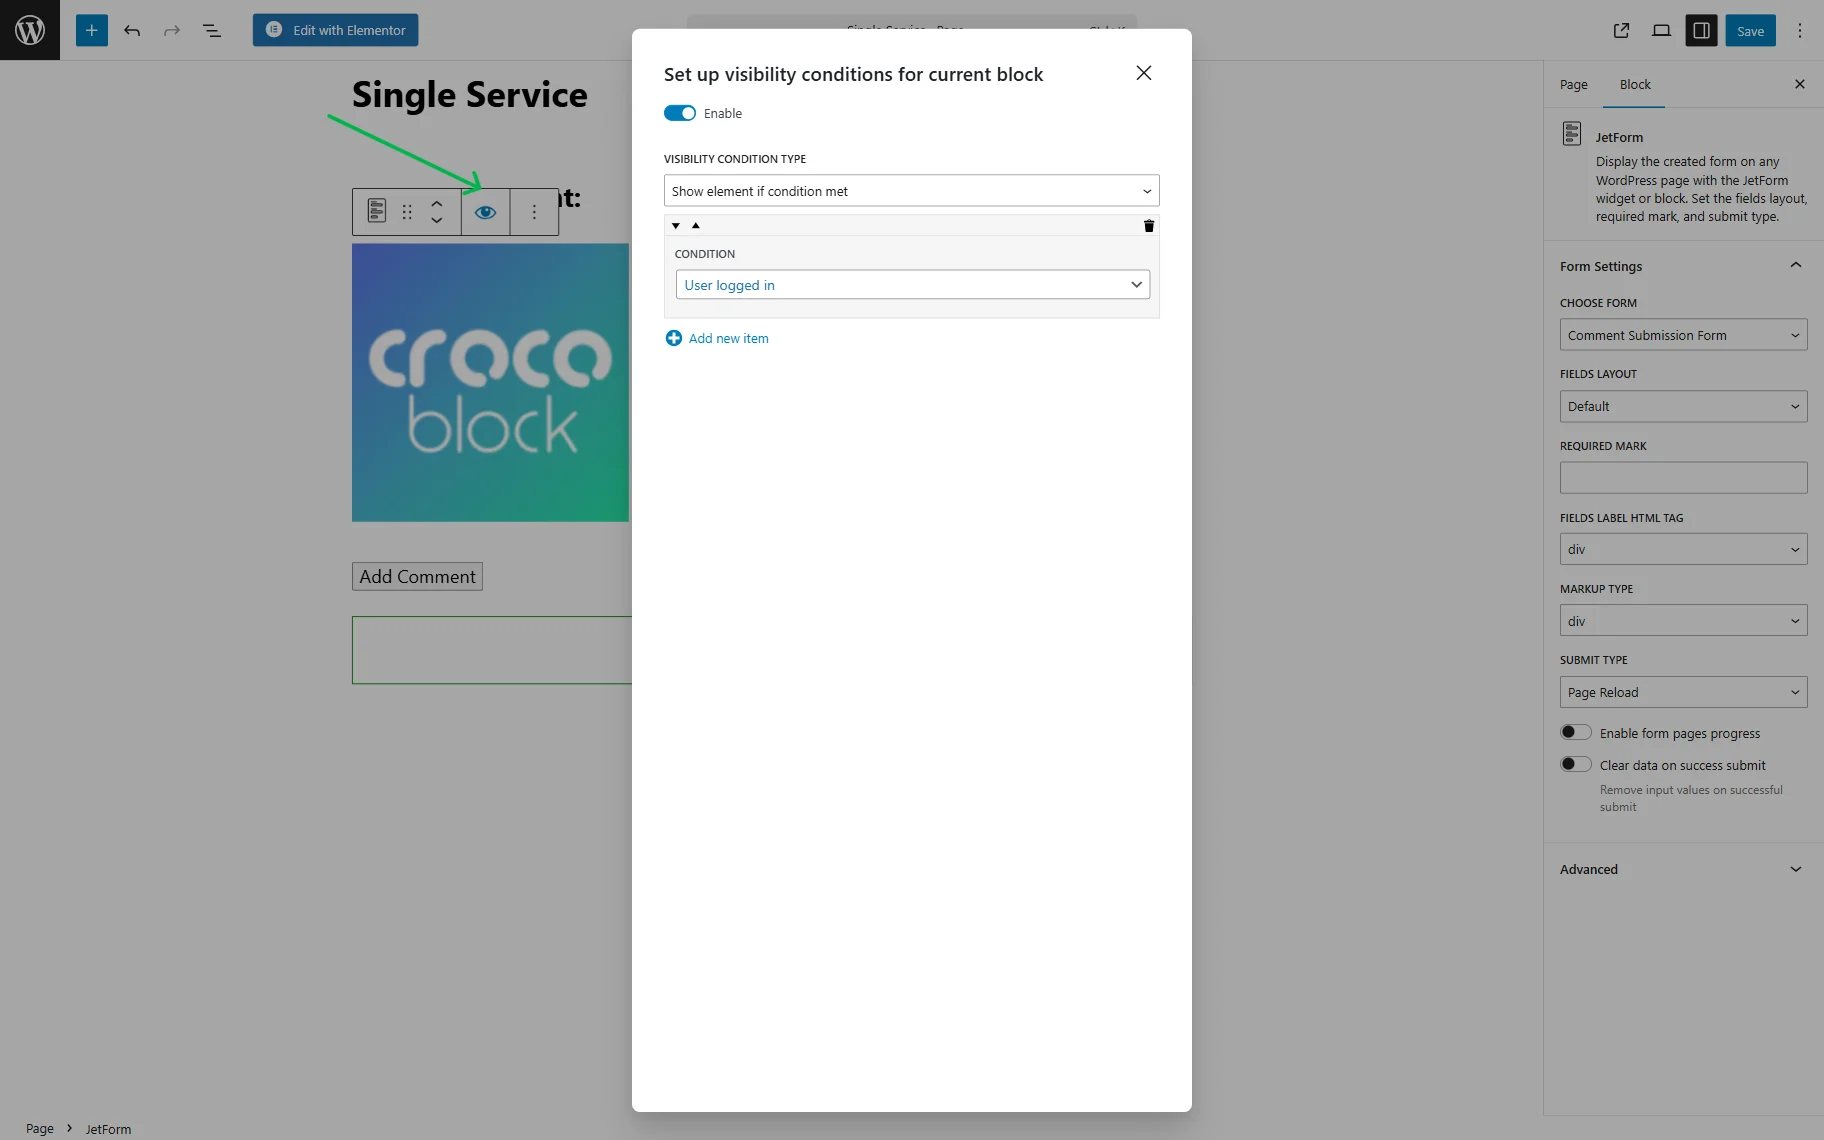
Click the “Save” button. Now, the form will only be displayed for logged-in users.
Check the result
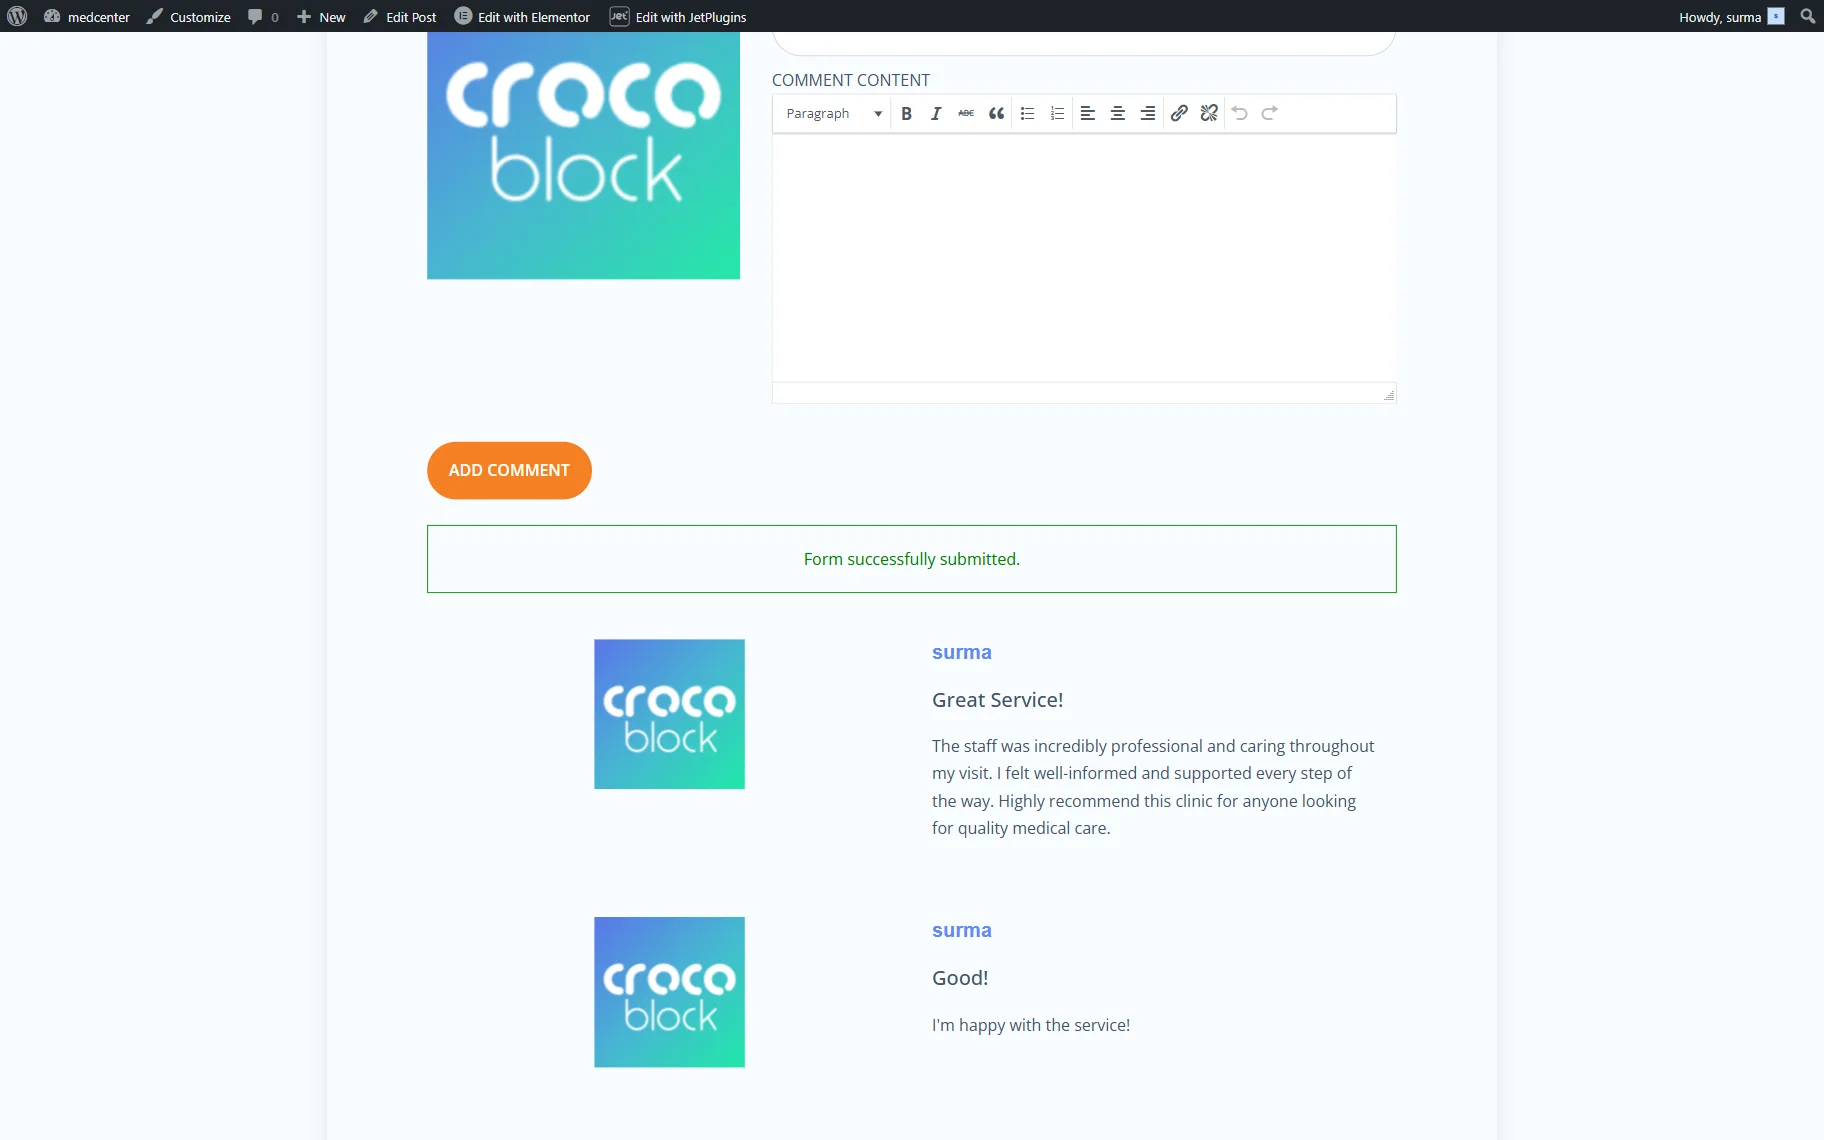
Go to the frontend page of the single post and find the form. Try submitting a new comment.
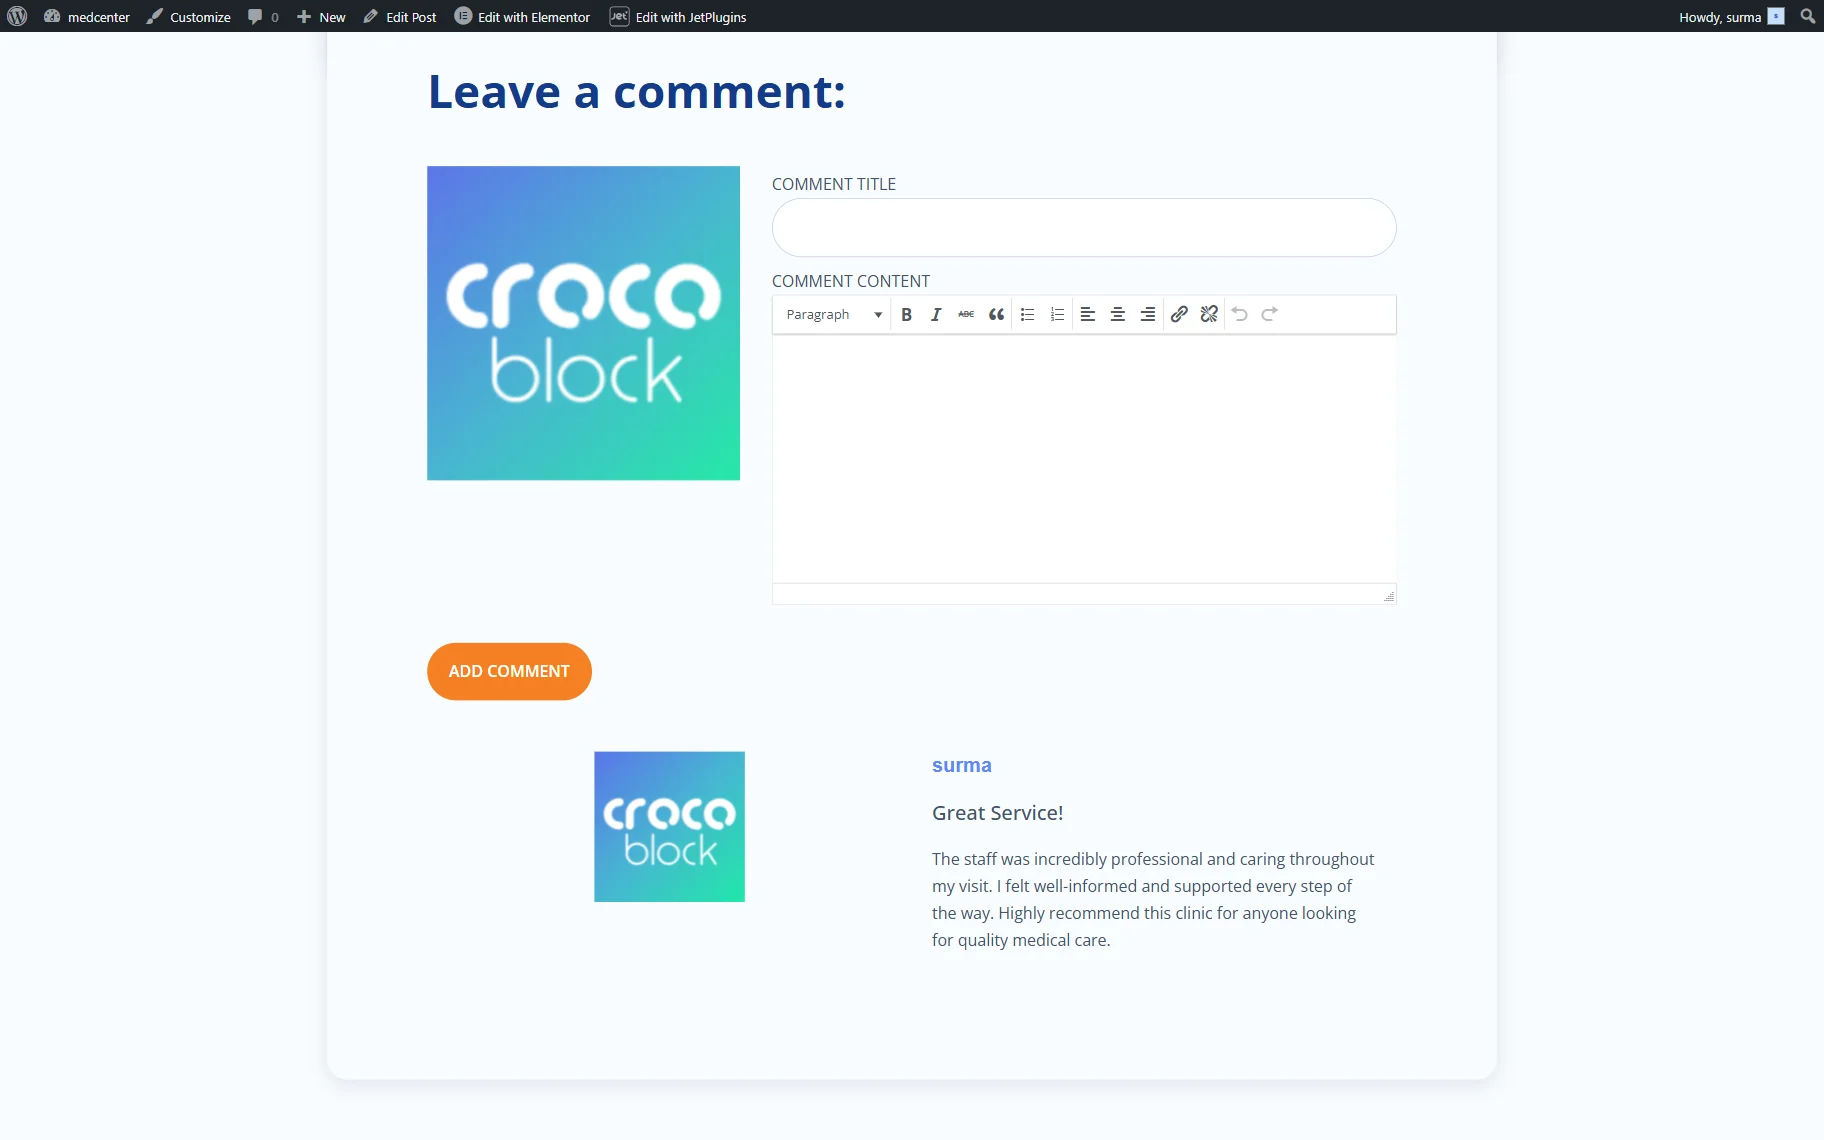
After the form is submitted, the page will reload, and a new comment will appear.
To verify that the Dynamic Visibility works for the guests, we logged out of the site and reopened the same page.

Now we can see the comments, but there is no form to add them for logged-out users.
That’s it. Now you know how to create a commenting system with a fully customizable comment layout, provided by the CCTs of JetEngine, and an input form from JetFormBuilder, WordPress plugins.