How to Use Merged Query
This tutorial explains how to use JetEngine's Merged Query to combine multiple queries into one Listing Grid. Discover how to display promoted posts first, then today's posts, and other posts in a specific order.
Before you start, check the tutorial requirements:
- Elementor (Free version), Block editor (Gutenberg), or Bricks
- JetEngine plugin installed and activated
The JetEngine plugin’s “Merged Query” Query Type allows for combining the results of multiple queries into one. For example, it can be used to combine posts based on different criteria into a single Listing Grid.
In this tutorial, we will describe a use case for displaying the promoted posts first, then the posts published today, and then the remaining posts in a certain order. To achieve this result, we will merge three “Posts” queries.
Creating a Custom Post Type
In our example, we will create a Custom Post Type (CPT) for the vacancy posts to rearrange them in a certain order with the Merged Query.
Note that the WordPress default posts also fit. Proceed to this tutorial to learn How to Add Custom Meta Fields to WordPress Post via Meta Boxes.
We move to WordPress Dashboard > JetEngine > Post Types and press the “Add New” button to create a new Custom Post Type. If you already have one, hit the “Edit” button next to the needed CPT.
In the General Settings tab, we enter the Post Type Name (“Jobs (Vacancies)”) and set the Post Type Slug.
In the Meta fields tab, you can add as many custom meta fields as you need (e.g., “Salary,” “Job description,” “Requirements,” “Work conditions,” and “Responsibilities”).
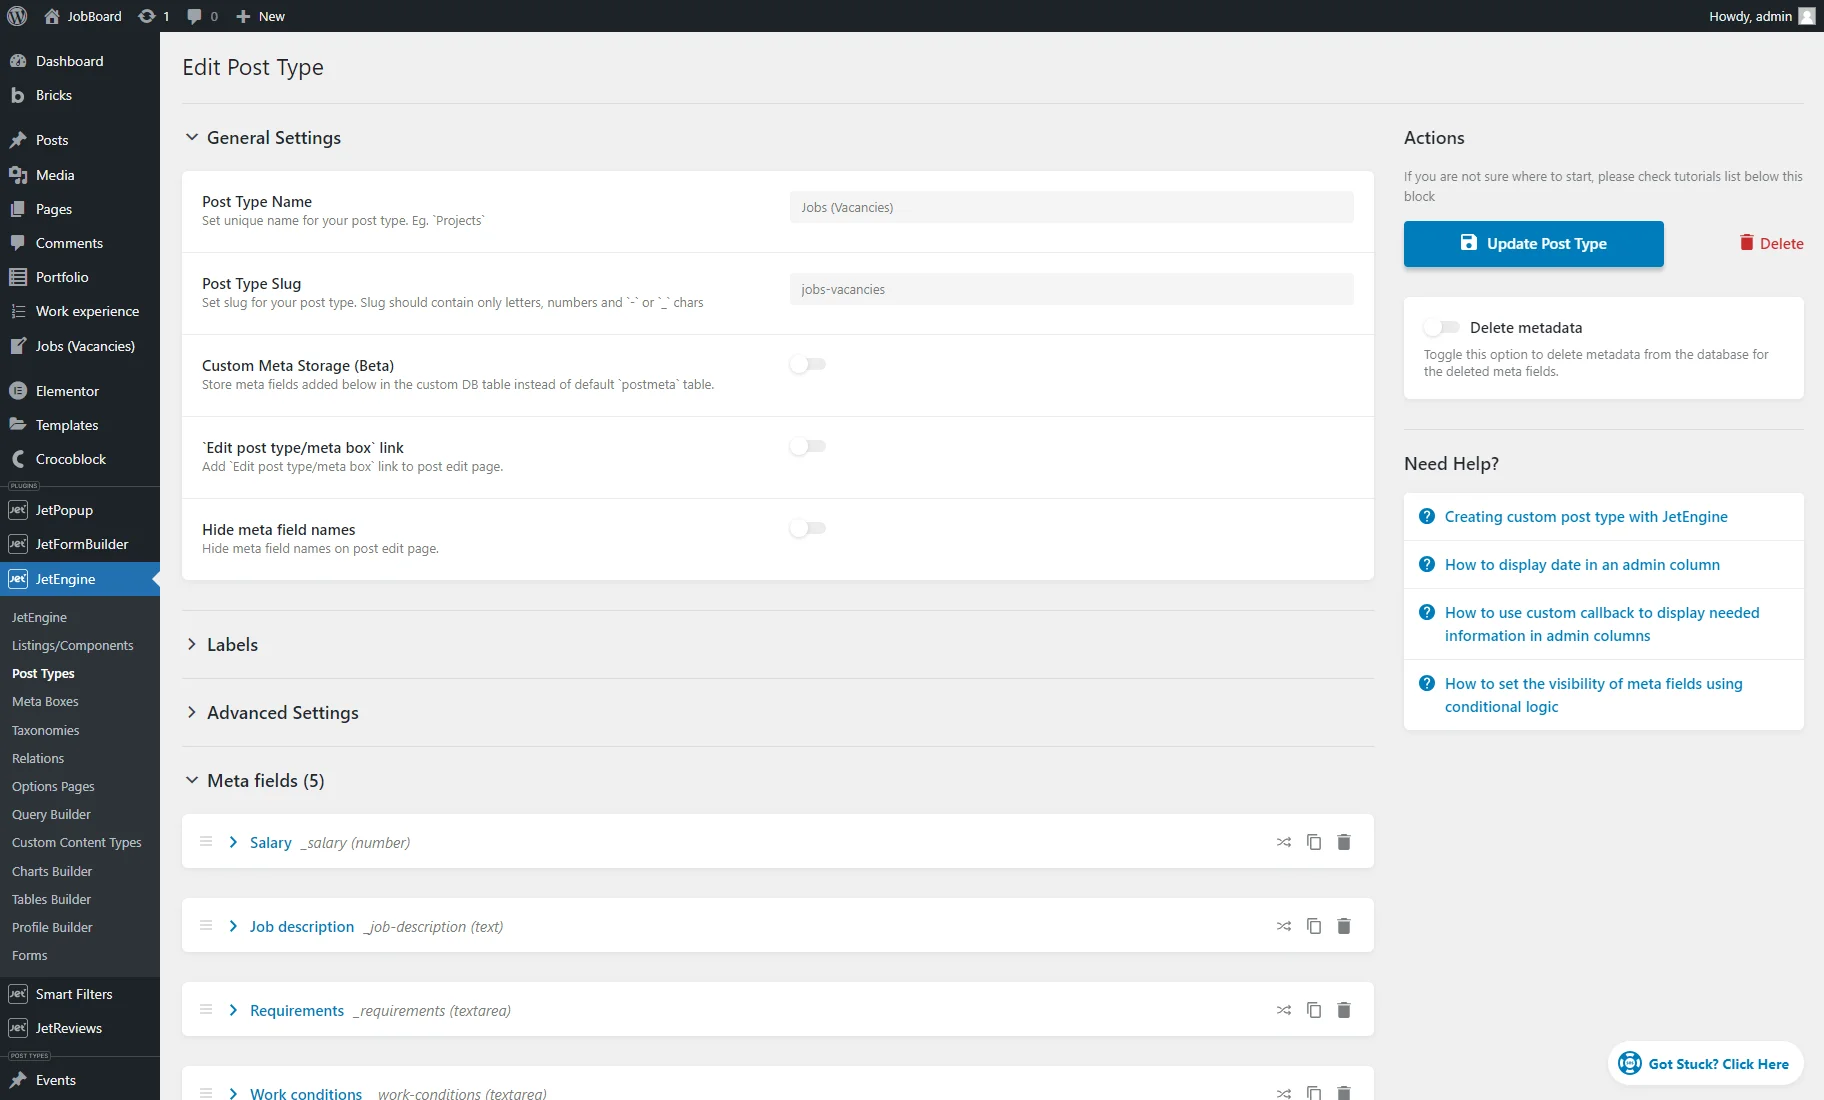
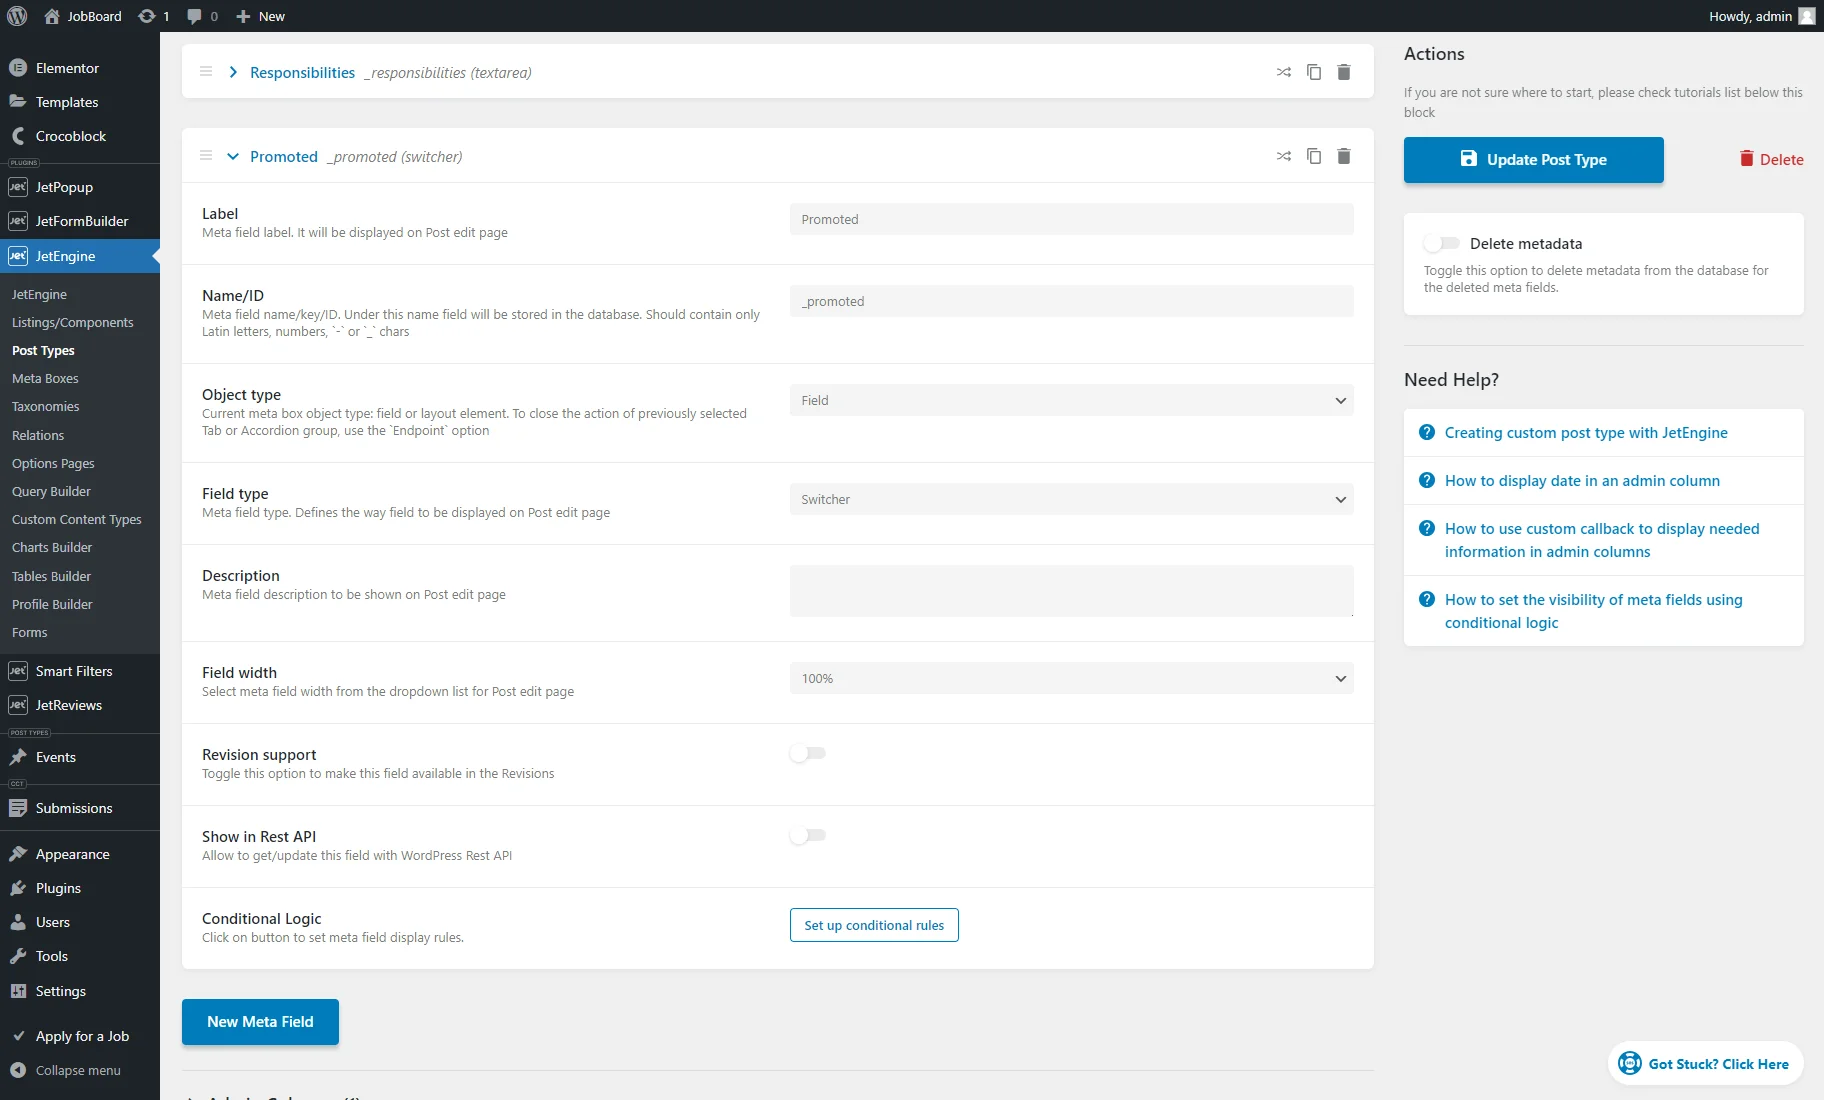
In our case, we also add a “Promoted” meta field of the “Switcher” Field type.
After finishing customizing the CPT, we push the “Add/Update Post Type” button.
For more information, navigate to the How to Create a Custom Post Type tutorial.
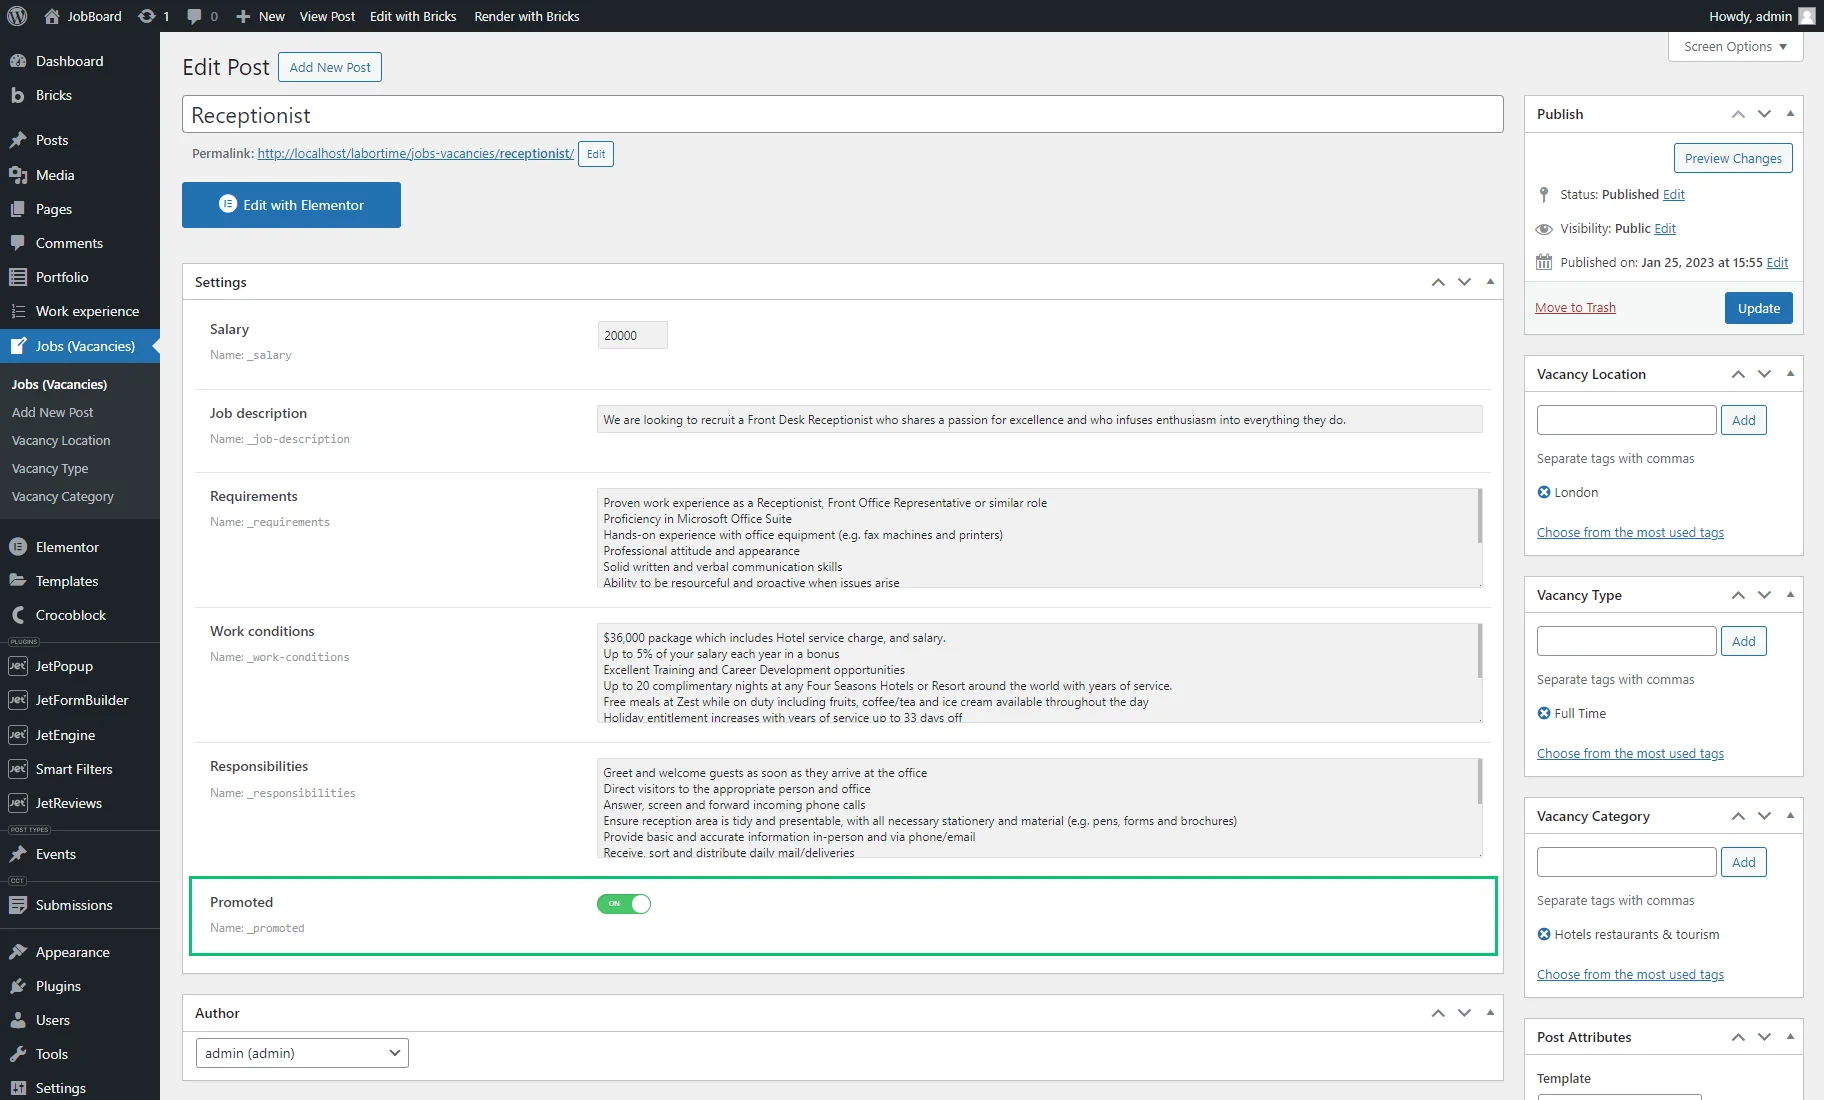
Proceed to the CPT tab on the WordPress Dashboard, create new posts or edit the existing ones, and fill in the custom fields.
For example, we turn on the switcher for one post, making it promoted.
Creating a Listing Template
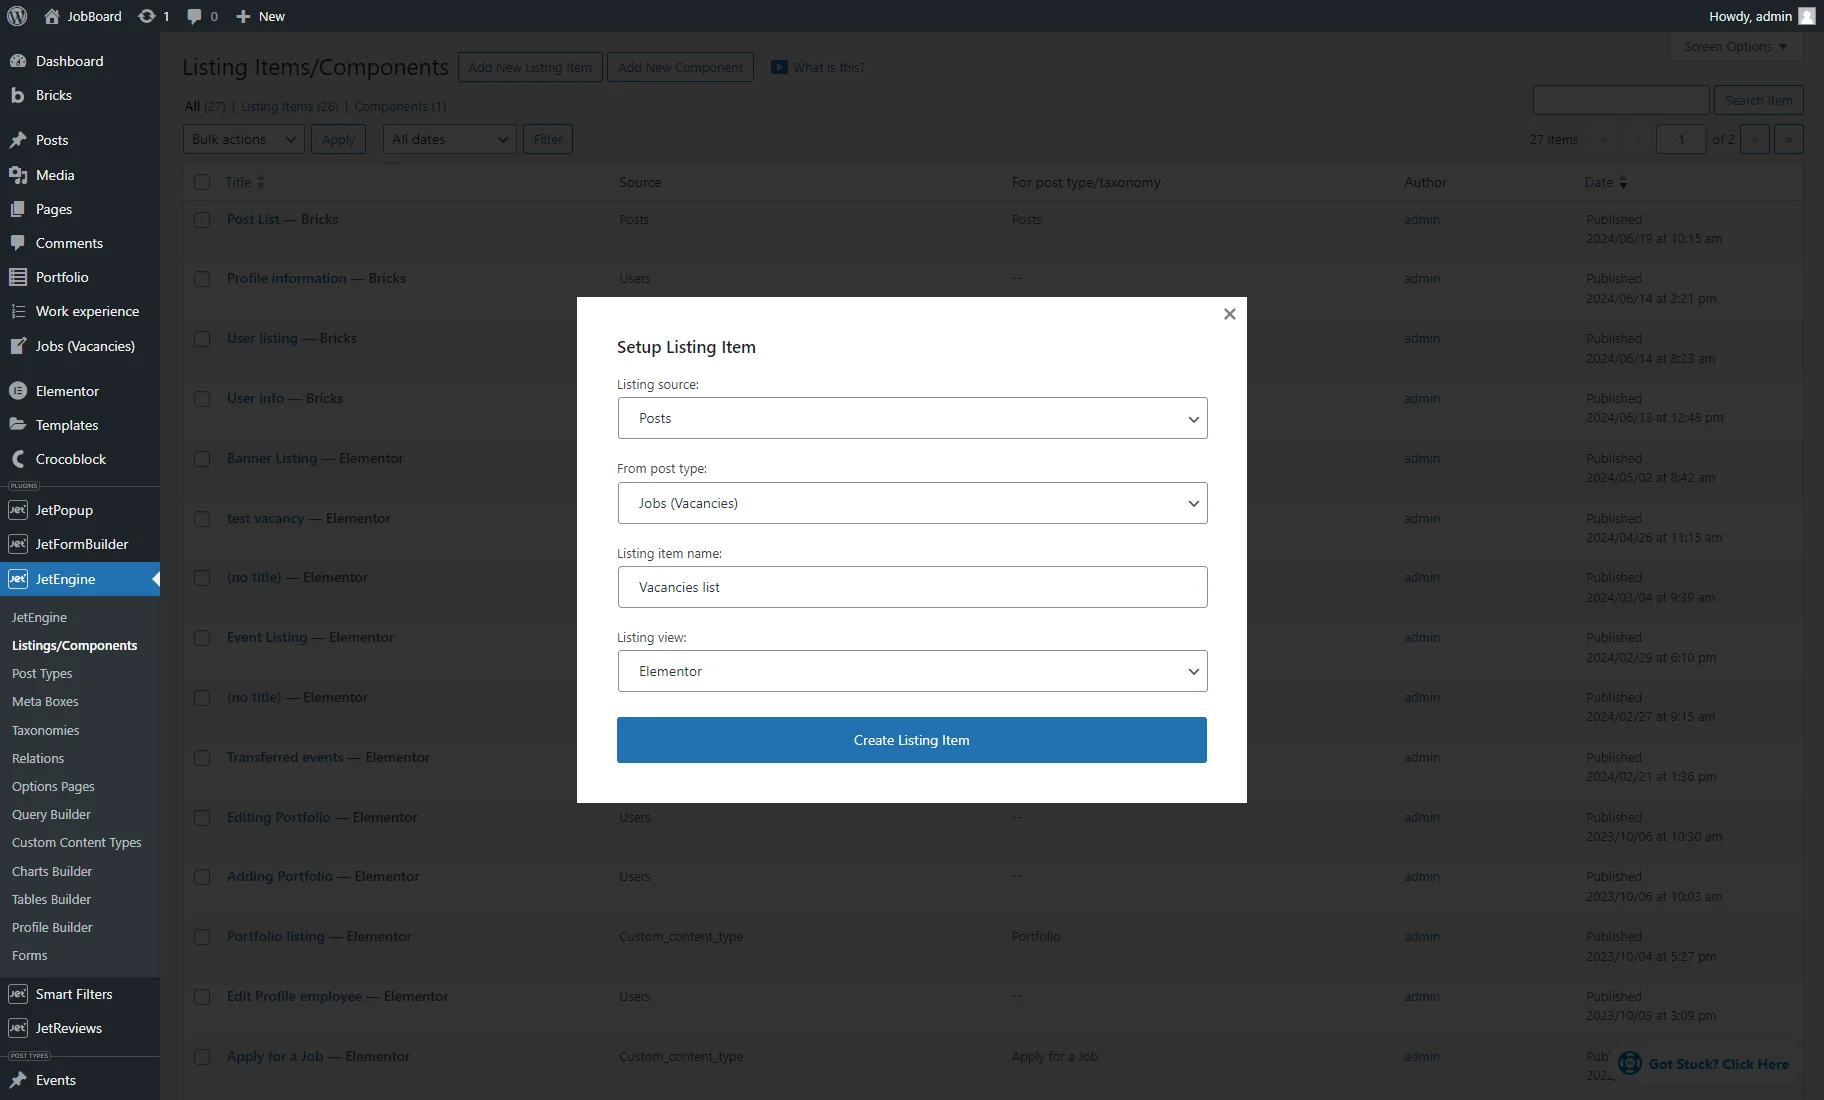
We head to WordPress Dashboard > JetEngine > Listings/Components and hit the “Add New Listing Item” button. If you already have a listing for the required CPT, you can edit it.
In the Setup Listing Item pop-up, we pick the “Posts” option as the Listing source, set the required post type in the From post type field (“Jobs (Vacancies)”), enter the Listing item name (“Vacancies list”), and choose the Listing view (for this case we choose “Elementor,” but it can also be “Bricks,” “Timber/Twig,” or “Blocks (Gutenberg)”).
Afterward, we click the “Create Listing Item” button.
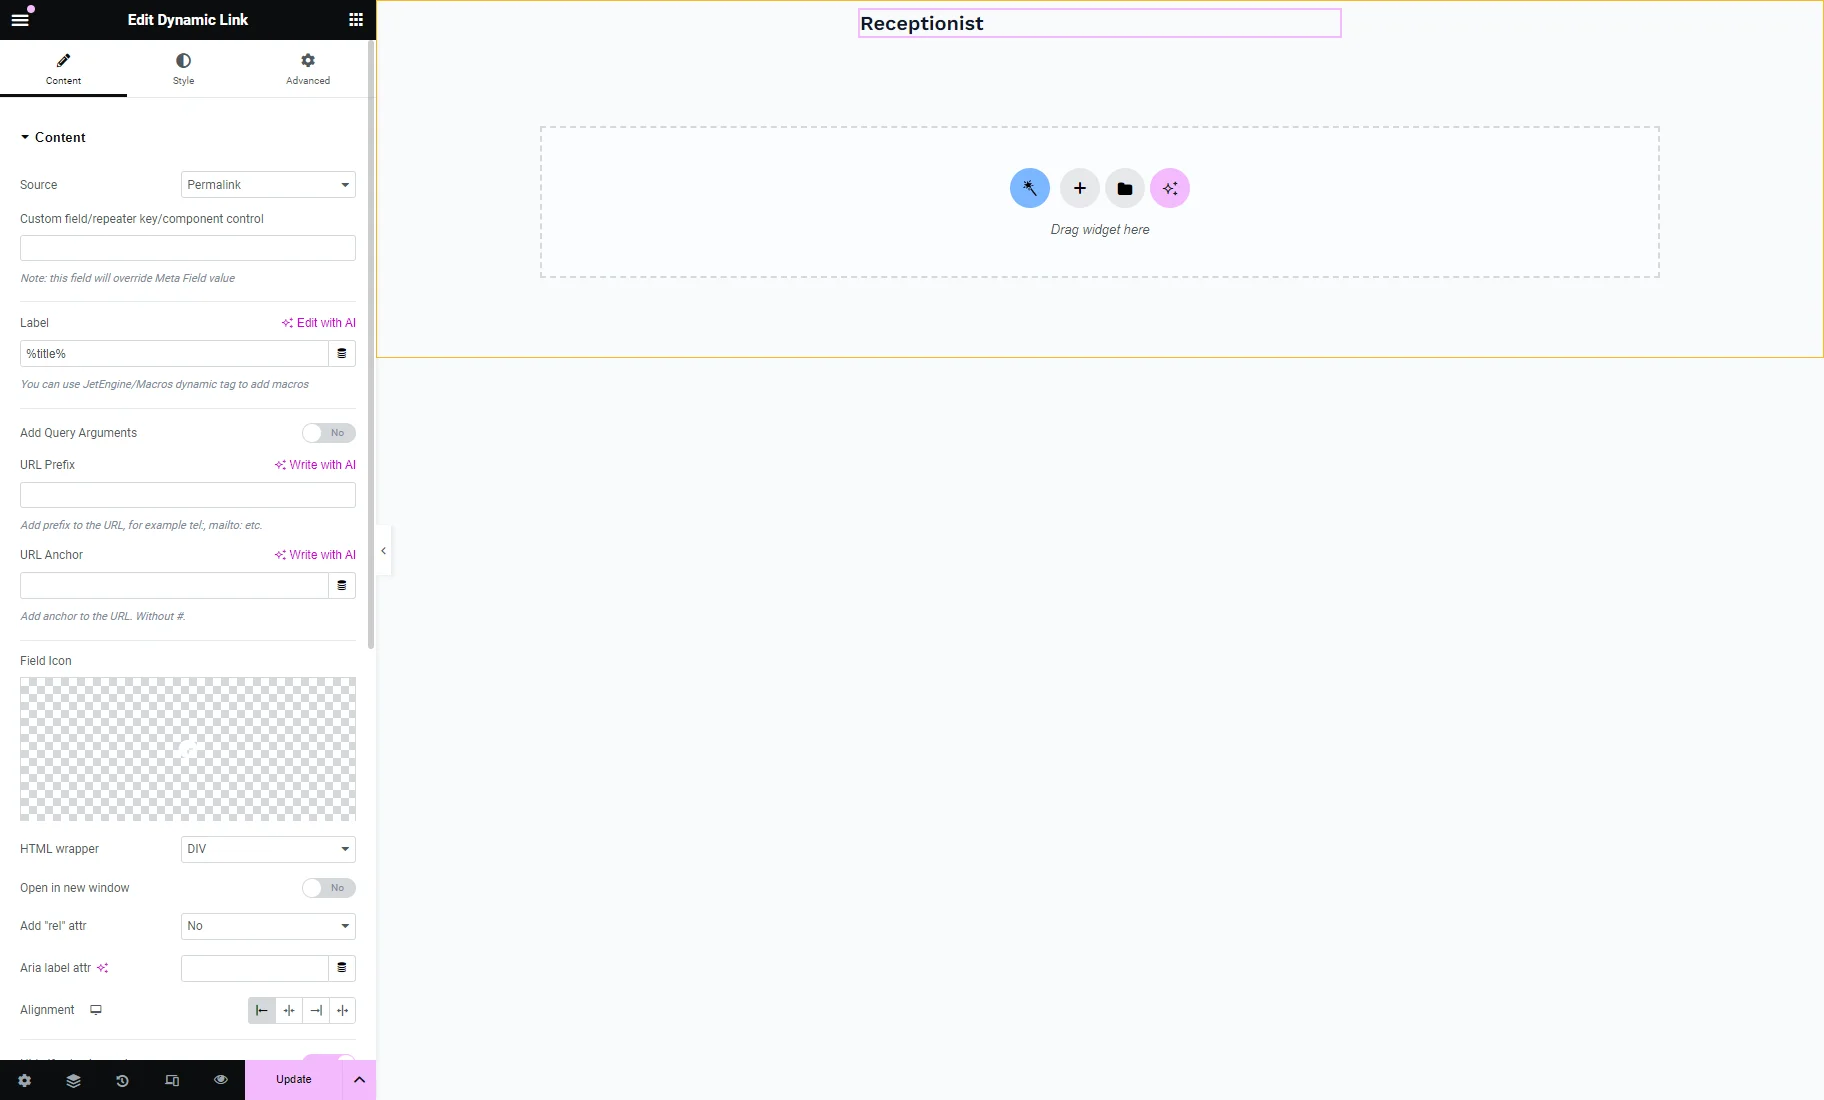
First, we place the Dynamic Link widget with the “Permalink” Source, so if users click it, they will be redirected to the CPT item single page.
Proceed to the How to Create Archive and Single Templates for Custom Post Type tutorial to learn how to craft a single page for CPT.
In the Label field, we enter the %title% macro, which causes the widget to show post titles in the Listing Grid.
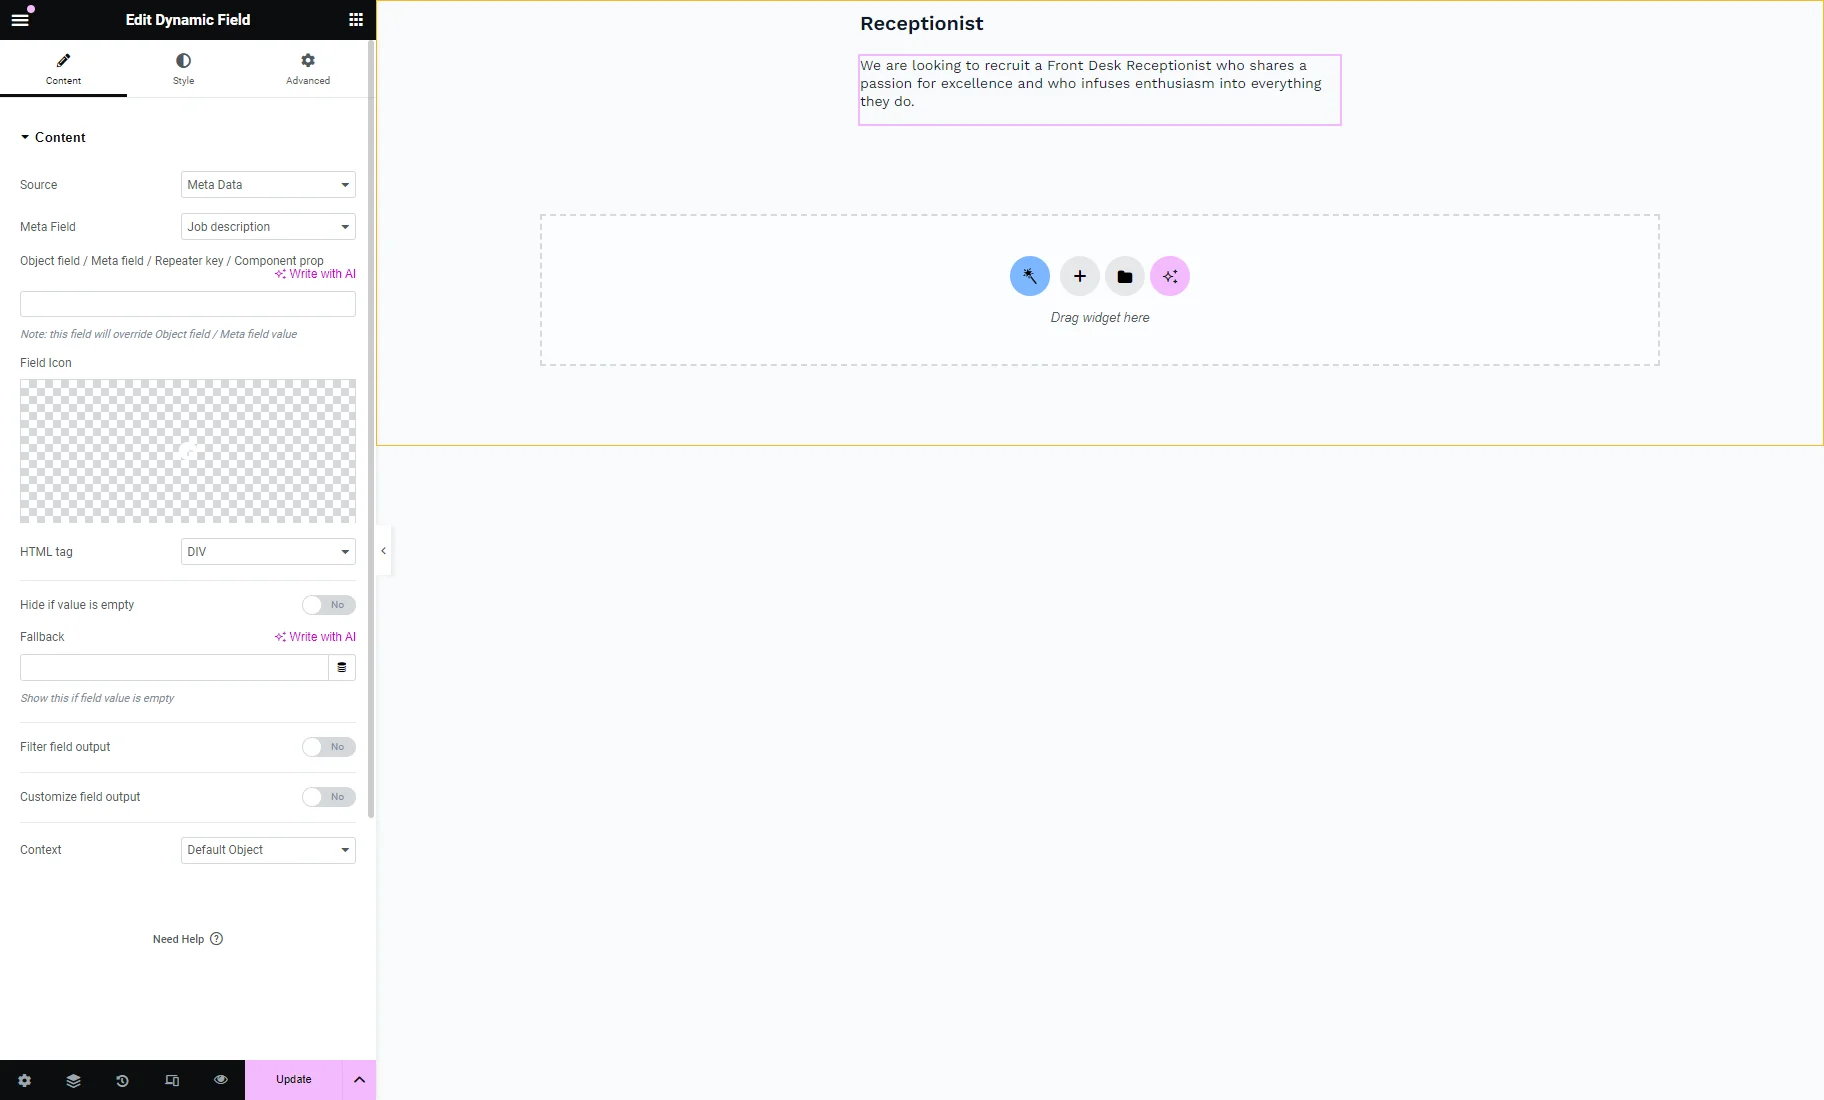
Then, we place the Dynamic Field widget with the “Meta Data” Source and “Job description” Meta Field.
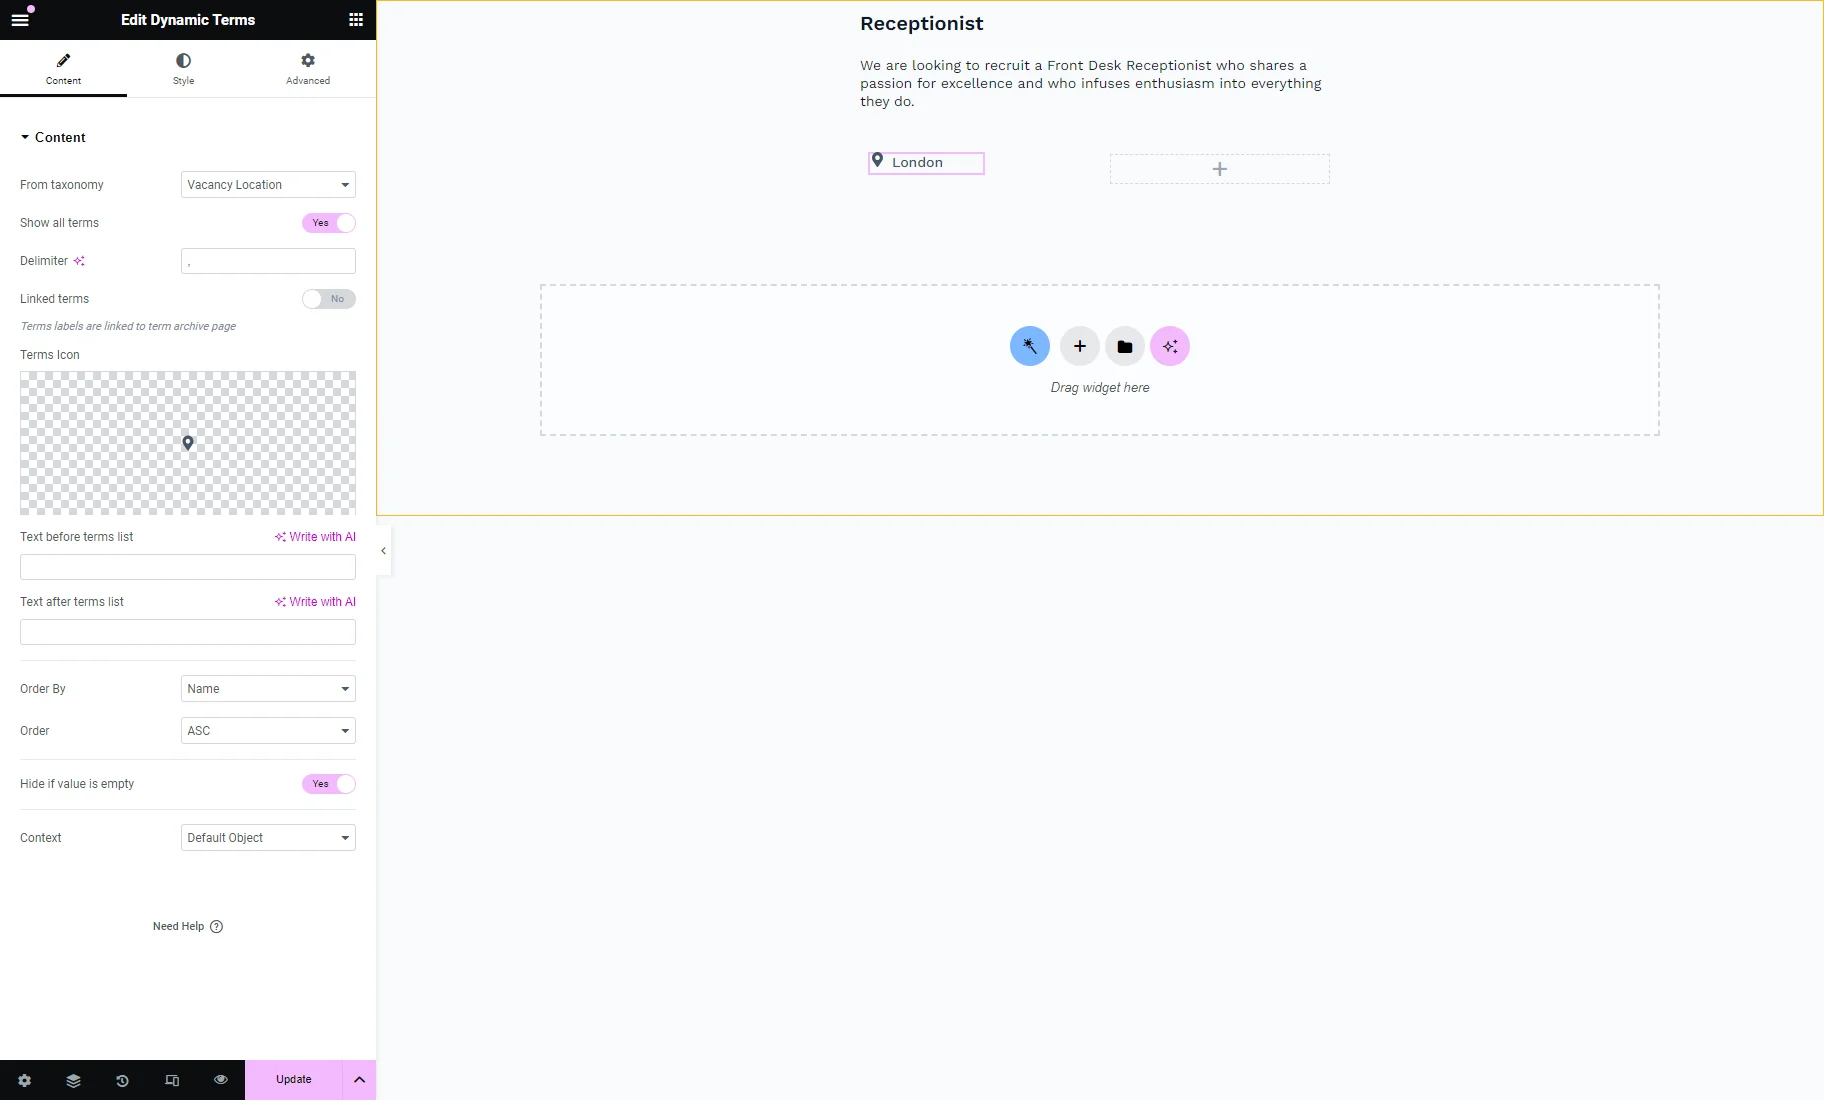
Then, we drag-n-drop the Inner Section widget. In the first Column, we place the Dynamic Terms widget and set the “Vacancy Location” custom taxonomy in the From taxonomy field.
Learn How to Create a Custom Taxonomy from this tutorial.
Also, we adjust the Terms Icon.
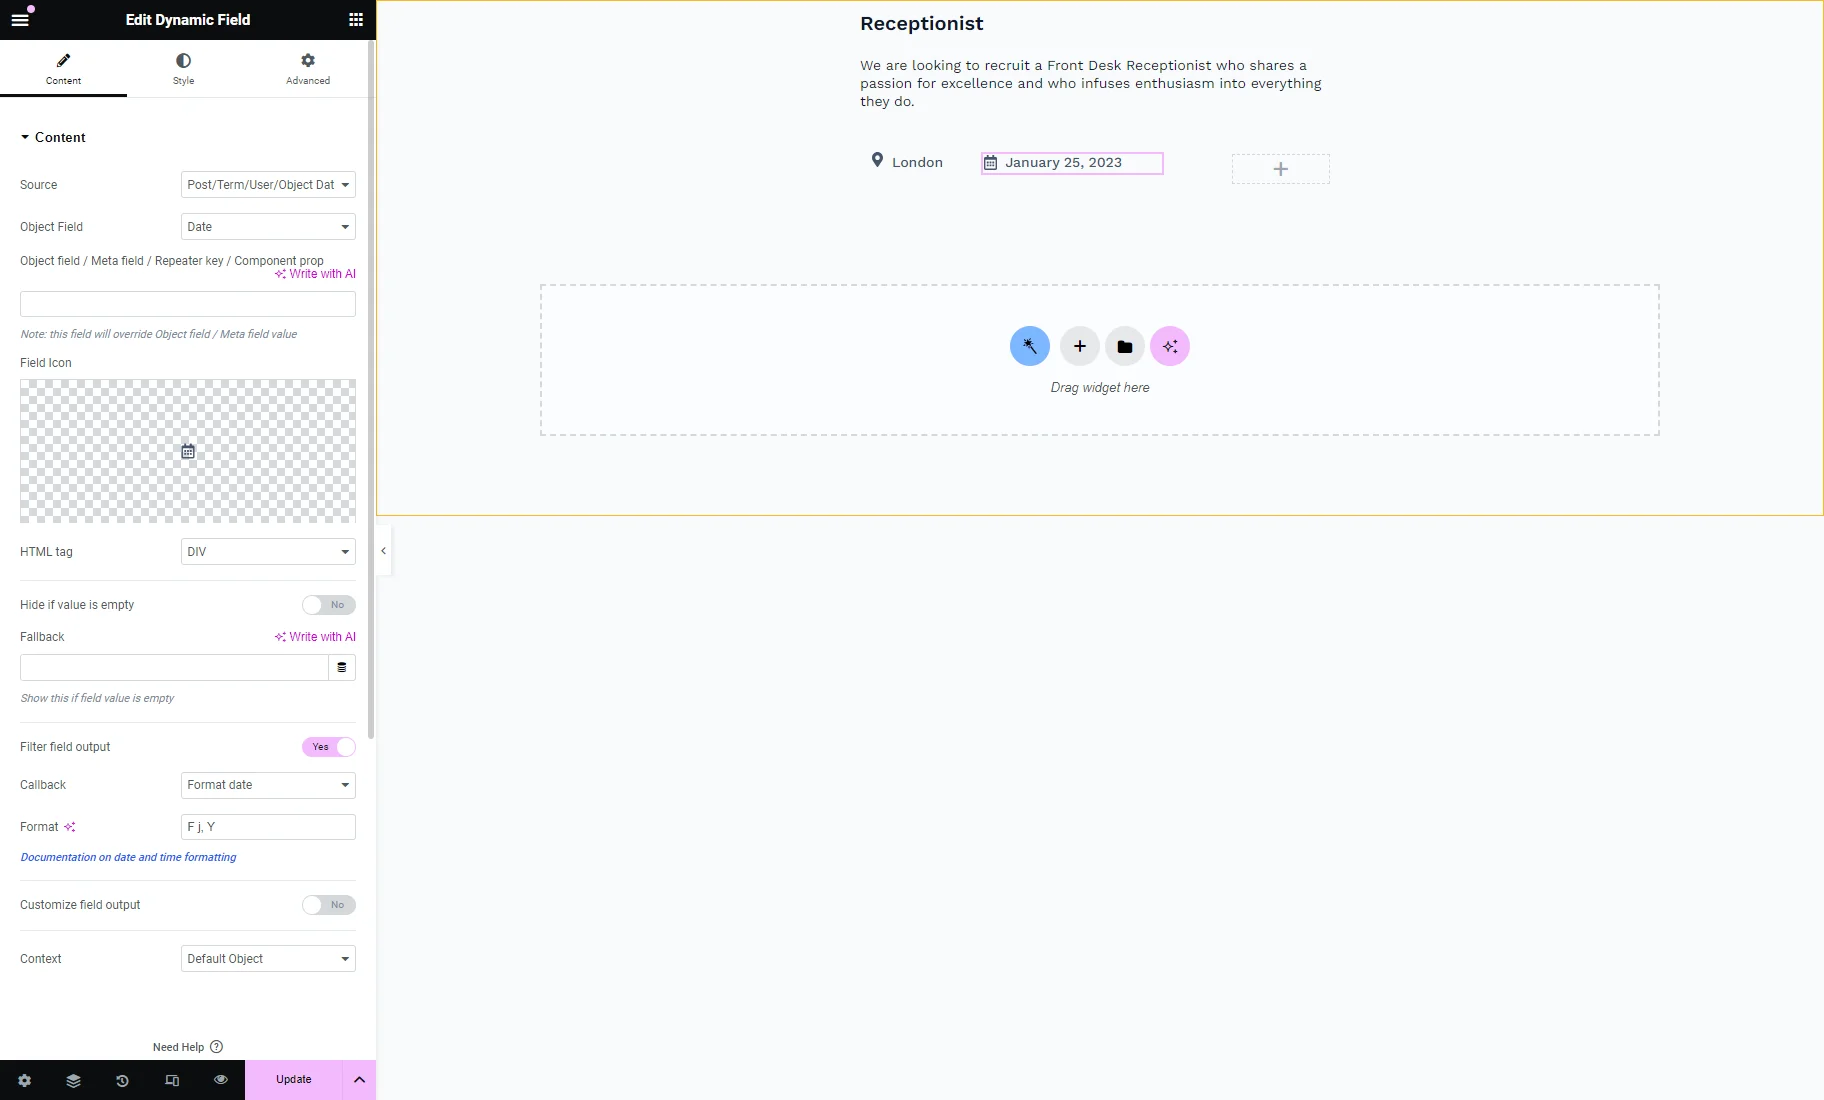
In the same Column, we place the Dynamic Field widget with the “Post/Term/User/Object Data” Source and post “Date” Object Field.
We set the Field Icon as well.
Also, we enable the Filter field output toggle, choose the “Format date” Callback, and set the “F j, Y” Format.
Learn about all available callbacks from the Filter Field Output Overview.
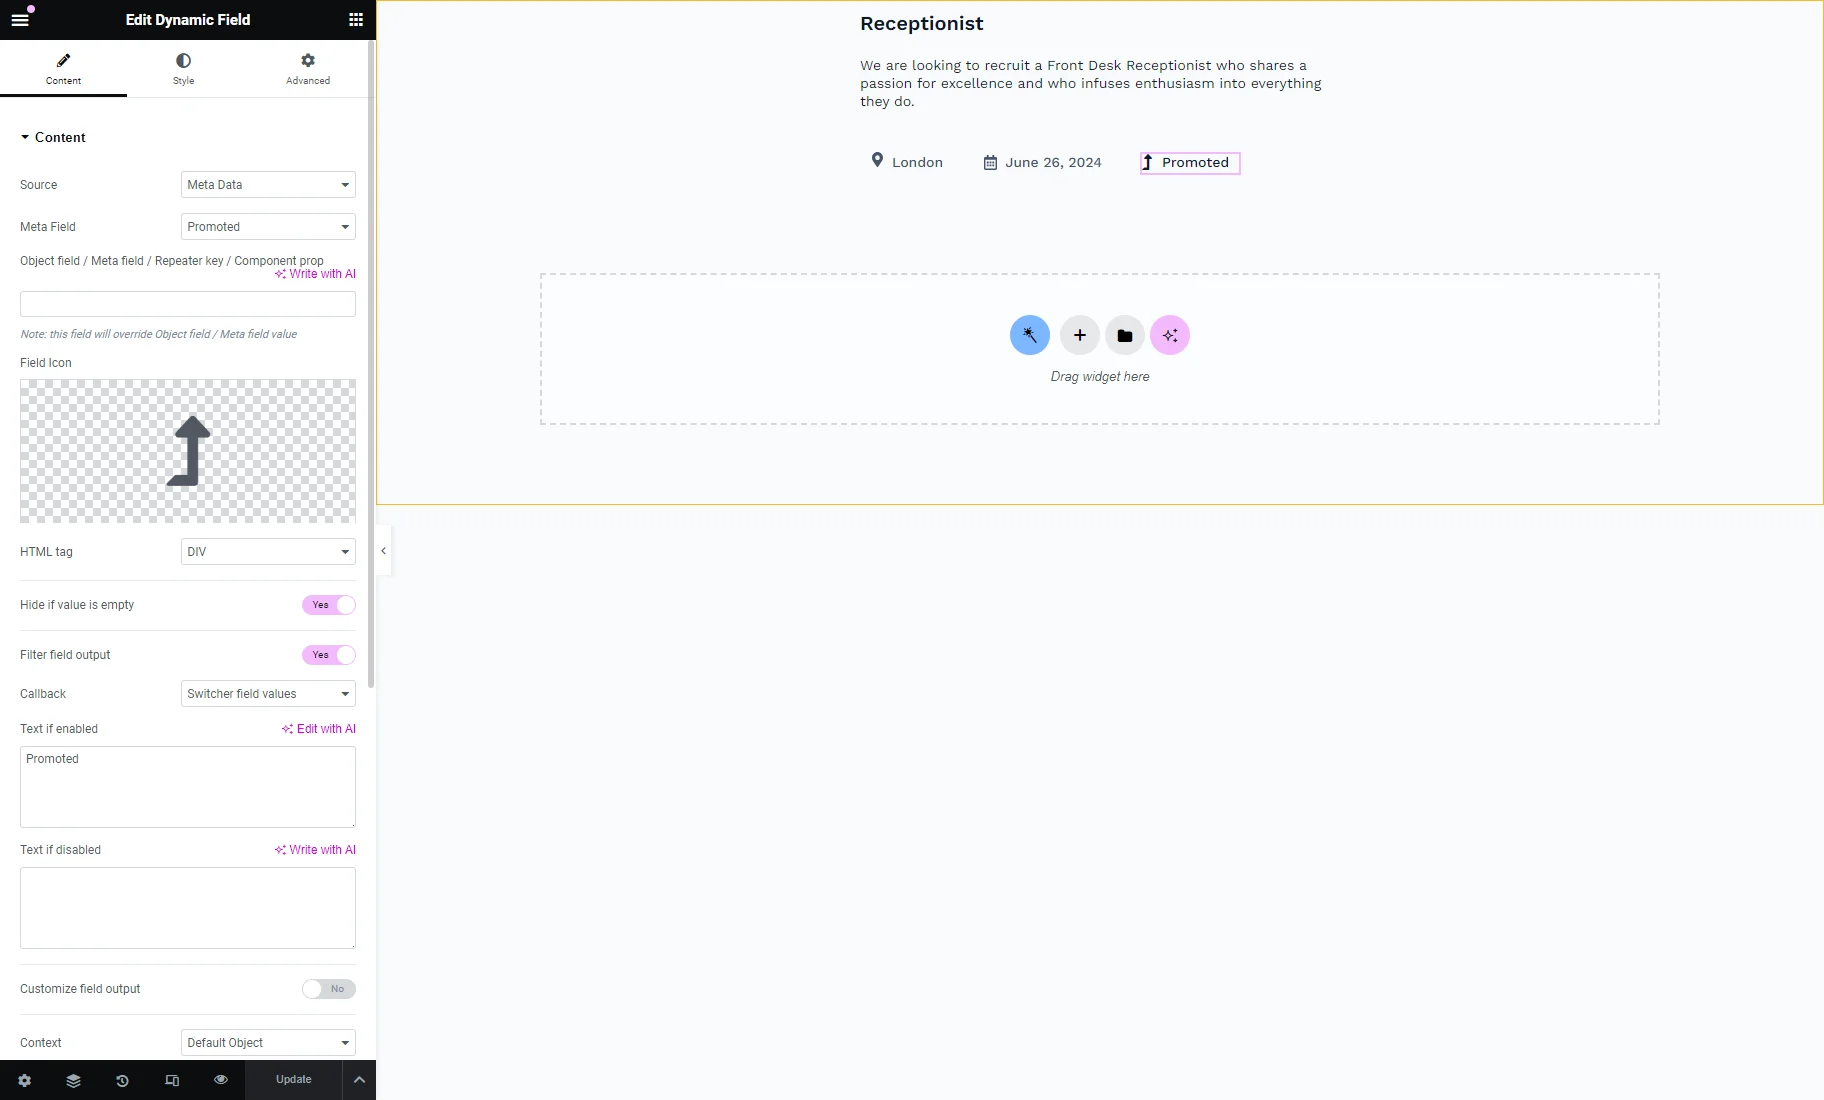
In the second Column, we add another Dynamic Field with “Meta Data” Source and “Promoted” Meta Field.
Also, we set the Field Icon and enable the Hide if value is empty toggle.
Then, we enable the Filter field output toggle, choose the “Switcher field values” Callback, and enter the “Promoted” text in the Text if enabled field. The Text if disabled field we leave empty.
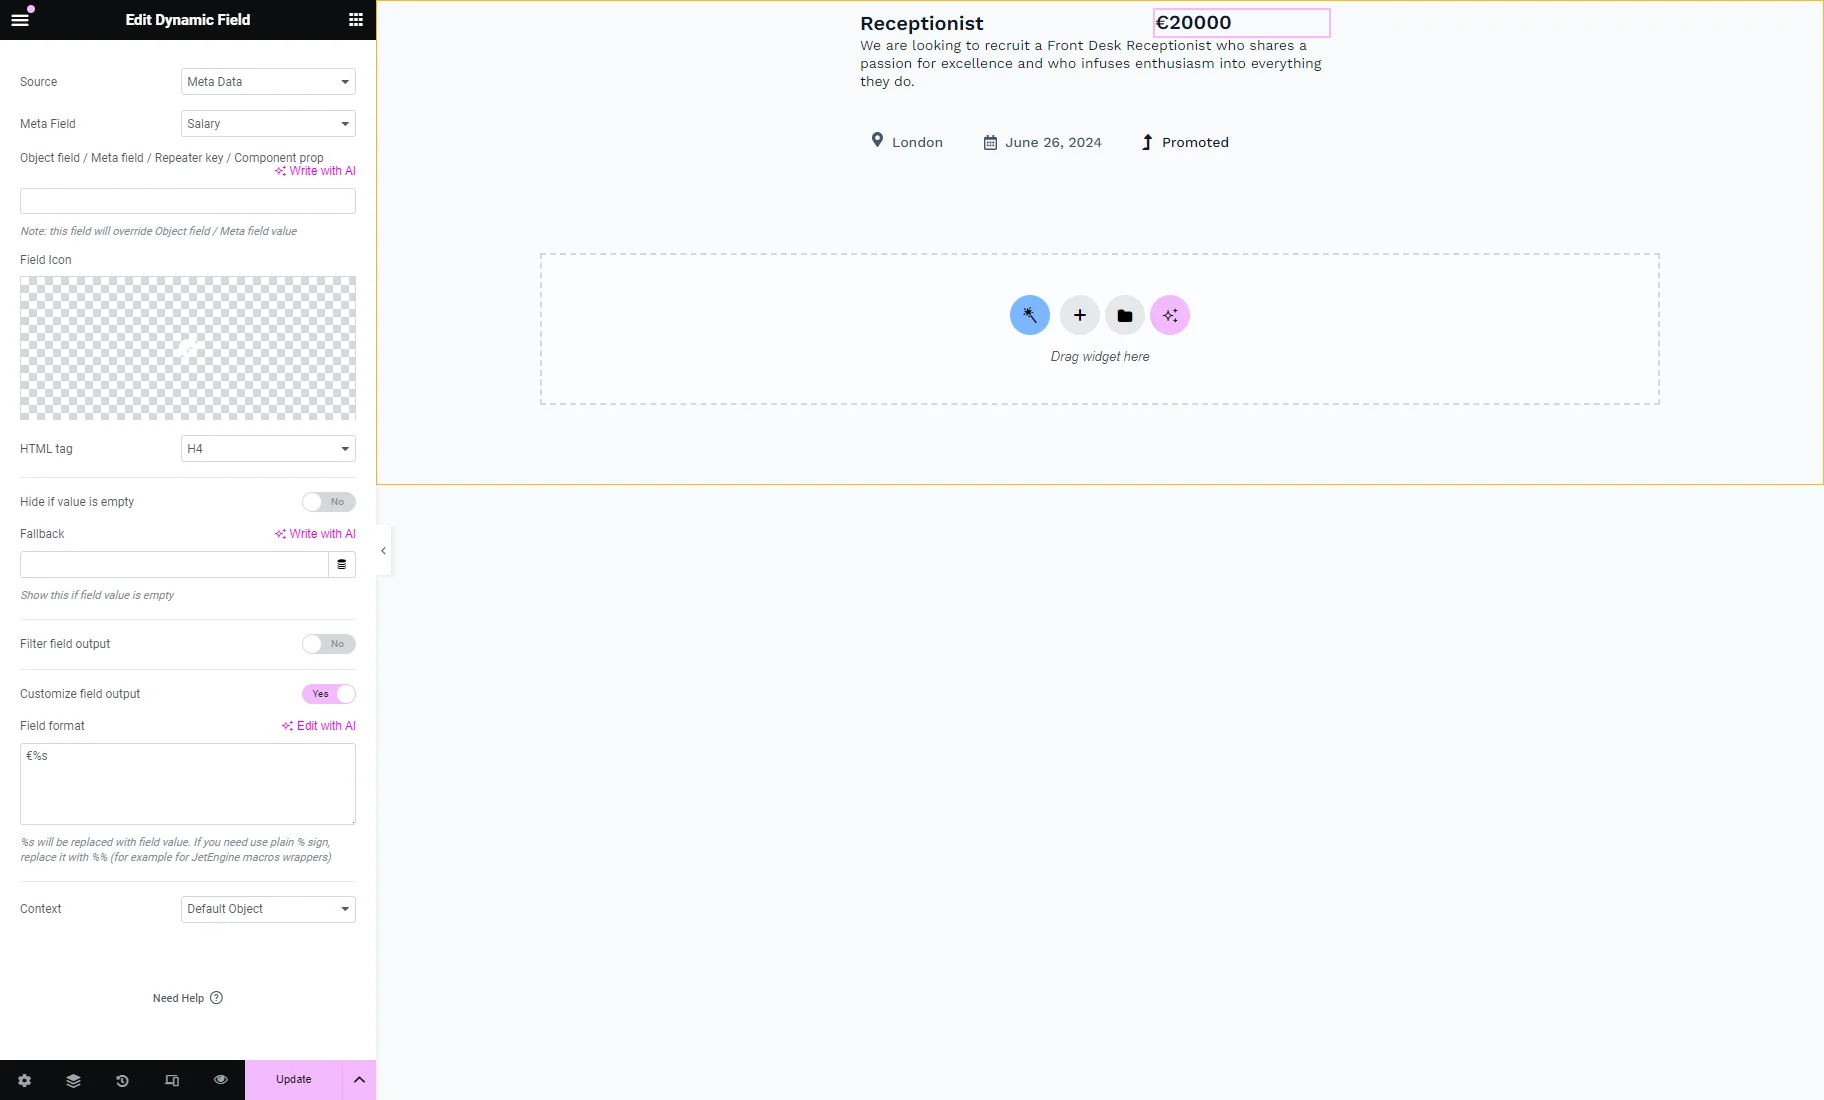
Near the Dynamic Link, we place another Dynamic Field widget with “Meta Data” Source and “Salary” Meta Field.
We enable the Customize field output toggle and set the “€%s” in the Field format textarea to put the “€” symbol before the salary.
After customizing the Listing item, we hit the “Update” button.
Setting the Custom Queries
Now, we will create three custom queries and merge them into a single query later.
Query for promoted posts
First, we craft a custom query that shows only posts for which the “Promoted” switcher is turned on.
To create a custom query, we navigate to WordPress Dashboard > JetEngine > Query Builder and push the “Add New” button.
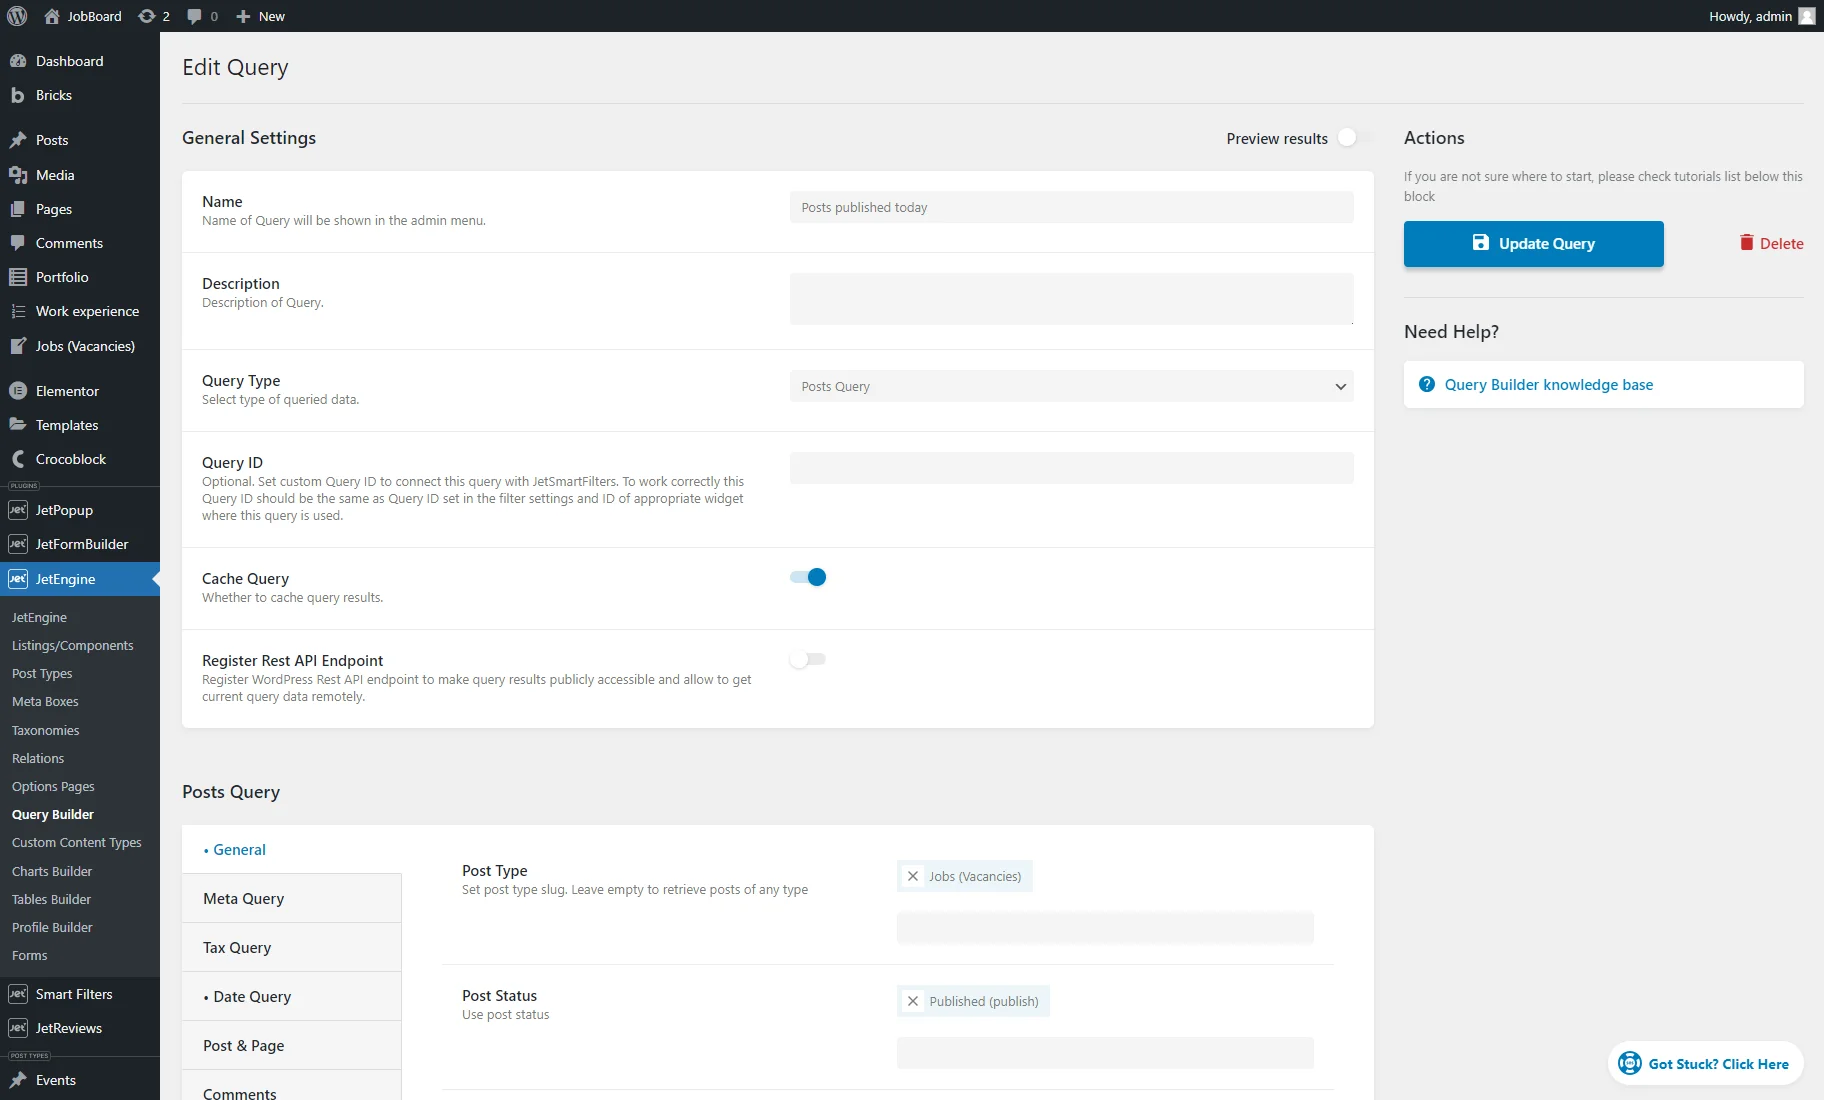
We enter the query Name (“Promoted posts”) and select the “Posts Query” Query Type.
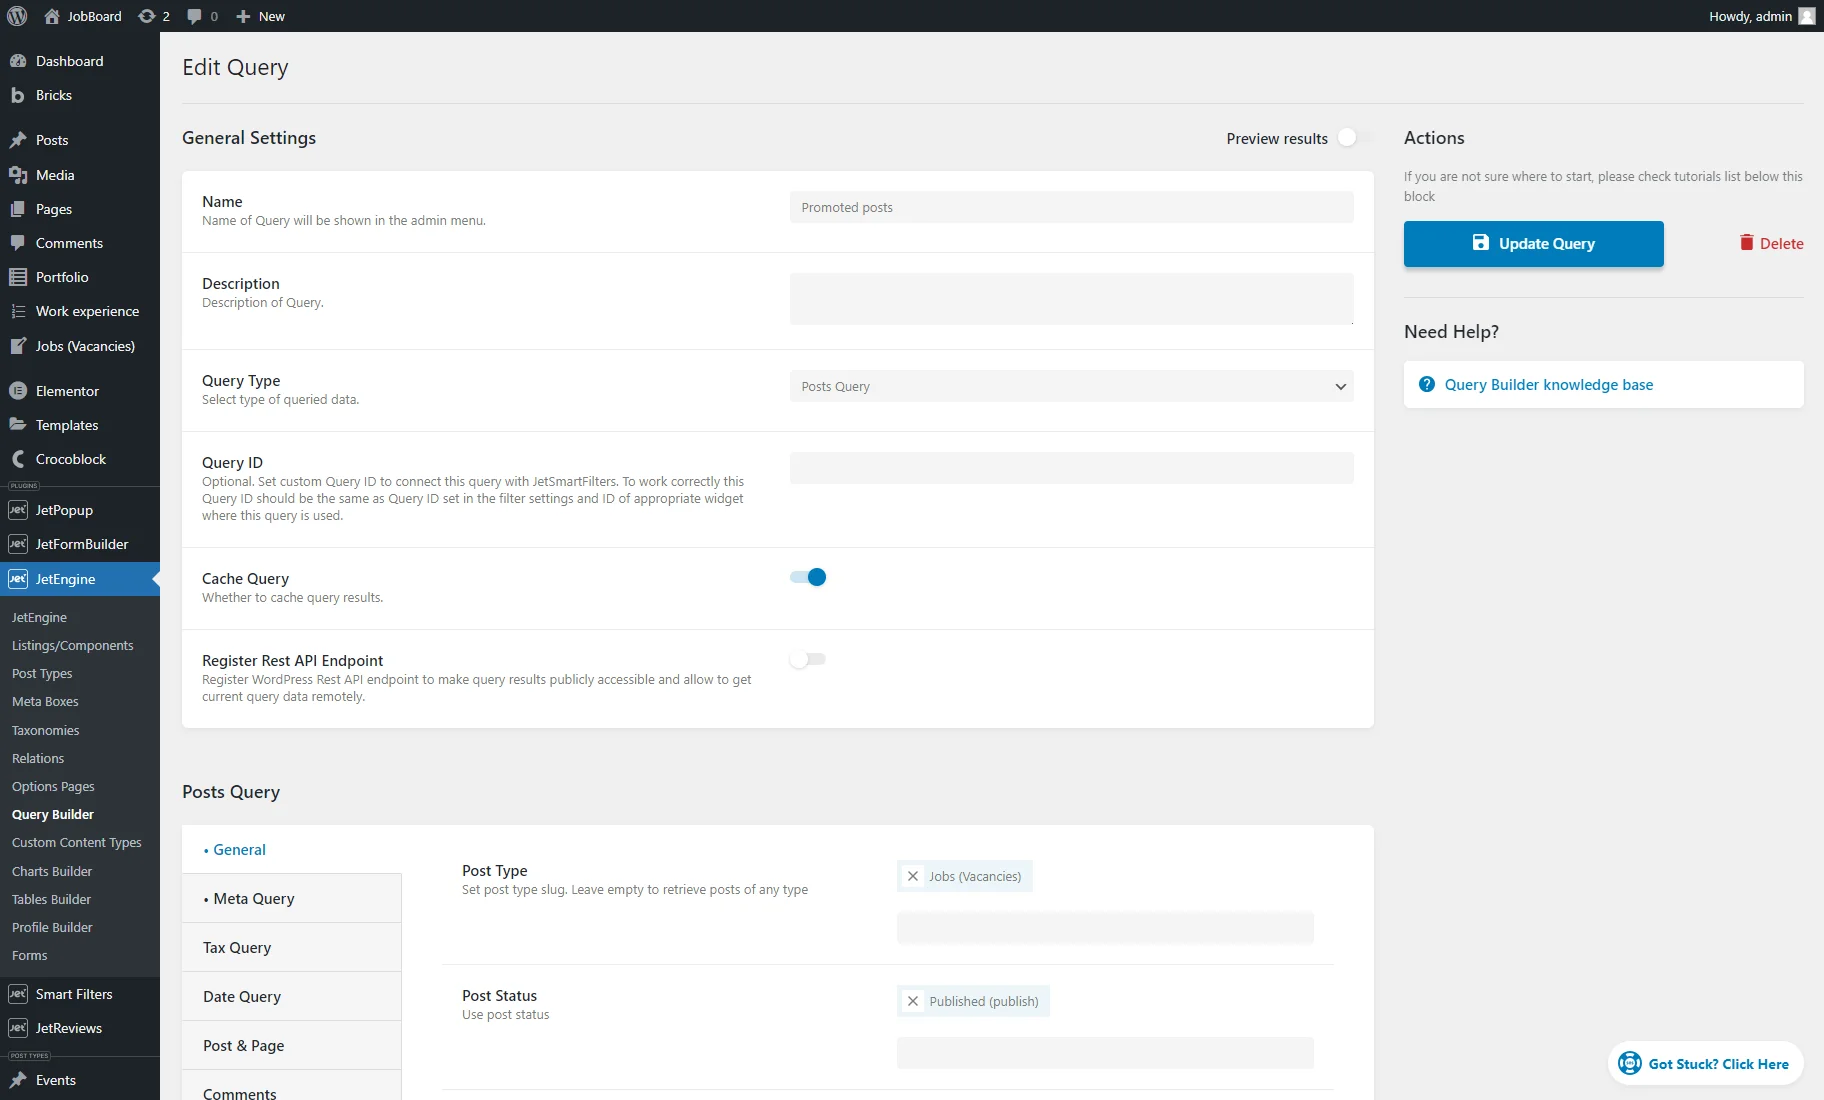
In the General tab of the Posts Query section, we set the Post Type (“Jobs (Vacancies)”) and “Published (publish)” Post Status.
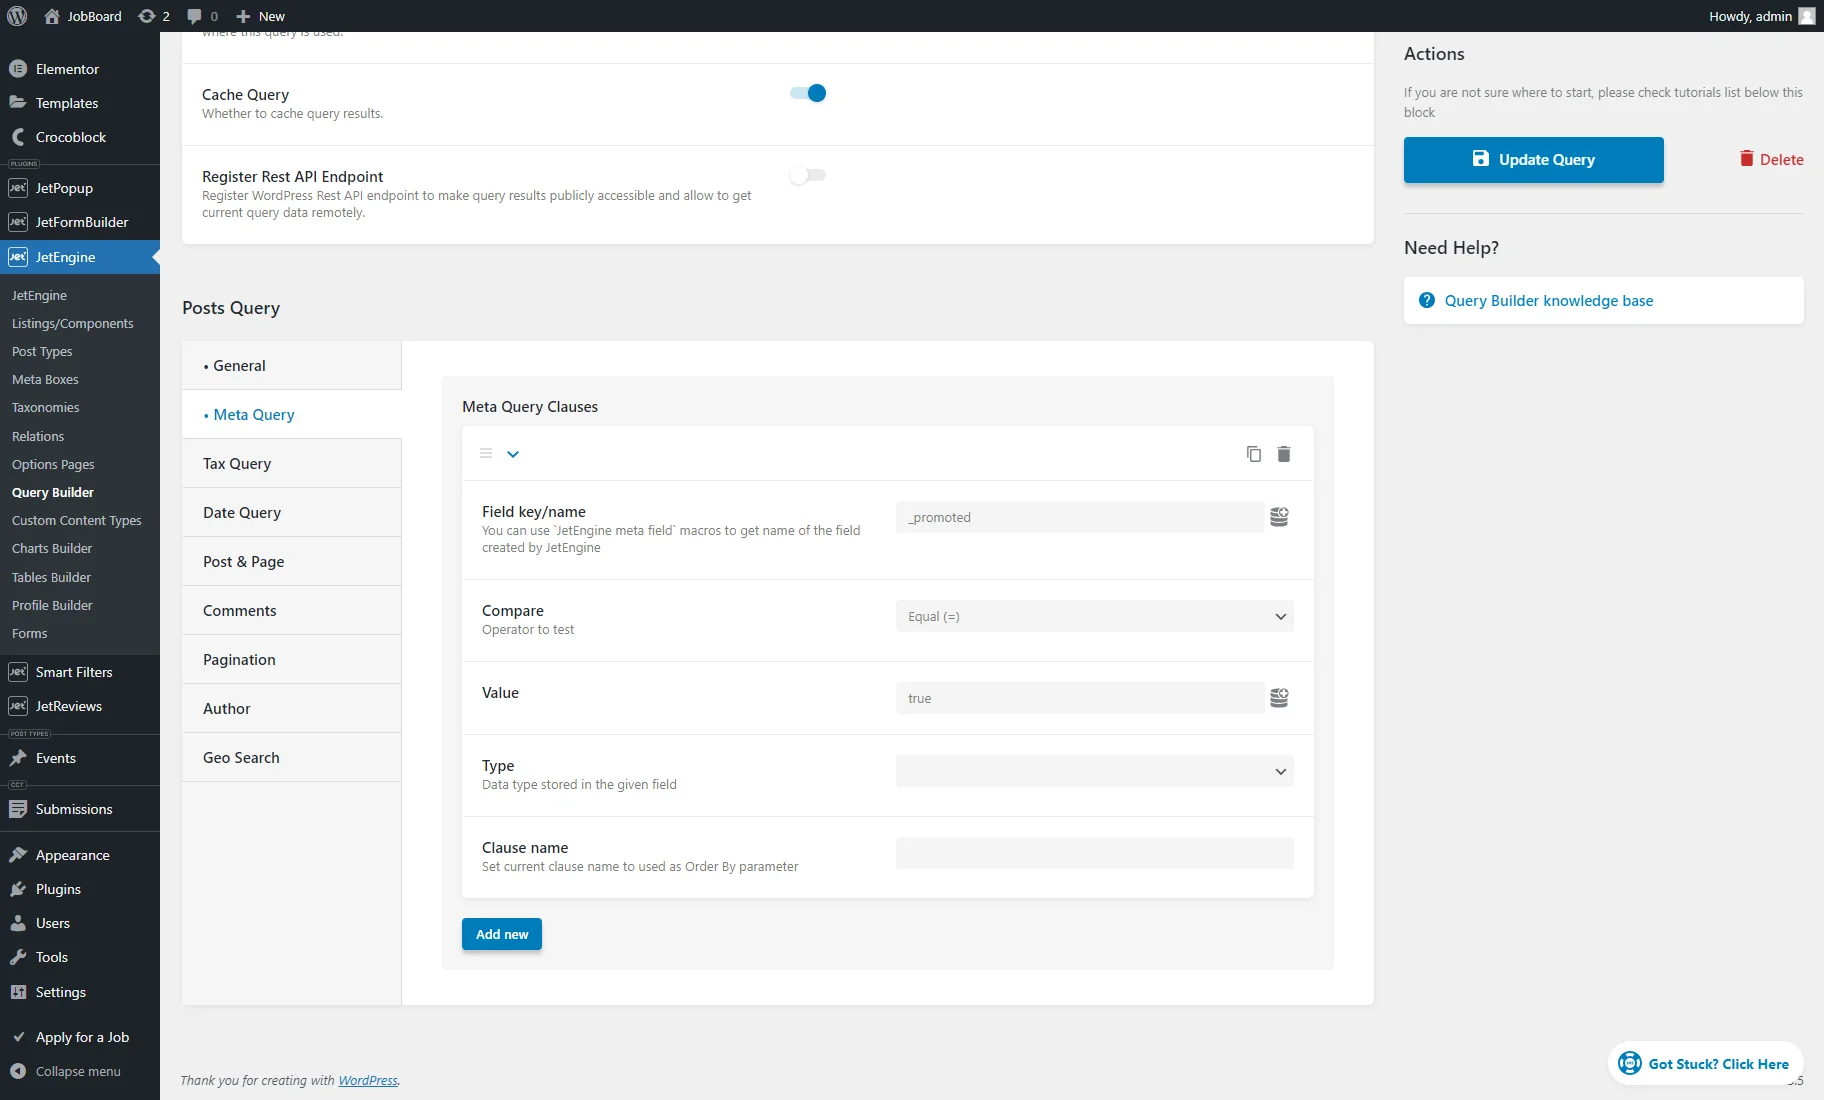
In the Meta Query tab, we hit the “Add new” button to add a meta query clause.
In the repeater field, we enter the “Switcher” meta field name into the Field key/name field (“_promoted”), pick the “Equal (=)” operator for the Compare field, and set the “true” Value.
Then, we hit the “Add/Update Query” button.
Query for posts published today
Now, we craft a query that shows only posts published on the current date.
We create a new query, enter the query Name (“Posts published today”), and select the “Posts Query” Query Type.
In the General tab of the Posts Query section, we set the Post Type (“Jobs (Vacancies)”) and “Published (publish)” Post Status.
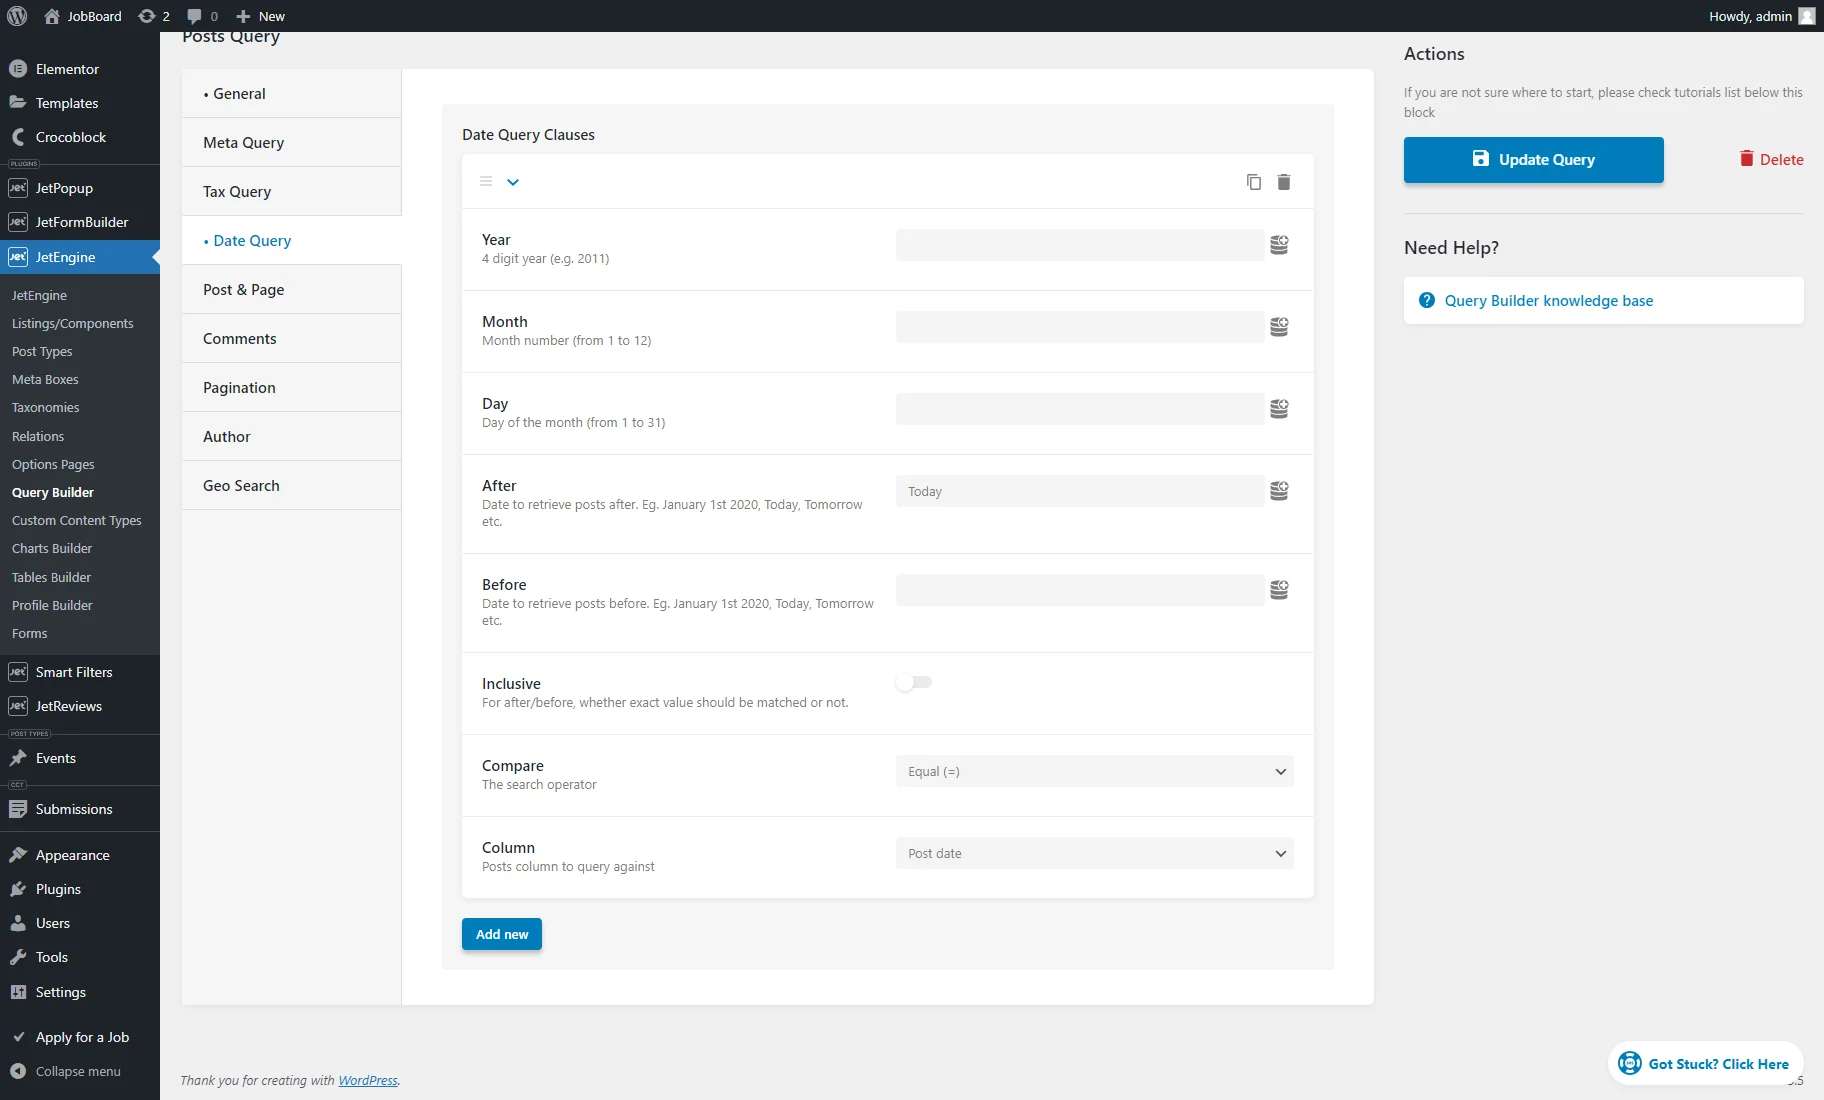
In the Date Query tab, we hit the “Add new” button to add a date query clause.
In the repeater field, we enter “Today” in the After field, pick the “Equal (=)” operator for the Compare field, and select the “Post date” Column.
To save the query settings, we hit the “Add/Update Query” button.
Query for post order
With the “Merged Query,” we will display the promoted posts first, then posts published on the current day, and other posts can be ordered by another requirement. For that, we create the third query.
We enter the query Name (“Query to order posts”) and select the “Posts Query” Query Type.
In the General tab of the Posts Query section, we set the Post Type (“Jobs (Vacancies)”) and “Published (publish)” Post Status.
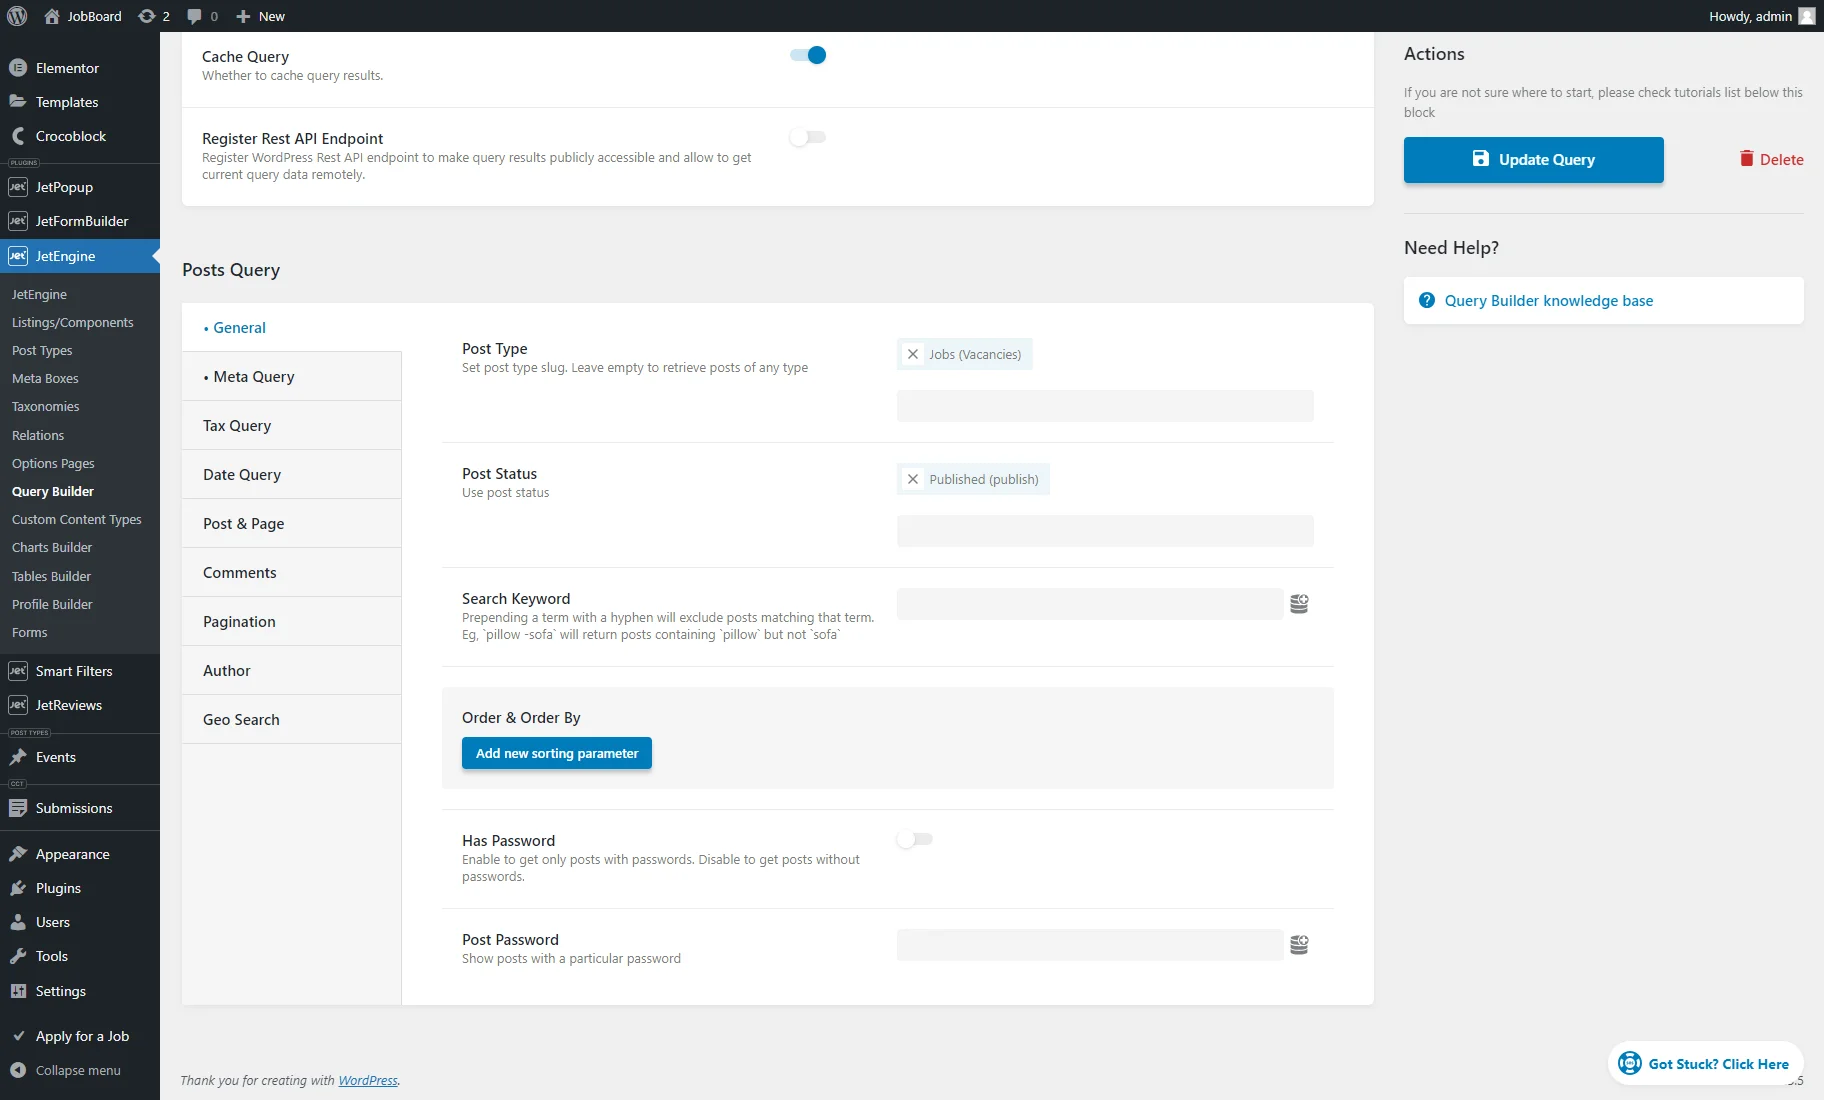
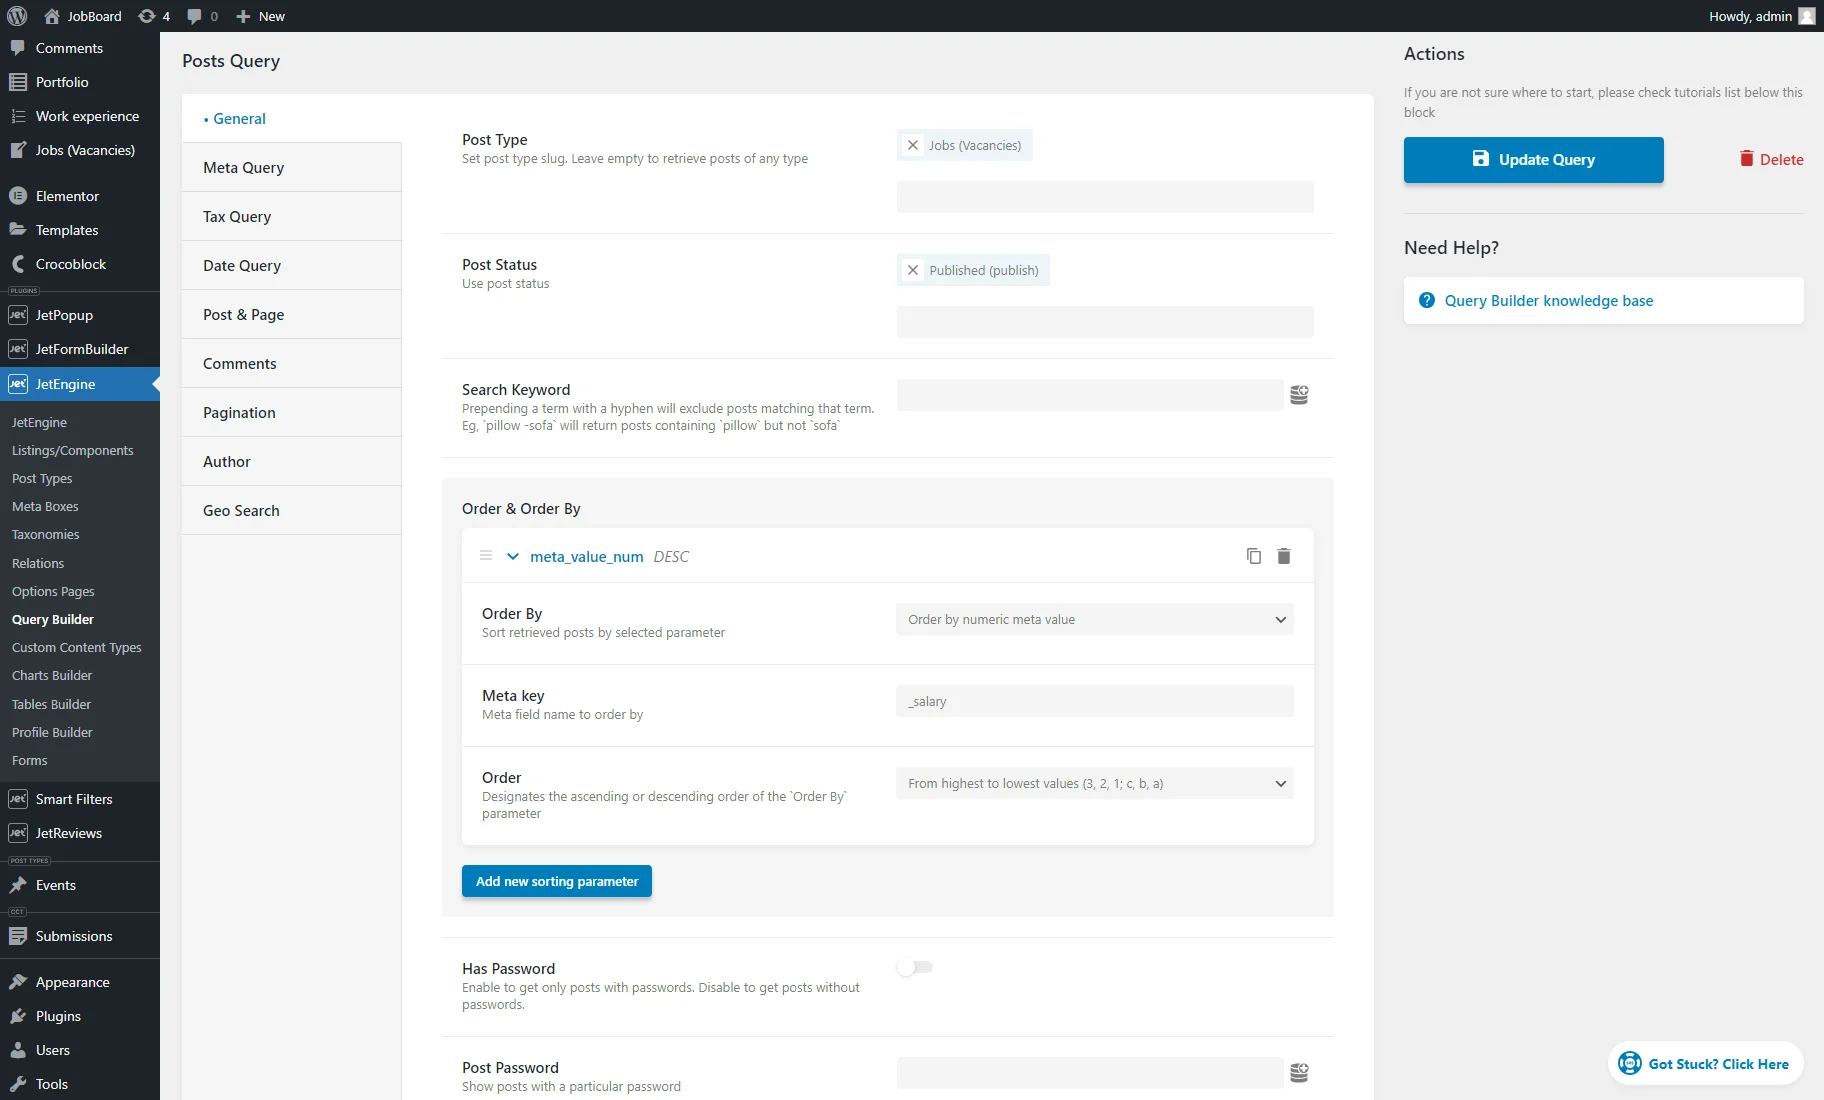
Then, we hit the “Add new sorting parameter” button in the Order & Order By section.
In the Order By field, the parameter by which the posts will be ordered can be picked. For example, posts can be ordered randomly, by date, title, number of comments, meta clause, distance (learn more in the How to Set Geo Search Based on User Geolocation tutorial), etc.
We decide to order vacancies by salary, so we choose the “Order by numeric meta value” option for the Order By field.
In the Meta key field, we enter the “Salary” meta field name (“_salary”).
For the Order field, we pick the “From highest to lowest values” option.
To save the query settings, we hit the “Add/Update Query” button.
Merged Query
We create a new query, enter the query Name (“Merged query for vacancies”), and select the “Merged Query” Query Type.
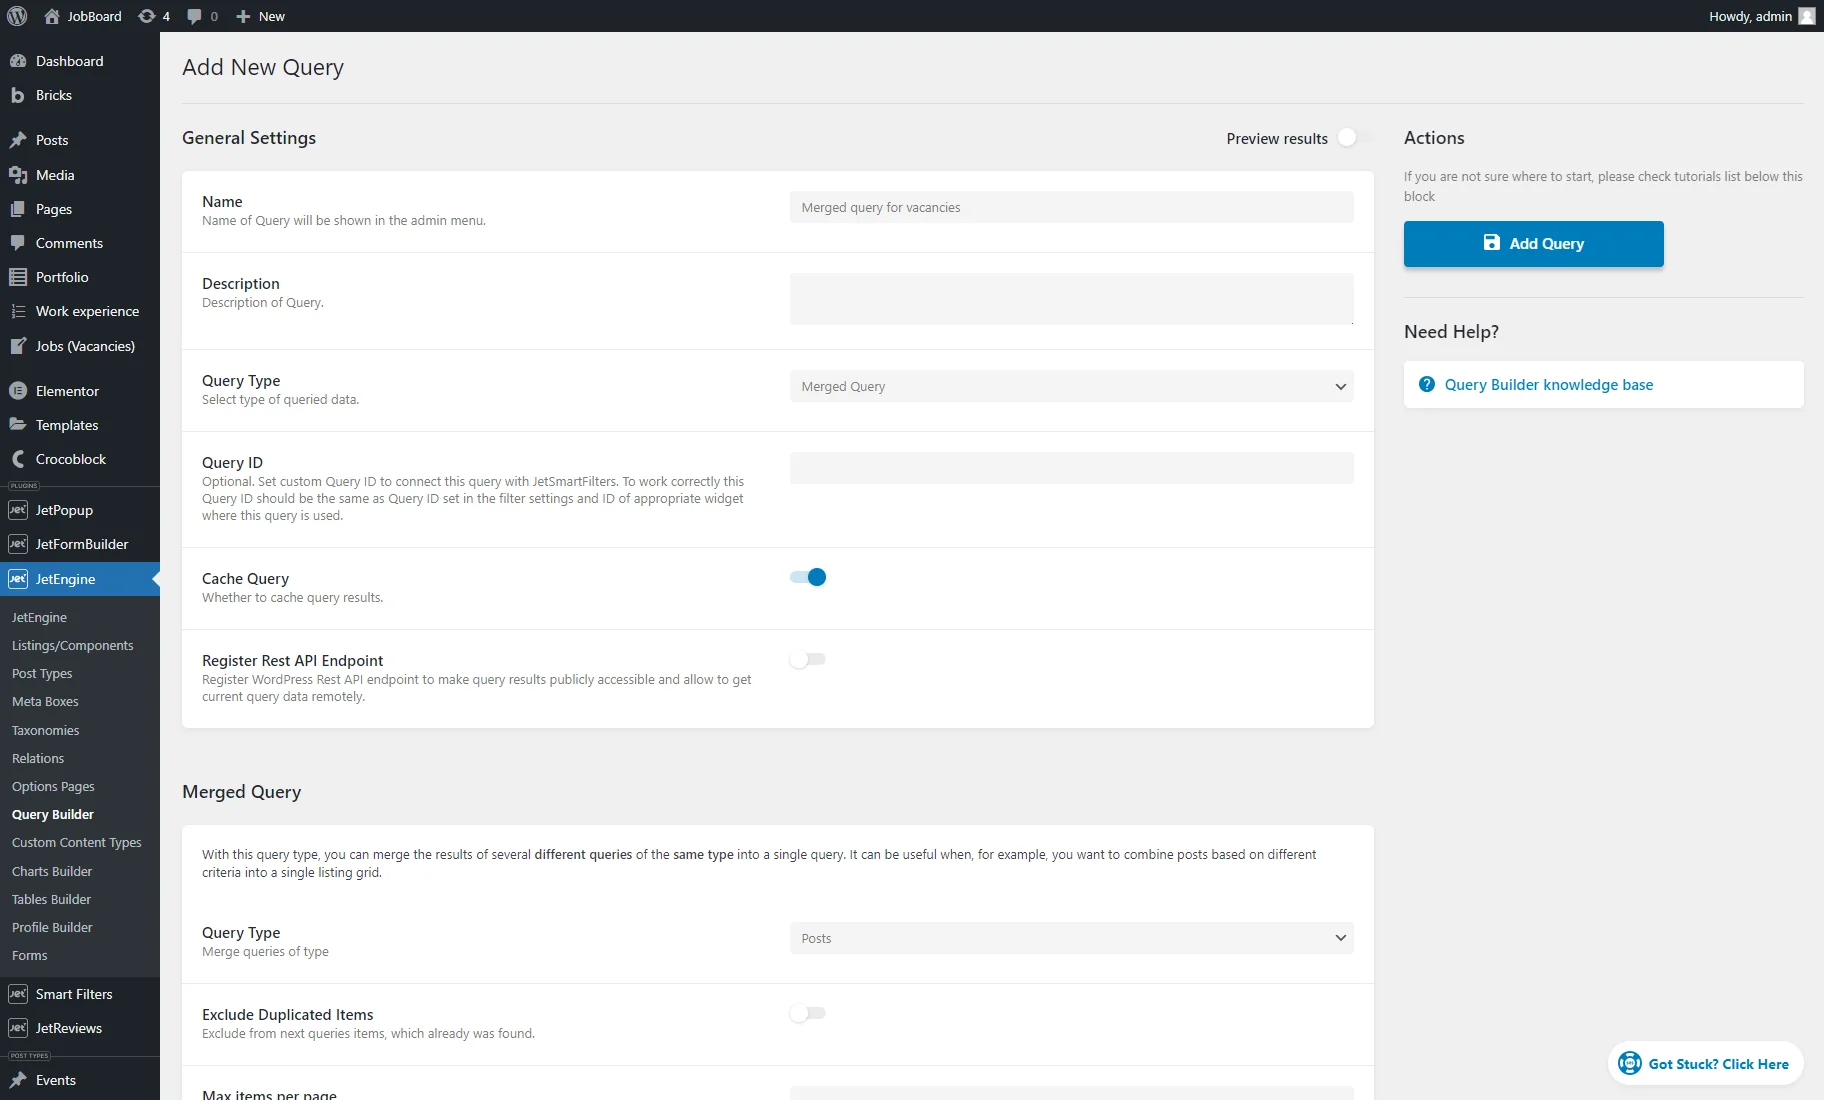
In the Merged Query section, we keep the “Posts” option for the Query Type field.
We enabled the Exclude Duplicated Items toggle to prevent duplication. It ensures that if promoted posts are published today, they won’t appear twice in the second query. Additionally, promoted posts and posts published today displayed by the first two queries won’t be repeated in the third query.
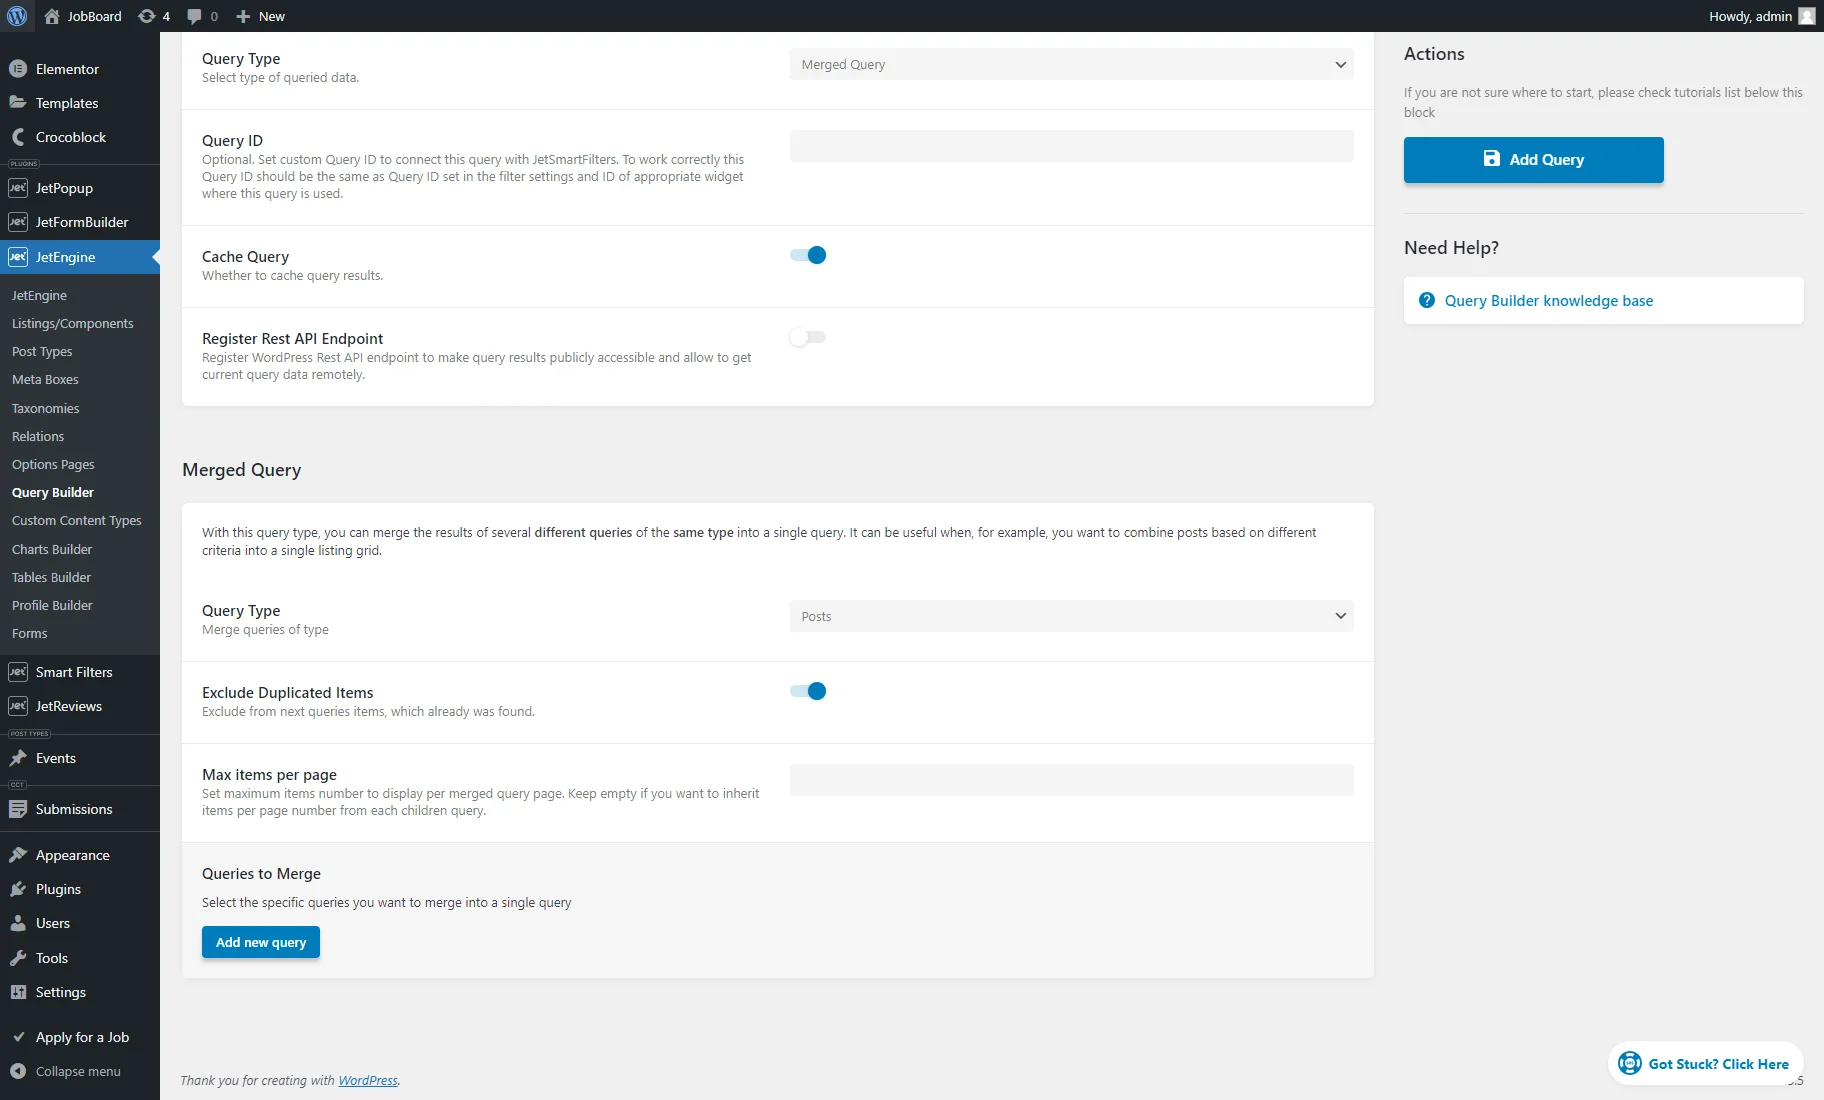
Then, we add three pre-made queries by clicking the “Add new query” button in the Queries to Merge section.
The first is the query for the promoted posts, the second — is for the posts published today, and the third — is for ordering the remaining posts by a certain parameter (salary).
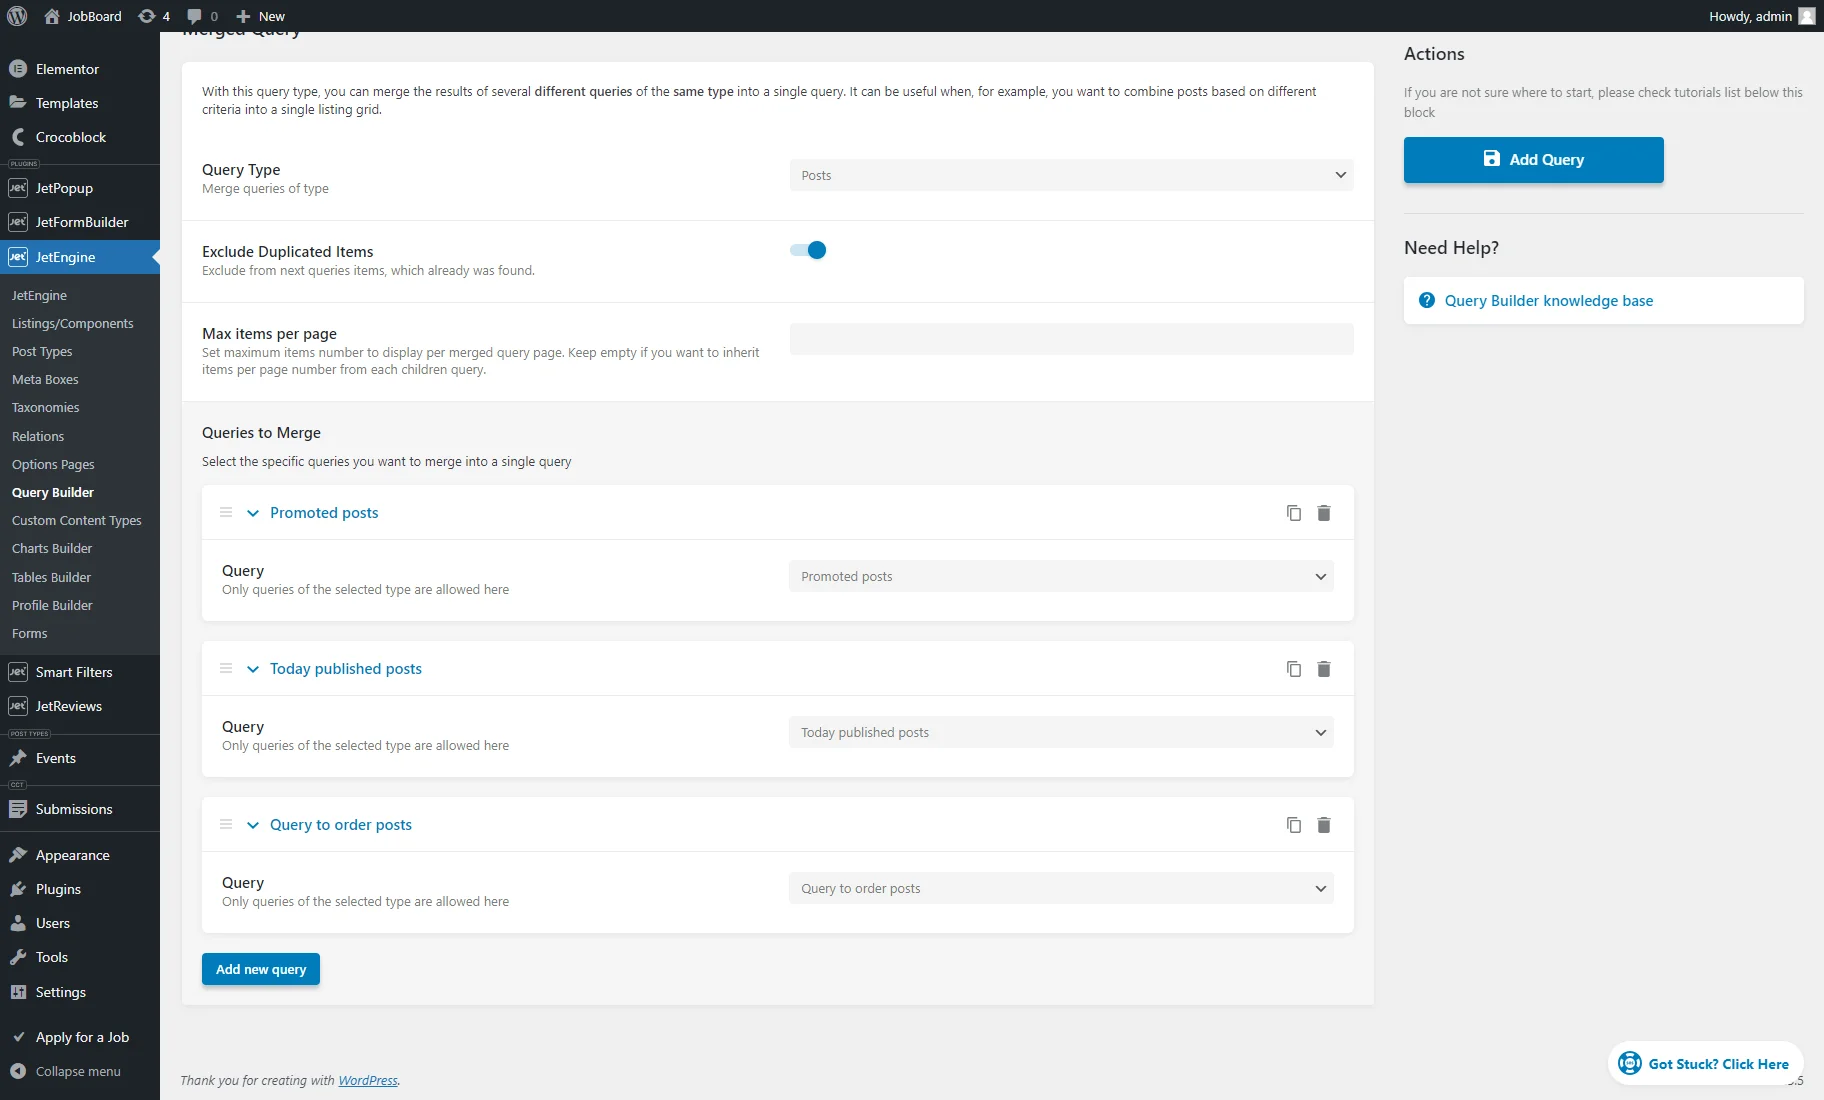
Then, we hit the “Add/Update Query” button.
Placing a Listing Grid and Applying the Merged Query
We go to WordPress Dashboard > Pages and hit the “Add New Page” and “Edit with Elementor” buttons. You can create a new page or edit an existing one, and you can use Elementor, WordPress block editor (Gutenberg), or Bricks builders.
Drag-n-drop the Listing Grid element, widget, or block (depending on the builder you use) to the editing page and set the recently created Listing.
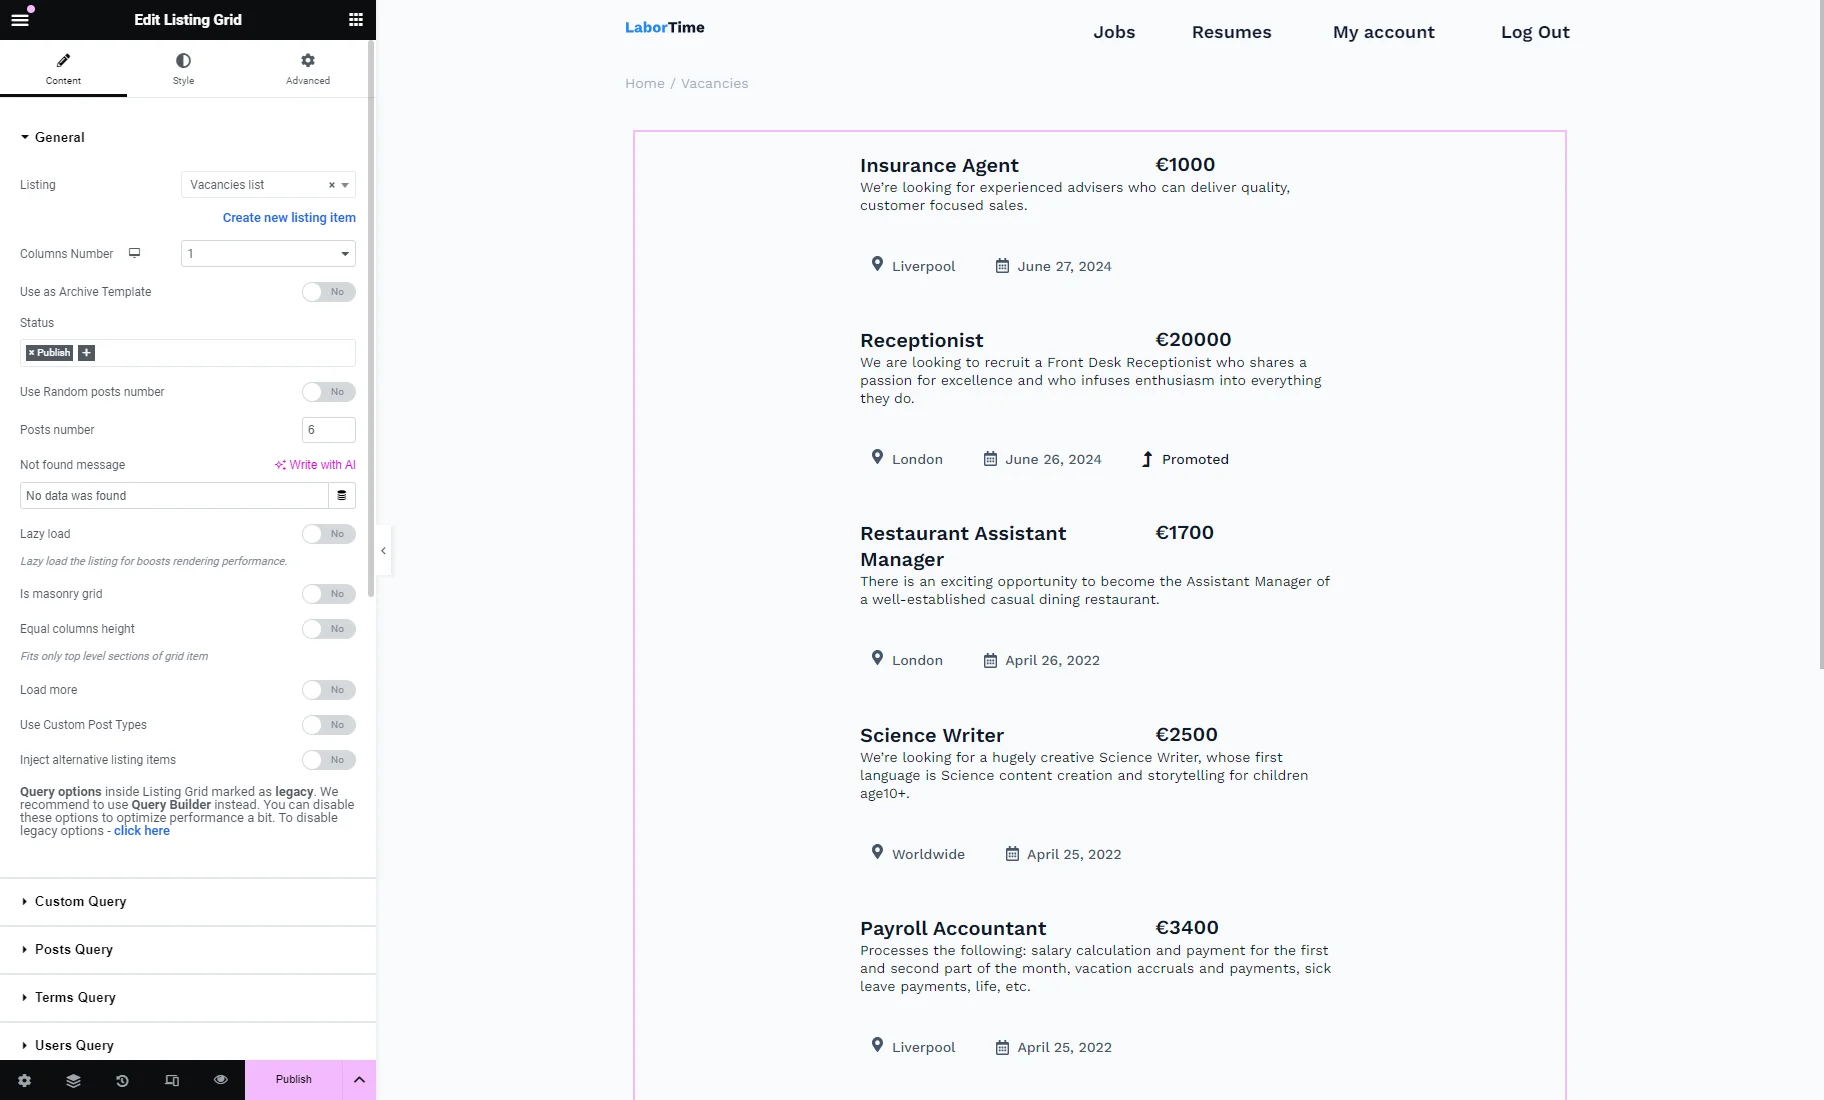
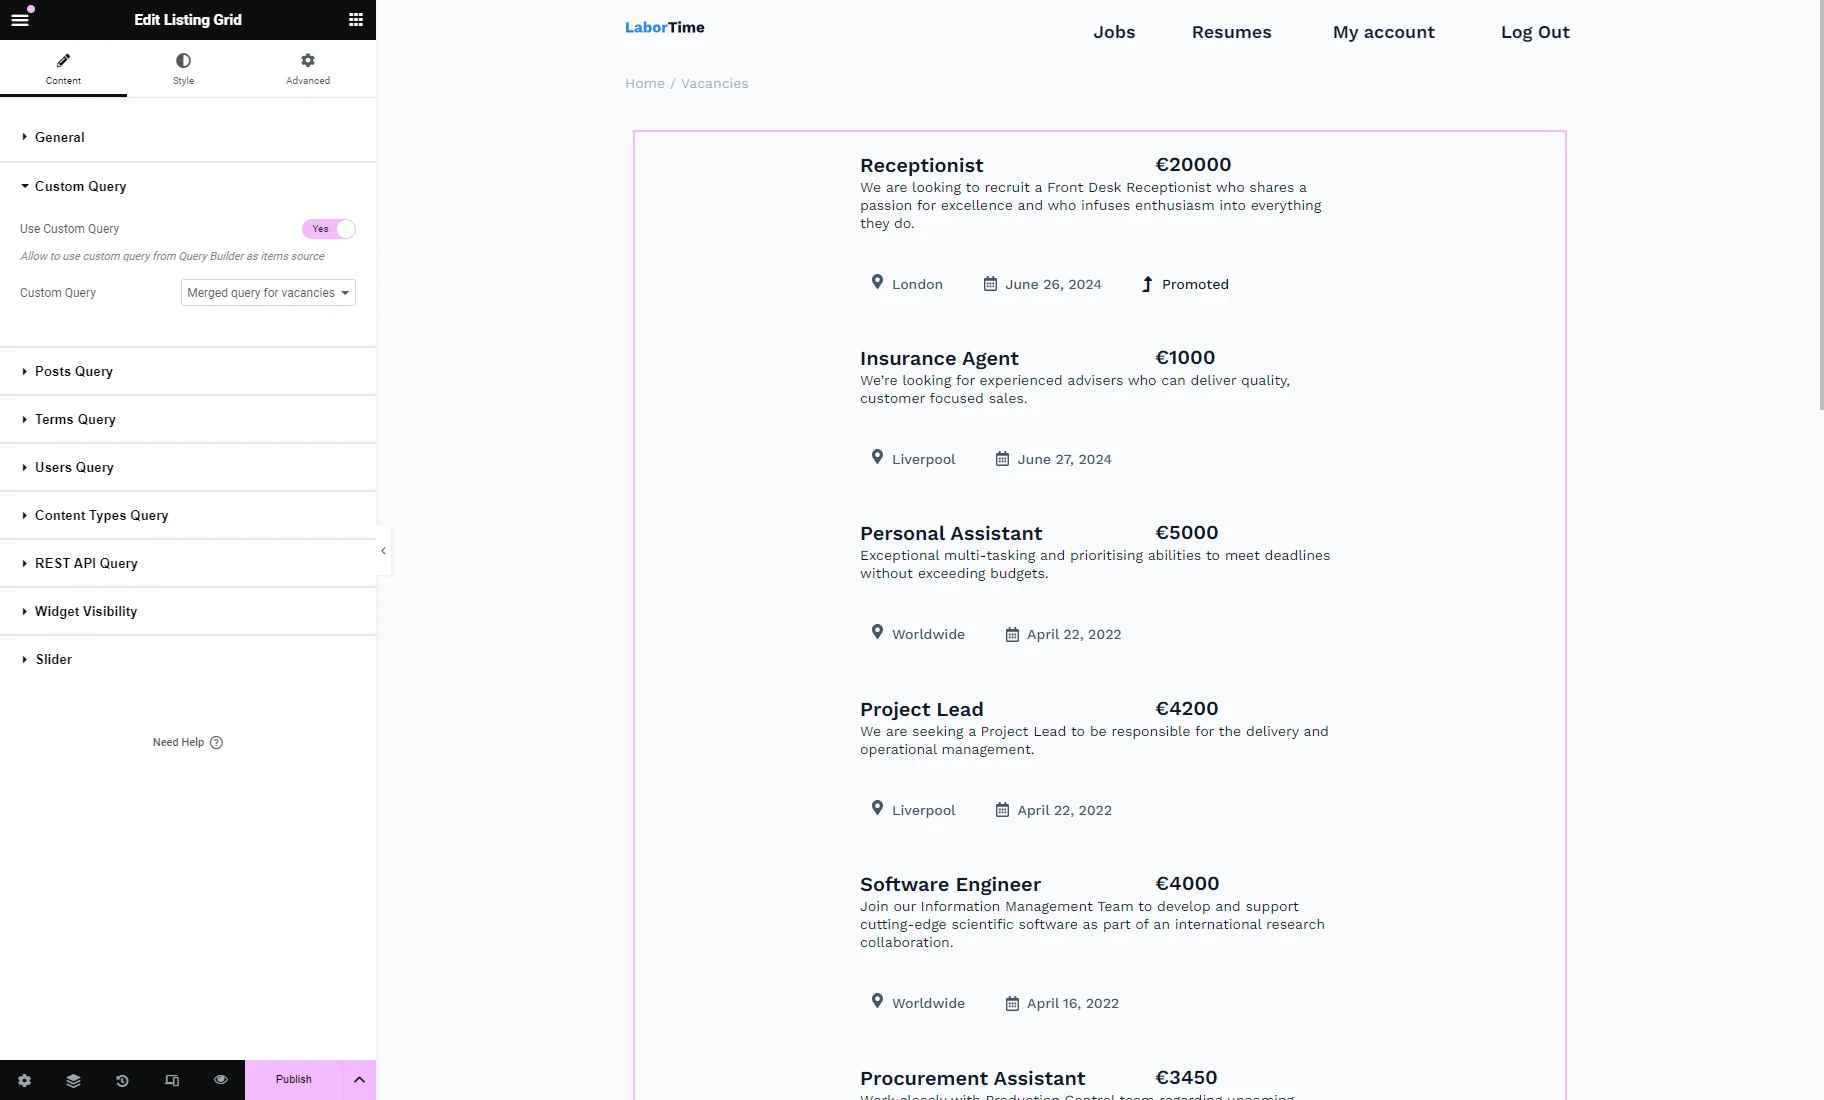
Then, unfold the Custom Query tab, activate the Use Custom Query toggle, and select the just created “Merged Query” from the Custom Query drop-down.
In our case, the “Merged Query” works with the Listing Grid as intended: first, it shows the promoted post, then the posts published today (June 27, 2024), and the other posts are ordered from the highest salary to the lowest.
The page can be saved by clicking the “Publish/Update” button.
That’s all. Now you know how to use JetEngine‘s Merged Query to combine multiple queries into one Listing Grid on your WordPress website.