How to Create Listing Template Using Repeater Meta Field
Learn how to use a Repeater meta field in the Listing template and how to showcase the repeater items in the grid layout on the Single post.
Before you start, check the tutorial requirements:
- Elementor (Free version) or Block editor (Gutenberg)
- JetEngine plugin installed and activated
JetEngine’s “Repeater” meta field allows you to display multi-value data, such as image galleries, service lists, etc. In this guide, you’ll learn how to create a Listing template using a repeater field and showcase structured content effectively.
Backend Preparations
The “Repeater” field can be created with the JetEngine or ACF plugin.
It can be adjusted for Custom Post Types (CPTs), Custom Content Types (CCTs), custom taxonomies, Meta Boxes, and Options Pages.
As an example, we’ll create a “Medical Conferences” CPT with a “Speakers” repeater field.
Create CPT and Repeater meta field
First, you need to create a CPT and fulfill all the needed values. You can find the needed information in the How to Create a Custom Post Type tutorial.
Once you prepared your CPT, it’s time to create a “Repeater” meta field.
We push the “New Meta Field” button, fill in the Label and Name/ID, and choose the “Repeater” Field type.
By clicking the “New Repeater Field” button, we add four fields within the repeater: “Speaker Name” text field, “Specialization” text field, “Presentation Topic” text field, and “Profile Photo” media field.
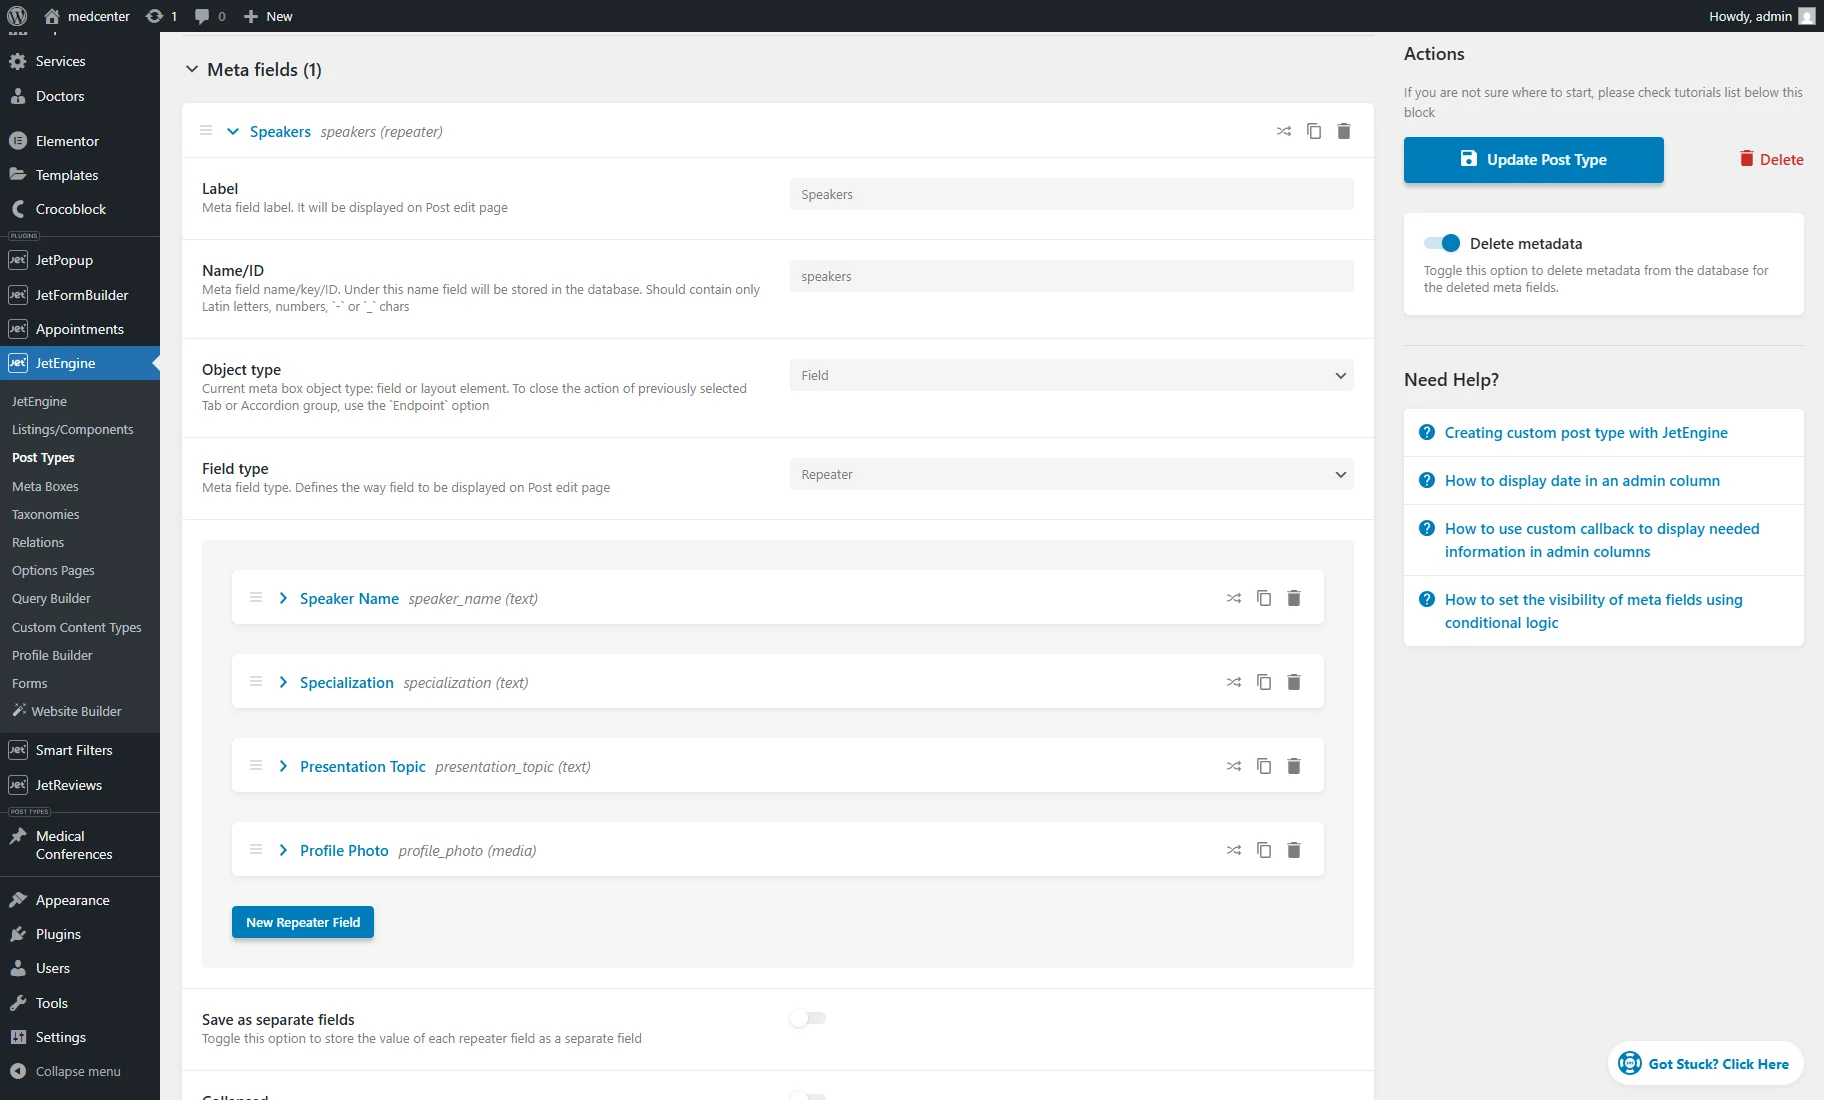
After that, the “Add/Update Post Type” button can be pressed.
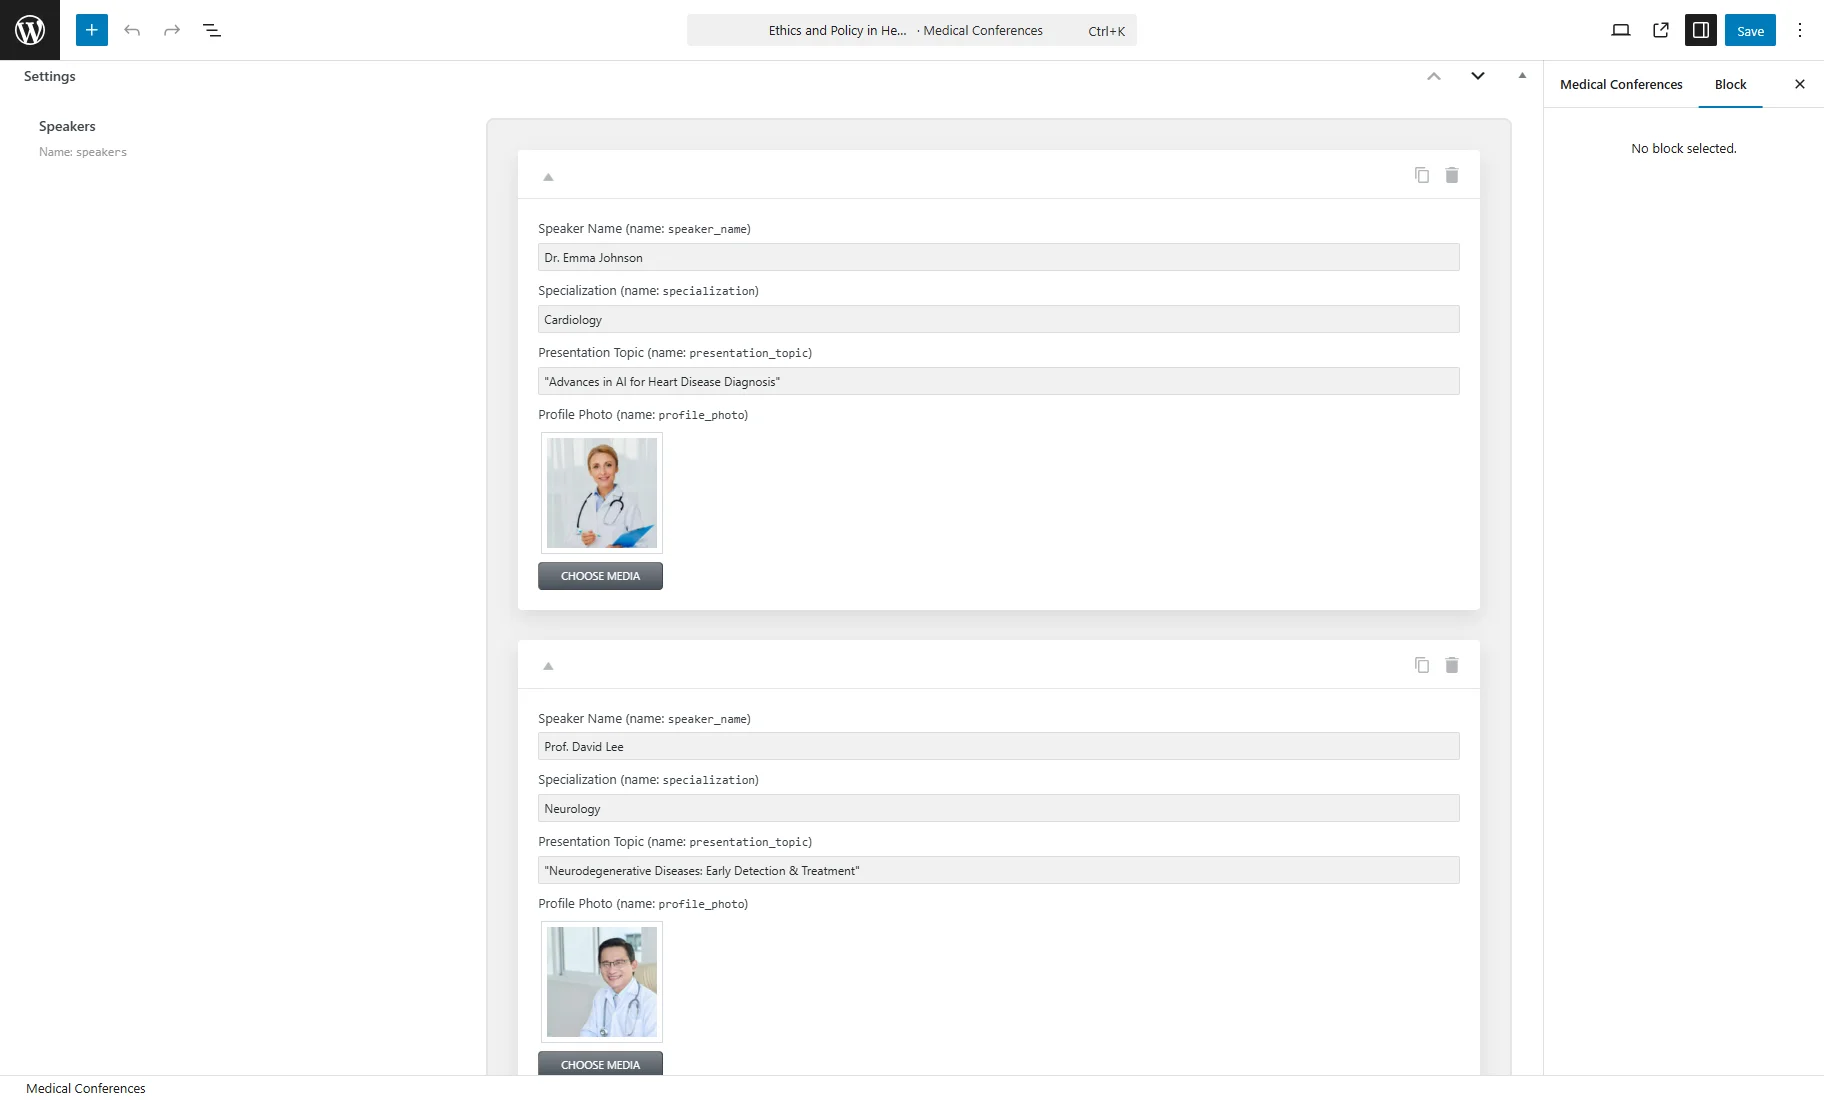
Fill the fields within posts
Go to the CPT tab on the WordPress Dashboard, edit each needed post, and add the needed information to the repeater fields. Remember to save updates.
Working with the Listing Template
Create a new listing
Go to WordPress Dashboard > JetEngine > Listings/Components and click the “Add New Item” button.
Choose the “Repeater Field” as the Listing source. Pay attention to the following parameters you should set:
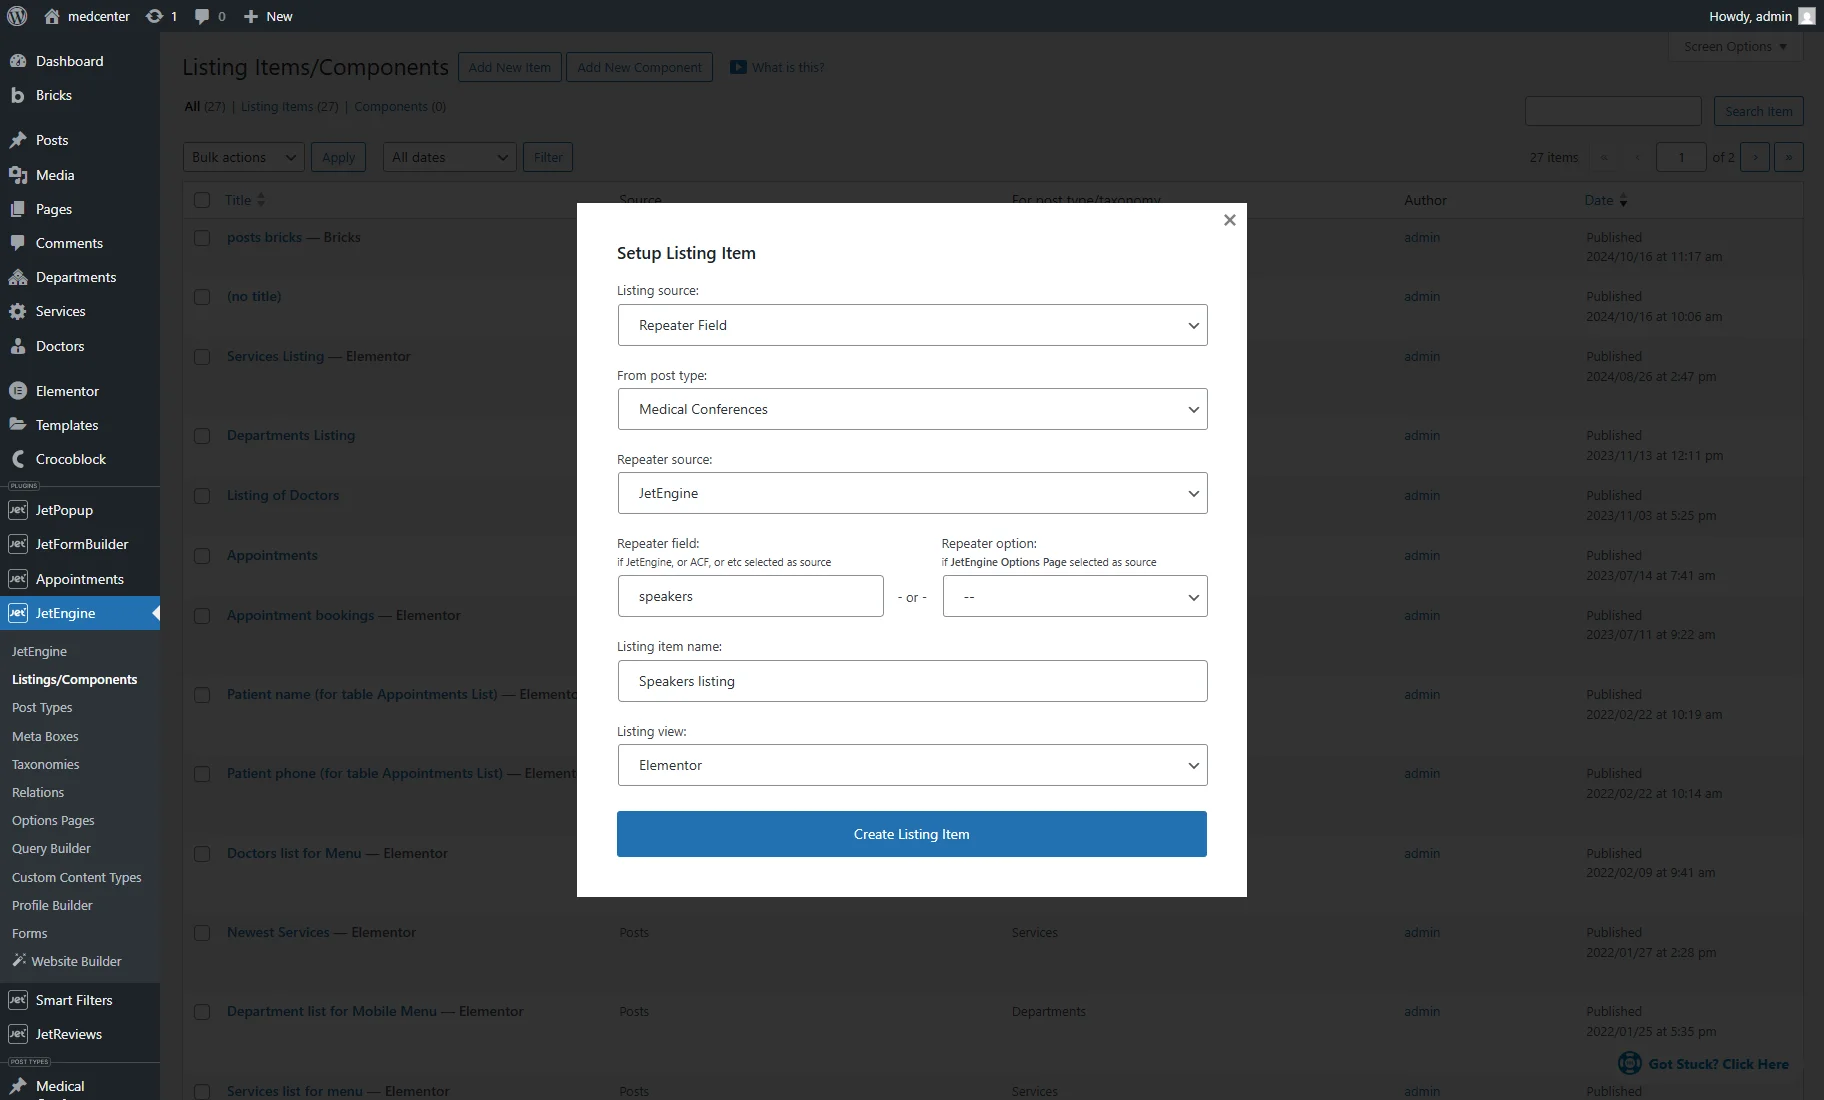
- From post type — is a CPT you created the repeater field for;
- Repeater source — contains two options: “JetEngine” and “ACF,” — if you created a “Repeater” meta field either via JetEngine or ACF, use the corresponding source;
- Repeater field — specify the name of the “Repeater” meta field;
- Repeater option — if you created a “Repeater” for the Options Page, select the required field from this dropdown instead;
- Listing item name — give a name to the Listing;
- Listing view — select the editor for Listing. It can be “Elementor,” “Bricks,” “Timber/Twig,” or “Blocks (Gutenberg)”.
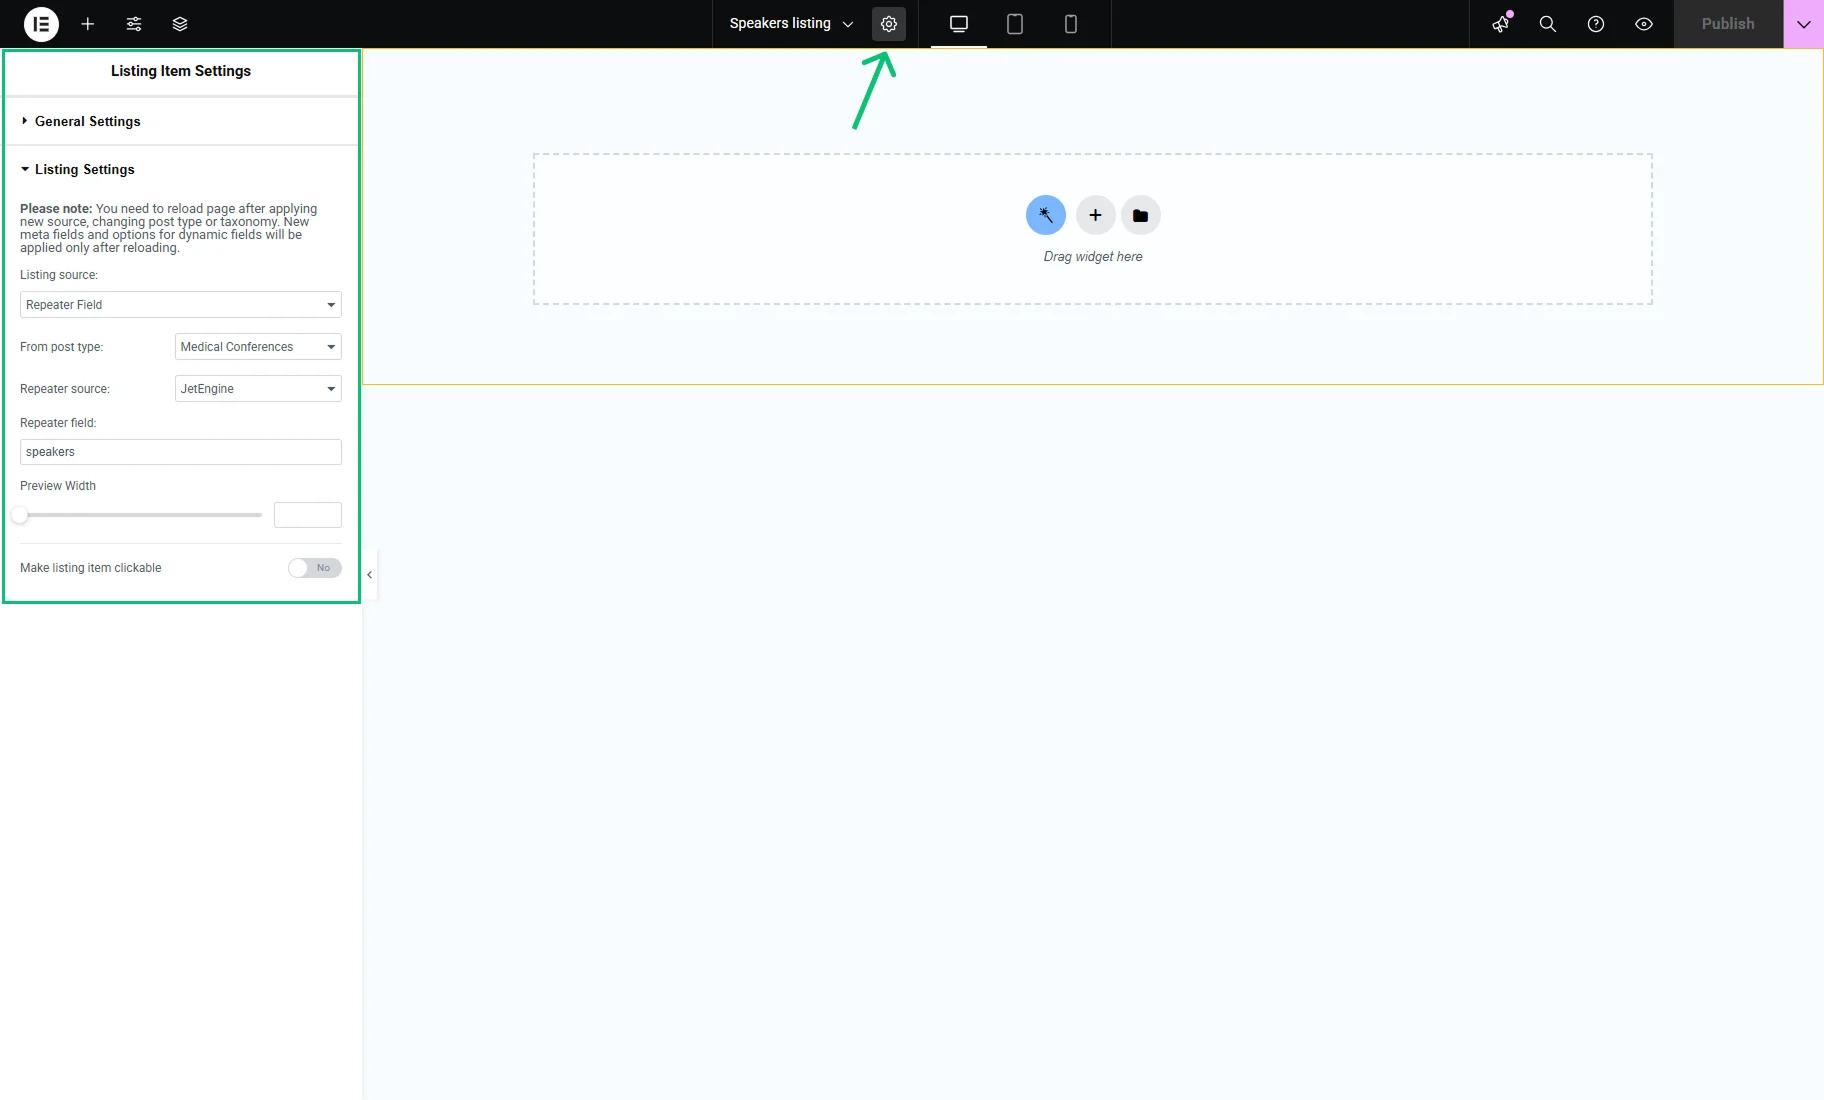
In our example, we selected the Elementor page builder. By pressing the “gear” icon in the editor, you can open and adjust the Listing Item Settings.
Listing setup
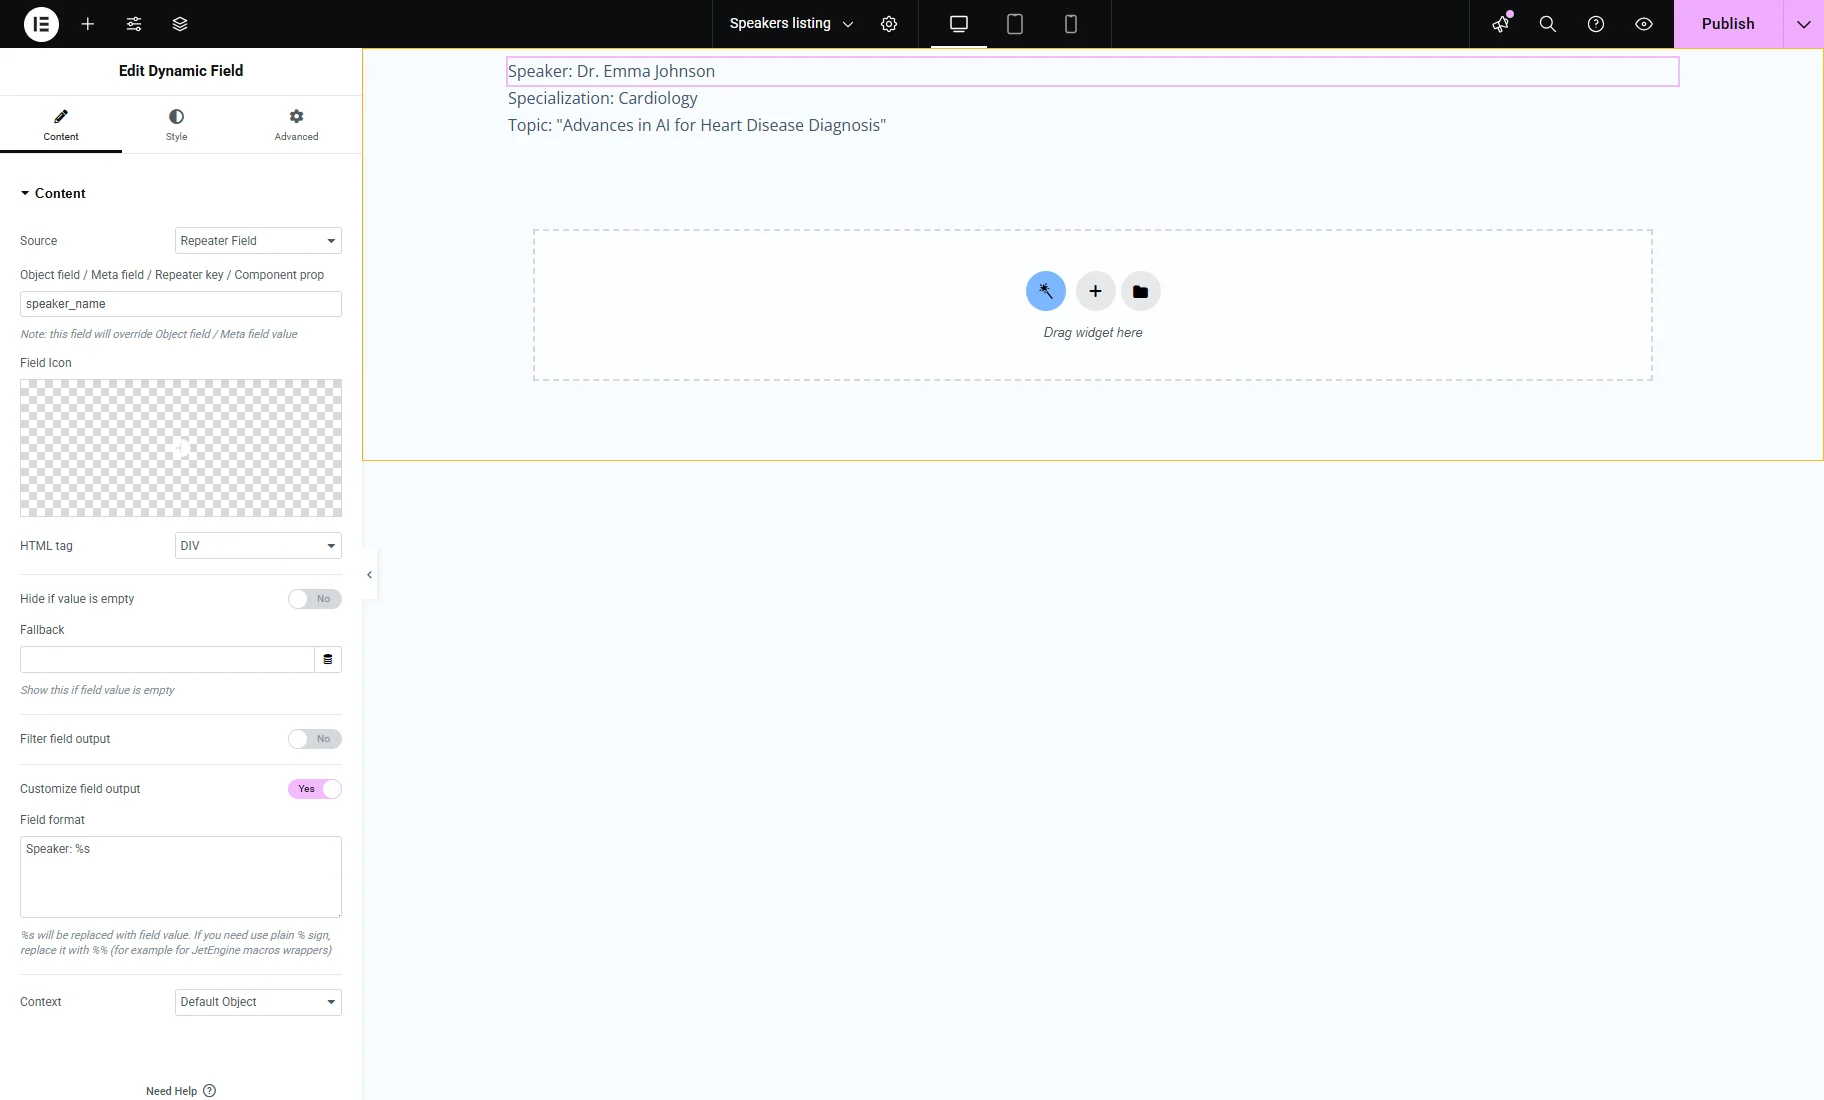
In the editor layout, you should use the Dynamic Widgets to display the repeater items dynamically. We add a Dynamic Field widget and duplicate it several times.
Here, in the Source field, you should choose the “Repeater Field” option. After this, you should input the meta field name from the “Repeater” to the Object field / Meta field / Repeater key / Component prop field.
Other widget settings can be customized, e.g., we enable the Customize field output and add a text before the ‘%s’ value in the Field format.
To display the “Media” field value (image), we enable the Filter field output toggle and pick the “Get image by ID” Callback.
You can adjust the content and style settings for the Listing and push the “Publish” button.

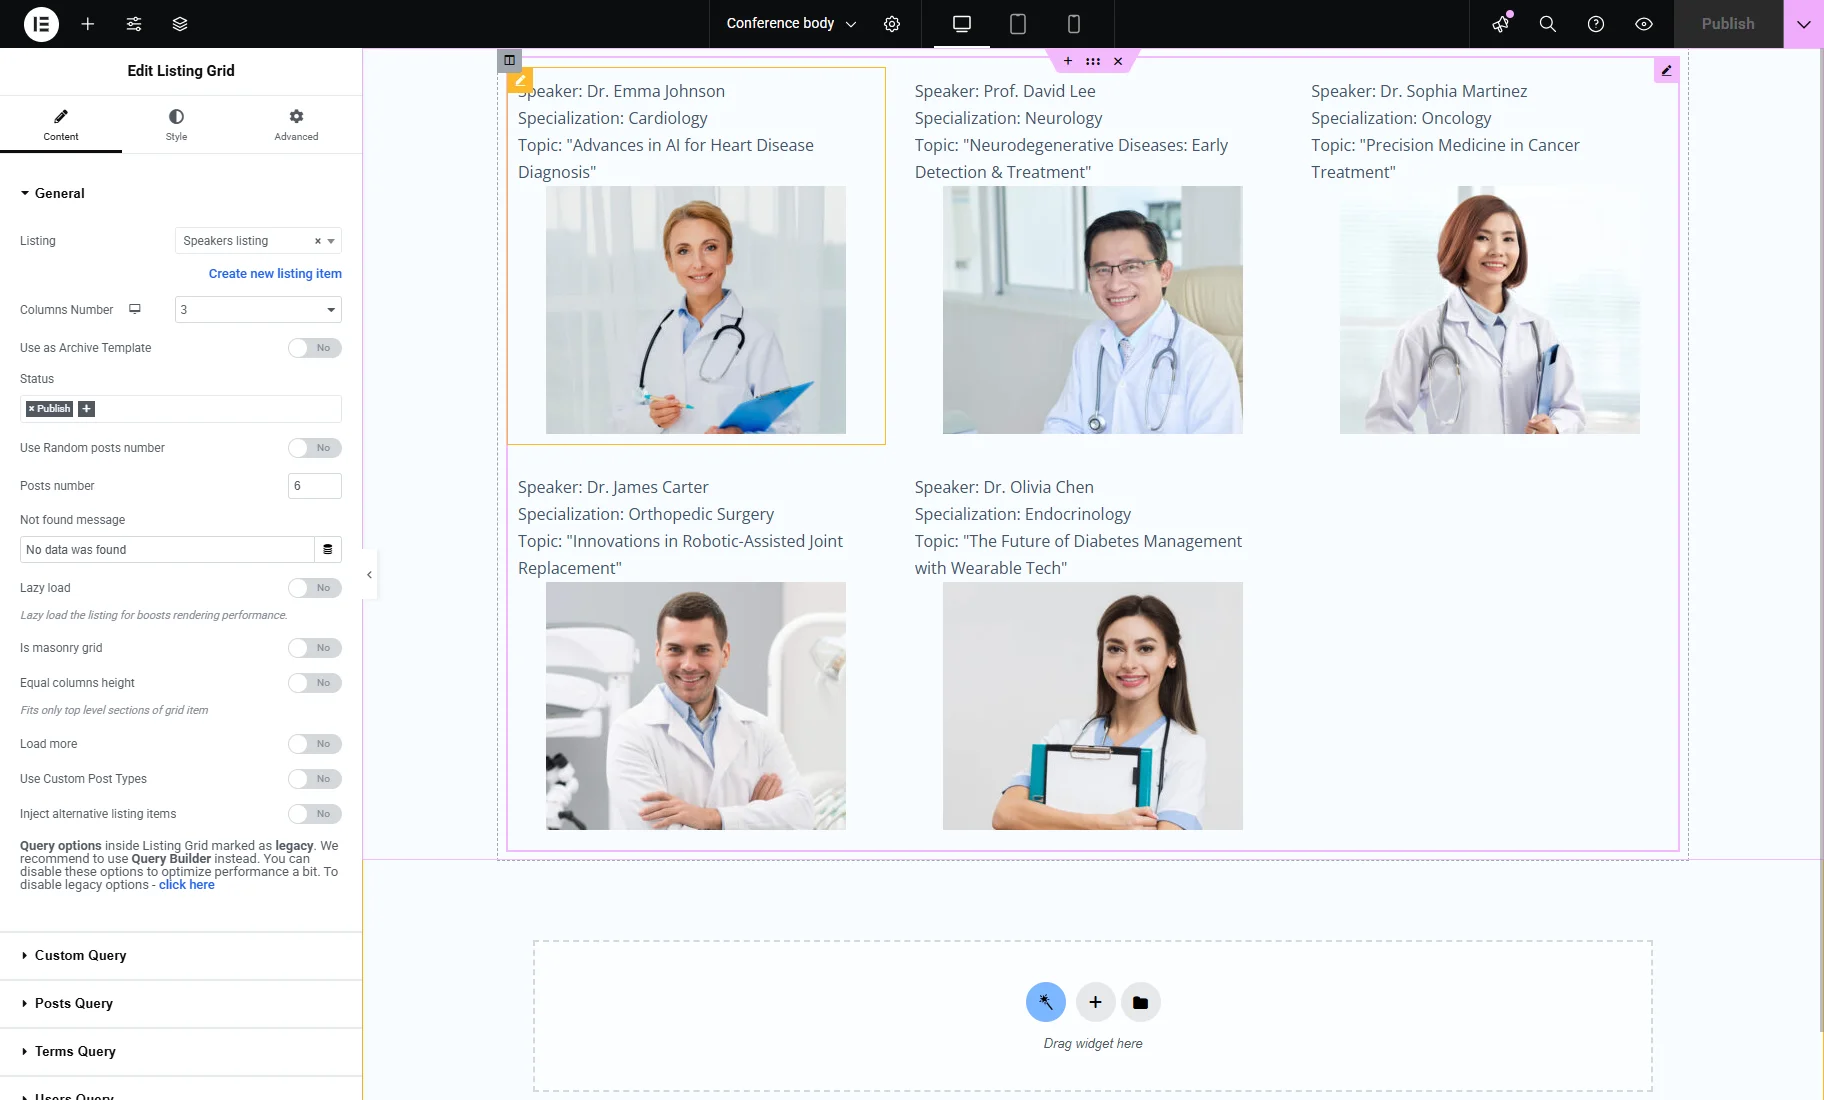
Apply the Listing Grid
After you prepared your Listing Template, you can display it with the Listing Grid widget. Use the Single Post template functionality available in JetThemeCore, Elementor Pro, etc. For example, we open the Single Post template created with JetThemeCore in Elementor and drop the Listing Grid widget.
Select the Listing you previously created for the “Repeater” meta field, and find those repeater items you added to your post on the backend, which are displayed in the form of a grid.
That’s all. Now you know how to create a JetEngine Listing template for “Repeater” meta field and showcase the repeater items on the Single Post template on WordPress website.