Creating a smooth shopping experience is essential for any online store. Customers expect to find exactly what they’re looking for without endless scrolling through hundreds of products. This is where JetSmartFilters comes in, a powerful WordPress plugin that transforms how visitors interact with your WooCommerce store by adding intelligent, customizable filtering options.
What Is JetSmartFilters?
JetSmartFilters works perfectly with Elementor, letting you build advanced product filters without writing any code. Whether you operate a fashion boutique, electronics shop, or any eCommerce site with a varied inventory, JetSmartFilters helps your customers easily narrow down their choices based on their preferences.
Before diving into specific filter types, let’s understand why JetSmartFilters stands out:
- enhanced UX as customers locate products more quickly;
- no code filtering systems with Elementor widgets;
- AJAX-powered performance with filters that update instantly;
- flexible customization to adjust filter styles and match your brand.
Now let’s explore the specific filters that make JetSmartFilters so effective.
Basic Product Filtering Options
Let’s start with the basic set of filters that can help users find products.
Search filter type
The Search filter works particularly well when combined with other filtering options. For example, when searching for a “sweater,” users can refine results with additional criteria (filters) such as size, price, or color.
To create a new filter, go to WordPress Dashboard > Smart Filters > Add New, and then select Search filter.
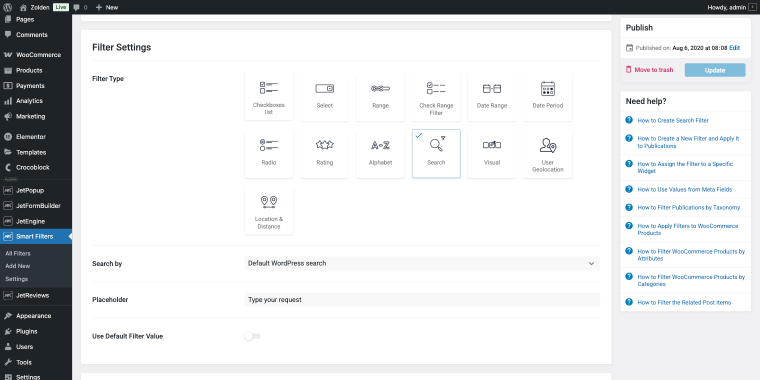
This filter type can search by “Default WordPress Search” or “By Custom Field”; choose whichever best suits you.
To add the filter to your Shop page template, use the Search Filter widget and select the previously created filter in the Search filter field.
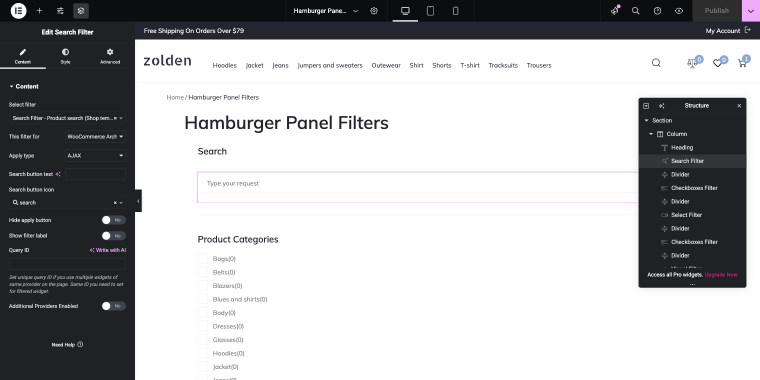
The field titled This filter for should contain the page where you will use your special set of filters on the front end. This, along with the other filters in this guide, will be used on the Shop page, which is why the “WooCommerce Archive (by JetWooBuilder)” option is selected.
Front-end presentation of the Search filter looks like the following:
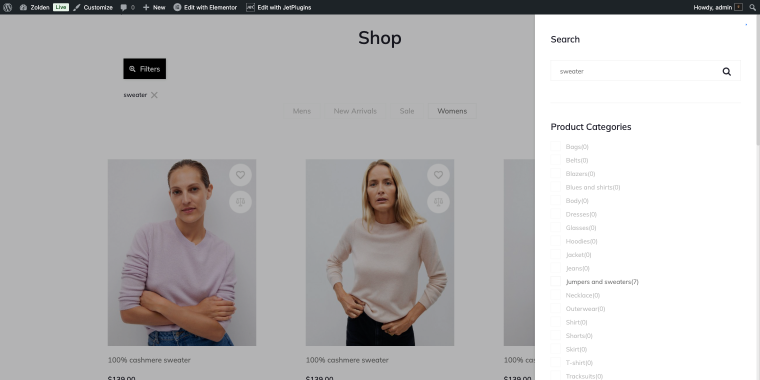
While search helps customers find products by name, they often need to browse by category. This is where our next filter type comes in handy.
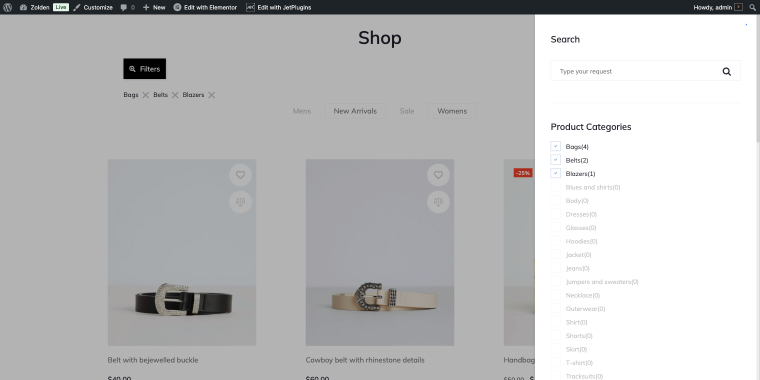
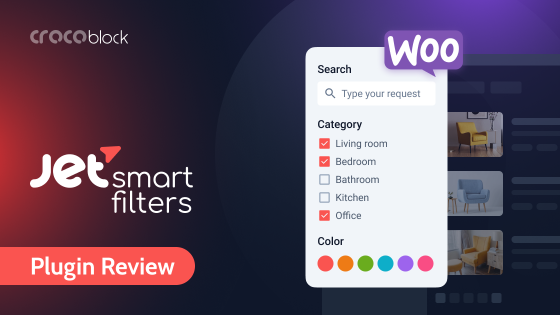
Checkboxes list filter type (for filtering by product category)
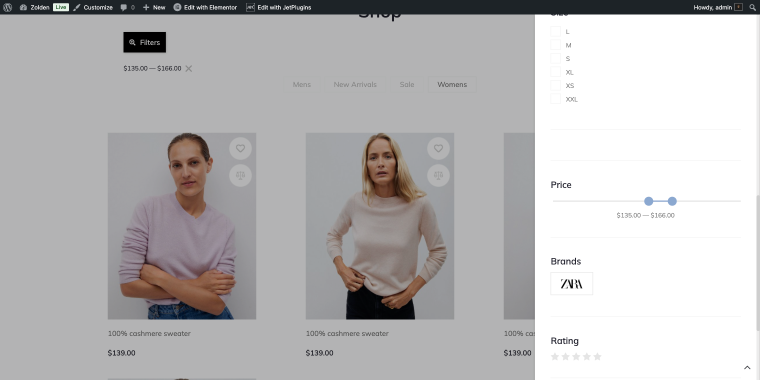
The Checkboxes list filter lets customers select multiple categories simultaneously. For example, a shopper looking for outdoor gear can view products across the “Bags,” “Belts,” and “Blazers” categories without running separate searches.
Assuming we already have a system for product categories in our WooCommerce store, we’ll skip creating one and proceed directly to setting up a product categories filter.
To create a new filter, go to WordPress Dashboard > Smart Filters > Add New, then select the Checkboxes list filter.
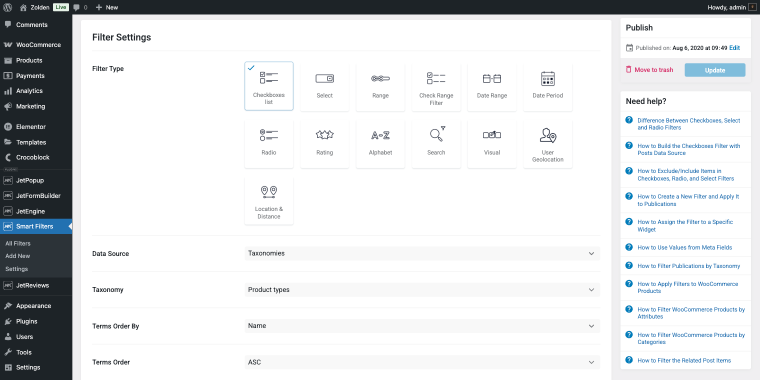
To display product categories, select the “Taxonomies” option in the Data Source field and the “Product types” option in the Taxonomy field.
The checkbox format is straightforward and familiar to most online shoppers.
To display this filter on the front end, use the Checkboxes Filter widget and select the previously created filter in the Search filter field.
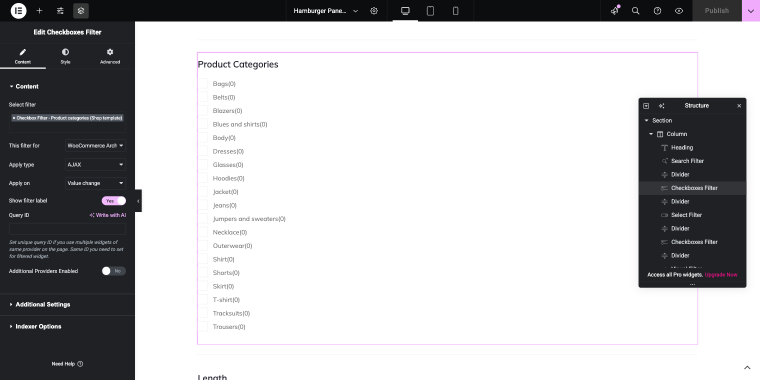
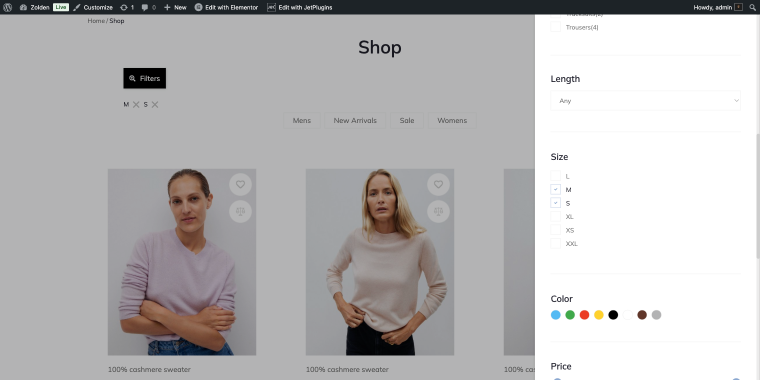
On the front end, the Checkboxes list filter will look like this:
Besides browsing by category, price usually influences most purchase choices. Let’s explore how to help customers manage their budget.
Range filter type (for filtering by product price)
The Range filter isn’t limited to price; it can filter any numeric product attribute, such as product dimensions, weight, or quantity. This makes it valuable across different store types. When you filter WooCommerce products by price, you’re providing a feature that modern shoppers expect.
To create a new filter, go to WordPress Dashboard > Smart Filters > Add New and select the Range filter.
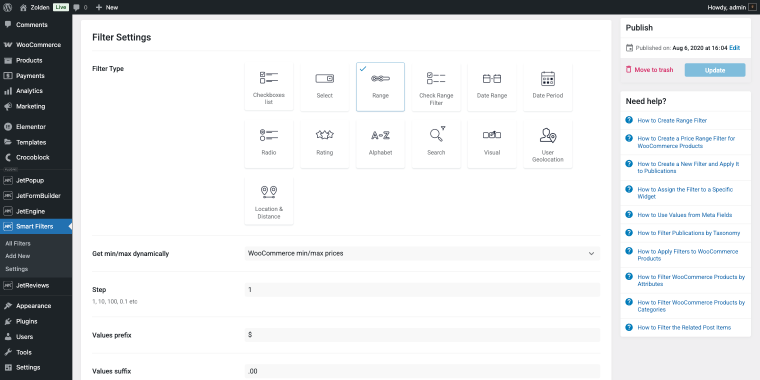
To enable filtering by prices in the Get min/max dynamically field, select the “WooCommerce min/max prices” option. Other settings are quite simple, including prefix, suffix, and so on.
To display this filter on your WooCommerce page, use the Range Filter widget. It offers an elegant slider interface that allows customers to set their budget limits.
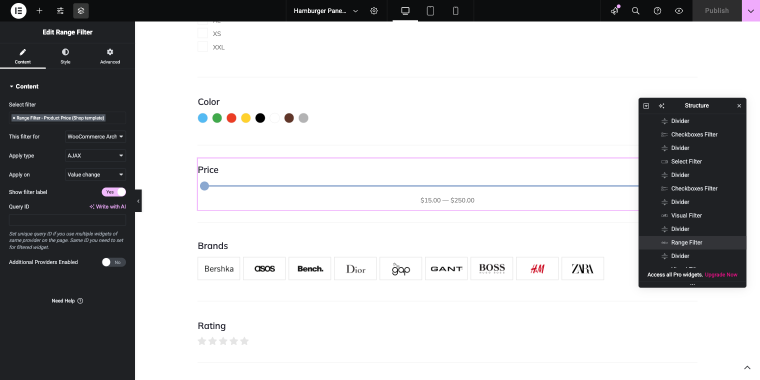
The front-end presentation of the Range filter is pretty common for this type of filter.
Price matters, but quality is just as important. After customers determine their budget, they often seek reassurance that they’re purchasing a quality product. That’s where ratings come into play.
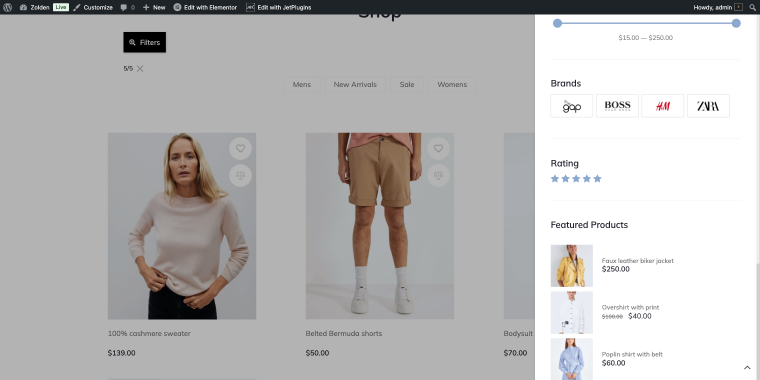
Rating filter type (for filtering by product rating)
The rating filter works with JetReviews or standard WooCommerce reviews, integrating with your existing review infrastructure. In our Knowledge Base, you can learn more about JetReviews configuration.
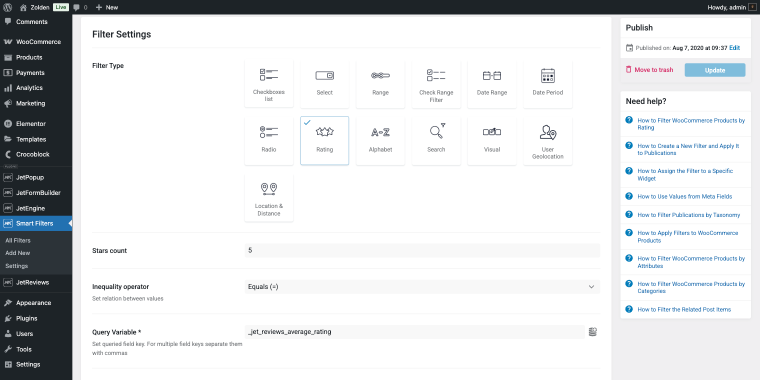
To create a new filter, go to WordPress Dashboard > Smart Filters > Add New and select the Rating filter.
Customer reviews heavily influence buying decisions. The Rating Filter widget lets shoppers filter products by customer ratings, helping them quickly identify highly rated items.
This filter typically displays ratings as star icons (1-5 stars), allowing customers to set minimum rating thresholds. For instance, selecting “5” stars instantly shows only products that meet this quality standard.
Product Attributes Filtering
The filters we’ve covered so far (search, categories, price, and ratings) form the foundation of any good filtering system. However, the real magic happens when you dive deeper into product-specific characteristics with the WooCommerce filter by attribute.
Let’s explore the types of filters we can use to help site visitors filter store inventory by product attributes.
Visual filter type (for filtering by product brand)
The Visual filter allows the user to filter store inventory by product attribute brand.
Before creating a new filter, we need to add a corresponding product attribute with images so we can filter our products by brand. The process is pretty straightforward:
- go to WordPress Dashboard > Products > Attributes;
- create a new attribute (in our case, image), fill the Name and Slug fields, and click the “Add attribute” button;
- in the list of attributes, click the “Configure terms” button to add actual brand terms (like “Asos,” “Bench,” “Bershka,” “Boss”) one by one by filling the Name and Slug fields and clicking “Add New Brand.”
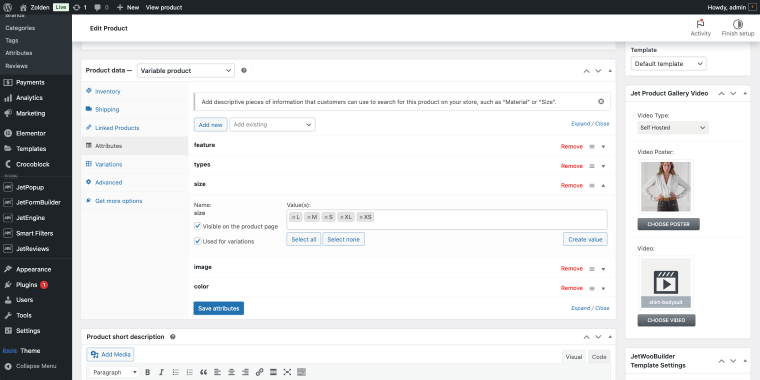
Add the brand attribute to corresponding products, edit any product, go to the Products data section, Attributes tab, then select your brand attribute in the “Select existing” dropdown field.
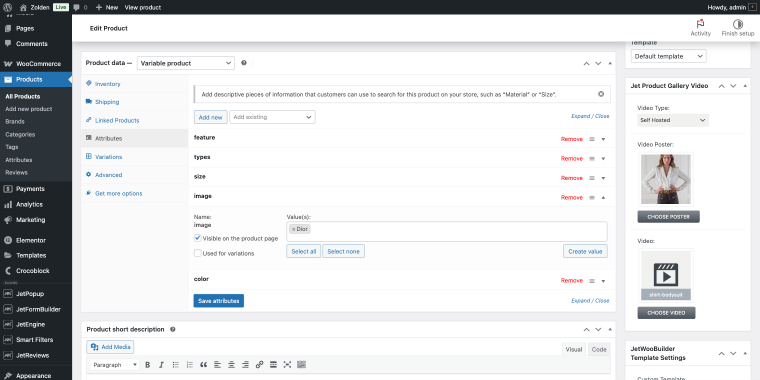
When done, click “Update” to save the product. After updating the WooCommerce products, we can create a new filter.
To create a filter, go to WordPress Dashboard > Smart Filters > Add New and select Visual filter.
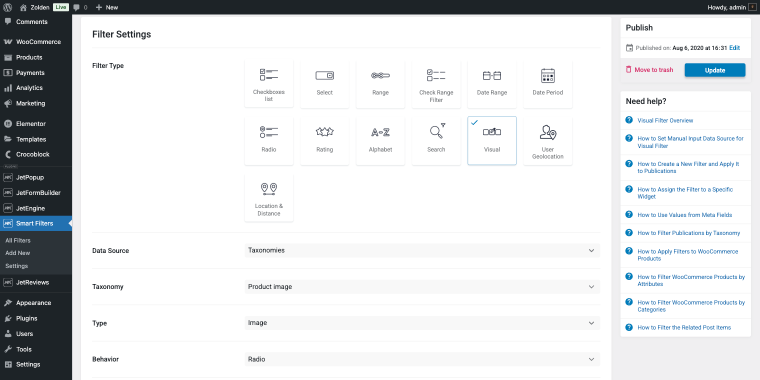
The filter will have the following settings:
- in the Data Source field, select the option “Taxonomies”;
- in the Taxonomy field, choose the option that corresponds to the brand image attribute;
- the Type field allows choosing between “Image” and “Color.”
The Visual filter type will allow us to display a set of images representing brands from our store inventory. The filter settings have an Options List section that needs to be filled with up-to-date brand logos and their labels.
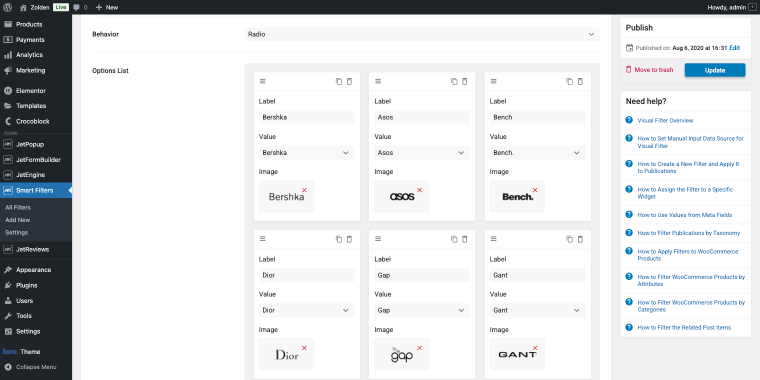
- Label field is for the brand name;
- Value field, select the corresponding brand attribute name;
- Image field, add the brand logo.
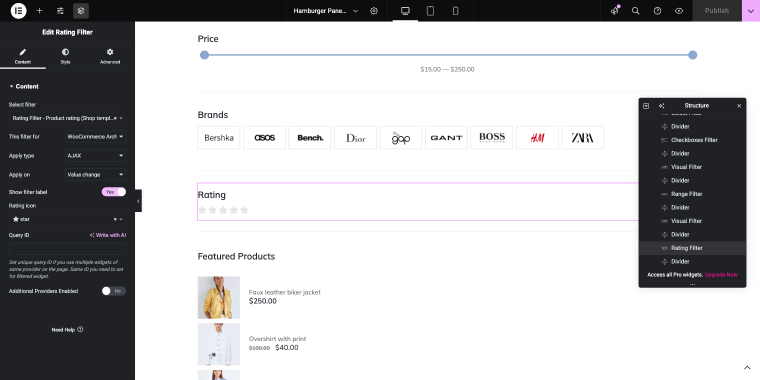
To present this filter in the front end, we’ll use the Visual Filter widget.
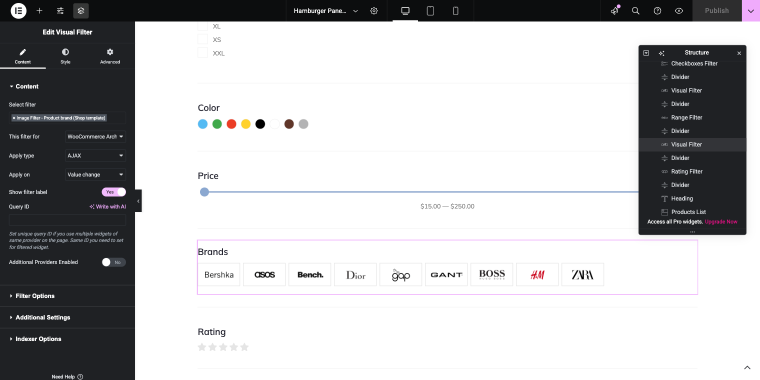
So when a customer is shopping for clothes, they might immediately spot and select “Zara” by their recognizable logo rather than scrolling and guessing.
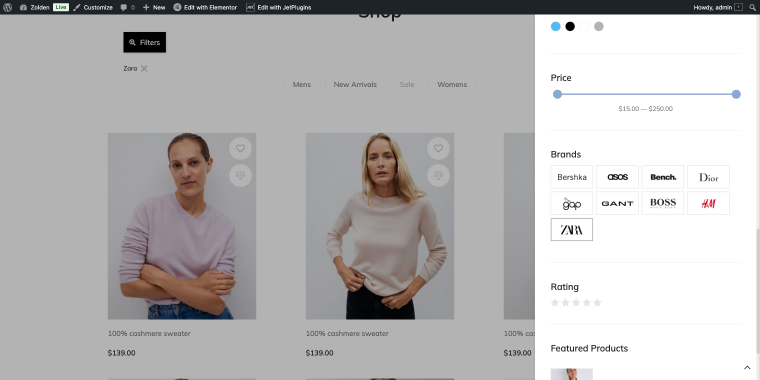
Similarly, you can create a filter that sorts products by color. The only difference is that in the Filter Settings, Type field, select “Color,” and in the Options List section, instead of the images, add your color options.
For attributes that don’t require visuals, such as sizes, a simpler method is more effective. Let’s examine how checkboxes manage these text-based attributes.
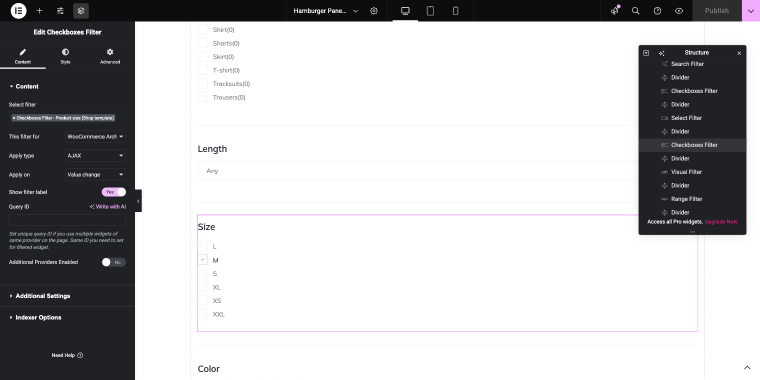
Checkboxes filter type (for filtering by product size)
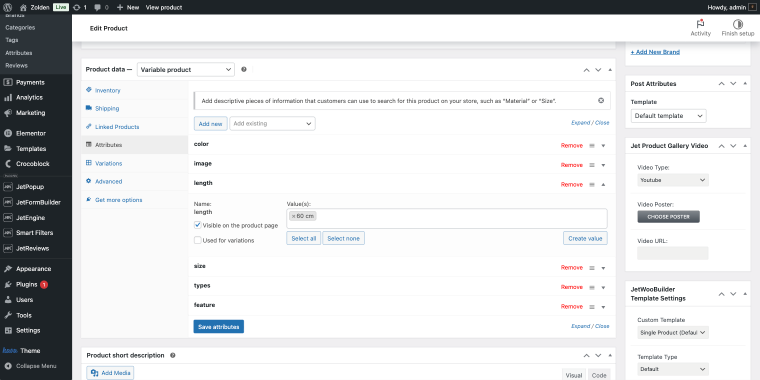
This filter type allows the user to filter store inventory by the product attribute size, displaying a checkbox list of size options. In the previous section, we talked about the Checkboxes filter; this time, we’ll create a filter for the product attribute size. If you have a clothes store, make sure you have a corresponding attribute to represent the array of sizes. The flow described in the previous step will help you create a new product attribute.
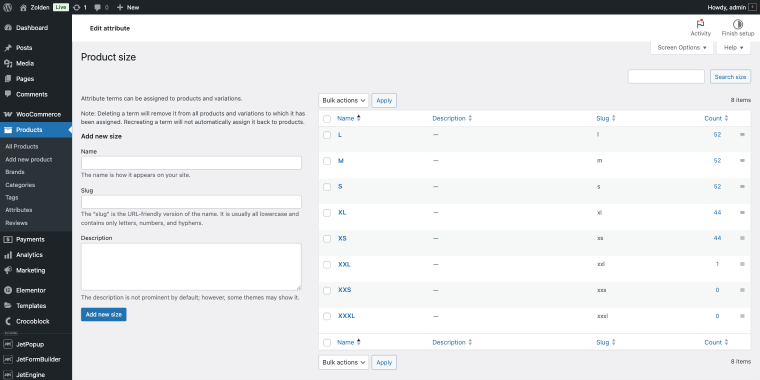
After adding the attribute, you need to update your products to ensure filtering works:
- go to WordPress Dashboard > Products > All Products;
- open the product editor, scroll down to the Products data section, Attributes tab, then select your brand attribute in the “Select existing” dropdown field (repeat for the rest of the products).
Now we can create a filter that helps users sort products by size attribute. To add a new filter, go to WordPress Dashboard > Smart Filters > Add New and select the Checkboxes list filter.
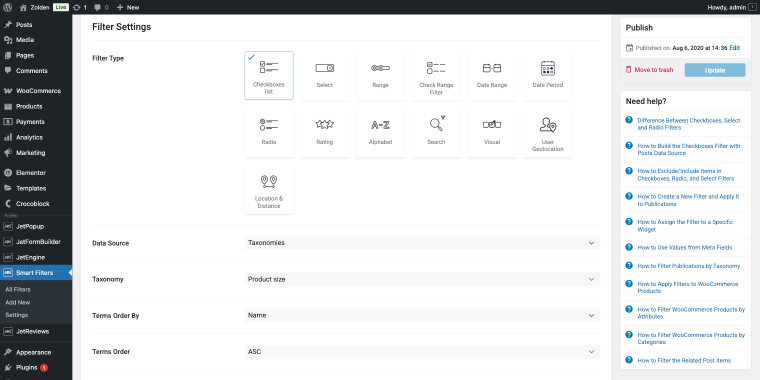
The filter will have the following settings:
- in the Data Source field, select the option “Taxonomies”;
- in the Taxonomy field, choose the option that corresponds to the brand image attribute.
To add this filter to the front end, use the Checkboxes Filter widget.
For apparel stores, this filter is essential, as it prevents customer frustration when browsing products that aren’t available in their size. The ability to filter product by attribute WooCommerce functionality, like size, ensures customers only see relevant options.
Checkboxes work well when you have a manageable number of options. But what happens when an attribute has dozens of possible values? That’s when dropdown selects become the better choice.
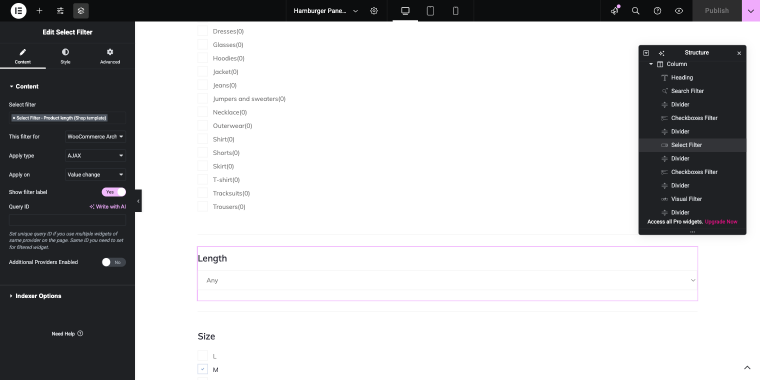
Select filter type (for filtering by product length)
For attributes with numerous options or where single selection is appropriate, the Select Filter provides a clean dropdown interface. After creating a new attribute length and updating your products with this attribute, we can move on to creating a filter.
Now we can create a filter that helps users sort products by the length attribute. Go to WordPress Dashboard > Smart Filters > Add New and select the Select filter.
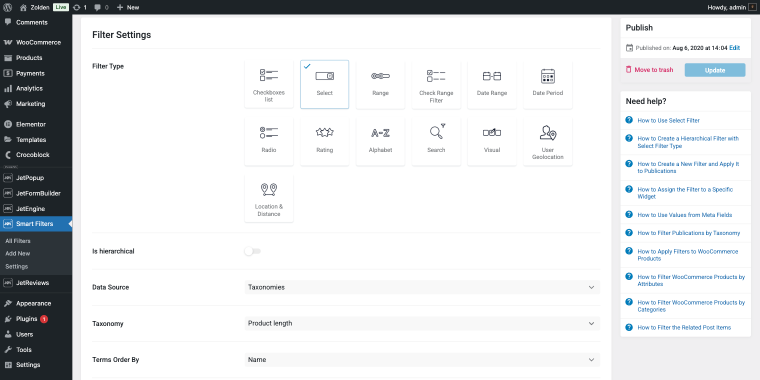
The filter will have the following set of settings:
- in the Data Source field, select the option “Taxonomies”;
- in the Taxonomy field, choose the option that corresponds to the product length attribute.
To present this filter in the front end, we’ll use the Select Filter widget.
On the front end, the filter will be presented as a minimal select field.
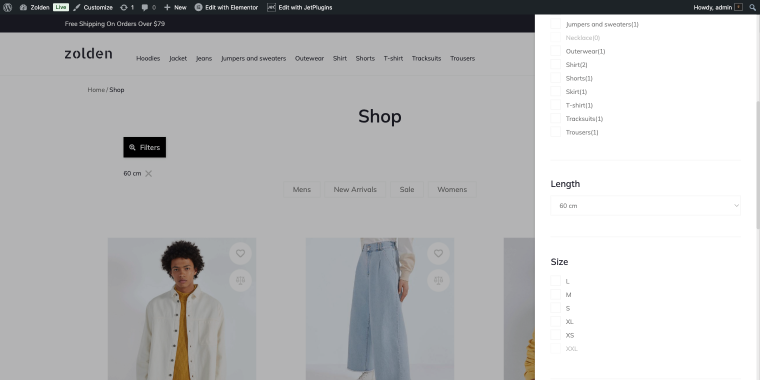
This filter works well for attributes such as product length, voltage specifications, model years, and other parameters where a dropdown makes sense.
For comprehensive guidance on setting up and customizing WooCommerce attribute filter options, check out this detailed tutorial on how to filter WooCommerce products by attributes.
Now that you understand each filter type and when to use it, let’s see how they work together to create a truly powerful search experience.
Combining Filters for Powerful Search
The true power of JetSmartFilters lies in multiple filters working together. Customers might:
- set a price range (~$90);
- select brand preferences (“Asos”);
- choose their size (“S”);
- filter by color (“Black,” “White”).
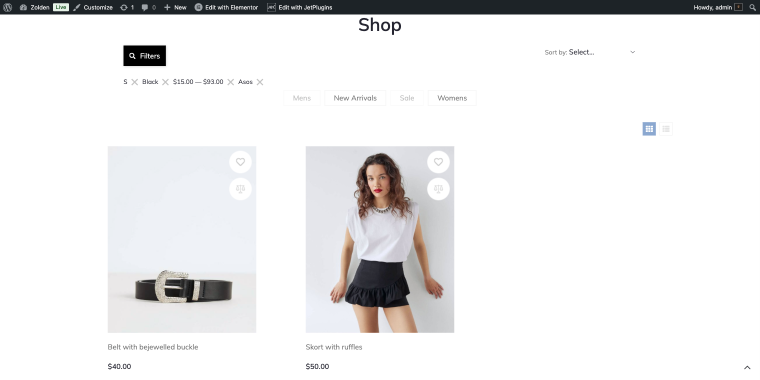
With each selection, the product grid updates instantly via AJAX, showing only items matching all criteria. This layered filtering approach mirrors how customers naturally think about purchases, making it intuitive and efficient. The combination of WooCommerce attributes filtering creates a powerful product discovery system.
FAQ
With JetSmartFilters, adding a WooCommerce price range filter is straightforward. Simply install the plugin, create a new filter using the Range Filter widget, select “Price” as the data source, and add the widget to your product page using Elementor. The filter automatically detects your product price ranges and creates an interactive slider that updates results in real-time without page reloads.
Yes, JetSmartFilters excels at multi-attribute filtering. You can combine as many attribute filters as needed – customers can filter by attribute WooCommerce products using size, color, brand, material, and any custom attributes simultaneously. Each filter selection further refines the results, and the AJAX-powered system ensures smooth performance even when multiple filters are active.
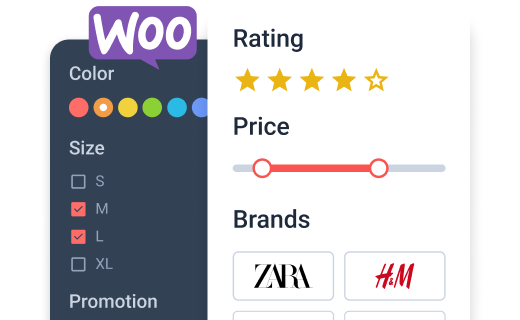
These three filter types offer different user experiences for attribute filtering. Visual filters display options as images or color swatches (ideal for brands, colors, or styles), Checkboxes allow multiple selections with clear visual indicators (perfect for sizes or features), and Select filters use dropdown menus to save space (best for attributes with many options). Choose based on your attribute type and available page space to create the most intuitive WooCommerce product filter by attribute experience.
Conclusion
JetSmartFilters transforms your WooCommerce store from a simple catalog into an intelligent product discovery system. By implementing Price, Rating, and Attribute filters using various Elementor widgets, you create a shopping experience that respects your customers’ time and preferences.
Whether you’re helping customers filter by price WooCommerce products to stay within budget, enabling them to WooCommerce filter by attribute to find exact specifications, or highlighting quality through ratings, JetSmartFilters provides all the tools you need. The plugin’s comprehensive approach to WooCommerce attributes filtering ensures every product characteristic becomes a searchable, filterable criterion.
The combination of intuitive Elementor widgets, flexible customization options, and powerful filtering logic makes JetSmartFilters an essential tool for any serious WooCommerce store owner aiming to improve their site’s functionality and user experience. The result is higher customer satisfaction, lower bounce rates, and ultimately, increased conversions through smarter product filtering.
