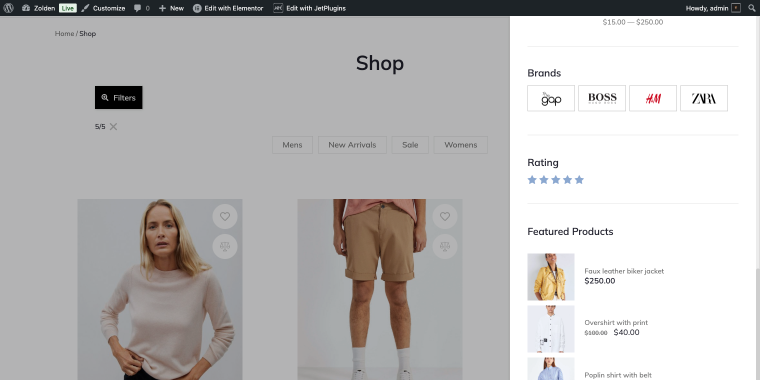
When shoppers land on your WooCommerce store with hundreds or thousands of products, they need one thing above all else: the ability to find exactly what they’re looking for, fast. This is where the product filter for WooCommerce transforms from a nice-to-have feature into an absolute necessity for conversion optimization.
Product filters are navigation tools that let customers narrow down your catalog by specific criteria (price ranges, colors, sizes, brands, ratings, and more). They’re the difference between a frustrated visitor bouncing away and a satisfied customer adding items to their cart.
Why Product Filtering Matters for Your Store
Think about the last time you shopped on Amazon or any major eCommerce site. You probably didn’t scroll through pages of results: you filtered. Modern online shoppers expect this functionality, and stores without proper filters for WooCommerce are at a significant disadvantage.
The impact of the WooCommerce filter is measurable in:
- reduced bounce rates as customers quickly find relevant products;
- higher conversion rates when shoppers narrow options to their needs;
- improved UX encouraging return visits;
- fewer support inquiries about product availability;
- enhanced mobile shopping experience through organized navigation.
For store owners, filters also provide valuable data about customer preferences and shopping behavior, helping you optimize inventory and marketing strategies.
6 Popular Filter Types Every WooCommerce Store Should Consider
Different product categories and customer bases require different filtering approaches. Here are the most effective JetSmartFilters filter types that stores may implement to filter WooCommerce products.
Range filter
🎯 Best for all stores, particularly those with wide price variations in similar product categories.
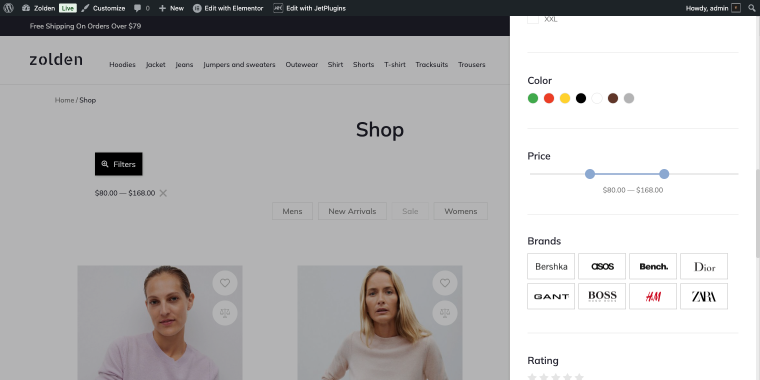
The Range filter is the most universal filter across all eCommerce stores. Customers set minimum and maximum price points and instantly view products within their budget. This prevents sticker shock and helps shoppers stay within spending limits while browsing.
Checkboxes filter
🎯 Best for stores with multiple brands, fashion and apparel, electronics, and any catalog with diverse product attributes.
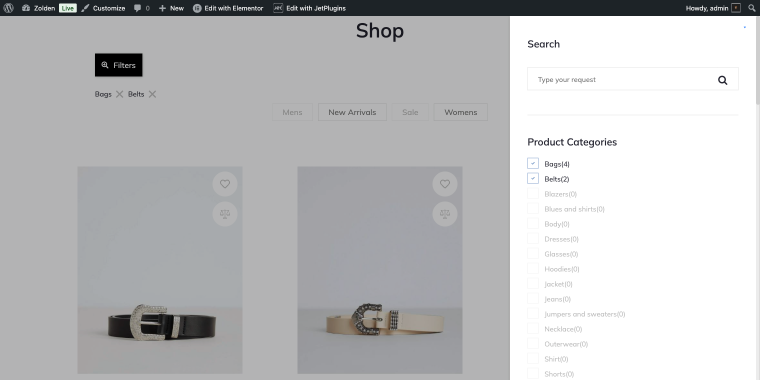
The Checkboxes filter type can pull from various data sources, including taxonomies, making it a convenient option for creating category filters alongside product attributes.
Also, it’s perfect for attributes with multiple options, such as brands, colors, materials, or features. Shoppers can select various criteria simultaneously (to show products from brands A, B, and C).
Radio filter
🎯 Best for product condition, shipping methods, stock status, or any single-choice scenarios.
Having a Radio filter on a shop page means customers must choose one option from a set, such as product condition (new/used/refurbished) or availability status. Radio buttons provide clear, mutually exclusive choices.
Rating filter
🎯 Best for stores with robust review systems, particularly in categories where quality varies significantly.
The Rating filter lets customers filter by product ratings and reviews to quickly find highly rated items. This builds trust by allowing social proof to guide purchasing decisions.
Search filter
🎯 Best for stores with extensive brand catalogs, technical products with model numbers, or any large attribute sets.
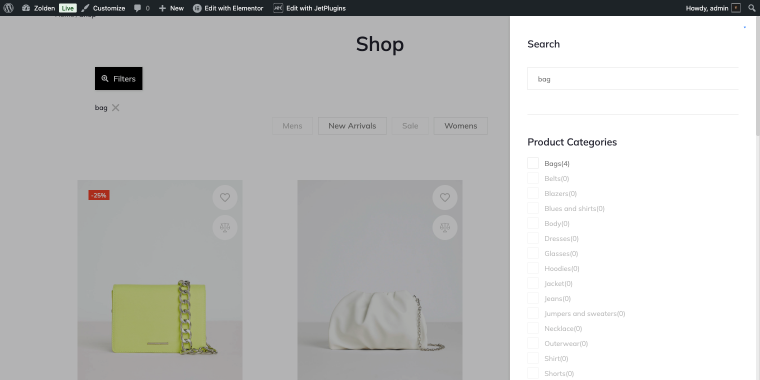
The Search filter box within specific attributes allows customers to quickly find brands, models, or specific product names without scrolling through long lists.
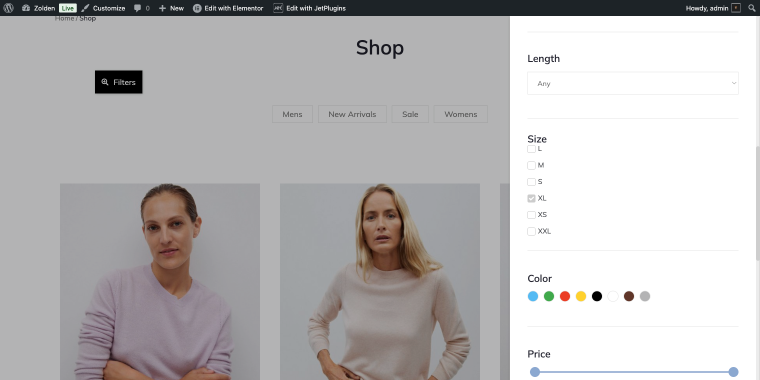
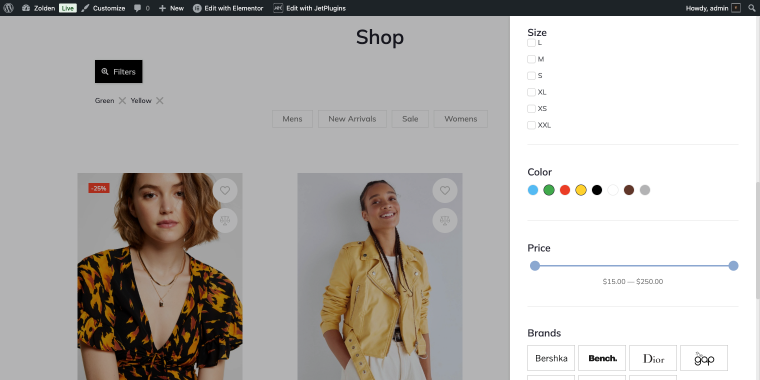
Visual filter
🎯 Best for apparel, furniture, cosmetics, paint, home improvement, art, and decor.
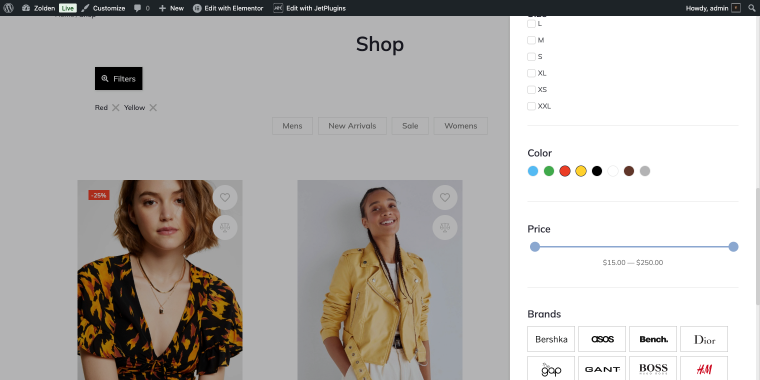
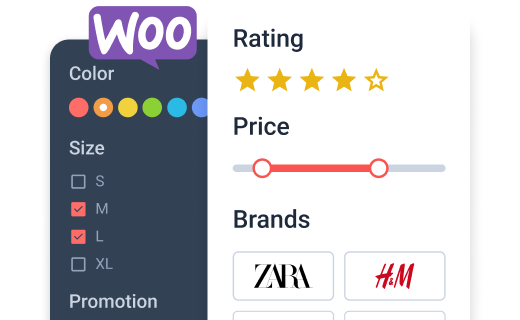
The Visual filter enables the display of actual color swatches or product images instead of text labels. This is especially useful for fashion, home décor, and any visually oriented shopping.
Now, let’s try to build a color filter for our women’s fashion store that will filter product inventory by color.
Creating Effective Product Filters Using JetSmartFilters
Now that we know which filters to implement, let’s look at how to add them to your WooCommerce store using JetSmartFilters, a powerful WooCommerce product filtering plugin designed specifically for WordPress and WooCommerce environments. As an example, we’ll create a product color filter that allows users to sort products by the Color attribute.
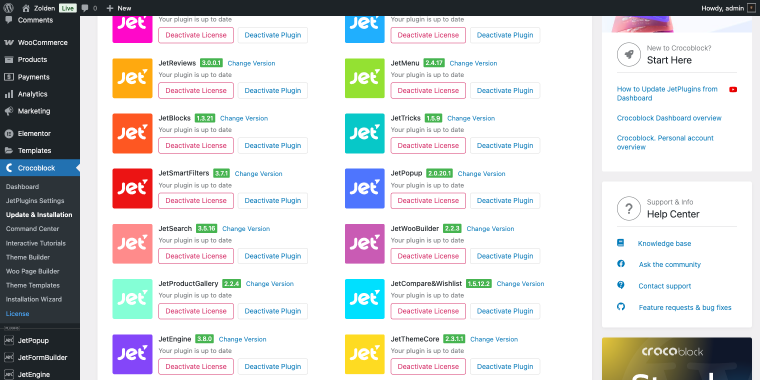
Step 1: Install and activate JetSmartFilters
Install the JetSmartFilters plugin through your WordPress Dashboard > Crocoblock > Update & Installation section. The WooCommerce filter plugin integrates seamlessly with WooCommerce and popular page builders like Elementor, Gutenberg, and Bricks, as well as other Crocoblock plugins.
Step 2: Choose your filter types
When the plugin is installed and activated, go to WordPress Dashboard > JetSmartFilters > Add New. Here you can select which filter types you want to create. Since we’re building a color filter, choose the Visual filter type.

Remember to give your filter a clear, sensible name.
Step 3: Configure filter settings
Since our filter will sort the products by color, we need to fine-tune it accordingly. Here’s a list of settings that will help you create an effective color filter.
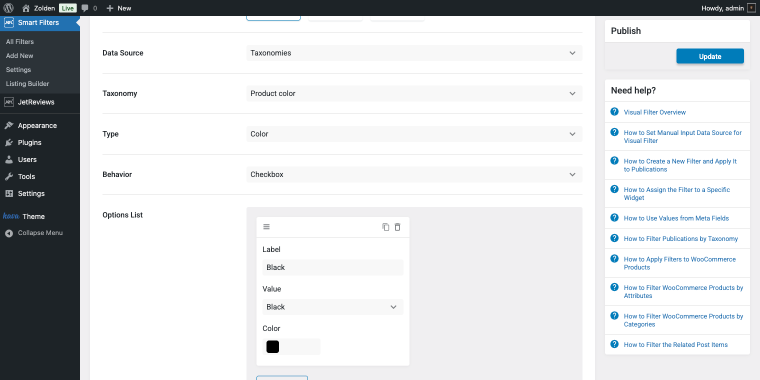
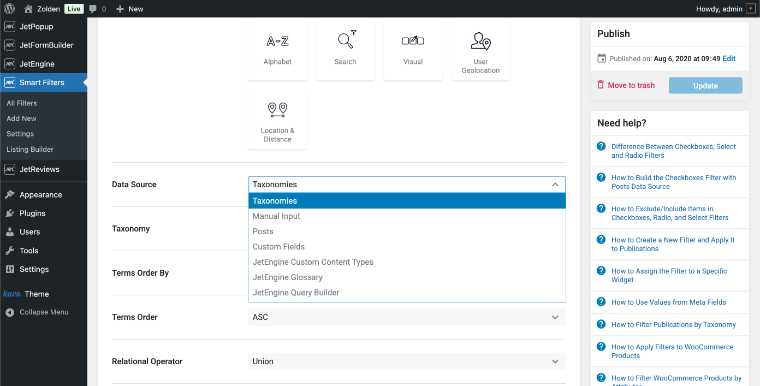
- Data Source – choose the option “Taxonomies” (when selected, it will reveal a corresponding set of fields), as it determines where the filter pulls its data from. “Taxonomies” means it will use WooCommerce’s built-in classification systems, in our case, custom attributes;
- Taxonomy – choose the option “Product color,” which specifies which taxonomy to filter by;
- Type – the option “Color” defines how the filter options will be displayed. This option shows visual color swatches instead of text labels, making it easy for customers to identify colors at a glance;
- Behavior – the option “Checkbox” allows multiple color selections simultaneously, so shoppers can view products in several colors at once (e.g., show red AND blue items).
- Options List – in this section, we’ll add the color filter options by clicking on the“Add New” button. The Label field contains the color name, and the Value field contains all available color options (created as product attributes).
If your WooCommerce store lacks a specific product attribute, you need to create one. Feel free to refer to these articles, which walk through the step-by-step process:
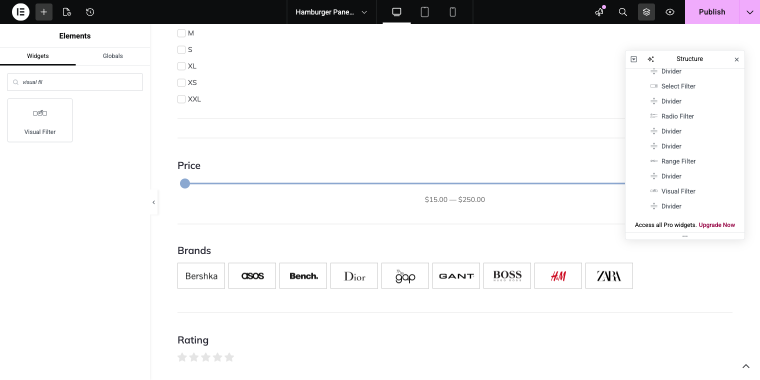
Once you’ve configured these basic settings in the filter creation panel, it’s time to add the Visual Filter widget to your product page or shop archive using Elementor.
Step 4: Place the filter widget
NOTE
The JetSmartFilters plugin supports 13 filter types; there’s a corresponding widget that lets you add each of those filters to your front end.
Use your page builder to position filters exactly where it makes sense (in the sidebar, above product grids, or in a mobile-friendly slide-out panel). JetSmartFilters provides widgets that integrate natively with Elementor, Gutenberg, and Bricks. Open your page or section with your editor, in this case, it’s Elementor. In the widget panel, use the search to find the Visual Filter widget, and then simply drag it onto the page.
The Content tab of the widget includes straightforward settings to fine-tune it.
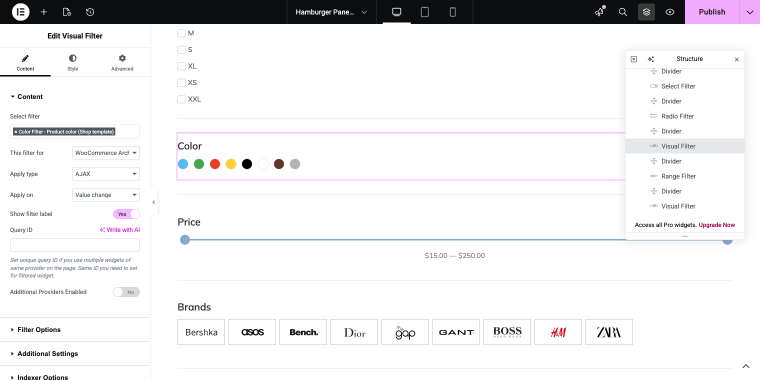
- Select filter – in this field, choose which pre-configured filter to display. This dropdown lists all filters you’ve created, allowing you to select the specific color filter you want to add to this page;
- This filter for – this field defines what type of content this filter will affect. “WooCommerce Archive (by JetWooBuilder)” means it will filter products on shop pages, category pages, and other product listing pages created with JetWooBuilder;
- Apply type – this field determines how filtering results are displayed: “AJAX,” “Page reloads,” or “Mixed.” Enable AJAX to update results instantly without page reloads. This creates a smooth, app-like experience that keeps customers engaged;
- Apply on – this field controls when the filter activates, the “Value change” option means products are filtered immediately when a customer selects or deselects a color, without requiring a separate “Apply” button click;
- Show filter label – this field toggles the visibility of the filter’s title/heading. When set to “Yes,” it displays a label such as “Color” or “Filter by Color” above the color swatches to help customers understand what they’re filtering by.
The Content tab of the widget has three more tabs with additional settings, including:
- Filter Options – with settings that let you show or hide item labels next to color swatches and adjust the size of color images (thumbnail, medium, or full) to match your design needs;
- Additional Settings – that enable search to let customers quickly find specific colors, activate “More/Less” to collapse long color lists, use dropdown mode for compact display, or enable scrolling for filters with many options;
- Indexer Options – this set of settings manages filter performance and data display. The Apply Indexer switch enables pre-processing of the filter data to improve load speed for large catalogs. Show Counter displays product counts next to each color; If Item Empty controls whether colors with no products are hidden or shown, and Change Counters determines when product counts update based on other active filters.
Step 5: Customize the widget’s styling
Finally, you can move on to the Style tab to adjust colors, fonts, spacing, and layouts to match your brand. The plugin provides extensive styling options while maintaining fast load times.
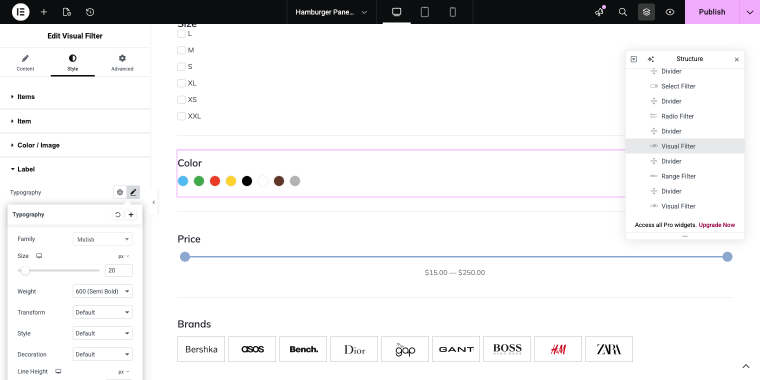
Let’s preview the color filter made with JetSmartFilters’ Visual Filter widget.
When choosing which filters to add, don’t overwhelm visitors with too many at once. Begin with the top 3-5 most relevant filters for your products using a reliable WooCommerce product filter plugin, then expand based on customer behavior.
A well-balanced filter set might include a Search Filter widget for quick product lookup by name or keyword, a Checkboxes Filter widget to sort products by categories or brands with multi-select capability, and a Visual Filter widget to display color swatches or other visual product attributes that help customers identify their preferences at a glance.
Make sure multiple filters work together logically with your WooCommerce filter products plugin. If someone filters by “Brand A” and “Color: Blue,” they should see all blue products from Brand A, not zero results.
FAQ
Start with 3-5 essential filters based on your product attributes (or price, category, and other important product characteristics). Too many product filter WooCommerce options can overwhelm customers, while too few limit their ability to find products quickly. Add more filters gradually based on customer behavior and feedback.
Well-implemented Elementor product filters with AJAX functionality and proper indexing actually improve performance by reducing the amount of data loaded on each page. The key is choosing a solution optimized for speed, like JetSmartFilters, which pre-processes filter data to ensure fast results even with large catalogs.
Yes, when implemented correctly. Filters should generate clean URLs that search engines can crawl, and filtered pages should remain accessible without JavaScript. This allows search engines to index your products through various filter combinations, potentially ranking for more specific search queries that match those filtered views.
Conclusion
Product filtering isn’t just a technical feature; it’s a customer service tool that operates 24/7, guiding every visitor toward products they’ll love. The stores that implement filtering thoughtfully, with attention to user experience and performance, consistently outperform competitors who treat it as an afterthought.
Start with the essential filters your customers actually need. Test and refine based on real usage data. Pay attention to which filter combinations are most popular and ensure those paths work flawlessly. Over time, your filtering strategy should evolve with your catalog and customer base.
The goal isn’t to have the most filters; it’s to have the right filters, implemented well, that make product discovery feel effortless. When customers can find exactly what they want within seconds of landing on your site, everyone wins: they get a better shopping experience, and you get more conversions.

