Displaying posts the way you want in WordPress isn’t always as simple as it should be. Whether you’re showcasing blog posts, listings, or products, you need a way to control what appears, in what order, and how it looks. That’s where the custom post loop comes in – it’s what determines how WordPress pulls and displays your content.
Traditionally, tweaking the post loop meant messing with code. While that gives full control, not everyone wants to dig into code just to adjust how their posts appear. Luckily, JetEngine’s Listing Template tool, in other words, the custom loop template, makes this process way easier. Instead of writing queries and HTML/CSS from scratch, you get a visual interface to fine-tune your post layouts, apply filters, and customize the display – without touching a single line of code.
In this article, we’ll explain how to set up a custom post loop using JetEngine, covering the key settings and best practices for making your content shine.
Table of Contents
What Is a Custom WordPress Loop Template?
WordPress’s loop is what makes your site display content – whether it’s a list of blog posts, any custom post types, a product catalog, or a single post template. Simply put, it’s a piece of PHP code that asks the database for posts and shows them one by one, repeating the process until it’s done fetching everything that matches the set conditions.
Think of it like a kid running into the kitchen asking, “Is there a chocolate cookie with raisins?” If there is, they grab one and head outside. But they keep coming back until all the chocolate cookies with raisins are gone. That’s exactly how the WordPress loop works – it keeps pulling in posts until there’s nothing left to show.
The idea of a custom WordPress loop template
A Custom WordPress Loop Template is basically a personalized way of displaying posts, terms, and users on your site. By default, WordPress uses the Loop to pull posts from the database and show them on the front end. But sometimes, the standard setup isn’t enough, and that’s where a custom loop comes in.
With a custom loop, you can tweak how posts appear – whether you want them in a grid, a slider, or something entirely unique. You can filter posts by category, tag, or even custom taxonomies, ensuring only specific content shows up. It also gives you control over the number of posts/terms/users displayed, lets you sort them by custom fields, and even improves performance by optimizing database queries. As a result, it’s a way to make your WordPress site work exactly the way you want it to.
💡 Read more about WordPress Loop in this article.
Custom Listing Template by JetEngine Explained
The term “listing” in JetEngine can be a bit confusing since it’s commonly associated with directory-style websites. Actually, you can create them quite easily using JetEngine and the tool we are discussing in this article.
However, in JetEngine, “listing template” specifically refers to a custom loop template used to display dynamic content in a structured way.
If you are new to JetEngine but have used Elementor Pro and the Elementor Loop Builder tool, it’s a very similar instrument, but it has much more powerful functionality when it comes to querying content and designing the template.
First, you choose what will be displayed, style the individual dynamically populated item, and display it as a grid, list, or carousel.
This is a simple demonstration of how fast and straightforward it is to create a post grid for blog posts. You can also add any custom field here and style it the way you want:
How to create a JetEngine Listing Template and Listing Grid (content loop)
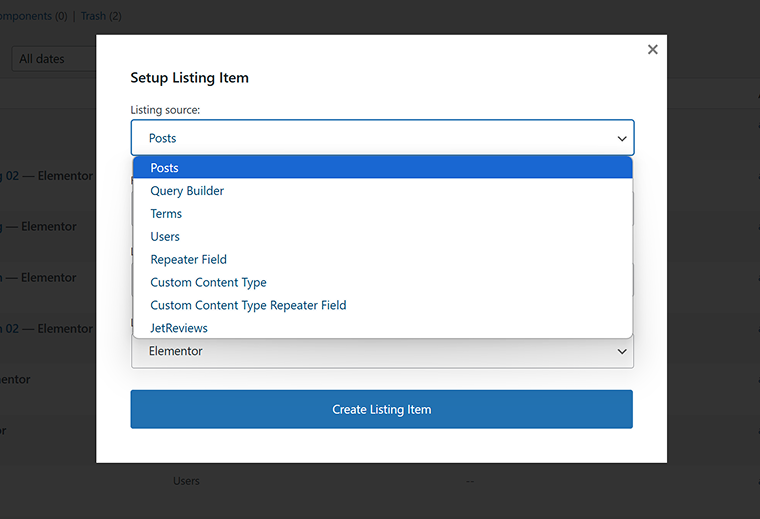
To create a Listing Template, go to JetEngine > Listings/Components and add a new listing. By default, it will be a Post listing, but you can choose among other options in the Source dropdown:
- Query Builder – for more refined querying of content for the Listing Template;
- Terms – for categories, tags, and custom taxonomy terms;
- Users – for users;
- Repeater field – for repeaters;
- Custom Content Type – for Custom Content Type (CCT), the unique JetEngine entity; to use it, make sure the CCT module is activated in JetEngine > JetEngine.
There may be other options, depending on the plugins installed on your website or JetEngine’s modules – for example, JetReviews to display reviews or REST API endpoint to display data from remote sources.
After that, choose a particular post type, taxonomy term, CCT, or repeater field. Then, give it a name and select an editor.
There are four editors available:
- Elementor (if it’s installed);
- Block Editor;
- Bricks (if you use Bricks Builder);
- Timber/Twig (if it’s activated in JetEngine > JetEngine > Performance tab).
When it comes to the latter option, it’s a great way to create a highly performance-oriented listing using HTML and Twig markup. If you’re focused on website speed or planning to build nested listings, this is the best choice. You can also combine Timber/Twig listings with other builders – for example, you can insert a listing template made with Timber/Twig into a page built with Elementor.
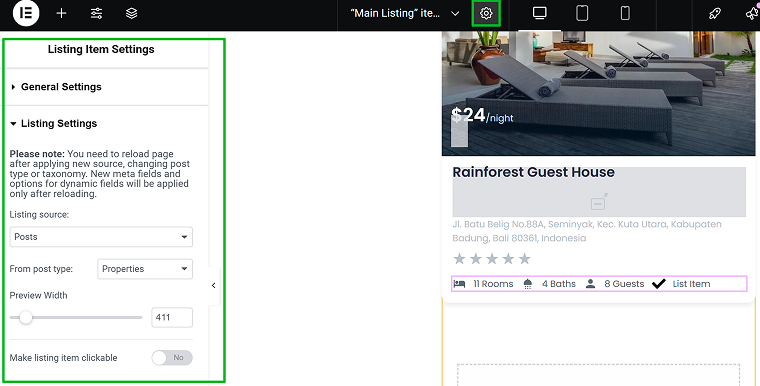
Step #1: listing item settings
Before creating a listing template, go to the Settings tab and select the preview width for greater convenience. By default, the full-width preview layout will be used, but most probably, the items will be displayed in a grid after all, so it’s better to have a similar preview size.
Also, you can add a permalink to the whole item section and make it clickable.
There, in Settings, you can also change the listing source.
Step #2: dynamic widgets and tags
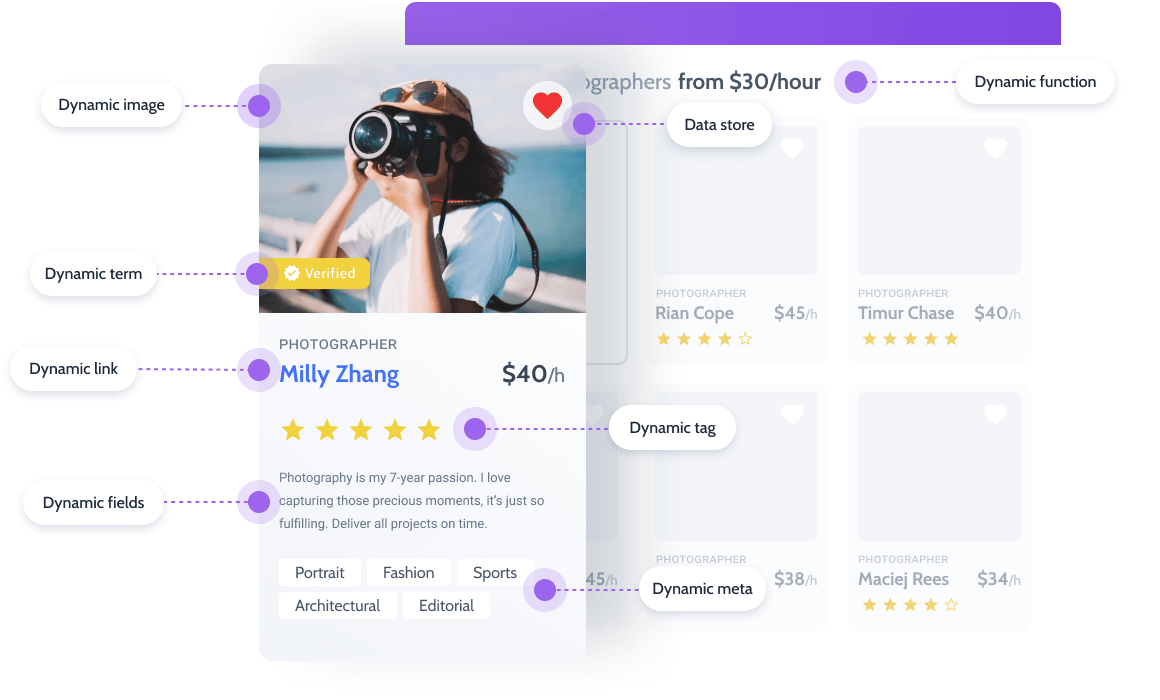
Listing templates are created just like any other section of a website. However, they are templates first and foremost, meaning they contain dynamic content that changes for each item.
JetEngine offers a choice of dynamic widgets/blocks for adding dynamic elements. These elements pull data from the meta fields or objects you specify. For example, if you have a “price” meta field storing product prices, selecting this field as the widget’s data source will ensure that each product automatically displays its correct price.
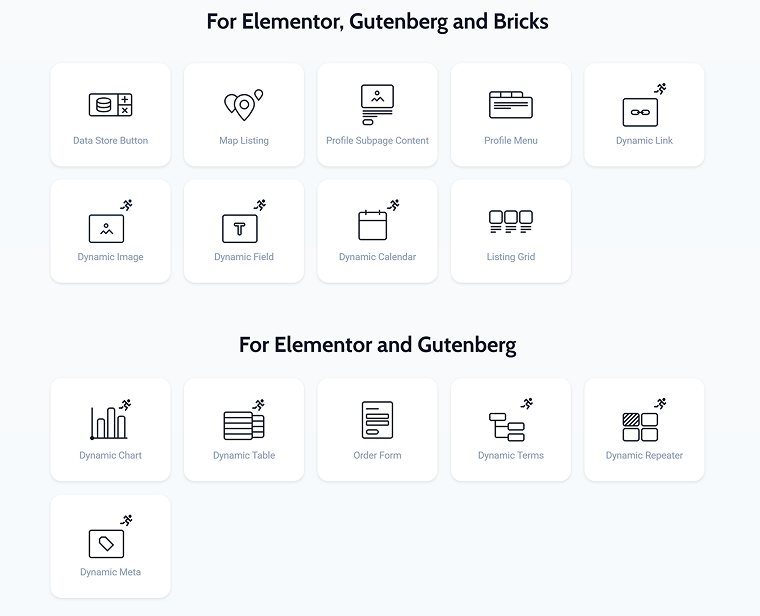
The following widgets are used the most:
- Dynamic Field – the universal one, used for displaying any text from meta fields and objects but also for fetching icons and images with the help of one of the callbacks in the “Filter field output” section.
- Dynamic Image – for displaying thumbnails or images from selected meta fields. It has controls specifically for images: resolution, size, lazy load, and link.
- Dynamic Link – for adding permalinks or links from the specified meta fields. You can add an icon, attributes, query arguments, and fetch the label dynamically. Mostly used for creating dynamic buttons.
- Dynamic Terms – for displaying terms (categories and tags) of the chosen taxonomy. You can set up a layout, delimit, and add links using it.
- Dynamic Meta – for adding metadata, such as author, publishing date, and number of comments. You can set up the layout and add links as well.
- Dynamic Repeater – for pulling out content from repeater fields.
- Listing Grid – this widget is used not for building but for displaying elements that use Listing Templates. I will show you how it works in the next section.
These widgets are used in more specific cases when the corresponding modules are activated:
- Dynamic Calendar – presents date-related content in a calendar layout.
- Map Listing – displays address-based data from meta fields as markers with pop-ups on a dynamic map.
- Dynamic Table – fetches dynamic tables.
- Dynamic Chart – fetches dynamic charts.
- Data Store Button – allows users to add or remove items from Favorites or Wishlists, storing the data in cache or the user’s profile.
- Profile Menu – displays a profile menu; the widget is a part of the Profile Builder module.
- Profile Subpage Content – displays user profile subpage content; a part of the Profile Builder module.
- Order Form – a legacy widget replaced by the JetFormBuilder plugin.
Using these widgets/blocks, you can create a template for an individual item.
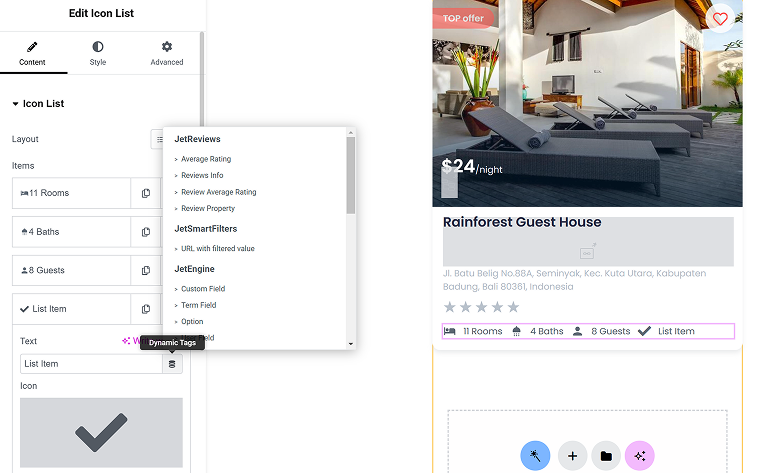
Except for the dynamic widgets I mentioned above, you can use JetEngine’s Dynamic Tag functionality, which allows you to insert dynamic content into other widgets/blocks.
For example, you can use the Icon List widget by Elementor. Instead of adding text manually, click on the database icon and choose a field to fetch the data. Using the Dynamic Tag functionality, you can even dynamically set up colors and backgrounds for icons or any container.
Dynamic Visibility is another cool tool for building listing templates. First, activate this module in JetEngine > JetEngine, and then enjoy the variety of settings for hiding or displaying elements depending on meta field or object values.
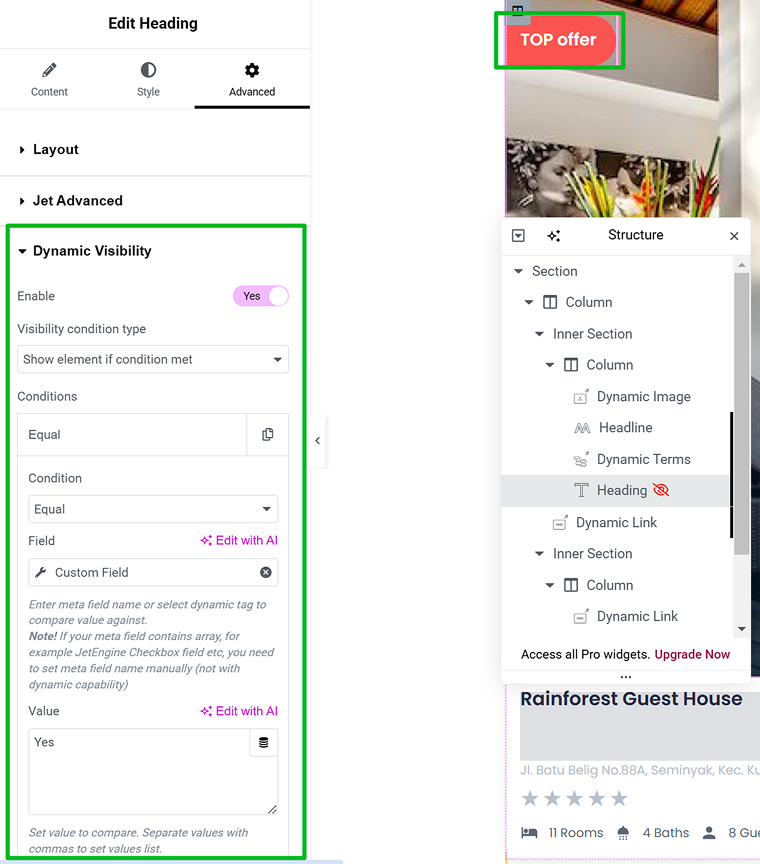
For example, you can display a Top Offer badge only if this meta field is selected on the backend. But that’s not all, as conditional visibility can be applied based on a user role, time of the day or particular period, post or terms relationship, a booking status (by JetBooking), appointment status (by JetAppointment), or specific WooCommerce values and statuses. Overall, there is a huge variety of options available that can also be combined.
Step #3: displaying listing items on a page
When the template for individual listing items is ready, the final step is to display items on a page or page template.
Listing Grid is the widget/block for doing it. Drag it into a page and select the listing template you created before. There, you can set up a number of posts and columns, choose between a grid (equal height is available) or carousel layout, and add a lazy load. There, you can also hide the grid if the query is empty (no posts to show).
One more cool thing there is that you can add a custom query on top of the grid for more refined fetching. Let’s say you created a listing template for a Property custom post type. But on the “Our Offers” page, you want to display only the properties that either belong to the “Features” category or have the “Features” meta field checked. No need to create a new listing – just go to JetEngine > Query Builder and add a new query where you can specify these parameters. Then, go back to the Listing Grid and add this query to the Custom Query section. This way, only featured posts will be displayed.
NOTE
First, you should create a listing template and then use a Listing Grid widget/block. Not vice versa, as the Listing Grid only displays existing listing templates.
When displaying a listing loop Using Query Builder, you can implement a wide variety of very interesting solutions. For example, you can show upcoming and past events, display a badge for posts published a certain number of days ago, change banners depending on the selected category, and do many other cool things.
Step #4 (optional): adding filters
Many content loops need filters, and you can definitely apply filters to the listing loop created as described above. Install the JetSmartFilters plugin and enjoy the powerful AJAX filter functionality that works smoothly with any layout of the content loop, be it a simple grid, table, calendar, etc. You can also add pagination instead of the “load more” functionality using this plugin.
💡 Read more about setting up filters for the JetEngine Listing Grid.
FAQ
Use the JetEngine plugin and its powerful functionality to create and display default and custom posts, taxonomies, custom meta fields, users, and other items that you might need on your site.
If you want to display custom categories for your listing website, build a listing template for categories and display it using the Listing Grid widget/block. All the functionality is provided by the JetEngine plugin.
Takeaway
Customizing the WordPress loop with JetEngine isn’t just about making your content look good – it’s about having full control over how it’s presented, filtered, and structured without the headache of coding. Whether you’re building a dynamic listing, showcasing products, or refining your blog layout, JetEngine’s Listing Template gives you the flexibility to shape your content exactly the way you want.
Instead of wrestling with PHP queries or complex template files, you get an intuitive interface that streamlines the process. You decide what content to display, in what order, and how it should appear – everything can be controlled using a visual builder. This not only saves time but also ensures your site stays efficient and easy to manage.
If you’re looking to break free from WordPress’s default limitations and craft truly dynamic layouts, JetEngine’s Listing Template functionality for creating custom loop templates is a game-changer. Once you get the hang of it, you’ll wonder how you ever built a WordPress site without it.
