How to Connect Filters with Providers Using Custom IDs
This tutorial is focused on connecting filters to different providers using custom IDs in the JetSmartFilters WordPress plugin.
Before you start, check the tutorial requirements:
- Elementor (Free version)
- JetSmartFilters plugin installed and activated
From the Filters Providers Overview article, you know everything about widgets, blocks, and elements that are filterable with the JetSmartFilters plugin. But the rules of connecting these widgets to the filters differ — this is what we focus on in this article. We will investigate how to apply custom IDs to different providers.
In this guide, we assume you know how to set up the filters and how to get the posts or products for the providers. Here we are focusing on connecting filters to providers to avoid many troubles with the filters’ work.
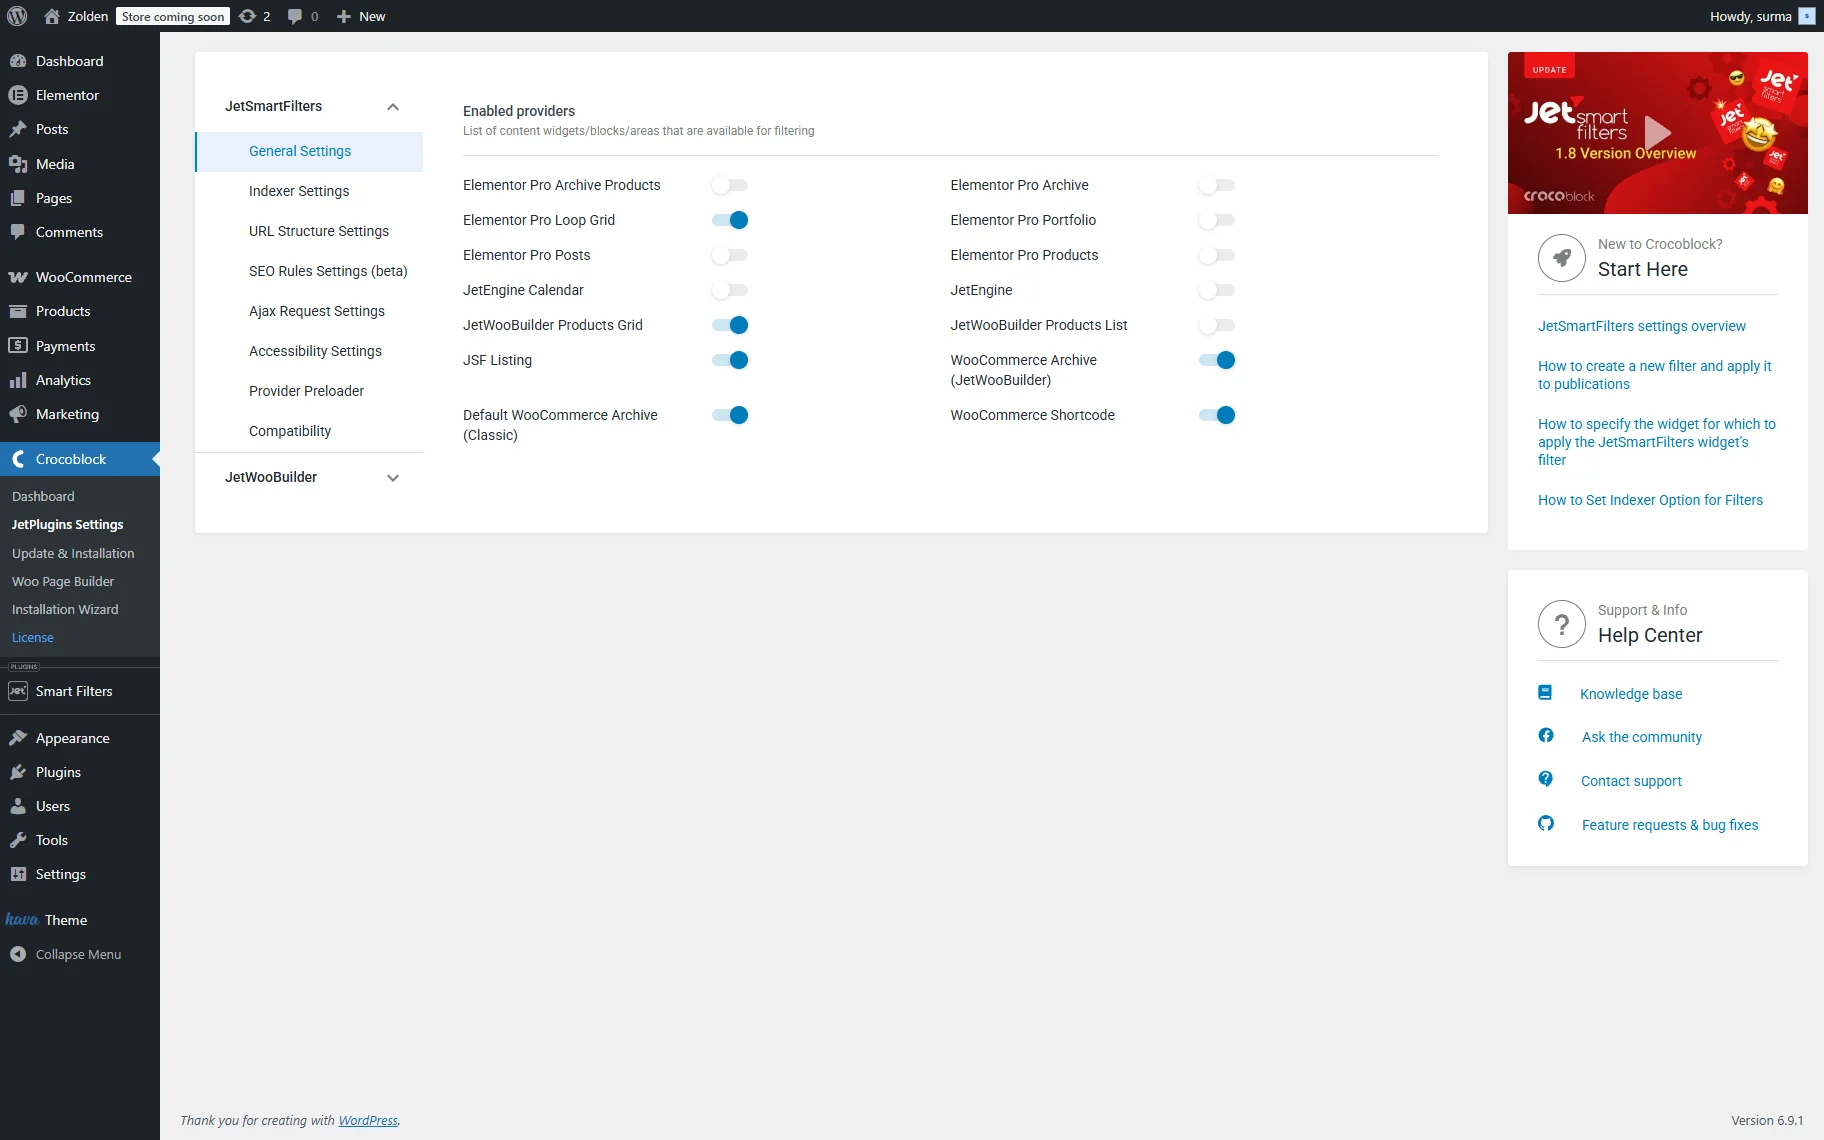
Remember to enable the needed providers in WordPress Dashboard > Smart Filters > Settings > General Settings.
Elementor Pro Providers
There are six widgets from Elementor Pro that can be filtered with the JetSmartFilters.
Elementor Pro Archive Products
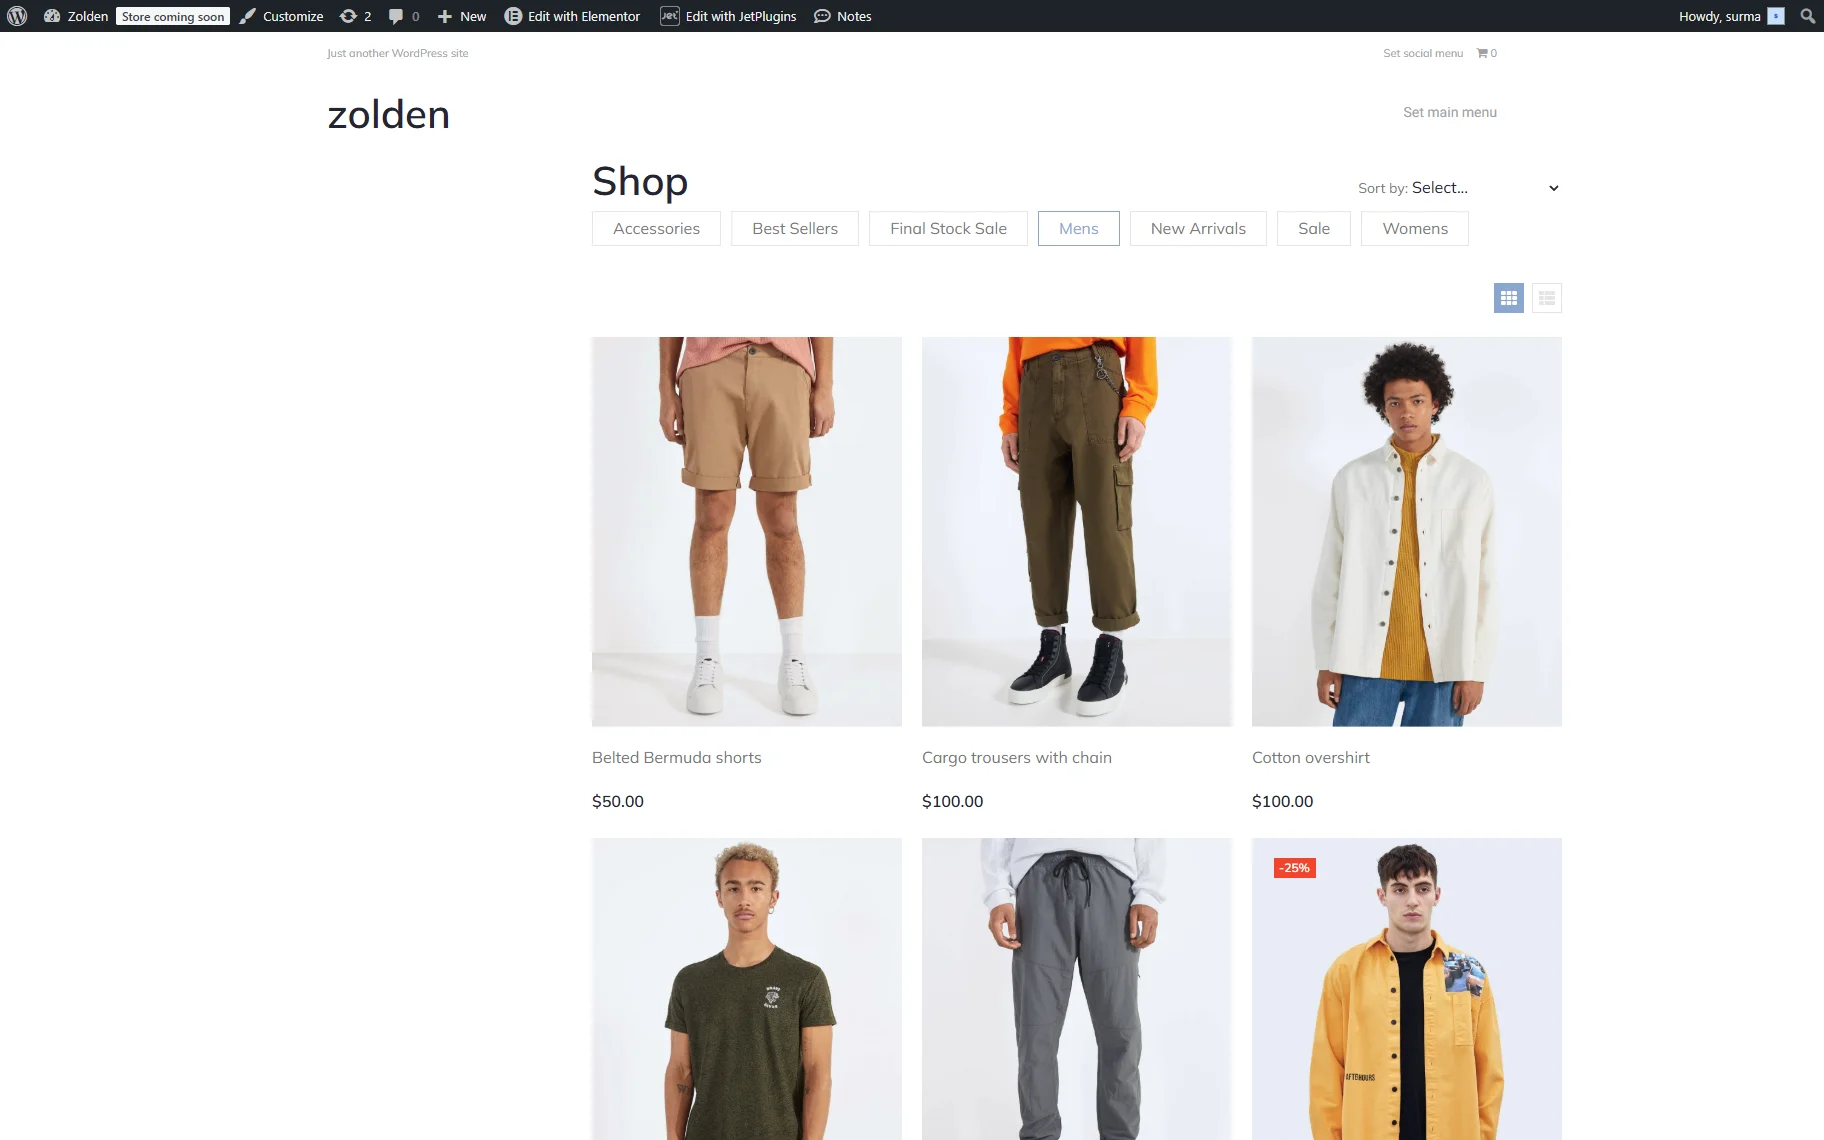
The “Elementor Pro Archive Products” provider allows filtering the Archive Products widget of Elementor Pro. Mind that the widget should be added to the shop archive page so the content is displayed.
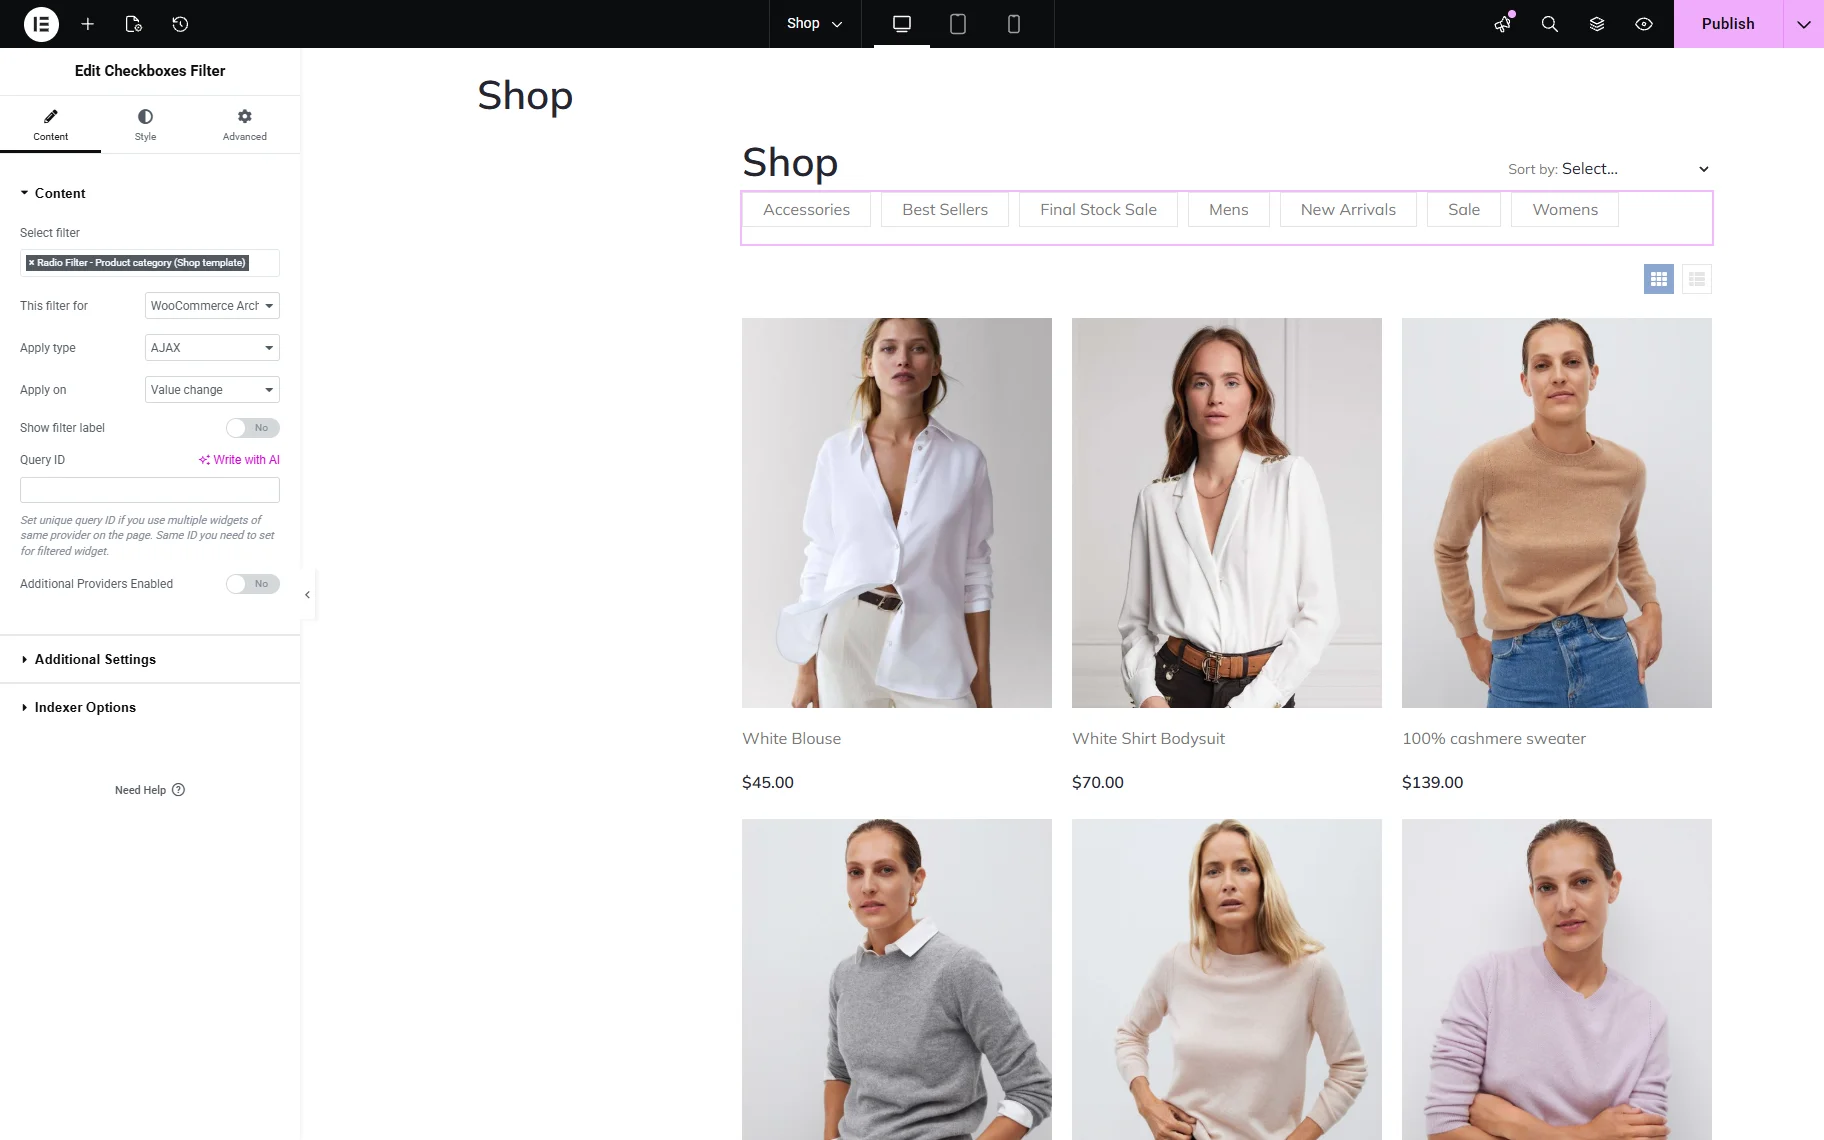
So, add the Archive Products widget and the desired filter (Checkboxes filter for the WooCommerce categories in this case).
Select the filter you created. For the This filter for field, select the “Elementor Pro Archive Products” provider. In the Query ID, enter the unique ID. Copy it and keep it for now.

Proceed to the Archive Products widget and open the Advanced settings section. In the CSS ID field, paste the Query ID you added to the filter.
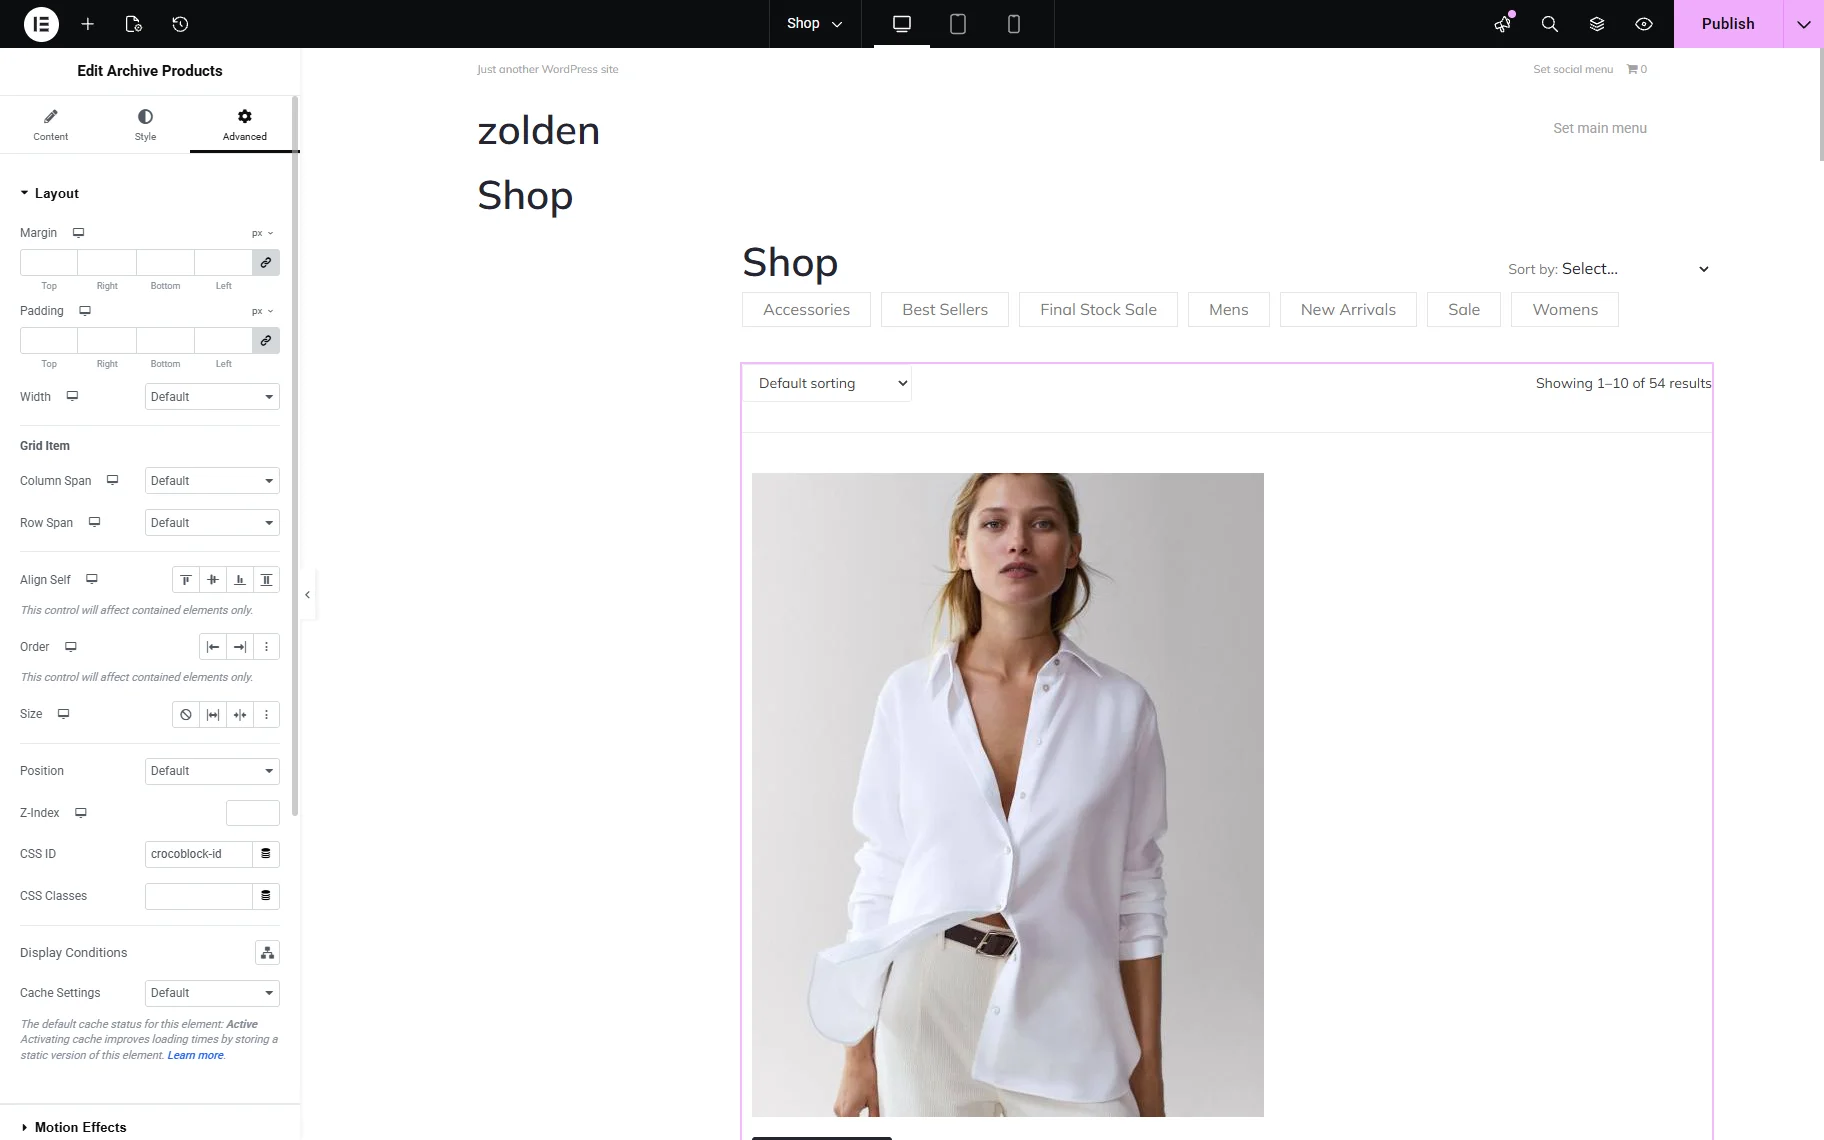
Save the settings and see that on the front end, the filter works properly, returning the products from the selected “Accessories” category.

Elementor Pro Archive
The “Elementor Pro Archive” provider is used to filter the posts in the Archive Posts widget of Elementor Pro. The Archive Posts widget displays a list of any posts within archive templates. The number of posts per page is controlled from the WordPress Reading settings (Dashboard > Settings > Reading).
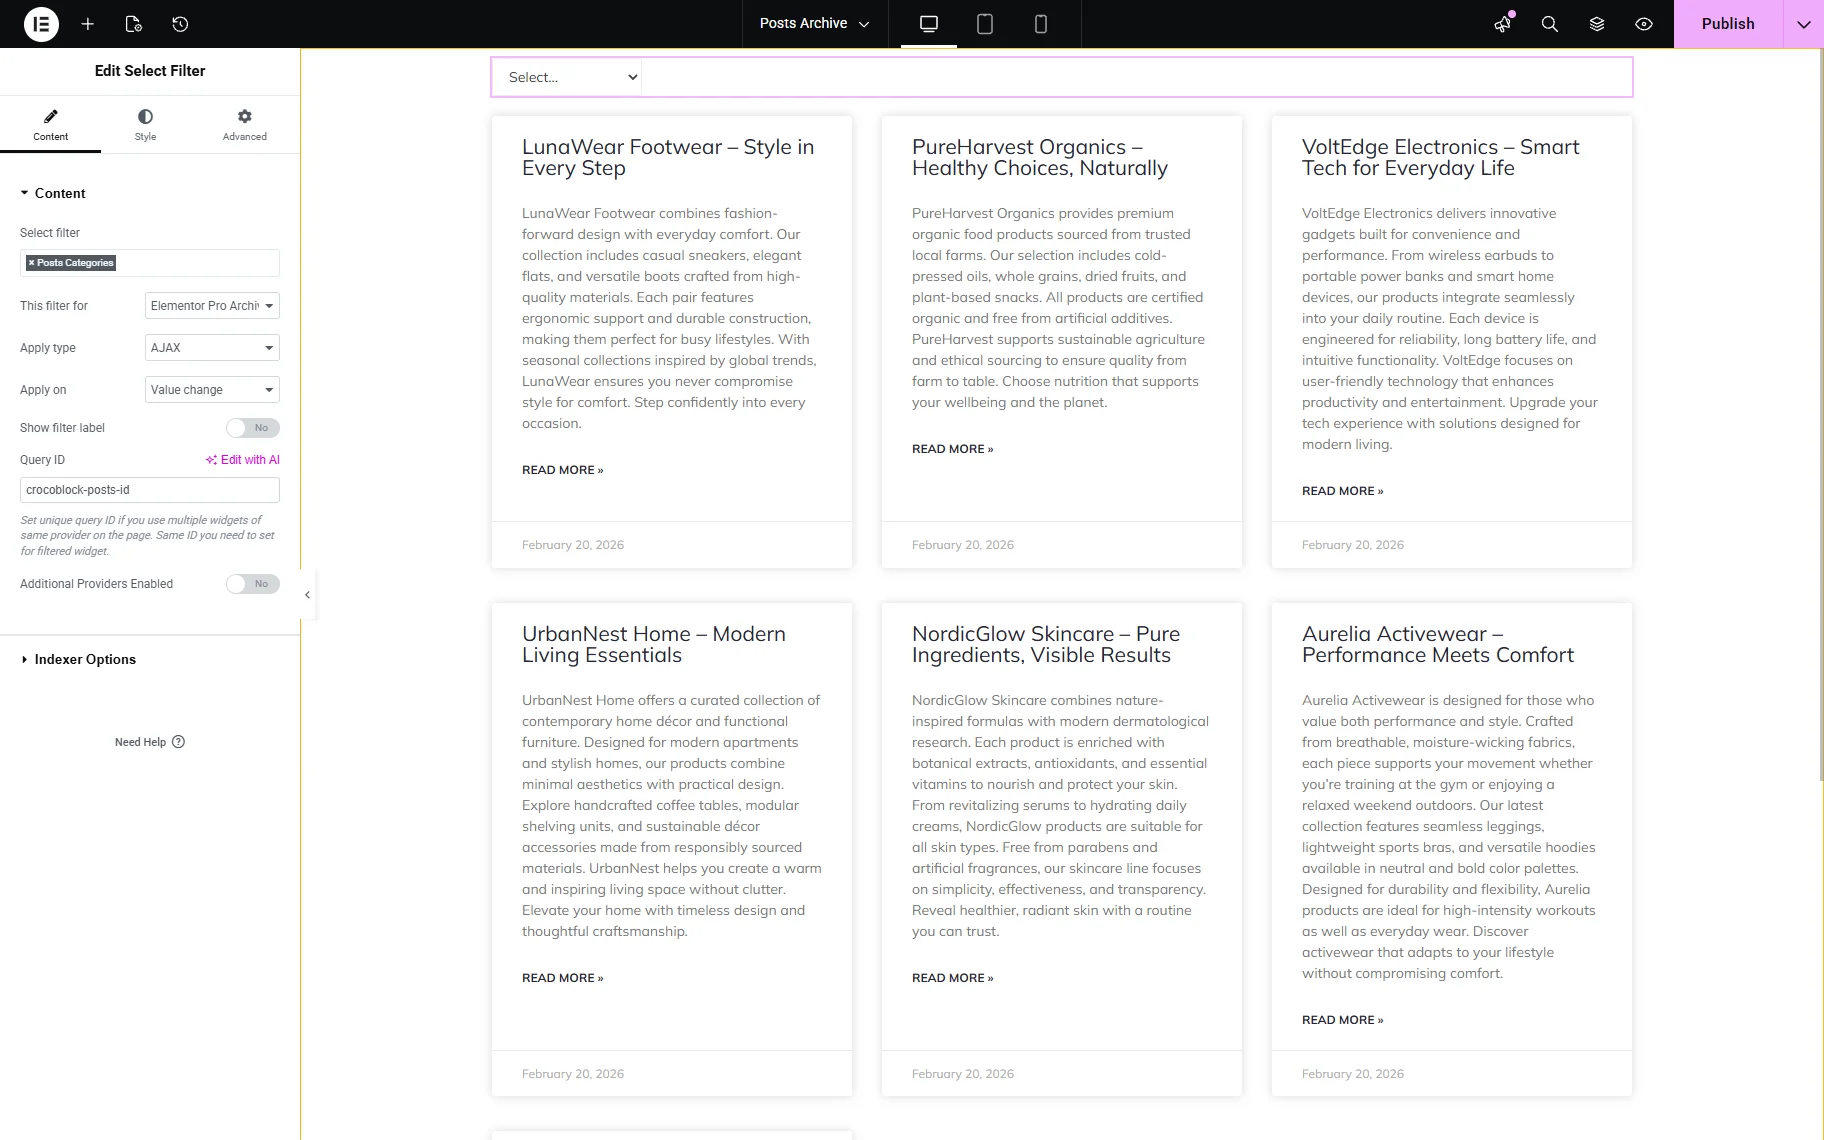
So, move to the archive template and add the Archive Posts widget and the needed filter widget. In this case, we use the Select filter for posts’ categories.
Select the filter you created, and for the This filter for field, select the “Elementor Pro Archive” provider. In the Query ID field, enter the unique ID. Copy it and keep it for now.
Open the Archive Posts widget’s Advanced settings tab. Paste the same Query ID you used for the filter into the CSS ID field.
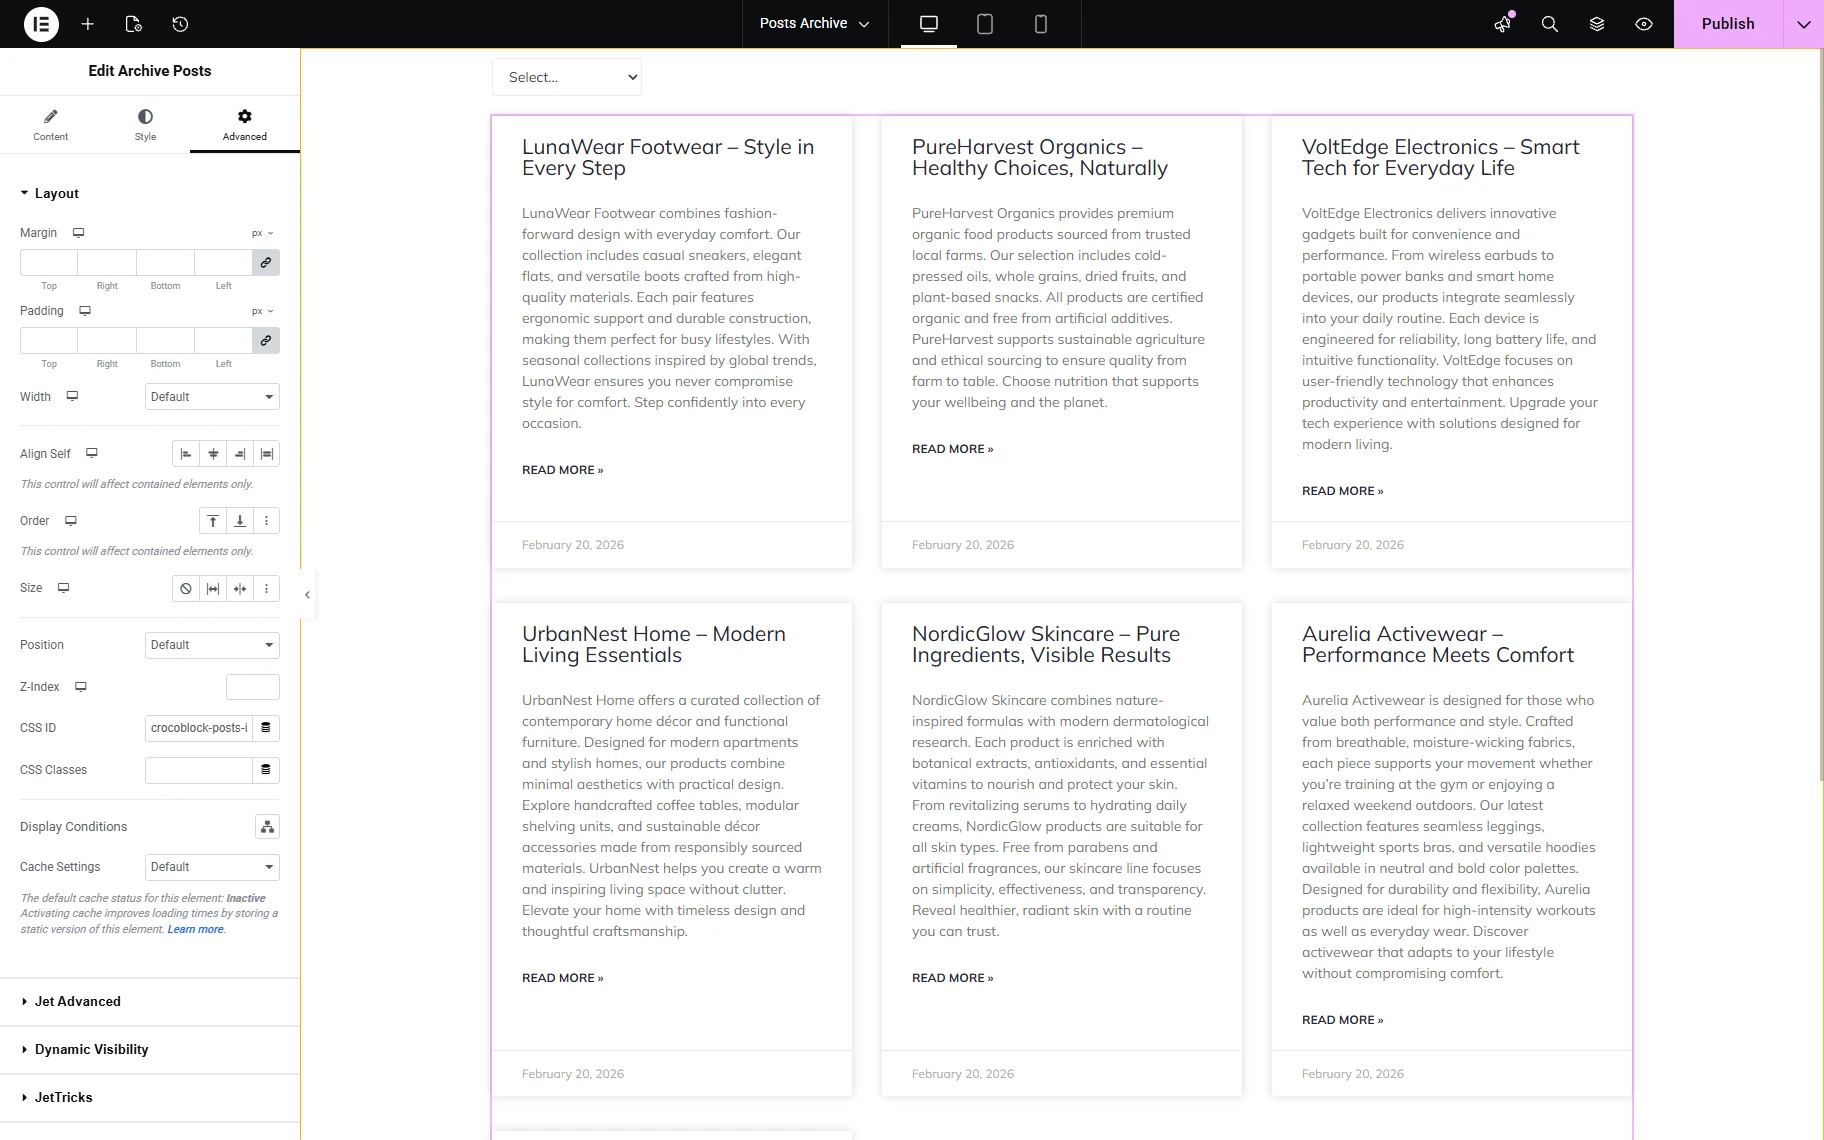
Ensure that the changes are saved. On the front end, the archive posts are filtered correctly.

The filter shows the correct post attached to the selected “Activewear” category.
Elementor Pro Loop Grid
The “Elementor Pro Loop Grid” provider filters the Loop Grid widget of Elementor Pro. You can use the Loop Grid widget wherever on your site, but you need to create a template for the loop beforehand.
Add the Loop Grid widget and the required filter (we use the Select filter for the posts’ categories).
In the Select Filter widget, select the filter you need. In the This filter for dropdown, select the “Elementor Pro Loop Grid” provider. In the Query ID field, enter the unique ID.
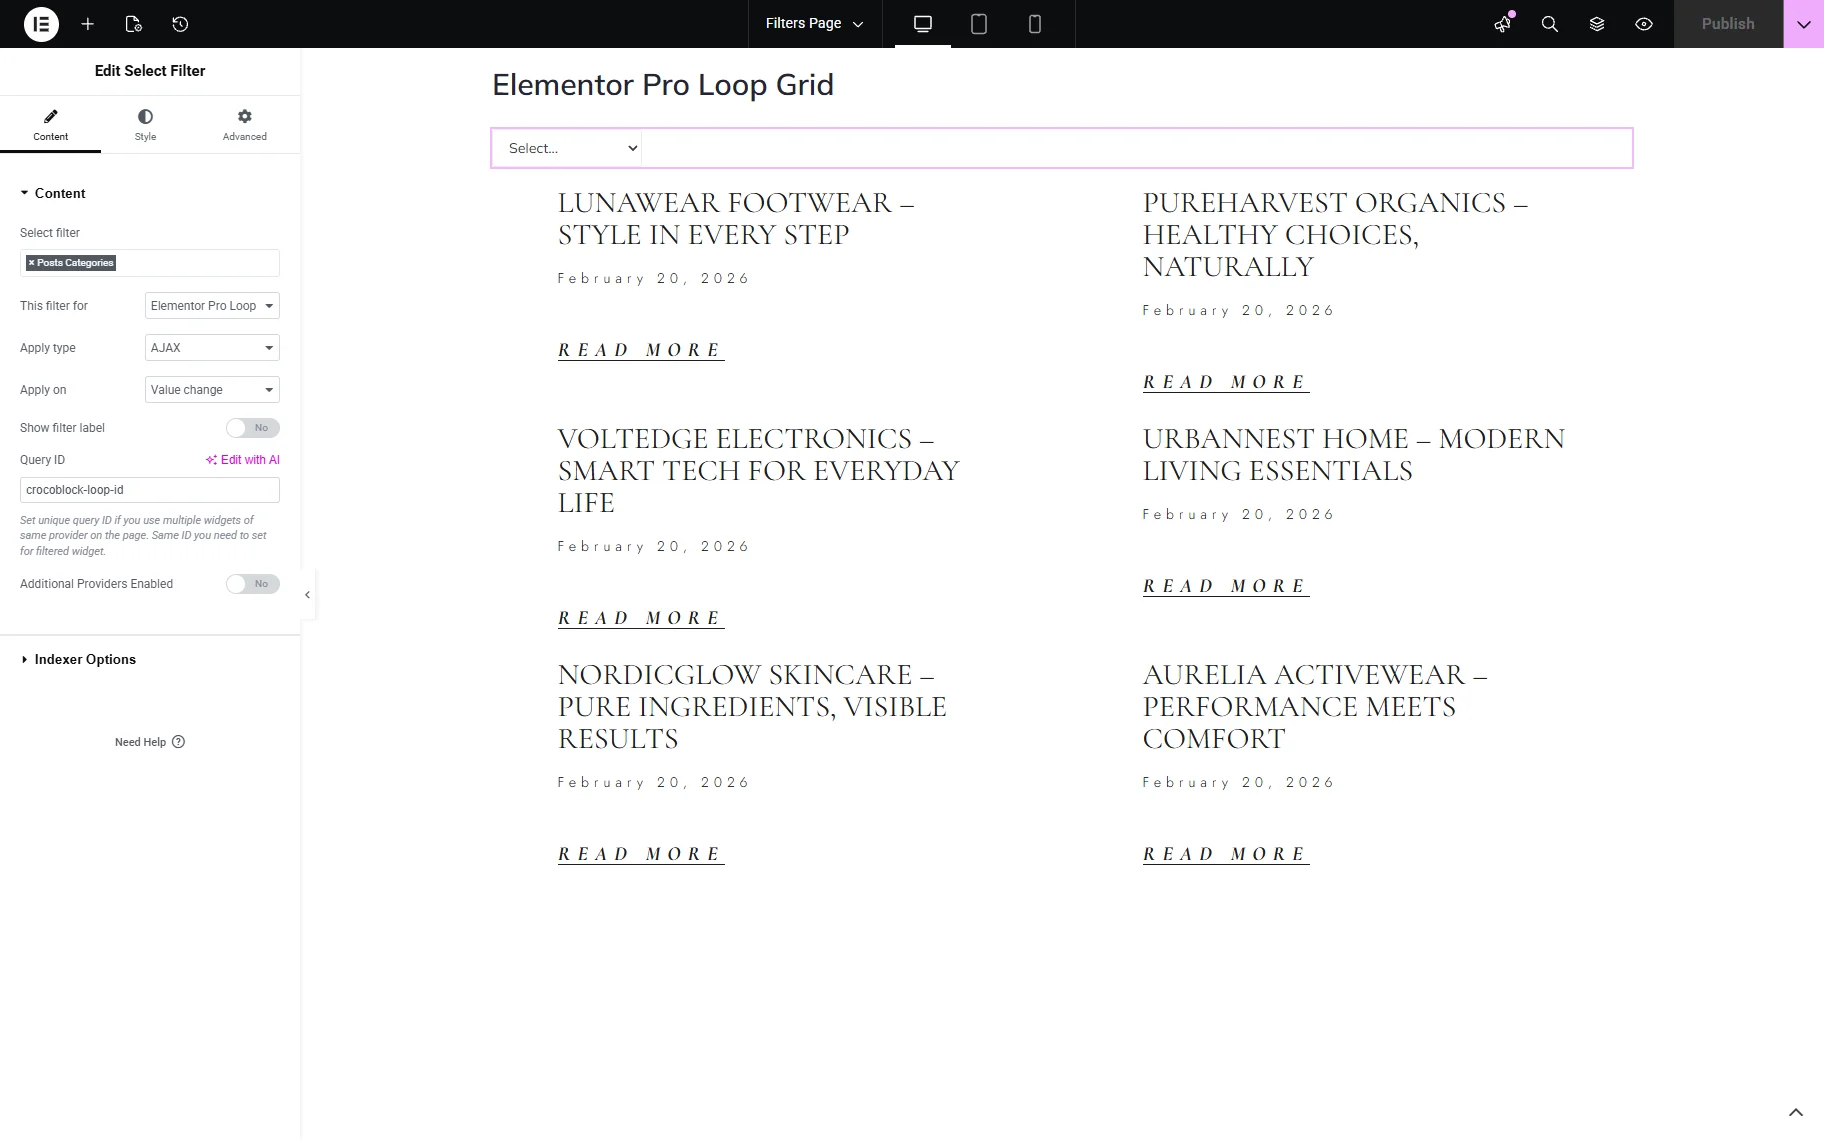
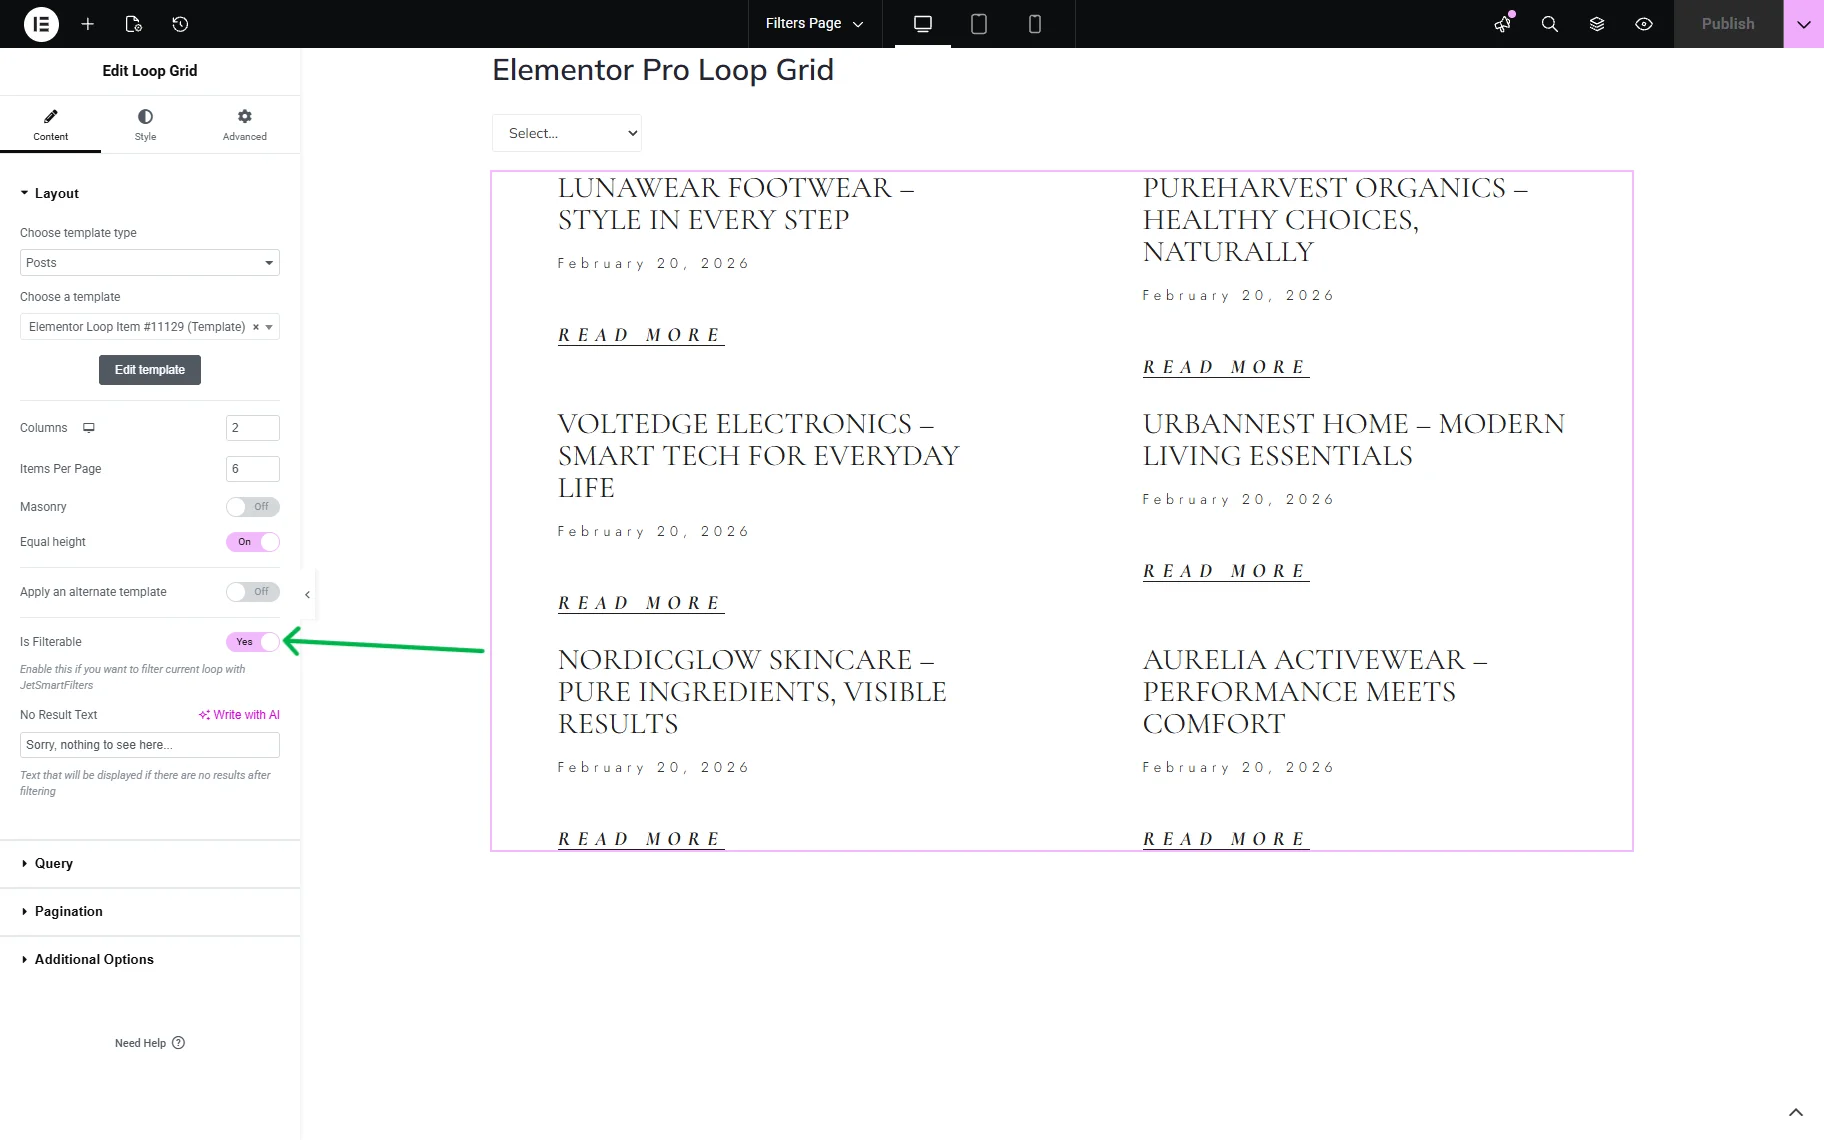
In the Loop Grid widget settings, enable the Is Filterable toggle.
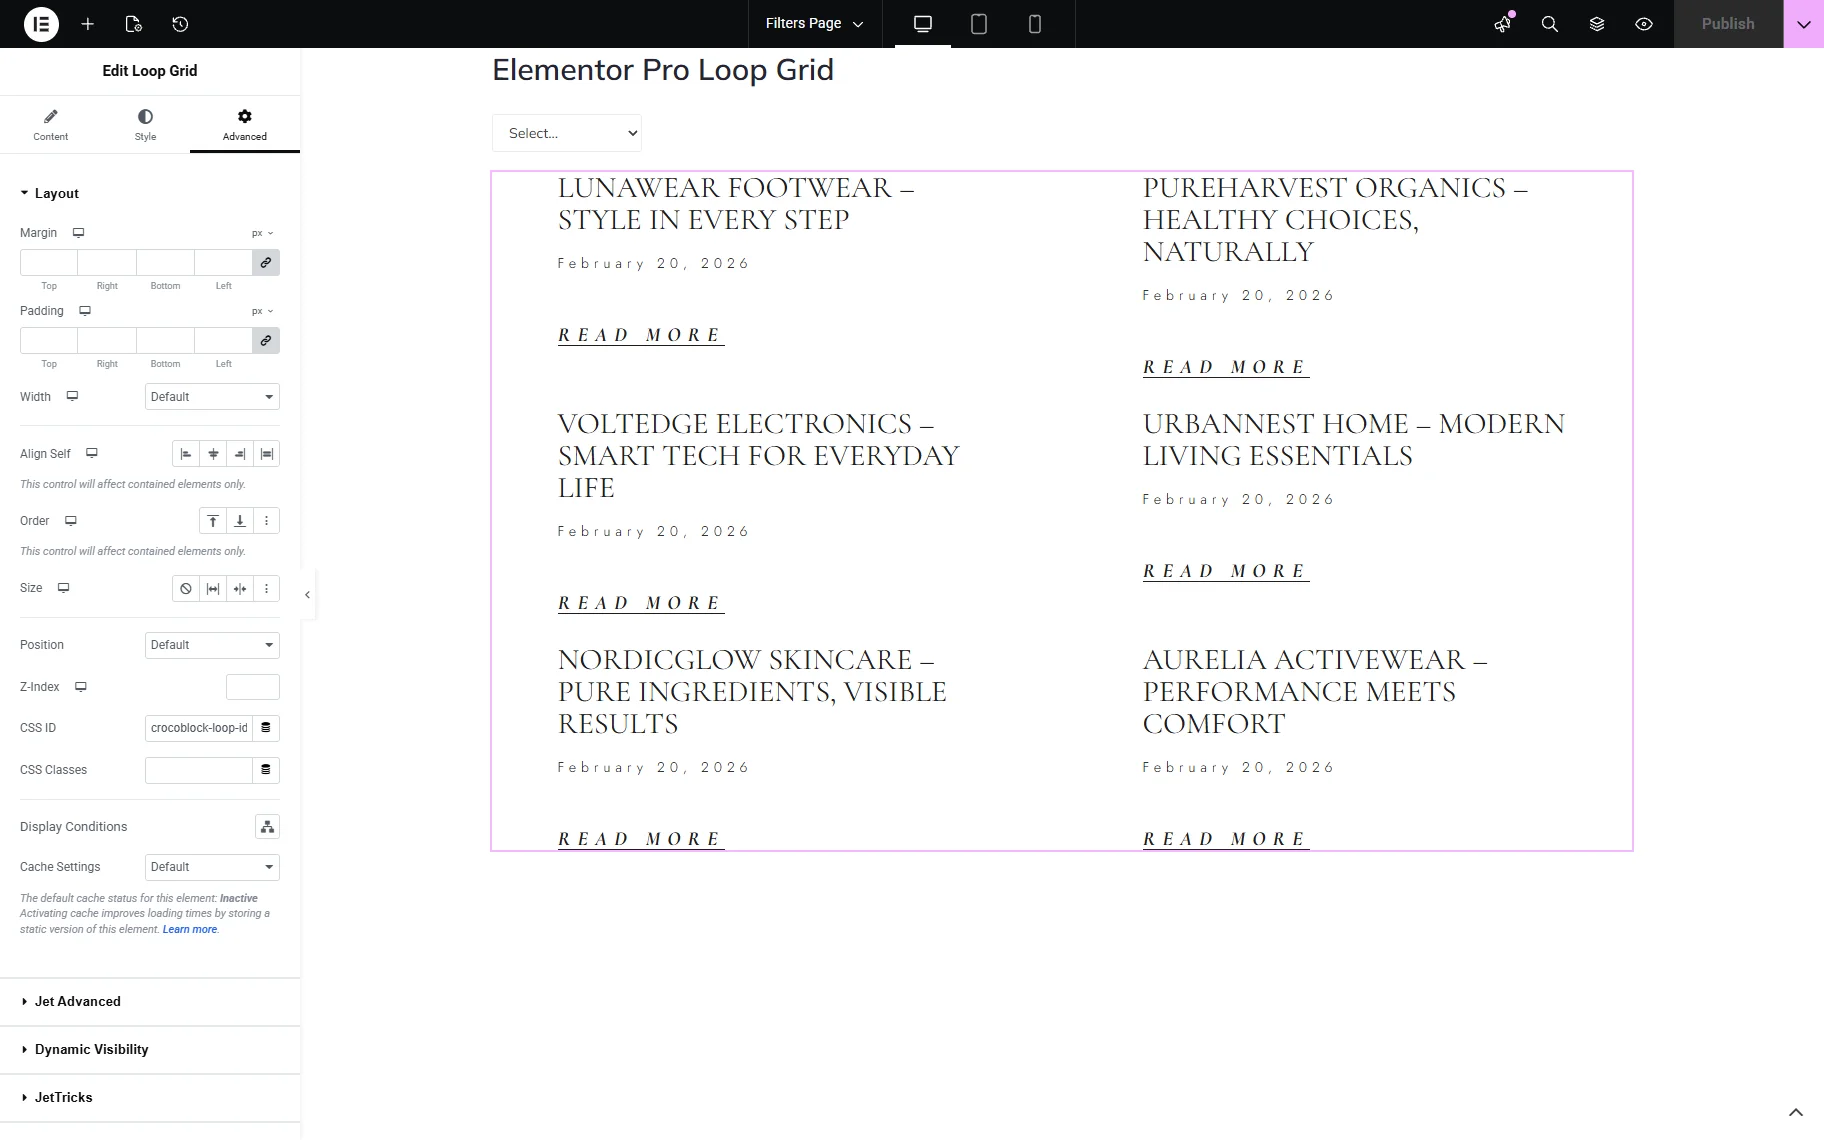
Then, open the Advanced settings section and paste the same Query ID you used for the filter for the CSS ID input.
On the frontend, we get the correct post from the “Activewear” category.

Elementor Pro Portfolio
The “Elementor Pro Portfolio” allows filtering the Portfolio widget of Elementor Pro. It can also be added to any kind of page on your site.
Add the Portfolio widget and the needed filter. In this case, we use the Select filter for the post categories.
In the filter widget settings, select the filter you created. Select the “Elementor Pro Profile” option for the This filter for dropdown.

Open the Portfolio settings and proceed to the Query tab. In the Query ID input, enter the “jet-smart-filters” value.
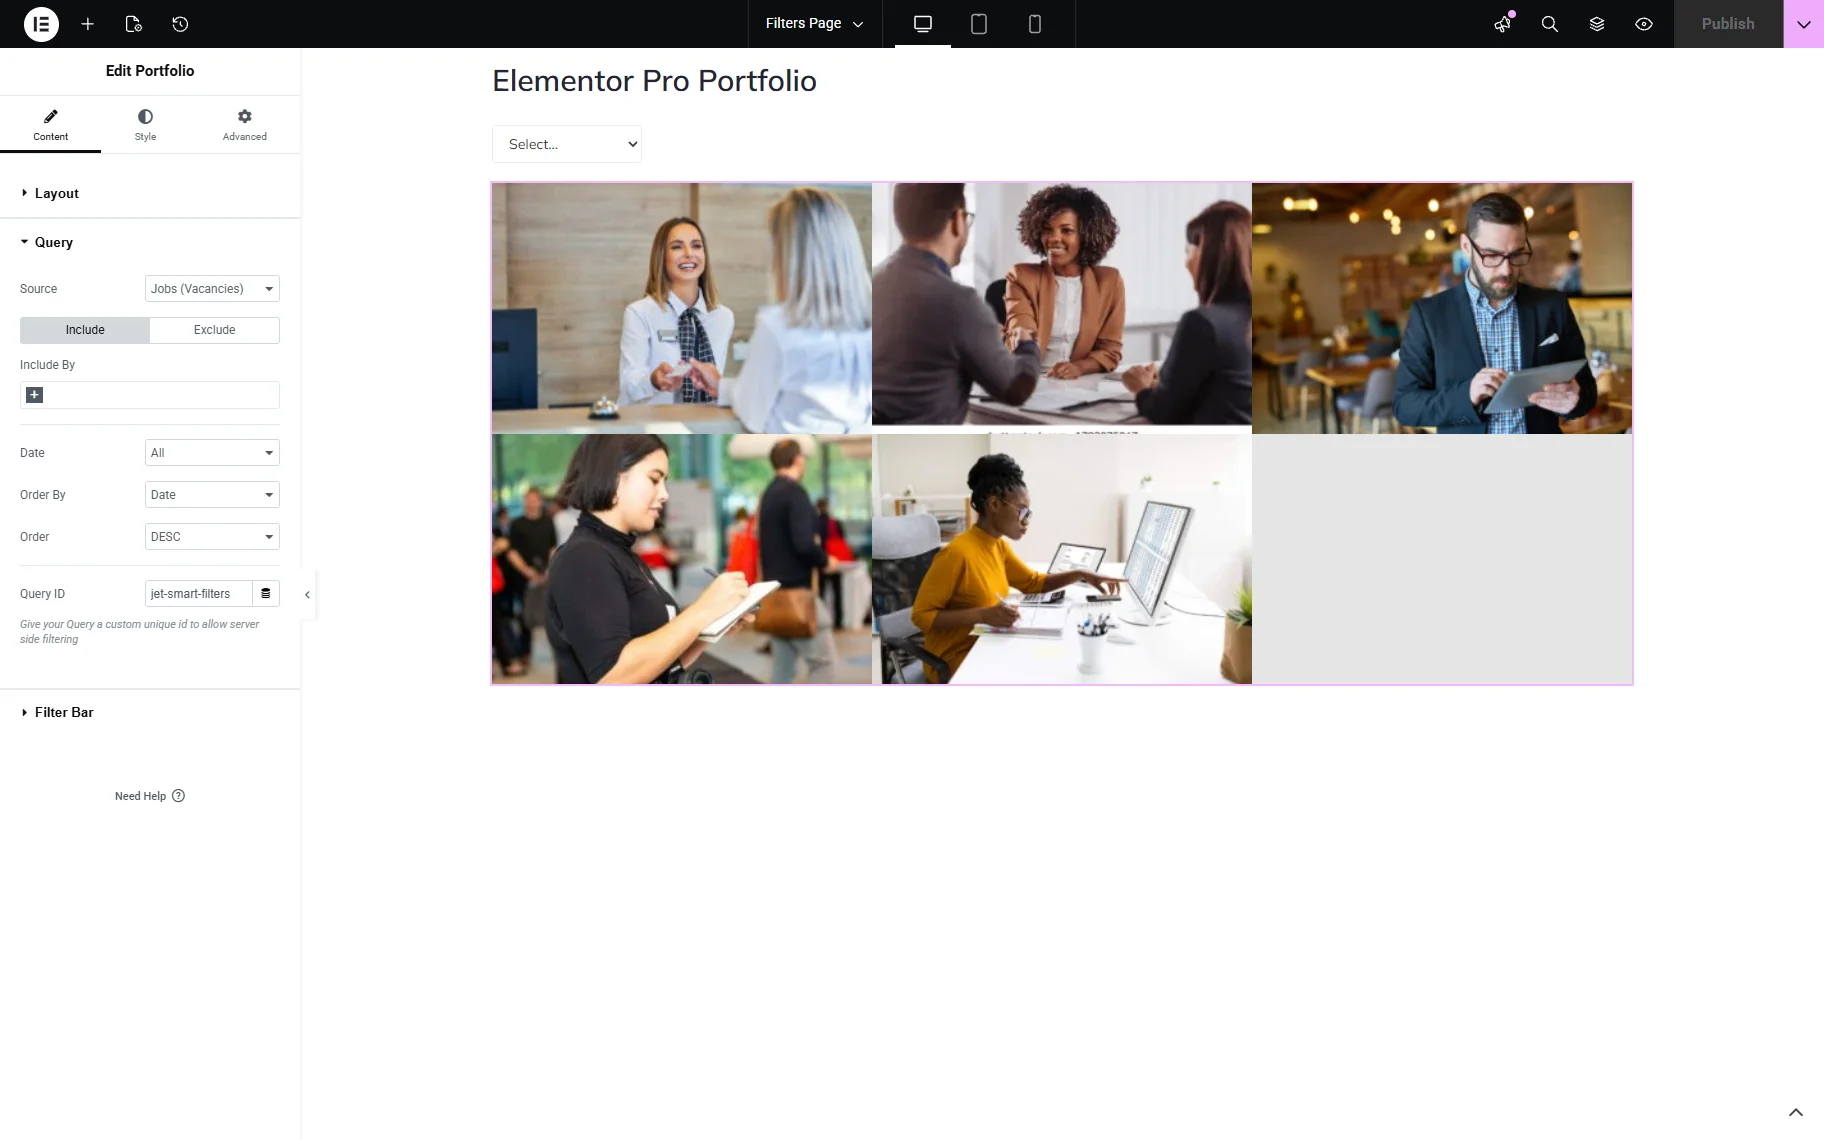
Save the changes and check the frontend. We get the correct posts.

Elementor Pro Posts
The “Elementor Pro Posts” provider filters the Posts widget of Elementor Pro. It can also be added anywhere on your site.
Add the Posts widget and the required filter to the page. In this case, we use the Select filter for the posts’ categories.
In the Select Filter widget, select the filter you created. In the This filter for dropdown, choose the “Elementor Pro Posts” provider.
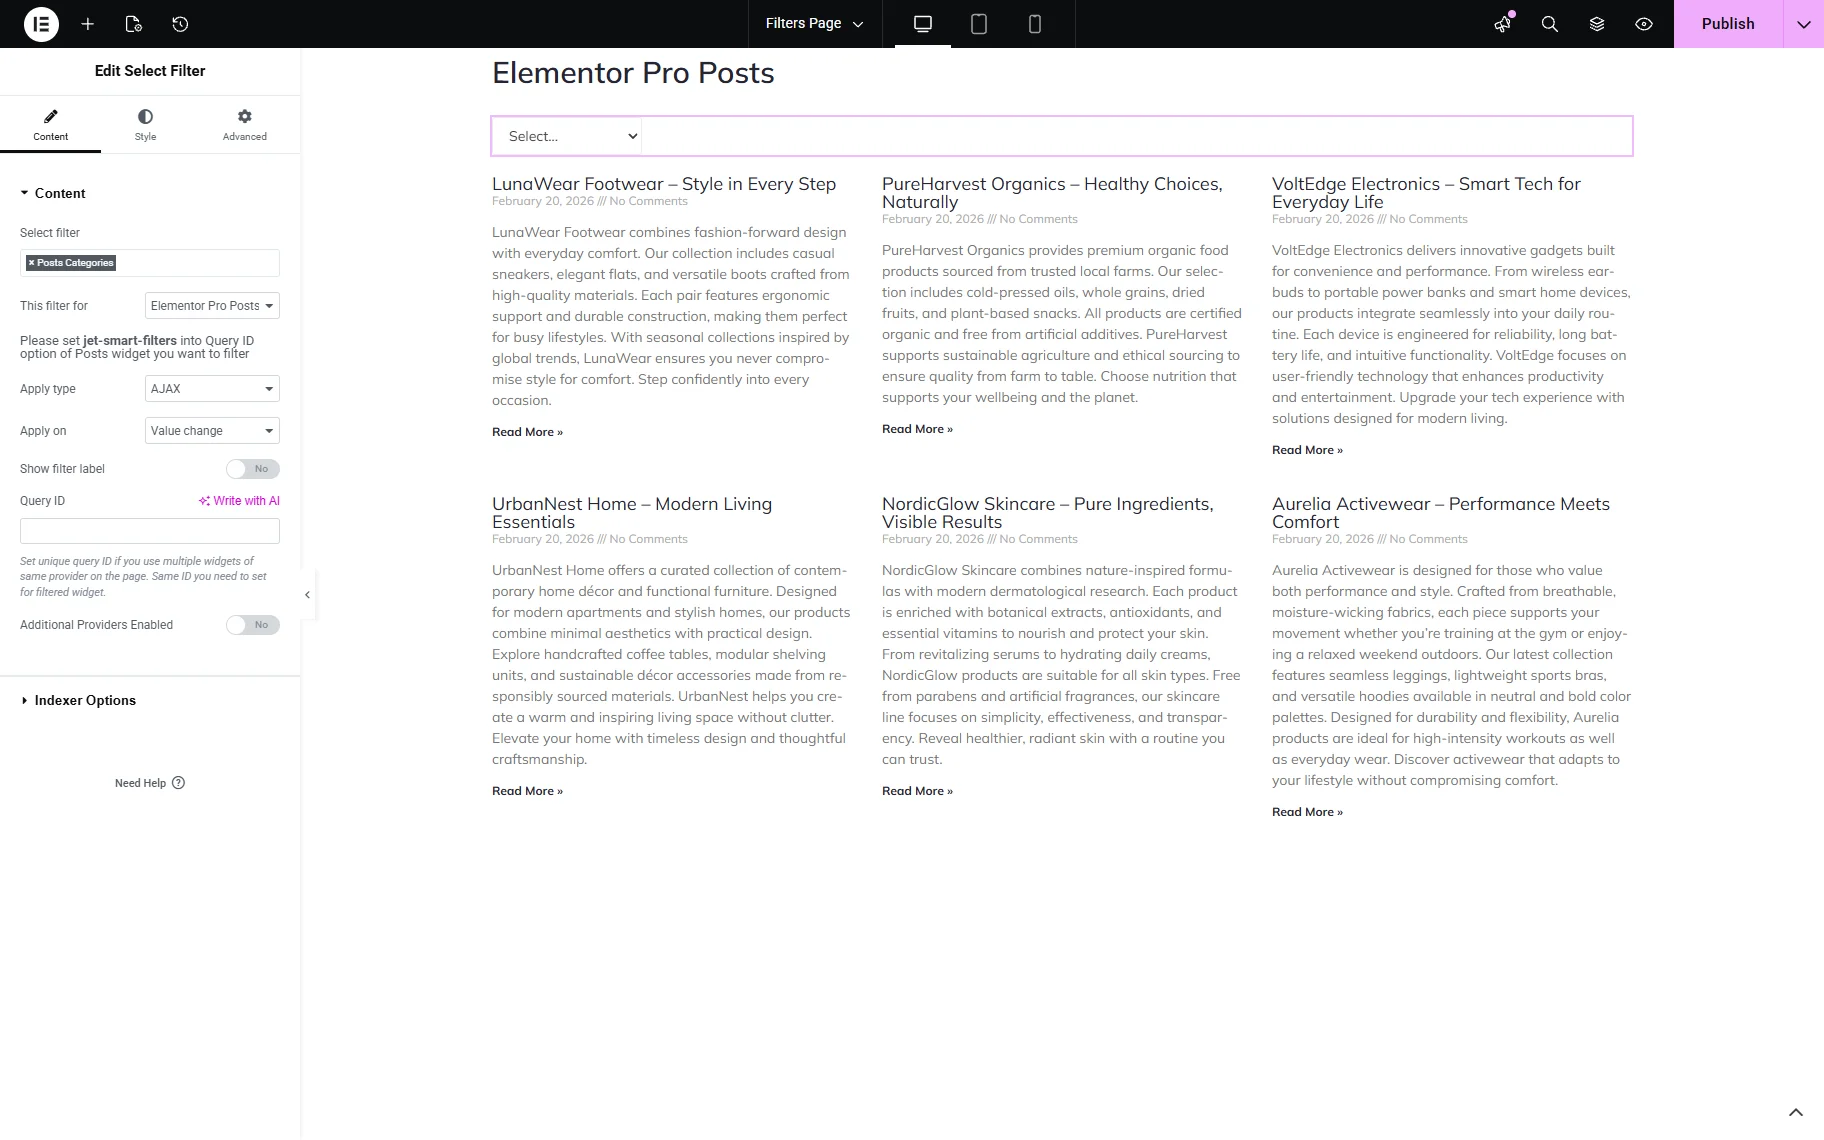
Open the Query tab of the Posts widget settings, enter the “jet-smart-filters” value in the Query ID input.
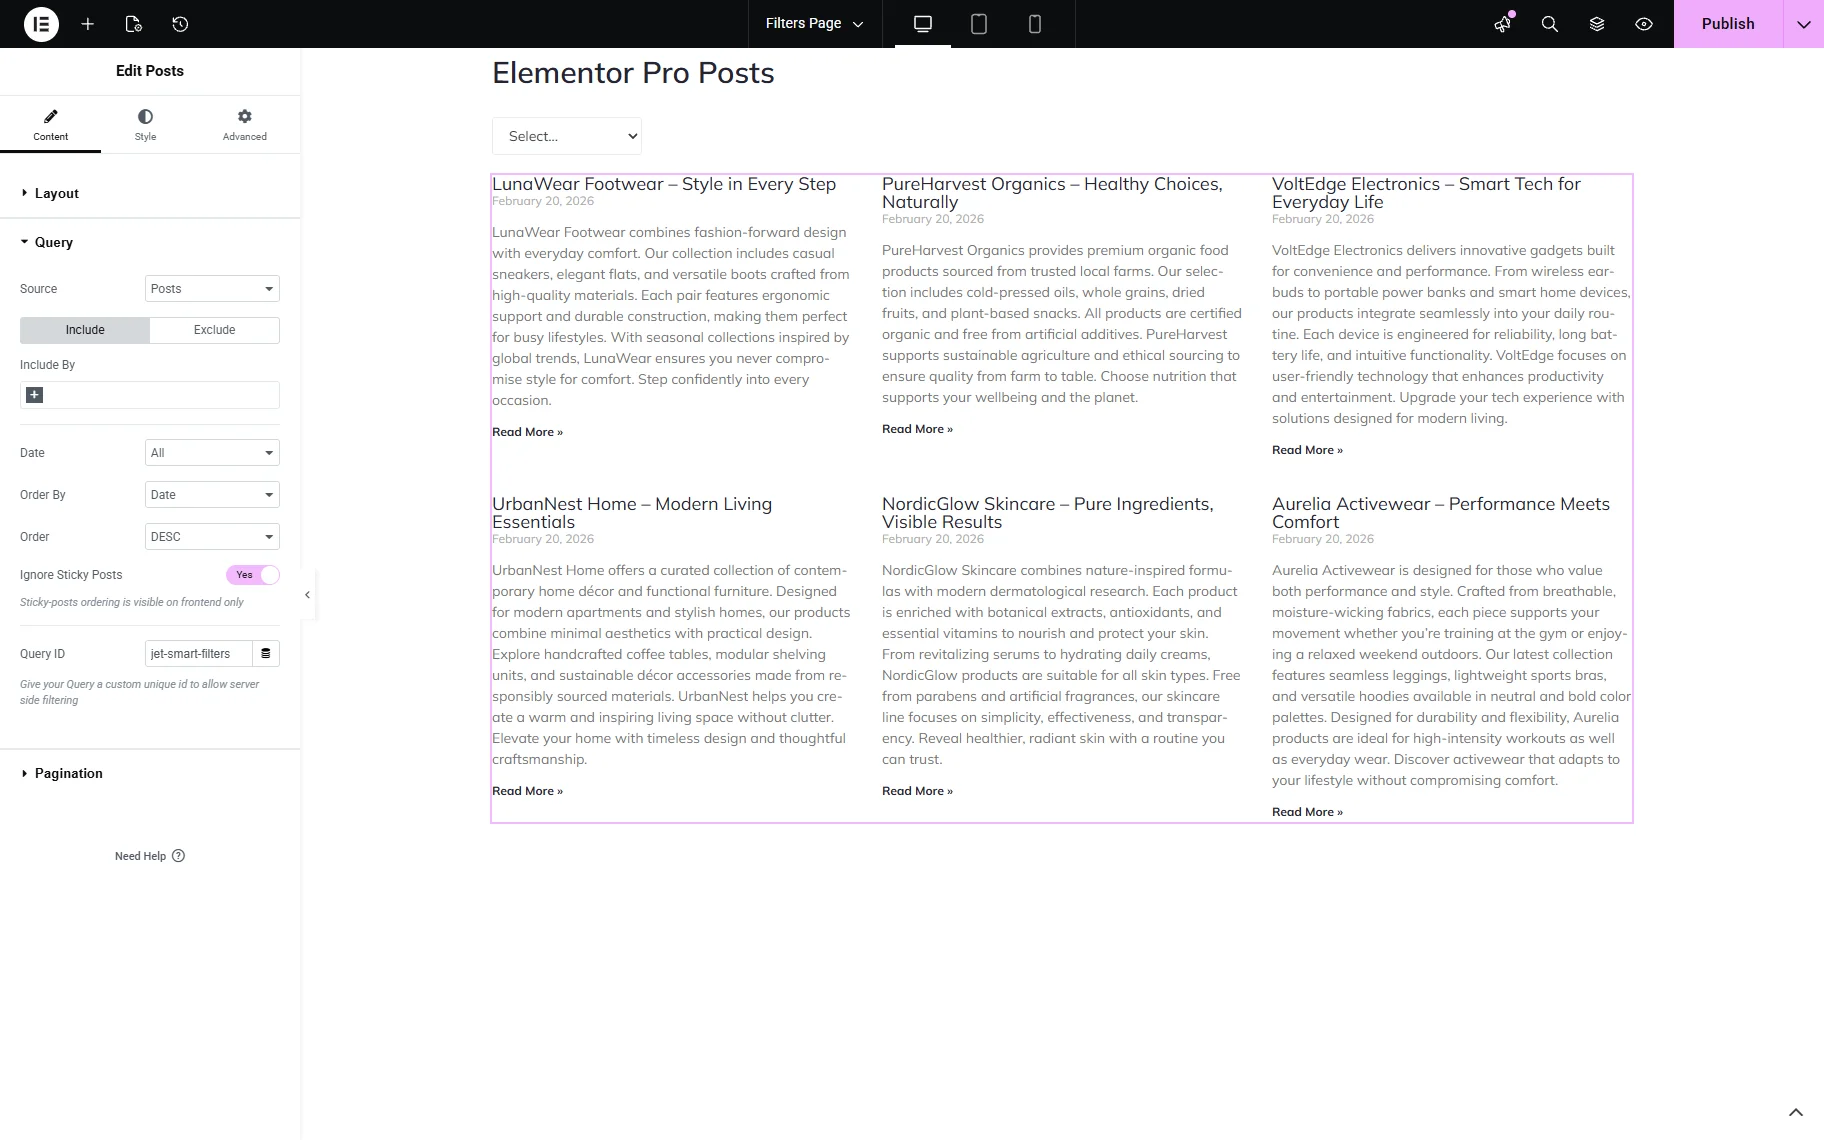
Save the settings and check the frontend. The filter can be correctly applied to the Posts widget.

Elementor Pro Products
The “Elementor Pro Products” provider allows filtering the Products widget of Elementor Pro. The Products widget can be added to any desired page on the site.
Add the Products widget and the needed filter. We use a Checkboxes filter for the WooCommerce categories in this case.
Select the filter you created in the Checkboxes Filter widget settings. Choose the “Elementor Pro Products” provider from the This filter for dropdown list. In the Query ID input, enter the unique ID.

In the Products widget settings, proceed to the Advanced tab. Enter the same Query ID you use for the filter in the CSS ID field.
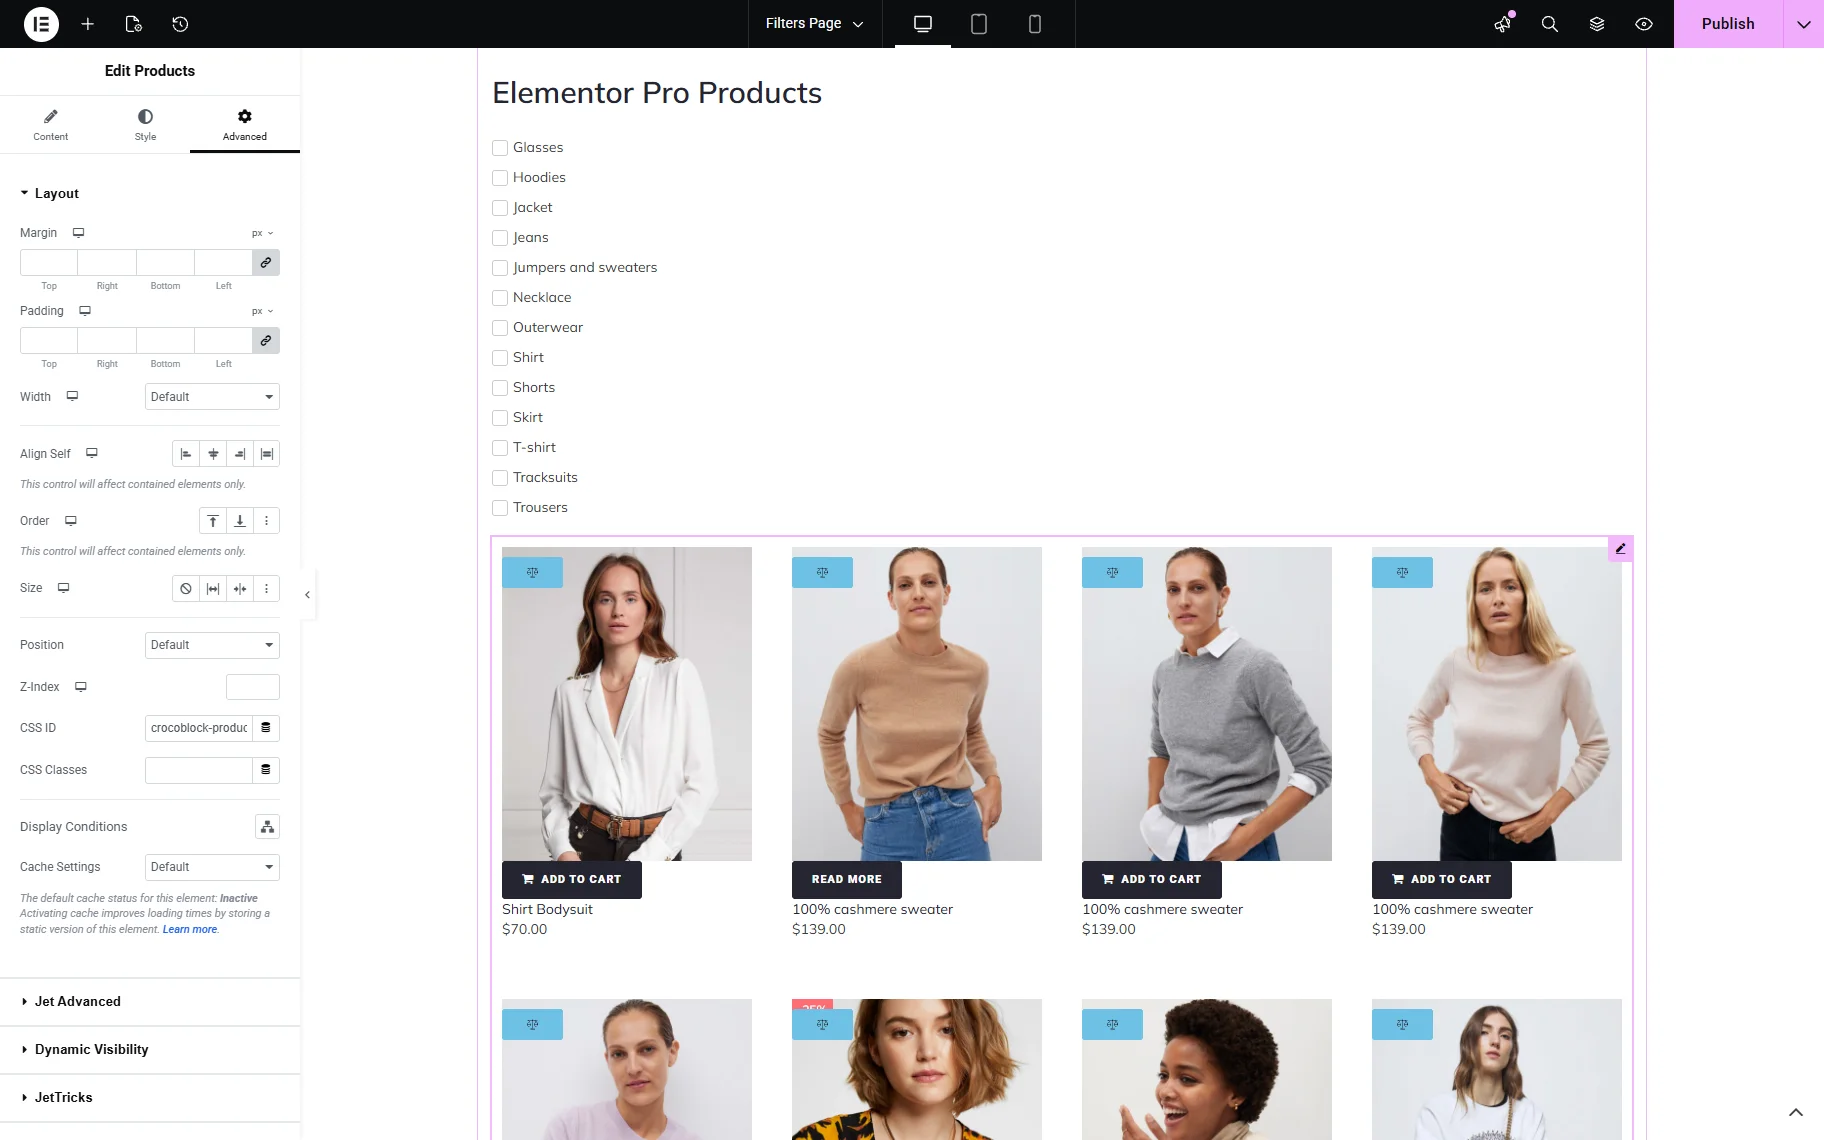
Save the changes and ensure that the filter works well on the frontend.

JetEngine Providers
JetEngine providers also connect via the Query ID. However, it is essential to emphasise that when the custom query is applied to the listing, the same Query ID you use for the filter and CSS ID should be added to the custom query settings.
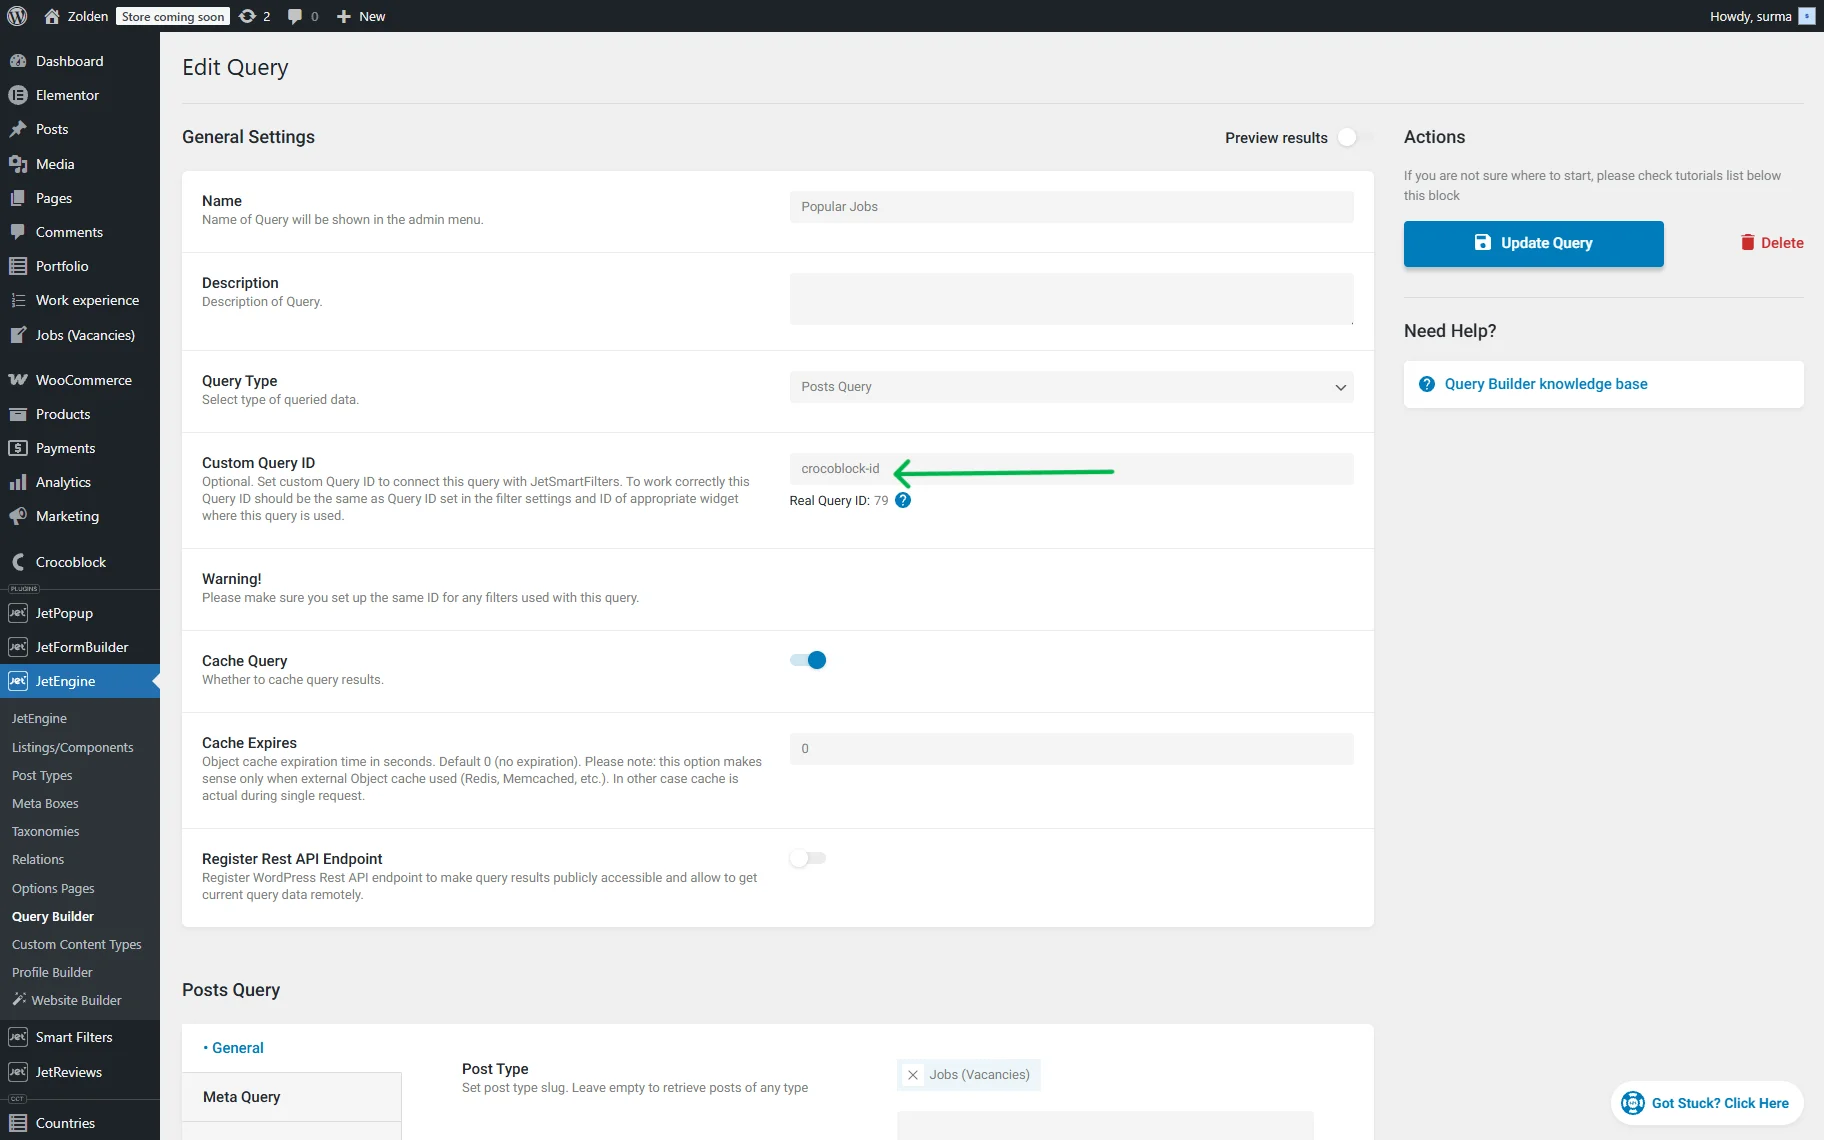
Additionally, when more than one query is used on the same page, it is recommended to apply different Custom Query IDs to all the queries on the page.
JetEngine
When you select the “JetEngine” provider, you can filter the Listing Grid widget. So, add the Listing Grid widget and the required filter. We use a Select filter for the CPT’s taxonomy.
Choose the filter you created and select the “JetEngine” provider from the This filter for dropdown. In the Query ID field, add the unique ID.
Select the listing template you created in the Listing Grid settings. Then, proceed to the Advanced tab. Enter the same Query ID you used for the filter in the CSS ID field.

Remember to apply the same Query ID to the custom query if it is used. Save the changes and check the frontend.
On the frontend, the filter works correctly.

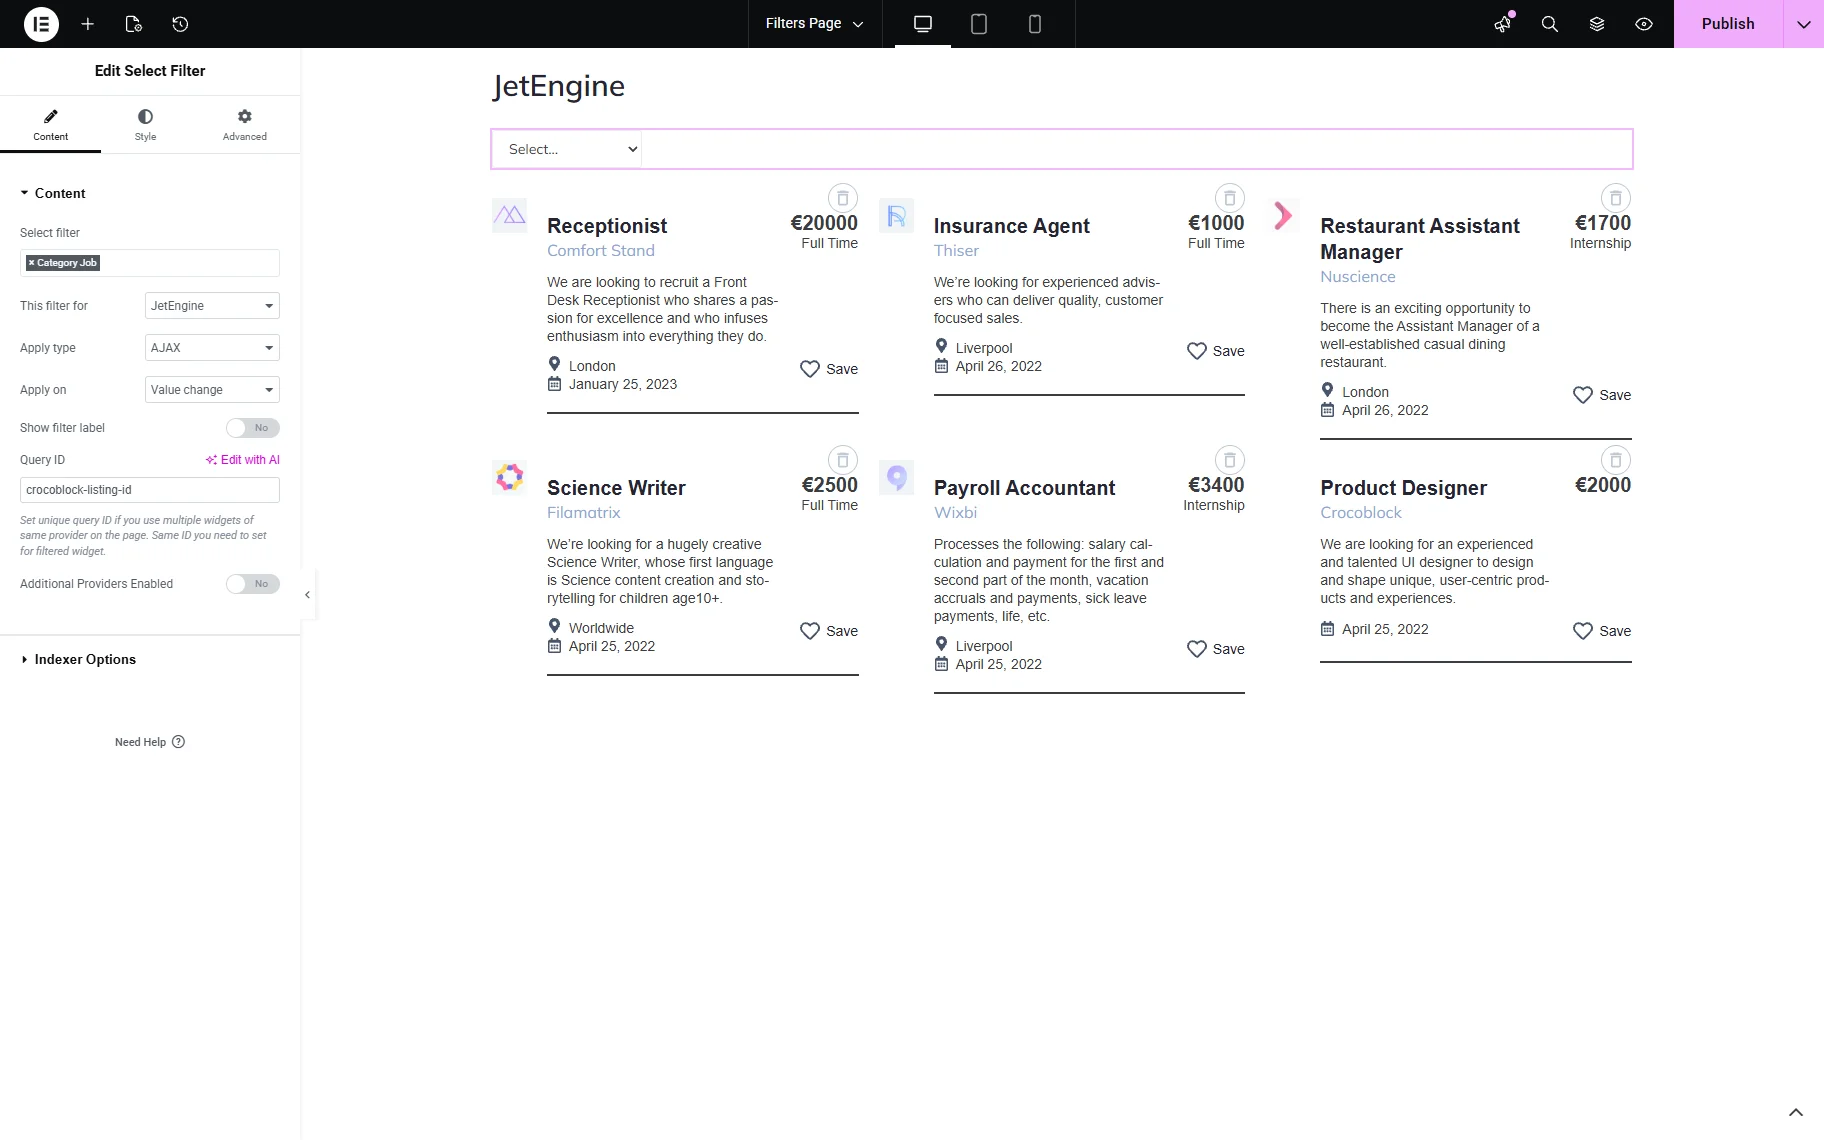
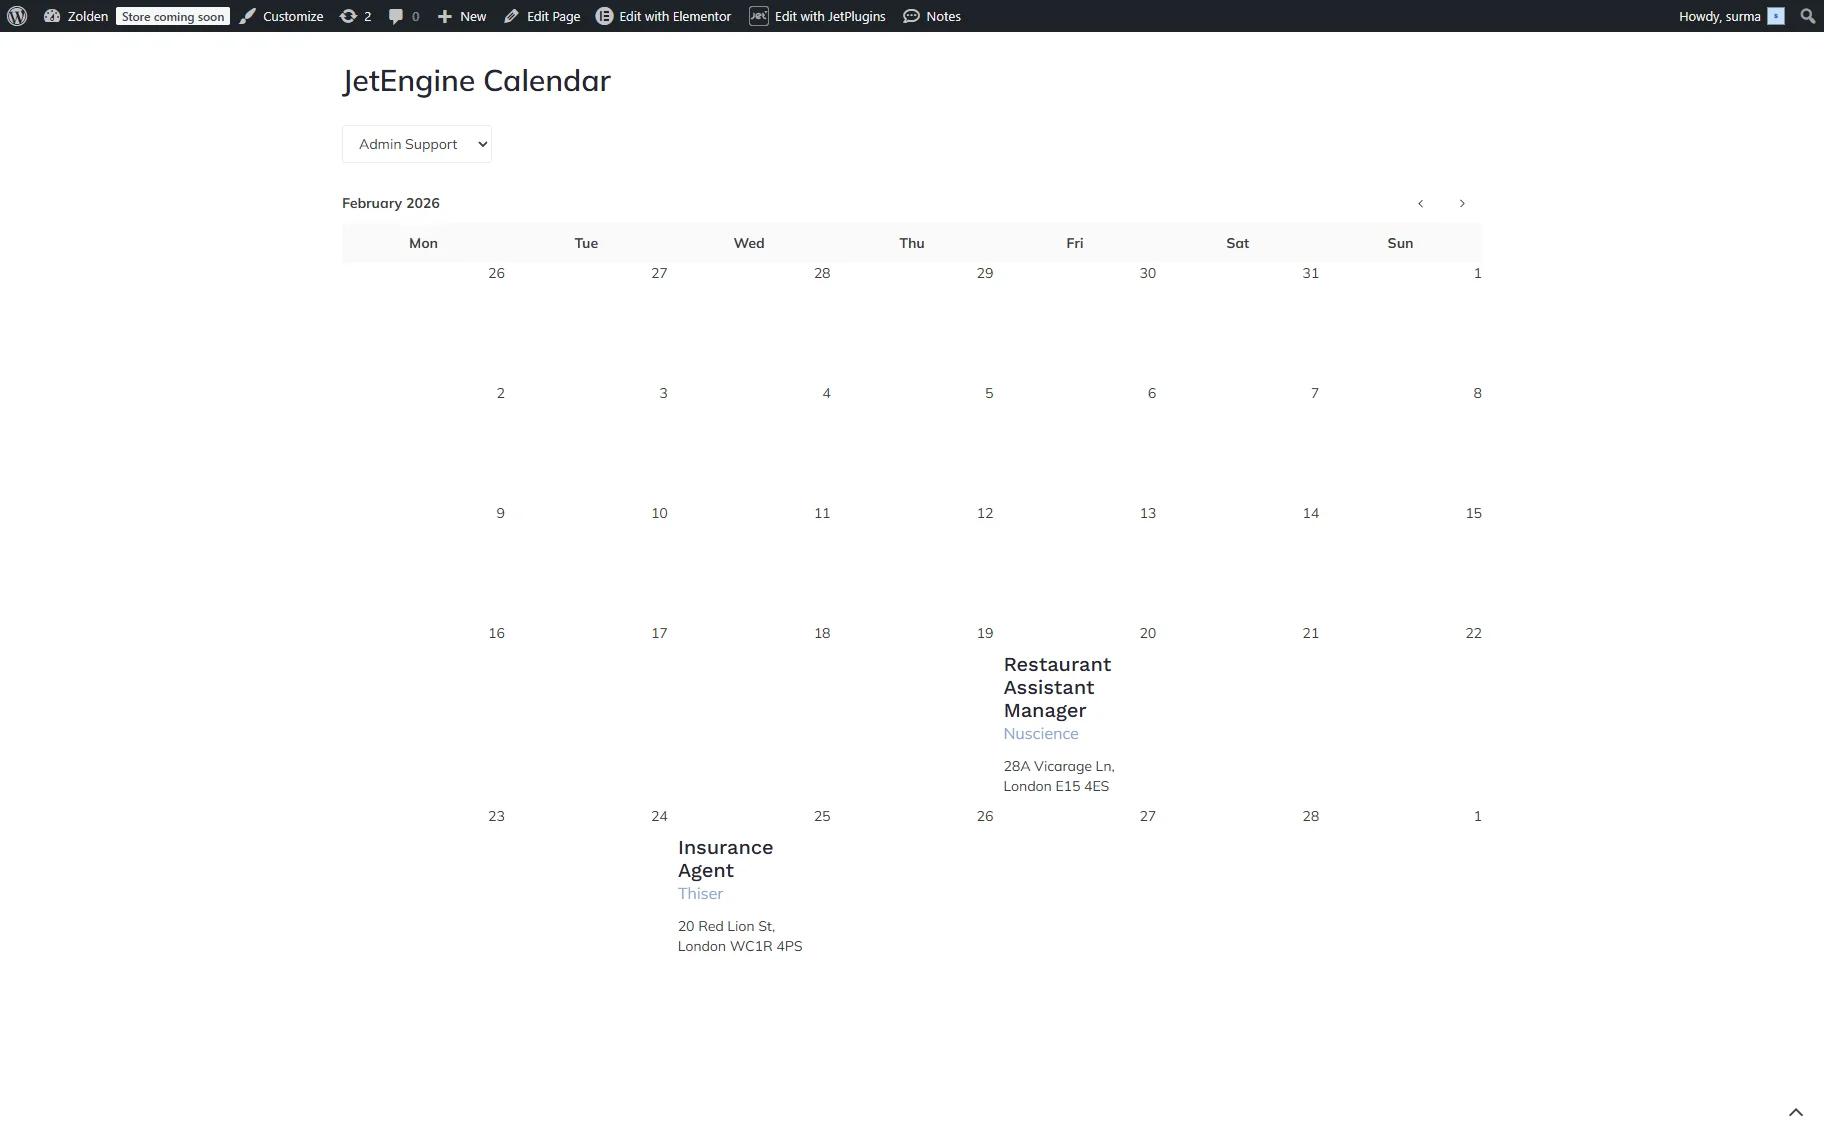
JetEngine Calendar
The “JetEngine Calendar” provider filters JetEngine’s Dynamic Calendar widget. So, add the Dynamic Calendar and the required filter (we use the Select filter for the custom taxonomies.)
In the filter’s settings, select the filter you created and choose the “JetEngine Calendar” in the This filter for dropdown. Add the Query ID as well.
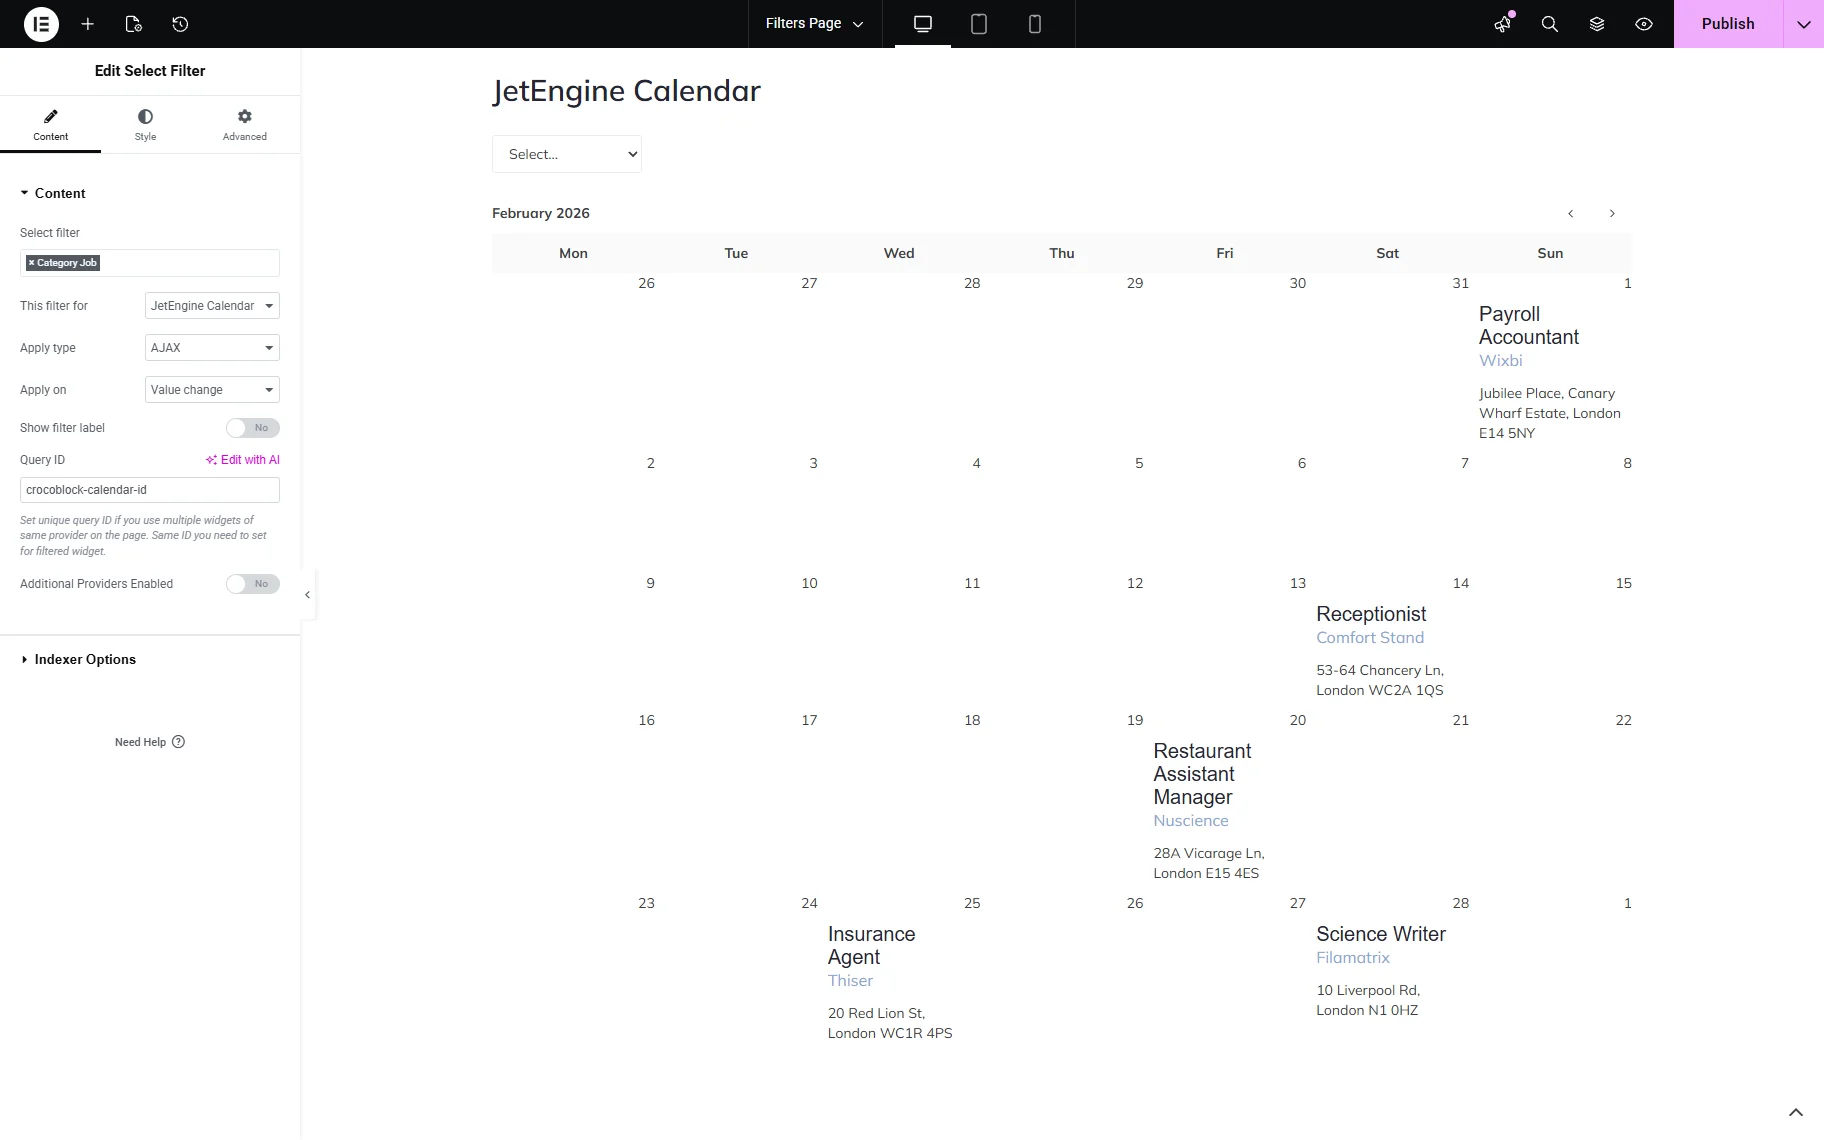
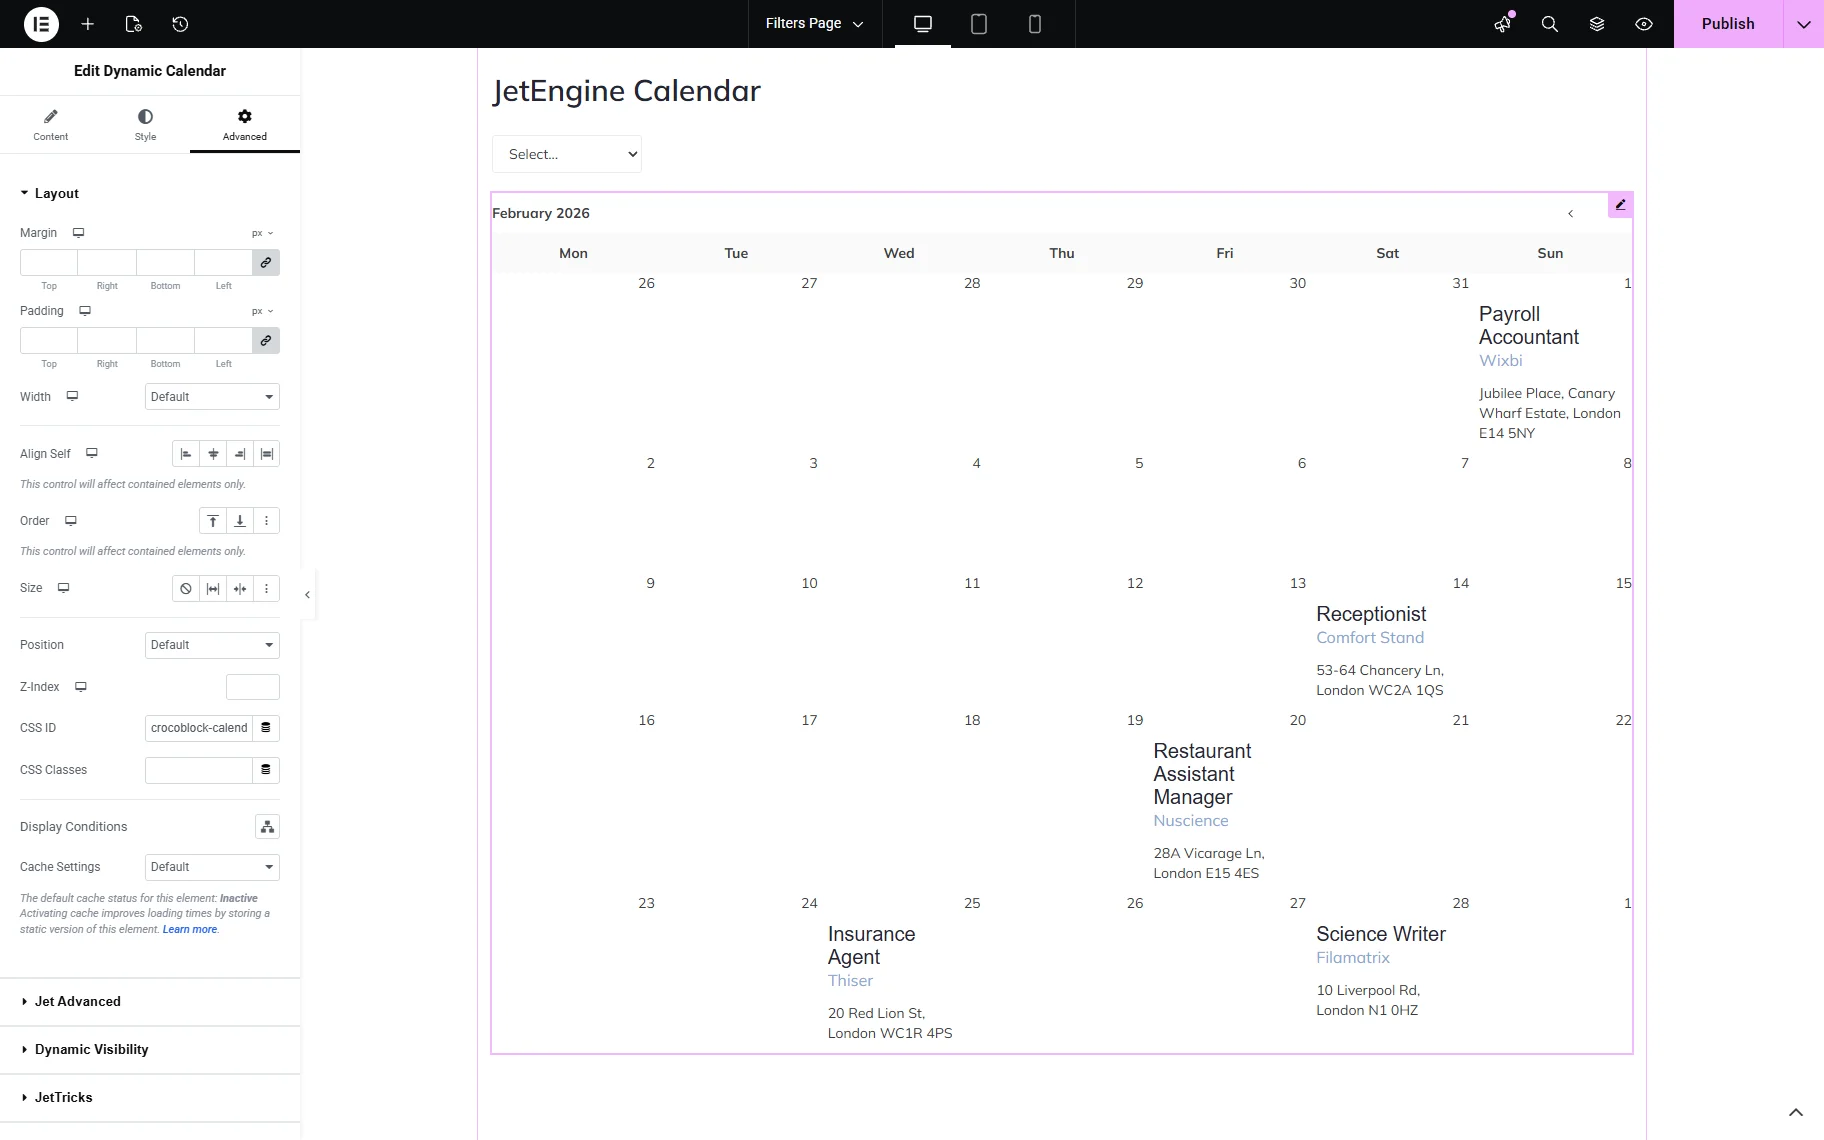
When the Dynamic Calendar widget is set, move to the Advanced settings tab. Enter the same Query ID you used for the filter in the CSS ID input.
Save the changes and check the frontend. The filter works correctly with the Dynamic Calendar.
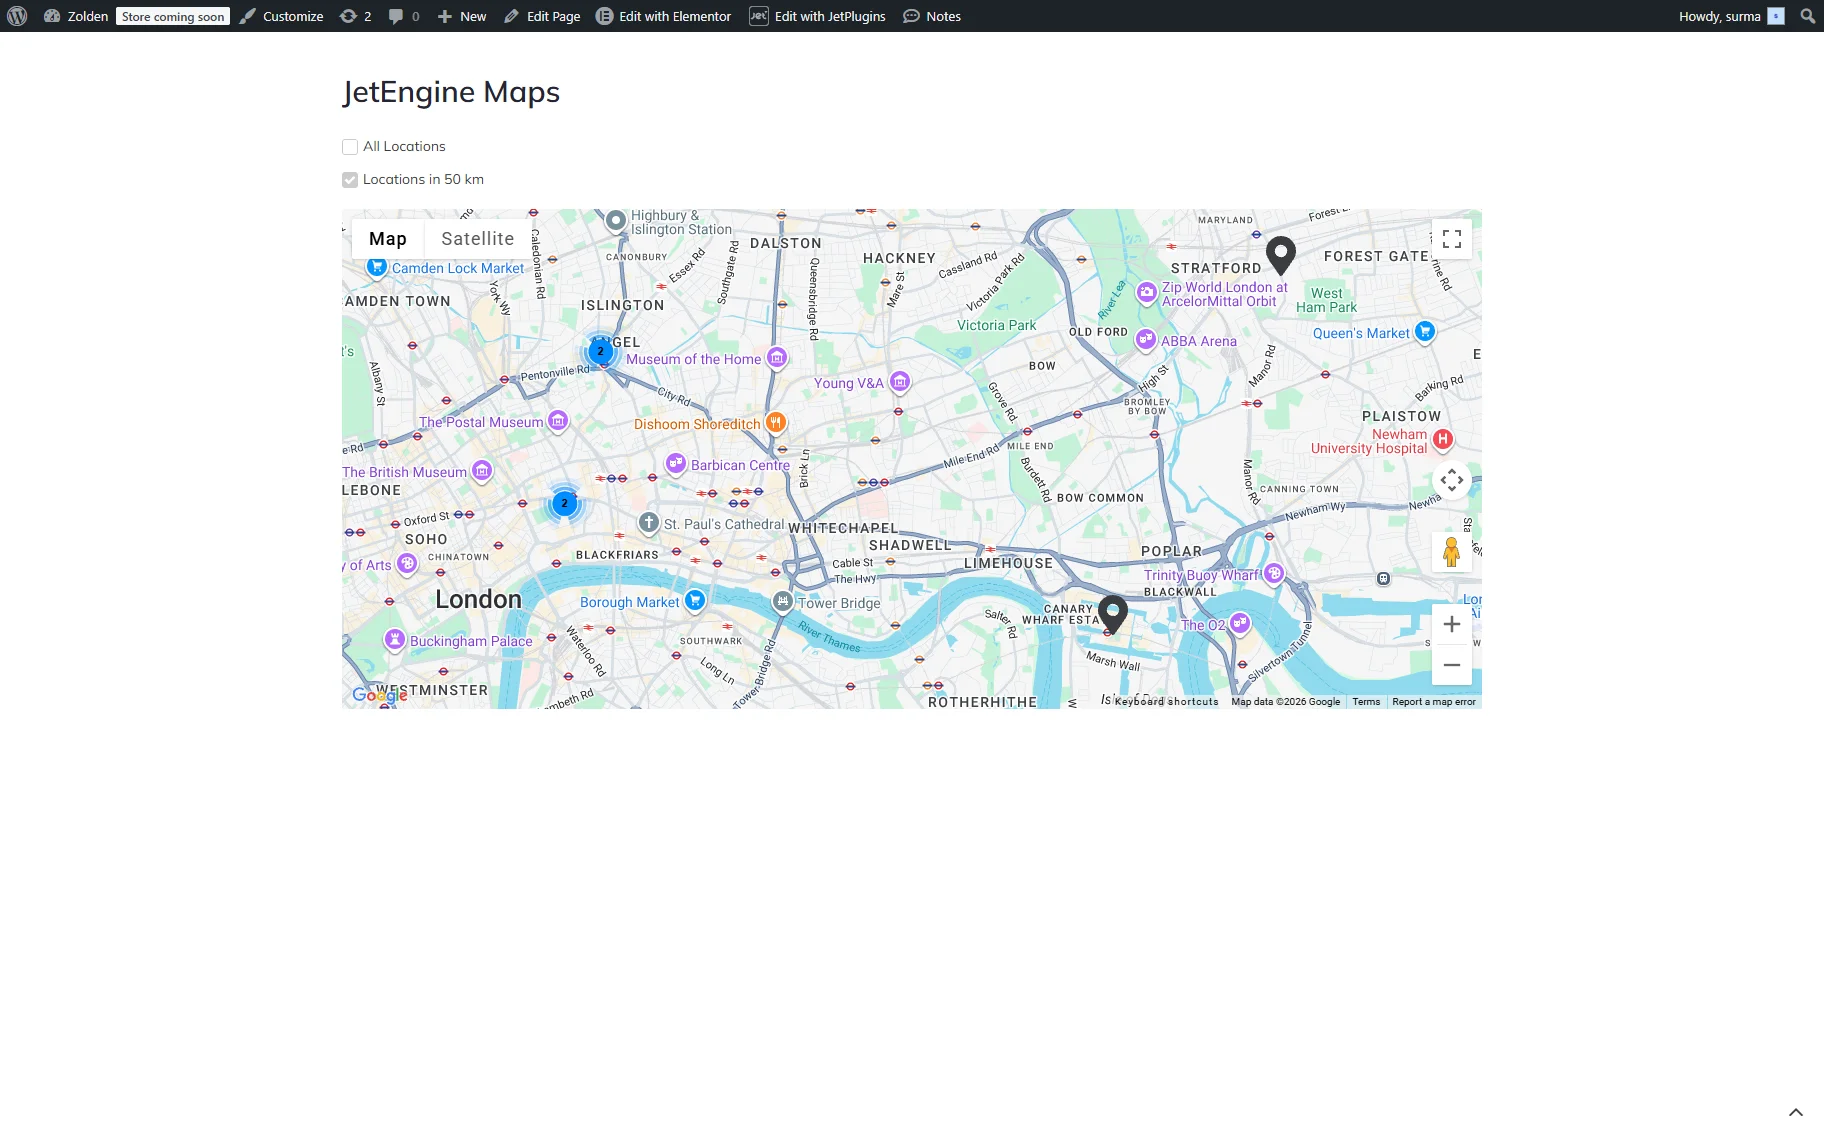
JetEngine Maps
“JetEngine Maps” provider allows filtering JetEngine’s Maps Listing widget. Add the Maps Listing and the needed filter to the page. In this case, we use a Radio filter.
In the Radio Filter widget settings, select the filter you created and choose the “JetEngine Maps” provider in the This filter for field. In the Query ID field, add the unique ID.
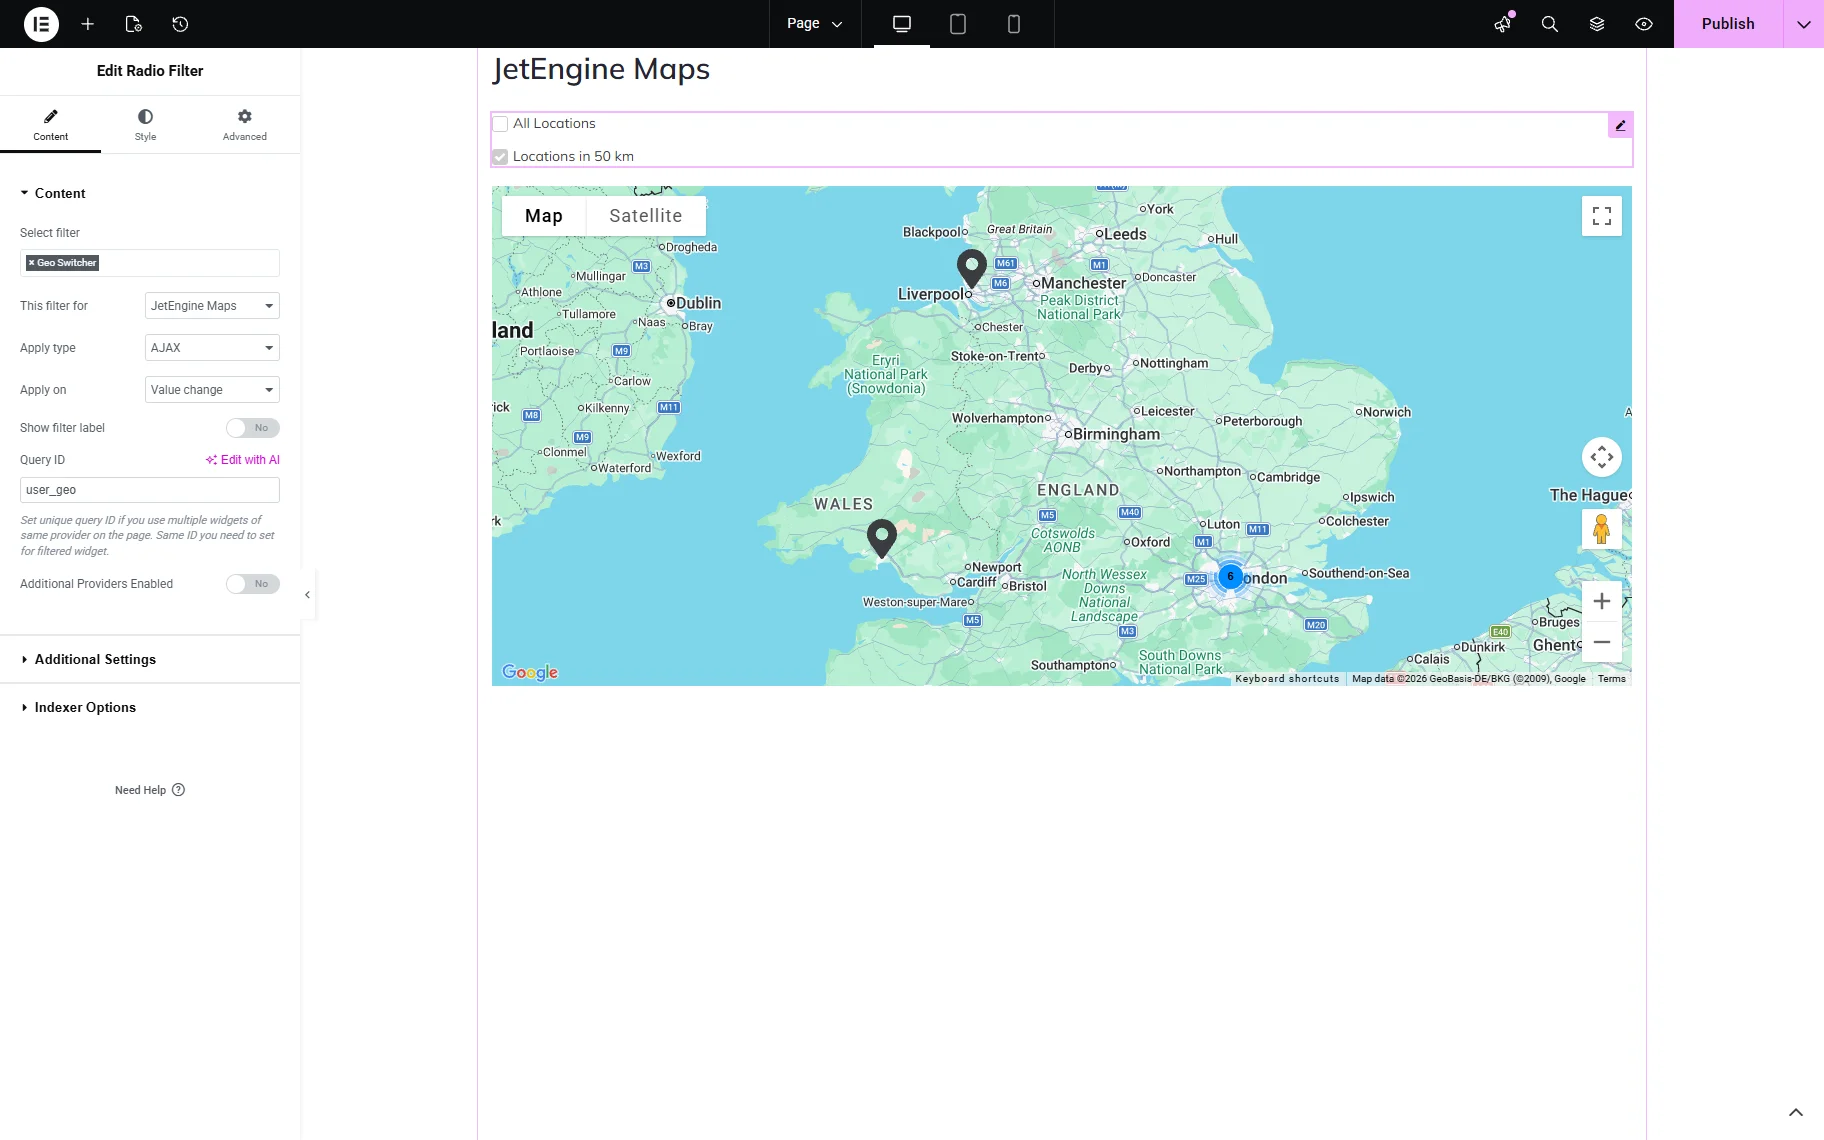
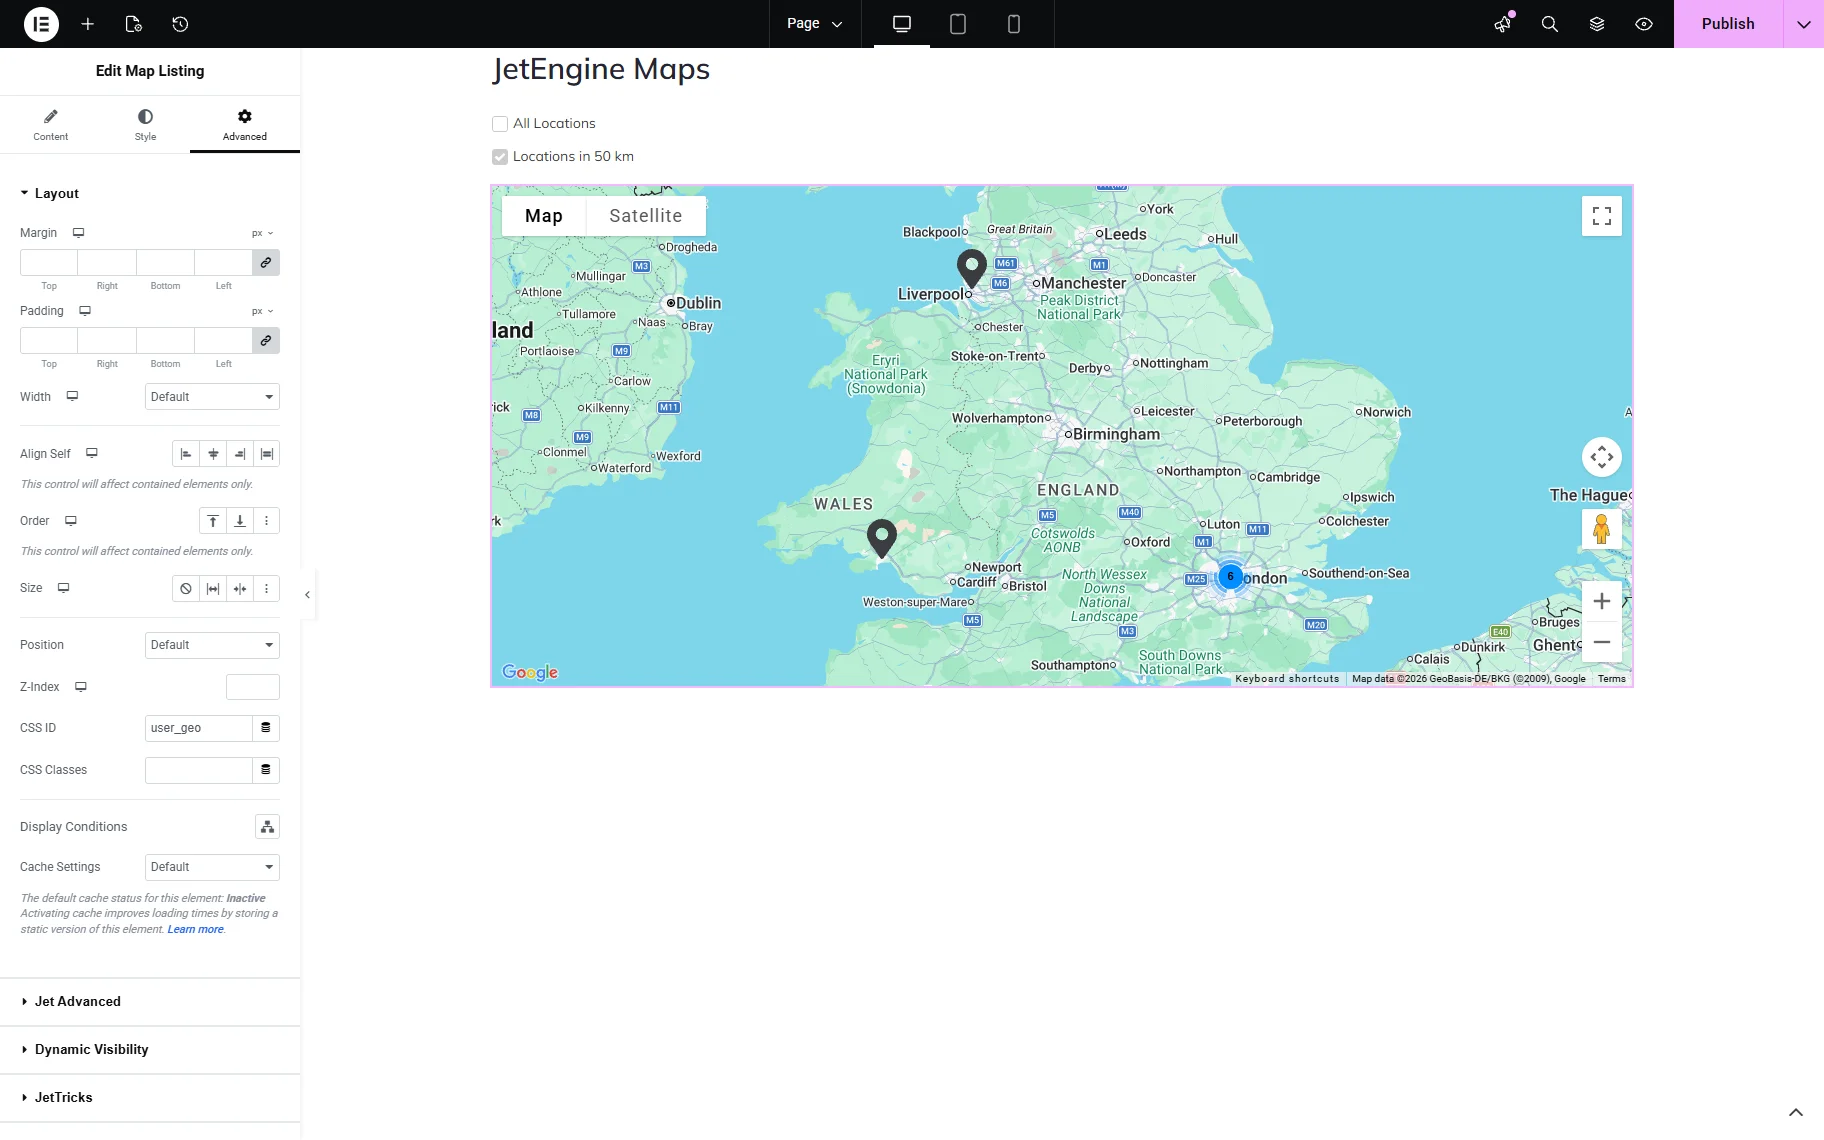
The same Query ID should be added to the CSS ID field in the Advanced tab of the Maps Listing widget.
Save the settings and ensure that the filter works correctly on the frontend.
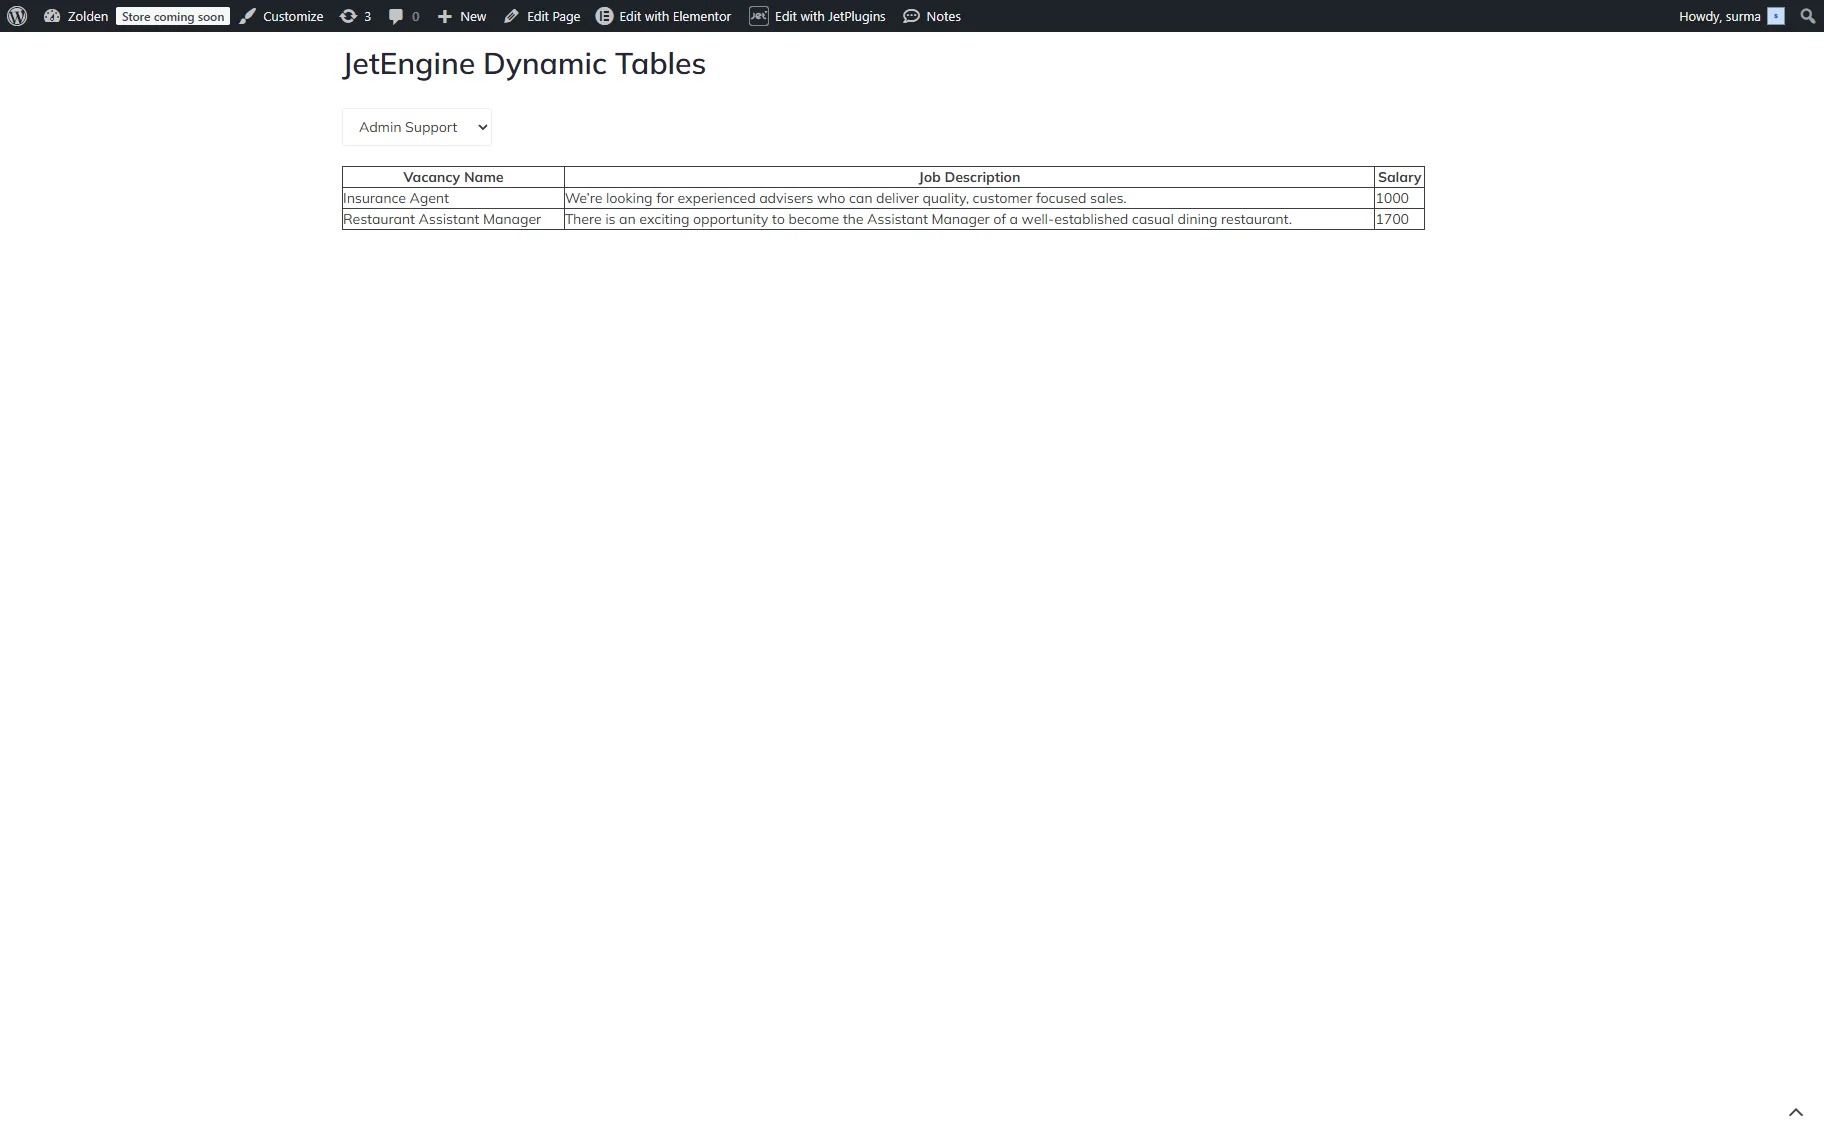
JetEngine Dynamic Table
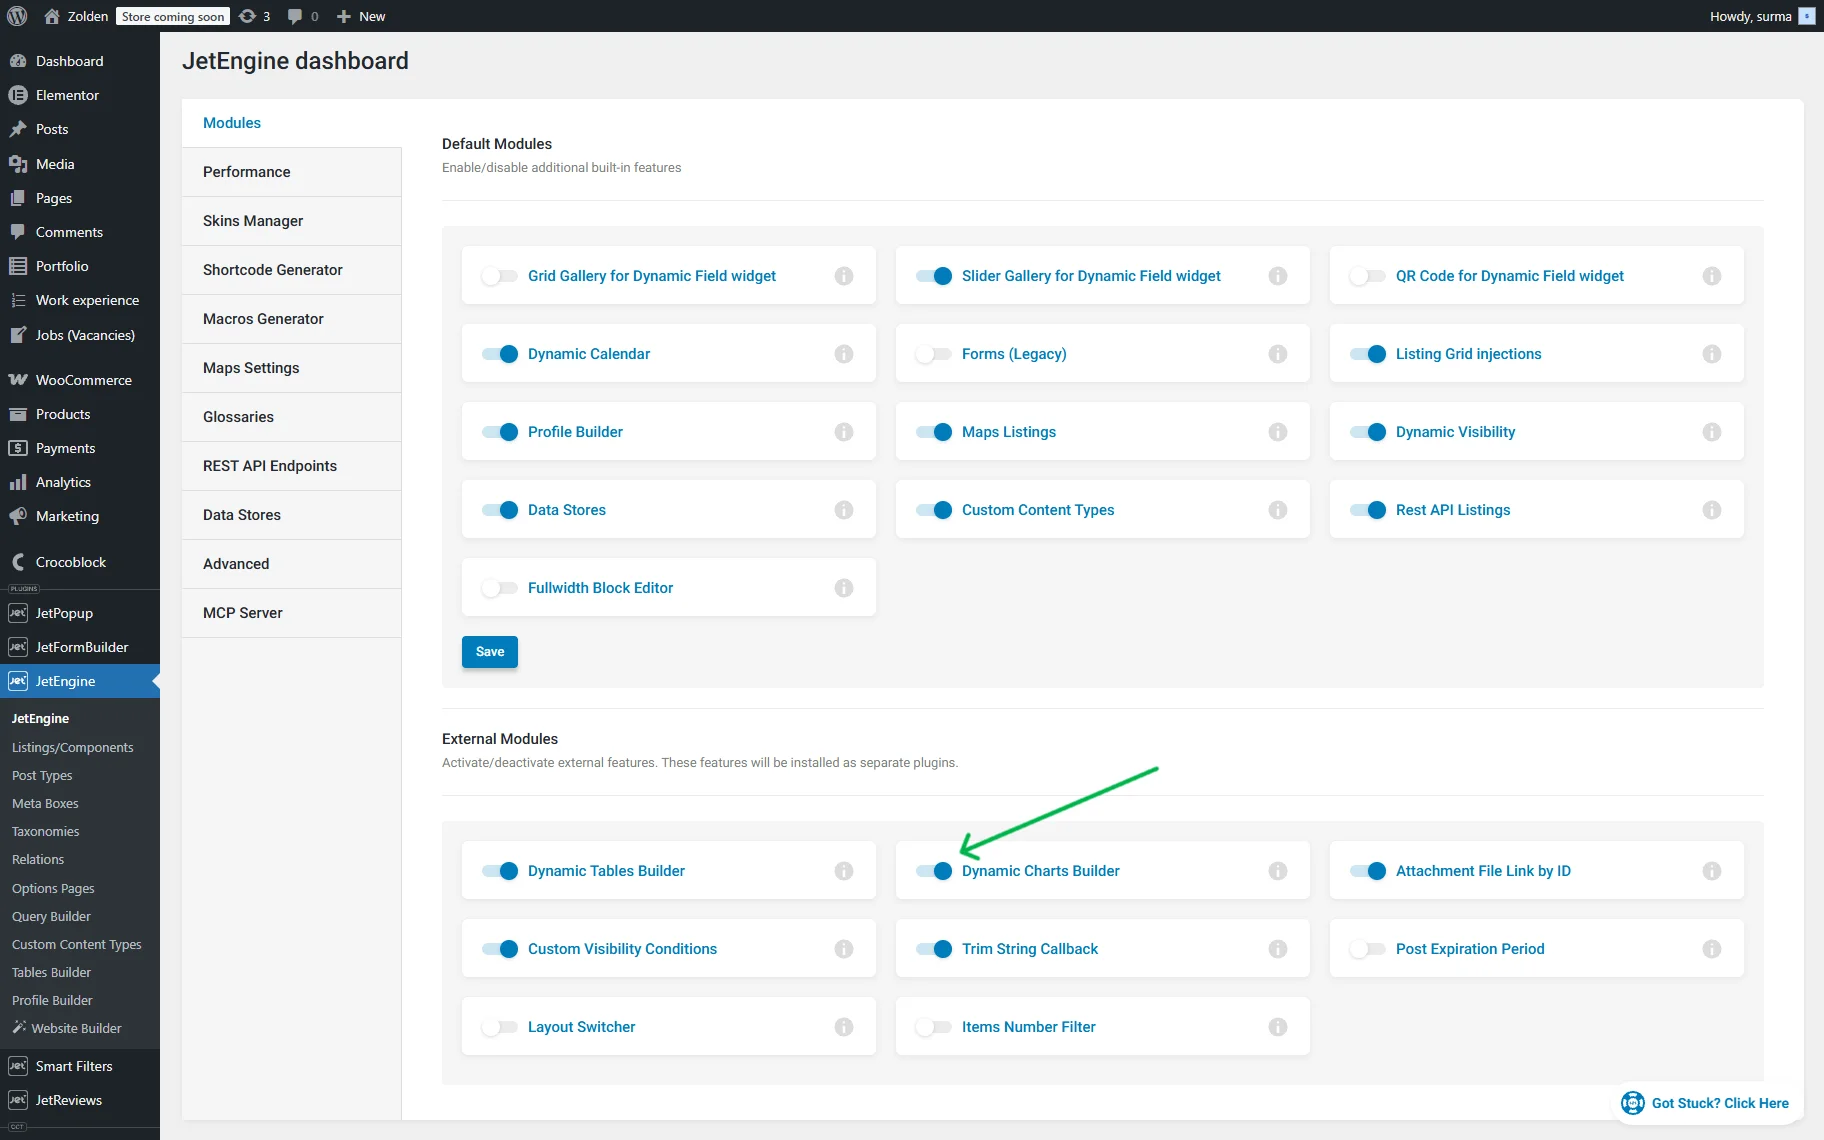
The “JetEngine Dynamic Table” provider allows you to filter through the JetEngine’s Dynamic Tables. To get this provider, you need to enable the Dynamic Tables Builder module in WordPress Dashboard > JetEngine > JetEngine > Modules > External Modules.

Once your table and filter are prepared, add the Dynamic Table and the required filter widgets. In this case, we use the Select filter.
In the filter settings, select the filter you created and choose the “JetEngine Dynamic Tables” provider from the This filter for dropdown. In the Query ID field, set the unique ID.
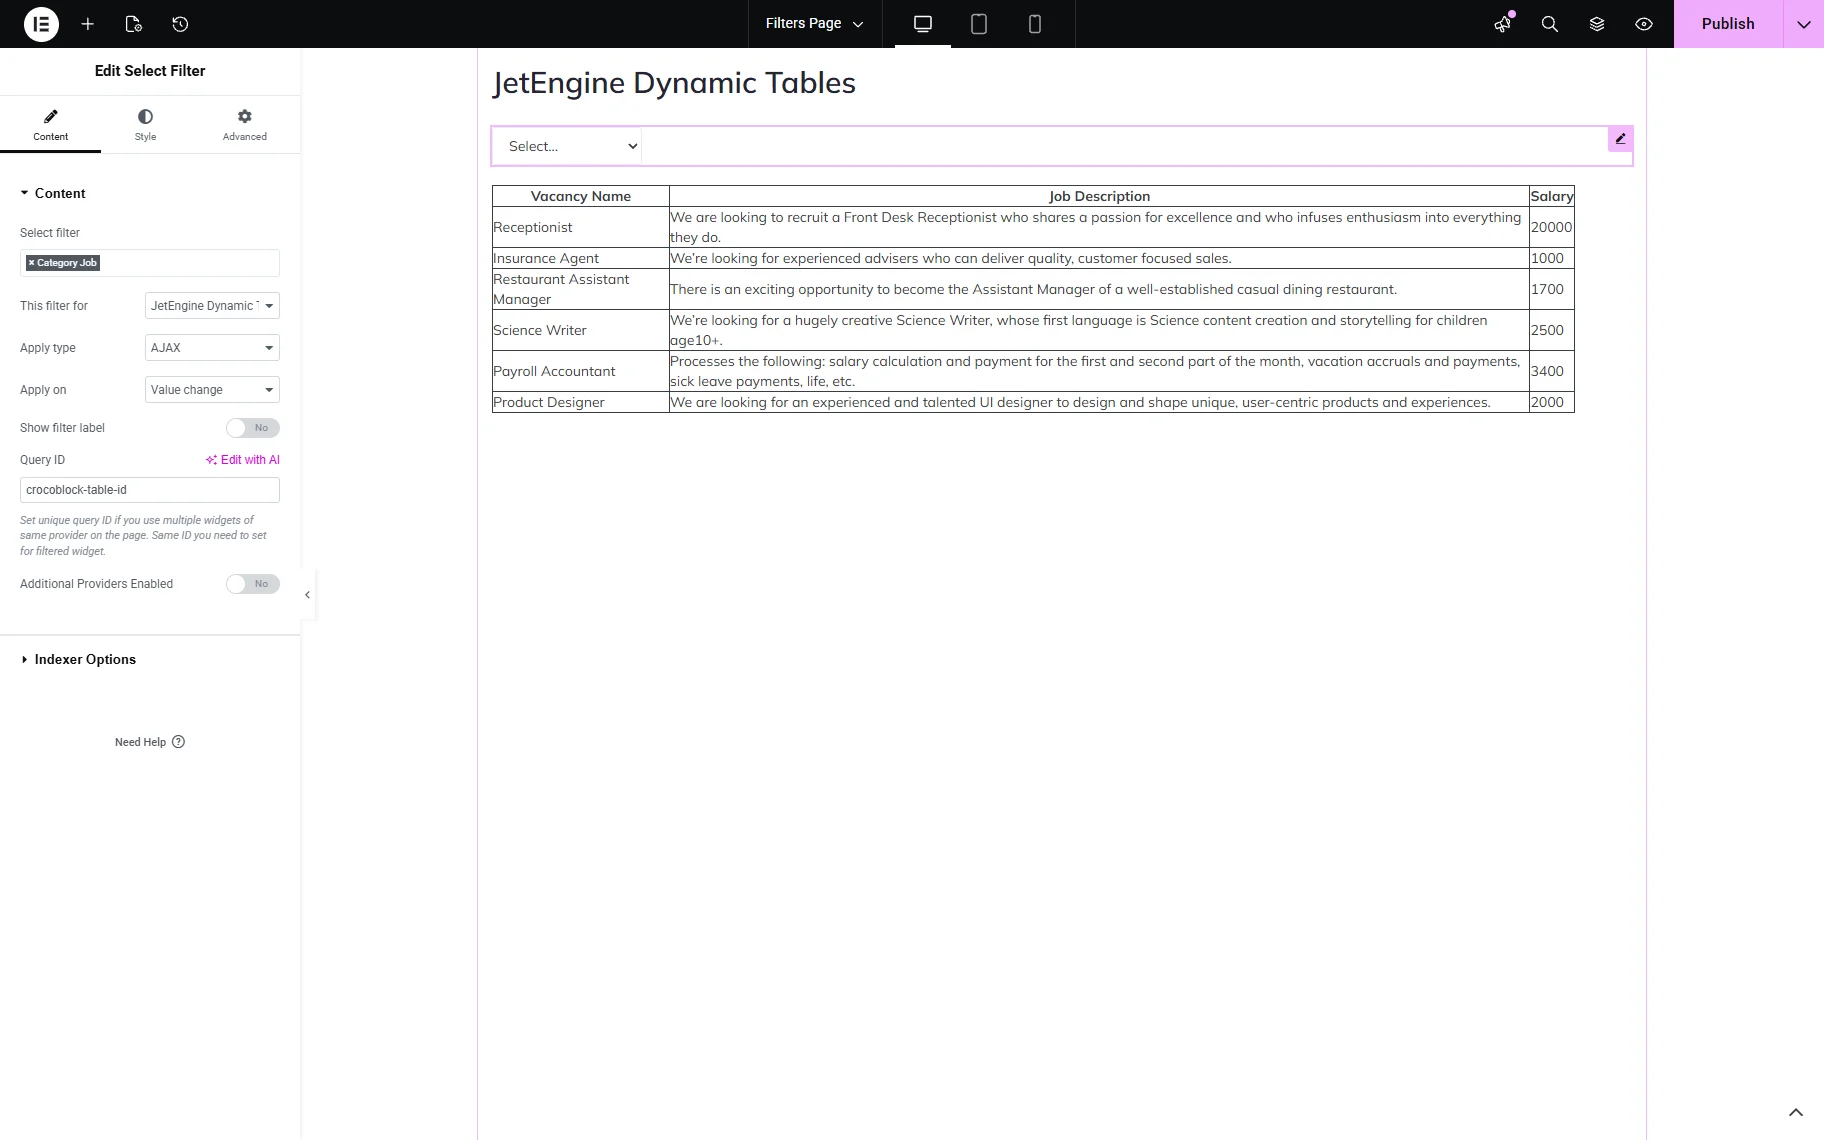
In the Advanced tab of the Dynamic Table widget, set the same Query ID used for the filter in the CSS ID field.

Save the changes and check the frontend. The filter works well.
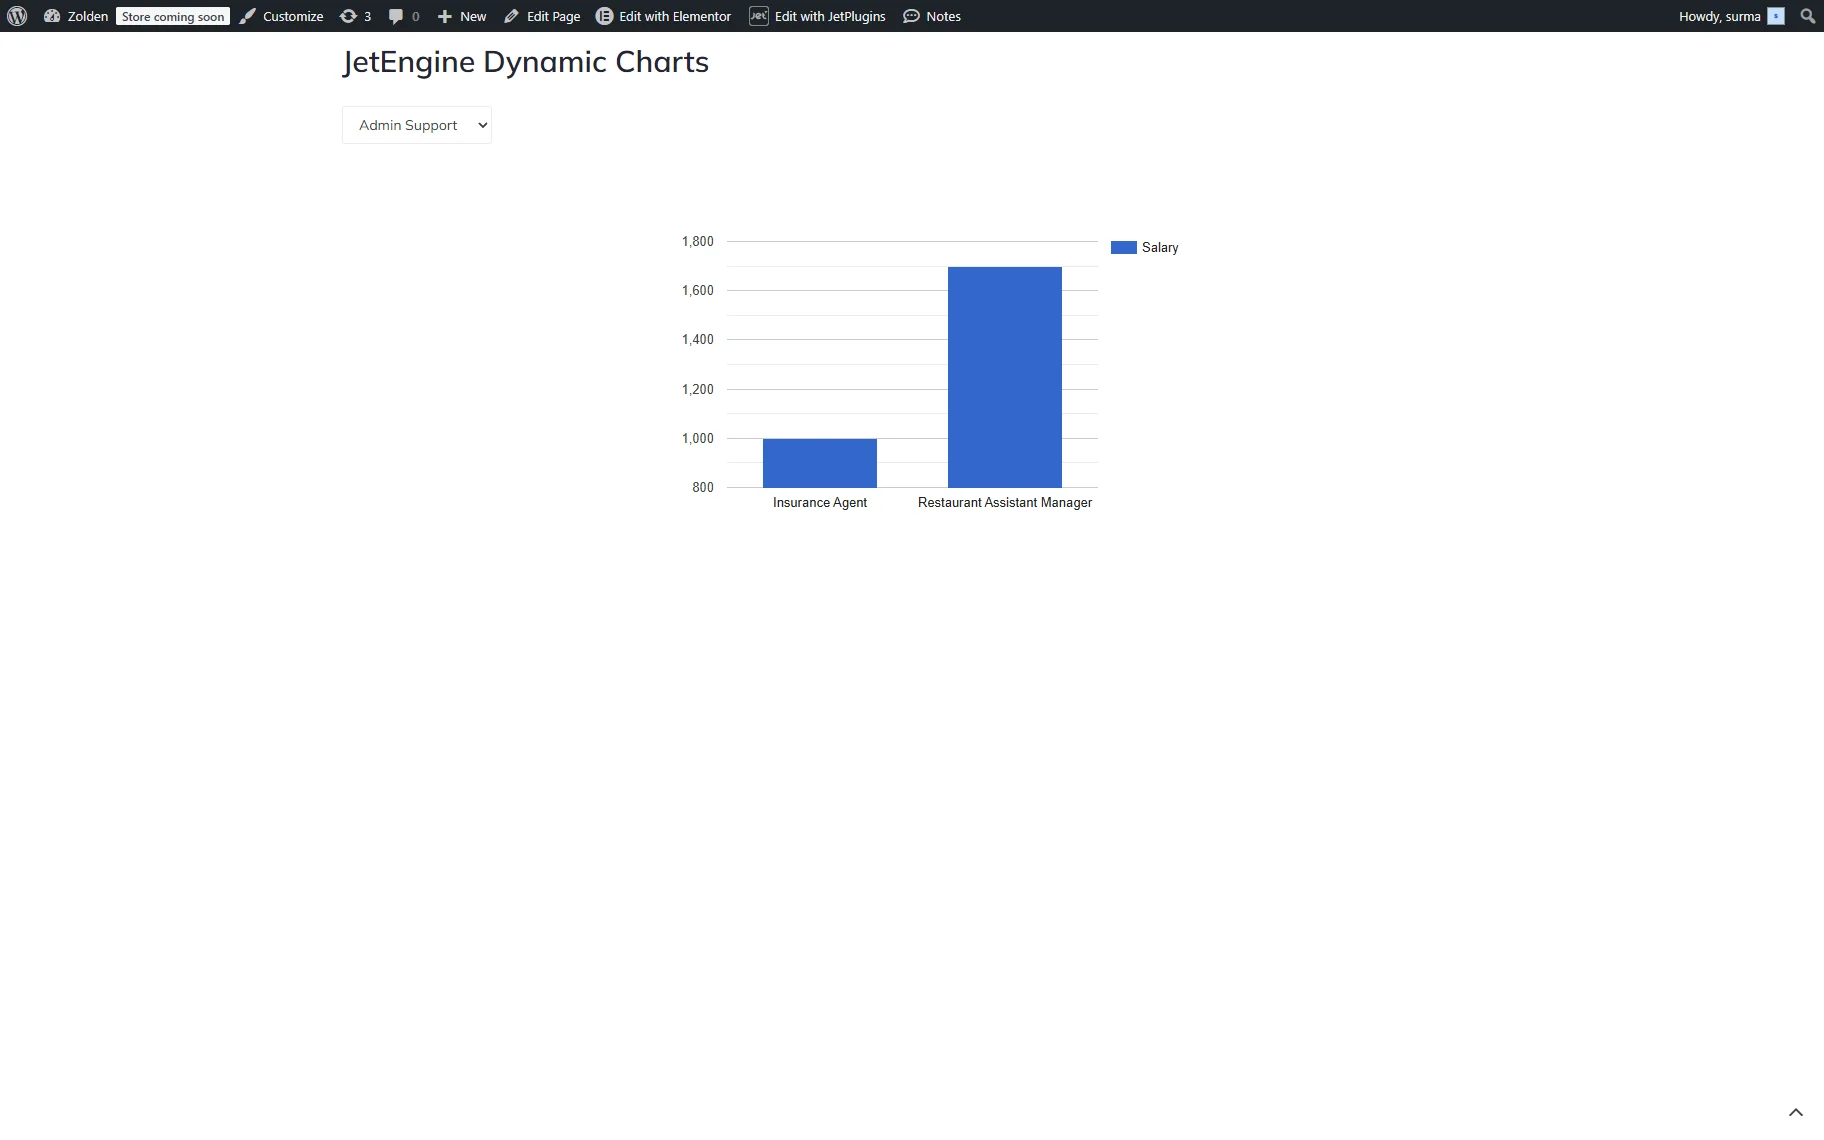
JetEngine Dynamic Chart
The “JetEngine Dynamic Chart” provider allows you to filter through the JetEngine’s Dynamic Chart. To enable this provider, you need to enable the Dynamic Chart Builder module in WordPress Dashboard > JetEngine > JetEngine > Modules > External Modules.
When charts and filters are set up, add the Dynamic Chart and filter widgets to the page. In this case, we use a Select filter. Select the needed filter in the widget settings. Choose the “JetEngine Dynamic Chart” provider in the This filter for field. Set the unique Query ID.
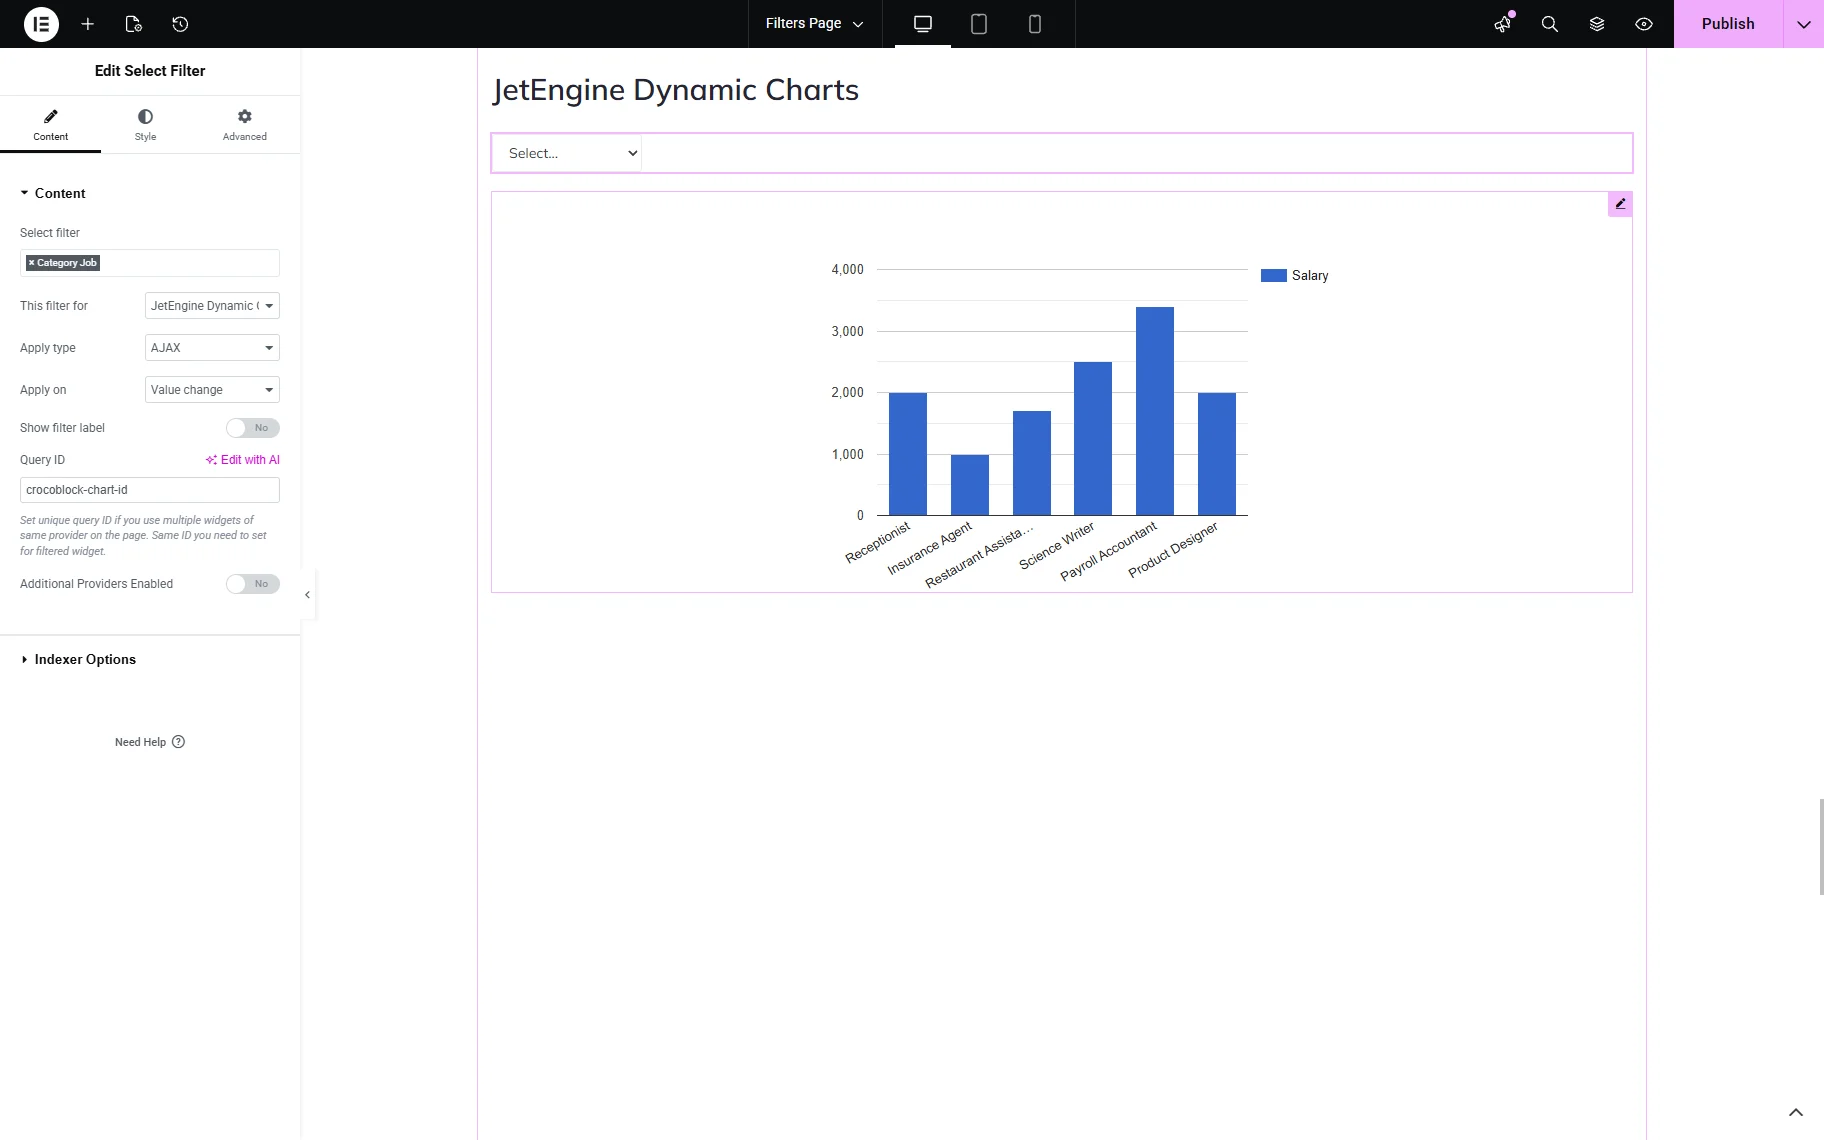
In the Advanced settings tab of the Dynamic Chart widget, set the Query ID in the CSS ID.

Save the settings and check the frontend, ensuring that the filter works correctly.
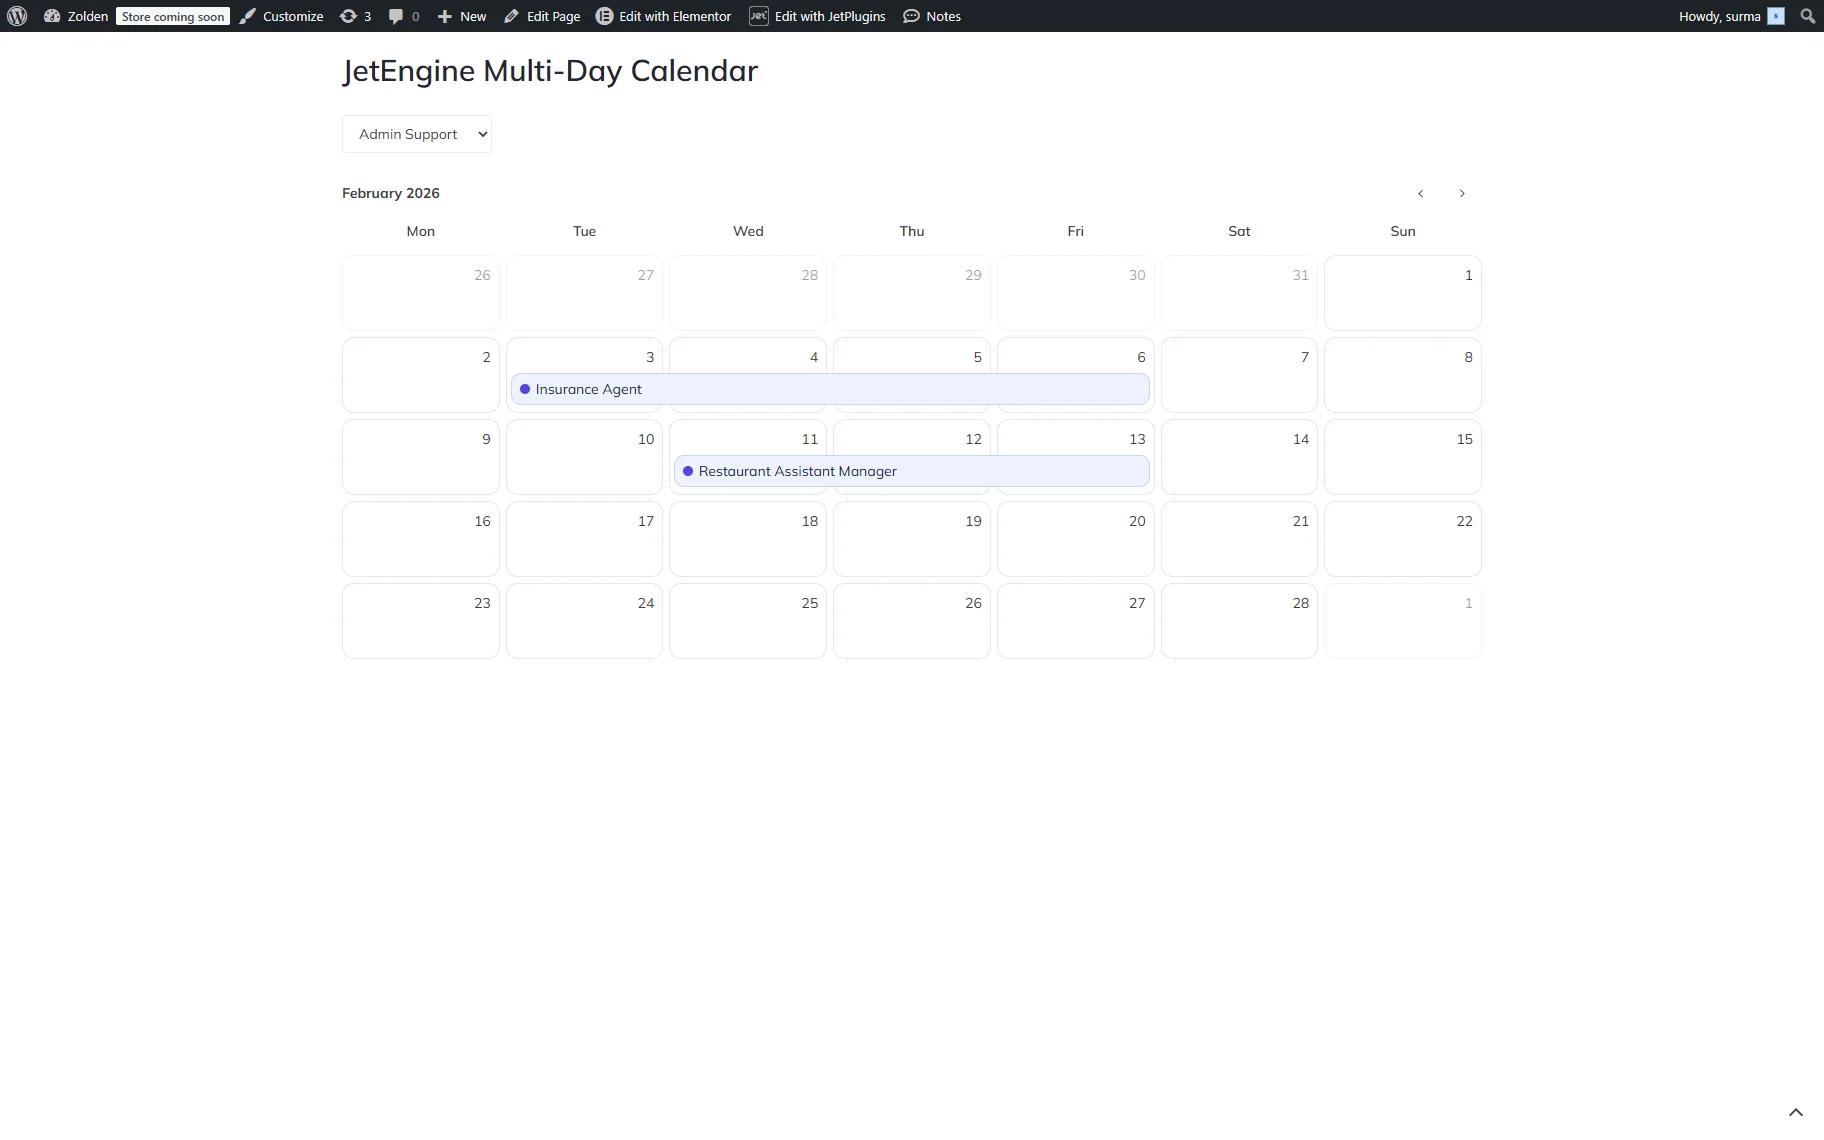
JetEngine Multi-Day Calendar
The “JetEngine Multi-Day Calendar” provider allows filtering the Multi-Day Calendar widget. Add the Multi-Day Calendar and filter widgets (we use the Select filter).
Select the filter you created and choose the “JetEngine Multi-Day Calendar” provider in the This filter for dropdown. Set the unique Query ID.
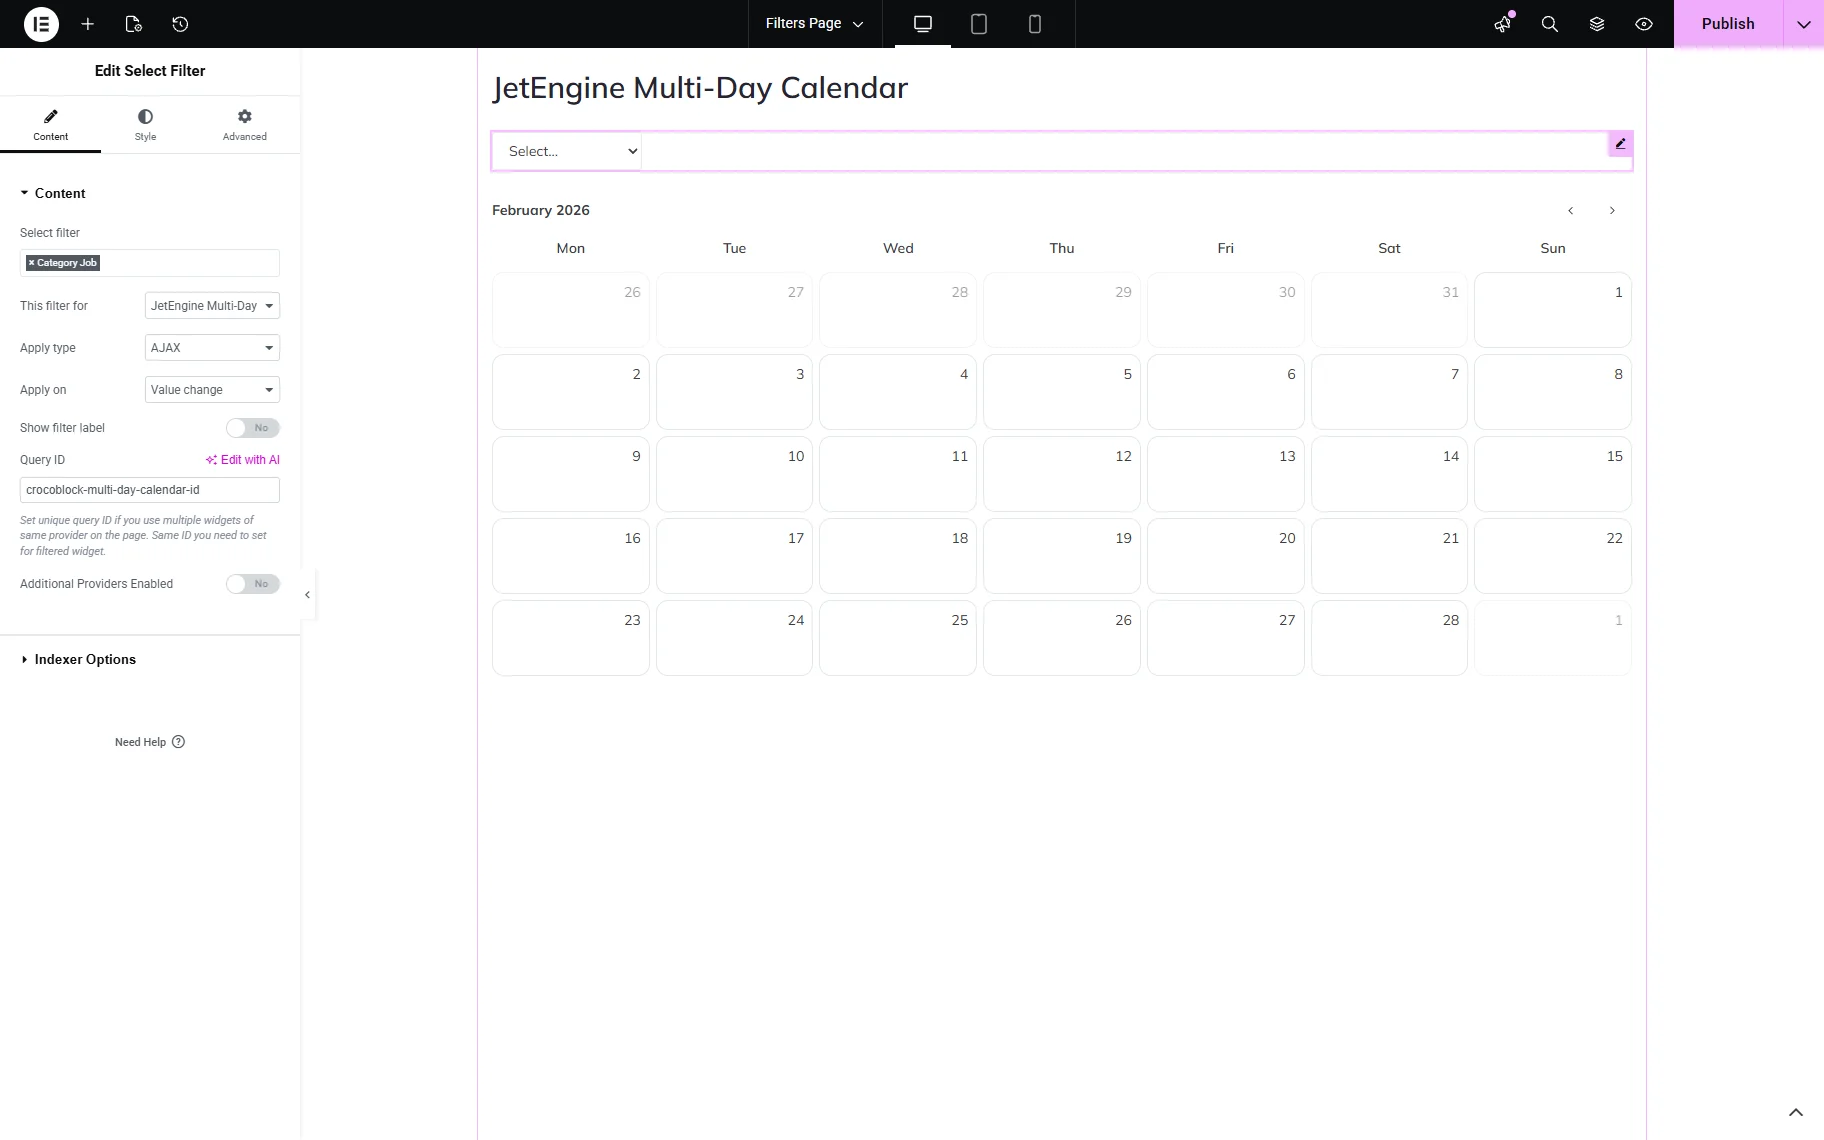
In the Advanced tab of the Multi-Day Calendar widget, set the same Query ID in the CSS ID.
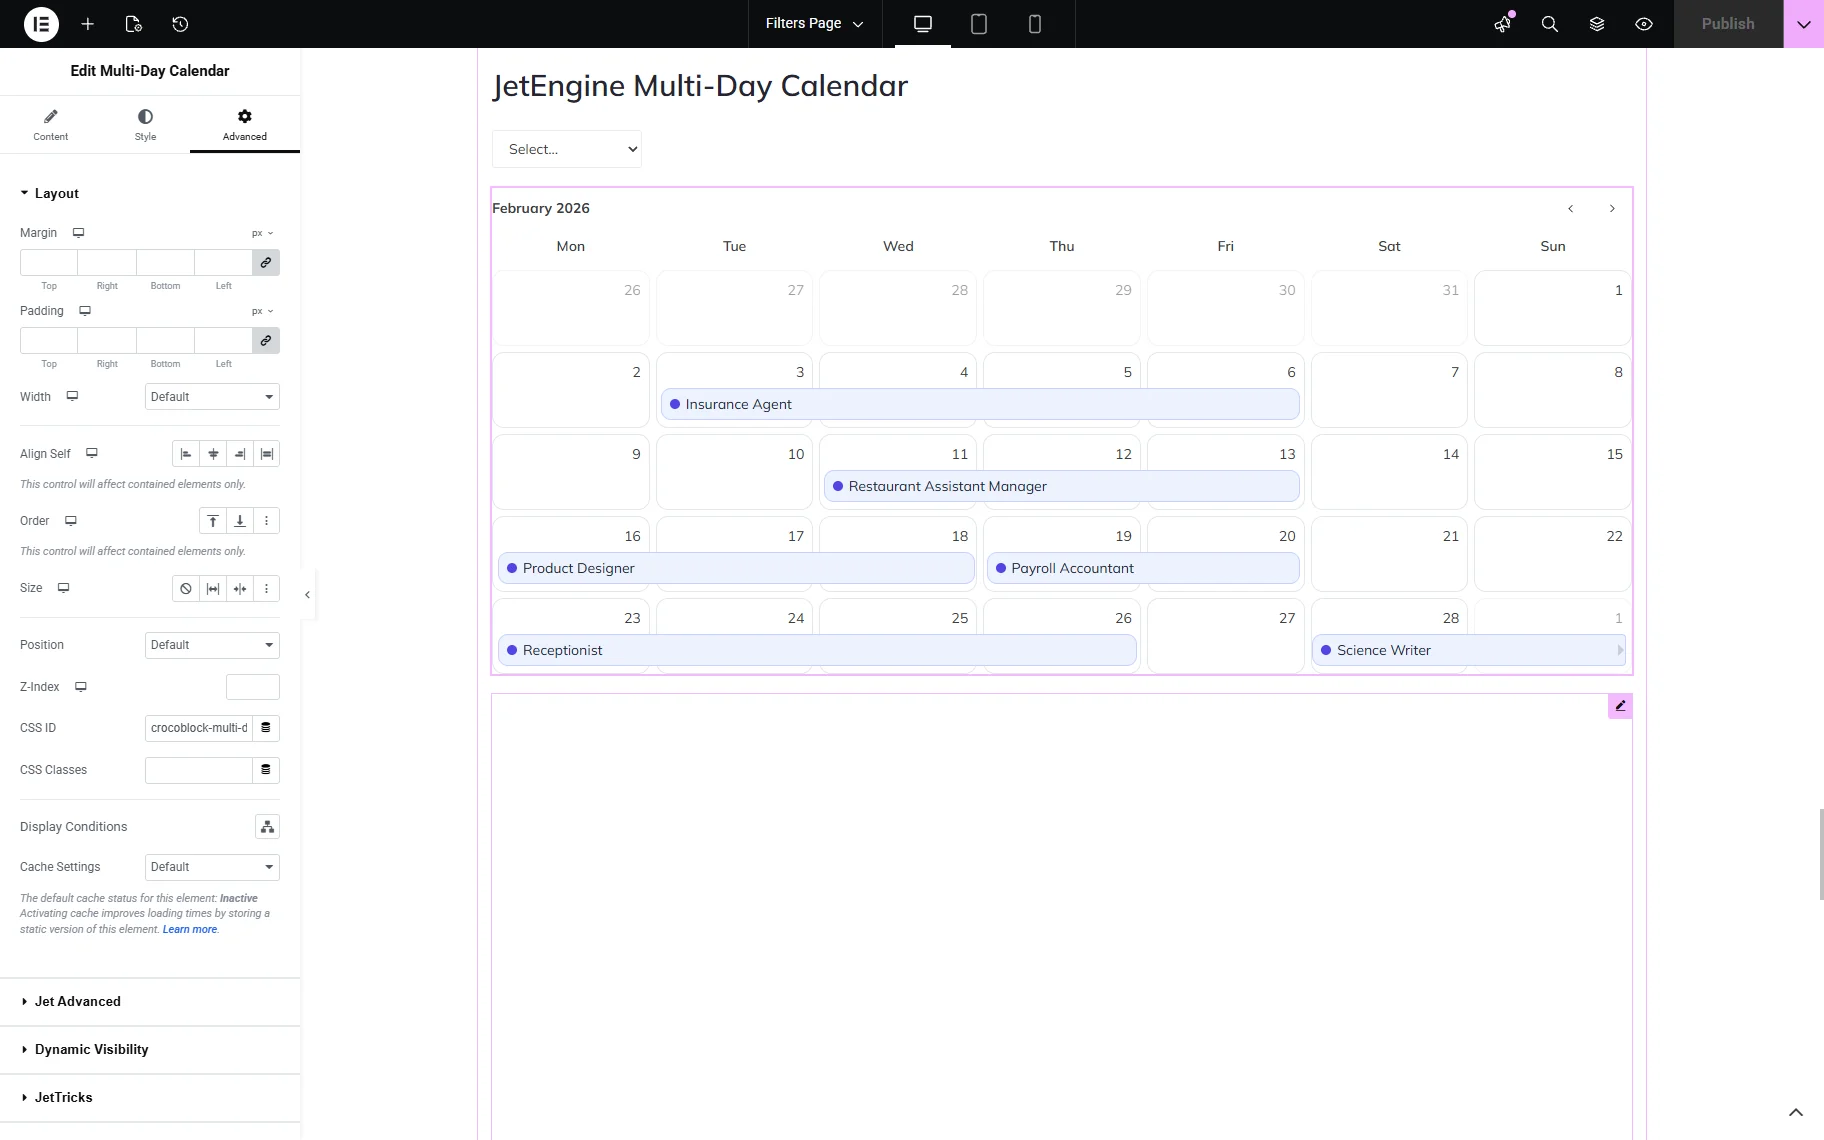
Save the changes and check the frontend. The filter works correctly in our case.
JetWooBuilder Providers
As far as WooCommerce products are filterable with JetSmartFilters, JetWooBuilder’s widgets can be filtered as well.
JetWooBuilder Products Grid
The “JetWooBuilder Products Grid” provider allows filtering the Products Grid widget on any page of the site.
Add the Products Grid and the required filter widgets to the page. We use the Checkboxes filter for the products’ categories.
In the filter’s settings, select the filter you created. In the This filter for dropdown, select the “JetWooBuilder Products Grid” provider. In the Query ID field, enter the unique ID.

Once the Products Grid widget is set up, open the Advanced settings tab and enter the same Query ID you used for the filter in the CSS ID field.
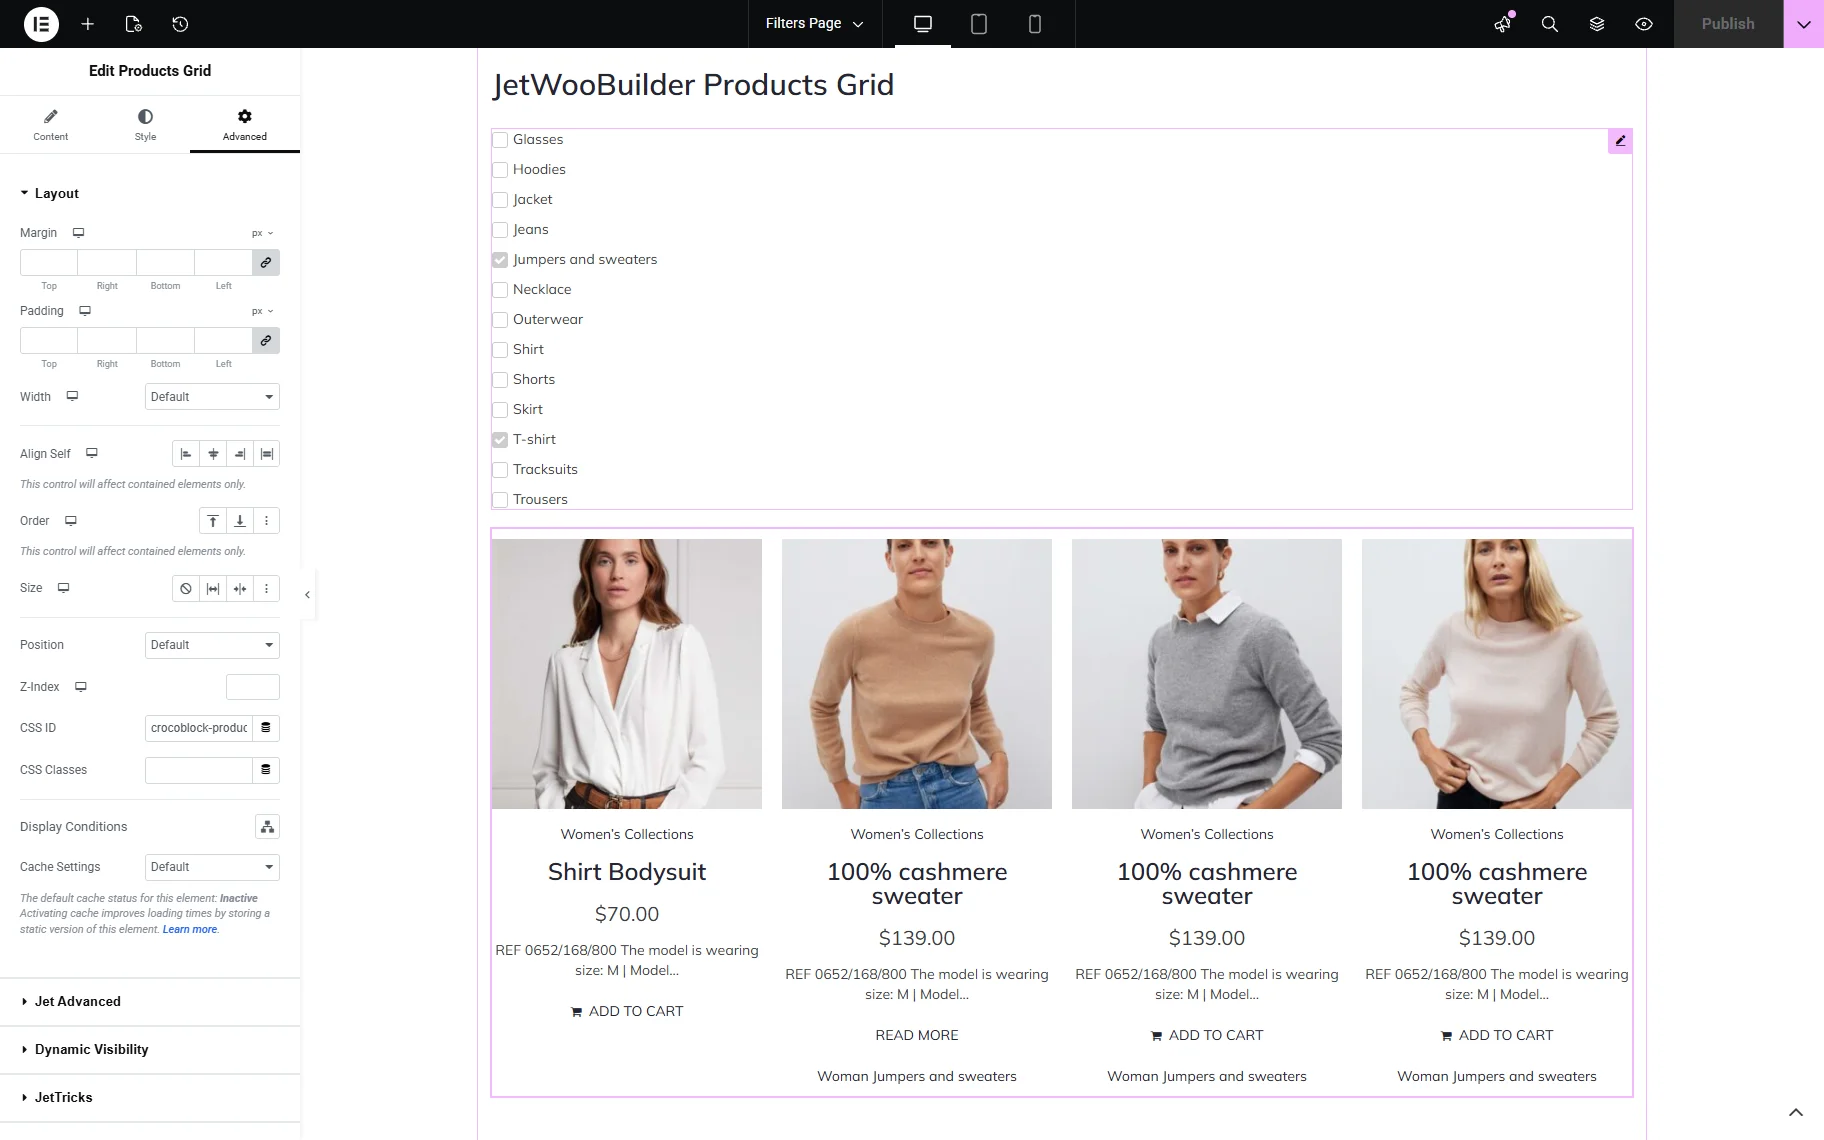
Save the changes and check the frontend. The filter works as expected.

JetWooBuilder Products List
With the “JetWooBuilder Products List” provider, you can filter the Products List widget. Add the Products List and the filter widgets to the needed page. We use the Checkboxes filter for the products’ categories.
Select the filter you created in the filter’s settings. Choose the “JetWooBuilder Products List” provider in the This filter for dropdown list. Set the unique ID in the Query ID field.

In the Products List widget, proceed to the Advanced settings tab. In the CSS ID input, paste the same Query ID you used for the filter.
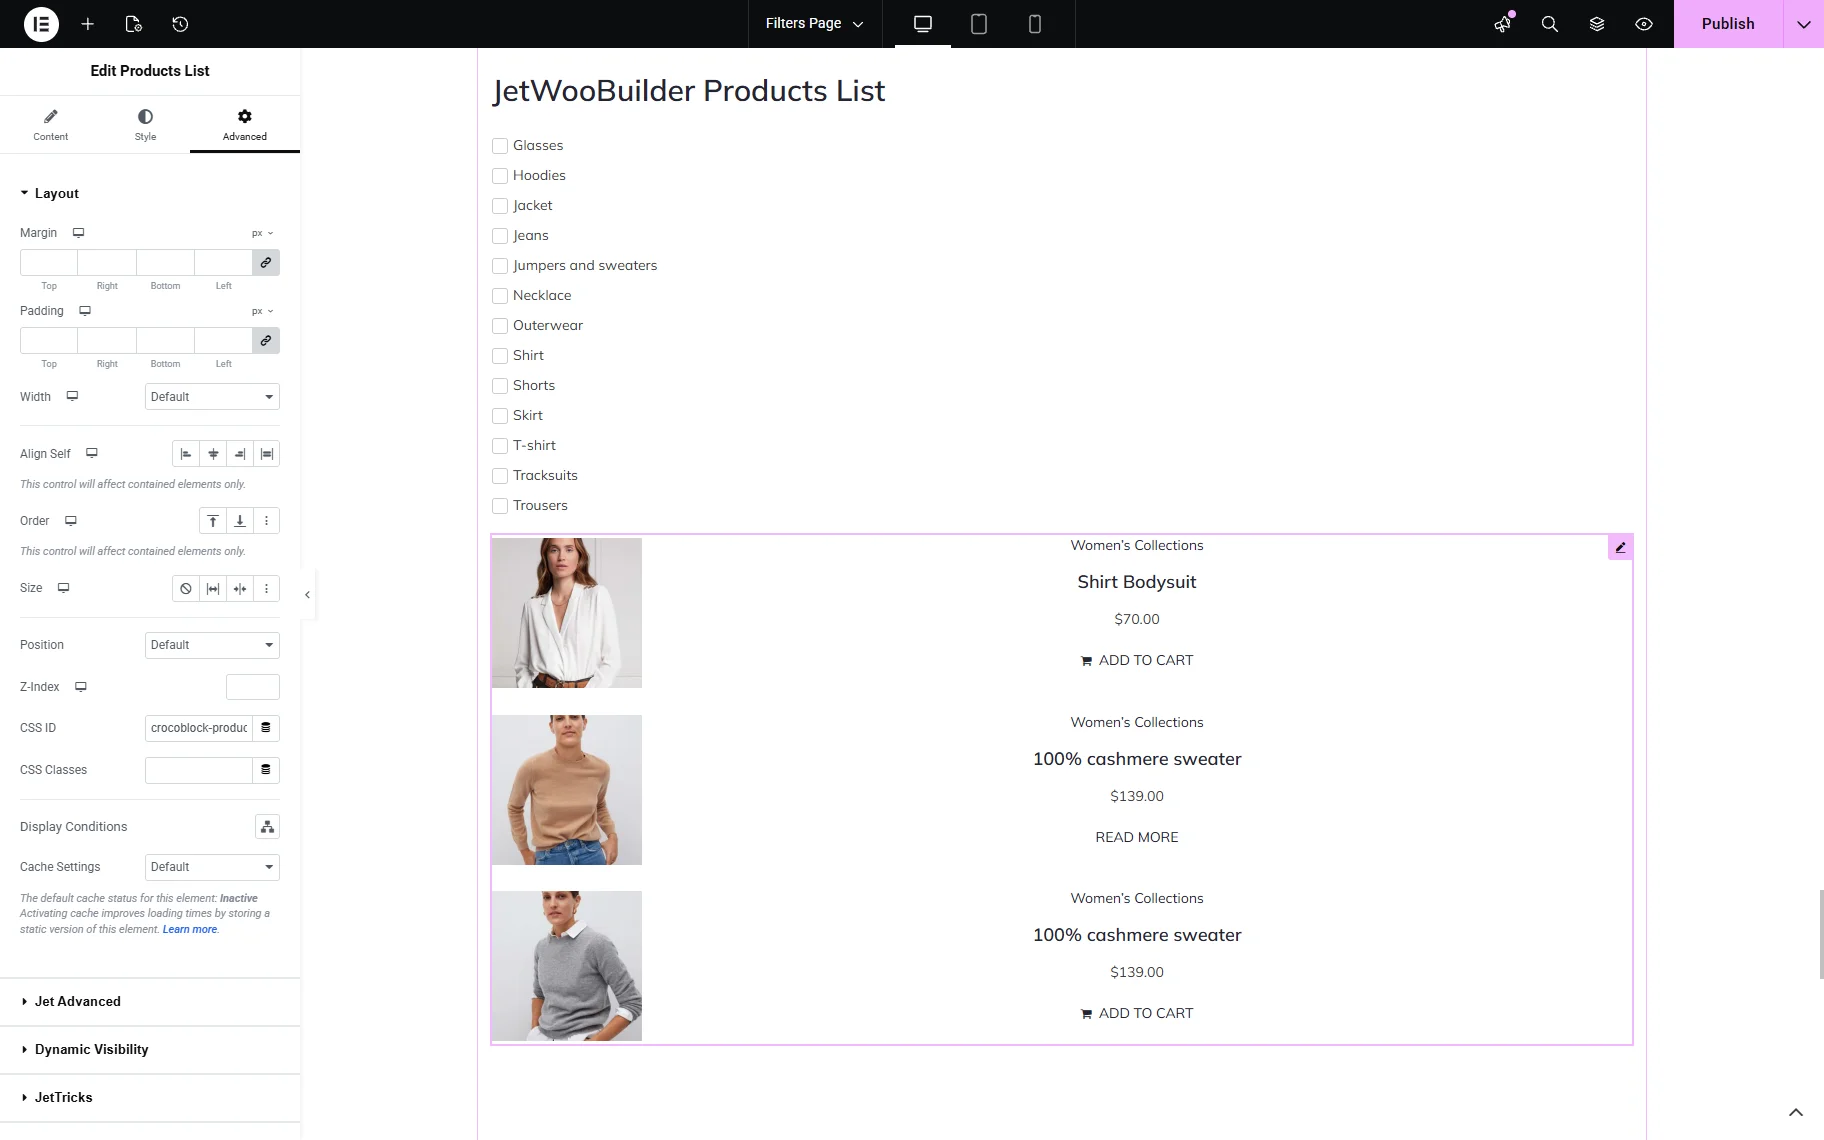
Save the changes and check the frontend. The filter is applied correctly.

WooCommerce Archive (by JetWooBuilder)
The “WooCommerce Archive (by JetWooBuilder)” provider filters the Products Loop widget of the JetWooBuilder plugin. It allows displaying a product loop on the product archive shop page.
Add the prepared Products Loop and filter widgets to the product archive shop page. We use the Checkboxes filter for the products’ categories.
In the filter’s settings, select the required filter and choose the “WooCommerce Archive (by JetWooBuilder)” provider in the This filter for field.
No other special settings are needed for the Products Loop widget. Save the changes and check that the filter works on the frontend.
WooCommerce Providers
Samelessly, JetSmartFilters work with the WooCommerce original widgets. However, here come some specific settings.
Default WooCommerce Archive (Classic)
The “Default WooCommerce Archive (Classic)” provider allows you to filter the native WooCommerce archive. It does not require Query IDs, but involves other features. Refer to our How to Add Filters for WooCommerce Products to a Classic Theme’s Sidebar guide to learn how to set the filter for this provider correctly.
WooCommerce Shortcode
The “WooCommerce Shortcode” provider allows filtering WooCommerce products displayed using the shortcode.
Add the required shortcode and the filter widget. In this case, we use the [products limit=”4″ columns=”4″ orderby=”id” order=”DESC” visibility=”visible”] shortcode and the Checkboxes filter.
In the filter settings, select the filter you created, and choose the “WooCommerce Shortcode” provider in the This filter for field. In the Query ID field, set the unique ID.
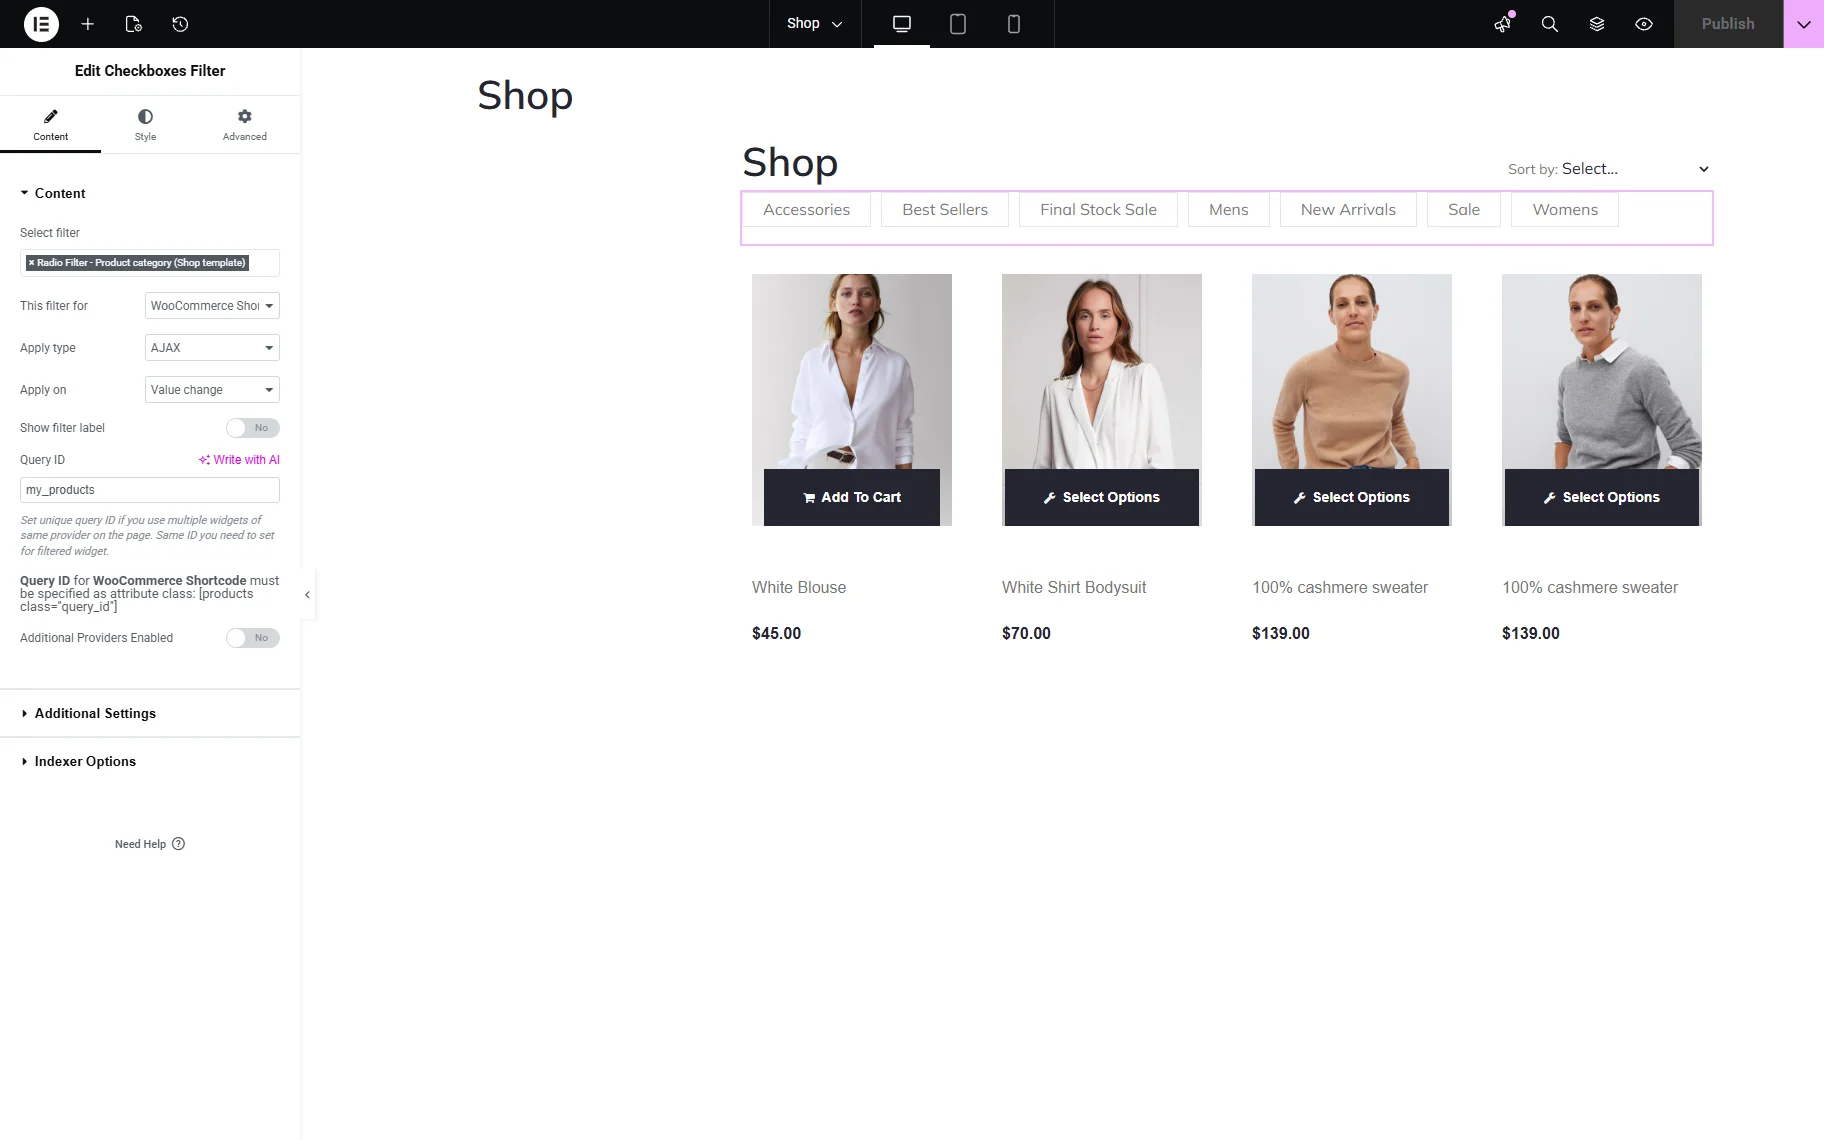
When we apply the Query ID to the WooCommerce Shortcode, it has to be specified as an attribute class: [products class=”query_id”]. So we modify our shortcode to the following:
[products limit="4" columns="4" orderby="id" order="DESC" visibility="visible" class="my_products"]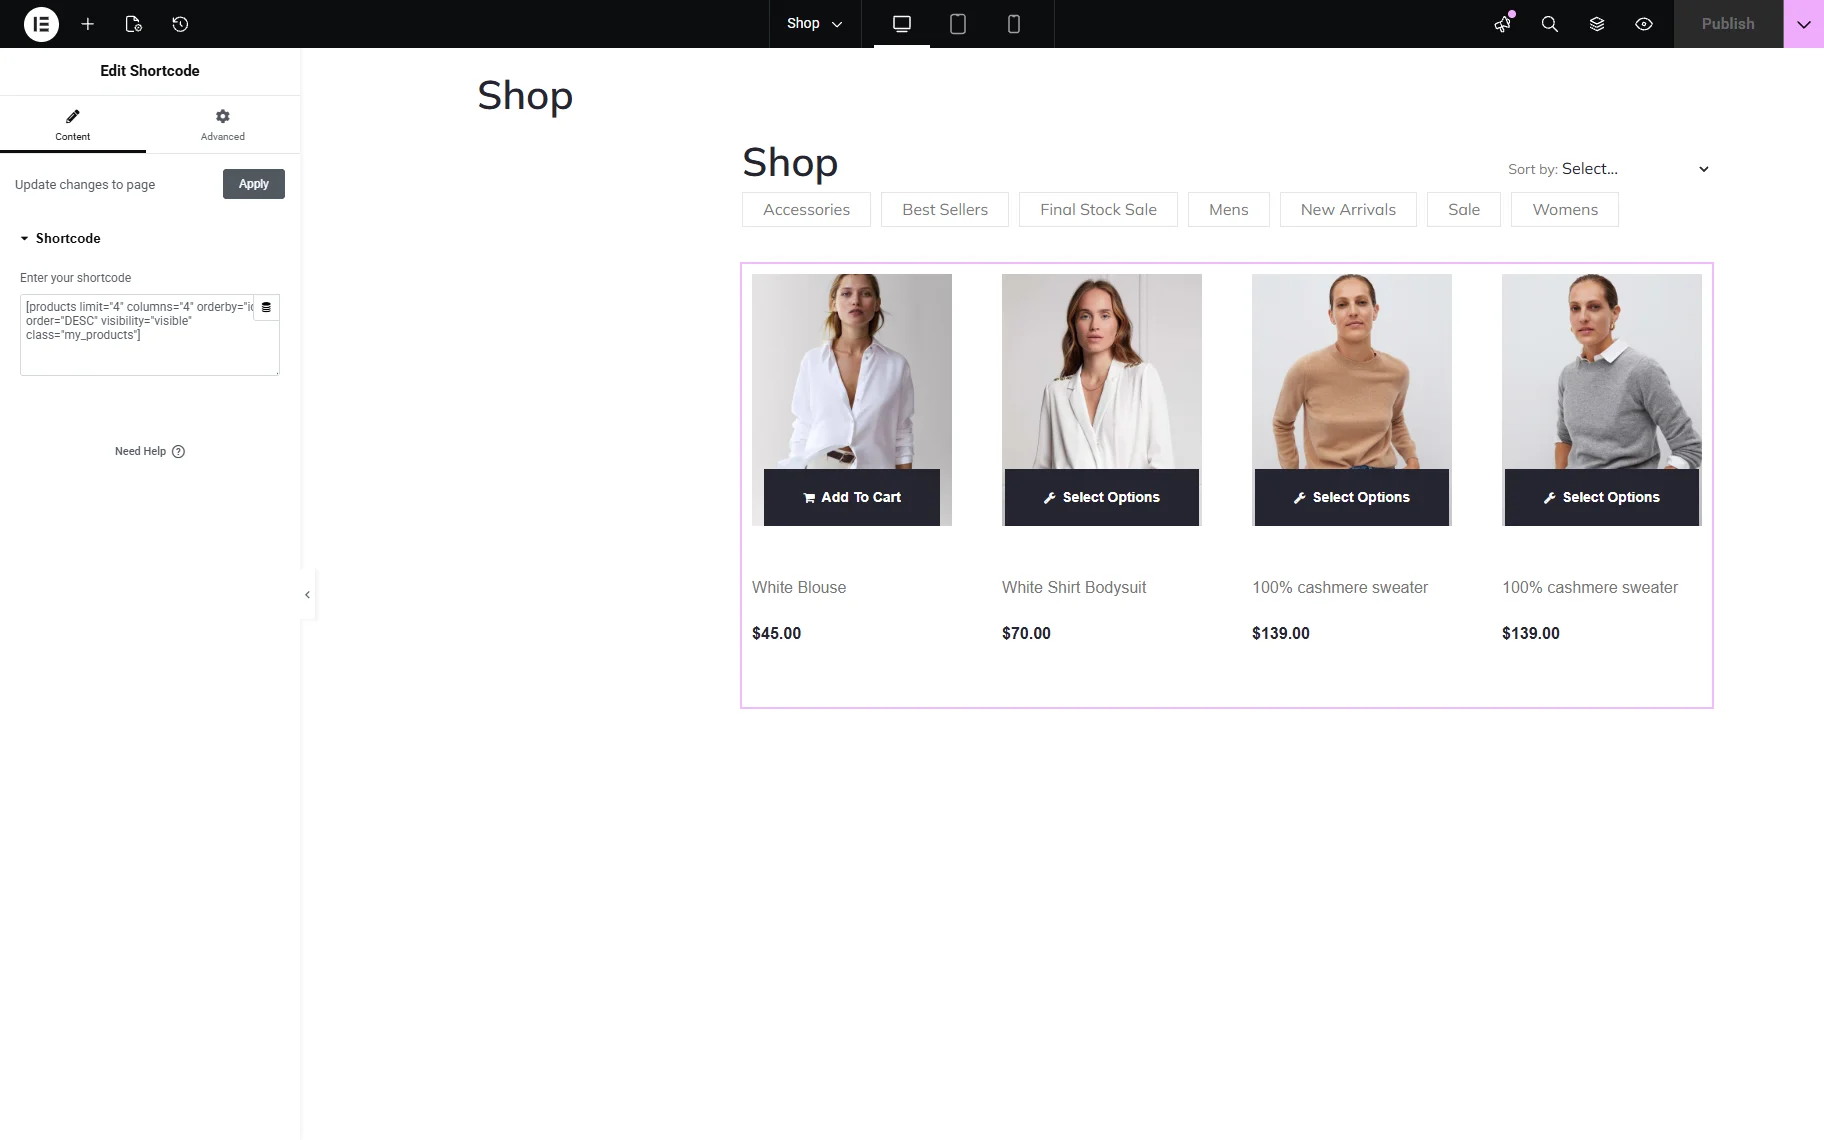
Save the changes and check the result. The filter works well.

JSF Listing
The “JSF Listing” provider allows filtering listings created with the built-in JetSmartFilters Listing Builder.
So add the required filter and the JSF Listing widgets to the page. We use a Select filter here.
In the Select filter dropdown list, choose the filter you previously built, and then assign the “JSF Listing” provider to this filter in the This filter for field.

The JSF Listing widget does not require any specific settings to be filtered.

Save the settings and check the frontend. The filter is applied correctly.

That’s it. Now you know how to connect filters to different providers using custom IDs in the JetSmartFilters WordPress plugin.